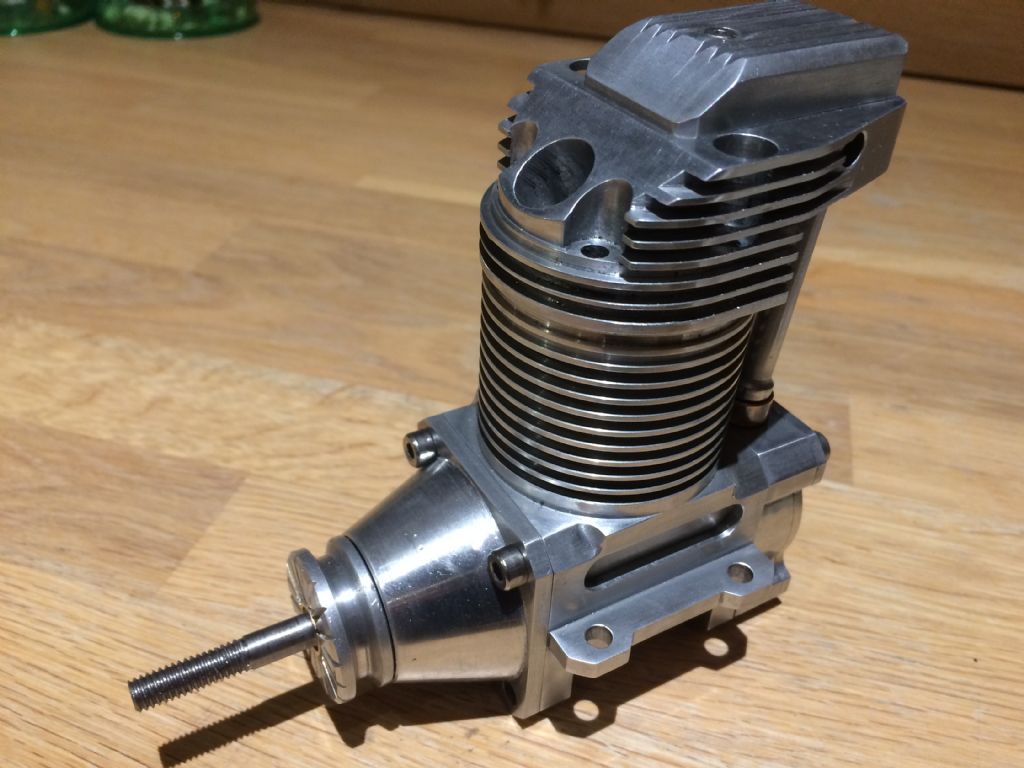
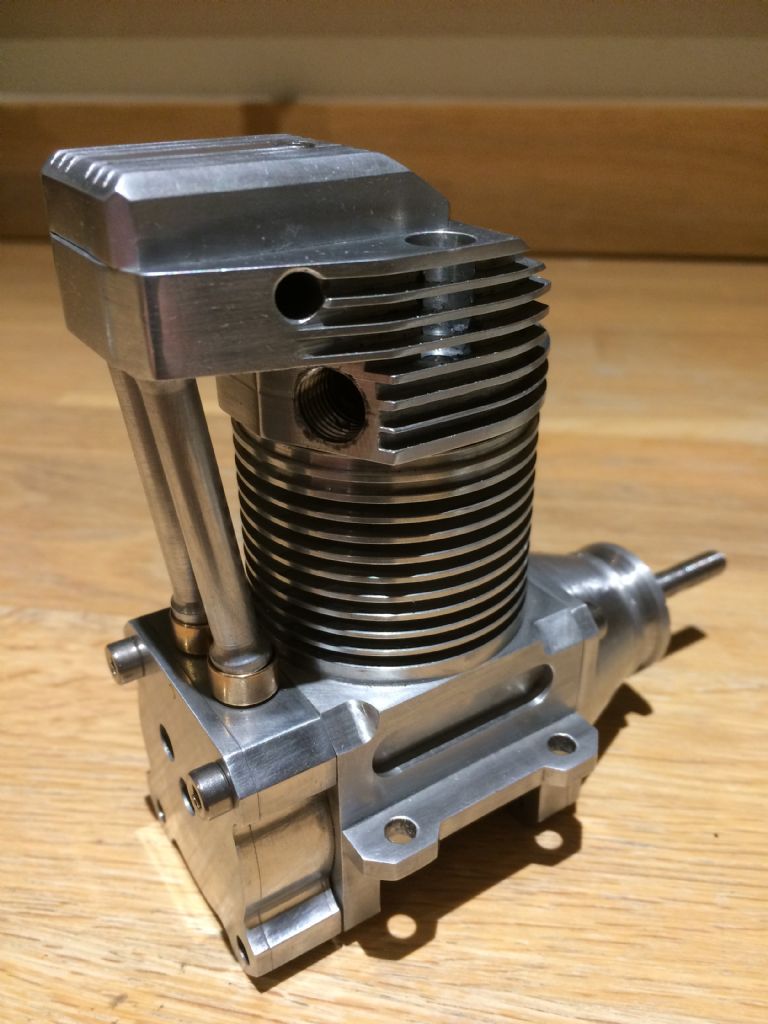
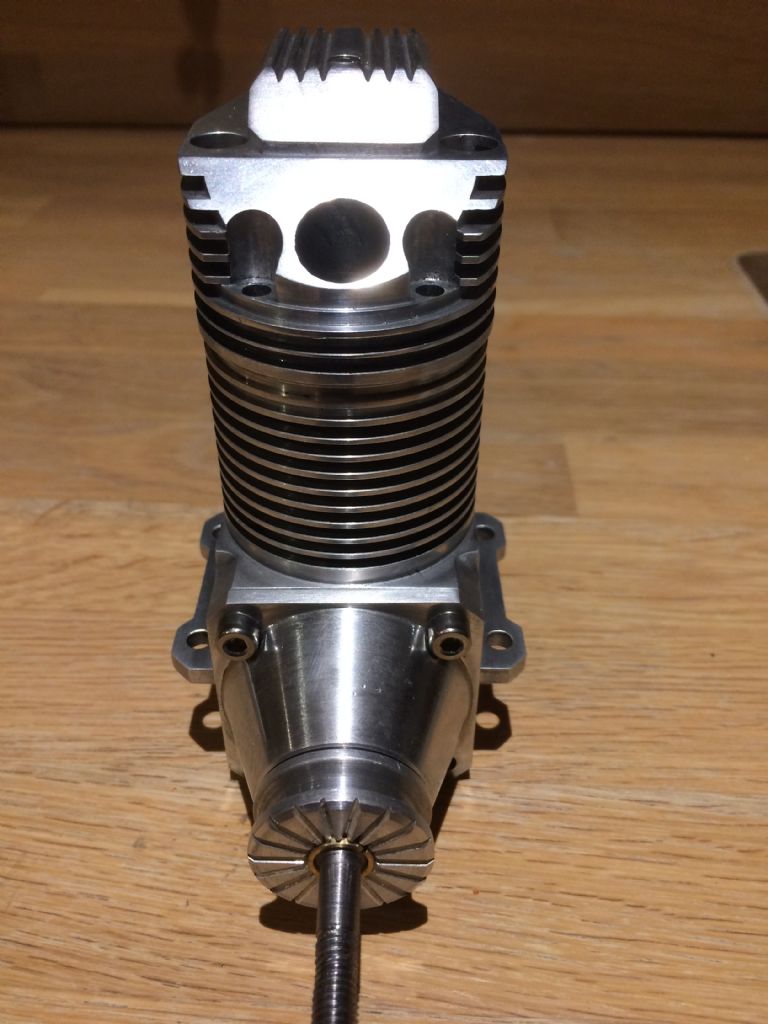
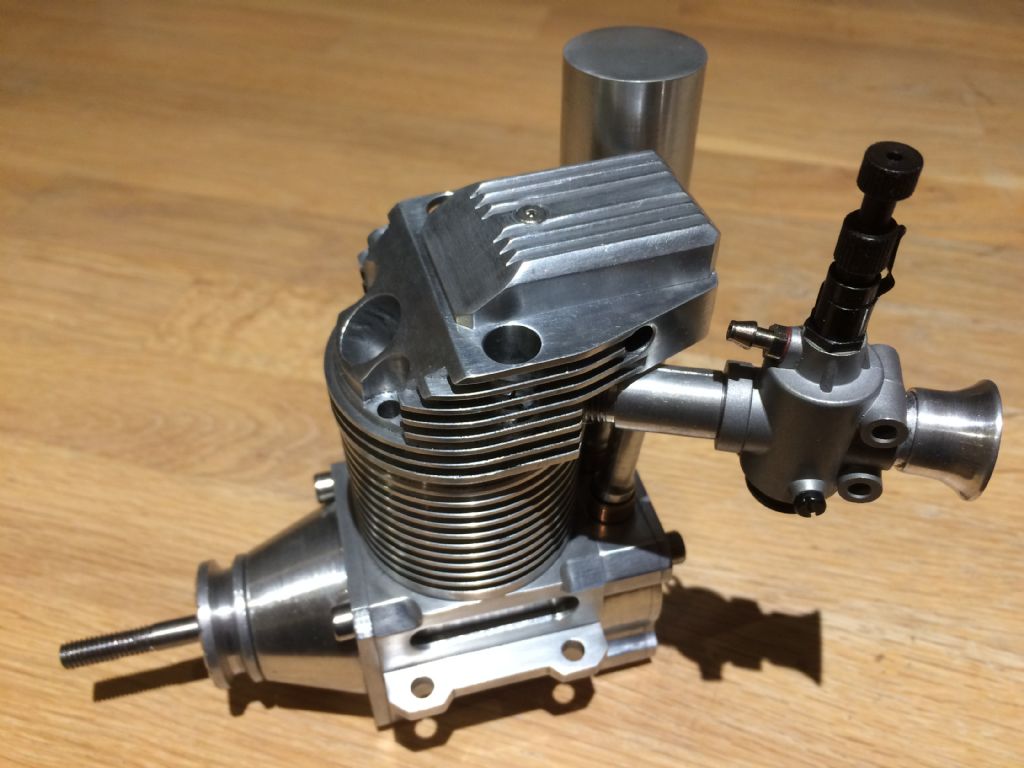
WT2527 15cc Glow Engine

Advert

WT2527 15cc Glow Engine

Home Forums Work In Progress and completed items WT2527 15cc Glow Engine

Viewing 25 posts - 26 through 50 (of 75 total)
  • Author
    Posts
  • #353303
    Craig Booth 1
    Participant
      @craigbooth1

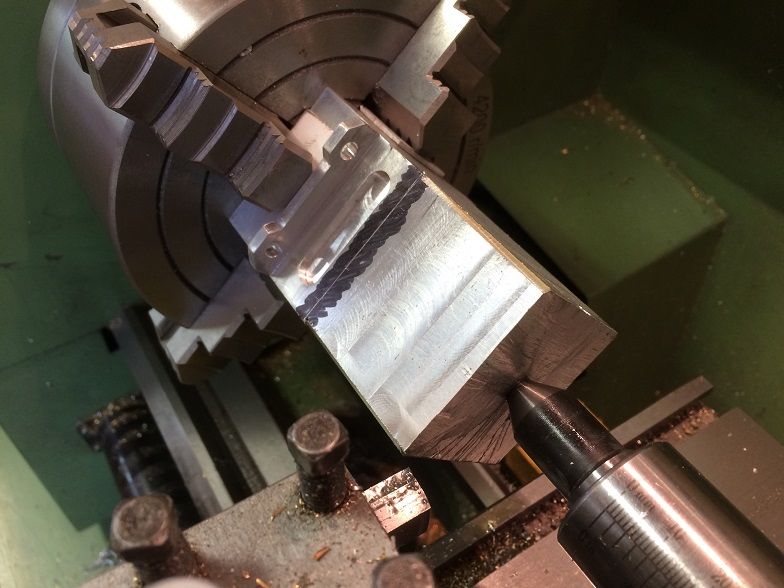
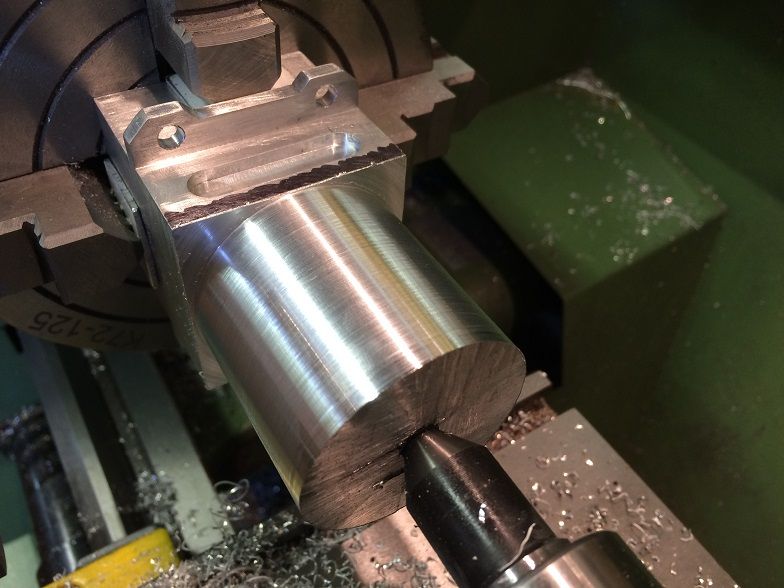
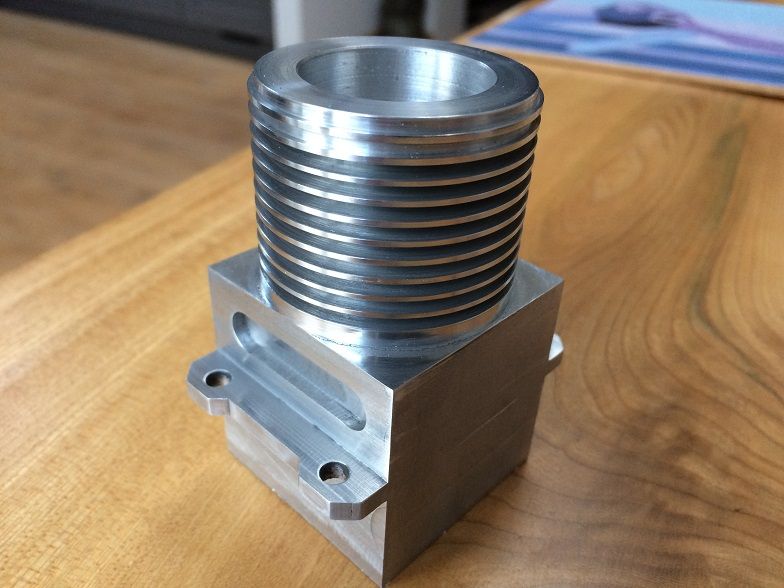
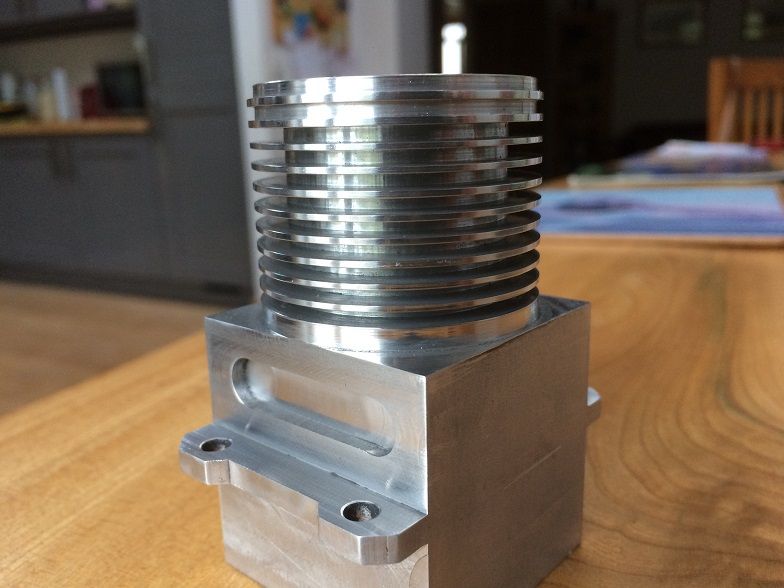
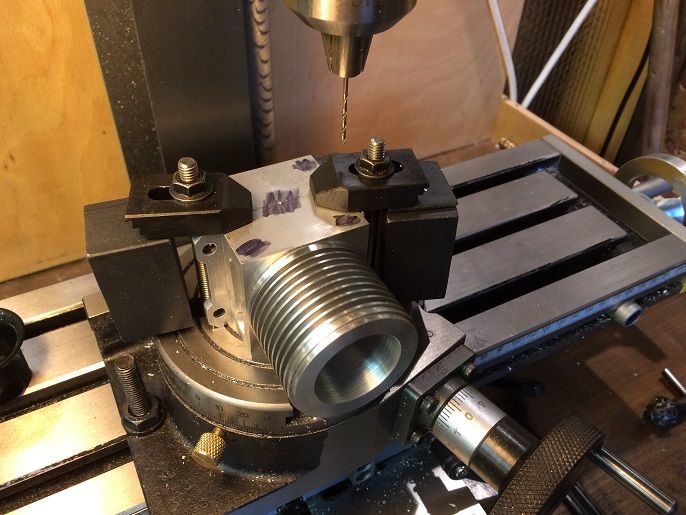
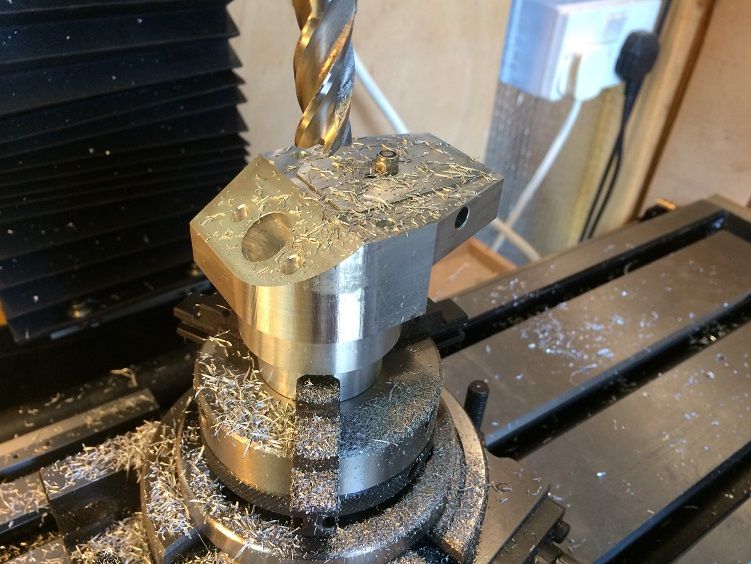
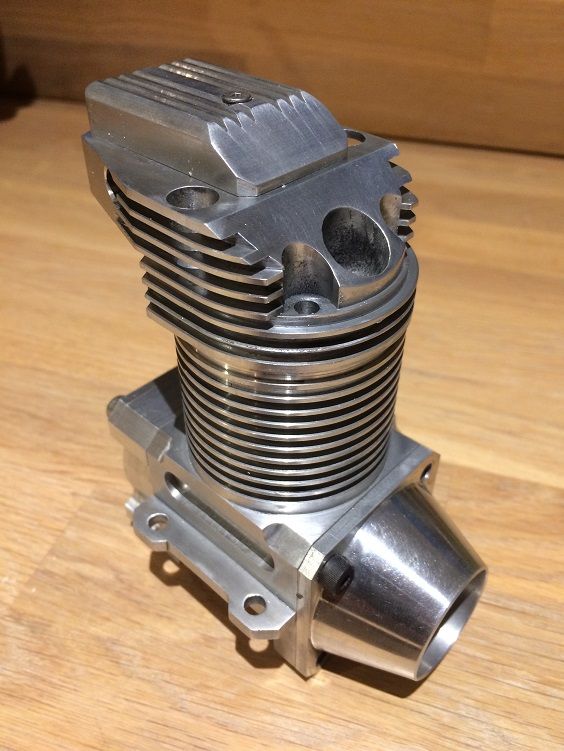
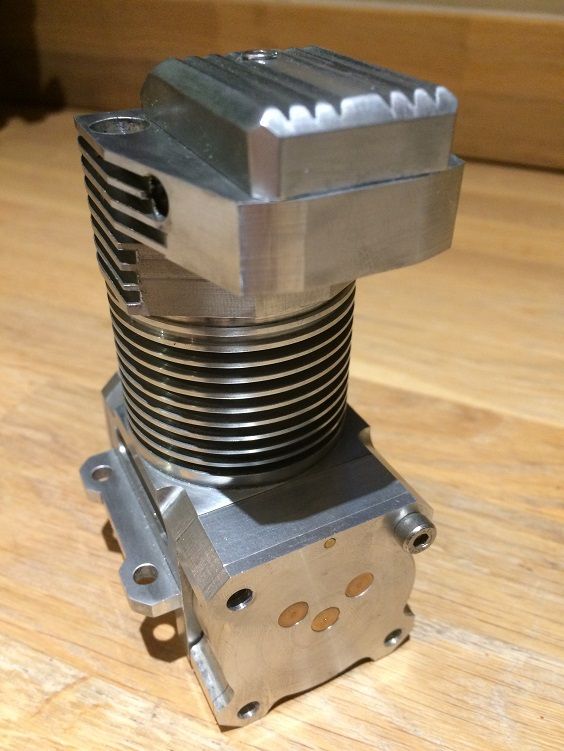
      a bit more progress today. Turned the cylinder, cut the fins (1mm fins/2mm spaces), and bored out ready for liner.

      img_5346sm.jpg

      img_5347sm.jpg

      img_5352sm.jpg

      img_5356sm.jpg

      Advert
      #353306
      LADmachining
      Participant
        @ladmachining

        Nice work – looks like you are making good progress! smiley

        #353312
        Trevor Crossman 1
        Participant
          @trevorcrossman1

          Good progress Craig​ ,neat finning , what do you plan to put it in for its first flight? Trevor

          #354791
          Craig Booth 1
          Participant
            @craigbooth1

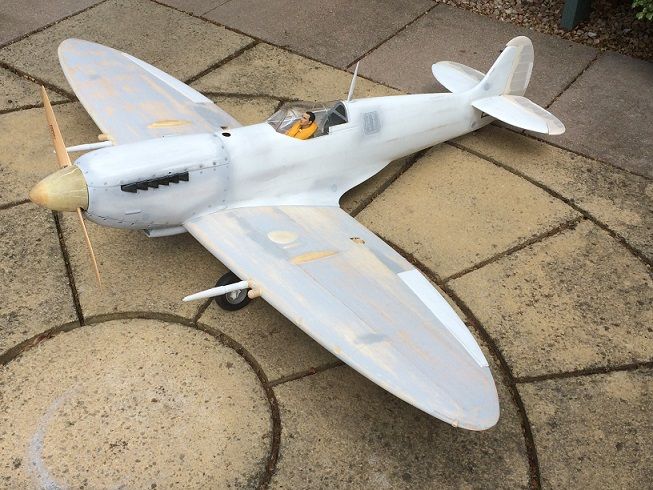
            Thanks guys. Trevor, after bench running I'll throw it in a trainer until I'm sure of its reliability. Then it's for a 1/7th scale scratch Spitfire I'm building. Failing that I have a Laser 100 in the cupboard ready.

            #354795
            Craig Booth 1
            Participant
              @craigbooth1

              Had a few sneaky days off while I built a kit set radio control car for the kids (well me actuallywink).

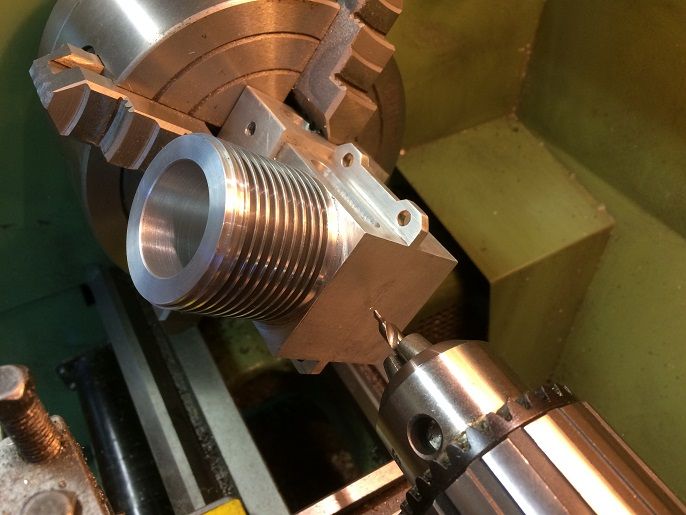
              Next on the engine was onto the rotary table to mark and drill out and tap the four 4 mm fixing holes front and rear.(I did use a centre drill first).

              img_5370sm.jpg

              Using a piece of scrap I made a holding jig so that I could put it back in the lathe to bore the tangential hole.

              img_5371sm.jpg

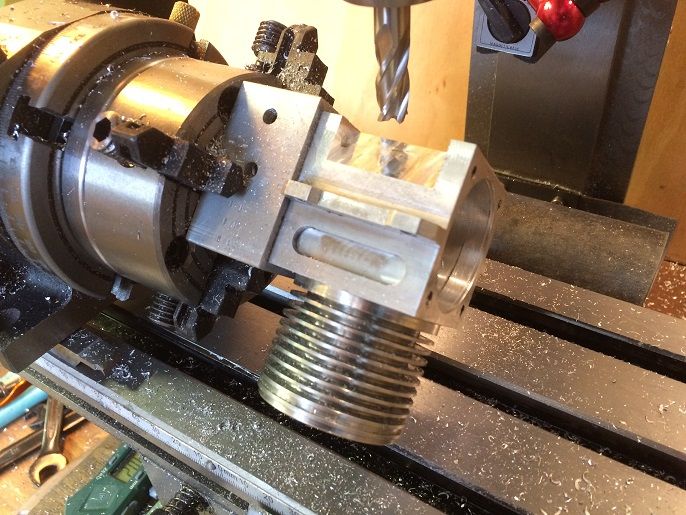
              Then back onto the rotary table to trim a few corners. I think what I'm finding now is that I'd wish I spent a little more on the next size up mill. Mine is a WM14 with 280mm spindle to table distance. Even with the smallest rotary table I could find I do struggle for space with some of the setups.

              img_5377sm.jpg

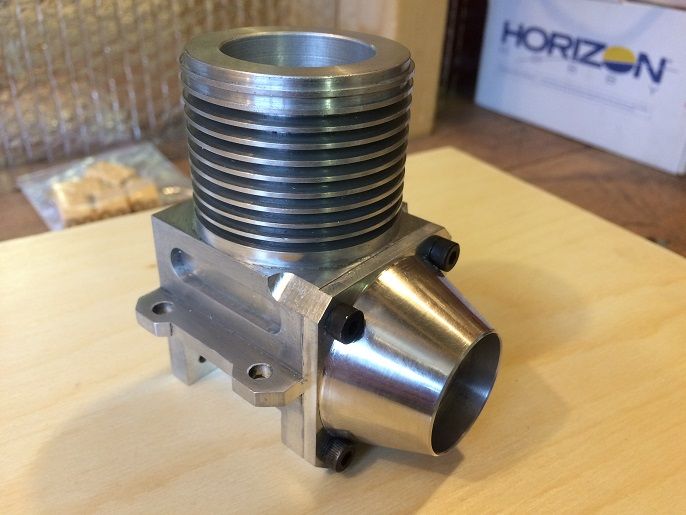
              Crankcase pretty much finished with exception of trimming the rear corners once I make the rear crank housing.

              img_5380sm.jpg

              #354808
              Hopper
              Participant
                @hopper

                Very nice work. Amazing what you find hiding inside blocks of metal isn't it.

                #369196
                Craig Booth 1
                Participant
                  @craigbooth1

                  Well it's been a while, been spending the summer with the radio control planes and also working on the spitfire.

                  With the wet weather decided to make a start again. Something simple and small to get back into the swing of working with metal rather than balsa. The rocker cover seemed like a good place to start.

                  img_6178sm.jpg

                  Edited By Craig Booth 1 on 26/08/2018 21:14:19

                  #369672
                  Craig Booth 1
                  Participant
                    @craigbooth1

                    Made the cylinder liner. Had some problems with boring the cylinder and getting a nice finish which I suspect was down to my lack of experience but possibly also the EN16M material which I understand is slightly less machinable than EN8. Perhaps I could have just used EN8 for the liner?

                    Anyway seem to corrected the problem with a lap and now all seems ok.

                    I also have EN16 for the crank, but if it is going to be that hard to machine then may look to change. Any opinions? Would EN8 suffice?

                    Also started making the blank for the cylinder head. That is going to be the hardest part for me to date. Plans look pretty complicated with plenty of angles and different steps. Trying to break it down into the right sequence.

                    cylinder head.jpg


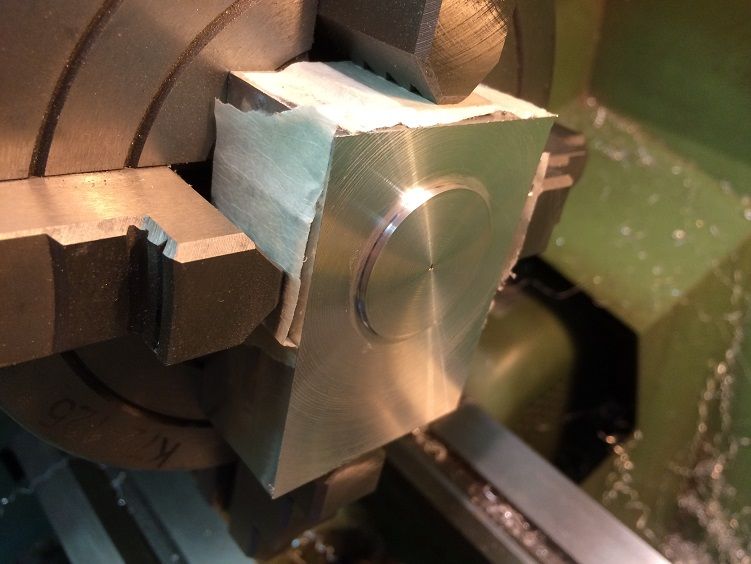
                    I have made the block and cut the part that sit in the top of the cylinder liner. I have then made a mirror jig of that out of aluminium 40mm bar. This should locate the jig exactly centre. Next I will drill the head bolt pattern using the mill and use those to fix securely to the jig. All other steps can then be carried out using the jig to hold it.

                    I am relying on a new Mill I have on order to help me. I currently have the WM14 but have been struggling for vertical space once i get the rotary table on, so have decided to upgrade to the WM16 and have also ordered a DRO set. I am hoping this will give me some better accuracy on my mill work.

                    (PS if anyone wants a WM14, 7 months old, little use, let me know)

                    img_6208sm.jpg

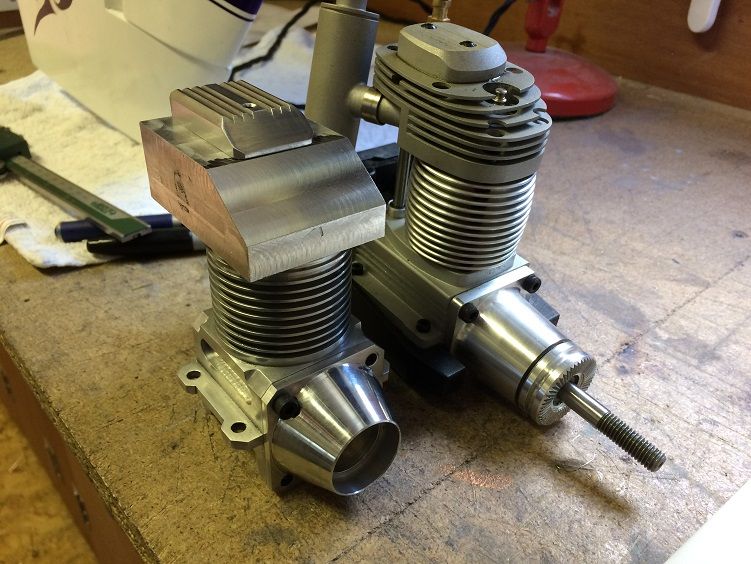
                    Here she is so far side by side with a Laser 100 which is currently destined for my Spitfire which is currently competing for my time.

                    img_6209sm.jpg

                    img_5850.jpg

                    img_6229.jpg

                    Edited By Craig Booth 1 on 30/08/2018 12:49:53

                    #370984
                    Craig Booth 1
                    Participant
                      @craigbooth1

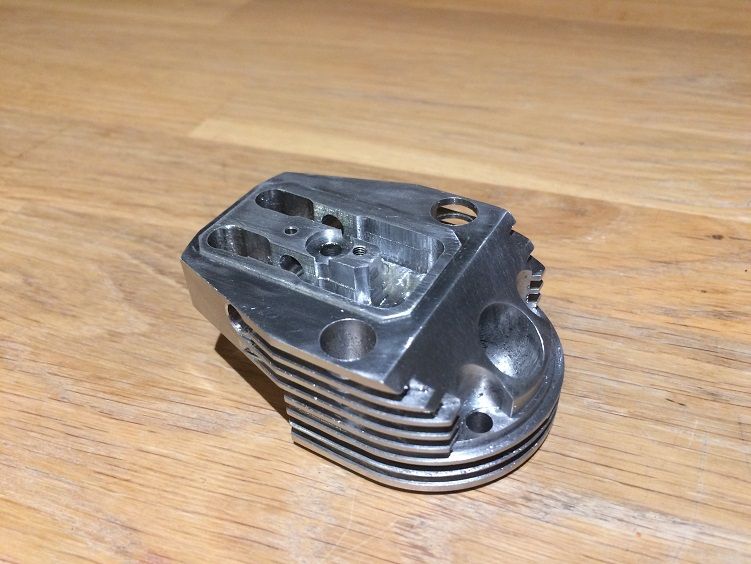
                      Had a new toy to play with today. A new WM16 mill with DRO. What a difference having a DRO makes.
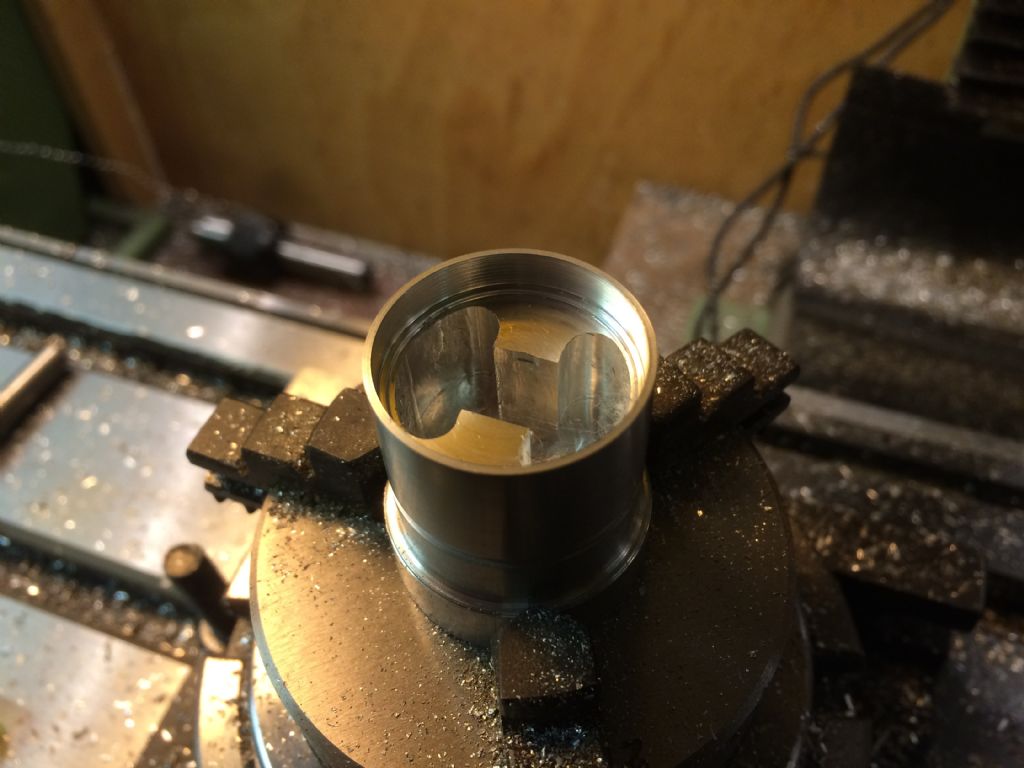
                      Used it for the first time to to do some more work on the cylinder head.

                      Learnt two lessons today. One – spend more time reading the plans, two – use lubricant with a slitting saw.

                      You can see the mistake on the first fin at the bottom of the cylinder head. Was supposed to be a 1mm fin at bottom, not 2mm. And the second fin is less than 1mm due to the slitting saw ripping.

                      Fortunately these are only cosmetic, but a bit annoyed with myself.

                      img_6295sm.jpg

                      img_6302sm.jpg

                      img_6307sm.jpg

                      Edited By Craig Booth 1 on 08/09/2018 21:15:54

                      #371127
                      Craig Booth 1
                      Participant
                        @craigbooth1

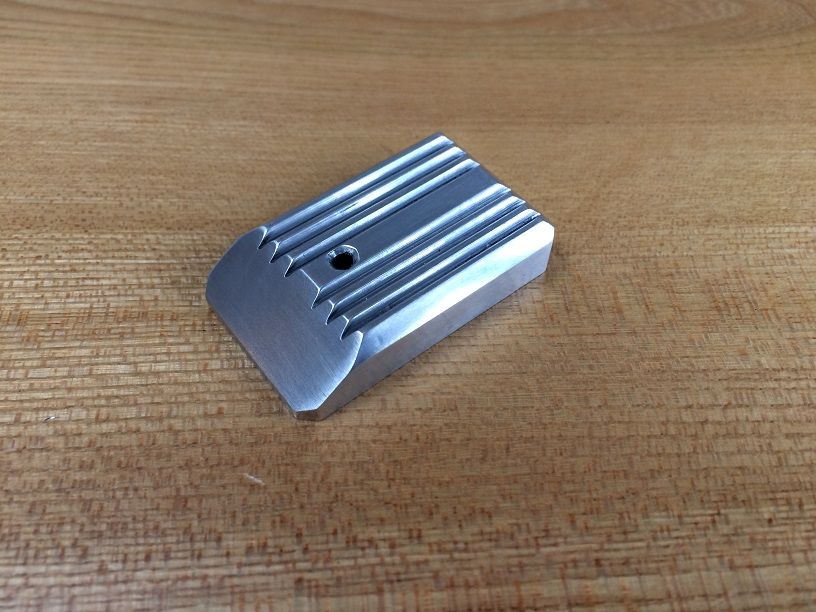
                        and today milled the cylinder head slots for the rockers.

                        img_6309sm.jpg

                        #371139
                        Adam
                        Participant
                          @adam

                          That all looks brilliant. I shall be watching for updates

                          #371147
                          Joseph Noci 1
                          Participant
                            @josephnoci1

                            Very Good Work Craig! A lot of intricate work on the cyl-head – very nice indeed. I seem to only ever make tooling or machines or parts for machines or upgrades for machines…. Am very much in awe of the type of work accomplished by chaps like you!

                            Very keen to 'hear' a video of it running! Nice going.

                            Joe

                            #371150
                            Neil Lickfold
                            Participant
                              @neillickfold44316

                              Great that you can take pictures as you go, I always forget, or don't have my phone handy etc. Don't have my phone in the shed when making parts, that way I don't get distracted. Looks really nice and coming along well. Looking forward to the video of it running. That will be real music to me.

                              Neil

                              #371157
                              geoff walker 1
                              Participant
                                @geoffwalker1

                                Agree with everyone, great craftsmanship. You appear to have a very wide range of skills, the spitfire looks superb. Keep posting Craig, really interesting topic.

                                If I was betting man I'd say you probably laid that patio as well……?

                                Geoff

                                #371472
                                Craig Booth 1
                                Participant
                                  @craigbooth1

                                  Hi all, thanks for all the comments, much appreciated.

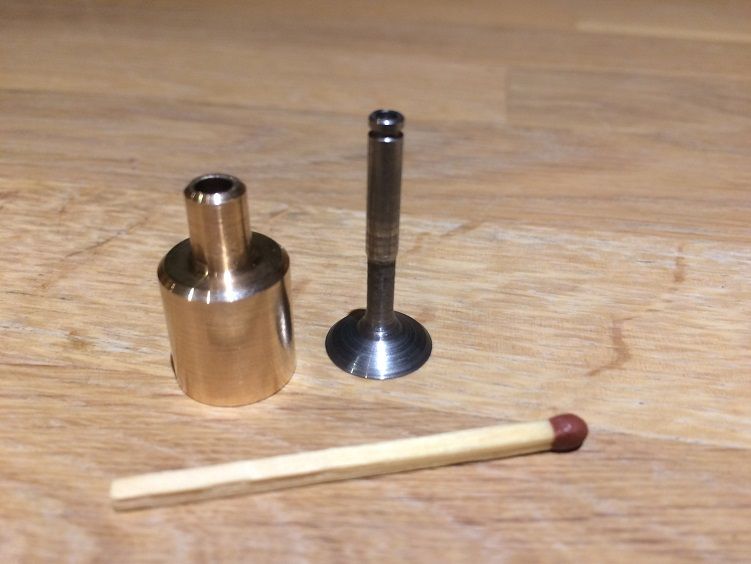
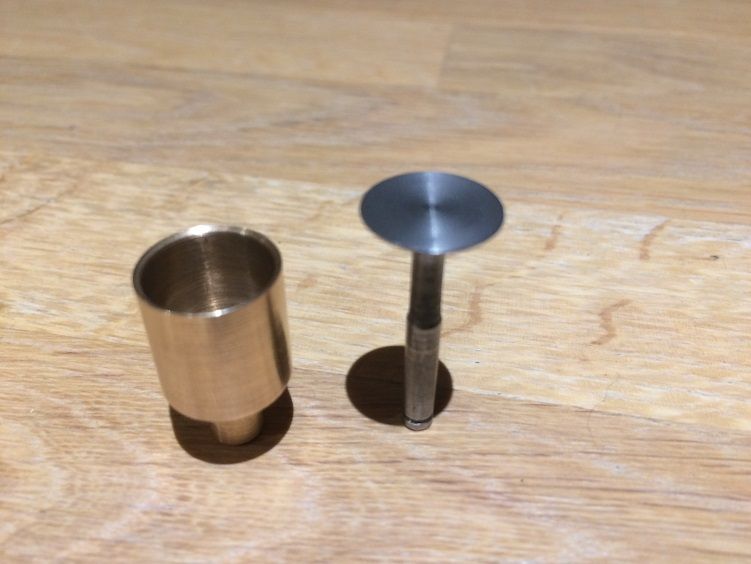
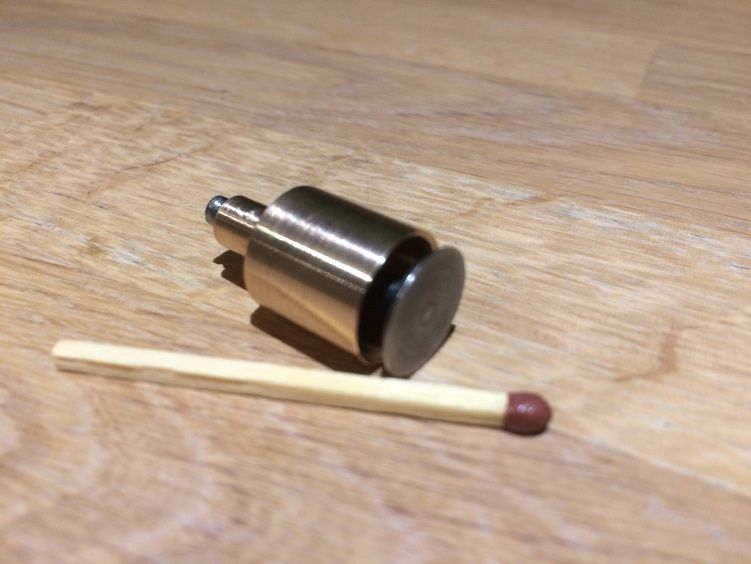
                                  Over the past couple of days I've been working on the exhaust valve (SS316) and valve liner (Colphos).

                                  The plans call for an OD on the valve liner of 13.5mm, and therefore obviously the same size hole to fit in the head. I looked at a 13.5mm end mill but to be honest was scared away by the cost for something I will probably never use again, so have reduced the OD to 13mm. Hopefully it does not make too much difference to the performance. If my maths is correct it is a 7% reduction in area. Might be able to make up for it a bit by some port and polishing.

                                  The valve liner will be an interference fit in the head.

                                  My other cheat was the valve shaft hole in the liner at 3.5mm. Again I do not have a 3.5mm reamer and looked at prices and decided just to drill. Although the valve feels smooth in the liner, I'm just not sure. Any slop here and the exhaust gases will pass. Of course I did not think of a hand reamer which are much cheaper. So I think this set I've made will be put down as learning curve and practice and I'll re-do it properly once I get a reamer.

                                  img_6334sm.jpg

                                  img_6333sm.jpg

                                  img_6338sm.jpg

                                  Edited By Craig Booth 1 on 12/09/2018 21:55:46

                                  #371480
                                  Hopper
                                  Participant
                                    @hopper

                                    Wow. The match stick really sets things in perspective! Nice work.

                                    For future reference, cheap but quite reasonable quality reamers are readily available, like this one here

                                    **LINK**

                                    two for $8.95 including shipping.

                                    I have found them quite good enough for home hobby shop use.

                                    Edited By Hopper on 13/09/2018 01:16:42

                                    #388163
                                    Craig Booth 1
                                    Participant
                                      @craigbooth1

                                      Hi all, Merry Christmas to all. Well it's been a while as I've been working on the Spitfire which is almost finished, so I've managed to find some time to get back onto the engine. The next couple of posts give an update of the last weeks work.

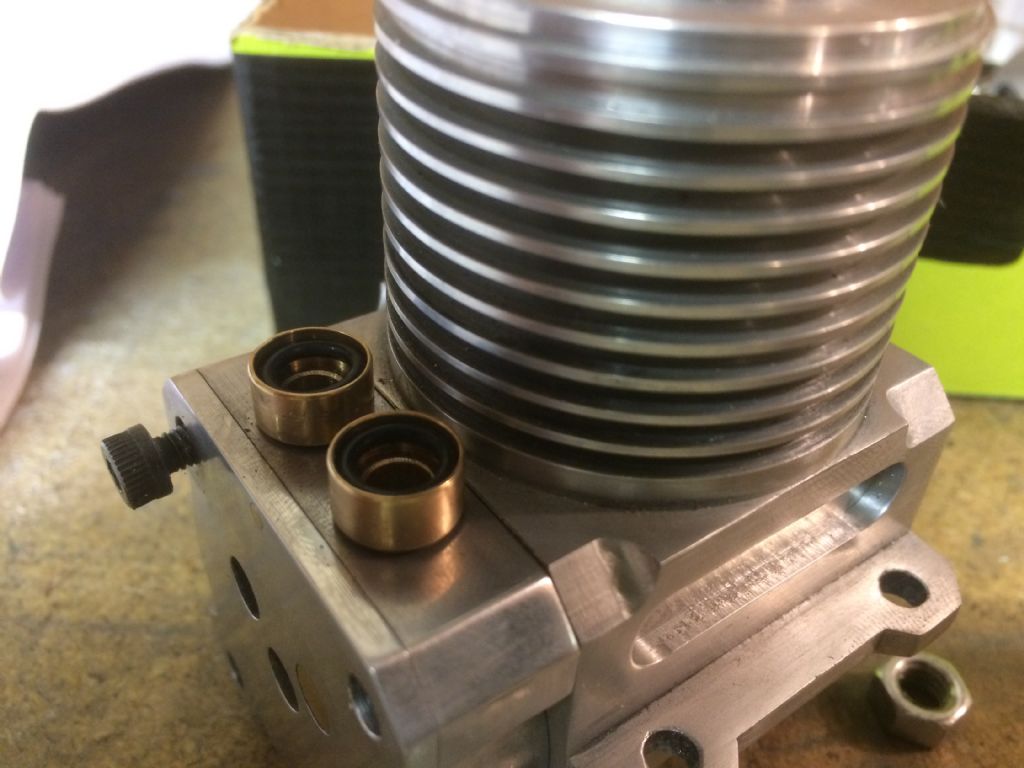
                                      Cam follower guides from Colphos made. You can see the o-rings in the photo below.

                                      img_7489.jpg

                                      #388165
                                      Craig Booth 1
                                      Participant
                                        @craigbooth1

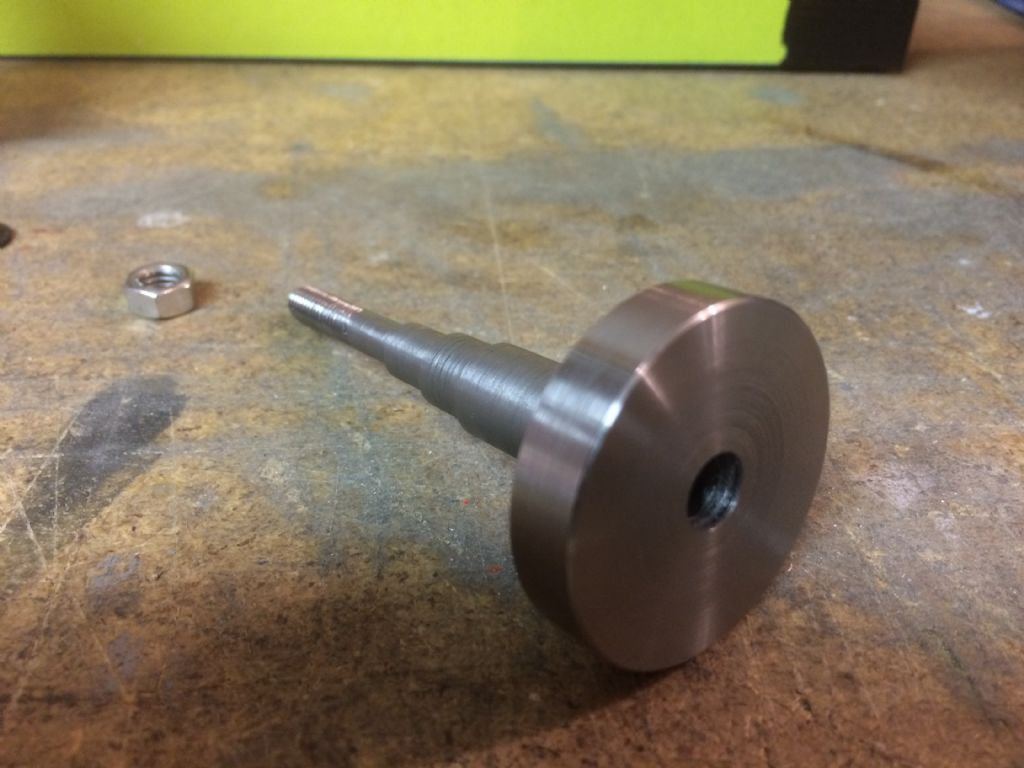
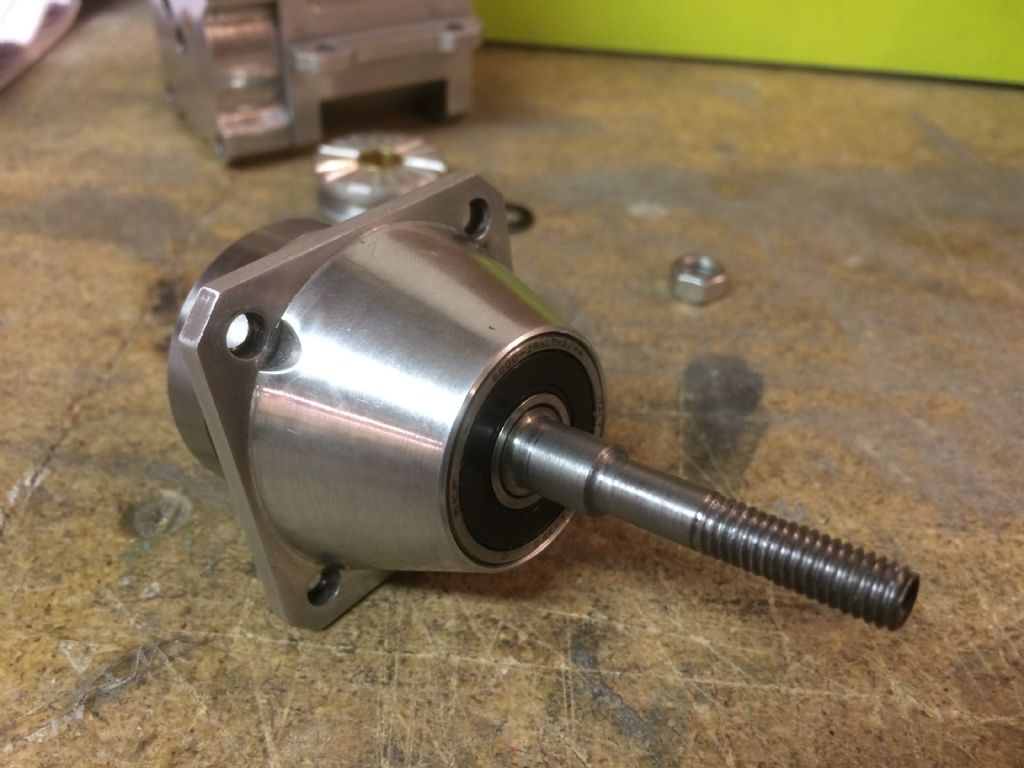
                                        I had a go at the crankshaft (EN16T) which started out well but I ended up taking a bit too much off the diameter for the big bearing. Only a margin but enough that I can feel a bit of slop in it.

                                        So once I get some more material I'll make another one. I'm also going to up the thread size from M6 to M8. That feels a bit better for an engine this size and will also fit the standard 8mm diameter on the props.


                                        img_7491.jpg

                                        img_7492.jpg

                                        img_7493.jpg

                                        Edited By Craig Booth 1 on 29/12/2018 20:57:03

                                        #388167
                                        Craig Booth 1
                                        Participant
                                          @craigbooth1

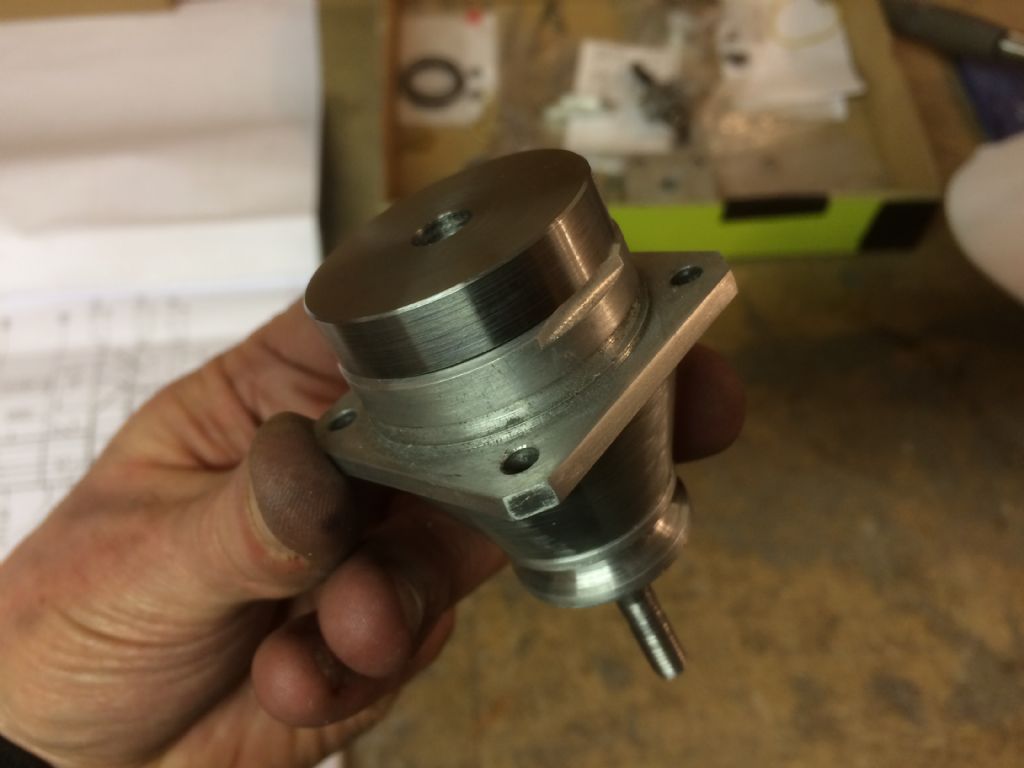
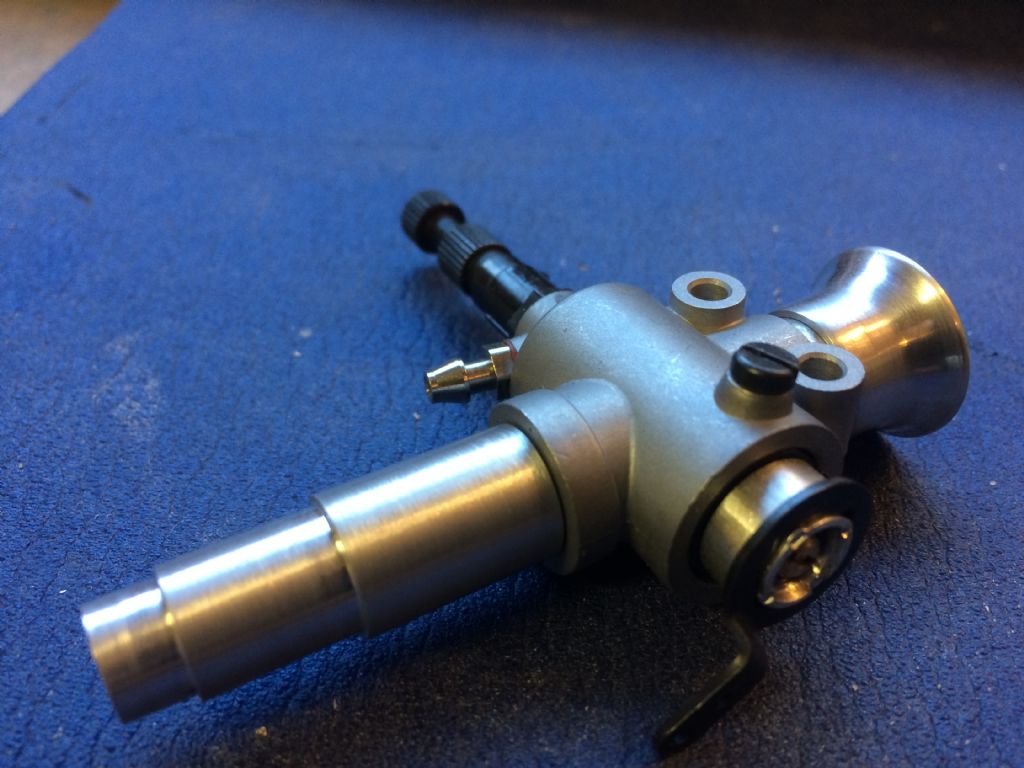
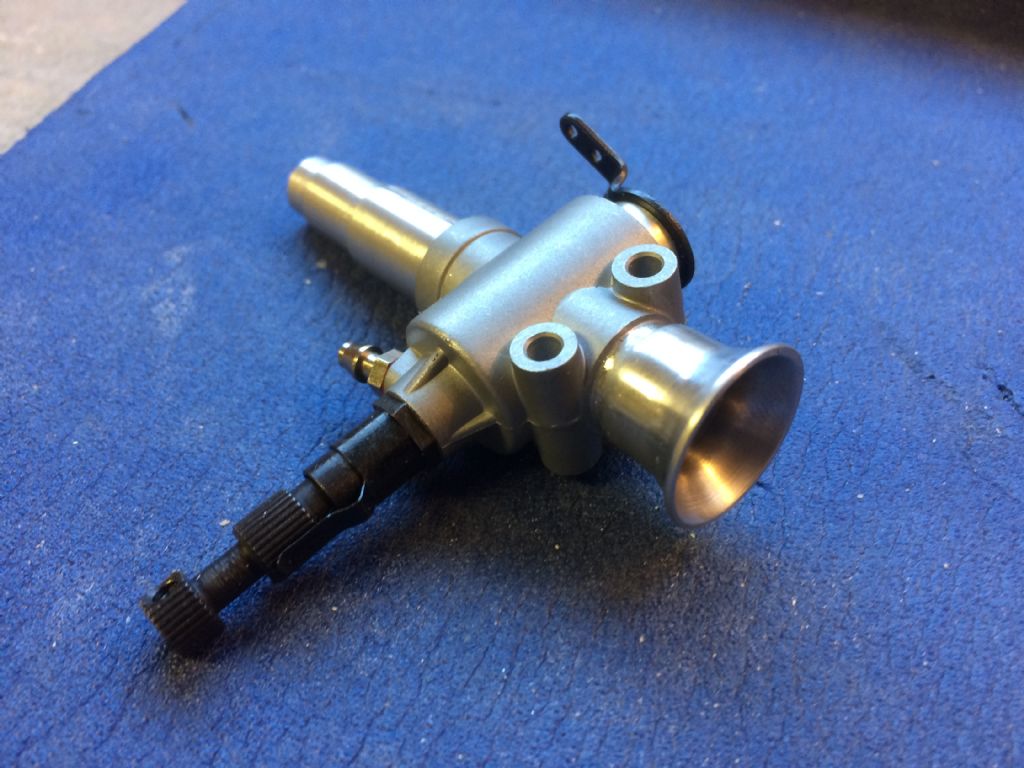
                                          For the carb I am using a standard unit from an A.S.P. engine and needed to make an adaptor that will fit the head.

                                          img_7522.jpg

                                          The end will receive an M10 thread to fit into the head inlet.

                                          I also had a bit of a play and made an inlet trumpet.

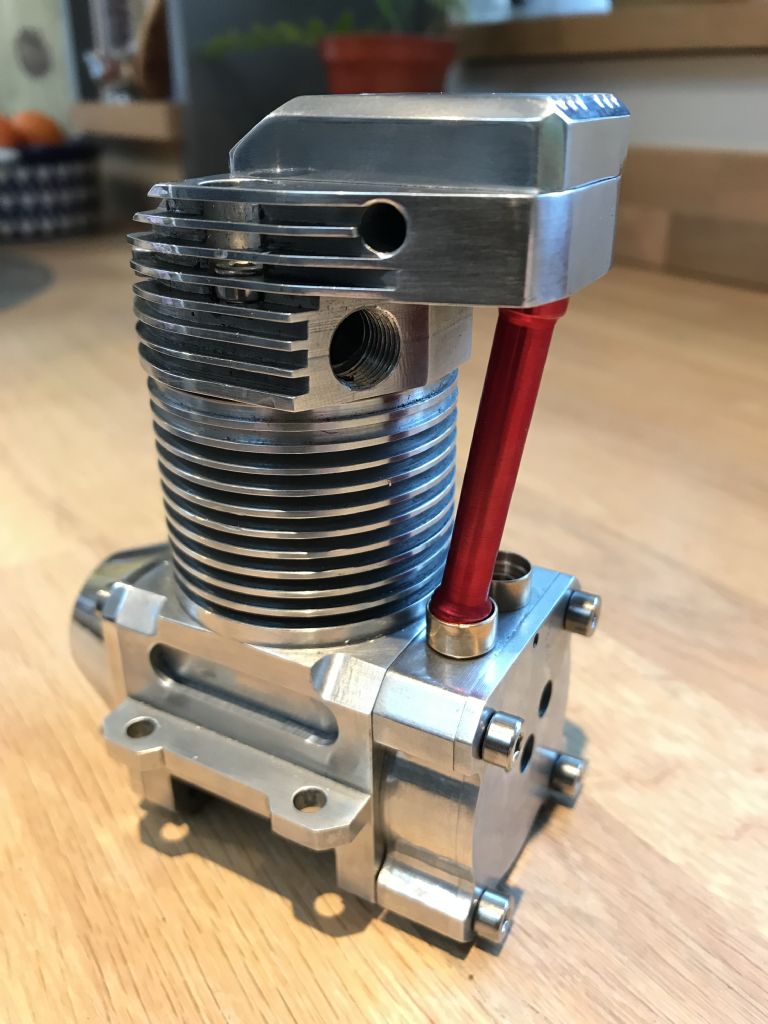
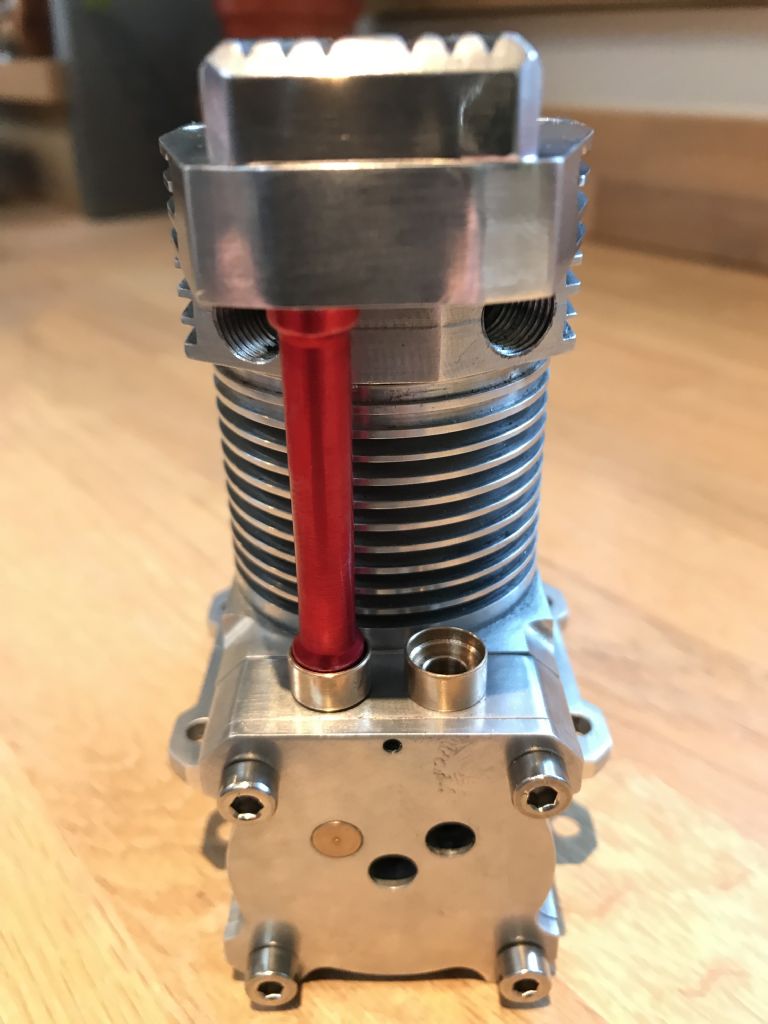
                                          As an aside I am also starting to organise the bits I need to do some DIY anodising. The trumpet, and rocker head cover will get a red anodising (if successful)

                                          img_7520.jpg

                                          #388168
                                          Craig Booth 1
                                          Participant
                                            @craigbooth1

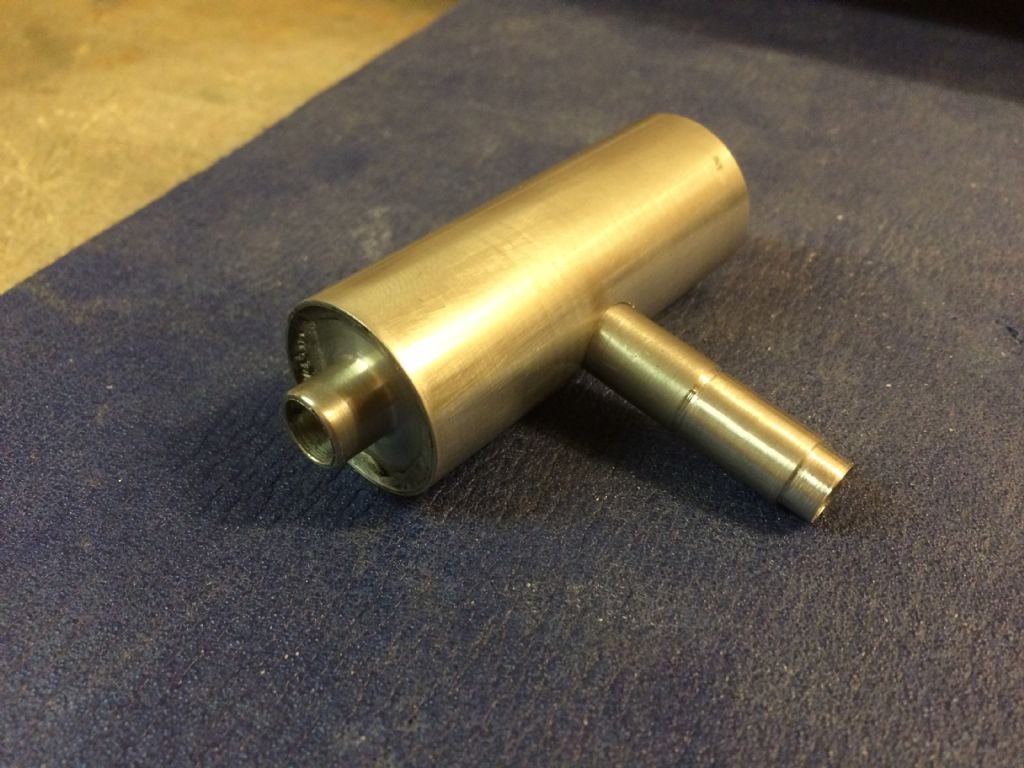
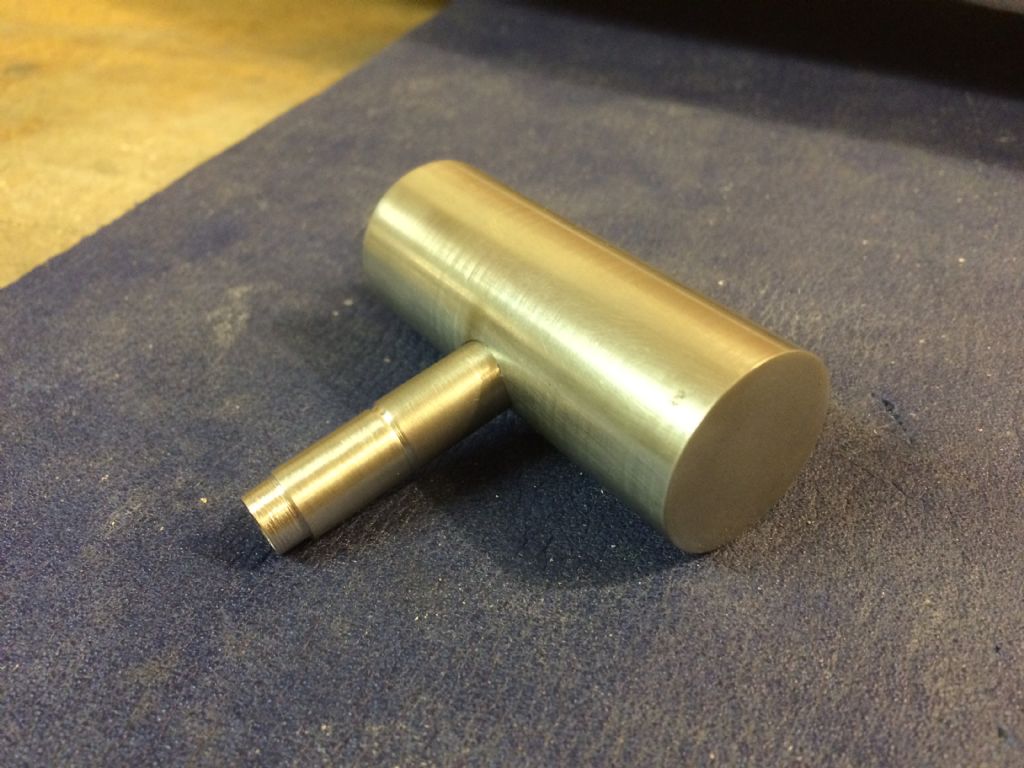
                                            On the exhaust side I deviated from the 2-piece unit on the plans and bored out from a single piece, then made an end cap with integral exhaust hole which I aluminium soldered into place.

                                            The head connection piece will also get soldered in once threaded.

                                            img_7524.jpg

                                            img_7525.jpg

                                            #388173
                                            Craig Booth 1
                                            Participant
                                              @craigbooth1

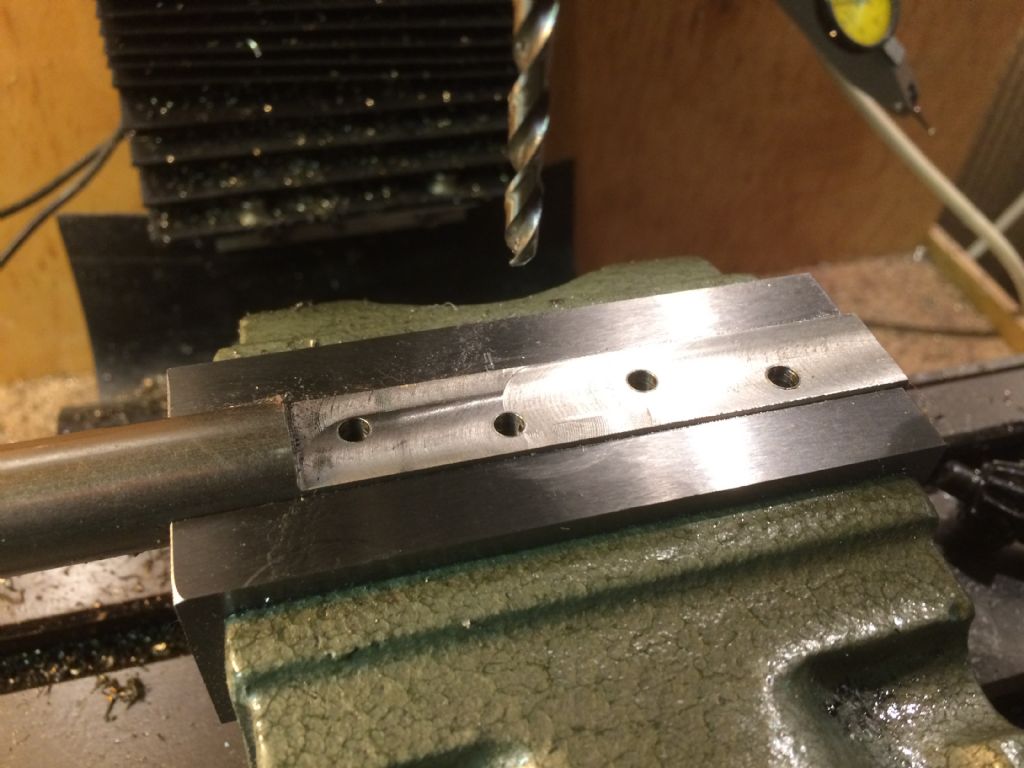
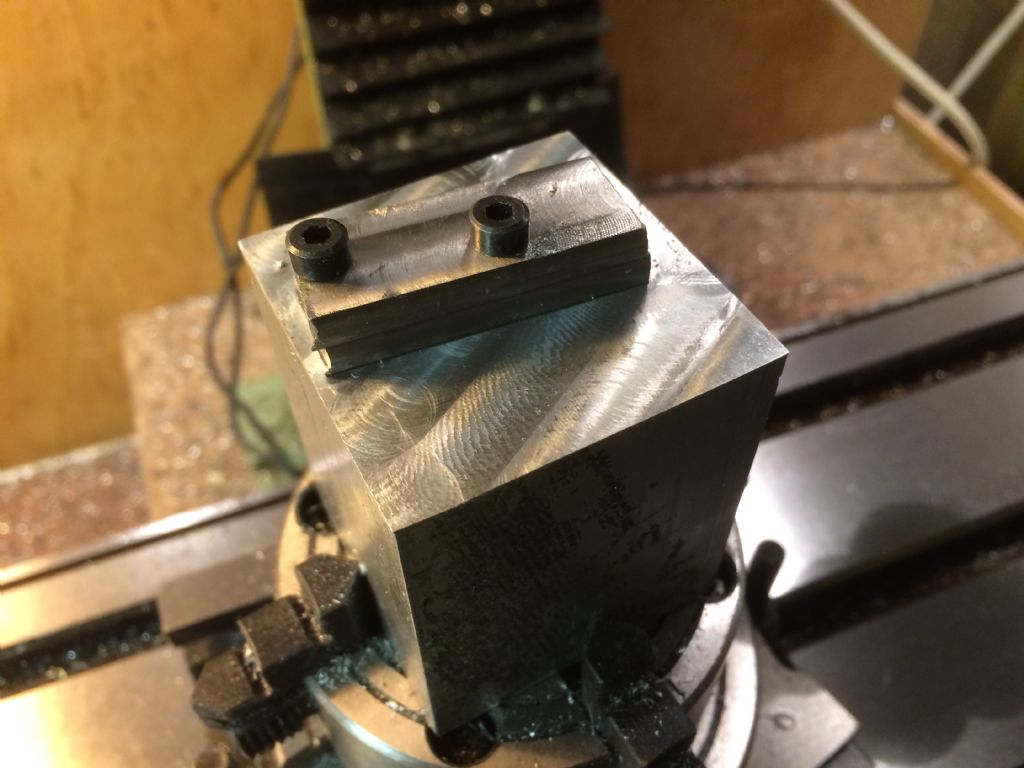
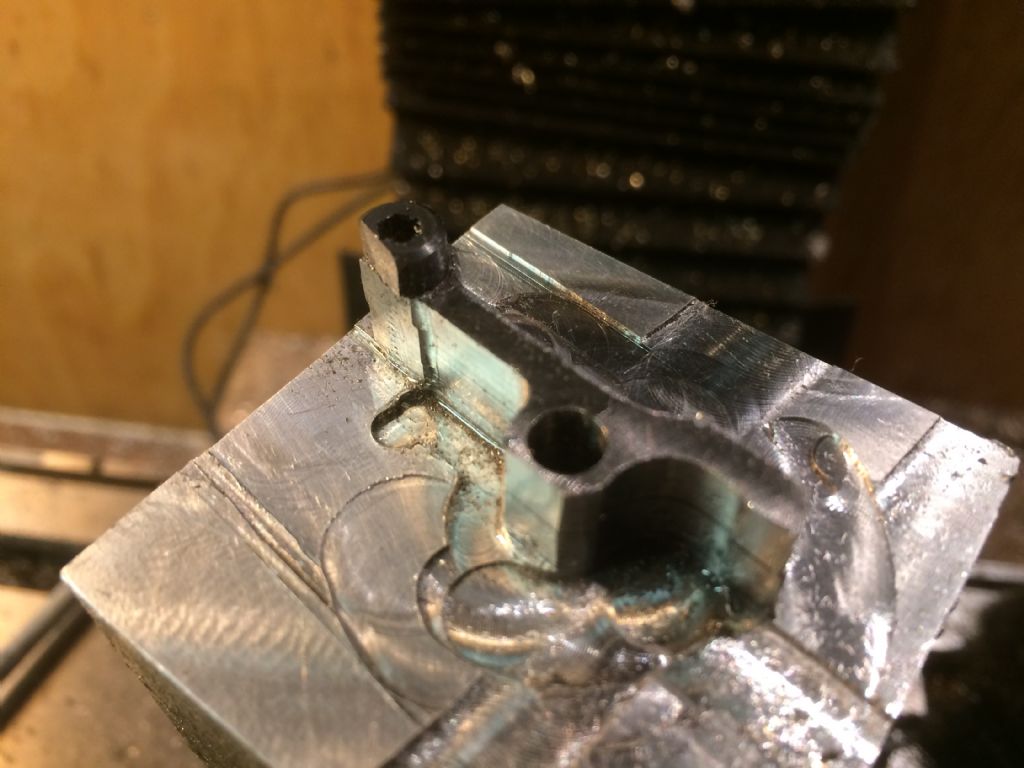
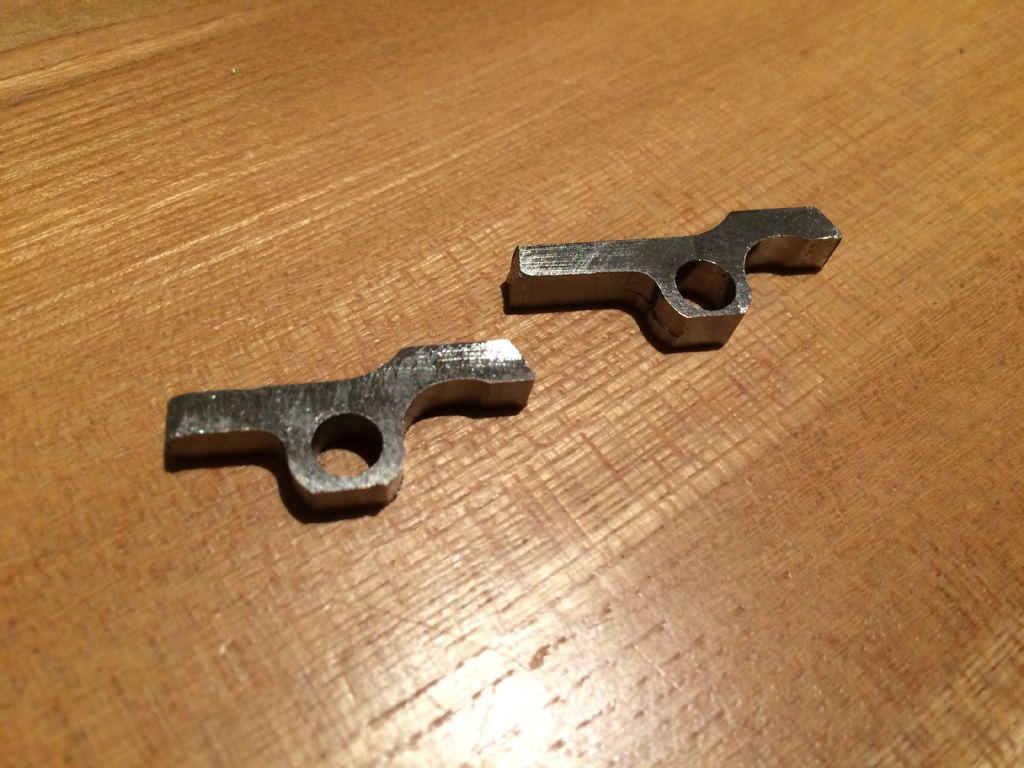
                                              Lastly, one unsuccessful attempt to make the rockers. Made from silver steel which I had to firstly machine out of 12mm round. Then made a jig to hold in place on the rotary table.

                                              All was going well, but made a silly mistake with dimensional error when I took a radius for a diameter and cut off too much length. So will be starting those again too. At least I have the jig to use.

                                              img_7519.jpg

                                              img_7526.jpg

                                              img_7531.jpg

                                              img_7533.jpg

                                              #388365
                                              Craig Booth 1
                                              Participant
                                                @craigbooth1

                                                Couldn't resist a temporary assembly

                                                img_7541.jpg

                                                img_7540.jpg

                                                img_7542.jpg

                                                img_7535.jpg

                                                #388982
                                                Craig Booth 1
                                                Participant
                                                  @craigbooth1

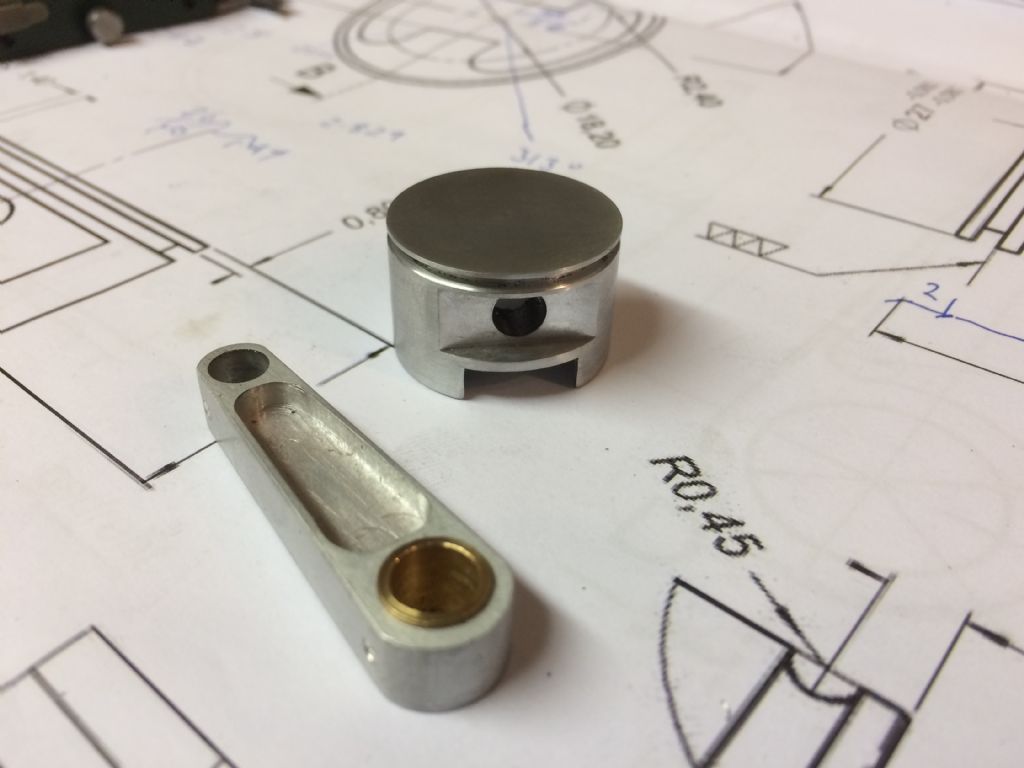
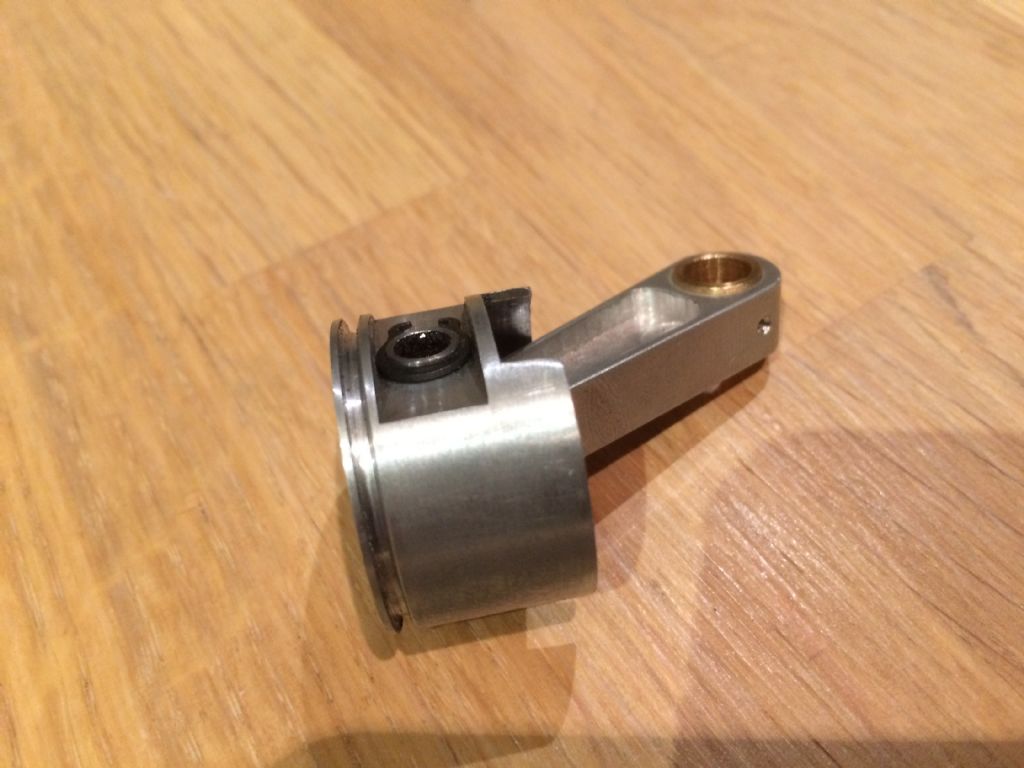
                                                  Ploughing on and tonight I got the piston and gudgeon pin finished. Happy with the fit. Piston is 0.06mm undersize to the liner.

                                                  What I'm not sure about is how I will fit the circlip on the other end of the pin. Looks pretty tight between the faces. Maybe need to try an E-type.

                                                  img_7564.jpg

                                                  img_7565.jpg

                                                  img_7570.jpg

                                                  #390925
                                                  Craig Booth 1
                                                  Participant
                                                    @craigbooth1

                                                    no real machining progress, but have been playing with a bit of home anodiziing. Mixed results. With sulphuric acid not available to the home user due to the new laws (unless you get a license), I've gone with using Sodium Bisulphate.

                                                    This part turned out alright. Think I'll also try doing the rocker cover.

                                                    img_7672.jpg

                                                    img_7675.jpg

                                                    #390928
                                                    LADmachining
                                                    Participant
                                                      @ladmachining

                                                      Looking great!

                                                      Thanks for sharing the updates.

                                                    Viewing 25 posts - 26 through 50 (of 75 total)
                                                    • Please log in to reply to this topic. Registering is free and easy using the links on the menu at the top of this page.

                                                    Advert

                                                    Latest Replies

                                                    Viewing 25 topics - 1 through 25 (of 25 total)
                                                    Viewing 25 topics - 1 through 25 (of 25 total)

                                                    View full reply list.

                                                    Advert

                                                    Newsletter Sign-up