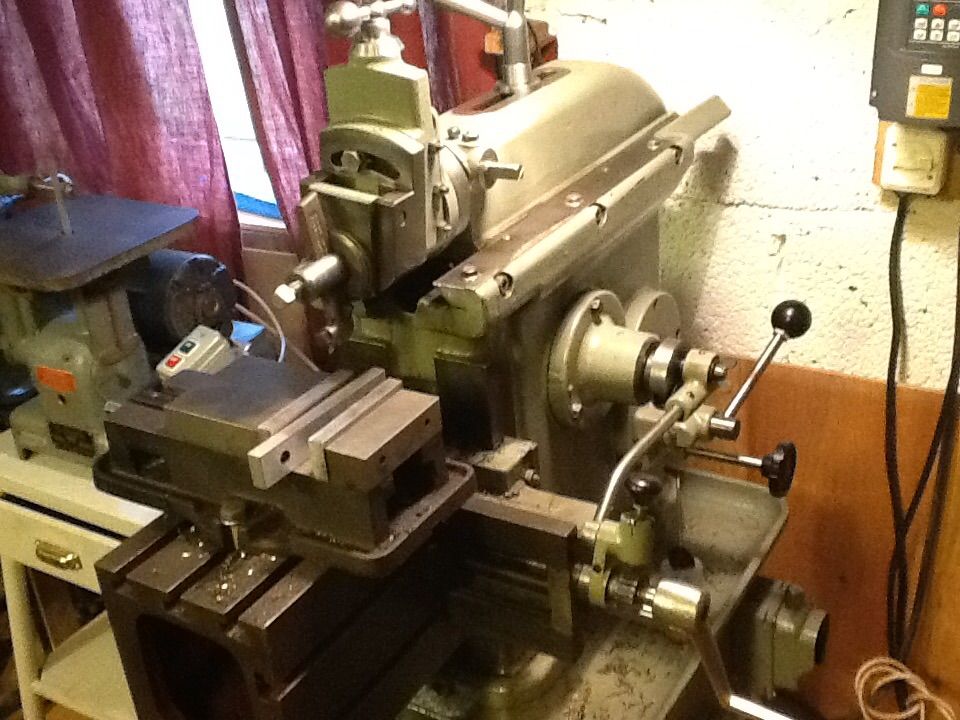
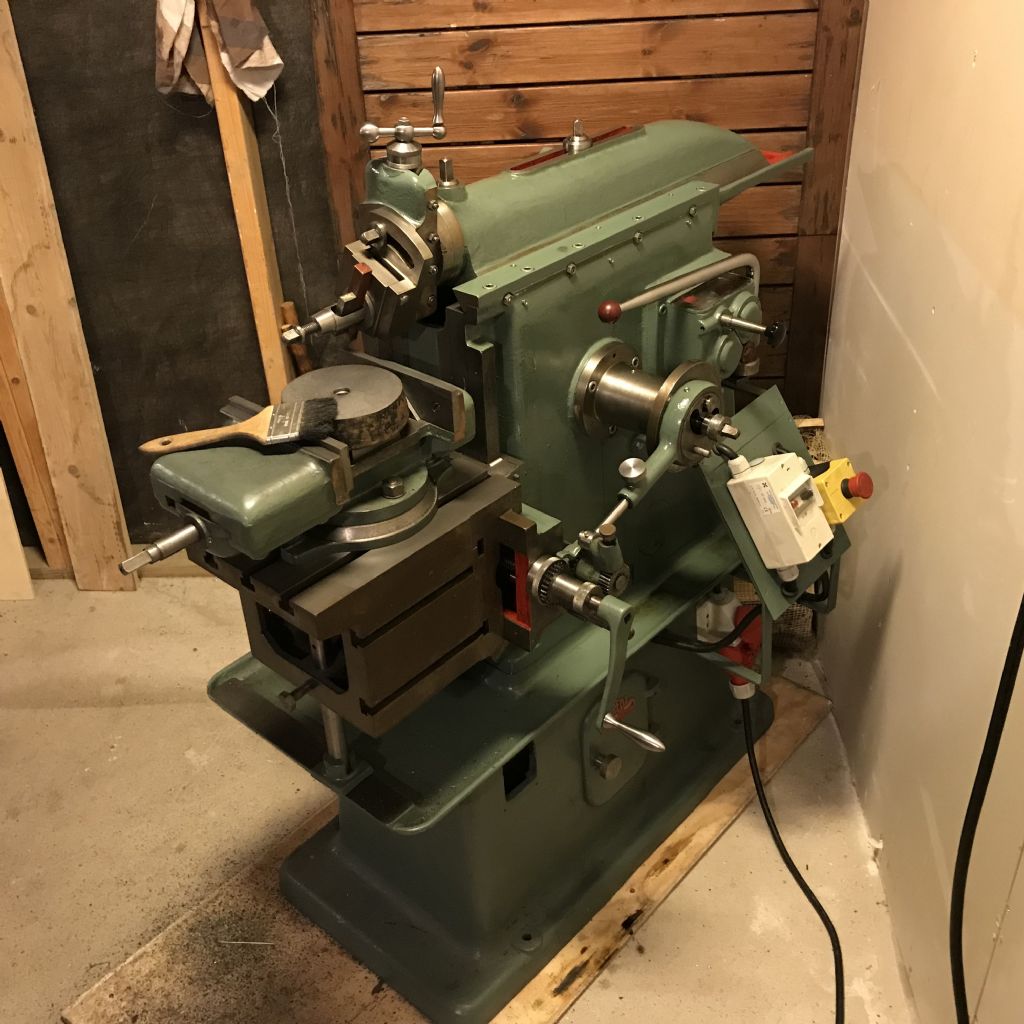
I switched mine on briefly for the first time the other day, she has been sat awaiting time to sort a few issues out – not the least of which is a broken switch box which renders the machine live when plugged in
Interesting, thanks chiefly to this thread MEW has featured a lot more about shapers in the last 12 months. Issue 278 will see Joe Noci's computerised Alba Shaper as the cover story, hopefully of wider interest than just to shaper fans.
Neil
(Thinking of getting a bumper sticker "Real Men have Shapers" or "My other Mill is a Shaper"
Maybe Ketan should think of getting the Chinese to make a new one he could sell.
Original Adept handle – 24" long, 1" x 5/16" – 3/8" holes at 1/2" and 4.1/2" centres from one end. Waisted at 'pulling' end. I've replaced mine with a shorter version (15" long) as for light work, it's more convenient and stores easily…
Last night I removed the old electrics and started to install NVRs, one as a master inbound cut-off to the sockets and a second for the shaper itself. The old contactor was 3 phase (badly) rewired for single phase working and IMHO it makes no sense to have the on / off switch at shin height in line with the moving ram head, 'elf & safety should have stopped that
Original Adept handle – 24" long, 1" x 5/16" – 3/8" holes at 1/2" and 4.1/2" centres from one end. Waisted at 'pulling' end. I've replaced mine with a shorter version (15" long) as for light work, it's more convenient and stores easily…
Regards,
IanT
That 5/16th thickness seemed a bit odd for some reason I couldn't quite put my finger on – so I checked the original again (with my glasses on) to be sure and it is right. However, it turned out that I used 3/8th x 1" on the shorter ( 15" ) replacement handle – must have been what I could get (or had) at the time. So either thickness should be OK for a replacement handle Peter.
I have an Alb 1 A for twenty years now and would not part wit it for all the tea in China. Saves a fortune in milling cutters into the bargain. Shapers are greatly underestimated machine tool as to their usefulness and versatility.
One more shaper user checking in! I got a Swedish made Värnamo Prema 02 Shaper. It does a really good job cleaning scrap metal which would either take forever on my bench mill and/or ruin my end mills.
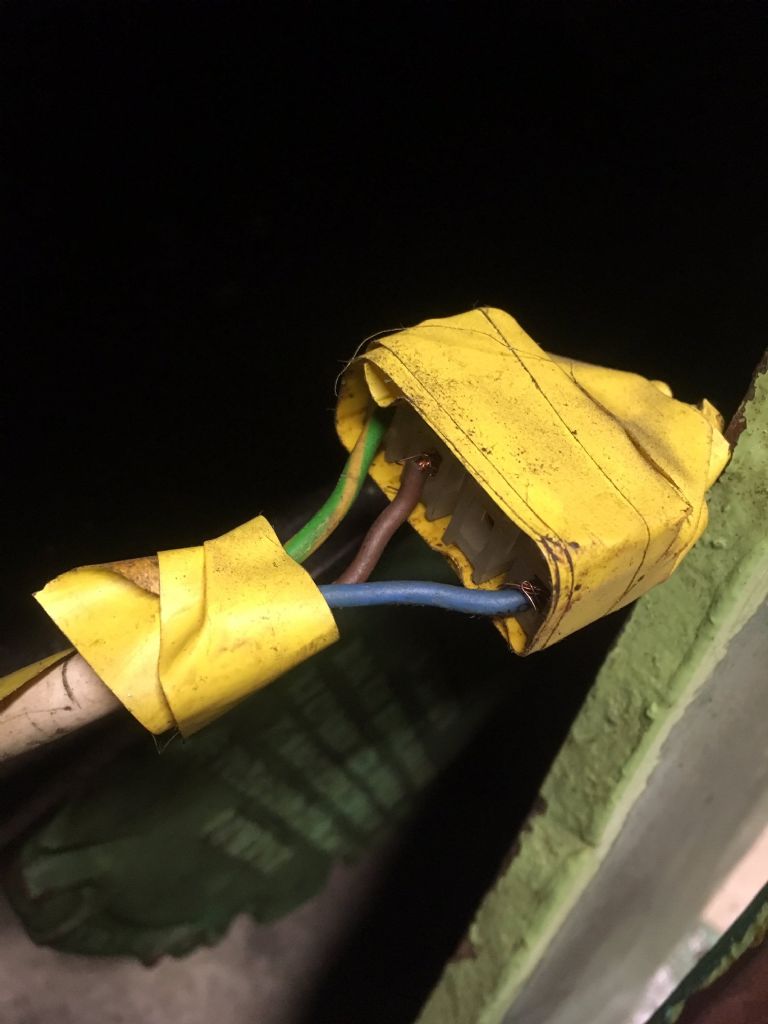
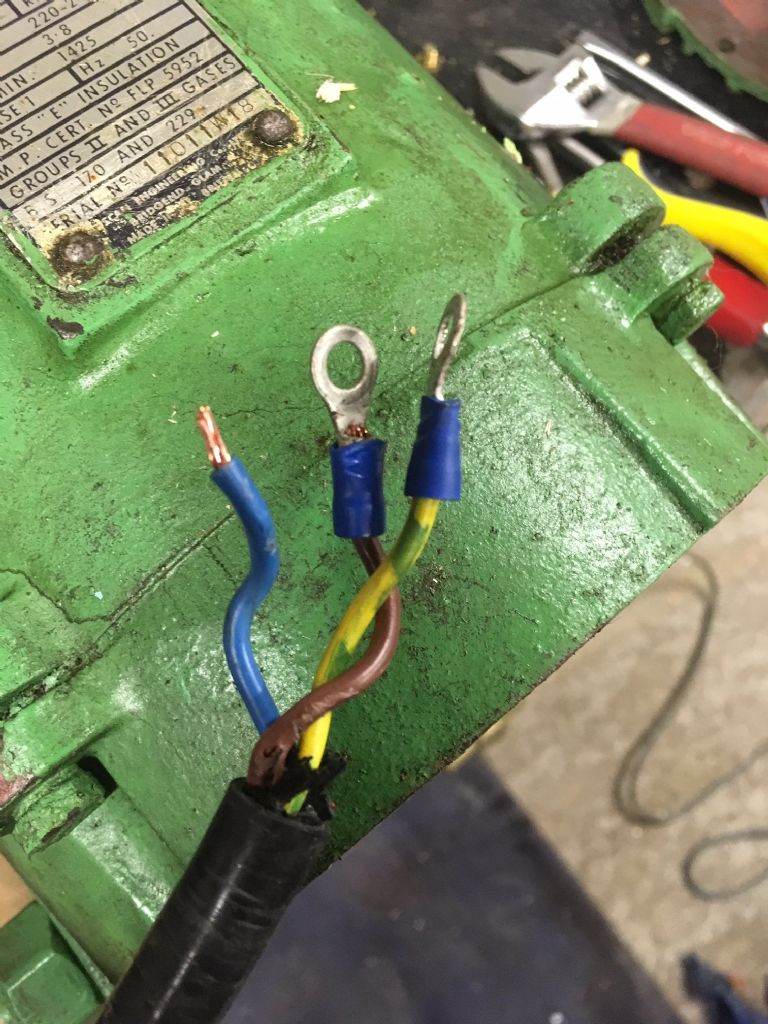
Rewiring was going well until i found this nasty little bodge tucked up out of sight
6" of wire from the choccy block to the motor
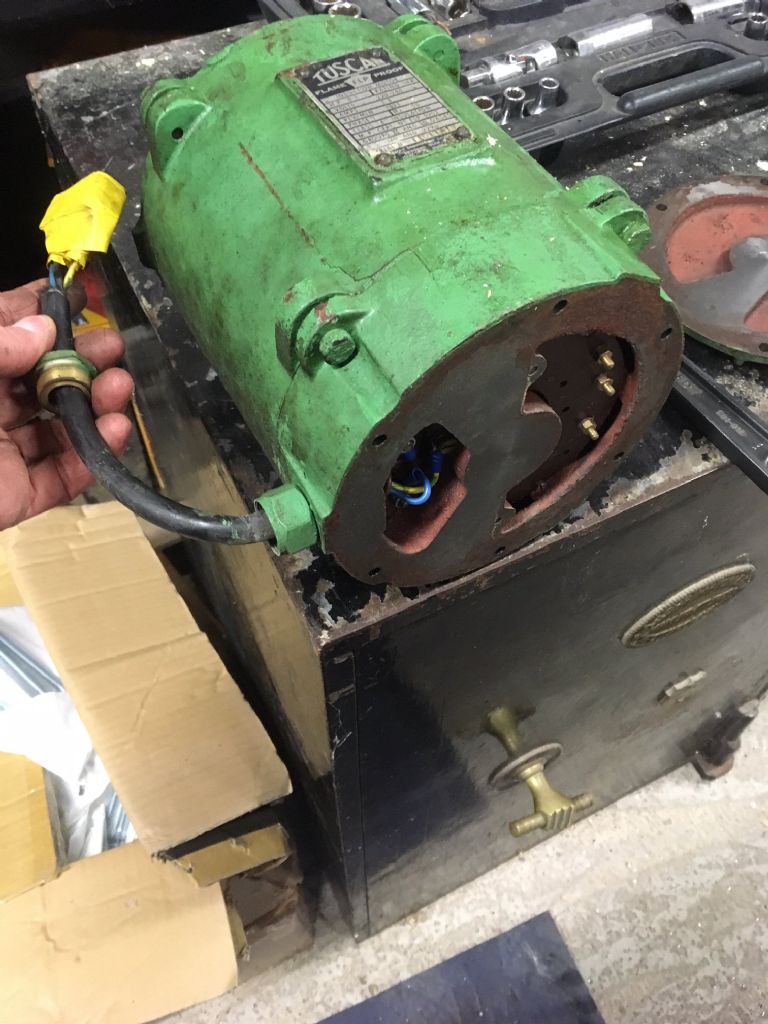
Yes, the motor is sat on a safe, I must tidy my work surfaces…
When the wiring was removed, a crimp fell off too
Motor reinstalled, I need to read the manual on tensioning the drive belt tomorrow, the second NVR specifically for the shaper also needs finishing then it is onto setting up and testing
Not really suprising since none of the remaining connectors are properly crimped. Looks like they were bodged on with a pair of those awful pressed steel abominations sold as "crimping tools" – such "tools" get an otherwise reliable termination system a bad name.
Exactly my thoughts, hence I have replaced all wiring. I do use the same crimps but ensure the right diameter crimp (in this case Red) are used and I also solder the wire to the terminal after crimping
Unless three is a better way which I am not aware of?
If the terminal is properly crimped, you should never solder it – The crimp is gas tight on its own, and soldering results in the solder creeping up the wire away from the crimp. This stiffens the wire at the crimp connection. When fitting the lug to the intended spot, dressing the cables then often results in difficulty in bending the wire, or excessive force results in fractures in the individual copper wires in the cable. Certainly a total no-no in the Mil-Spec environment, but then our shops are a lot more lax I guess..
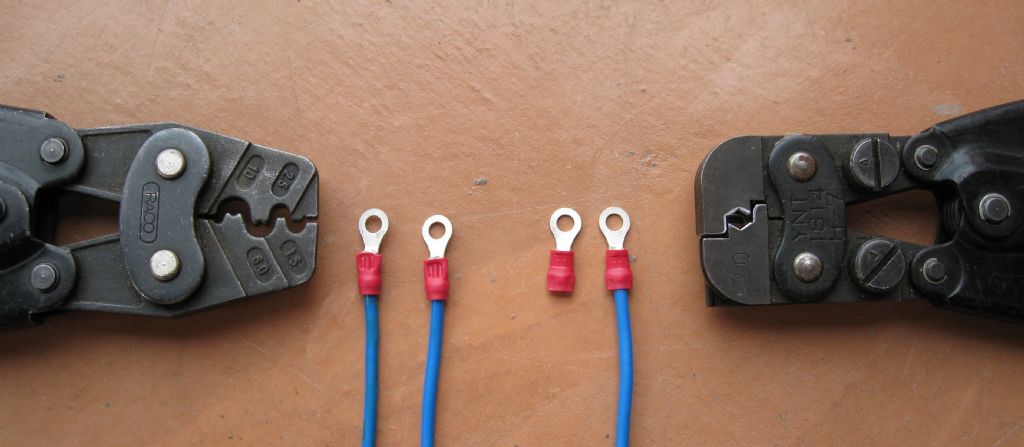
Anyway, here are some photos of good and better crimps..The second is typical of the Mil environment. The plastic shroud on the lug is itself crimped over the wire insulation, affording some strain-relief to the crimped copper section. The first crimper, typical of a 'good' quality commercial crimper does not crimp the rear shroud section, but the joint is sound, and if the wire fitting is sound, the crimp is as good as the second one.
Commercial crimper on the left ( not a pressed steel type, or at least the jaws are not)
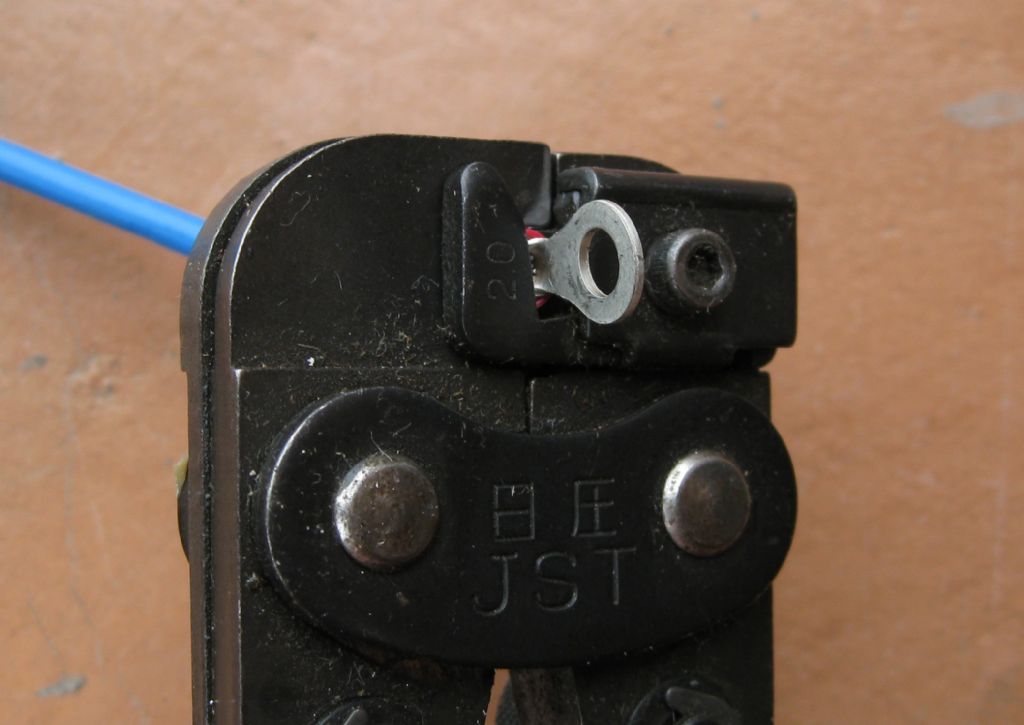
The 'Mil' crimper…It has built-in mechanisms to ensure the wire penetrates the lug the correct amount, and that the lug is positioned properly in the crimper, ensuring the crimp jaws impact the lug at the correct spot.
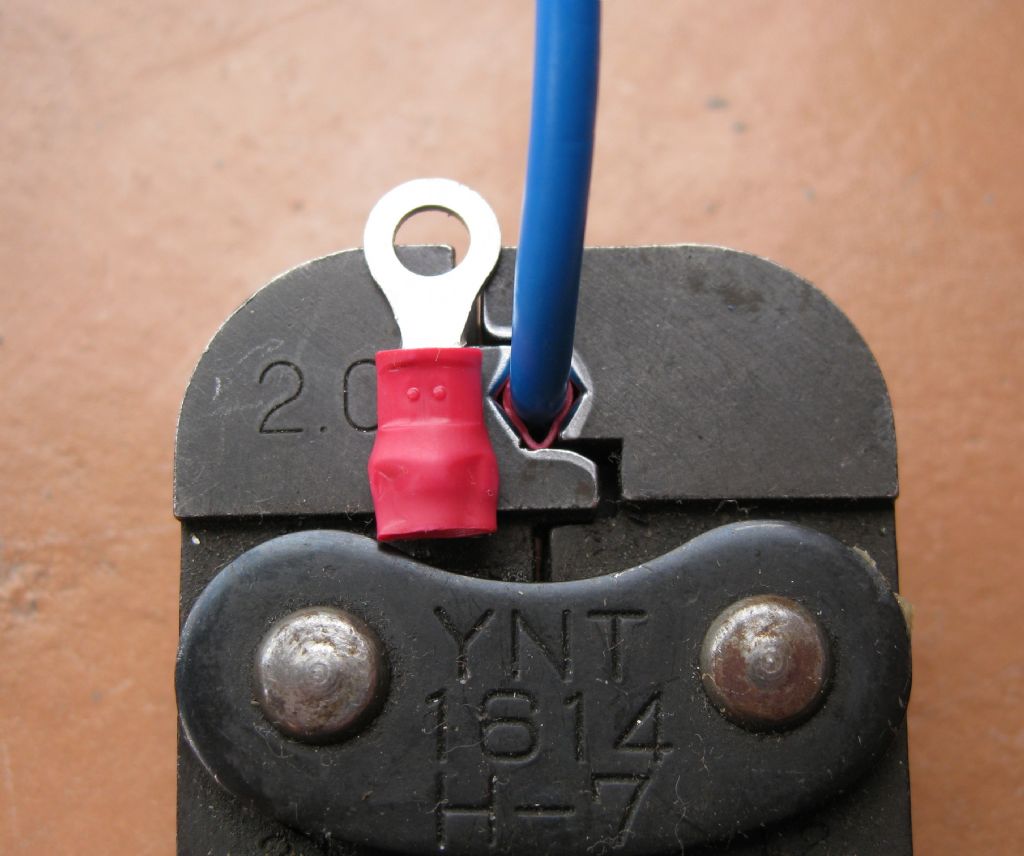
The other side of the crimper – with a sample crimp, showing the two dots on the plastic shroud – these two dots are for inspection and show that the lug was in the correct position, and the pressure correct. If a lug of to small a size were used for the selected crimper, the two dots would not form. Also nicely seen , the wire end of the shround on the lug shows the over-crimp.
Thanks Joseph and NDIY – I must get "proper" crimps for future use, I appreciate your comments
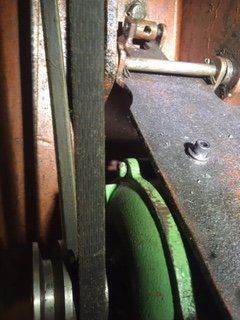
Having refitted the motor, can anyone offer me advice on how to secure the mounting plate please? I cannot find reference on YouTube or Internet – a photo would be greatly appreciated. As can be seen, there is a bolt through the casing with washer / nut on the end fully wound out. The bolt thread matches the swivel nut in the mounting plate, but they are not aligned. The motor is not the original so it may be the replacement motor has altered the geometry and is just hanging on the plate giving tension to the belt
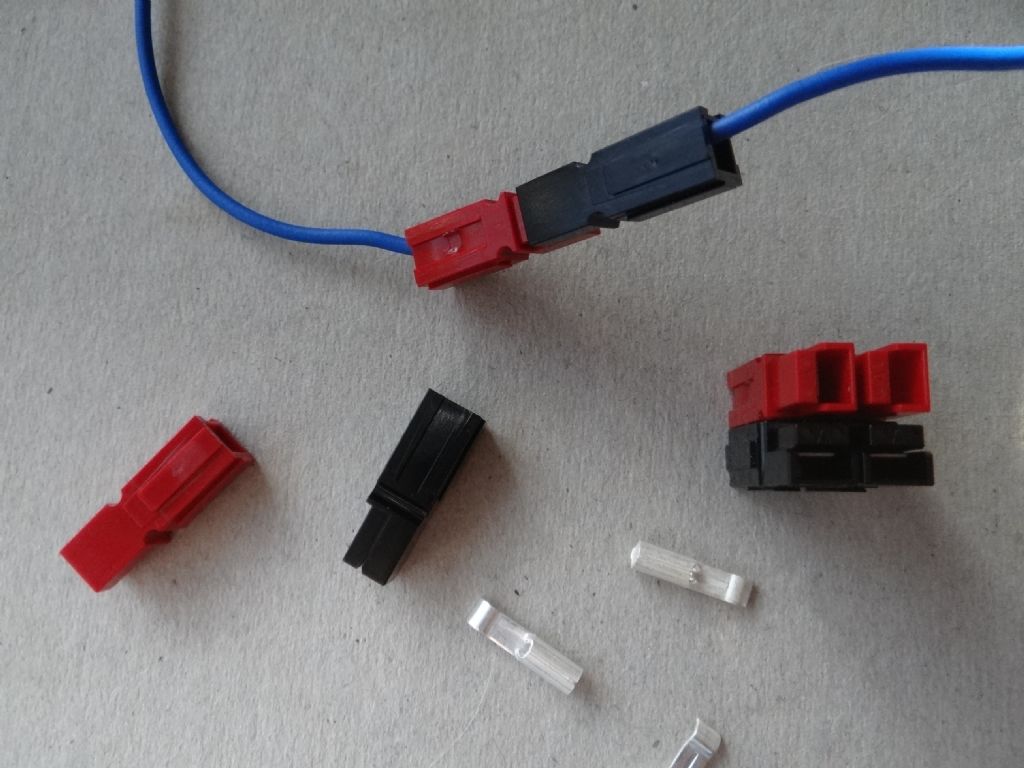
On the subject of crimps and 'choc-bloc' terminal connectors I've recently discovered 'Powerpole' connectors. They are jolly clever!
They come in various capacities and different colours, those pictured are 30A. The clever features are:
The connectors are hermaphrodites, ie only one connector type is needed – the system doesn't have separate male plugs and female sockets. (Top of photo shows red and black plugged together to connect the blue wires together. Apart from the colour both connectors are identical. The connectors only mate in one of the 4 possible alignments. )
The plastic shrouds are side dovetailed so they can be physically combined into blocks. The example shown in my photo is 2×2, but any other combination is possible. The geometry is such that matching pairs of blocks can be made, and it is impossible to connect them wrongly.
Wires can be soldered or crimped to the silver tongues.
The tongues clip into the plastic shroud
Simple and inexpensive.
They've been around for a good few years and have a good reputation for reliability. I now prefer them to screw terminals and male/female crimp connectors for all inline connections.
I have an Elliott 10M shaper. Can anyone explain how the ratchet mechanism on the power cross feed works? Mine only works intermittently. There seems to be only one pawl and sometimes the feed advances and then retreats slightly and repeatedly with each stroke so I get no proper cross feed advance. I can only guess that the action should depend somehow on friction in the feed screw resisting the backwards movement (and I don't have enough friction) or my machine has somehow lost a second pawl. or perhaps I have not understood it at all.
System does depend on friction holding the ratchet wheel in place whilst the pawl retreats. Assuming mine is typical the factory spring is very weak, probably provides a force equivalent to the weight of the pawl at most. As ever crud builds up making the action stiffer so the system doesn't work as it should.
Cure is to clean things out so the pawl moves freely. Big difference with mine between as obtained in apparently well looked after condition and post cleaning. However mine was more likely to stick up so there was no attempt to feed rather than do the forward – backwards dance.
I have used the power-pole connectors for a number of years. I have a 12v to 48v power converter for running wireless access points for site surveys. All the batteries have very shorts leads with spade connectors one end (for the battery) and power-pole connectors on the other end. These can then be either plugged into a power-pole connector on the PSU or onto a power-pole connector on the charger. Always a good firm connection.
I use the same connectors on the intelligent charger on my Caterham 7. When charger is disconnected I can then easily add other devices phone chargers, sat nav chargers, laptop chargers in its place.
It pays to purchase the correct crimp tool for the metal connectors, not particularly cheap but good ones never are.