What we did with Jason’s bronze

Advert

What we did with Jason’s bronze

Home Forums Work In Progress and completed items What we did with Jason’s bronze

Viewing 15 posts - 1 through 15 (of 15 total)
  • Author
    Posts
  • #108311
    David Littlewood
    Participant
      @davidlittlewood51847

      Like many others among you, I bought a couple of lengths of the excellent bronze bar from Jason Udall. I thought it might be interesting to invite you to share any interesting things you did with it – if nothing else, it would be nice for Jason to know that he wasn't wasting his time.

      In fairness, I'd better start. The only thing I have had time to do so far was to make a roller for an anomalous climbing novelty.


      The double cone was of course made by sticking two cones together. The cones have an included angle of 40 degrees. I was a little concerned about how to locate them; then I realised that there was a nice 1.03 mm pip left from parting off. I drilled a 25 mm hole in a piece of softwood with a wood bit, which was just enough to hold one cone to drill a 1.1 mm hole. Glued with Araldite, baked in oven at 65 degrees for an hour, which made it harder than I would have wished and was a b****r to clean off.

      The lash up in the first picture is just to work out the necessary settings to enable the cones to roll "upwards"; broadly making the two bars (silver steel in this rig)  diverge more is positive, increasing the slope is obviously negative. You either have to work out the maths or do it by trial and error. I have embarked on making a nice oak stand with stainless steel bars.

      Bronze is ideal for this purpose; it turns well, looks nice and does not stain badly. Brass would need to be varnished to avoid this, or be polished every few days, and I think varnish would not help the rolling.

      David

      Edited By David Littlewood on 09/01/2013 19:41:18

      Advert
      #31014
      David Littlewood
      Participant
        @davidlittlewood51847

        Ideas on what we did with the 27 mm bronze bar supplied by Jason

        #108315
        JasonB
        Moderator
          @jasonb

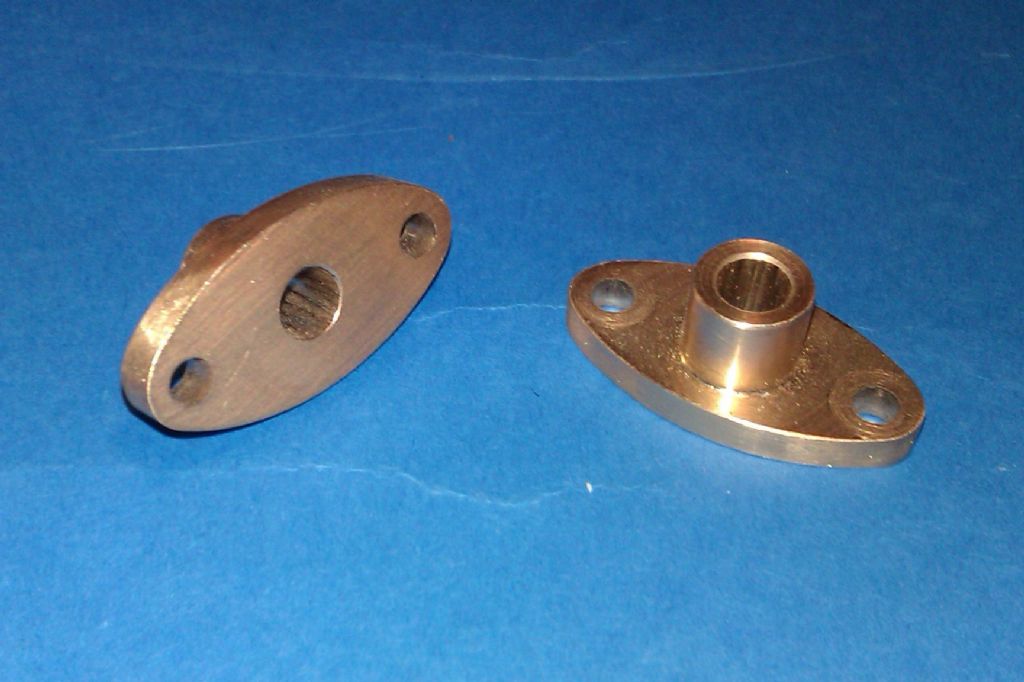
          Well I've only made a pair of glands with mine so thats 1" down and another 35" to go!!

          imag1212.jpg

          #108345
          jason udall
          Participant
            @jasonudall57142

            Thanks guys..it is appreciated.

            JasonB…err were you intending to silver solder those?…

            I don't know how well leaded bronze takes to that ?

            Regards

            #108431
            Old Elan
            Participant
              @oldelan

              Sorry to say that my piece is still on the floor behind the settee in the conservatory along with my last steel purchases!

              Christmas, New Year and all that………

              Edited By Old Elan on 11/01/2013 13:32:49

              #108446
              David Littlewood
              Participant
                @davidlittlewood51847

                Jason (B),

                Very neat piece of work! I take it you made them in one piece, so no soldering will be necessary. How did you get the splendid elliptical shape so neatly, CNC?

                David

                #108449
                magpie
                Participant
                  @magpie

                  It maybe just the light, but it looks to me like they have been soldered ????

                  Cheers Derek

                  #108453
                  JasonB
                  Moderator
                    @jasonb

                    They are one piece, the spigot was turned one the lathe and the hole bored & reamed at the same setting. Part off a little overlength then hold by the spigot to finish the parted face.

                    Then into the mill to drill the holes. The two larger curves of the "elipse" were done with a boring head set to cut with the tool the opposite way round and the ends were just done with good old filing buttons.

                    This is not my photo but should give you an idea of how its done, mine being smaller were just held by the spigot rather than the jig shown. You can also use a similar method by having the gland mounted on the end of a rod in the lathe, either hace teh rod the dia of the curve and use the 3-jaw or a smaller rod offset in the 4-jaw.

                    #110485
                    David Littlewood
                    Participant
                      @davidlittlewood51847

                      Here is a picture of the finished climbing novelty – I was waiting to get hold of some 3/4" stainless.

                      Now, any more of you want to share the results?

                      David

                      PS – Why are the pictures coming out so small? The link I inserted is to one twice that size. Maybe, after months of having problems with huge pictures messing the line wrap we have now had some limit imposed. If so, it's too small.

                      …And now the bloody writing is too small. Why is this web software so c**p?

                      Edited By David Littlewood on 30/01/2013 11:56:57

                      #110505
                      steamdave
                      Participant
                        @steamdave

                        Don't know if it is my computer, but I have tried 2 browsers and can't see ANY picture.

                        Dave

                        The Emerald Isle

                        Who would like to know how to only get one line spacing.

                        #110507
                        David Clark 13
                        Participant
                          @davidclark13

                          Hi Steam dave

                          Press shift and return
                          at the same time
                          like this,

                          not like this.

                          regards David

                          #110510
                          JasonB
                          Moderator
                            @jasonb

                            I find that the forum makes any image hosted elsewhere narrow but if you upload to this site in my photos you can then click to enlarge the image.

                            If using an external host such as Photobucket set the width to about 500 when you add the link at least then it stays in proportion but still can't be enlarged or just link to the image rather than showing it in the post.

                            LIKE THIS

                            Edited By JasonB on 30/01/2013 15:21:37

                            Edited By JasonB on 30/01/2013 15:23:23

                            #110513
                            David Littlewood
                            Participant
                              @davidlittlewood51847

                              Jason,

                              Thanks. Got so many photos on photobucket for other purposes I really don't want to start another tribe here, but here is the link to the image there:

                              **LINK**

                              David

                              #110516
                              steamdave
                              Participant
                                @steamdave
                                Posted by David Clark 1 on 30/01/2013 15:07:45:

                                Hi Steam dave

                                Press shift and return
                                at the same time
                                like this,

                                not like this.

                                regards David


                                Thanks DC. It works!

                                Dave
                                The Emerald Isle

                                #110538
                                jason udall
                                Participant
                                  @jasonudall57142

                                  Just to add my two hapeth(?)…used all of 42 mm today for two replacement bushes in motor of vibro finisher…1mm wall 16 mm id …lovely and smooth now..until excentric added…wink…lets see if these out last originals..kaput at 18 months-2 years…….

                                Viewing 15 posts - 1 through 15 (of 15 total)
                                • Please log in to reply to this topic. Registering is free and easy using the links on the menu at the top of this page.

                                Advert

                                Latest Replies

                                Viewing 25 topics - 1 through 25 (of 25 total)
                                Viewing 25 topics - 1 through 25 (of 25 total)

                                View full reply list.

                                Advert