Thats the general Idea, changed the family Idea to if we dont need it we dont keep it, for instance our Daughter is thirty four and we still had here cot and pushchair, my two sheds and garage have enough in that would keep my wife clearing for months but she doesnt go in there thank god
If you need extra loft insulation and storage space, fit loft legs, made from recycled plastic and available from several DIY outlets. Screw them to the ceiling joists or trusses and fit boarding on top. No connection with manufacturer, just a satisfied customer.
However, what the heck where you up there in the first place for?
.
I was up there with a mastic / sealant gun. With the high winds and driving rain there was a small weep coming in through the roof so decided to issue corrective treatment to the guilty fixing point.
Damage.! Safest would have been to have landed on my head as there is nothing to damage in there but rusty bolts and sawdust.
I am about to ( after Christmas I think! ) increase the amount of loft insulation as the final part of upgrading the " comfiness" of the house. (Heat pump fitted and all double glazing renewed). I was a bit fazed by the amount of "stuff" in the loft – mostly owned by my kids and largely by the one in Australia ! I think the "Loft legs" will be just the thing.
I think I will be buying loft legs, didnt know they existed until this morning. Norman you copying me, not long had my secondary glazing and crittal windows all replaced, also going for a more efficient boiler, nothing wrong with current boiler apart from the fact that its over 25 years old, I'm doing all this work ready for retirement in a couple of years, so spending while I'm still earning.
Today I bored and filled the drill holes in my jig borer table prior to surface grinding. I bored them flat bottomed with a 12mm cutter and then turned cast iron bar to a push fit for each hole. JB Weld was used to glue them in place and I milled the tops flush when dry so the grinder can just skim straight across.
I also made a tool trolley for my new machine, simply a set of Ikea wooden drawers on a wheeled trolley and a tool tidy made and fitted on the top made of MDF. I can keep my Int 30, Morse 2 and Morse 1 tools easy at hand.
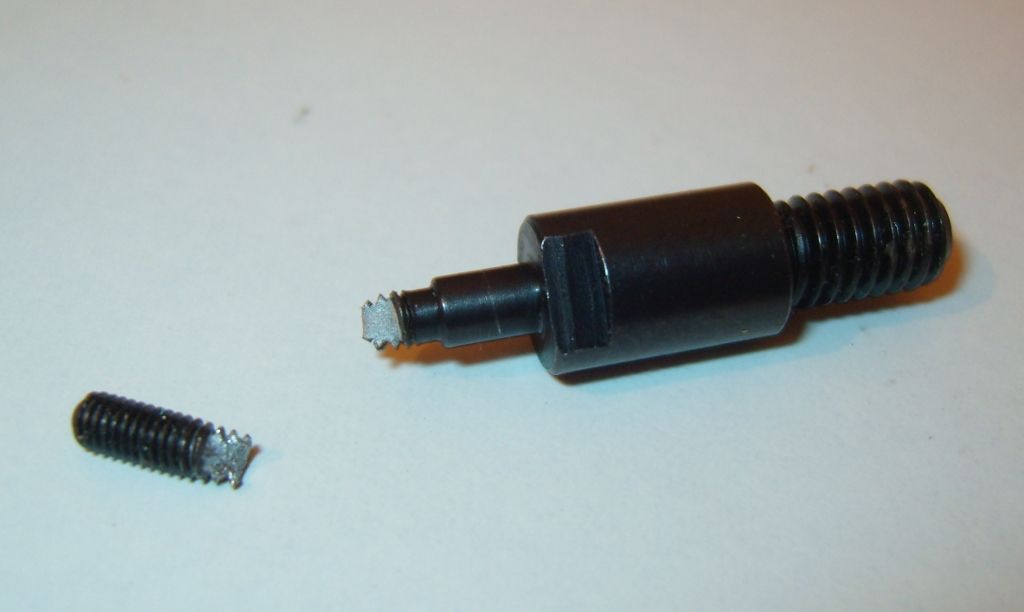
Hi, having been a bit heavy handed the other day when using my threaded insert riveter, this hapened to the 3mm pulling pin.
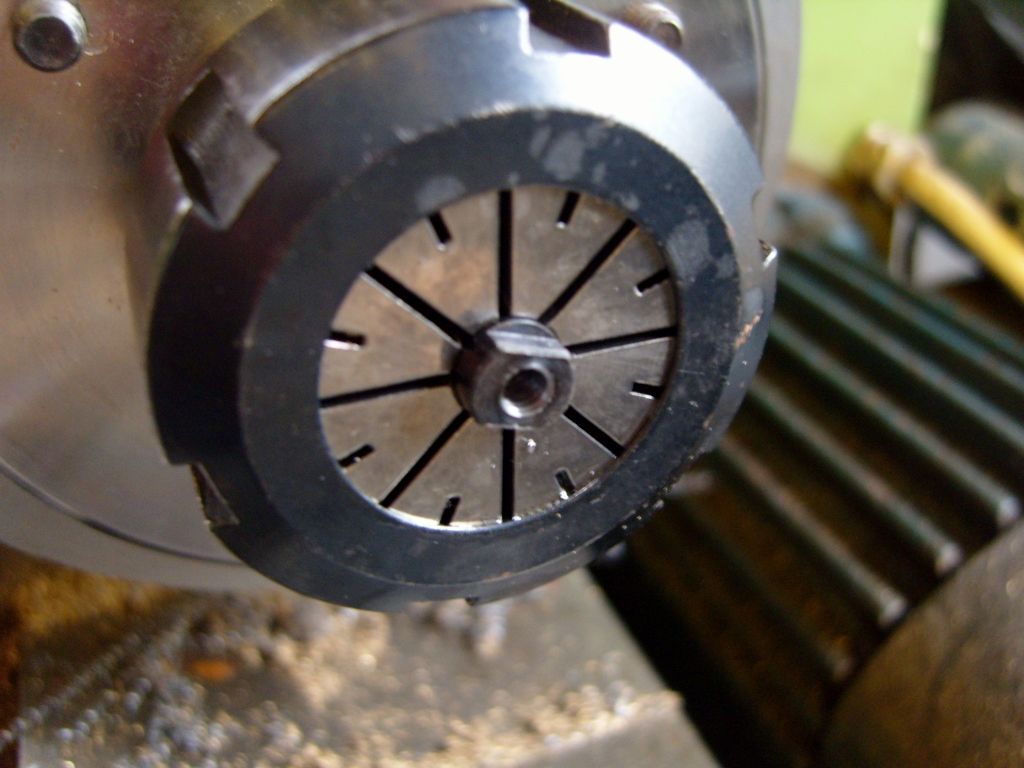
So today I set about repairing it. First things first, I measured the diameter and length of the plain shank portion and then the overall length of the the plain shank and the threaded portion. I then cut off the plain shank and mounted the pin into my ER collect chuck and faced off the last little bit of the plain shank. I then drilled and tapped it 6mm deep for a 4mm internal thread.
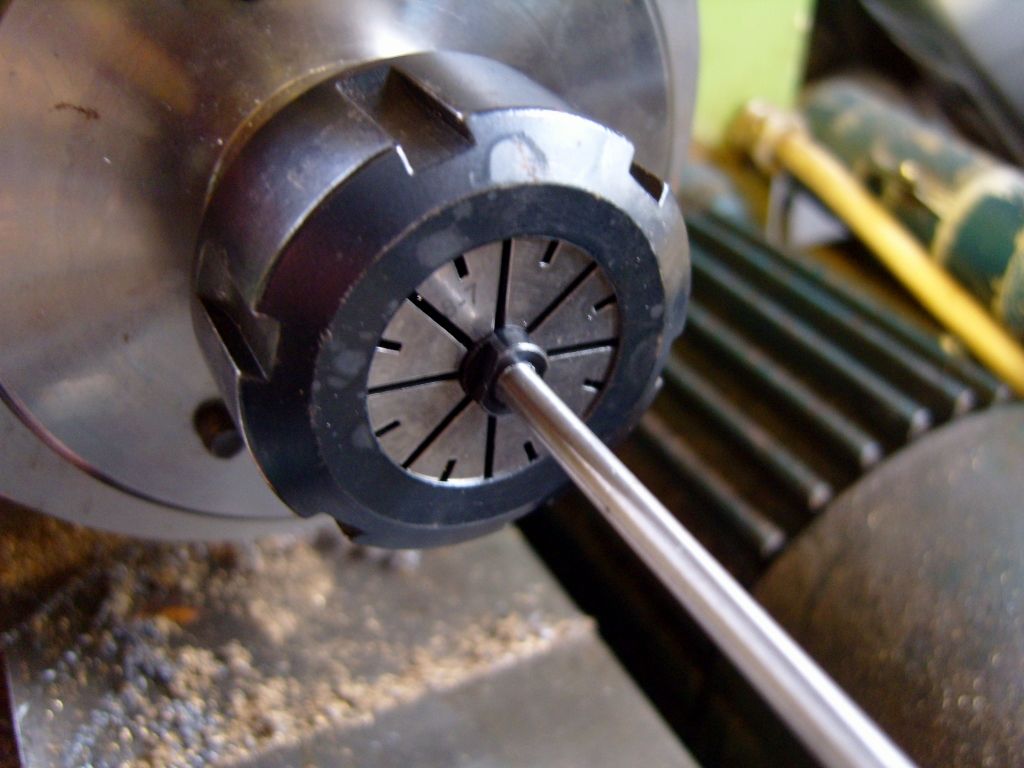
I then threaded a length of 4mm silver steel about 4mm long at one end. Using a little Loctite 270 studlock, I screwed it in as tight as I could, into the threaded hole that I had just made in the pulling pin.
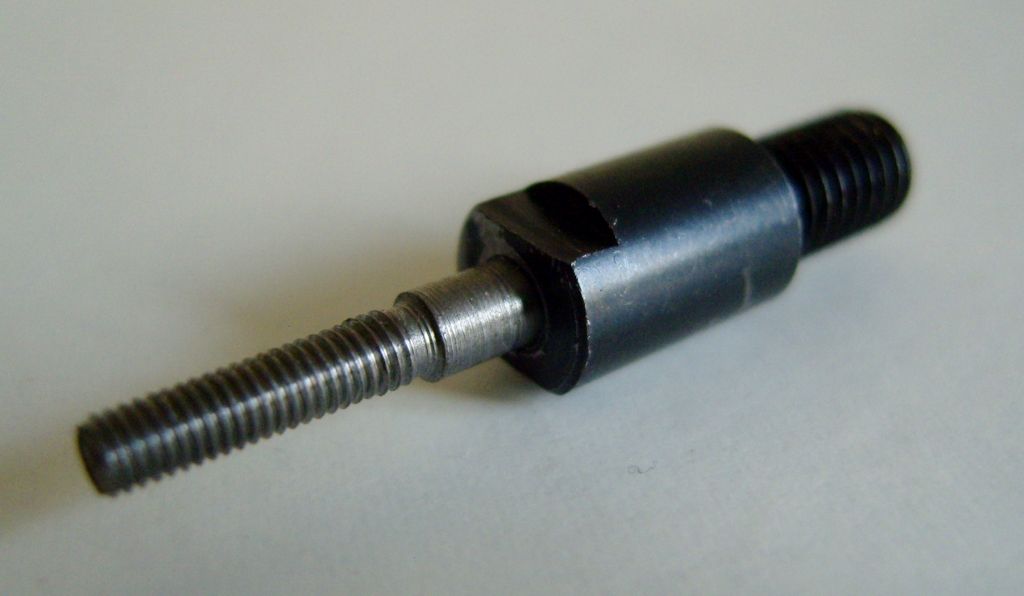
This was then cut off just slightly longer than the overall measurement I had made earlier. It was then faced off to the correct length and turned down to the diameter of the plain shank portion and then to the 3mm diameter for the length of the threaded portion and finally threaded 3mm.
I then finished putting in the rest of the inserts with success.
Looks like an excellent repair Nick, well done. I like to see that sort of job keeping everyday tooling going, rather than waiting for something from ebay or running to the shops every time a tool has a fixable breakage. JD
Thanks Pete! Cosmetically, it would have looked better if all the knurled bits where shouldered/sitting slightly proud. Functionally its spot on, so happy with that.
Santa called early and dropped off a new mill, an SPG 2217-II, a lot beefier than the Clarke CMD10 that;s been used and abused over the past 10 years or so but surprisingly has only ever had to have one new motor drive gear. Nice to open the crate and find it not covered in packing grease but clean and well oiled but not so nice when you realise it weighs 110kg and had to be moved from the garage at the front of the house to the shed in the back garden including some steps. Had to unbolt the column and head from the base then just about managed to carry the base and table on my own but needed help to lug the column/motor. Now reassembled,trammed and has a lovely solid smooth action, well pleased with it and now ready to do some bigger heavier duty work ,
Found some cable drums in a skip and now have a dozen 1ft M6 bolts, matching nuts with those spikes on them for gripping in wood, 8 ply circles, and 4 thick cardboards tubes. Pity it's been raining but the tubes after about 6 moths drying may be short end storage, the ply might just be drilling pads, but can't say no to a few yards of steel rod.
Yesterday I got my now annual visit to Chronos when a work trip allows me to deviate off the M1 during opening hours. Pity they don't do shows anymore.
At work, I got an Arduino Uno working with a brushed motor controller shield to implement closed loop control of an electric actuator (for turbocharger wastegate control). The actuator has a 0-5V position sensor and a simple brushed 12V motor, so I set up 2 analogue inputs for a setpoint (pot, 0-5V) and the position sensor. Then I implemented a PID controller using the standard Arduino PID library, did some processing and sent the resulting speed and direction signals to the H-bridge driver "shield".
It works quite well after a bit of tuning, although the PID library was obviously written by a "non-professional". I had to modify it to generate a proper bipolar drive – presumably it had only been used on unidirectional systems like heaters etc. You wouldn't normally expect to have to fiddle with the standard library but at least nobody died.
The Arduino has several spare analogue and digital I/O that you can read from and write to for debugging purposes. The language is basically a version of C, so fairly simple to work with and the IDE is pretty straightforward. When I finally got round to it, I found the Arduino quite straightforward to set up and bring to life.
Not today but yesterday evening I was looking up the specifications of the latest Beretta shotguns, and I note that they are now using an alloy steel called Steelium for their barrel tubes. All I can discover is that it is a nickel/chrome/molybdenum steel, but can't find out much more. I note that TATA produce it in rolled sheets, mainly for car bodies I think, but if anyone is making bars, then they seem to be keeping very quiet about it. Is the specification patented? Anybody know anything about its exact composition and properties? I'd be grateful is anyone could point me in the right direction.
I would think this is just a variation of the Chrome/Molybdenum steel just tweaked slightly, Beretta have always used chrome/molybdenum steel for their barrels and they make strong light barrels. I remember they chrome the inside of their barrels also. Browning had a Black chrome process.
From how you ask, maybe this is Beretta unobtanium?
Barrel rusting in a shotgun has always been a problem and I have seen many a pitted barrel but never in a Beretta.
Further to my problems with a spot welding transformer, tried a 100 ohm fire element in series, now not enough current. I reckon it was about 65A. So tomorrow, its going to be 50 ohms.
Can't tell whether they are making blue whiskey, or premixed petrol/oil about 16:1 as a fractional distillation column.
If it's just a blue ball generator, could have saved themselves a lot of trouble by just visiting my shop on a February morning at -30 deg C and 70 kph wind. Guaranteed blue balls there and then, no extra apparatus needed.
I keep my dustbin next to my garage, which is about 50 yards from my house. A strange pipping noise was coming from the bin this morning, and it got louder when I lifted the lid. Had to sort through no end of yucky stuff, and I eventually found the source – an old carbon monoxide detector my wife had thrown out, without removing the batteries. The only reason for the alarm to go off that I can think of is that rotting vegetable matter could have released methane. Could it, or can anyone think of another explanation?
Mike – it could have just been a low battery warning. I had the same sort of experience some time ago with a CO detector that had been taken down and stored away. Kept hearing this strange noise but had difficulty tracing it as it was a single "pip" and then silence for about a minute or more. Eventually found the CO detector at the back of a drawer in a kitchen cabinet. It had been driving my uncle spare for days – and he was the one that had taken it down and put it away!