What did you do today? (2014)

Advert

What did you do today? (2014)

Home Forums Work In Progress and completed items What did you do today? (2014)

Viewing 25 posts - 151 through 175 (of 2,328 total)
  • Author
    Posts
  • #144035
    Anonymous
      rather than stuff about CAD, DRO, 3D printing, gear cutting etc.

      It's been a mixed day, some good, some not. In the spirit of the partial quote above, from another thread on this forum, I'd better not report some of it. smile o

      Started off by finishing the machining of ——–REDACTED———

      Then I screwed six J-shaped brackets onto the rafters in the workshop to store all the miscellaneous lengths of aluminium extrusion and thin wall square steel tubing that I'm fed up tripping over.

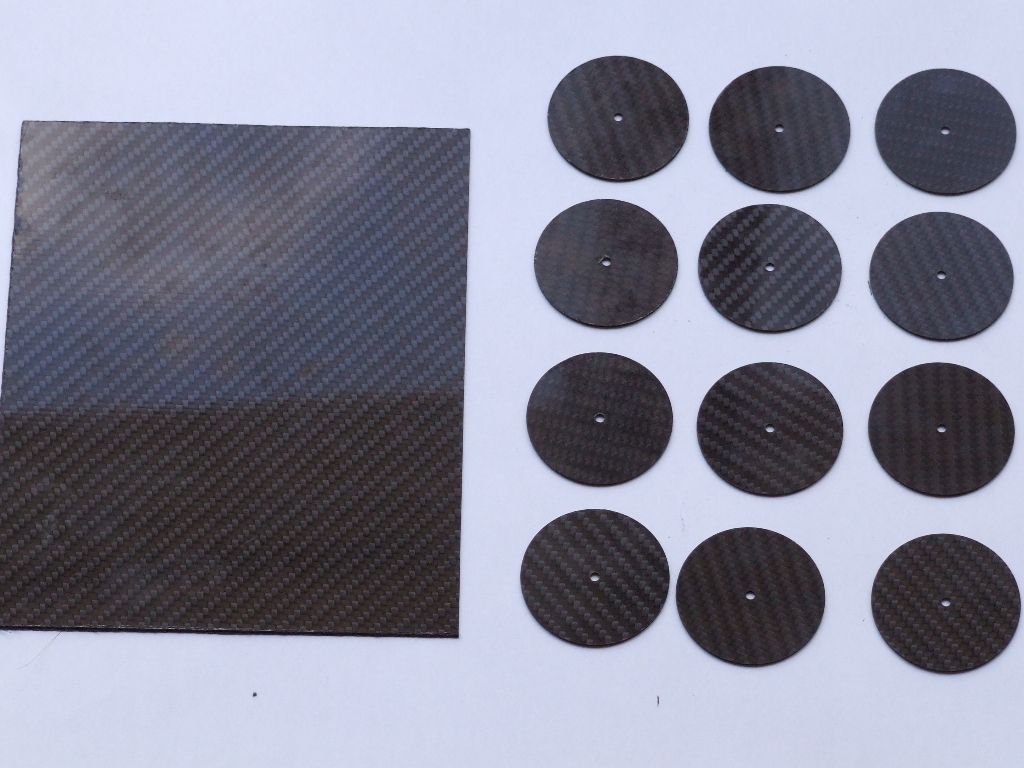
      After lunch I made twelve 48mm diameter discs from carbon fibre sheet. These are for our two seat glider, to help attach the new cockpit trim, replacing that which was attacked by mice a couple of winters ago.

      cf_discs.jpg

      Then I made a jig to hold the rear spokes for my traction engine wheels for machining. I started machining the spokes ——–REDACTED———– complete foul up resulting in two broken cutters. On reflection it looks like I was being over-ambitious on the feedrate. sad So Monday morning it'll be down the tool shop.

      After a shower and the weekly supermarket shopping I'm going to carry on designing the lamps for my traction engines. Ooops, that should be redacted too as it involves CAD. wink 2

      Regards,

      Andrew

      Advert
      #144040
      JasonB
      Moderator
        @jasonb

        Just to make it look like I have been even more prolific than usual, I'll start off with wat I did not post from last week.

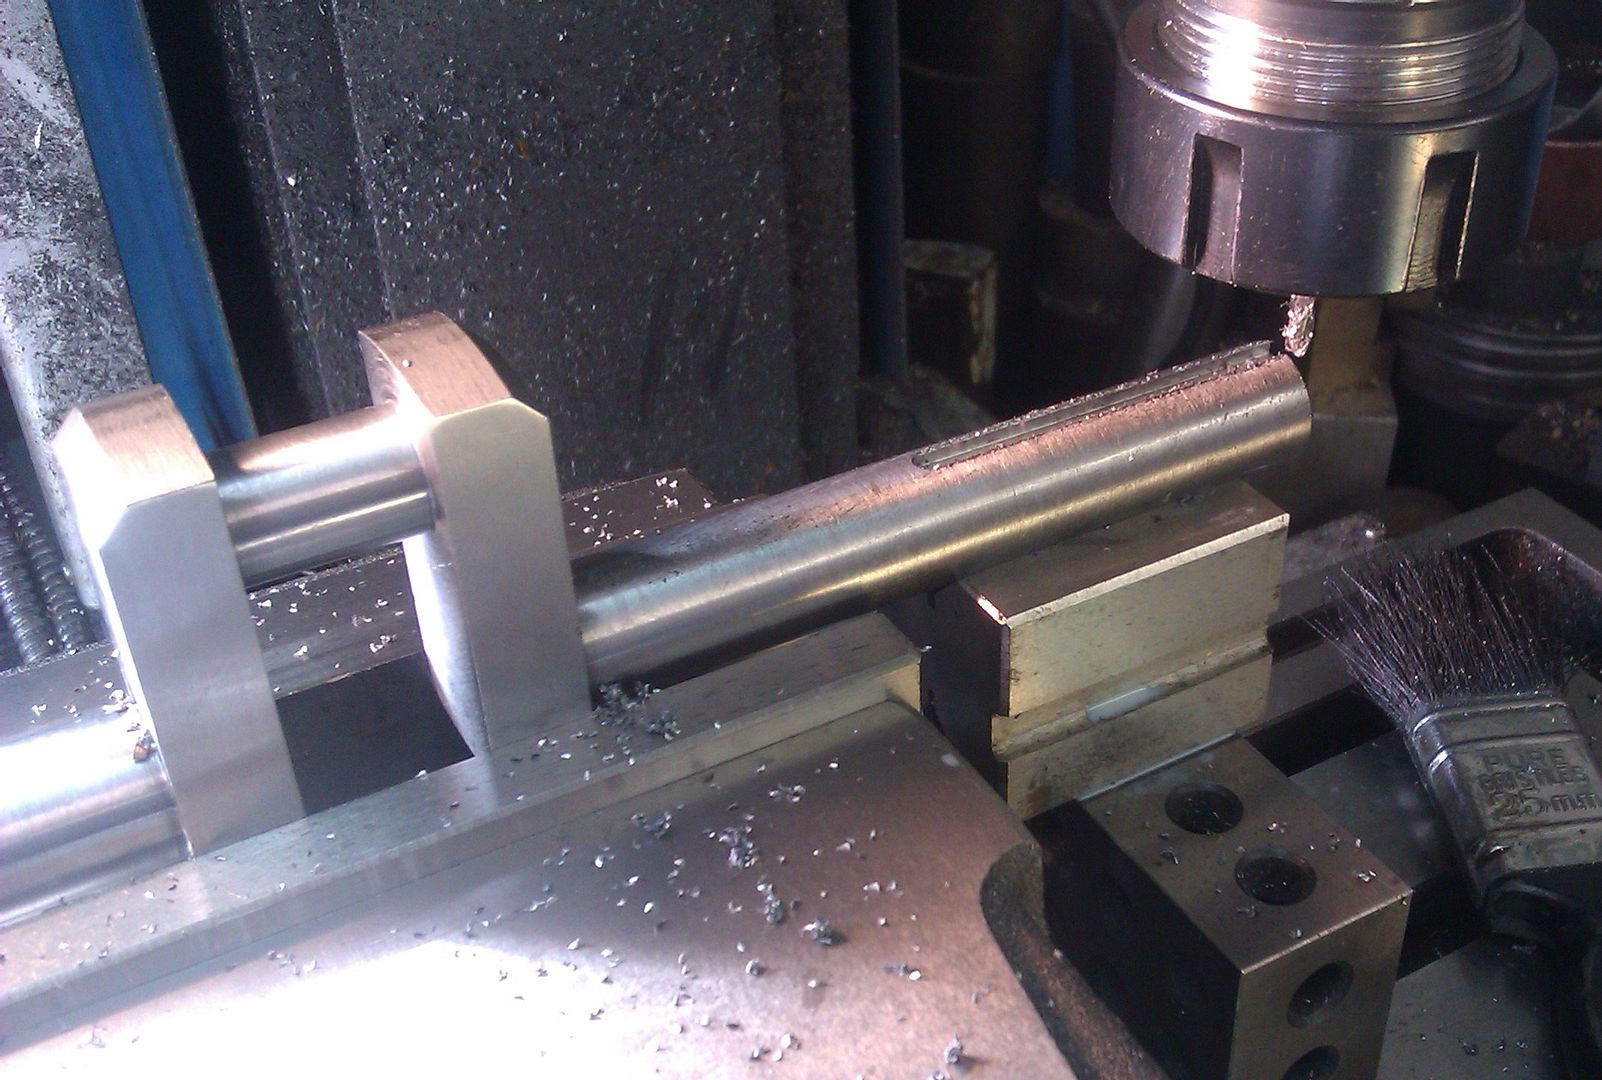
        Keyways milled in the Monitor's crankshaft

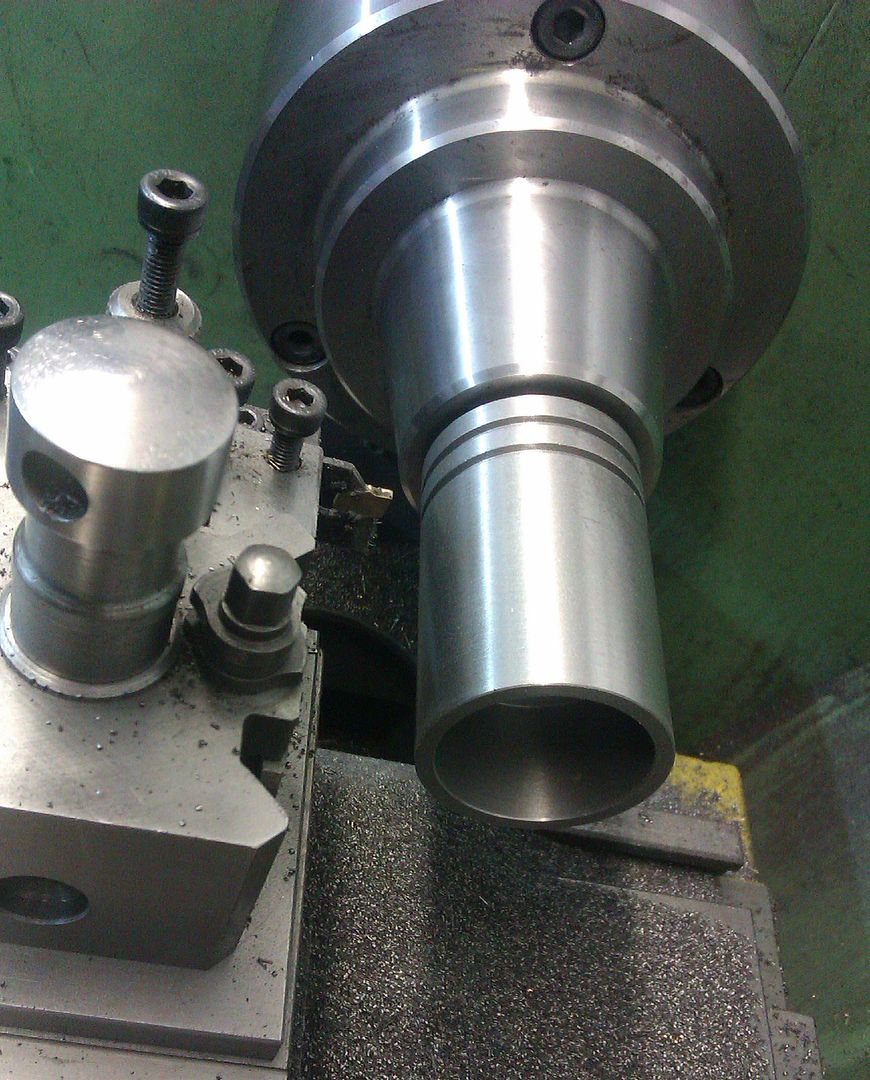
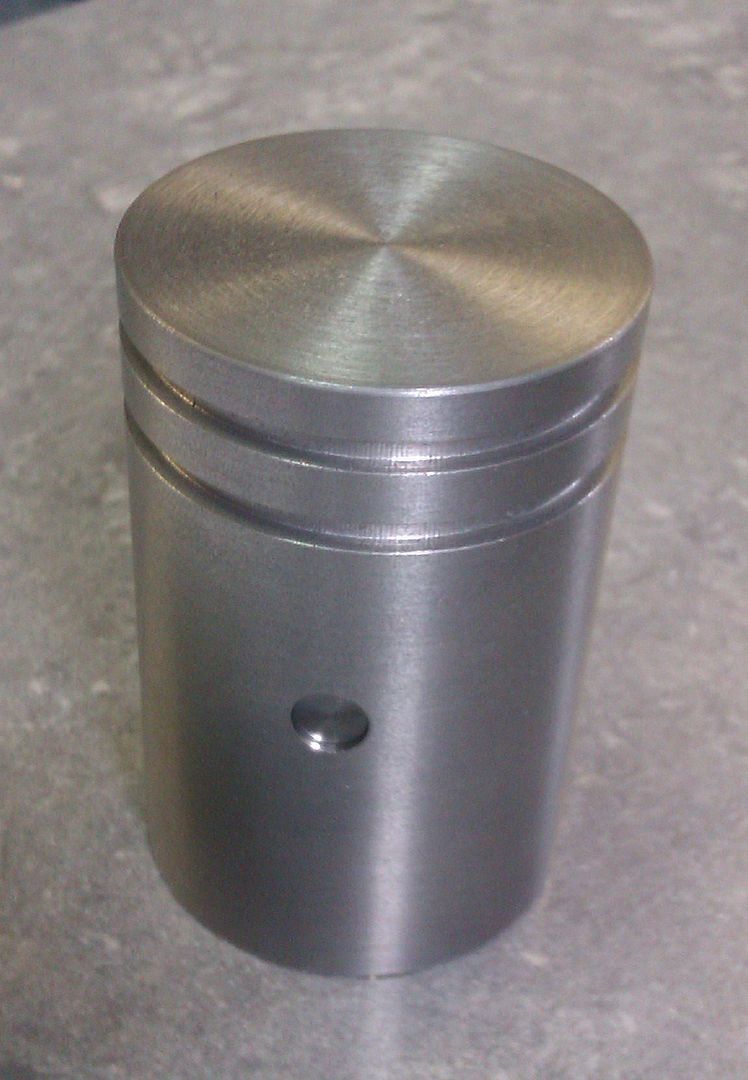
        Then turned the piston, nice piece of CI, a lot better than some of the other castings in the kit.

        Followed by a bit of milling and drilling to complete

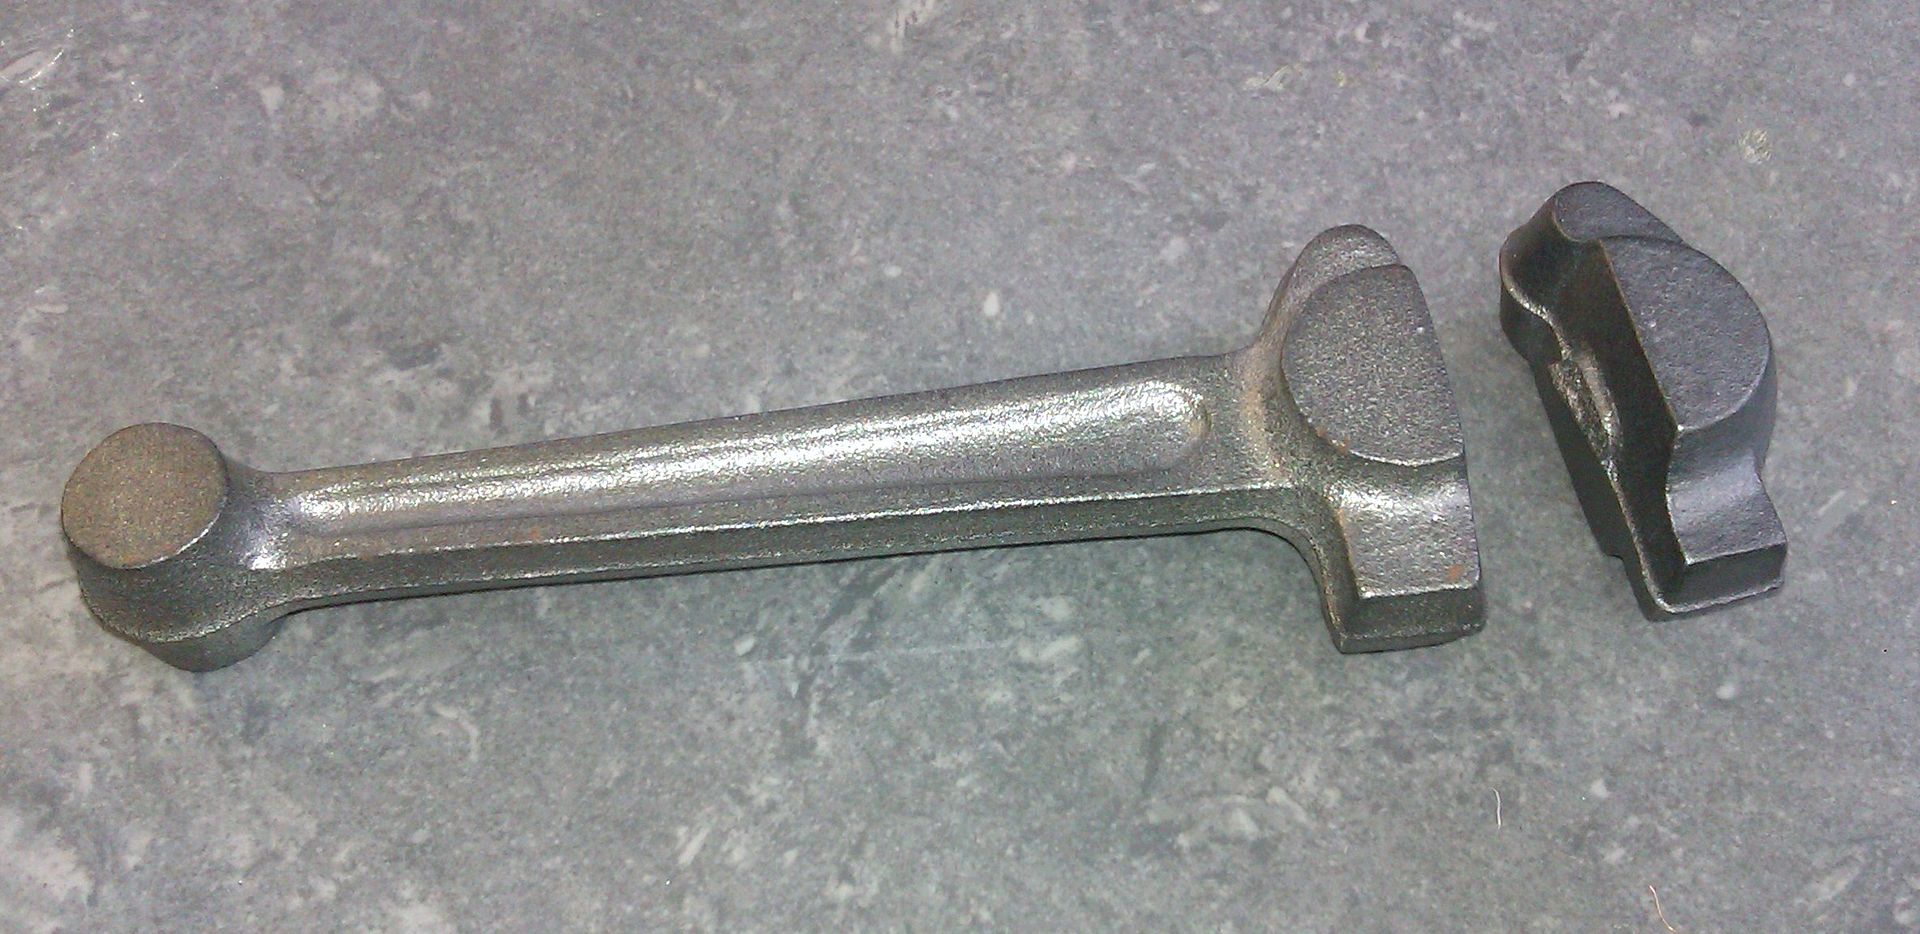
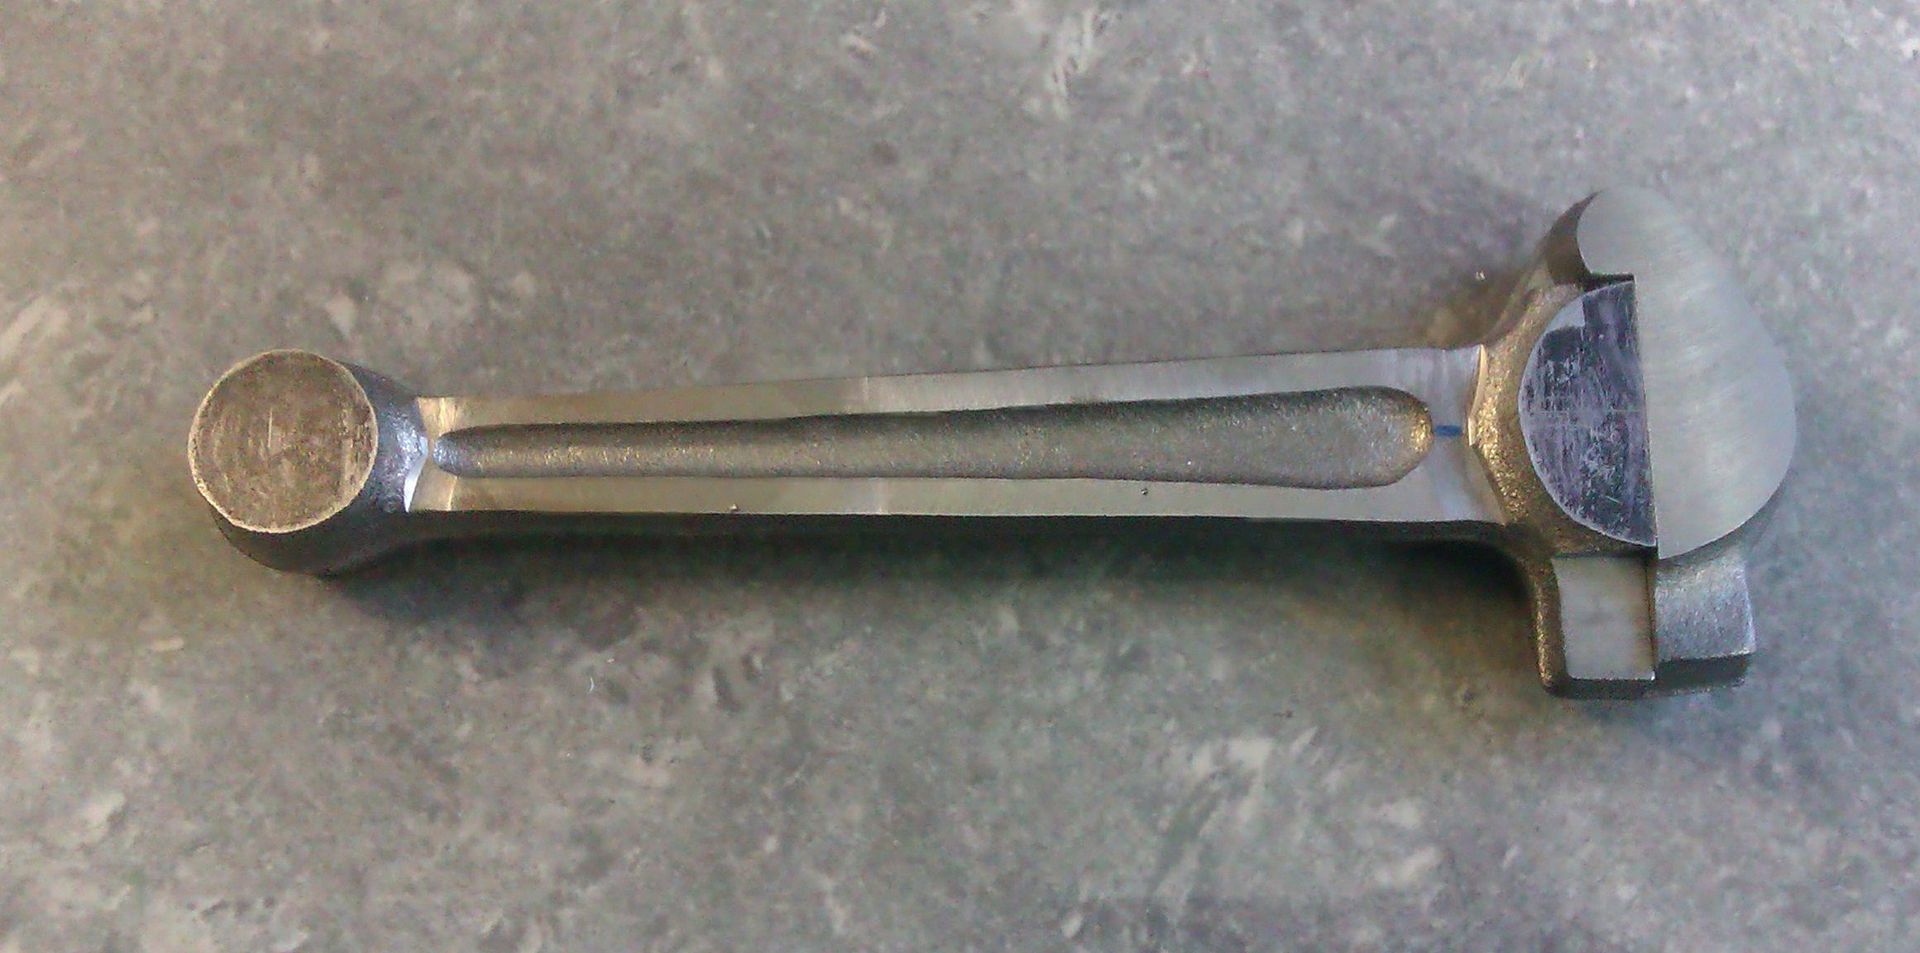
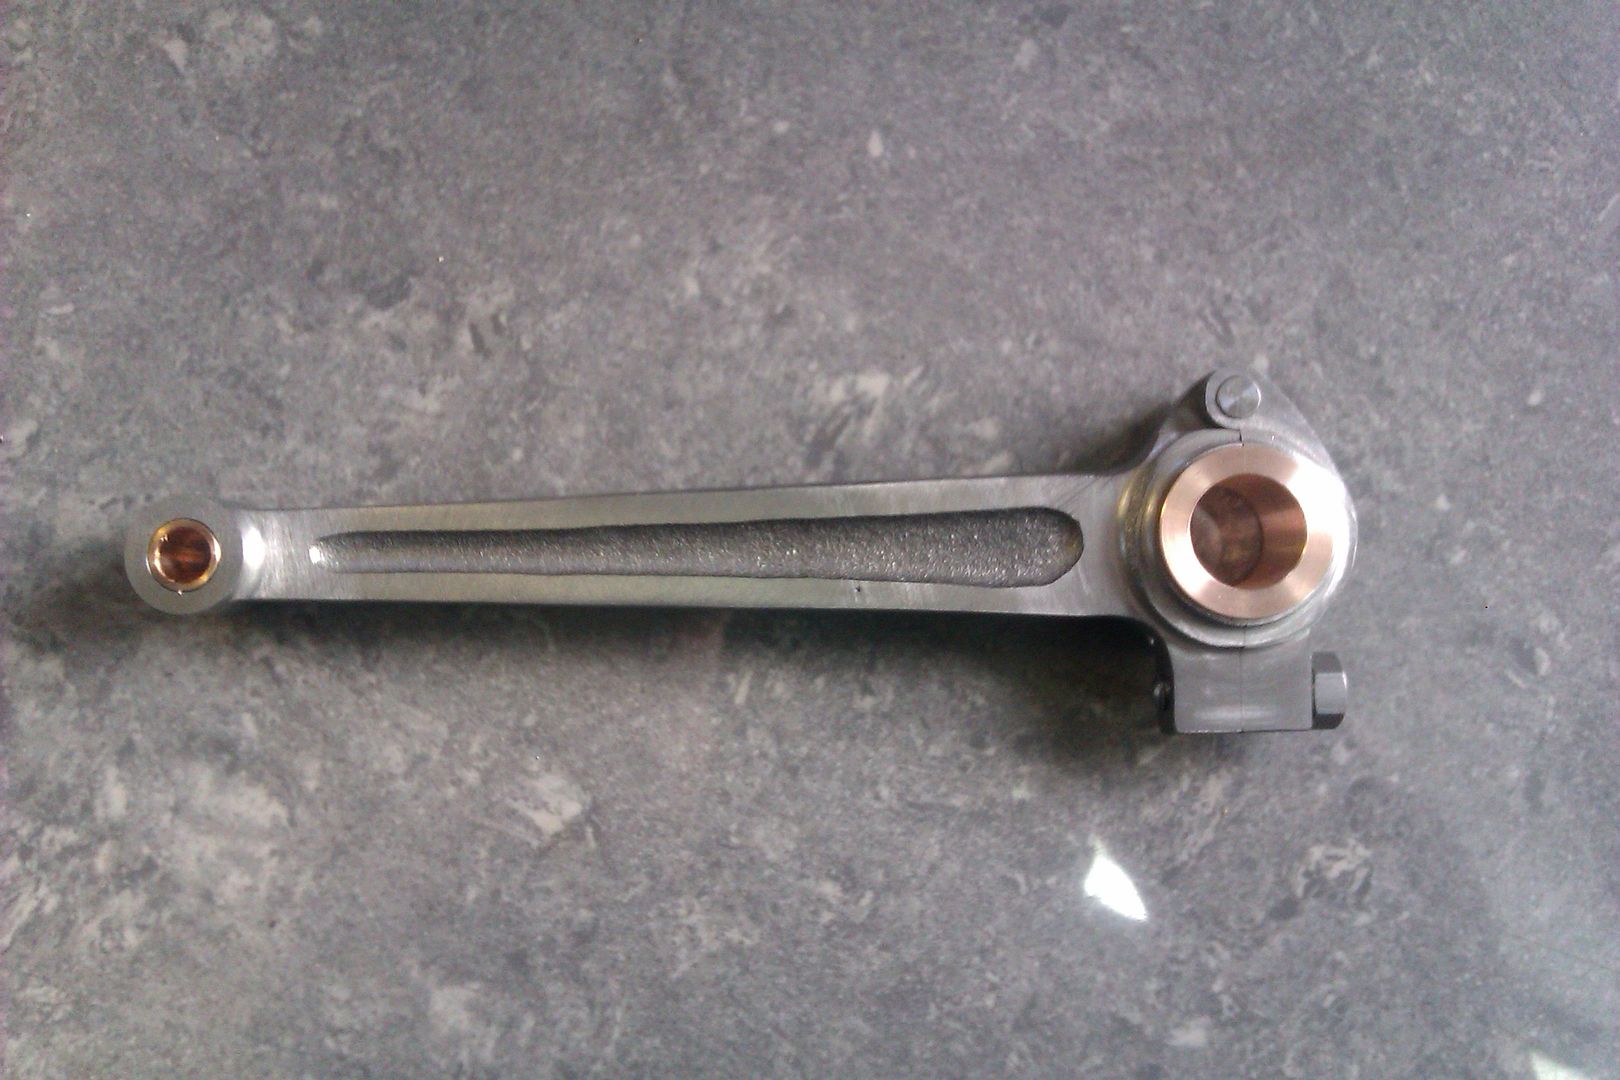
        Then onto the conrod which has an unusual hinged big end to aid assembly withing the crankcase

        And got as far as fitting the two bits together

        #144041
        JasonB
        Moderator
          @jasonb

          Today I started off by mounting the Galloway on its cart together with the fuel tank and battery box and did a bit of wiring. The connections to the Minimag LT coil are temporary while I try out a few different windings that Julian supplied.

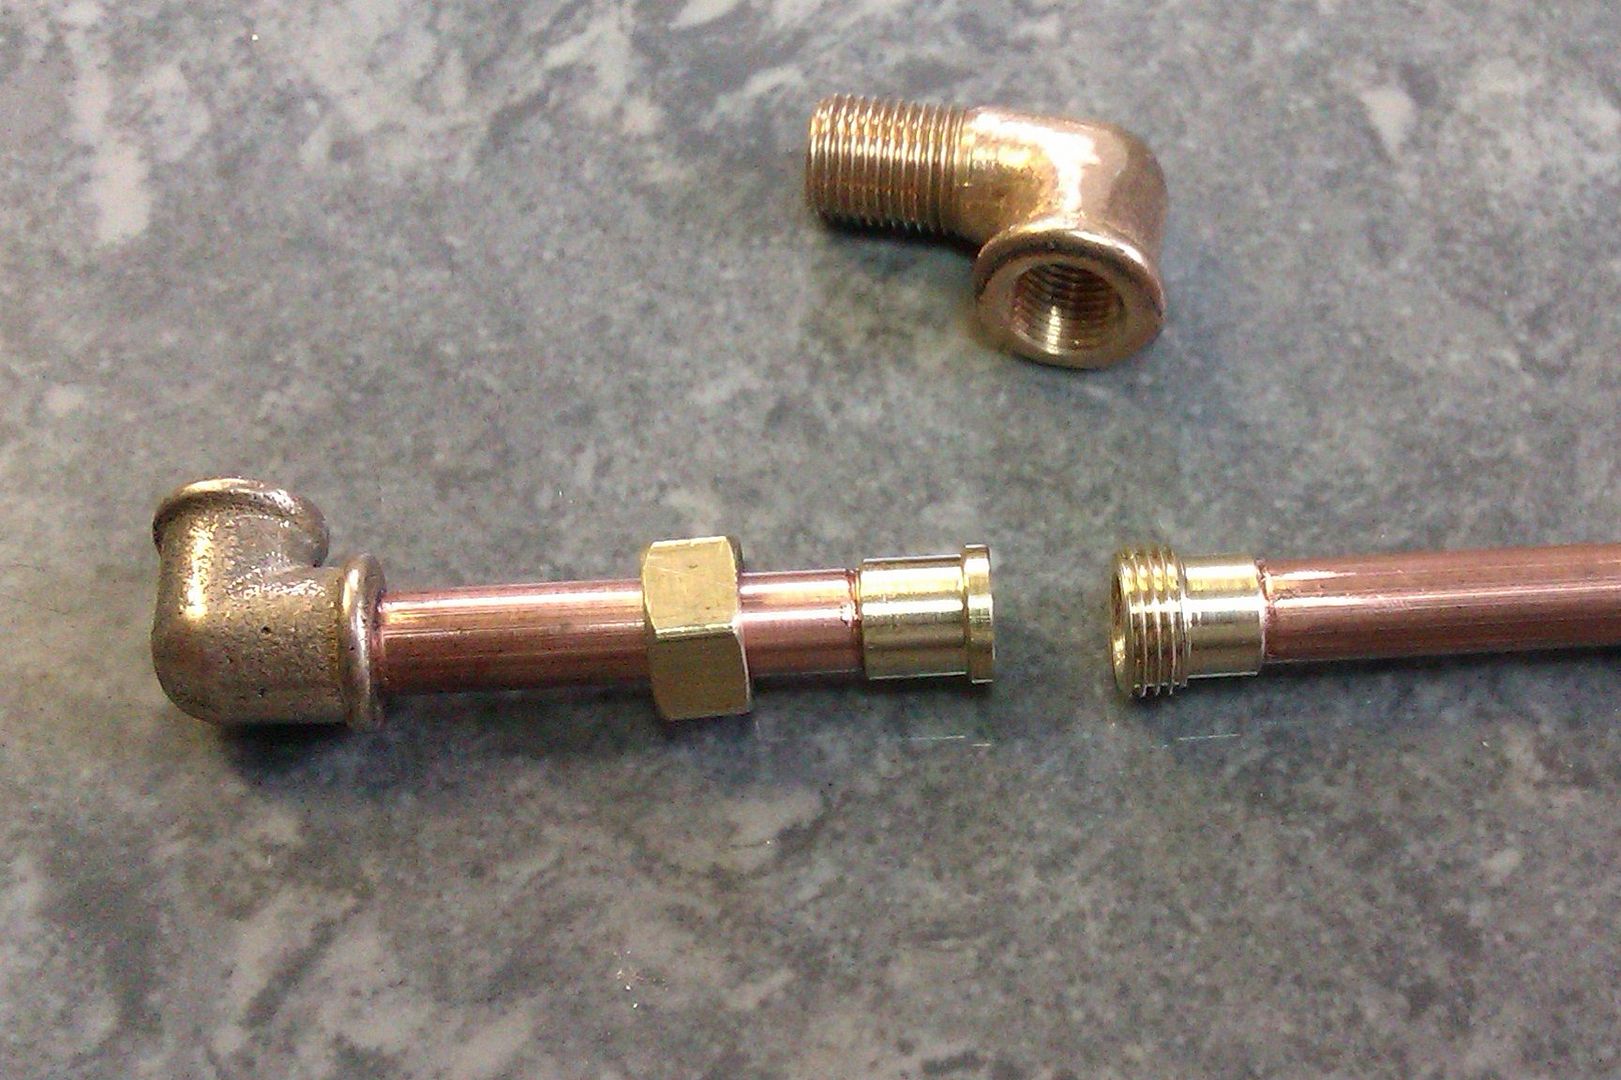
          With things in place I could plumb up the fuel tank which needed a couple of PM Research elbows threading and machining up a union. Just waiting for the paint to dry on these now.

          Last night I also cut some masks for the hopper and painted that today. Quite pleased with how thay came out considering the masks were just hand cut with a scalple.

          All that and no mention of the deadly sins, though I suppose I could be accused of padding things out with too many photos, good job I don't post them all herewink 2

          J

          #144042
          martin perman 1
          Participant
            @martinperman1

            Jason,

            May I ask what scale your Galloway is and which HP model it depicts.

            Martin P

            #144043
            JasonB
            Moderator
              @jasonb

              Martin, it's the 1/3rd scale of the 5HP now cast by Linley Machine from the Dick Shelly patterns and available in the UK from Forrest Classics. Comes out quite big with 10.2" flywheels but they also do 1/4, 1/6 and 1/8th scales but the last is quite fiddly.

              If you fancy doing one I have a far more detailed build thread over on MEM

              #144046
              martin perman 1
              Participant
                @martinperman1

                Jason,

                Thank you, my interest is born from the fact that I restore and show full size Stationary engines and a friend has a Galloway he has restored.

                Martin P

                #144051
                Stovepipe
                Participant
                  @stovepipe

                  There is some great workmanship on here. I feel that because something may not be "Sandown Finish" (to coin a phrase) in no way detracts from the skill or the workmanship put into it and exhibited.

                  Dennis

                  #144060
                  John Stevenson 1
                  Participant
                    @johnstevenson1

                    Certainly no Sandown finish on my gear,it has to work for it's keep laugh

                    Anyway day didn't go as planned.

                    Brecky took longer than it should because the lady in the pub felt sorry for me and bunged a couple more hash browns on me plate.

                    Then whilst i was having it, got a text asking can i do a pump this morning. because of all the flooding down south the motor repairers in those area's are flooded out, either with work or just flooded out. result is they are sending work anywhere they can get a fast turn round.

                    Anyway did the pump, simple job, sleeve one end housing and build the rotor up and re-machine down, then started on the lathe which according to the first pic was 4:06

                    This is the standard gear setup on my new lathe.

                    this one ratio will do all the standard metric threads which is what it's been bought for. Imperials need different gears and invoke the 120 / 127 gears on the idler. Problem i have is with modern tooling speeds have risen from a few years ago and running at 1200 revs is now more the norm than t ever was. result is in feed mode these gears kick up a bit of a clatter.

                    So by 8:00 tonight this is state of play with the drive.

                    Gear train has been replaced with tooth belt drive to the same ratio although not the same number of teeth. Idler gear now lives on the lower guard stud and all the special gears for imperial, MOD, DP worms etc are all mounted on a bracket under the guard so no hunting for odd gears in a box somewhere. This should save me earache and time spent hunting.

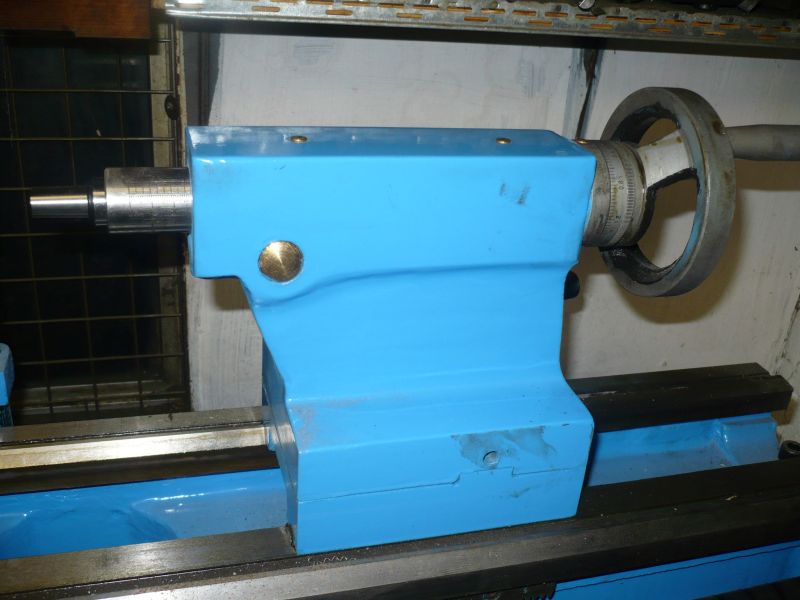
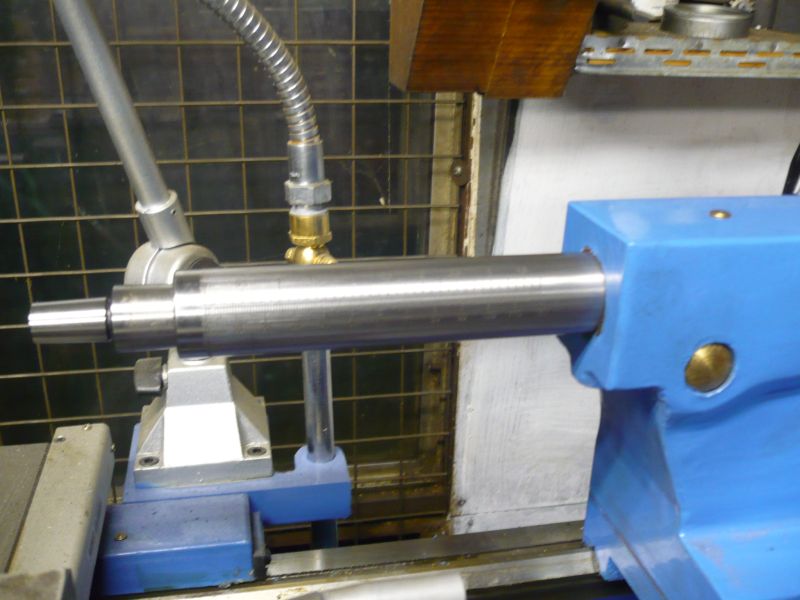
                    Next mod is to the tailstock, one thing about furriners, they can't design a tailstock if their lives depended on it.

                    tailstock with blank chuck arbor fitted and wound back to the stop, one more turn and it will eject.

                    Problem is there is over an inch of barrel sticking out, My TOS is the same, 20mm of lost travel.

                    If you cut the thread down you loose that same amount of travel at the other end and most of these lathes are short on travel to start with.

                    Got it stripped and worked out in my head how to fix this, started turning some new bits up and will carry on tomorrow but again late start as I have to go look at a job.

                    Hoping to get it to go to zero, still eject and have more travel than it has at present, can't post any sketches are drawings as there isn't any, typical weld where it touches job.

                    Watch this space.

                    #144063
                    JasonB
                    Moderator
                      @jasonb

                      I thought that you were going to use the grinder to lob 20mm off the author, that’s what I did on the Warco.
                      J
                      PS.is that why they call it an all day breakfast?

                      #144066
                      Michael Gilligan
                      Participant
                        @michaelgilligan61133
                        Posted by JasonB on 15/02/2014 22:51:26:
                        … use the grinder to lob 20mm off the author …

                        .

                        Please don't shout at me for pedantry, but

                        that must be the typo of the week.

                        MichaelG.

                        #144068
                        John Stevenson 1
                        Participant
                          @johnstevenson1

                          Pedantic nit picker wink

                          Trouble is Jason a lot of my tooling is shared between 3 lathes, chop 20mm off the author wink and it gets stuck in the other lathes. Once this lathe is done and in service I can then attack the TOS and do the same mod I have in mind to that one.

                          This tailstock mod will literally save hours over a short period of time, don't want to say more at the moment as without any drawings, sketches etc thing may change [ edit ] will change but hopefully I'll have it finished by tomorrow.

                          Talking of grinders i did chop a big hole in the tailstock end foot so I can fit a door, still got to do the headstock end.

                          No rush on this as the new doors will have to go over the road to the spray shop to be painted to match and they don't work weekends.

                          #144077
                          JasonB
                          Moderator
                            @jasonb
                            Posted by Michael Gilligan on 15/02/2014 22:58:44:

                            Posted by JasonB on 15/02/2014 22:51:26:
                            … use the grinder to lob 20mm off the author …

                            .

                            Please don't shout at me for pedantry, but

                            that must be the typo of the week.

                            MichaelG.

                            Thats what comes with borrowing a Kindle Fire with predictive text and not reading through before postingblush but as you say quite apt.

                            J

                            #144130
                            JasonB
                            Moderator
                              @jasonb

                              Not so much today but did get the conrod finished and the two bearings and bolt to suit.

                              #144134
                              Bazyle
                              Participant
                                @bazyle

                                In this lull in the rain I went out to unwrap and re-oil a machine I have in storage and ended up taking a bit off it. So instead of sensibly using the engine crane and big trolley I messed around with ratchet straps and my smallest skate to get the dirty 200lb lump along and over the door threshold. Really should modify that door but now the lump is cosy and dry in the living room. (no 'lump' is not code for 'wife' you will be suprised to hear I am not married.)

                                #144162
                                John Stevenson 1
                                Participant
                                  @johnstevenson1

                                  Well attacked the tailstock this evening.

                                  This is what took the time

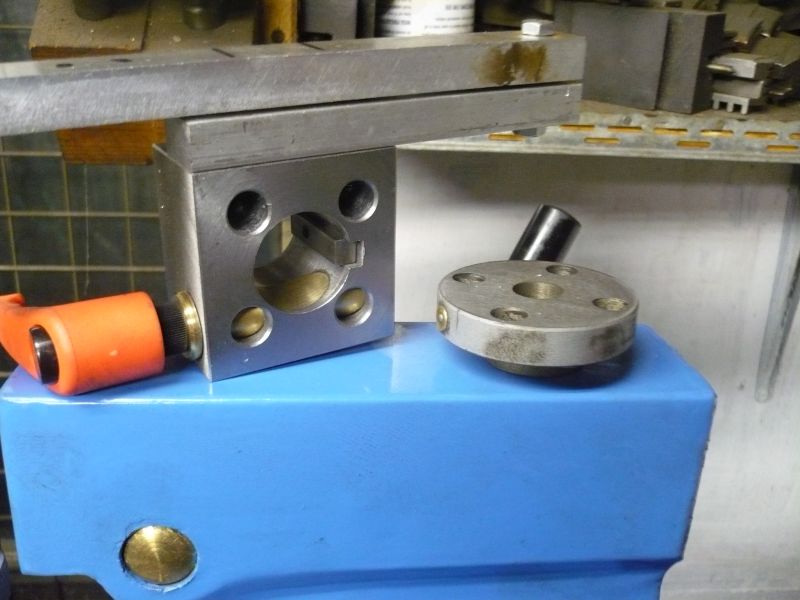
                                  That square block replaces the round keeper, it's bored the same size as the barrel, has a fixed key fitted and a lock.

                                  These are the bits that go in.

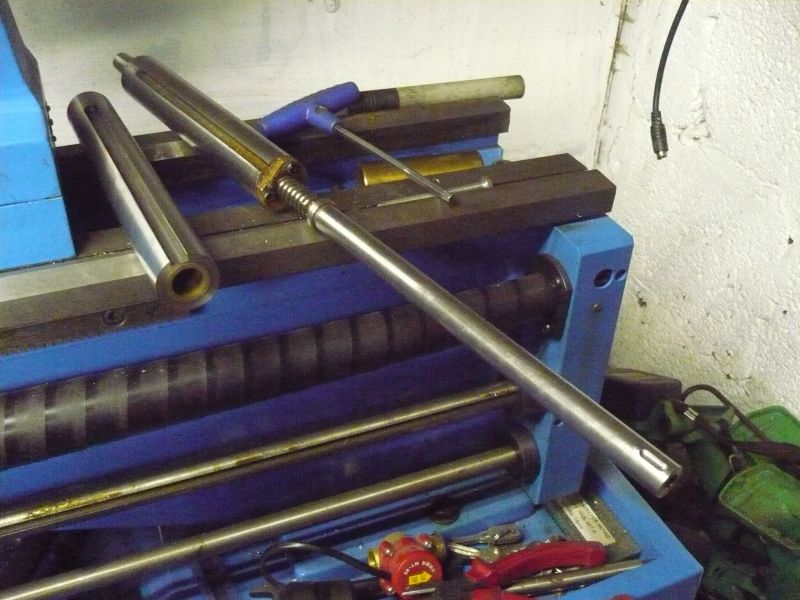
                                  On the left a dummy barrel, made out of stainless because I had it in the right size, keyway nearly to the end so it can slide thru the square keep block but not come out because of the key and bushed to take the screw shaft extension.
                                  One bush is at the end, that's the hand wheel end and the other bush is 50 mm inside because of the screw that sticks out.

                                  This dummy barrel is not connected to anything, it slides in the square block and pushes on the original barrel. The screw extension is just that, the outer end mimic the end of the screw where the hand wheel fits and the other end is threaded into the screw.

                                  This is the only part that has to be modified from original in that it has to be secured to the original screw either by drilling and pinning or loctite. I used loctite but if push comes to shove you can break the seal.

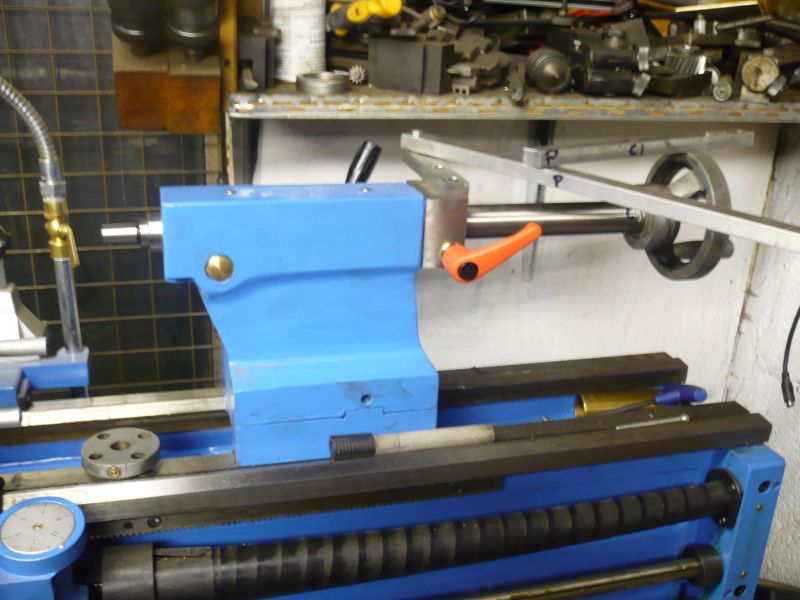
                                  This is it assembled.

                                  Linkage isn't finished.
                                  It need a clamp block right at the far end next to the handwheel to take that bar that has P [ pivot ] on it and C [ clamp ].
                                  There is a C on the end of the dummy barrel.

                                  To use you unlock the orange lever that the lever feed will push the barrel out nearly 6" pull it back, lock the orange lever and you get 4 1/2" of screw feed.

                                  However you can use both together if you want screw in on fine feed whist drilling, lever out to clear chips, lever back in, lock, and carry on using the handwheel.
                                  or lever in to get up to the job, lock, then hand wheel, or if it's just fast drill use the lever feed on it's own.

                                  Not a new idea, Clausing had a similar arrangement but it means buying a new barrel and screw so spendy. This way need no modification to the machine [ except for the dab of loctite ] and nothing has to be to microns, no taper to cut in fact it's that agricultural I did the lot with now drawings at all.

                                  max usable travel.

                                  #144167
                                  Michael Gilligan
                                  Participant
                                    @michaelgilligan61133

                                    … Nifty !!

                                    MichaelG.

                                    #144185
                                    John Stevenson 1
                                    Participant
                                      @johnstevenson1

                                      John,

                                      Great minds ?

                                      Already worked out where I can get the two screws without being in plain sight, not that it matters, and miss the graduations.

                                      They are not that critical as I'm fitting one of the cheap linear scales with remote DRO to it.

                                      Got these on the other lathe and they work fine for what i do. I know you have a proper DRO on yours but for my work that's overkill.

                                      I have posted this on the HSM forum as well and can't believe the number of replies I got saying just cut the tangs off ?

                                      Hang on they fit one lathe, 20mm out on another and 1 1/8" on this one but alter the tooling to just fit one ? It already fits one. The fault is in the machines not the tooling.

                                      Anyway I have now got, or will have shortly when I fix the linkage, an increase from 3" travel to nearly 6" and lever feed to boot without loosing the screw feed, AND the flat earth society will be pleased to know i haven't had to drill any holes in my machine.

                                      That's a definite No- No, can't drill holes in your machine but it's Ok to chop the tangs off dont know

                                      #144187
                                      jason udall
                                      Participant
                                        @jasonudall57142

                                        I am no fan of butchery of machines but frankly if its yours make it work your way..especially if you can put it back the way you found it..nice work John.
                                        Ps (?) Does that make me a flat earther?

                                        #144191
                                        OuBallie
                                        Participant
                                          @ouballie

                                          Thank you to both Johns!

                                          Brilliant mods.

                                          Geoff – ModRock not what it used to be, but doing what I want.

                                          #144213
                                          Bazyle
                                          Participant
                                            @bazyle

                                            Nice mod JS. Unfortunately it shows why magazines are on the decline, a few pictures and anyone with half a brain can do it – who needs drawings or a long article.

                                            Can't understand the 'don't drill' attitude. The great thing about owning a Landrover is you find chopping great chunks out let alone a few holes is the norm while shineymobile owners worry about the slightest scuff from car park door opening clashes.

                                            #144217
                                            John Stevenson 1
                                            Participant
                                              @johnstevenson1

                                              You would be surprised by how many that do need the article.

                                              I once posted something on the web that simple it was only about 4 tapped holes in a block of metal and a guy asked for drawings. When I pointed out that mine wouldn't fit his machine and to take the idea and run with it i was castigated for not being helpful.

                                              You can't spend your life riding round Tesco's car park with L plates on, at some point you need to get out on the road.

                                              As regards altering machines we all work differently and who says the manufacturer got it right in the first place ?

                                              Why did Myford make the 7 series carriage move 0.861" per hand wheel turn ? When with a bit of forethought it could have gone exactly 1" and no need for expensive, complex hand wheels to be offered as extras.

                                              But hey it's a Myford [ faces East, incanting 3 hail Mary's, 2 Moore and Wrights and a Mitutoyo ]

                                              If you are a fan of butchery ™ smiley keep reading later when the 7" angle grinder finds 15 minutes work to do.

                                              #144226
                                              jason udall
                                              Participant
                                                @jasonudall57142

                                                It might be a matter of confidence. .if it can be unbolted and a new “better” one made , then there is no risk of wrecking your machine….if it requires sawing bits off..well you need to know you are right….

                                                Cautious but not devout

                                                #144246
                                                John Stevenson 1
                                                Participant
                                                  @johnstevenson1

                                                  Depends on how good you are at welding Jason. smiley

                                                  #144252
                                                  Neil Wyatt
                                                  Moderator
                                                    @neilwyatt

                                                    I was going to suggest that John wrote it up… not that it would need to be much more than the posting above.

                                                    Neil

                                                    #144255
                                                    Bazyle
                                                    Participant
                                                      @bazyle

                                                      I'd hazard a guess that it would invoke the same level of interest as the screwcutting clutch so might need drawings for up to a dozen popular lathes. JS shudders at the work involved but perhaps that is where MEW could employ a pro draughtsman.

                                                    Viewing 25 posts - 151 through 175 (of 2,328 total)
                                                    • Please log in to reply to this topic. Registering is free and easy using the links on the menu at the top of this page.

                                                    Advert

                                                    Latest Replies

                                                    Viewing 25 topics - 1 through 25 (of 25 total)
                                                    Viewing 25 topics - 1 through 25 (of 25 total)

                                                    View full reply list.

                                                    Advert

                                                    Newsletter Sign-up