Warco WM280V-F Gearbox

Advert

Warco WM280V-F Gearbox

Home Forums Hints And Tips for model engineers Warco WM280V-F Gearbox

Viewing 16 posts - 51 through 66 (of 66 total)
  • Author
    Posts
  • #483573
    Tony Pratt 1
    Participant
      @tonypratt1

      I have a Warco lathe & sorry to say this type of thing is par for the course, a first year apprentice wouldn't do some of the things I have seen on my lathe.

      As I have said before I'm generally pleased with the lathe & it's got a lot of good points but I could write a book on the poor practices which have gone into its manufacture & assembly but hey ho it's back to the old chestnut of old British iron or new Chinese, both have their problems.

      Tony

      Advert
      #483733
      S.D.L.
      Participant
        @s-d-l
        Posted by Tony Pratt 1 on 02/07/2020 19:46:19:

        I have a Warco lathe & sorry to say this type of thing is par for the course, a first year apprentice wouldn't do some of the things I have seen on my lathe.

        snip

        Tony

        Reminds me of the old 80/20 rule, get 80% of a broduct for 20% of the cost, its that detail that costs the money,

        Steve

        #483735
        S.D.L.
        Participant
          @s-d-l

          Next Installment

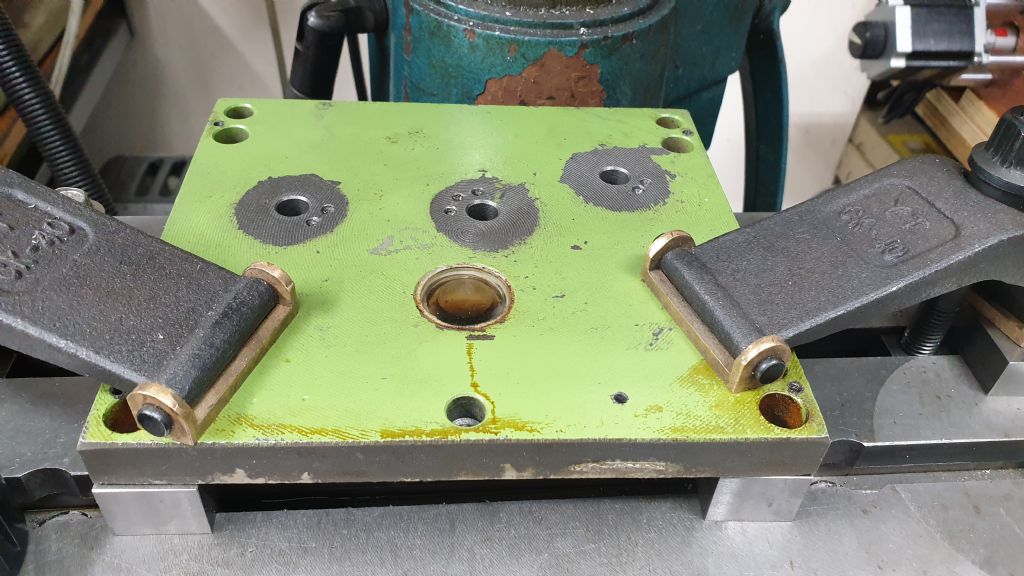
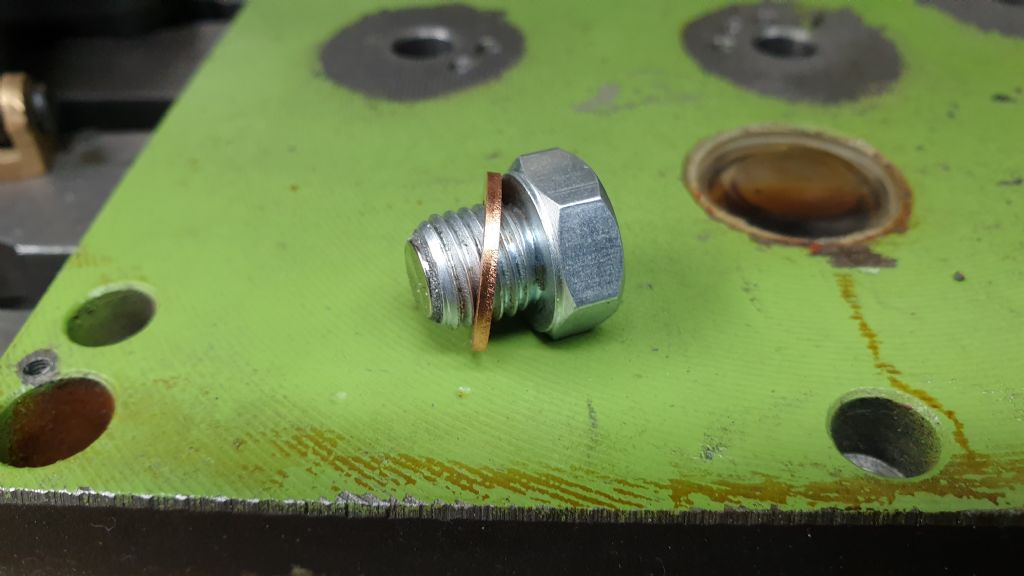
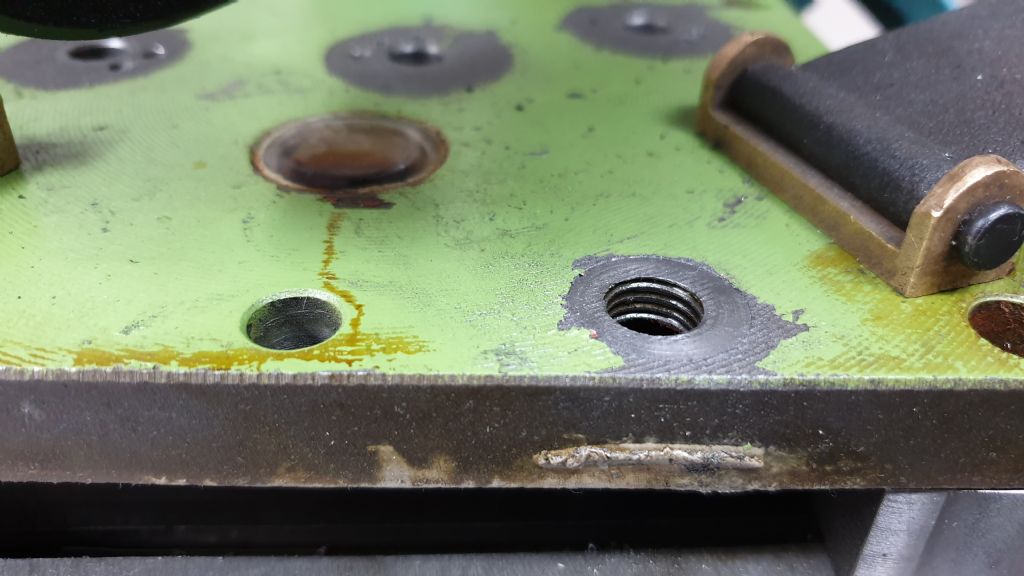
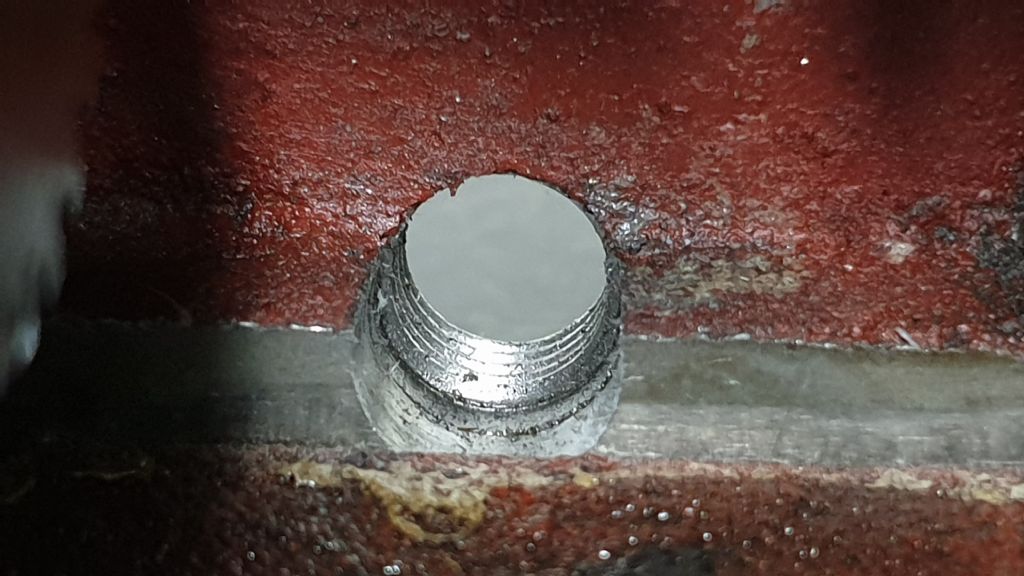
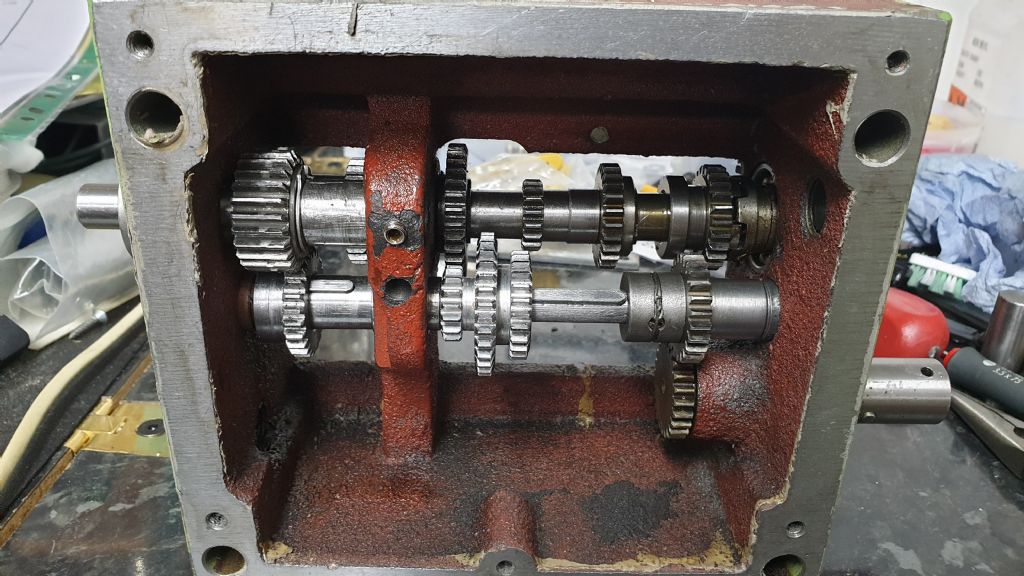
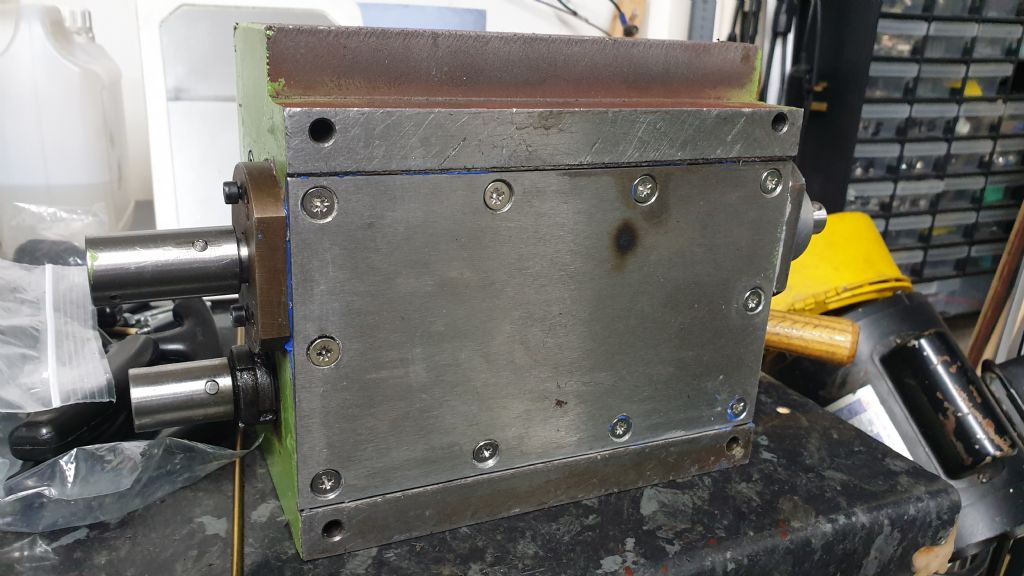
          Although I had read it elsewhere, I was surprised at just how ineffective the gearbox drain plug was. It is around 20mm ABOVE the level of the inner casting. This results in a large amount of residual oil cascading out when the front panel is removed. Someone had suggested adding a drain hole at a more appropriate position, so that formed part of my project. I decided to fit a magnetic drain plug and sourced one from eBay. It required an M12 x 1.5mm tapped hole. After some deliberation I drilled a pilot hole 19mm up from the bottom of the front cover in the mill. The panel was turned over and a 14mm mill, centred on the previously located pilot hole, used to produce a clearance for the M12 tap. The panel was again turned face up and a 10.5mm tapping hole drilled. The hole was then tapped perfectly square whilst still in the mill. The finish on the front panel although adequate for a panel face was not deemed good enough to guarantee a good tight fit when the magnetic drain plug crush washer was compressed, so a light skim with a 20mm end mill improved that area. I used a 20mm ‘Q’ cutter to produce the hole in the front aluminium cover plate, the centre of which had also been located using the pilot hole..

          The last photo shows the reworked gear to the left on its keyway and the now smooth triple gear assembly on its shaft & keyway

          #16.jpg

          #17.jpg

          #18.jpg

          #19.jpg

          #20.jpg

          #21.jpg

          #22.jpg

          Posted by Steve for Barry

          #483750
          Howard Lewis
          Participant
            @howardlewis46836

            So soon, you will be up and running again, and better than when the machine left then factory.

            Good work!

            Howard

            #483856
            S.D.L.
            Participant
              @s-d-l
              Posted by Howard Lewis on 03/07/2020 19:08:25:

              So soon, you will be up and running again, and better than when the machine left then factory.

              Good work!

              Howard

              Considering Barry did a conversion to three phase motor and vfd that was covered in MEW. Before this happened it will be a far better lathe than when new and shipped.

              Steve

              #483865
              Samsaranda
              Participant
                @samsaranda

                I had problems with a Warco lathe gearbox, I bought a new Warco BV20 lathe some years ago now, no longer a current model, I purchased a geared lathe because at the time of purchase the electronic boards that governed speeds on non gear head lathes were considered to be somewhat prone to premature failure. My problem was excessive noise from the gears, on investigation I found that the running clearances of the gears was excessive leading to backlash noise from the gears. I mentioned the problem to Warco when on a visit to one of their open days and with no argument they exchanged the lathe. Unfortunately this did not cure the problem, the exchanged lathe was just as noisy, I checked the backlash of the gears and it was the same as the first lathe. Fortunately everything appeared to be in line so no problems there, I accepted that the gearbox was noisy due to backlash between the gears and that it was going to be noisy, Wearing ear defenders became the norm when the noise irritated me. I worked out that the cause of the backlash was due to the gears being cut undersize, it doesn’t take much of an error to make a significant difference to the mesh of the gears. Being that the lathe is a budget model intended for occasional use for hobby work the gears are basic and cut from inexpensive material, had it been an expensive lathe I would have expected ground and hardened gears with minimal backlash, the lathe has continued to function for many years now and the only other problem that has happened has been the failure of the NVR switch, easily rectified. All in all I consider that although my lathe was noisy it was fit for the purpose that I purchased it for and I am still glad that I chose a geared lathe rather than an electronic one.
                Dave W

                #483947
                S.D.L.
                Participant
                  @s-d-l

                  Next Installment

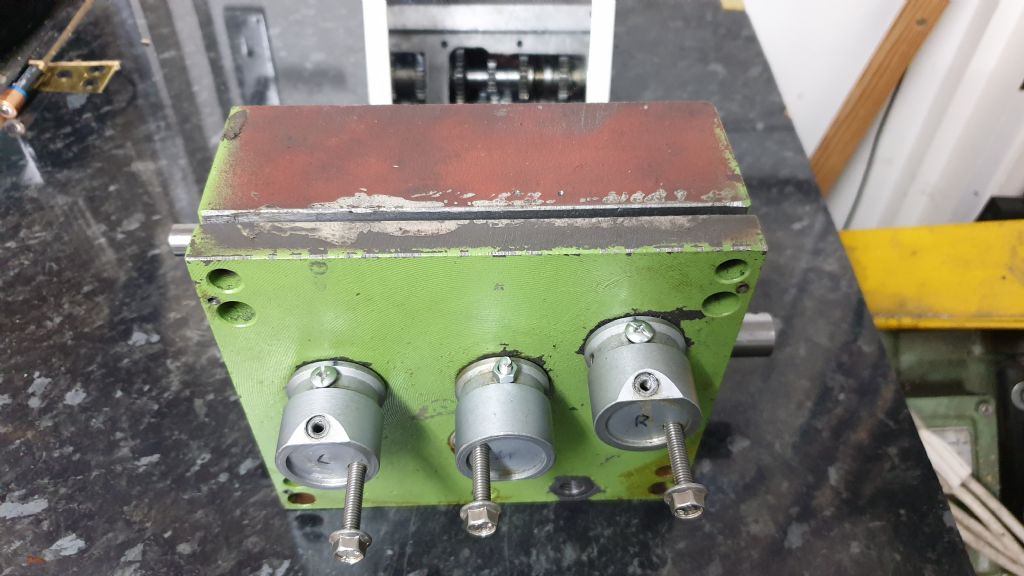
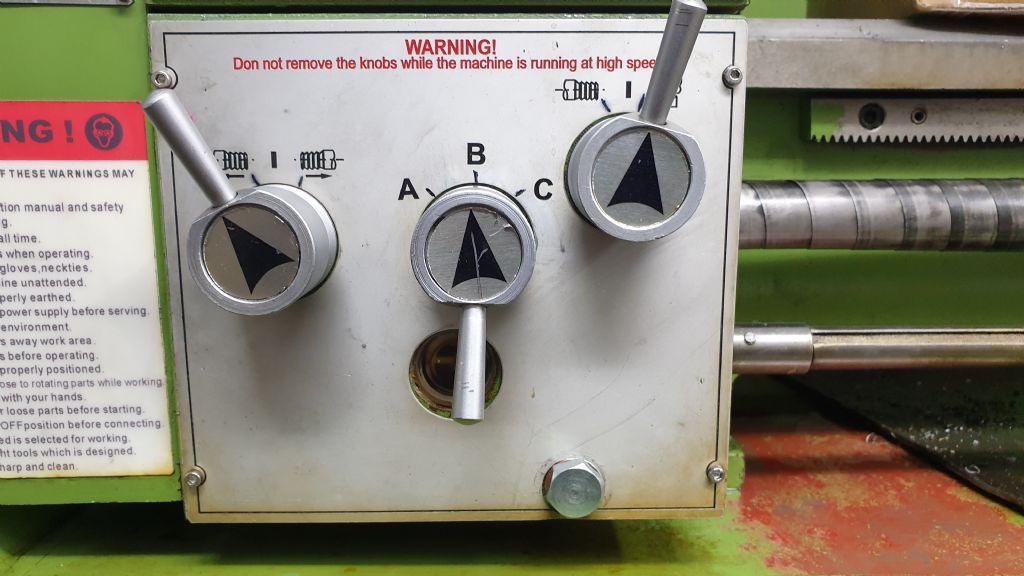
                  Refitting the front panel. I had removed the three knobs to give them a good clean. Each knob has TWO balls, a spring and a tensioning grub screw so care must be taken not to lose any part. These were removed before driving out the roll pins securing the knobs to their shafts.

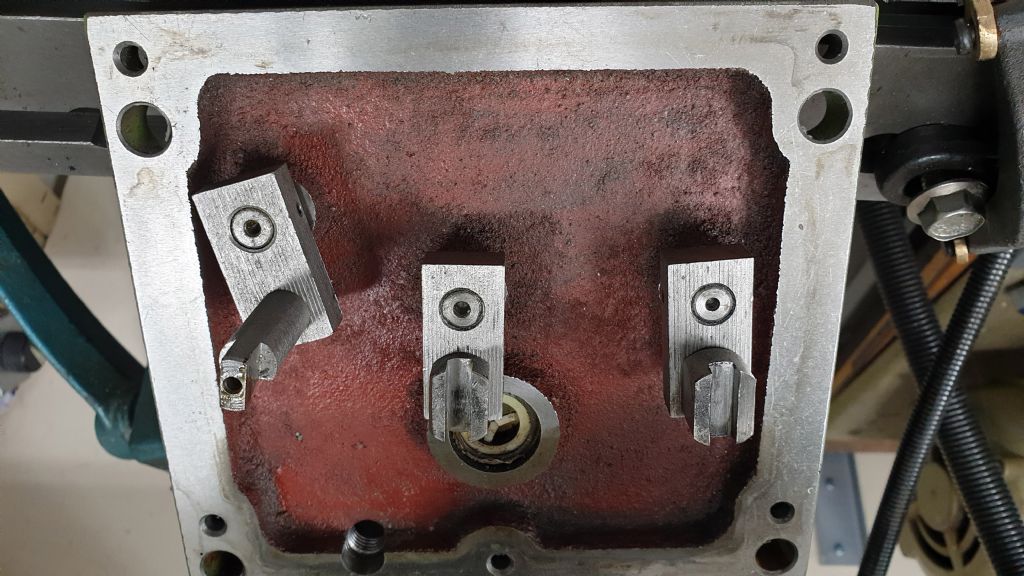
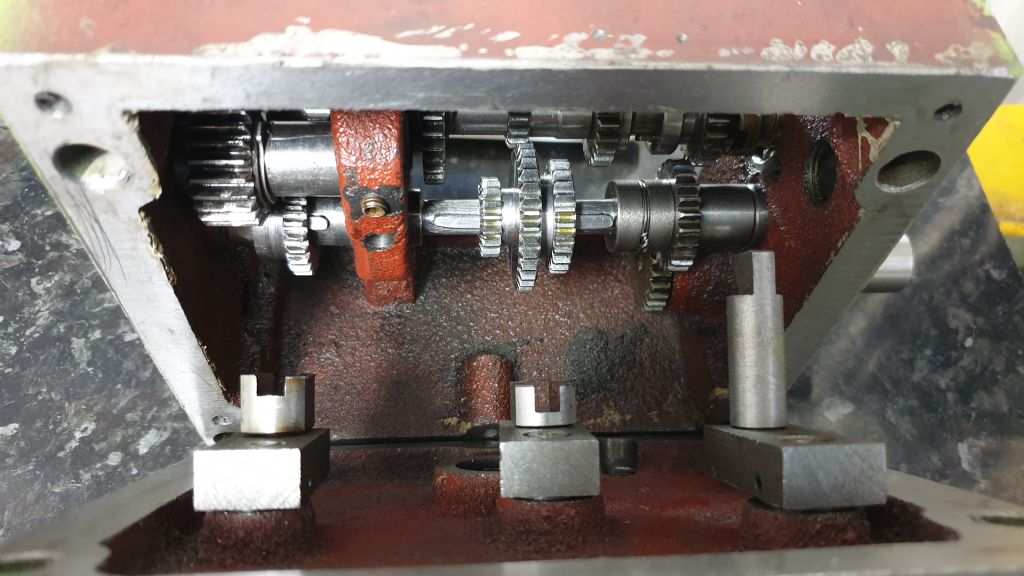
                  I used some M4 nuts and bolts in place of the roll pins to position the gear selectors such that the selector arms would line up with the gear trains. The selectors were very loose, so to keep them vertical I inserted some 15mm lengths of bamboo skewer and slightly compressed them against the front panel with bolts screwed by hand into the tensioning grub screw holes. This method worked well.

                  The technique I found worked was once the arms were vertical it eventually becomes possible to get the actuating cams to engage whilst pivoting the front panel against the bottom of the gearbox housing. Full engagement could be confirmed by looking in a mirror positioned behind the gearbox (as in the last photo) then moving the selector knobs in both directions. Once comfortable with the positioning it was a matter of applying gasket compound to the previously cleaned surface of the gearbox, repositioning it in front of the mirror and repeating the pivoting motion and confirming again that the selectors worked correctly before refitting and tightening the 5 front panel retaining bolts.

                  #23.jpg

                  #24.jpg

                  #25.jpg

                  Loaded by Steve for Barry

                  #484150
                  S.D.L.
                  Participant
                    @s-d-l

                    And the last part of Barry's journey back to a working lathe.

                    After final confirmation that the gear selectors were engaged and working properlye gasket sealing compound was applied and the rear cover panel refitted. Where the missing screw had been (original hole filled with sealer) I managed to extend the tapped portion of what was left in the casting and fitted longer screws which gave some purchase.

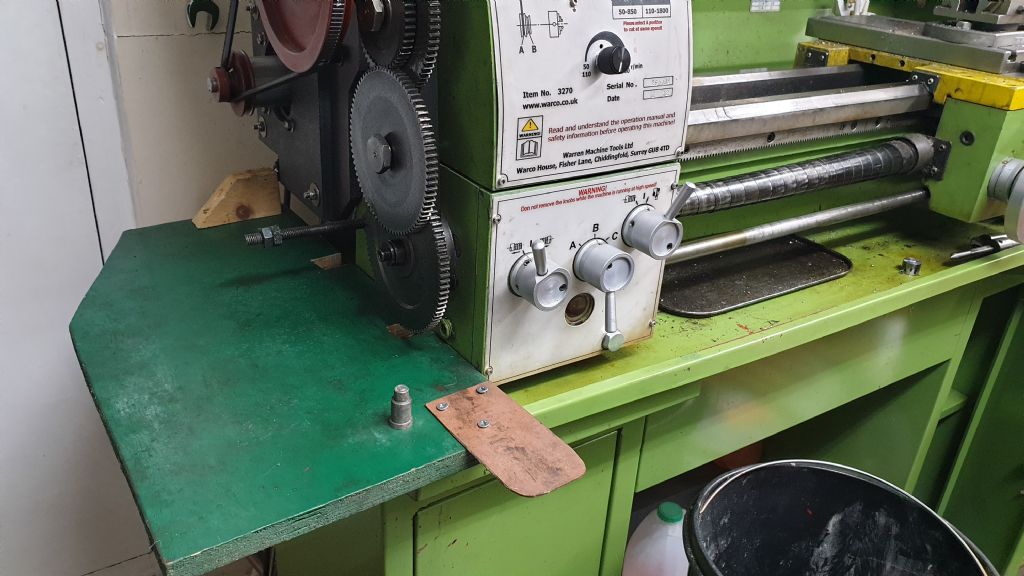
                    Gearbox and shaft taper shear pins refitted. Note table used for changing gear wheels. Corner removed to allow door to open, override block top right engages with safety cut out switch for testing, and banjo rests on the extended piece when pivoted forward. Final photo shows everything panelled up and ready for testing.

                    #26.jpg

                    #27.jpg

                    #28.jpg

                    Posted by Steve for Barry

                    #484348
                    S.D.L.
                    Participant
                      @s-d-l
                      Posted by JasonB on 15/03/2020 15:52:13:

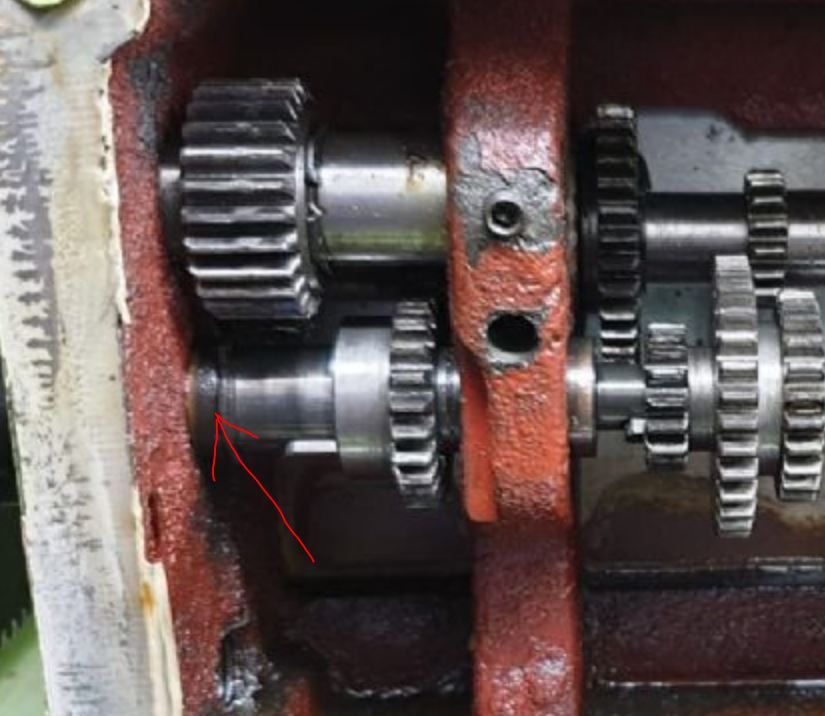
                      Is there a Circlip missing from the groove?

                      circlip.jpg

                      One of the interesting things with Barrys stripdown of the gearbox was the the O ring grooves, as the dimensions were decidly odd Barry sent me the dimensions and asked for my view on the circlips to use.

                      The dimensions were:-

                      Shaft :19mm Groove 18.5mm Width 1.3mm old circlip 1.0mm thick

                      Shaft: 18mm Groove: 17.0mm Width 1.3mm old circlip 1.0mm thick

                      Shaft: 15.74mm Groove: 15.36mm Width 1.22mm old circlip 0.94mm thick

                      The only one that is std that I could see is the 18/17 and that was after checking the imperial ones as well.

                      In the end I sugested the following sizes and comments.

                      Well all I can say is what a dogs dinner


                      D1400-019

                      D1400-018

                      D1400-016


                      I would get 10 packs as they are only a bit more than 2

                      If they don't look as if they will stay In place make a tapered mandrel out of steel

                      and lap the ID of circling with valve grinding paste.

                      Hopfully now that everything is sliding properly the circlips will stay in place.

                      Steve

                      #484474
                      Dave Halford
                      Participant
                        @davehalford22513
                        Posted by S.D.L. on 04/07/2020 17:29:32:

                        Next Installment

                        Refitting the front panel. I had removed the three knobs to give them a good clean. Each knob has TWO balls, a spring and a tensioning grub screw so care must be taken not to lose any part. These were removed before driving out the roll pins securing the knobs to their shafts.

                        I used some M4 nuts and bolts in place of the roll pins to position the gear selectors such that the selector arms would line up with the gear trains. The selectors were very loose, so to keep them vertical I inserted some 15mm lengths of bamboo skewer and slightly compressed them against the front panel with bolts screwed by hand into the tensioning grub screw holes. This method worked well.

                        The technique I found worked was once the arms were vertical it eventually becomes possible to get the actuating cams to engage whilst pivoting the front panel against the bottom of the gearbox housing. Full engagement could be confirmed by looking in a mirror positioned behind the gearbox (as in the last photo) then moving the selector knobs in both directions. Once comfortable with the positioning it was a matter of applying gasket compound to the previously cleaned surface of the gearbox, repositioning it in front of the mirror and repeating the pivoting motion and confirming again that the selectors worked correctly before refitting and tightening the 5 front panel retaining bolts.

                        #23.jpg

                        #24.jpg

                        Loaded by Steve fo

                        The Centec has similar design fingers to shift the gears except they are bronze.

                        #484816
                        Barry Chamberlain 1
                        Participant
                          @barrychamberlain1

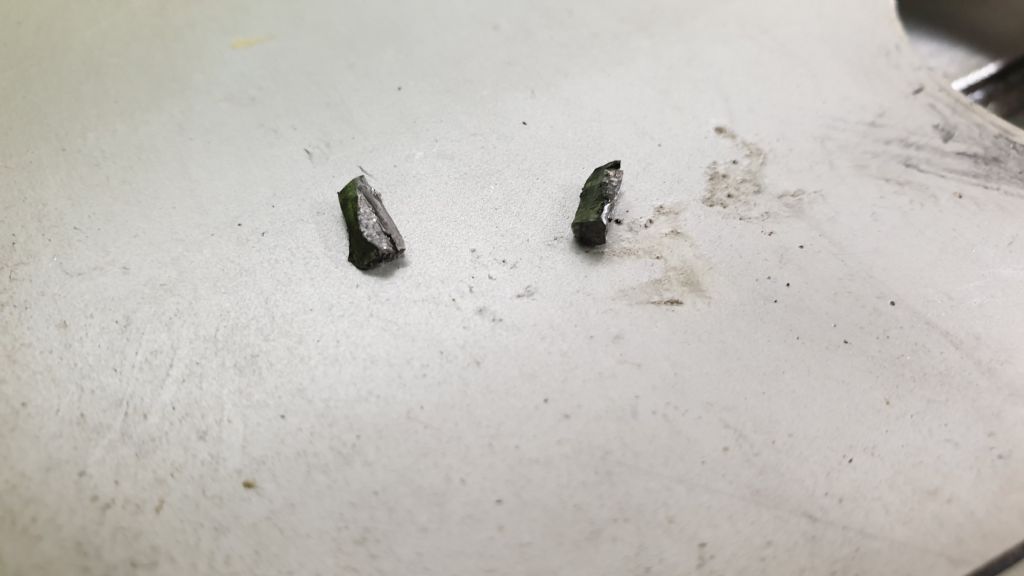
                          In response to earlier queries, all I discovered inside the gearbox were these two broken teeth.

                          broken gear teeth.jpg

                          Photo uploaded by Barry – at last! Many thanks to Steve for earlier uploads!!

                          #512271
                          Noel Carlyle 1
                          Participant
                            @noelcarlyle1

                            Indeed a sad story, but not unique – others among us have just been lucky. About 5 years ago I purchased a Weiss WF290VF from the local distributor here in Australia. On advice from a friend that these "Chinese" gearboxes were prone to be assembled with casting sand still inside, I stripped and cleaned both the lead screw and carriage gearboxes. Thank the Lord that I did, both were found with sand, sometimes painted over and otherwise very poor condition. The arrangement to keep oil inside the carriage gearbox in particular is pathetic and I subsequently added "O" ring groves where practical or made external covers to fit "O" rings into. Not saying it is perfect but a long shot better than the original design that leaked like a sieve. Many other minor faults found and rectified but would I buy one again? The qualified answer is "yes" but certainly don't take things for granted and check it out for yourself.
                            Mine was sold to me with what was claimed to be a 1.5hp (1.1kw) motor. This proved to be only 0.75kw and after threats of legal process, the supplier agreed to pay for a new 1.1kw motor and appropriate sized inverter. I installed these myself and did a complete re-wire of the assembly due to the added load on the system, including a decent sized cooling fan on it's own timed cooling circuit for the motor. Since then I have added a 5 micron magnetic DRO and now have things pretty much as I would like and enjoy what is still, a reasonably priced lathe.

                            #512292
                            not done it yet
                            Participant
                              @notdoneityet

                              You were lucky that they claimed 1.5HP and not 1.1kW. They have since learned how to be ‘legally ambiguous’!

                              The usual hyped-up figures, for consumption by the inexperienced, is to quote 1.1kW for the motor when it really means one horsepower – ie a one horsepower out from a motor with only 67% efficiency.

                              I don’t suppose it actually cost them a lot, if the original items were returned, but did avoid others realising they, too, had been conned into thinking they had a stronger motor than in reality.

                              The problem then arising, for your machine is whether it could stand the extra power (without breaking or wearing prematurely).

                              If everyone insisted on a motor of twice the designed power output, they might have been a lot more machines with warranty claims!🙂 I wonder if your machine was actually then legally covered by the manufacturer’s warranty, after that motor change?

                              #512308
                              Hopper
                              Participant
                                @hopper

                                Lol. Yes I have a very small Chinese air compressor with a big 2.5HP sign on the side of it — and a tiny direct drive motor not much bigger than a pistol drill. If it's half a horsepower its with a tail wind. Proper commercial 2.5hp compressors are 4 times the size with belt drive, honking great motor and honking v twin compressor, made in country.

                                #512370
                                Howard Lewis
                                Participant
                                  @howardlewis46836

                                  The story of how a sow's ear has been made much closer to a silk purse!

                                  As ever, the devil is in the detail, and small adjustments here and there can transform a mechanism.

                                  Amazing how well machines perform once they have been set up to specification and drawing.

                                  Well Done!

                                  Howard

                                  #512481
                                  Noel Carlyle 1
                                  Participant
                                    @noelcarlyle1

                                    Actually, I did not return the originally supplied motor and VF drive – they now grace my pedestal drill press and do that job rather well. The supplier initially wanted them back till I "explained" to him that he would then need to install the new (correct) items, which required a re-engineering of the whole drive to incorporate the larger components.
                                    As for the higher output motor jeopardising machine life or warranty – this new motor is what they still install today on the same machine so no worries there, it was the design correct product. I have even see larger capacity offered in catalogues though don't know why one would need it? Only issue might have been that I took my 1.1kw a step further, not only 1.1kw but went from 4 pole to 6 pole motor, sacrificing quite useless top speed for more torque. The lathe is well out of warranty today anyway so no longer an issue. I have found the extra torque to be a real improvement since low speed thread cutting is a breeze and any large diameter machining may be done with ease without the motor over heating. For what it's worth, the primary drive belt is a single XPZ /3VX section which I run between the two pullies with an idler roller for tensioning. I had expected to need two belts but this would have sacrificed the ability to have a high speed function if needed, via the second row sheaves. However, the single belt drive does not slip, nor has it required adjusting during this whole time in service, perhaps due to the programmed soft start through the VF drive? I further added a delay stop timer to the larger engine cooling fan which I have set to run on for 3 minutes after motor stop. Programming the inverter was a new experience for me for which I asked an electrical engineer friend to assist and from the manual he sorted all the parameters and I then plugged them in. It has worked faultlessly for the 4 plus years since installation.

                                  Viewing 16 posts - 51 through 66 (of 66 total)
                                  • Please log in to reply to this topic. Registering is free and easy using the links on the menu at the top of this page.

                                  Advert

                                  Latest Replies

                                  Viewing 25 topics - 1 through 25 (of 25 total)
                                  Viewing 25 topics - 1 through 25 (of 25 total)

                                  View full reply list.

                                  Advert

                                  Newsletter Sign-up