Vernier gauge testing.

Advert

Vernier gauge testing.

Home Forums Beginners questions Vernier gauge testing.

  • This topic has 38 replies, 20 voices, and was last updated 26 May 2015 at 10:44 by Nigel McBurney 1.
Viewing 14 posts - 26 through 39 (of 39 total)
  • Author
    Posts
  • #191103
    Nicholas Farr
    Participant
      @nicholasfarr14254

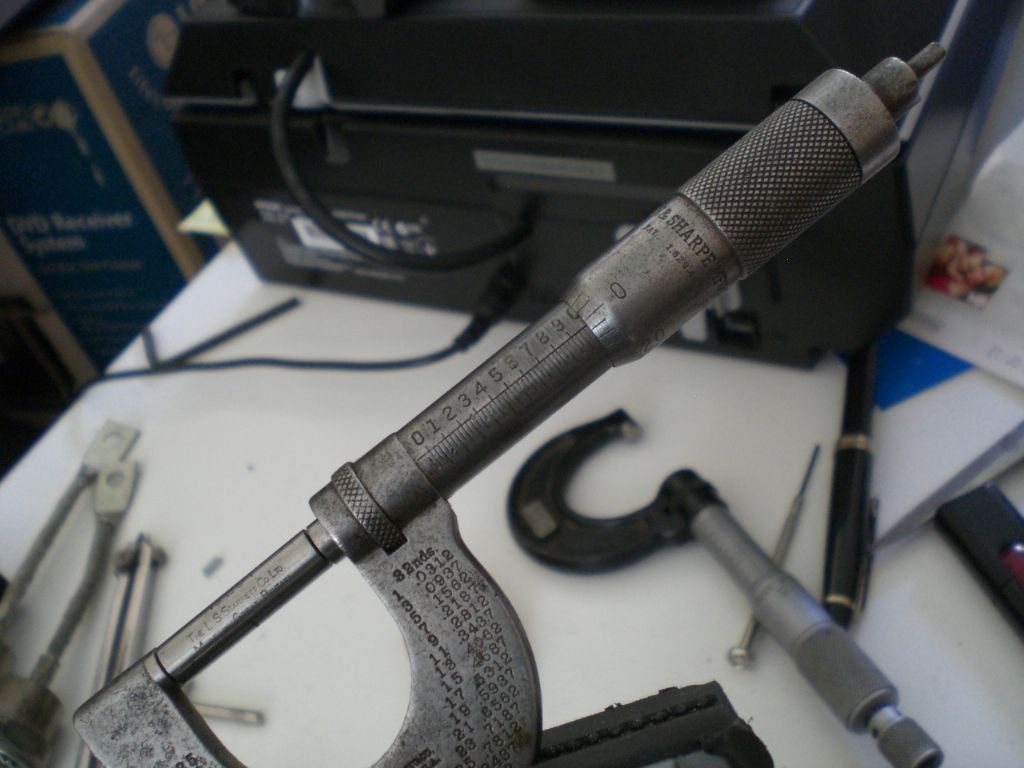
      Hi Jesse, not all micrometers can be totally adjusted to read zero. Below is a photo of the only micrometer that my late farther had and could ever afford, it is a Brown & Sharp 0-1" and has a fixed zero line on the inner sleeve. It was second hand when he bought it before I was born and I have never known it having a ratchet which is missing, it also reads approximately 0.0005" above the zero line and always has as far as I know. Maybe it was a marriage between two damaged identical mics. I just don't know, but it is shown here just holding a No. 234 1" L.S. Starrett standard and when it is closed it reads above the zero line by the same amount.

      b&s 1 inch.jpg

      There are more photos in this **LINK** of other mics I have holding the same standard by using the ratchet as described in the Mitutoyo instructions scanned with the calibration certificate for my 0-50mm Mitutoyo mic. There is also a photo just and only just holding the same standard in my inexpensive Vernier calipers and one of my cheap digital calipers, the digital one could not make it's mine up as to whether it is 1" or 0.9995" the photo caught it as the latter.

      All the results came out good enough spot on for me and as I keep all of these in the house, they are all at near as dam! is to swearing, the same temperature.

      Regards Nick.

      Edited By Nicholas Farr on 24/05/2015 19:43:19

      Advert
      #191106
      Dominic Collings 1
      Participant
        @dominiccollings1

        I get what you're saying about using a micrometer over a calliper but for several reasons a micrometer isn't the tool for the job in this instance. The top of piston is slightly convex while the combustion chamber is concave so when you squish the solder it goes to a slight taper. Scrutineers measure just in from the end in an attempt to avoid a false reading from any snipping at the end of the solder. I've tried all sorts to get the cleanest cut possible from pliers to tin snips, I've even tried a cigar snipper and all leave a slight snipped section at the end. The best thing I've found is a pair of wallpapering scissors. This seems to leave the cleanest, squarest and least deformed cut. However they use the external calliper prongs where they taper to a point to try and get as "exact" a measurement as possible. If they used the flatter thicker section further up it would just show the thickest part of the tapered section. This would be the same with a micrometer. Obviously you can get micrometer with a radius end but it would be very difficult to measure a specific point on the solder. The solder is very soft and if you do press too hard with a calliper to get a falsely low reading it tend to leave a slight whiteness mark which is a good reason to request a re-test. I doubt a micrometer would leave such a mark. Ultimately it's how the scrutineers are trainer to measure the squish so it pretty pointless measuring it any other way despite the methods apparent failings. Initially I think I'll buy a 100mm standard. At least that way I can test how accurate my calliper is. I didn't realise they're only £20.

        Edited By Dominic Collings 1 on 24/05/2015 20:18:22

        #191109
        ANDY CAWLEY
        Participant
          @andycawley24921

          Sciince the only thing you are doing is trying to get through scrutineering you need to be able to argue with a scrutineered (in the nicest possible way) if you have a difference. I would acquire a slip gauge that I took to meetings and be able to show that my measurement was accurate against a known standard.

          A possible source of inaccuracy using the method described is that of the narrow knife edge of the caliber cutting into the solder not to mention the distortion caused by cropping the solder. A ball ended micrometer tightened up using the ratchet would be more controlled than the method you describe.

          Oooh I could be real trouble in the paddock!😉

          #191115
          Ian P
          Participant
            @ianp

            I'm confused (not an unusual state of affairs for me), this thread started off with an enquiry about checking measuring instruments, after going round the houses the subjects of measuring the thickness of something so soft that most common measuring devices are likely to give inaccurate results.

            Out of interest (and stepping into Michael Gilligans territory!) I Googled squish and karts. The following is from the first regulation document I found (so probably not the right one) but it does clarify the procedure somewhat. This is for a Rotax engine but I suspect the procedures is similar for others.

            They do not mention solder but call the wire 'tin'. Whether that is pure tin, tinned copper wire, or tin/lead solder is not explained but something harder than solder would be more sensible. If by any chance flux cored solder was accidentally used that would give even more variable results as the point of measurement might have voids filled with soft flux.

            Another fact is the use of a certified 'slide gauge'. No further details are given but the dimensions stated are well within the accuracy specifications of even cheap digital calipers. There are other images of readings being taken on parts of the engine ant those show fairly normal looking digital calipers so that is probably what the slide gauge is.

            Below is the quish section,

            5.1. Squish gap

            125 Junior MAX/evo minimum = 1,20 mm

            125 MAX/evo minimum = 1,00 mm

            125 MAX DD2/evo minimum = 1,30 mm

            The squish gap must be measured with a certified slide gauge and by using a 2 mm tin wire (Rotax part no. 580 130).

            The crankshaft must be turned by hand slowly over top dead center to squeeze the tin wire.

            The squish gap must be measured on the left and right side in the direction of the piston pin.

            The average value of the two measurements counts.

            The document I found is at http://www.rotax-kart.com/upload/files/2505.pdf

            I do not understand the difficulty of cutting the end of the wire without deforming it. Full flush cutters are made by Lindstrom and others that will cut soft solder or even steel wire absolutely square ended with imperceptible ovality

            It seems to me that the scrutineers should be answering any questions.

            Ian P

            #191125
            Bowber
            Participant
              @bowber

              There is only one solution to this, you need to use slip gauges and check your caliper at the specified gap of 1.2mm and take the slip gauges with you to scrutineering.

              I also hope they are checking with wire at both side of the piston because if they are not then the measurement will be wrong anyway because the piston will tip.

              Steve

              #191129
              Dominic Collings 1
              Participant
                @dominiccollings1

                That's exactly what I'll do Bowber and yes they check both sides as do I. I have had a situation where it's been 1.18 on one side and 1.24 on the other so ok but not by much. Makes you very nervous if they take the low reading first.

                #191150
                Michael Gilligan
                Participant
                  @michaelgilligan61133
                  Posted by Dominic Collings 1 on 24/05/2015 07:40:20:

                  … to put the problem in context I'll explain the issue. My son races go karts in a class with several technical rules and regulations. One such rule relates to the size of the "squish". That's the volume that remains between the top of the piston when at top dead centre and the top of the combustion chamber. This measurement cannot be less than 1.2mm.

                  The squish gap is critical to the engines performance so typically engine builder will set the squish to 1.26mm so you've only got 0.04 of a mm before taking action or 0.06mm before you're failing a squish test.

                  .

                  Having found another reference document

                  http://sportstilcup.com/si/TEHNICN_PRAVILNIK_MINIMAXDD22013%20(2).pdf

                  I think I understand the underlying problem.

                  Looking at page 4: The specified squish gap is 1.20mm to 1.80mm, which we could also state as 1.50mm +/- 0.30mm … That makes the scrutineering test method look entirely reasonable.

                  However; given the nature of racing, these engines are 'blueprinted' to get the maximum performance whilst complying with the letter of the rules [as opposed to the spirit of the rules].

                  If you are dancing that close to the edge, then your test method needs to be an order of magnitude better than that of the scrutineers. …

                  MichaelG.


                  Edited By Michael Gilligan on 25/05/2015 08:51:56

                  #191154
                  jason udall
                  Participant
                    @jasonudall57142

                    Michael….I think that about sums it up.

                    Thus given that the method of transfer is a given ( “tin” wire)….I note the reference to direction relative to the (gudgeon? ) pin.
                    I , if I were looking to “explore” the envelope or at least to check for deterioration ( relative to spec) would measure the wire with a mike…we need a technique with an order of magnitude better than the dimension to be verified.
                    In this case +/- 0.3 so that relates to 0.030 resolution. .thats not outside resolution sold in calipers but my taste would be a mike.
                    If you need narrow jaws ..use the supplemental jaws Sold for this purpose.
                    As to verifying any instrument. .in production we used go no go plug gauges ( double ended pins in handles.)..with the two ends, at either end of the measurement window. .

                    All that said..my experience of scrutineers is even with “superior”and traceable calibration. The only instrument acceptable is the one in their hand.

                    Edited By jason udall on 25/05/2015 09:17:30

                    #191158
                    David Colwill
                    Participant
                      @davidcolwill19261

                      Hi,

                      MSC J&L do gauge blocks idividually. The 1.2mm is £11.70 see page 878 of their catalogue.

                      Regards David.

                      #191160
                      Dominic Collings 1
                      Participant
                        @dominiccollings1

                        That's great David thanks. I can't see a quoted tolerance on their website +/- ???. Does it say in the catalogue?

                        #191171
                        David Colwill
                        Participant
                          @davidcolwill19261

                          Hi,

                          If you google BS4311 this gives you the tolerances for gauge blocks which looks to be .0002 mm. If you were to get 1 it might be useful to take it with you and ask them to measure it with the calipers they use.

                          Regards David

                          #191178
                          Dominic Collings 1
                          Participant
                            @dominiccollings1

                            That's great thanks. That's more than accurate enough for that I need.

                            #191265
                            Neil Wyatt
                            Moderator
                              @neilwyatt

                              A set of feeler gauges from Halfords will give you something accurate enough to test at accuracy at these sizes.

                              A £286 Mitutoyo Digimatic Absolute caliper (the cheapest of the top end ones) has a resolution of 0.01mm and an accuracy of 0.02mm. As has been said, if they are measuring to 0.01mm, a caliper isn't good enough.

                              But rules is rules, and the only way to 100% guarantee you will pass scrutineering is to have gap significantly bigger than the limit in case your measurement is high and theirs is low… having a slip or even a feeler gauge in you pocket that is 1.20mm thick might prove very handy as you can say 'test this' and see their faces if they get 1.18mm.

                              Neil

                              #191276
                              Nigel McBurney 1
                              Participant
                                @nigelmcburney1

                                reading through this topic,it reminds me of many discussions with inspectors and quality engineers during my time working on the minute tolerances of hard drives, verniers tended to be regarded as guessing sticks,the older verniers with engraved scales and read with a eye glass were usually only reliable to plus /minus a thou and I have never regarded the dial or digital type caliper to be any better, if a very accurate measurement is required and only a caliper can reach the area to be measured then the caliper should be used as a comparator against a standard ie slip gauges set to the nominal dimension.The sidetrack of measuring squish bands ,well if the owner and scrutineer measure the band with a length of squashed solder and and some carbon on head and piston ,with possibilty of the measurements being taken in different places and a variation in carbon thickness whats the point of discussing the accuracy of calipers,its like measuring a piece of foam with a micrometer. regarding rules, 50 years go I bought a Rabone chesterman 6 inch rule ,narrow type , one side was ok and accurate ,on the other side the first division was short nearly a sixty fourth so rubbish was also produced in the good old days ,Too much hassle to get another so I put it on the surface grinder and made it into a single sided thin very flexible rule ,ideal for tool setting . Still got it somewhere as I work far quicker in imperial.

                              Viewing 14 posts - 26 through 39 (of 39 total)
                              • Please log in to reply to this topic. Registering is free and easy using the links on the menu at the top of this page.

                              Advert

                              Latest Replies

                              Home Forums Beginners questions Topics

                              Viewing 25 topics - 1 through 25 (of 25 total)
                              Viewing 25 topics - 1 through 25 (of 25 total)

                              View full reply list.

                              Advert

                              Newsletter Sign-up