Turning a cylindrical bar into a semi circular cross section bar?

Advert

Turning a cylindrical bar into a semi circular cross section bar?

Home Forums Beginners questions Turning a cylindrical bar into a semi circular cross section bar?

Viewing 21 posts - 26 through 46 (of 46 total)
  • Author
    Posts
  • #636054
    JasonB
    Moderator
      @jasonb

      Looking at the part and what it does I would say it does need some accuracy and not everyone could file to that accuracy including me.

      Any slight height deviation between base and crankshaft bearing or angle and the hole in the standard that this piece supports won't line up with the hole in the outboard crankshaft bearing support.

      My current thought is to clamp horizontally to the topslide across the lathe and pack it up to ctr height. Mill out the slot. Then mark half way point around the part and saw off most of the waste material then it can be soldered to the standard. Finish by clamping the standard to top or cross slide and mill/flycut to final size this should ensure it is at right angles to the flat standard and height is easy to measure and no risk of it being off if something moves during soldering.

      As for the Vee using the offcut from the base mill that first with the corner of a milling cutter and position the Vee so it is in the bit you saw off. Mount using the two edges of the vee to set it level and mill the sawn surface flat.

      Advert
      #636058
      Nicholas Farr
      Participant
        @nicholasfarr14254

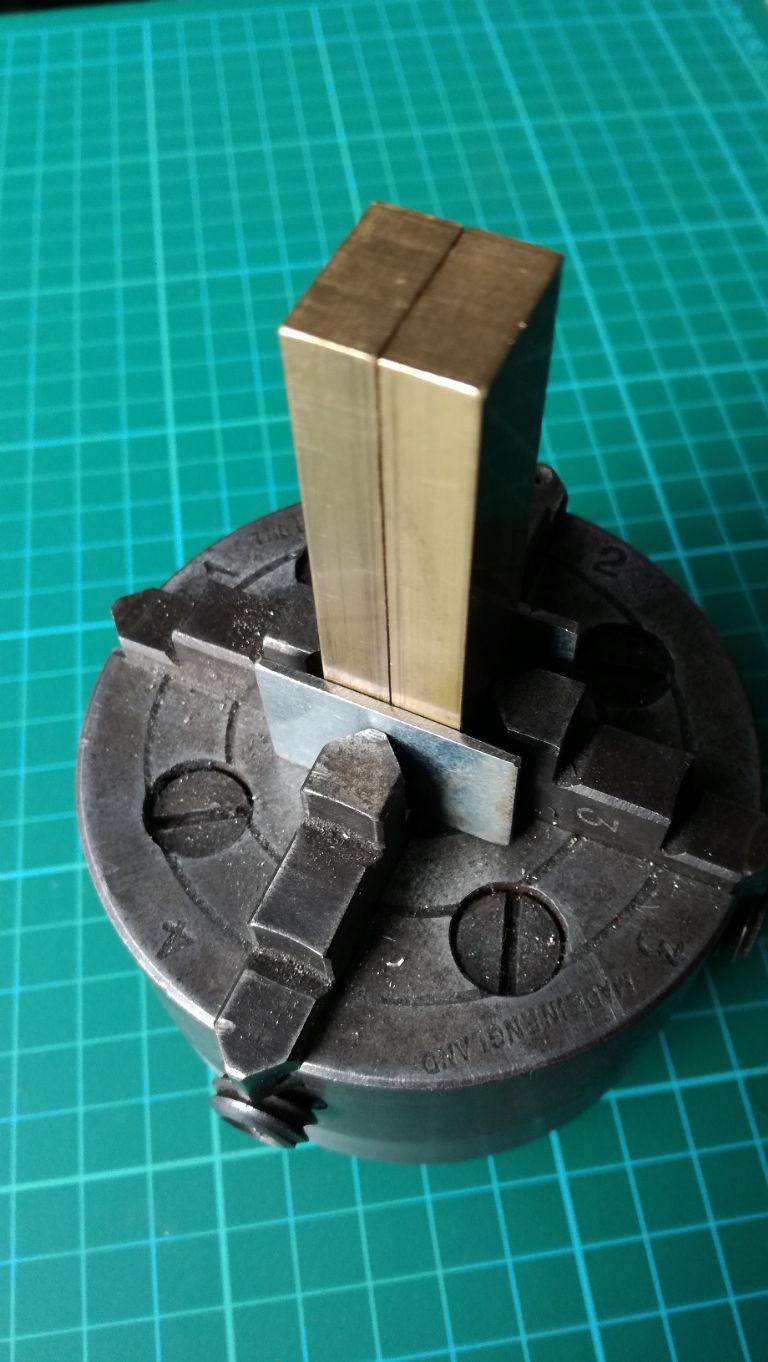
        Hi Paul, further to Clive Foster's idea, you could buy a piece of 3/8" x 3/4" from say macmodels.co.uk, cut two pieces long enough and mount them in your four jaw as shown below, but making sure the centre of the two pieces are central to the spindle axis, drill and tap a small hole in the end sticking out but making sure they are both nipped up to each other and screw in a short grub screw, this will stop the two ends parting away from each other during turning. Put a small centre on the joint for your tailstock centre, and then turn the two pieces down to size. Once turned down, just cut to length. You will then have two pieces of half round, so if you mess up the first attempt of putting the slot in, you can have another go with the other piece.

        chucking idea.jpg

        Regards Nick.

        #636066
        Michael Gilligan
        Participant
          @michaelgilligan61133

          Excellent, Nick yes

          A real case of “If I were you, I wouldn’t start from there”

          … that’s ‘Engineering’ !

          MichaelG.

          #636071
          John Haine
          Participant
            @johnhaine32865

            +1 for Nick's method. You could also soft-solder the mating flat faces together for more security.

            #636077
            Paul McDonough
            Participant
              @paulmcdonough43628

              Yup, starting with two rectangular bars softsoldered together was suggested to me by a friend I felt it was cheating!

              but thank you for the suggestions and the very helpful images.

              this reminds me, how do you post images on this forum please?

              #636078
              Paul McDonough
              Participant
                @paulmcdonough43628

                As for starting from the wrong place, yes that does seem applicable I should have started with another kit! LOL!

                #636080
                JasonB
                Moderator
                  @jasonb

                  Although thetwo flat bits is a way to do it it does seem to defeat the idea of buying a "kit" of materials in the first place and does not really address the issue of soldering the part on exactly true and suare to teh vertical standard.

                  So putting my metal where my mouth is this is how I described in my previous post and answers the question of how to make the part with the material supplied.

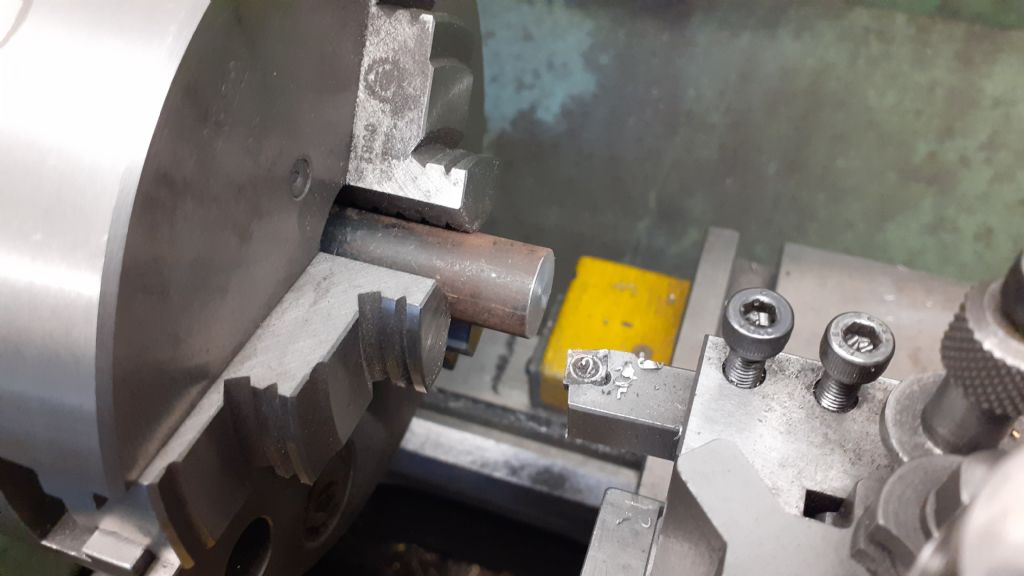
                  First face the two ends of the bar

                  20230304_110735.jpg

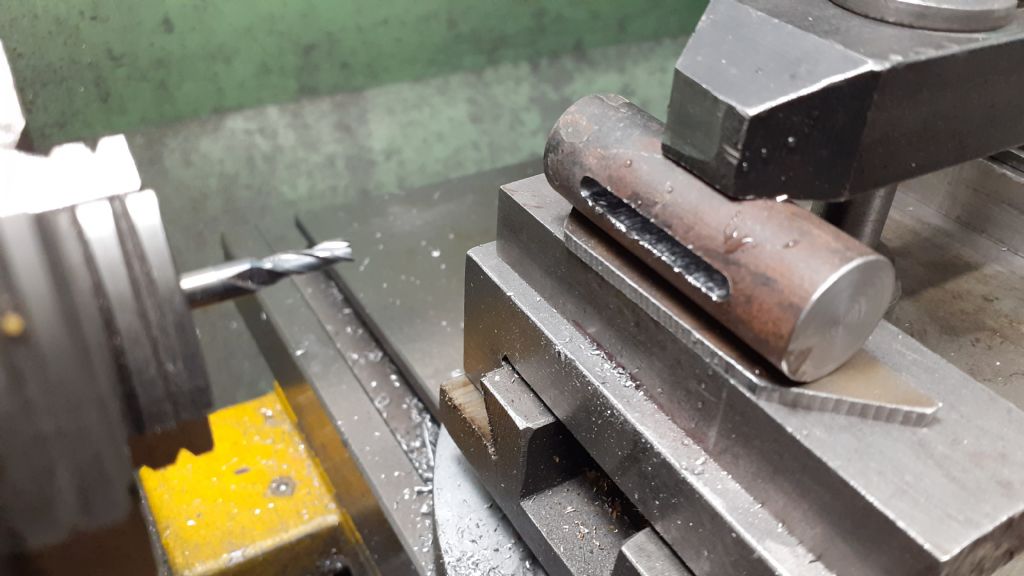
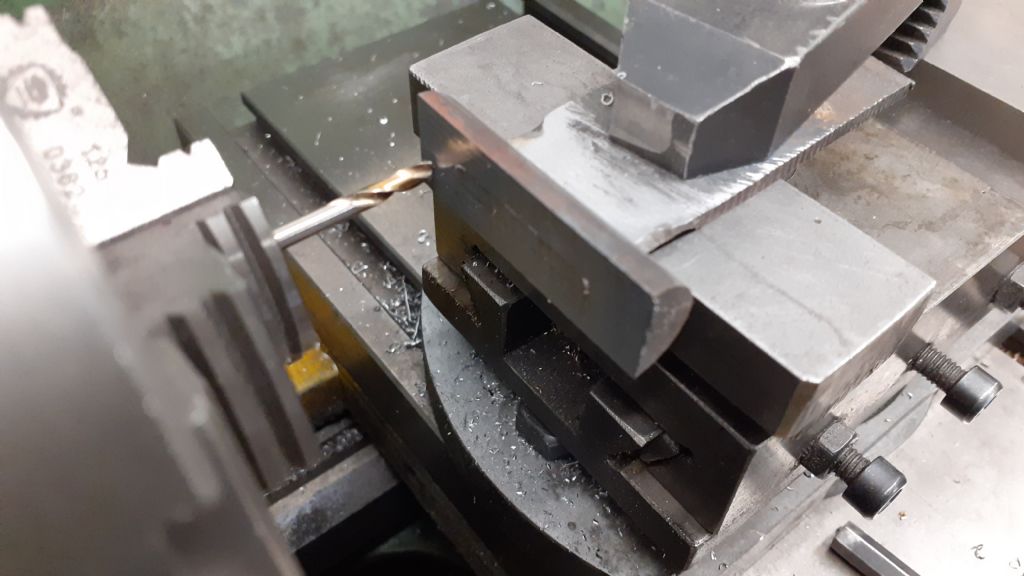
                  Clamp to topslide with packing to bring it upto ctr height. If your toolpost will take 5/8" than you can just hold it in that. You can then drill your series of holes

                  20230304_111602.jpg

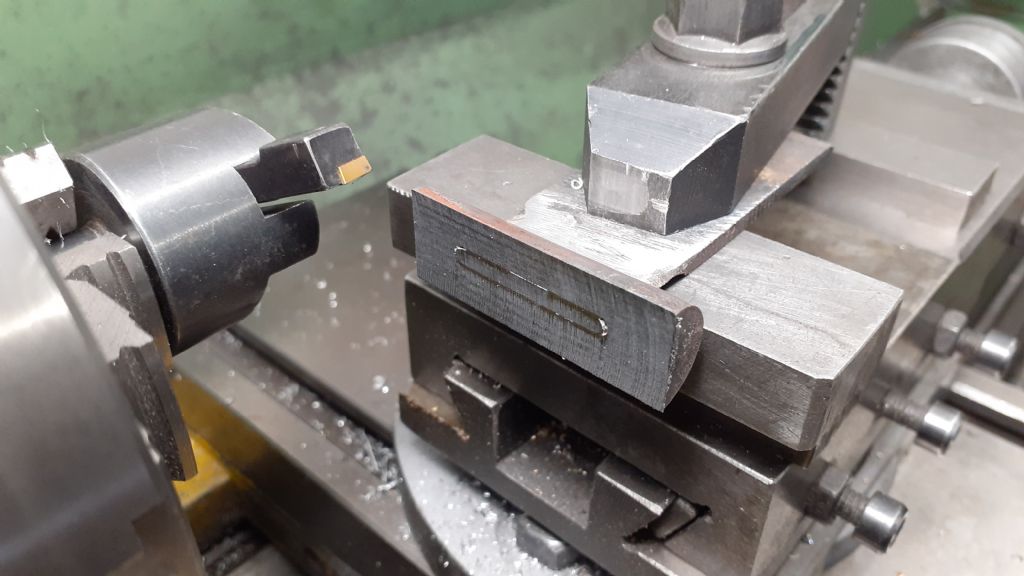
                  Or better still mill the slot

                  20230304_112850.jpg

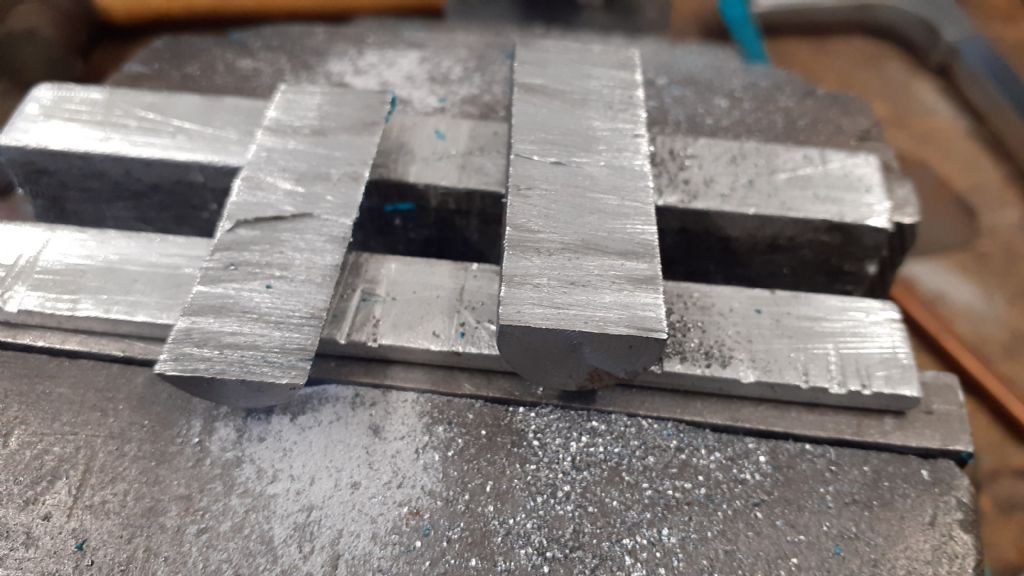
                  Saw roughly in half to get rid of most of the waste

                  20230304_113255.jpg

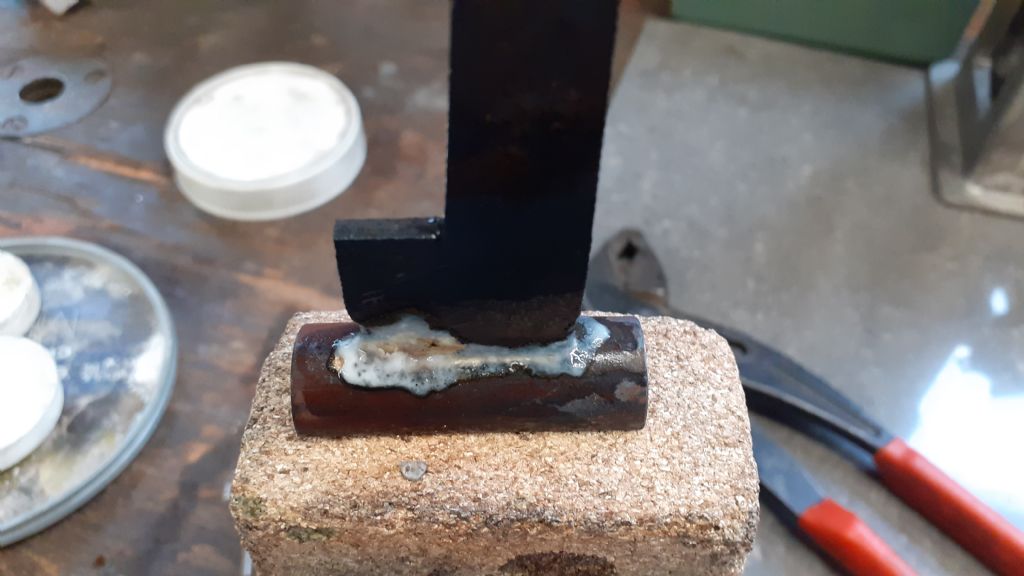
                  Solder to the vertical member

                  20230304_114352.jpg

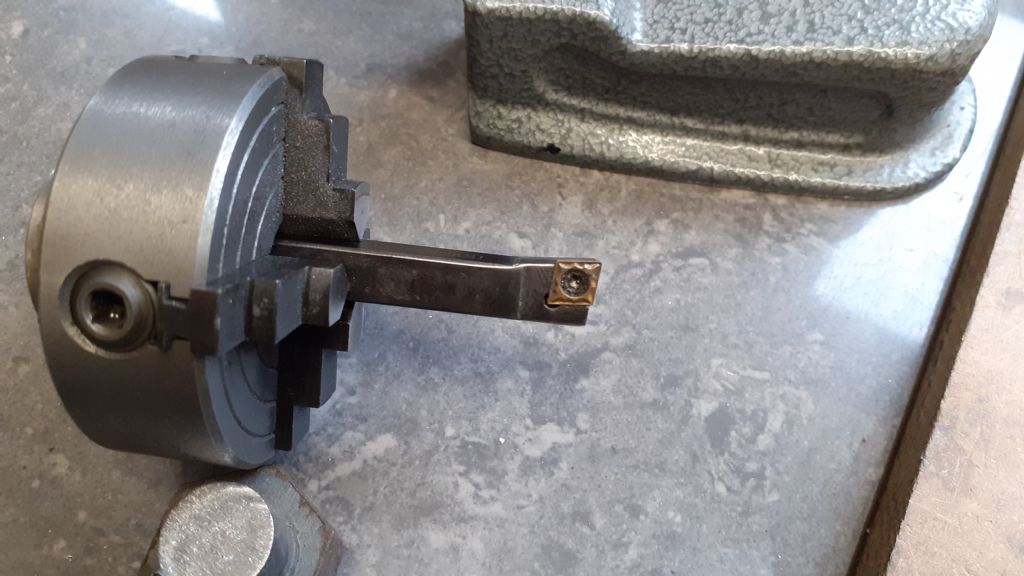
                  back to the lathe and clamp it by the standard clocking that true along the lathe axis and flycut the end back to half the 5/8" thickness

                  20230304_115652.jpg

                  Job done, if you don't have a fly cutter or big milling cutter try this

                  20230304_120451.jpg

                  #636082
                  Paul McDonough
                  Participant
                    @paulmcdonough43628

                    Wow, thank you that is truly commitment to helping out!

                    thank you very much.

                    #636085
                    Martin Johnson 1
                    Participant
                      @martinjohnson1

                      Hats off to Jason B for ILLUSTRATING the full chapter and verse.

                      That said the standard of design on so many "beginner" designs is very poor and turns the project into anything but beginners work. Add to that castings that hardly ever include chucking or clamping pieces or sit down pieces and you have a supply industry doing it's level best to strangle our hobby. It makes me so annoyed.

                      I think JasonB might feel the same way given his re-working of old designs that are designed to be MADE.

                      Martin

                      #636089
                      JasonB
                      Moderator
                        @jasonb

                        Just wondering why it is being suggested to waste material by turning two pieces of flat bar when one could be done on it's own in the 4-jaw?

                        #636116
                        Paul McDonough
                        Participant
                          @paulmcdonough43628

                          Btw I would not have thought of putting a lathe tool in at chuck and using it like a small fly cutter

                          #636132
                          Michael Gilligan
                          Participant
                            @michaelgilligan61133
                            Posted by JasonB on 04/03/2023 13:23:20:

                            Just wondering why it is being suggested to waste material by turning two pieces of flat bar when one could be done on it's own in the 4-jaw?

                            .

                            I assumed it was to allow the use of a tailstock centre for support

                            … very wise, given the small chuck that Nick was illustrating.

                            MichaelG.

                            Edited By Michael Gilligan on 04/03/2023 17:36:53

                            #636161
                            Nicholas Farr
                            Participant
                              @nicholasfarr14254

                              Hi JasonB, OK yes there is a bit of waste but you do get two pieces to play with, whereas cutting the the bar in haft produces a bit of waste that wouldn't be any good, should the piece that has been turned to size goes wrong. I'm not saying that my idea is any better than the one that you have shown, and I understand your method, and it is a valid one, but I don't know if Paul has the equipment or the skill to do it the way you have shown. Of course with the way I've described, there is no heating involved or cleaning up once finished. Although I thought of it before reading Clive's method, using the two pieces will allow tailstock support. Now by all accounts, looking at the finished engine, it seems to me that the semi-circular piece will need a couple of tapped holes on the flat side to fix it to the base, which could be drilled easily on a bench drill before the two parts are turned together, and can be used to hold the piece in a similar manner to the way you have shown, when milling the slot. My method was only an alternative way of doing the same job, and many others my find an easier way for them, There is waste, but it's a small amount compared to videos I've seen of things milled out of solid blocks of metal. There is always a cost in any method, whether it's extra material, heating, cleaning, time mistakes, etc.

                              If Paul does it by the method I've described, and it turns out fine, he could always buy another kit and make another engine and then sell it for a little profit to put towards his next project. devil

                              Regards Nick.

                              #636178
                              JasonB
                              Moderator
                                @jasonb

                                As for wasting half the round bar by sawing it off yes but it is better than wasting it all by not using itsmiley

                                As the base and standard are going to be soldered together then there is no extra clean up with my method as it will be needed anyway and I'd be happy to do the same if it were JBWelded or soft soldered together.

                                And apart from a bit of bar for a clamp (which I have said may not be needed) and some packing no extra equipment needed

                                Did not add too many photos but my setup also allows for drilling and tapping the two holes in the base perfectly perpendicular and just about exactly spaced by use of the cross slide handwheel.

                                20230304_115743.jpg

                                But above all it ensures the base is true to the standard. other methods being suggested hope that the stitch drilled and filed slot will hold the standard truely vertical.

                                Cash could also pay for the additional materials bough devil

                                Edited By JasonB on 05/03/2023 07:23:00

                                #636180
                                Hopper
                                Participant
                                  @hopper

                                  Unless you drill and file the slot, then solder the two pieces together, then machine the flat on the round bar, either as shown in the pic above or by holding the standard in the four jaw and taking a facing cut.

                                  As with most machining, there is no end of different ways to skin the same cat.

                                  Edited By Hopper on 05/03/2023 07:37:29

                                  #636182
                                  JasonB
                                  Moderator
                                    @jasonb

                                    Exactly Hopper which you can't do if the finished bottom of your round bar is one flat face of the rectangular bar being shown. You have to hope the slot is true and that the jointing of the two parts is also true.

                                    Edited By JasonB on 05/03/2023 07:59:24

                                    #636189
                                    Paul McDonough
                                    Participant
                                      @paulmcdonough43628

                                      I do like JasonB’s solution as getting the upright, well upright was a concern of mine. My only worry is whether the 5/8” cylindrical bar will fit in my tool post.

                                      must check that today

                                      Edited By Paul McDonough on 05/03/2023 09:40:53

                                      #636197
                                      JasonB
                                      Moderator
                                        @jasonb

                                        Fingers crossed though as you are likely to need to do other milling with the lathe a simple clamp bar may be a worthwhile investment in time and material, I still have and use the ones I made for my little Unimat 3 which must be about 40yrs old.

                                        You mentioned about making a vee block from the offcut from the base, having sawn a similar bit off it is rather small and would be hard to hold for making into a Vee block. Luckily you don't need a vee block and have all that is needed.

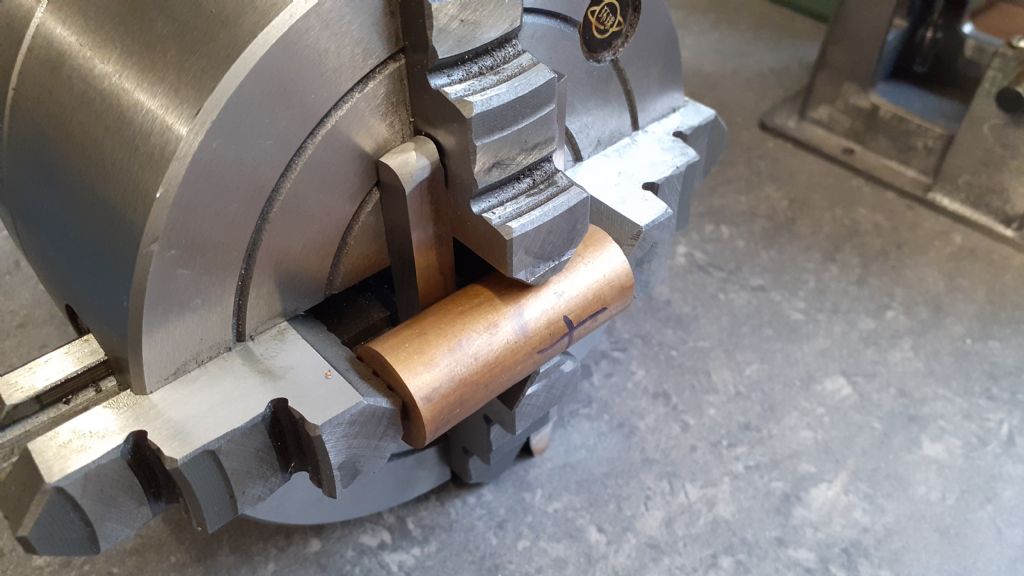
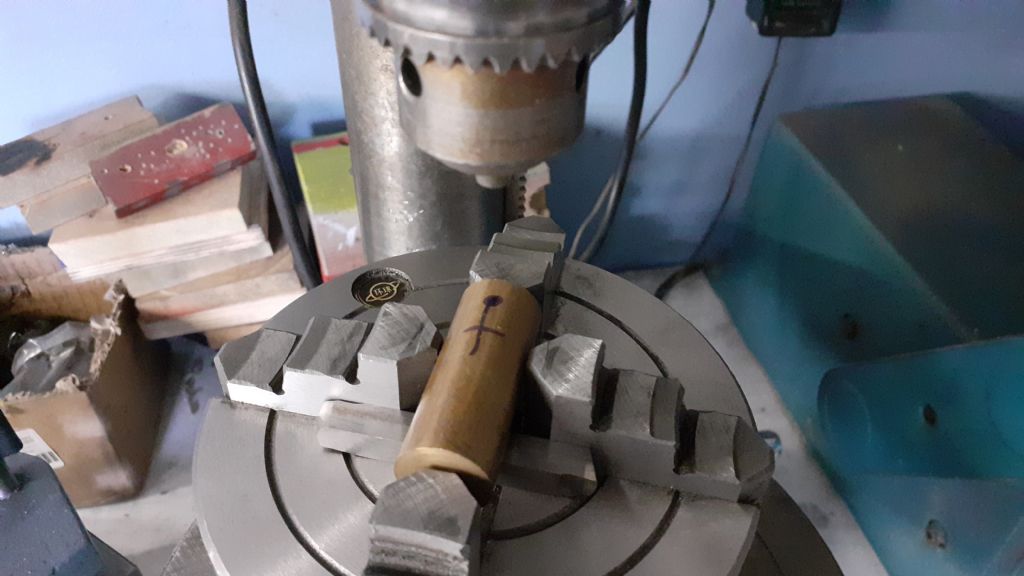
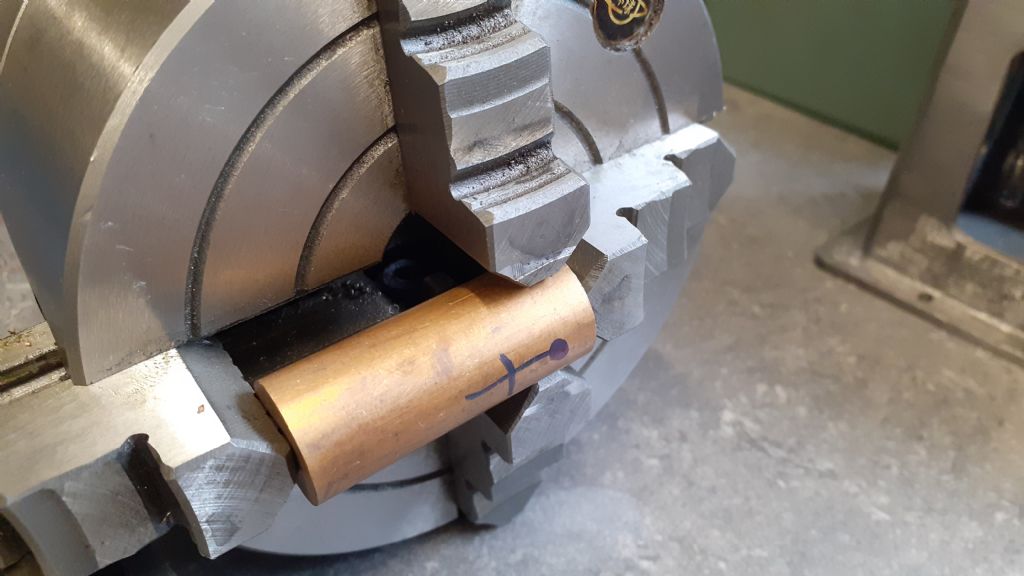
                                        After facing the ends of the supplied stock set it up in the 4-jaw using some lathe tools as packing (remove before switching on) and set it lengthways so that the lathe axis is on the point where the cylinder pivot goes. You can then face back to produce the flat surface and then drill and tap the pivot hole, it is important to get this perpendicular to the face for a good seal and doing it all at one setting will ensure it is. Guide the tap with the tailstock chuck so it does not wander and give a wonky thread.

                                        20230305_094220.jpg

                                        If you have a bench drill you can take the chuck off the lathe and move it with the work still in place to that to drill the steam passage

                                        20230305_094305.jpg

                                        If you don't and have to drill on the lathe then just move the work in the 4-jaw

                                        20230305_094529.jpg

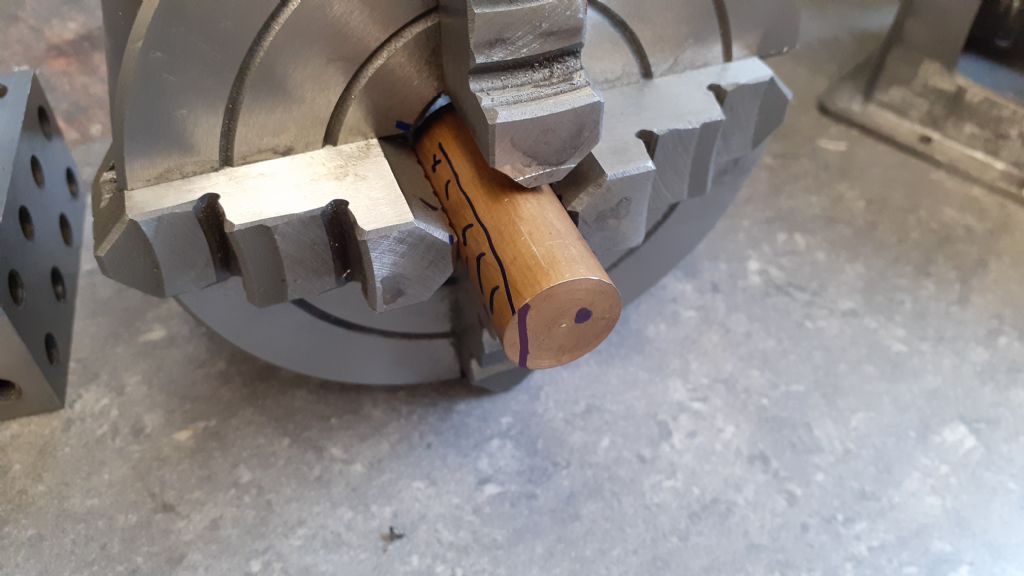
                                        It looks like the bore is offset in the stock so you can then use the 4-jaw to hold your work and set it to run true to a marked ctr position and spot drill, drill and bore or ream the hole.

                                        20230305_094723.jpg

                                        Depending on what you have to make and finish the hole I would consider making it a through hole so any lapping will be easier and then just turn and loctite in a stepped cap to close off the cylinder.

                                        #636205
                                        Paul McDonough
                                        Participant
                                          @paulmcdonough43628

                                          Ah yes I spotted this challenge for later!

                                          Again thank you for your encouraging how to do it pictures, it is much more than I expected

                                          #636229
                                          Martin Johnson 1
                                          Participant
                                            @martinjohnson1
                                            Posted by Hopper on 05/03/2023 07:36:47:

                                            Unless you drill and file the slot, then solder the two pieces together, then machine the flat on the round bar, either as shown in the pic above or by holding the standard in the four jaw and taking a facing cut.

                                            As with most machining, there is no end of different ways to skin the same cat.

                                            Edited By Hopper on 05/03/2023 07:37:29

                                            Well yes but if the design had specified a bit of angle instead of half round, the OP would probably be running the engine in by now. Easy for me to say after 40 years in engineering design, not so easy for a beginner to see.

                                            Martin

                                            #639496
                                            Paul McDonough
                                            Participant
                                              @paulmcdonough43628
                                              Posted by Paul McDonough on 05/03/2023 09:40:21:

                                              I do like JasonB’s solution as getting the upright, well upright was a concern of mine. My only worry is whether the 5/8” cylindrical bar will fit in my tool post.

                                              must check that today

                                              Edited By Paul McDonough on 05/03/2023 09:40:53

                                              It did fit in my tool post and this process has now been completed, thank you for your help

                                            Viewing 21 posts - 26 through 46 (of 46 total)
                                            • Please log in to reply to this topic. Registering is free and easy using the links on the menu at the top of this page.

                                            Advert

                                            Latest Replies

                                            Home Forums Beginners questions Topics

                                            Viewing 25 topics - 1 through 25 (of 25 total)
                                            Viewing 25 topics - 1 through 25 (of 25 total)

                                            View full reply list.

                                            Advert

                                            Newsletter Sign-up