Todays update from Bodgers Lodge

Advert

Todays update from Bodgers Lodge

Home Forums Workshop Techniques Todays update from Bodgers Lodge

Viewing 25 posts - 26 through 50 (of 341 total)
  • Author
    Posts
  • #153238
    Gray62
    Participant
      @gray62

      John,

      whats the spec of the MIG wire you are using, I've got a couple of old motors here with knackered shafts so fancy having a go at a repair smiley.

      Graeme

      Advert
      #153248
      John Stevenson 1
      Participant
        @johnstevenson1

        Graeme,

        Mostly just common or garden MiG wire although I do keep one welder with some better quality wire on for things like the Bridgy rotors that are a wear item.

        Usually everything on a motor is pressed or bolted up solid so if it's all tight, it should stay tight.

        This one landed a short while ago.

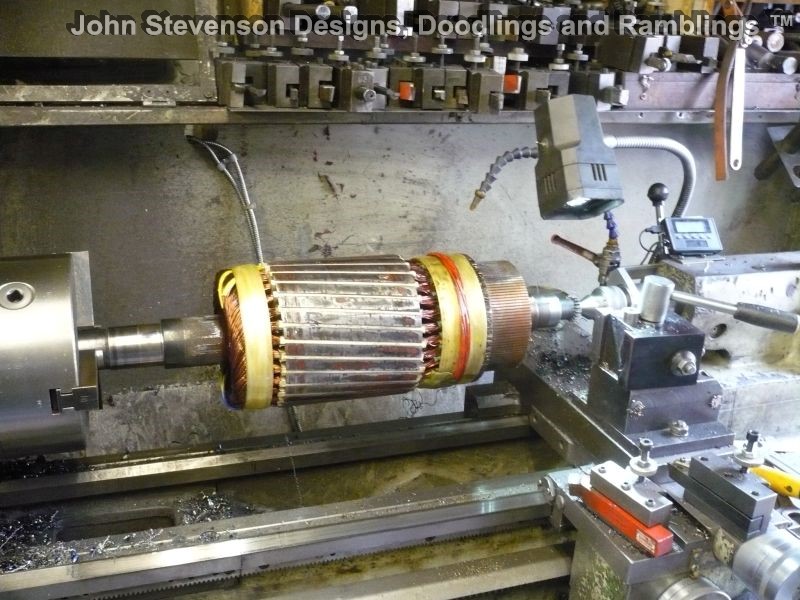
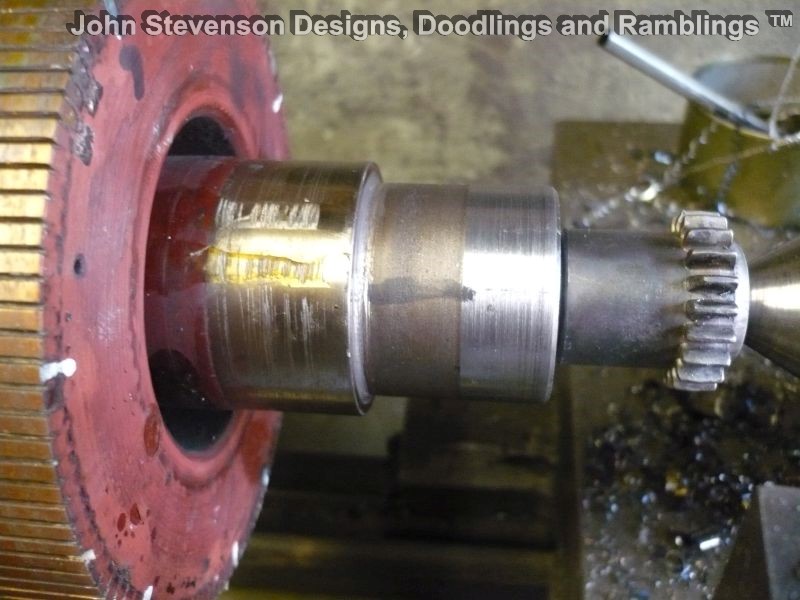
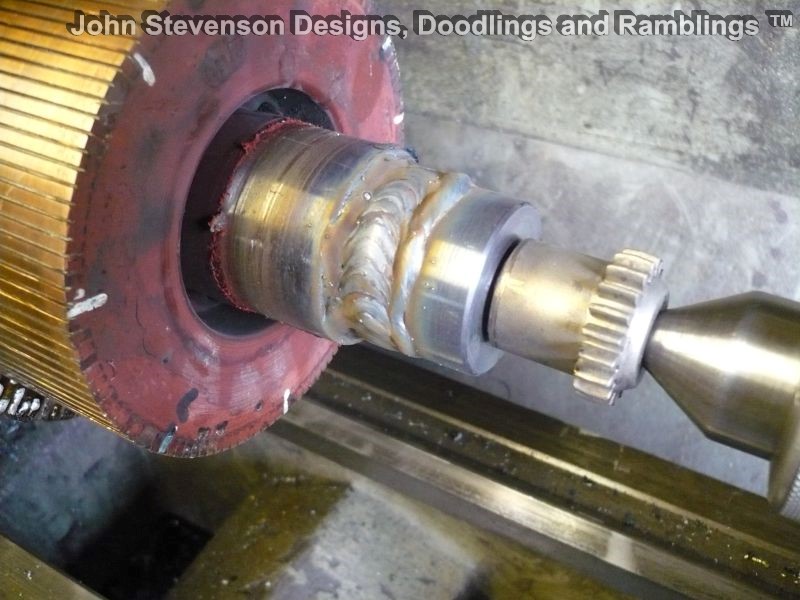
        Typical Friday job seeing as Friday 'should' be play day. Armature out of god knows what [ does it even matter ? ], both bearing surfaces worn. Annoying job this in that it's been rewound and they have only just found out the journals are down so panic stations – a-gain [ best Forrest Gump voice ]

        Worn journals.

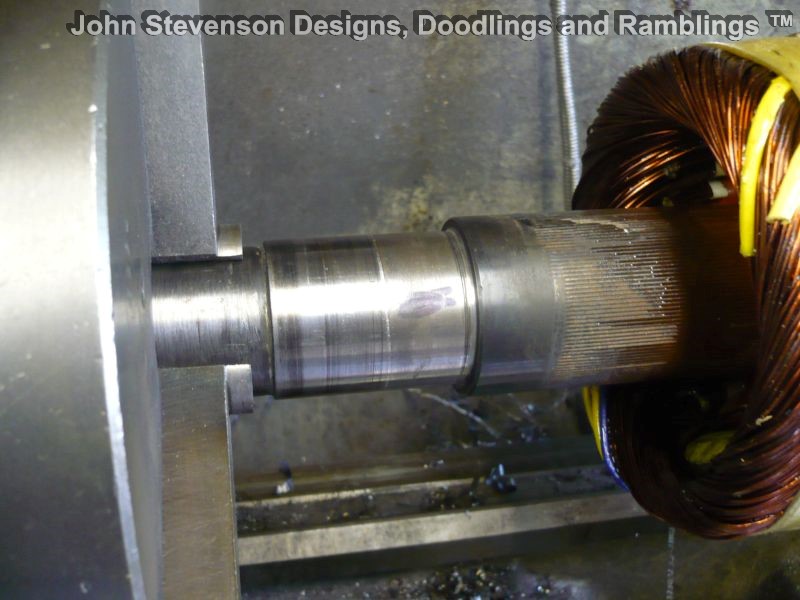
        So machine under size by about 1 to 2 mm not critical, the idea is the get the weld transition point below finished size as you can sometimes get flaking and you need some depth to the weld.

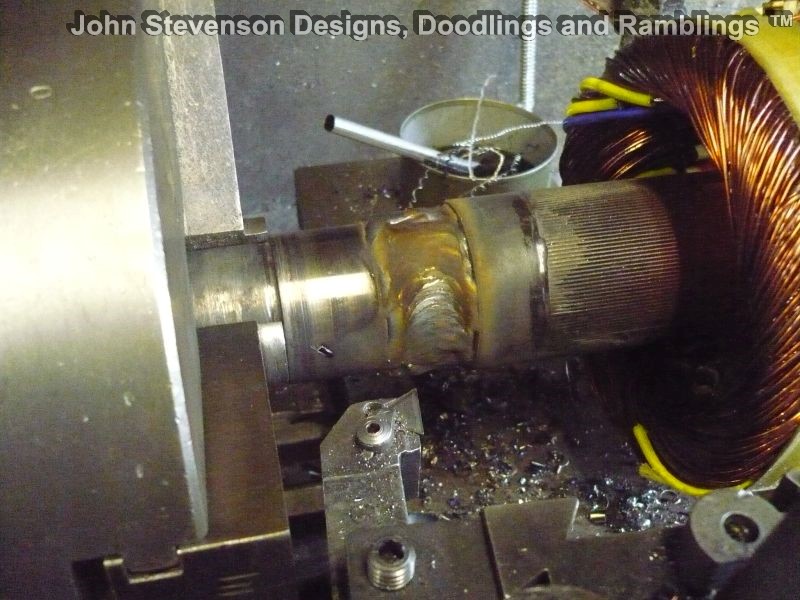
        Throw on the precision welding bench that was thinly disguised the other day as the precision grinding bench and stick some weld on. Just plain of the shelf MiG wire. I can get the spec off the box if needed but it won't be anything special as I usually bulk buy the cheapest I can get in 15KG reels.

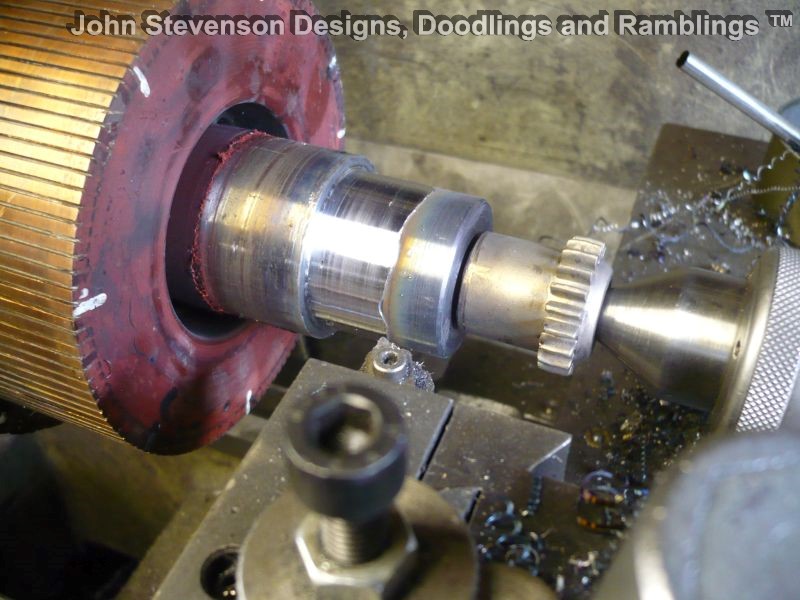
        Then skim whilst still hot. Remember the chicken, plucks better when warm.

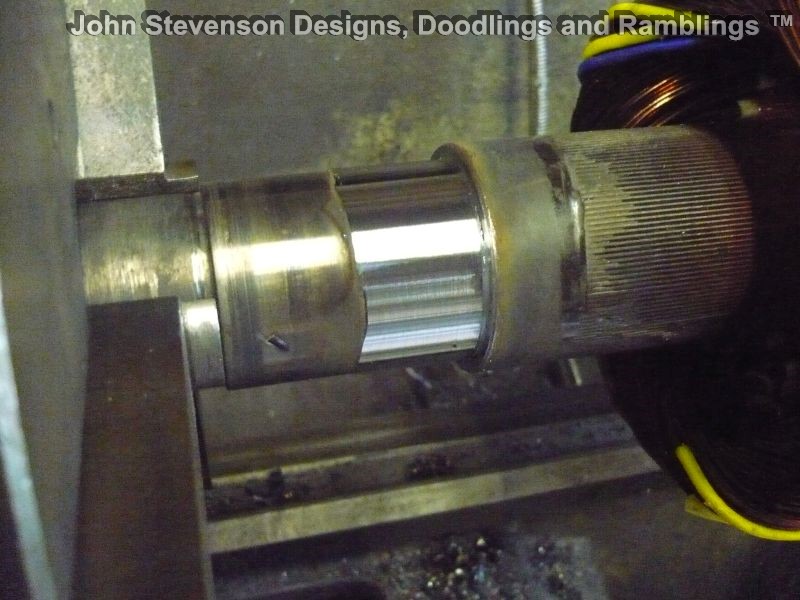
        Both these diameters are about 0.5mm up on finished size as they are still hot so came in to answer this post, get a coffee and a bite whilst it all dries.

        Doesn't take a lot of doing or fancy equipment, if anyone wants to check the pictures there is 20 minutes from first to last and probably another 10 minutes to finish off. Then wait an hour before you ring them, don't want them knowing how easy it is wink

        Seriously they are not bothered, they all used to run their own machine shops and still do for small jobs like skimming comms but all other work is farmed out as it works out cheaper in the long run.

        #153280
        Martin Cottrell
        Participant
          @martincottrell21329
          Posted by ChrisH on 23/05/2014 10:11:06:

          Now I do like this thread – a 'life in the real world' thread if ever there was one.

          Keep it going JS, all good stuff,

          Chris

          Couldn't agree more Chris, nothing more satisfying than seeing a "quality bodger" at work! Keep it coming John!

          Kind regards, Martin.

          #153382
          OuBallie
          Participant
            @ouballie

            JohnS,

            How did you discover the trick of machining the weld whilst it was still hot?

            Anyone have the tech details of why this is so?

            Geoff – Drawer organising finished! Promise!

            #153390
            John McNamara
            Participant
              @johnmcnamara74883

              hi All

              Maybe this is the reason

              At around 600 degrees Centigrade Steel softens, I would think that is the reason John S finds it easier to machine the weld hot, it is easier to cut. Also if the rotor shaft is alloy or carbon steel it is not likely to be chilled (hardened) when cooling in air possibly forming a hard skin. Near red heat will not worry the carbide cutting tip.

              If you click on the graphs below you can follow them back to the source site.

              **LINK**

              Regards
              John

              #153820
              John Stevenson 1
              Participant
                @johnstevenson1

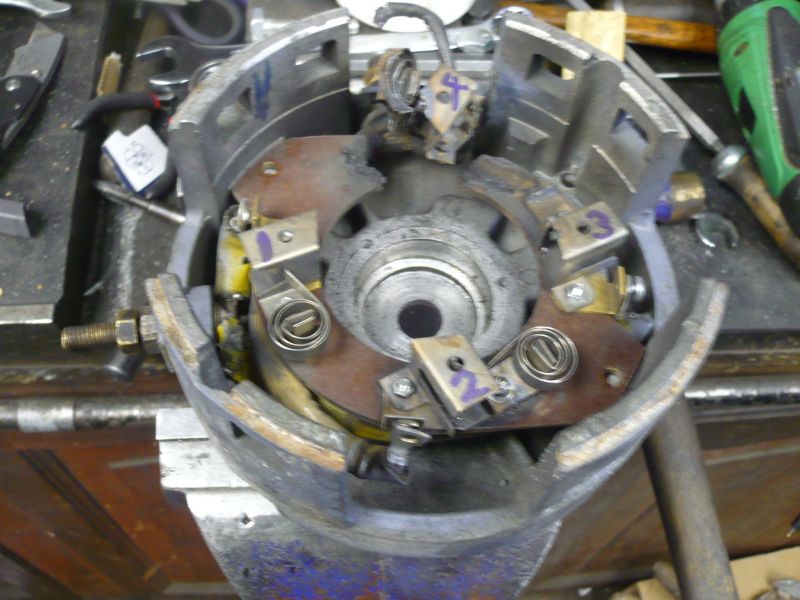
                First off my apologies from the bodgers lodge on the quality of the first picture.

                Taken at 3:42 it was eight minutes short of my mid afternoon intravenous caffeine transplant.


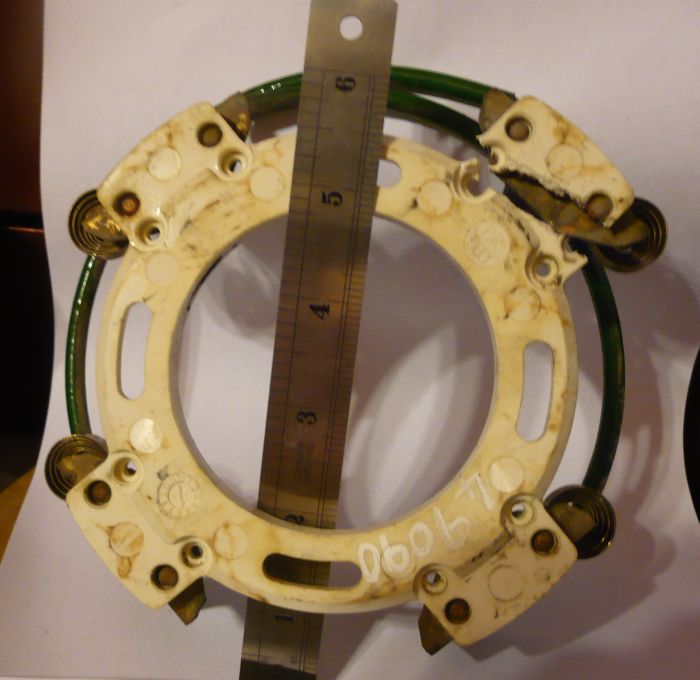
                End cover off a fork truck motor, apparently when they run these with flat batteries the volts go down but the amps increase and the revs drop so no cooling and they over heat and often catch fire.

                In this case the brush ring is toast and no 4 brush holder is well past it's use by date and no3 holder has lost the upstand for the spring. According to the rewinders a new motor is £1760


                Usually these are a quite easy job because as a rule only a new brush ring is needed as they usually have loads of dead motors to rob brush boxes off, never rings as they are always burnt out. This one isn't that beefy in that it's only 4mm thick tufnol.

                A few years ago these would have been band sawn out of a tufnol sheet then turned, milled and drilled to shape.

                Some of the more complex ones like this one.


                Would have taken a couple of hours to do.


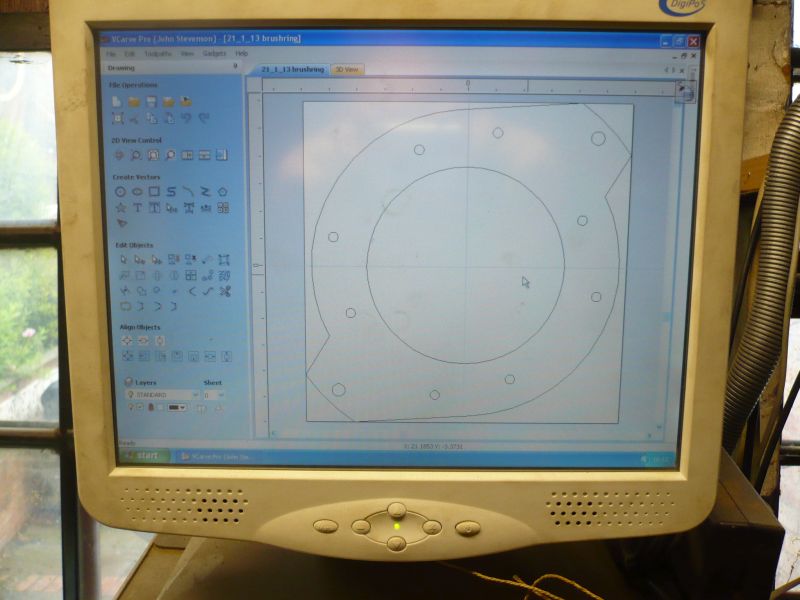
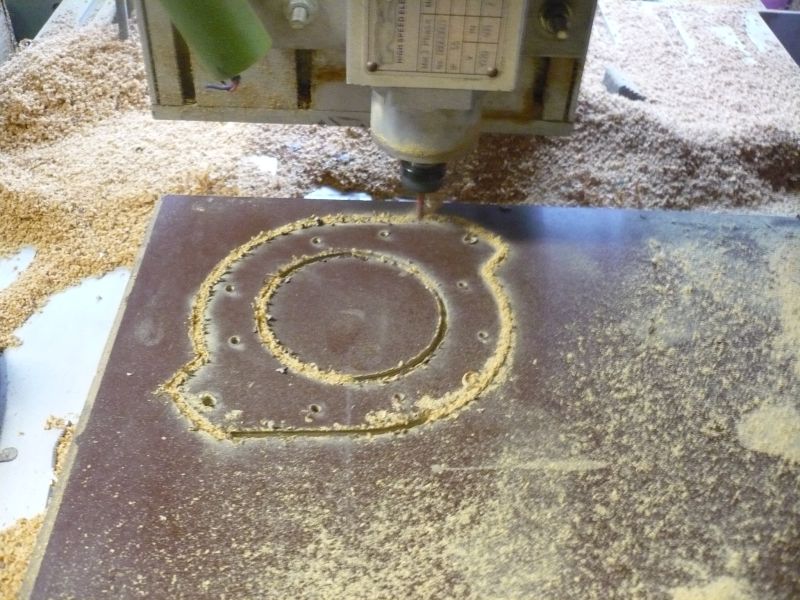
                However fast forwards to today's well equipped bodging shop and it's quicker to draw this out in CAD then get the code off the drawing for the little desktop router to spit out.


                So eight minutes later as the caffeine has chance to mainline we get a simple drawing.


                And twelve minutes after this we get a nearly finished brush ring.


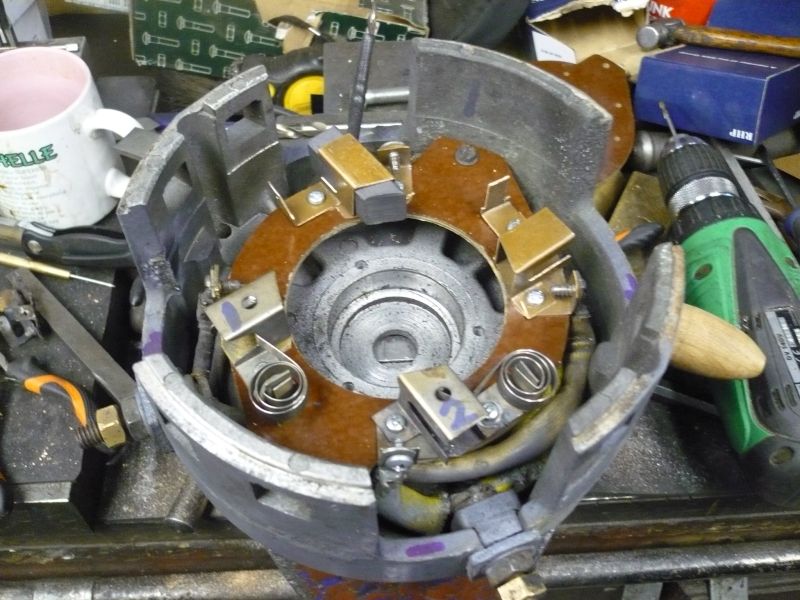
                However the finished job is still a couple of hours away because of the missing brush boxes and spring supports.


                I must admit I find sheet metal work arduous, tiresome and like trying to weld pasta. In the case of these fiddly boxes from 0.75mm brass that wants to bend everywhere but where I want it to I seem to spend more time than the job warrants.


                Anyway finished, the sample brush slides in and out easily without binding or flopping about and it doesn't look like someone has kicked a baked bean tin down the hard shoulder to Milton Keynes, [ as it usually does ]


                So another happy camper and another £3 17s and 6d in the bank with a bit of luck.

                Edited By John Stevenson on 28/05/2014 22:10:22

                #153889
                Brian Wood
                Participant
                  @brianwood45127

                  Thank you John for starting this utterly practical and informative thread. I for one have found these windows into your business world very interesting, showing as they do that what many might regard as job stoppers can be salvaged and turned around with admirable speed.

                  Please keep them coming.

                  Regards Brian


                  Edited By Brian Wood on 30/05/2014 09:35:40

                  #153895
                  Rik Shaw
                  Participant
                    @rikshaw

                    John – Looks like Brian is volunteering to be your PR manager. smile p

                    #153896
                    John Stevenson 1
                    Participant
                      @johnstevenson1

                      As long as he works cheaper than me he's got the job. wink

                      #153898
                      Brian Wood
                      Participant
                        @brianwood45127

                        What's the going rate John? I'll work out a start date as your man Oop North!.

                        Brian

                        Edited By Brian Wood on 30/05/2014 11:17:59

                        #153911
                        John Stevenson 1
                        Participant
                          @johnstevenson1

                          Friday again init ?

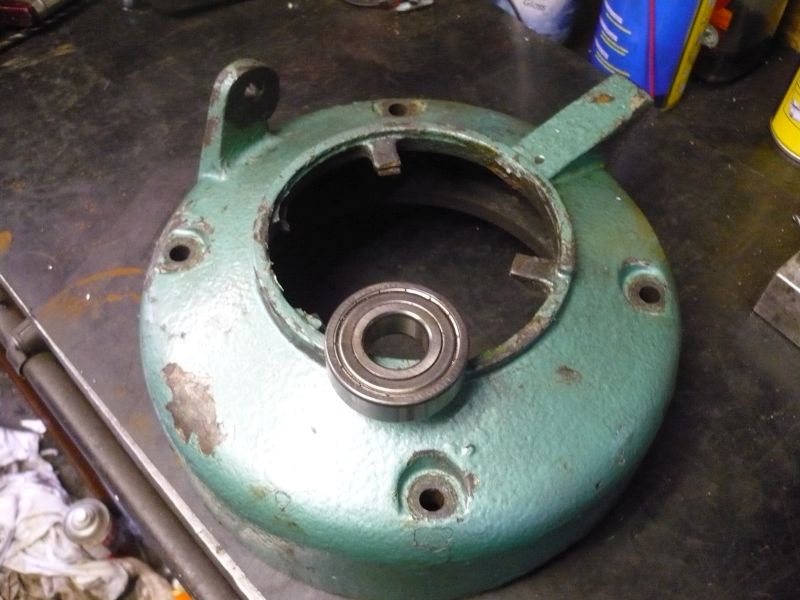
                          Judging by the build up inside on various diameters it's off some sort of pump. Should be a boos in the middle to take the bearing but it's gone walkabout somewhere.

                          Told can't use a solid plate as it needs vent slots in it.

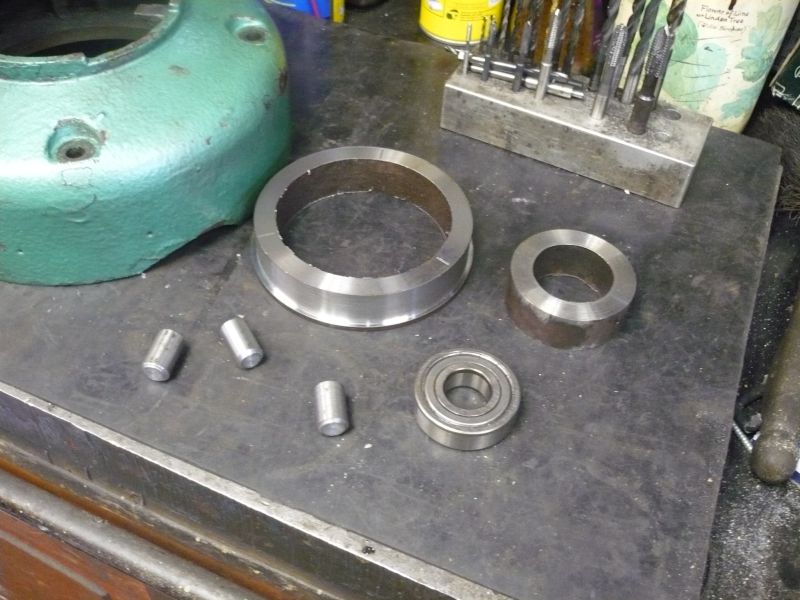
                          So raid the scrapbinium rack and get this lot.

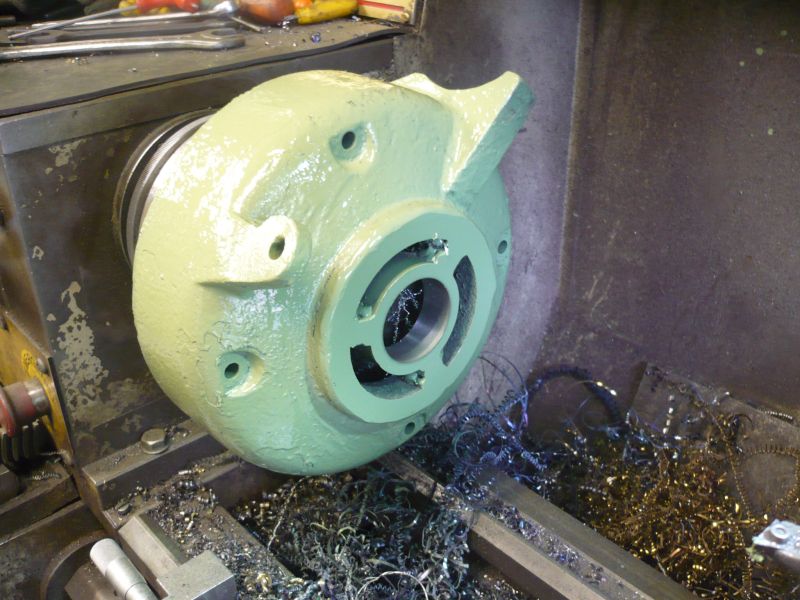
                          Followed by a bit of judicial hammering, banging, crashing and weld it where it touches and we get.

                          Just so not to upset the flat earth society it got wafted with one of Mr Warco's finest rattle cans which should also add threepence to the bill, scrub that it's Friday so we'll call it sixpence.

                          First pic timed at 12:13, last pic timed at 1:13.

                          Can I get me diner now ?

                          Brian, you up to handling the PR ?

                          #153916
                          Brian Wood
                          Participant
                            @brianwood45127

                            John,

                            It depends on what's involved—some clues please and how much you expect is needed.

                            Brian

                            #153923
                            Michael Gilligan
                            Participant
                              @michaelgilligan61133

                              John,

                              Great work on that motor end-cap !!

                              On another thread, there is mention of this BCA Mk.3 Jig Mill which has some of the worst tee-slot damage I have ever seen.

                              It would be an education for us all if you could tell how you would go about fixing something like this.

                              The Seller has suggested one approach, and I would probably do it differently; but if anyone knows the quick and effective method, it's likely to be you.

                              MichaelG.

                              .

                              Edit: added link to thread.


                              Edited By Michael Gilligan on 30/05/2014 16:06:03

                              #153926
                              Rik Shaw
                              Participant
                                @rikshaw

                                BCA bodge? Just mill 4 x new "T" slots at 45 degrees to the damaged ones and you're done!

                                Rik

                                #153930
                                Michael Gilligan
                                Participant
                                  @michaelgilligan61133

                                  Rik,

                                  I can't find the "smiley" that depicts "sticking two fingers down my throat and retching"

                                  MichaelG.

                                  #153932
                                  Neil Wyatt
                                  Moderator
                                    @neilwyatt

                                    J B Weld?

                                    devil

                                    Neil

                                    #153934
                                    Rik Shaw
                                    Participant
                                      @rikshaw

                                      "I can't find the "smiley" that depicts "sticking two fingers down my throat and retching"

                                      Look in the room where the perfectionists live! teeth 2

                                      Rik

                                      #153935
                                      Michael Gilligan
                                      Participant
                                        @michaelgilligan61133

                                        Oh well … serves me right for asking a serious question

                                        MichaelG.

                                        #153936
                                        Rik Shaw
                                        Participant
                                          @rikshaw

                                          "J B Weld?"

                                          Would you buy a second hand car from this bloke?

                                          Rik

                                          #153940
                                          Neil Wyatt
                                          Moderator
                                            @neilwyatt

                                            More seriously, you can get special sticks for welding cast iron (e.g. repairing gearbox flanges), surely that's the stuff you'd use?

                                            Neil

                                            #153957
                                            John Stevenson 1
                                            Participant
                                              @johnstevenson1

                                              OK the BCA table from my point of view.

                                              Repairing the slots with either weld or inserting new cheek pieces in will look a kludge, even with weld and most CI weld is nickel based and hardaswitchestits with the resurt it comes out shiny when the rest of the table is dull grey.

                                              Cheel pieces and a bolt on top will have screws showing and look a bodge.

                                              Yes I know it's bodgers lodge but it doesn't always have to look like one.

                                              So if this was mine and it was going to be a keeper I'd remove the table and face it off to the bottom of the slots and loose all the damage or at least most of it.

                                              Then I would turn the OD that was left just above the degree plate back about 5 or 6mm.

                                              Then I'd source a flame cut blank or sawn as I don't know what size the table is 8" ? about 25 to 30mm thick and machine it out as a recess so it popped over the original table.

                                              CSK screws from the bottom but not breaking thru the top and these would have to be planned very carefully as I would put 6 slots in and not 4.

                                              4 would be as original in a 90 degree cruciform and two would be at 120 degrees to an existing slot so you had a 4 slot layout and a 3 slot layout .

                                              I would also be tempted to but an array of tapped holes in, some in a grid pattern, some radially but togther with the mounting holes it would take some thought and planning.

                                              I feel if this was done it would actually be an improvement of the original design, at least it would be more functional and in steel be more durable.

                                              But hey whatta I know ? I'm only a bodger.

                                              #153963
                                              John McNamara
                                              Participant
                                                @johnmcnamara74883

                                                Hi All

                                                A while back I made a traditional iron picket fence for my house using 19mm plain black not deformed rebar; Reo suppliers have some of the cheapest steel available, perfect for a fence. I still have quite a few offcuts from this job. It is a bit fibrous but with a sharp tool turns well.

                                                The spears on top about 150mm high are made from cast iron by a local foundry, alas as with most foundry's in Melbourne no longer trading. The pickets had a rough 14 or so mm hole in them, plan A was to bore them to size and epoxy them on the rods. but that required a fiddly jig to centre them on the lathe and a trial found the cast material was chilled and very hard.

                                                Plan B was to weld them on. First the ends of the rods were turned down to make a reasonable loose fit in the cast hole, then a rod and spear were assembled in a jig that centred the spear and allowed the spear and rod to be turned for welding.

                                                Nickel iron rods for cast iron were used for the weld. Reading through the recommended procedure for welding with these rods I noted that the work should be pre heated or the weld may be brittle. Also that between passes the quality of the weld may be improved by hammering the weld prior to the next pass.

                                                So the procedure was to heat the spears in an oven to around 400 degrees F then assemble them in the jig and weld one pass around then peen the weld followed by a second pass. a fair amount of weld material was placed in the two passes, the rod and spear was horizontal and turned slowly as the weld metal was deposited on top.

                                                Nickel iron rods… well the ones I used from CIG did not leave a nice bead or fillet, the weld looked a bit lumpy rather than the smoothed ripples I can get with a iron rod. The last process was to grind a nice looking fillet under each spear. this was done on an 200 mm bench grinder. (I formed a radius about 8mm on one edge and rotated the rod) this formed a nice 90 degree fillet feathered to nothing under the spear and against the rod. I am not sure but I believe feathering to nothing may also reduce any residual stresses lessening the chance of a fracture between the cast iron and the weld.

                                                I built this fence about 25 years ago and so far only a two or 3 of the 300 or so spears have worked loose. A good result. The break was as expected between the cast iron and the weld not the rod. They were quickly epoxied back on and did not even need repainting.

                                                Regards
                                                John


                                                Edited By John McNamara on 31/05/2014 02:47:28

                                                Edited By John McNamara on 31/05/2014 02:50:07

                                                #153968
                                                Michael Gilligan
                                                Participant
                                                  @michaelgilligan61133
                                                  Posted by John Stevenson on 30/05/2014 23:01:46:

                                                  OK the BCA table from my point of view.

                                                  < etc. >

                                                  .

                                                  John,

                                                  Thank you for the comprehensive reply … I'm pleased to find that we are thinking along very similar lines [which gives quite a boost to my self-confidence].

                                                  My own BCA table is in near-pristine condition; but who knows what "spares" might turn up … or what disaster might befall it. Anyway, I thought it worth the question for the benefit of anyone who might be interested in technique.

                                                  Yes, the BCA table is 8" diameter [and very nicely made]; and yes, four slots can be inconvenient.

                                                  You indicate that you would remove the table and face it off in the lathe; but I would probably try machining it in-situ … using a 3/8" cutter to remove the bulk of the material, and a fly-cutter to finish. [Hopefully this would take advantage of the existing accuracy of the machine.]

                                                  I would also leave a substantial boss in the middle; firstly to support the hardened sleeve, and secondly as a register for the new top-plate. For my own purposes, I might then consider making that plate from Mic6 or similar; although that may not suit others' requirements.

                                                  As for slots: Four slots has proved inconvenient on my BCA, and three would be worse. … Your idea of combining the two sounds good but [when designing "Head Expanders" for vibration test machines] we often used four long slots at 90, with four short ones at 45.

                                                  Thanks again

                                                  MichaelG.

                                                  #154469
                                                  John Stevenson 1
                                                  Participant
                                                    @johnstevenson1

                                                    OK fellow bodgers.

                                                    Last one for a bit as got to nip over to China and show them how to bodge properly.

                                                    Got a taper lock coupling in for modification. It's off a big compressor out on site and the coupling has all broken up and really old style so they ordered a new coupling to fit the motor. Typical off the shelf 80mm bore taperlock.

                                                    They came to fit it and it's too loose and the keyway is wrong. Turns out that at some stage it's happened before and someone has turned the rotor down from 80mm to 78 to clean up and opened the keyway out from 22 to 23.

                                                    No way are they going to pull this rotor out off site to build back up to standard when noting else is wrong with it so it's mod the taper lock. 78 into 80 won't go so cheat and but a 75mm bore taper lock and open up to 78.

                                                    That's the easy bit.

                                                    23mm keyway is definitely non standard and no one lists a broach and if they did £300 for one keyway is a bit OTT.

                                                    Now we can make a tool and slot it or bodge even further and mill the slot out.

                                                    Mill an internal keyway with square corners I hear you ask ?

                                                    .

                                                    .

                                                    .

                                                    .

                                                    .

                                                    Well go on – ask.

                                                    Ok..

                                                    Bridgy Quillmaster head with right angle attachment.

                                                    Close up.

                                                    Bridgeport has some stupid shank fitting like 7/32" diameter but I have bored mine out to 6mm so it now uses standard FC3 throw away cutters.

                                                    Result, about 15 minutes to set up and then opened out very accurately because you can use the DRO, in another couple of minutes.

                                                    Also works on large internal splines.

                                                    Keep bodging until I get back.

                                                    #154483
                                                    Anonymous

                                                      You're one ahead of me John, I've got one of them there Quillmasters, but have never had the need to use it, so far.

                                                      Andrew

                                                    Viewing 25 posts - 26 through 50 (of 341 total)
                                                    • Please log in to reply to this topic. Registering is free and easy using the links on the menu at the top of this page.

                                                    Advert

                                                    Latest Replies

                                                    Home Forums Workshop Techniques Topics

                                                    Viewing 25 topics - 1 through 25 (of 25 total)
                                                    Viewing 25 topics - 1 through 25 (of 25 total)

                                                    View full reply list.

                                                    Advert

                                                    Newsletter Sign-up