Todays update from Bodgers Lodge

Advert

Todays update from Bodgers Lodge

Home Forums Workshop Techniques Todays update from Bodgers Lodge

Viewing 25 posts - 226 through 250 (of 341 total)
  • Author
    Posts
  • #211446
    Hopper
    Participant
      @hopper
      Posted by John Stevenson on 10/11/2015 14:06:28:
      Apparently 95% of all the Harleys made are still on the road.

      The other 5% did make it home..

      I thoughtthat was BMWs with their self-destructing bevel drives and gear boxes?

      Advert
      #211448
      Hopper
      Participant
        @hopper
        Posted by Martin Kyte on 10/11/2015 14:13:48:

        Goodness sake back off John, the last thing we need a flood of more cheap Iron from scrapped Harleys.

        :0)

        Martin

        Not to worry. No iron on the modern Harleys.

        #211460
        Nicholas Farr
        Participant
          @nicholasfarr14254
          Posted by John Stevenson on 10/11/2015 14:06:28:
          Apparently 95% of all the Harleys made are still on the road.

          The other 5% did make it home..

          Ah! but did they ride, or were they pushed! moon

          Regards Nick.

          #211462
          duncan webster 1
          Participant
            @duncanwebster1

            Surely 'modern' and 'harley'; constitutes an oxymoron

            #211465
            John Stevenson 1
            Participant
              @johnstevenson1

              No an Oxymoron is an idiot welder, ask Neil wink

              #211467
              Mike Poole
              Participant
                @mikepoole82104

                I don't think Harleys are about motorcycling, they are for weekend warriors with "righteous bro" pretensions.

                just my opinion!

                Mike

                #211472
                Muzzer
                Participant
                  @muzzer

                  aka Village People bikes.

                  #211493
                  Phil Whitley
                  Participant
                    @philwhitley94135
                    Posted by Michael Poole on 10/11/2015 19:18:18:

                    I don't think Harleys are about motorcycling, they are for weekend warriors with "righteous bro" pretensions.

                    just my opinion!

                    Mike

                    I'll have you know my brother has a Harley………………………………….and you are SPOT ON!

                    I will also confirm what JS already knows, the build quality is abysmal, all the "chrome" embellishments are plastic, and it had both mudguards perforated by rust at only 5 years old(and I mean like lacework) because (GET THIS) there is no paint inside the mudguard, it is bare steel (I use the word steel in it's loosest sense) Rear seat held on by an aluminium D nut with a steel bolt in it, through a hole in the mudguard. You really have to experience how bad they are to believe it. Needles to say he hasn't ridden it for a couple of years, it sits in his workshop partly in bits.!

                    #211504
                    Hopper
                    Participant
                      @hopper

                      I stick with my 1942, 1977 and 1995 models. Never any trouble with any of them. Rode the '77 on a 6,000 mile cross-country trip in 2008 and it never missed a beat. I've owned it since new and it's never let me down. I can't speak for the new ones though. Most of the spare parts and accessories are labelled Made in China so they are not "real" Harleys.

                      Edited By Hopper on 11/11/2015 02:53:13

                      Edited By Hopper on 11/11/2015 03:02:40

                      #211508
                      john carruthers
                      Participant
                        @johncarruthers46255

                        >>Rode the '77 on a 6,000 mile cross-country trip in 2008 and it never missed a beat.<<

                        Went down the shop then?

                        #211509
                        JasonB
                        Moderator
                          @jasonb

                          Looks like we now have two motorcycle threads , can I suggest anymore aboput bikes is posted in the other thread to keep this one about bodging.

                          J

                          #211510
                          Michael Gilligan
                          Participant
                            @michaelgilligan61133
                            Posted by JasonB on 11/11/2015 08:09:50:

                            Looks like we now have two motorcycle threads , can I suggest anymore aboput bikes is posted in the other thread to keep this one about bodging.

                            .

                            Trouble is, Jason … 'Zen and the Art of Motorcycle Maintenance' is perhaps the ultimate philosophical study of bodging.

                            MichaelG.

                            devil

                            #211531
                            Neil Wyatt
                            Moderator
                              @neilwyatt

                              Well I suppose Hopper's 'hybrid Harleys' raise a question about authenticity…

                              Neil

                              #211535
                              Gordon W
                              Participant
                                @gordonw

                                A couple of blokes came to buy some bits off me- they both had Harleys, full dress I believe it's called. I said " Hello, didn't know there was a ploughing match " they were not amused, no sense of humour. Back on topic- Zen and the art….. is not about bodging, it's about sensible stuff such as cutting shims from coke cans.I was just surprised the man did not know about these things before.

                                #211538
                                Mike Poole
                                Participant
                                  @mikepoole82104

                                  Switch to bike thread for further discussion.

                                  #215131
                                  John Stevenson 1
                                  Participant
                                    @johnstevenson1

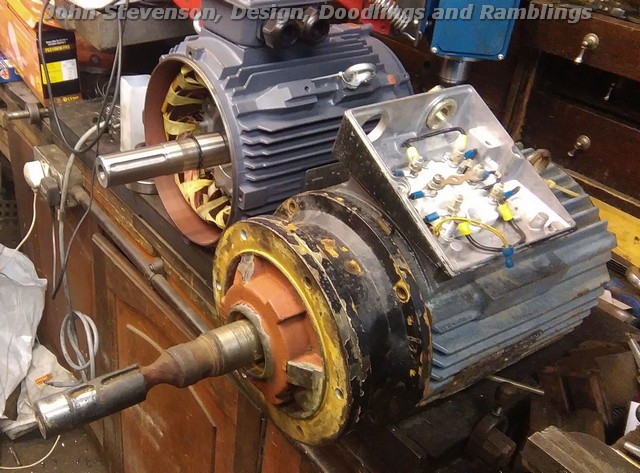
                                    Thought this one was interesting because of the amount or wear on the steel rotor but the resin pulley got off quite lightly.

                                    The rotor was nearly a 'D' shape and the bit on the pulley is what is left of a 6mm square key, that rolled over it's neatly 8mm in one direction but the soft pulley although worm and bell mouthed has come off very well compared.

                                    So bit of weld and whilst it's drying knock a top hatted sleeve up and press and screw into the pulley hub.

                                    Final turn down, polish a keyway and jobs a good un.

                                    #218195
                                    John Stevenson 1
                                    Participant
                                      @johnstevenson1

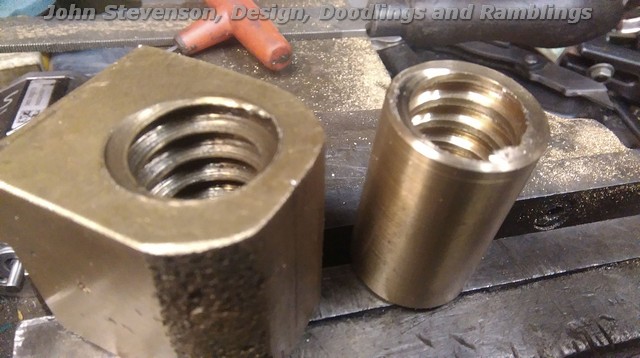
                                      Today's escapade was to make a new cross slide nut for an Edgwick lathe.

                                      The old screw was quite good but the nut was toast.

                                      Internal threads are like razors and it will soon rip out what's left.

                                      Photographed this from the wrong side really as the bottom is complex with dowels and tenons machined in, plus it's a biggish lump of bronze so being idle as it holiday time made an insert out of a bit of round bronze bar.

                                      Thread is 7/8" x 5 tpi LH Acme.

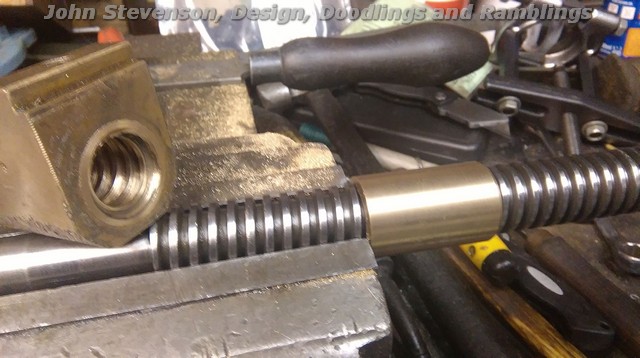
                                      So setup the lathe for imperial threading and belt a couple of nuts off, one to fit and one as a spare for the guy as it takes longer to setup than screwcut the new nut.

                                      Machine a plain diameter dummy shaft up that is a push fit in the worn nut, setup in the four jaw with dummy shaft running true and bore out. Press fit and loctite the new nut in.

                                      Knock off and go feed the dog.

                                      #218288
                                      David Clark 13
                                      Participant
                                        @davidclark13

                                        Don't forget to put the bins out.

                                        #218295
                                        mark costello 1
                                        Participant
                                          @markcostello1

                                          Have to do the same exact job when I can afford a roundtoit.

                                          #218302
                                          John Stevenson 1
                                          Participant
                                            @johnstevenson1
                                            Posted by David Clark 1 on 29/12/2015 14:04:06:

                                            Don't forget to put the bins out.

                                            .

                                            .

                                            Thursday.

                                            #218681
                                            John Stevenson 1
                                            Participant
                                              @johnstevenson1

                                              David,

                                              I remembered the bins.

                                              #218756
                                              John Stevenson 1
                                              Participant
                                                @johnstevenson1

                                                Now anyone of a delicate disposition, that's anyone who feels the Teletubbies are violent do not read the following.


                                                Over the last few days I have been doing shop maintenance on machines etc as it's one of the few times per year I can catch up.


                                                Silly things like making sure all the nuts and bolts on the mill share the same 3/4" A/F spanner instead of hunting different tools out.

                                                Same for the lathe chucks which in my case are 'A' series that bolt on. I much prefer these to camlocks as they cannot come loose on heavy interrupted cuts like laser cut plates. 8 different chucks means 32 nuts and over the time having been sourced from different suppliers has again finished up with different spanner sizes.


                                                Anyway today I started to address the tailstock problem on the TOS lathe. It's my belief that only the British can design a decent tailstock. The Chinese / Taiwanese don't stand a cat in hells chance and TOS / Eastern European are only second place behind them. The only thing TOS have going for them is, if a 10 lb casting will do,  they have to use 25 lbs.


                                                So the problems.


                                                Three things wrong with it.

                                                [1] Usual ejects the taper before getting back to zero which is just sorting the screw out.

                                                [2] Locking for the tailstock. From new this was just a long threaded rod into the bottom clamp and a nut and washer on the top which means using / finding a spanner every time and it wasn't as easy as fitting a simple handle as it needs about two full turns to clamp up because of the clamp design.


                                                The system shown was one I did many years ago and the idea pinched off Honda as that is how they operate the clutch on the C50 / C90 step thru's although they use ball bearings in between. It gives the facility to lift the rod a long way with a short travel.

                                                It's worked well for years but never been pleased with it's looks and it will be in the way when I continue to modify this tailstock and fit a lever and screw feed.


                                                [3] Biggest drawback is just that. This thing is massive and the base is over long with the problem you start off with the barrel half way out to reach the work, not made any better since fitting a cross slide DRO.

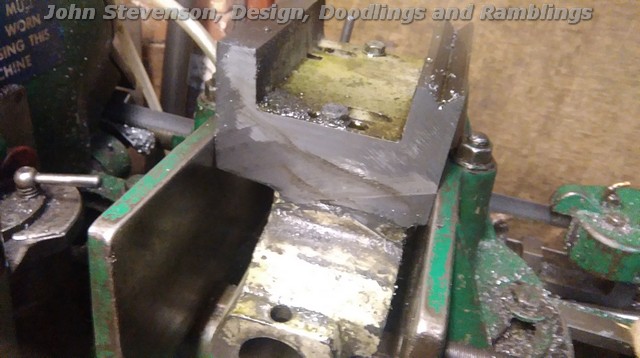
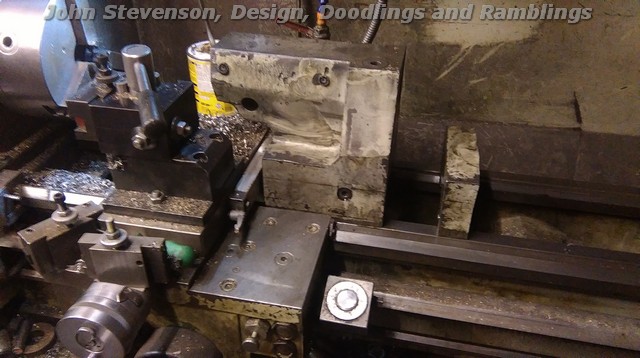
                                                Now this is where it gets messy. Measured up and Deb's Bantam has a 6 1/2" long tailstock, my Chinese lathe which is bigger than the TOS also has a 6 1/2" long tailstock. If this one is cut off to make it flat fronted and get rid of the overhang it would still be 7" long. Stripped down, no spindle, clamps etc, just a bare casting this puppy weights 33Kg !!


                                                So stick it on the power saw and cut from both sides because of the blade angle and then onto the mill to clean up.


                                                However the cut was so good and it's only a casting I just cleaned it up with the angle grinder and a flap wheel. It will need a repaint anyway.


                                                Offer it back up and jobs a good un.


                                                Gained an extra 48mm of space and a nice lump of cast iron to boot.


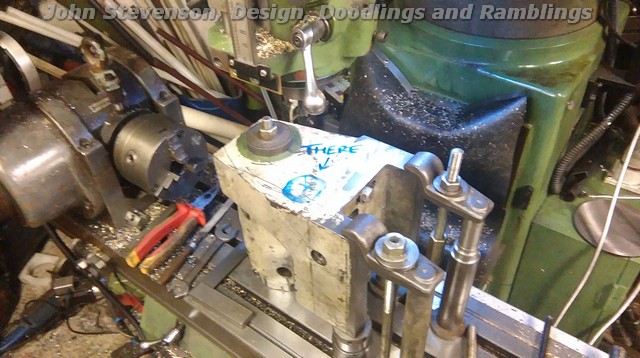
                                                Next up is problem [2], so stick it on the mill by it's nose and clamp down.

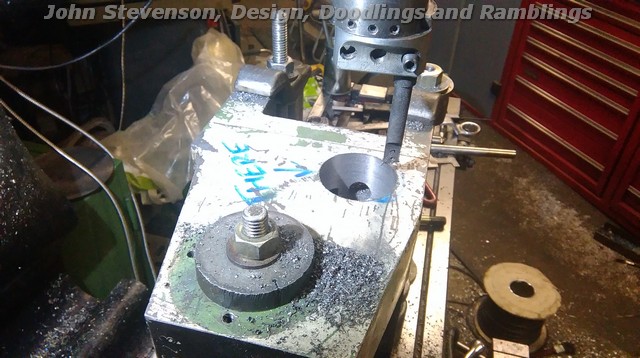
                                                Accurately mark out where the hole for the clamp stud is and start drilling and boring out.


                                                Bore out to 50mm diameter and 50mm deep because it sounds nice numbers, and remove.


                                                That's as far as I have got tonight, now took some measurements and retreated into the scribble pit ™ © ®  to work out how to get an eccentric locking system fitted into the hole.


                                                Edited By John Stevenson on 01/01/2016 14:10:28

                                                #219100
                                                John Stevenson 1
                                                Participant
                                                  @johnstevenson1

                                                  Got sidetracked yesterday on something else so picked this up today but didn't get a chance to do any scribbling so in the best laid plans, weld it where it touches.

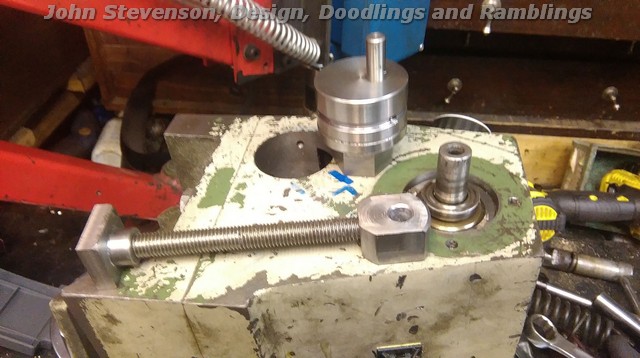
                                                  First job, new shorter pull stud and link for the top and square nut for the bottom. The bottom nut fits in a slotted recess as it can't turn, that is the adjustment.

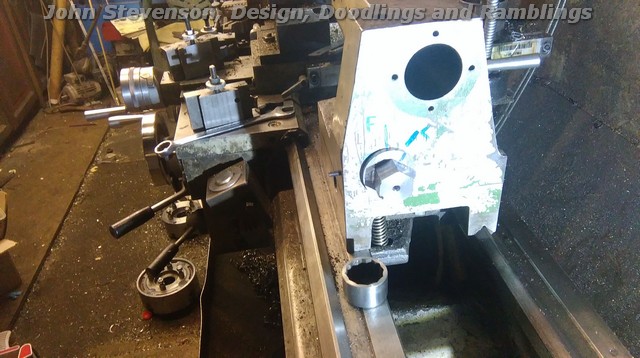
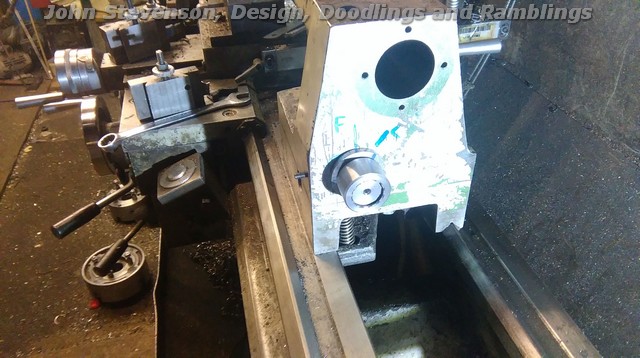
                                                  Eccentric was made out of a lump of scrapbinium ™ and turned to fit the hole, groove in for a retaining screw, 10mm hardened dowel pin fitted 10mm on the eccentric and a hexagon put on the outboard end but more on this after the other couple of pics.

                                                  When the line on the hexagon is lined with the vertical line 'F' then it's free to slide, rotate it about 30 degrees with a spanner and it's locked, tried driving it back with the saddle under power but the clutch on the feed slips so that's me one happy bunny.

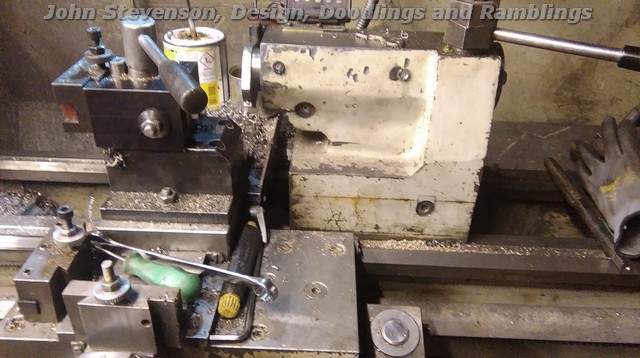
                                                  That is a cut down 11/16 Whit socket on the bed that's fit the hexagon, chose that size as I have three of them and won't miss one.

                                                  Because this has genuinely all been done with no drawings or sketches I wasn't sure where the handle would fit and at what angle it would come out if I fitted it directly to the eccentric.

                                                  So the idea is to shrink this cut down socket into a thick walled sleeve and I have 12 positions now to get it somewhere near and if I do cock up then it's a simple job to turn the sleeve off and start again.

                                                  Socket fitted to see how much room I have without fouling the handwheel [ not fitted at this point ].

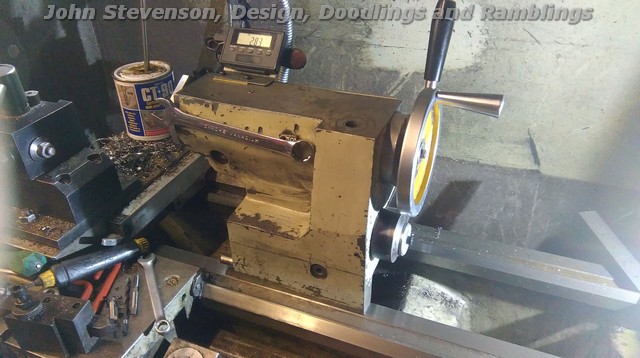
                                                  So tomorrow, sleeve to do, handle to do, refit the iGauging DRO and a stop sleeve on the front so it hits the saddle before anything else does. That will make it a far nicer machine to use.

                                                  At a later day I plan to follow on with a lever / screw feed tailstock.

                                                  #219259
                                                  John Stevenson 1
                                                  Participant
                                                    @johnstevenson1

                                                    Last lap.

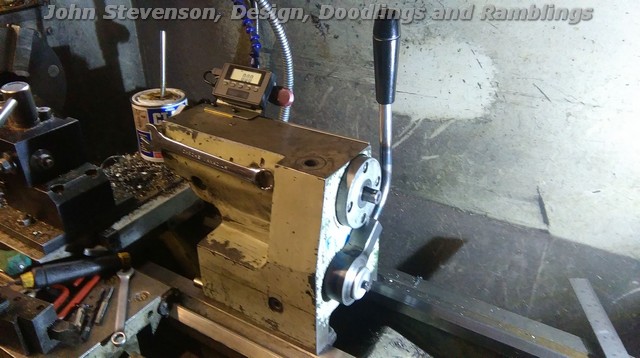
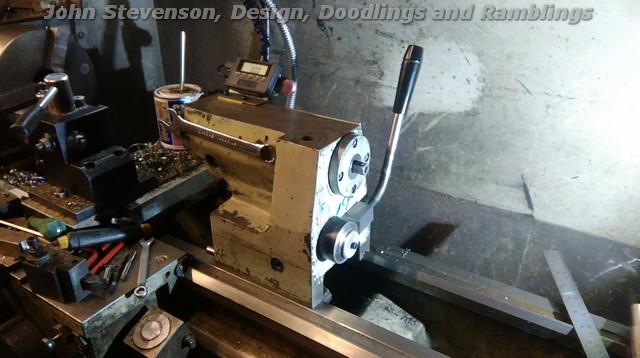
                                                    DRO fitted, stop on the front fitted so it doesn't whack the cross slide DRO and handle made and fitted.

                                                    This is the handle in the unlocked position, tailstock hand wheel removed for ease of fitting and clarity.

                                                    Handle in the locked position, no spring, dead positive in operation.

                                                    All finished working. Two very strong magnets fitted to the side to hold the toolpost and chuck spanner.

                                                    Need a plug to fit in the original clamp hole and drilled 5.8mm to hold the allen key for the quick change tool-posts.

                                                    Very pleased with this mod, should save some time in all the winding in and out but just makes it so much nicer to use.

                                                    #221252
                                                    John Stevenson 1
                                                    Participant
                                                      @johnstevenson1

                                                      Thought I'd post this one just for laughs.

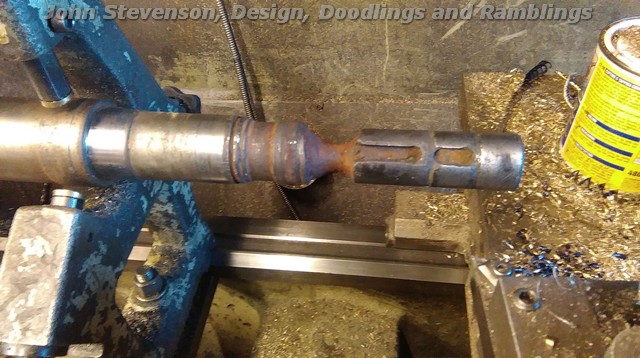
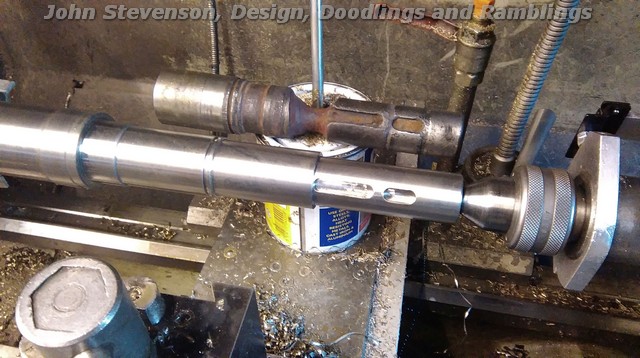
                                                      So Thursday morning get a pump in for repair and it was in a bit of a state. It supposedly pumps some sort of chemical or more than likely corrosive but it has a steel shaft ?

                                                      It has three impellers, one keyway is at 180 degrees, out of sight and behind the last impeller is a seal, that's the bit that's worn away, so guess it's leaking a tad ? wink

                                                      So the instructions are, "Make the new motor look like the old motor but without the wear and do it in stainless 316, No rush, few days as they have fitted the standby pump."

                                                      So order a lump of 10" steel 4.5" thick and it will be here Tuesday, Stainless will land Friday morning. Nice little earner without breaking a sweat.

                                                      So this morning at five past seven gets woke up in me pit with the news that the standby pump burnt out in the night and this one is now desperate and to get something out the door for late dinner. As the old pump is electrically sound, decided to repair this and still do the new one for later when the steel comes in.

                                                      So belt it in the lathe, chop the bad bit off. Drill, bore and ream a 50mm hole up the spout, shrink and press a big lump of stainless in, weld it where it touches and turn to finish.

                                                      Jobs a good un and can now try and get back to working out why me hobber is playing up, or more to the point throw all the old control gear away and fit some new updated gear in it's place.

                                                    Viewing 25 posts - 226 through 250 (of 341 total)
                                                    • Please log in to reply to this topic. Registering is free and easy using the links on the menu at the top of this page.

                                                    Advert

                                                    Latest Replies

                                                    Home Forums Workshop Techniques Topics

                                                    Viewing 25 topics - 1 through 25 (of 25 total)
                                                    Viewing 25 topics - 1 through 25 (of 25 total)

                                                    View full reply list.

                                                    Advert

                                                    Newsletter Sign-up