The Workshop Progress Thread 2020

Advert

The Workshop Progress Thread 2020

Home Forums Work In Progress and completed items The Workshop Progress Thread 2020

Viewing 25 posts - 126 through 150 (of 284 total)
  • Author
    Posts
  • #467946
    JasonB
    Moderator
      @jasonb

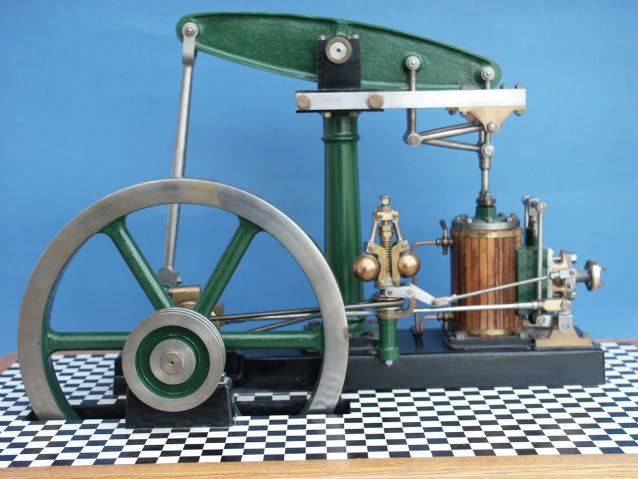
      Chris, you can do it with some white formica or even conti board, maybe even paint what you have as it looks quite smooth. Stick some fablon or similar stick backed plastic on top and then use a scalple to cut a grid of lines into it. then peel off alternate squares which will leave your mask. Now spray with black before peeling off the mask, clear lacquer the top.

      Stuart beam done here and this link will take you to a few pics of my Benson being done.


      Nice job on the undertype, you don't see them about much these days.

      Edited By JasonB on 29/04/2020 19:53:10

      Advert
      #468074
      Chris Gunn
      Participant
        @chrisgunn36534

        Jason, thanks for that, I feel it was one of your engines where I saw it done before. I never thought of doing it that way, it will make working around all the holes in the base much easier.

        Thanks for your comment on the undertype, I was lucky to find a set of part machined castings on Ebay a few years back, and even luckier that whoever did the machining was a real pro, they were not butchered. Once I finished the engine itself, it looked really good, so had to make the boiler.

        I always wanted an undertype, but when they were listed back in the seventies they were too dear for me. A set of engine castings cost a tad under £60 in 1972, equivalent to £800 or thereabouts today.

        I am also making a Musgrave right now, but the M1 non dead centre engine.

        Chris Gunn

        #468158
        JasonB
        Moderator
          @jasonb

          Lockdown has allowed me to get on with this engine to the stage where I could give it a tickle of air. Only got a few screws tacking it together, no gland packing or piston rings and the valve links only have screws as pivots not fitted pins but it run straight away as soon as the air was turned on. :cartwheel:

          Learned a lot doing this one not just with the CNC but working out the rocking valve construction as the source of drawing that were on the web has been removed so I just had to make up the details myself, did not even have to break out the collet chuck as all done in the 3-jaw except the trunk guide which was done in the 4-jaw and the micrometer did not get a look in either. Fairly happy with how it's turned out just needs some finishing touches now.

          Hope this lockdown does not go on two long as i'll be running out of subjects as this one took just under a month doing a bit most days.

          #468198
          Chris Gunn
          Participant
            @chrisgunn36534

            Jason, that looks good, I have yet to make the 2 rocking valves in the Musgrave M1, I hope mine runs first time out.

            Chris Gunn

            #468200
            Steviegtr
            Participant
              @steviegtr

              Brilliant work.

              Of course it would only have taken me about 5 years to make.nerd

              Steve.

              #468208
              JasonB
              Moderator
                @jasonb

                Thanks chaps

                Chris, who's design of Musgrave are you using? Julius de Waal, Lothear Matrian or Paul Jacobs?

                #468231
                Chris Gunn
                Participant
                  @chrisgunn36534

                  I am using Julius de Waal's drawings, so only a representation of the original, but something i could start quickly as of course no castings are needed, apart from the flywheel which was my choice to use a Stuart casting. I downloaded the drawings FOC, and modifying bits here and there. When I have a minute I will put some pictures up.

                  Chris Gunn

                  #468255
                  Ron Laden
                  Participant
                    @ronladen17547

                    Isn't that a very sweet runner, excellent. Some interesting shapes in the parts Jason certainly different. The crosshead guide/housing looks interesting was it machined similar to the entablature cylinder with faceted cuts but leaving the central rib along the top.

                    What are you thinking for the base plate certainly deserves something good.

                    Very nice.

                    Ron

                    #468264
                    JasonB
                    Moderator
                      @jasonb

                      Chris have you seen this one built from those drawings over on MEM, if not a member you will have to join a spics are posted as attachments, also look at his other posts as it is not all in one thread. I quite like the look of the engine but would probably make it to at least look like it had compound cylinders and also add the levers that work the pump.

                      That's it Ron, mad a simple rod with two stepped "nuts" to hold it by and used the same method, back side looks better as I moved the tool over a bit more from ctr line once far enough from the top rib.

                      Not quite decided on the base, a planked floor was quite common in the US where these engines originate but all the other 24mm engines have had quite a plain base. Whatever I go for it will need to have some depth for the flywheel pit.

                      Edited By JasonB on 01/05/2020 07:43:08

                      #468387
                      Dave Wootton
                      Participant
                        @davewootton

                        004.jpg002.jpg                     Since I finished work at the end of March, and as we are in lockdown I thought it was time to get some of the un- started projects on the go. I've had the castings for these for some time but house moves, work and old motorcycles got in the way.

                        The Kennet is almost finished I'm waiting on a couple of deliveries to complete, some welding gas so the wheel guard can be fabricated, and a new motor capacitor as the old one is very badly dented, now I've left work there's no more access to the lovely Clarkson, so thought I'd better get my finger out.

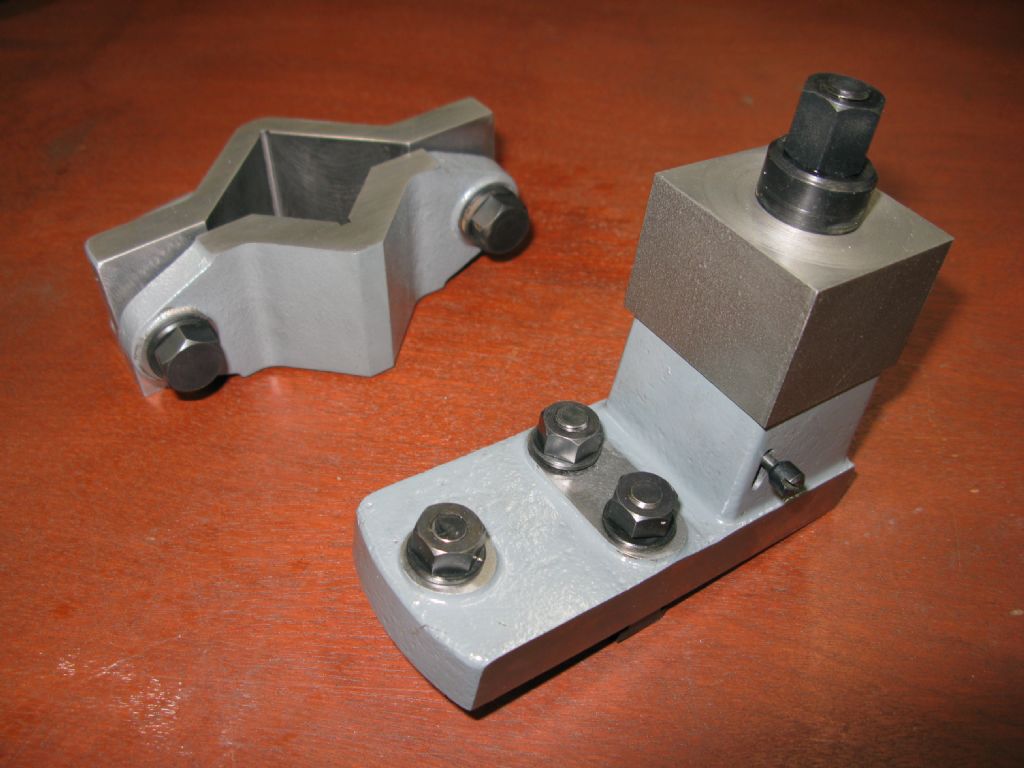
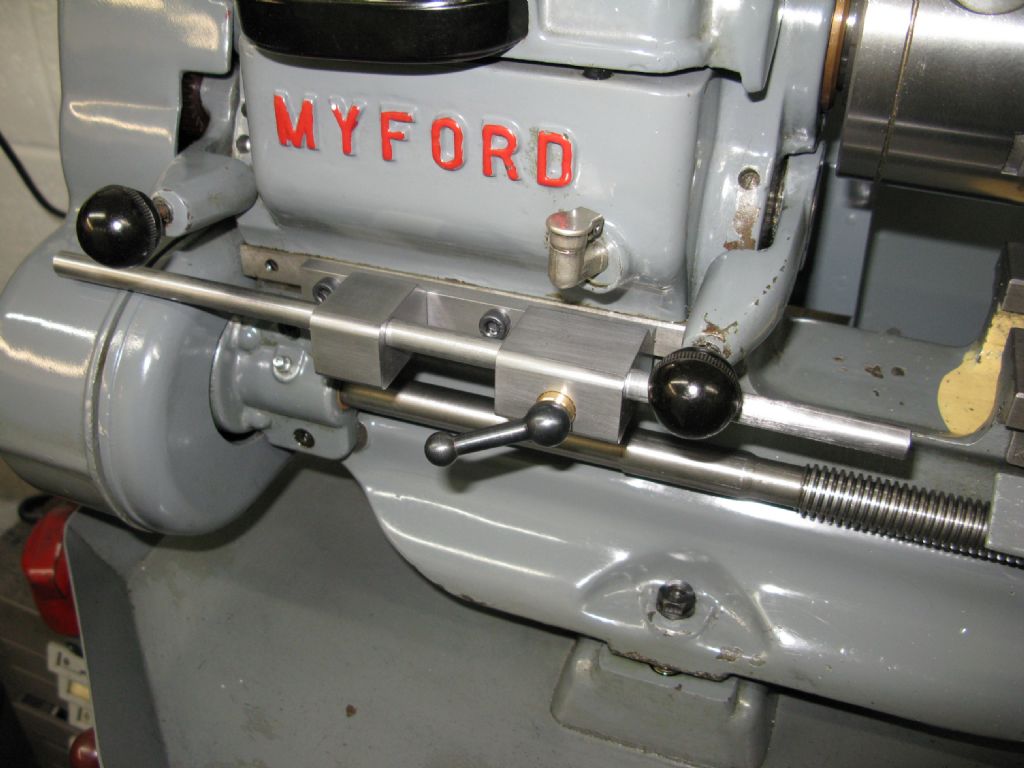
                        The Myford saddle stop is something that's been on the list for ages been very useful in making the smaller parts for the others it's fabricated from odd bits that were to hand, the rear toolpost is GHT's design for the short Myford crosslide (ML7- R) and the Keats angle plate from College Engineering supplies. The rear toolpost still needs slotting for the parting tool, but nearly there.

                        Thought I'd put these on as I'm always interested in what everyone else is making, there are some great projects underway on this site.001.jpg


                        Edited By Dave Wootton on 01/05/2020 18:08:32

                        #468388
                        Steviegtr
                        Participant
                          @steviegtr
                          Posted by Dave Wootton on 01/05/2020 18:07:35:

                          004.jpg002.jpg Since I finished work at the end of March, and as we are in lockdown I thought it was time to get some of the un- started projects on the go. I've had the castings for these for some time but house moves, work and old motorcycles got in the way.

                          The Kennet is almost finished I'm waiting on a couple of deliveries to complete, some welding gas so the wheel guard can be fabricated, and a new motor capacitor as the old one is very badly dented, now I've left work there's no more access to the lovely Clarkson, so thought I'd better get my finger out.

                          The Myford saddle stop is something that's been on the list for ages been very useful in making the smaller parts for the others it's fabricated from odd bits that were to hand, the rear toolpost is GHT's design for the short Myford crosslide (ML7- R) and the Keats angle plate from College Engineering supplies. The rear toolpost still needs slotting for the parting tool, but nearly there.

                          Thought I'd put these on as I'm always interested in what everyone else is making, there are some great projects underway on this site.001.jpg

                          Edited By Dave Wootton on 01/05/2020 18:08:32

                          Like the saddle stop. Unfortunately that is right where my quick change gearbox lives. Dam.

                          Steve.

                          #468414
                          Chris Gunn
                          Participant
                            @chrisgunn36534

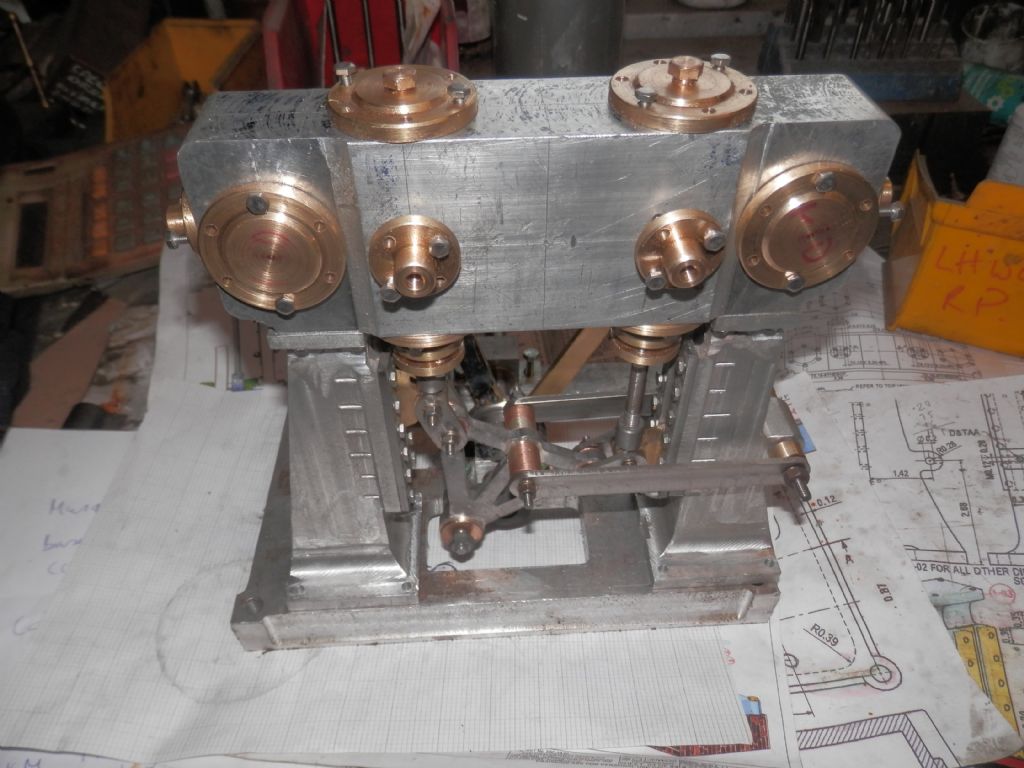
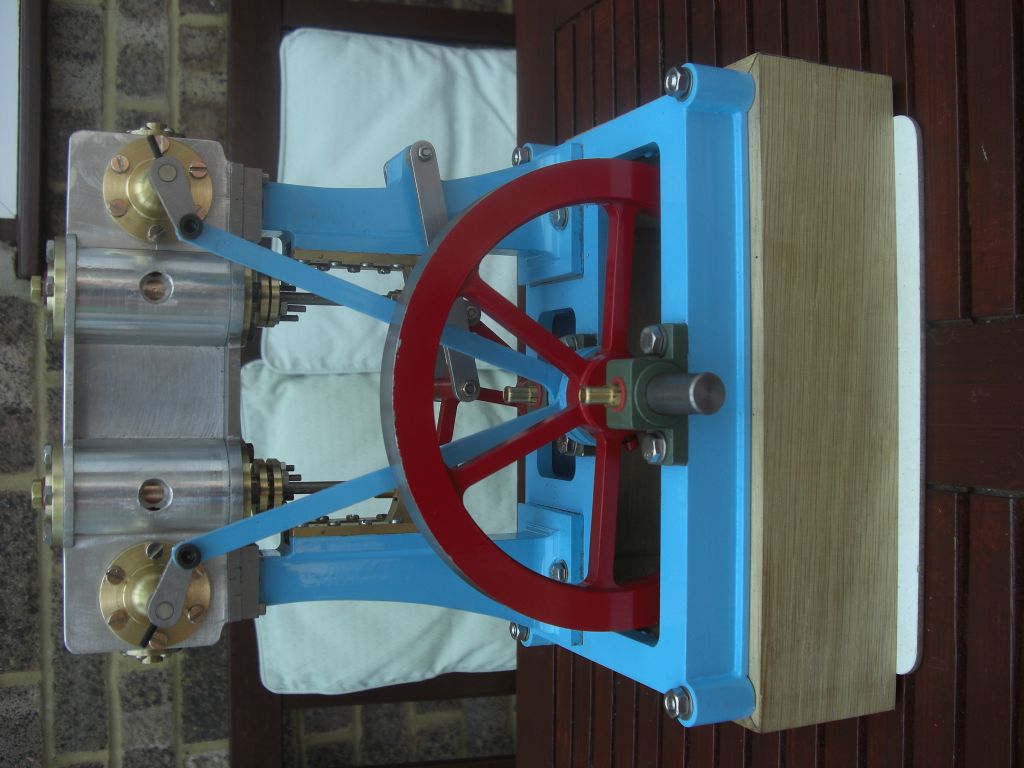
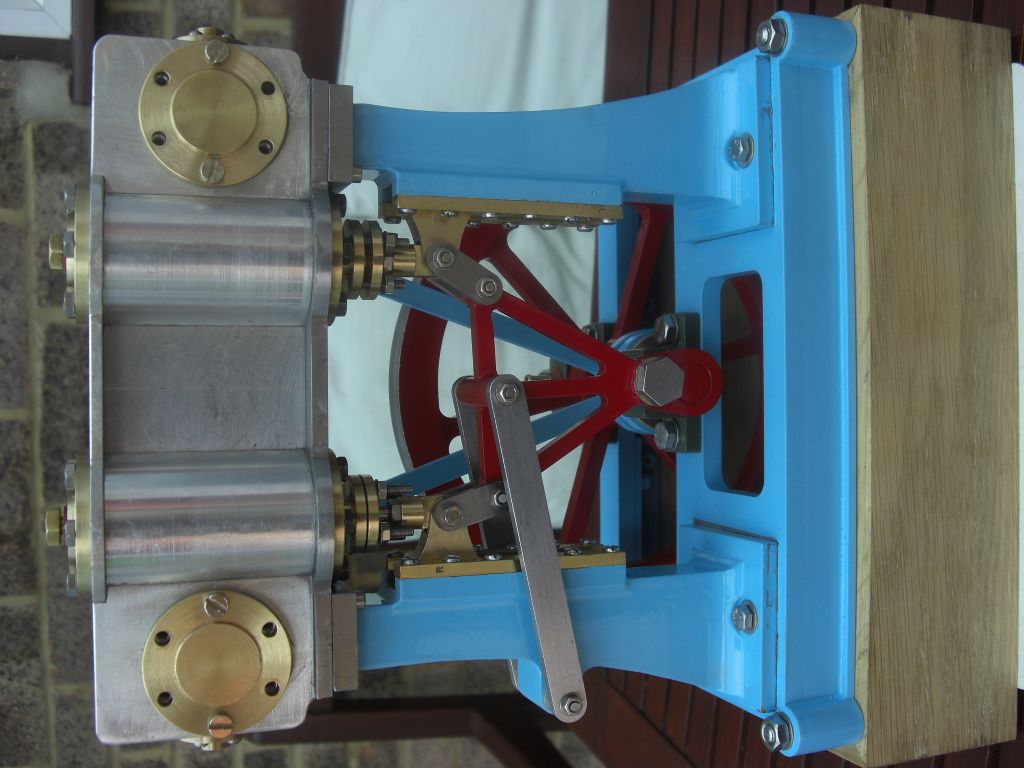
                            p5013952.jpgJason, thanks for the info on the Musgrave, I will have a look later, I have done a couple of his engines as a fill in, they are fast to do, and cheap too, as mainly built from bar stock. I started with the aluminium, and after 85 hours got the almost finished engine. p2073379.jpg

                            #468466
                            Kevin Bennett
                            Participant
                              @kevinbennett25223

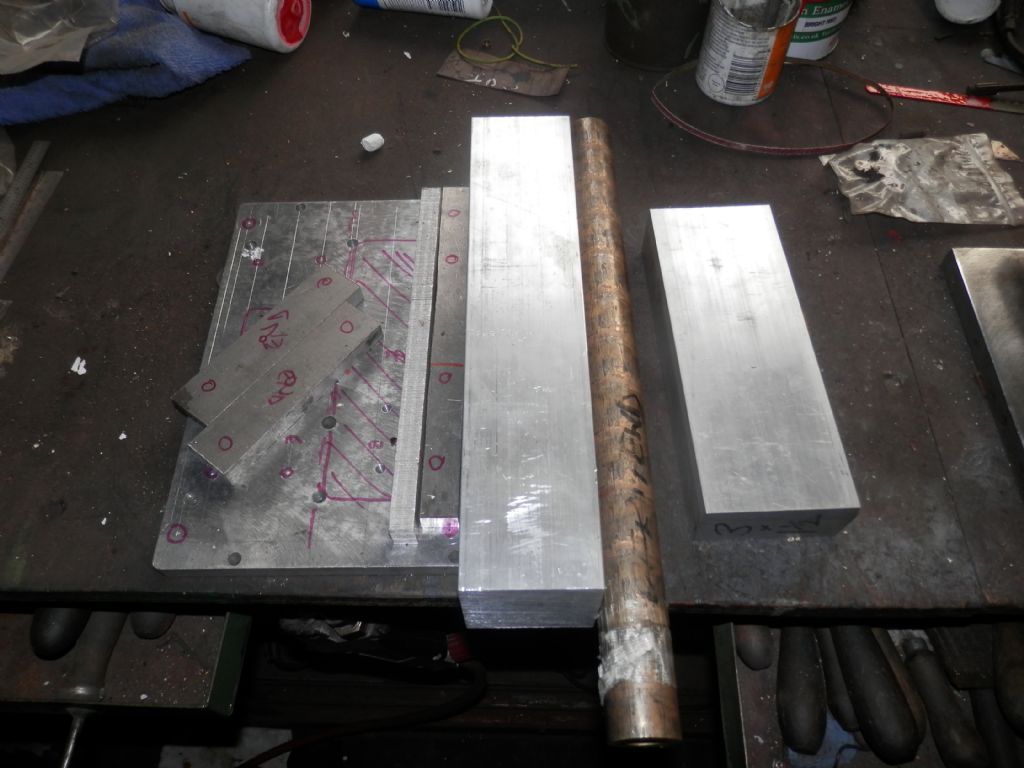
                              cimg4521.jpgI have one of these but not set up running due to another project cimg4523.jpg

                              #468495
                              Ed Duffner
                              Participant
                                @edduffner79357

                                – Swapped out my fluorescent lights for the LED sort in the shed. It's very bright but not too harsh on the eyes.

                                – 3D printed some resin parts for my brother. He's scratch building a V&W Class Destroyer in 1/96 scale, HMS Vega. Have spent hours in fusion 360 on this.

                                – Completed the installation of a DRO to the mill, finally!.

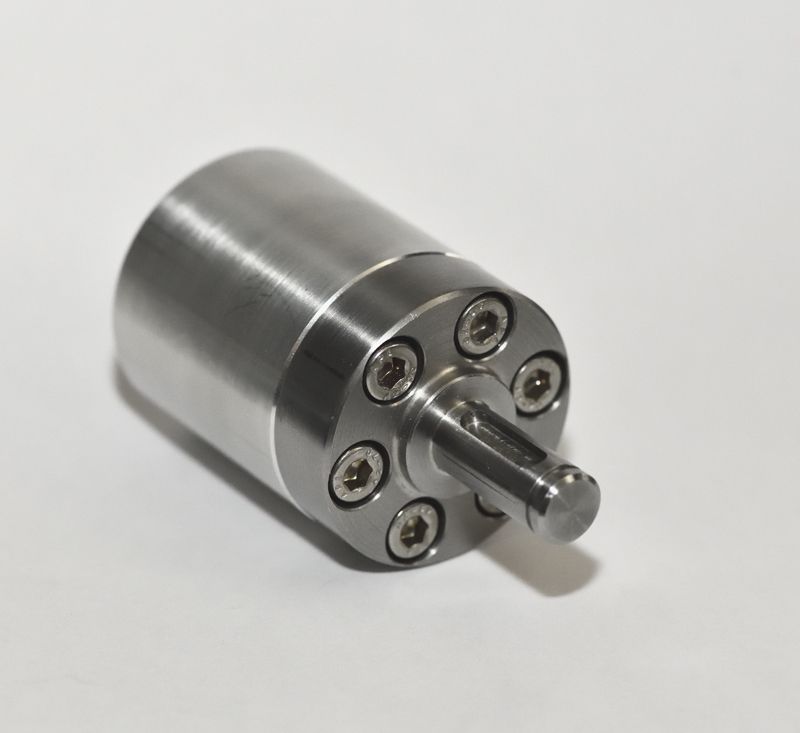
                                – Machined a custom oldham coupling to enable fitting a 3phase motor to the mill, but the idea was canned because I wouldn't have been able to remove the draw-bar blush . Then machined a stub shaft (photo below) so the motor can sit in its original place and use the machine's helical drive gear. The motor mount plate willl be next.

                                – I'm also part way through motorising my rotary table.

                                Ed.

                                stubshaft.jpg

                                #468886
                                Iain Downs
                                Participant
                                  @iaindowns78295

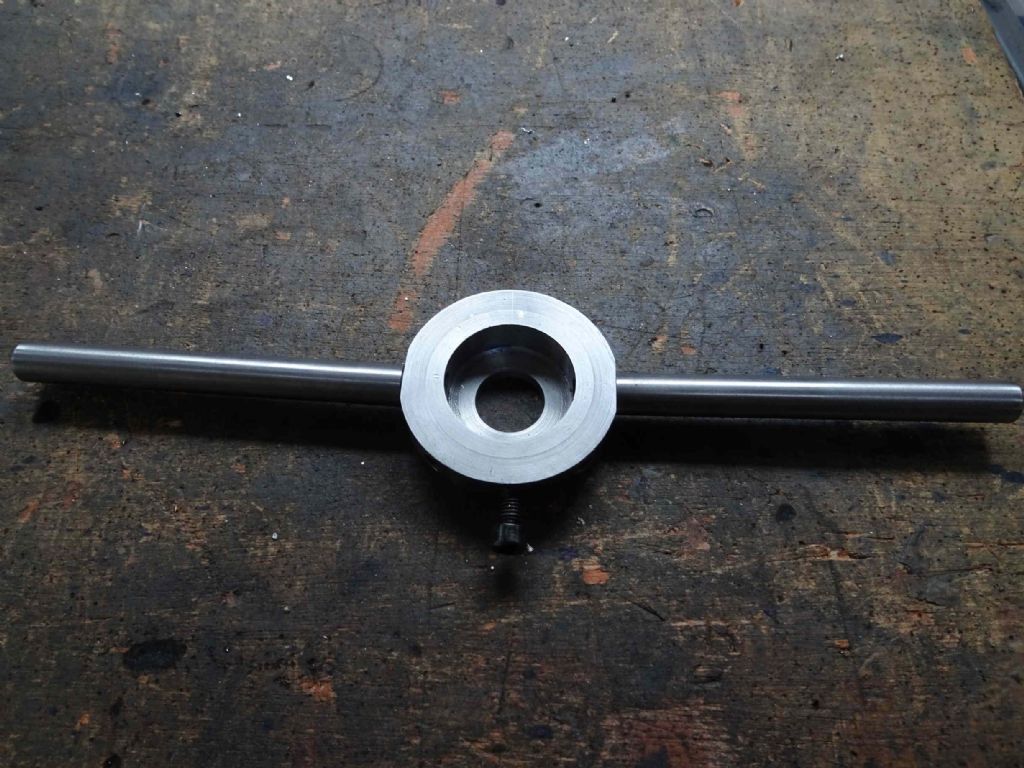
                                  I'm working on a table for my FEMI saw and needed to cut a 10mm thread in the end of a ally support bar. I have 3 (carbon steel) 10mm dies and not one of them would cut the aluminium! So pretty much useless. eBay to the rescue and a new HSS die was ordered.

                                  When it got here, I found I'd ordered a die with a 30mm diameter (I mean who knew that existed!). I pondered for a while and asked what a real engineer would do. He'd make a die holder! So I pretended to be a real engineer for a few hours and came up with this.

                                  die holder 30.jpg

                                  In the spirit of full disclosure my eyeballing of the angle for the holding screws was a bit naff – next time I will need to be a bit more accurate, but I now have two aluminium pillars with threaded ends!

                                  Iain

                                  #469641
                                  Iain Downs
                                  Participant
                                    @iaindowns78295

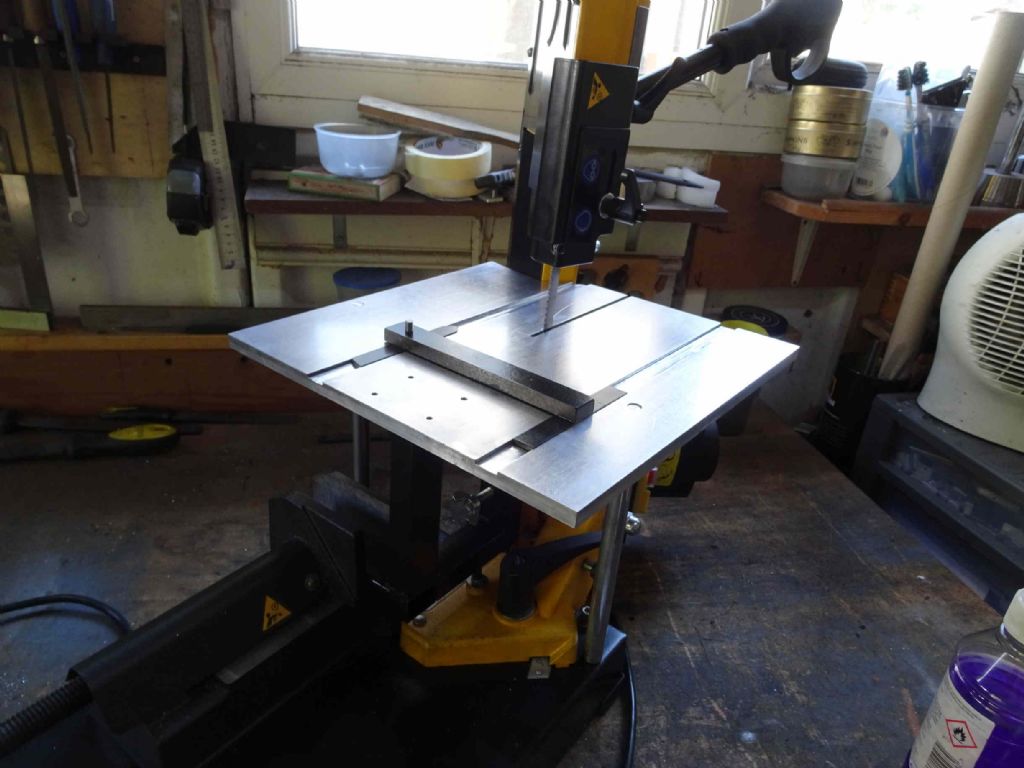
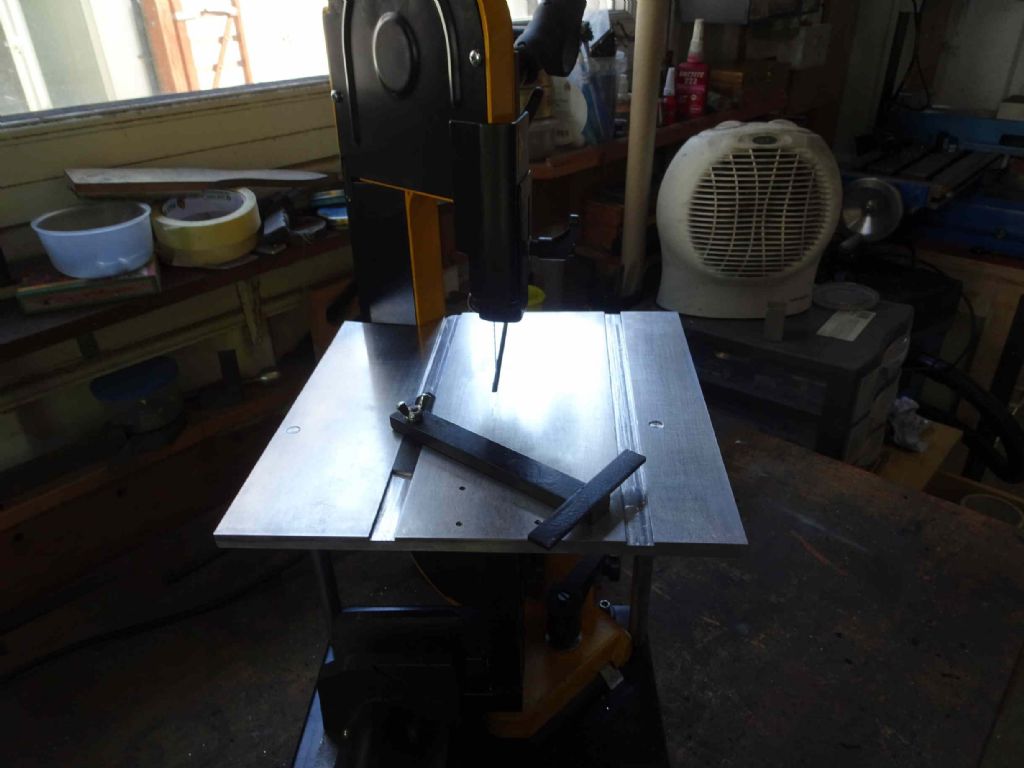
                                    One of my distraction projects has been building a saw table for my Femi Bandsaw.

                                    Finally, it's all done!

                                    saw table.jpg

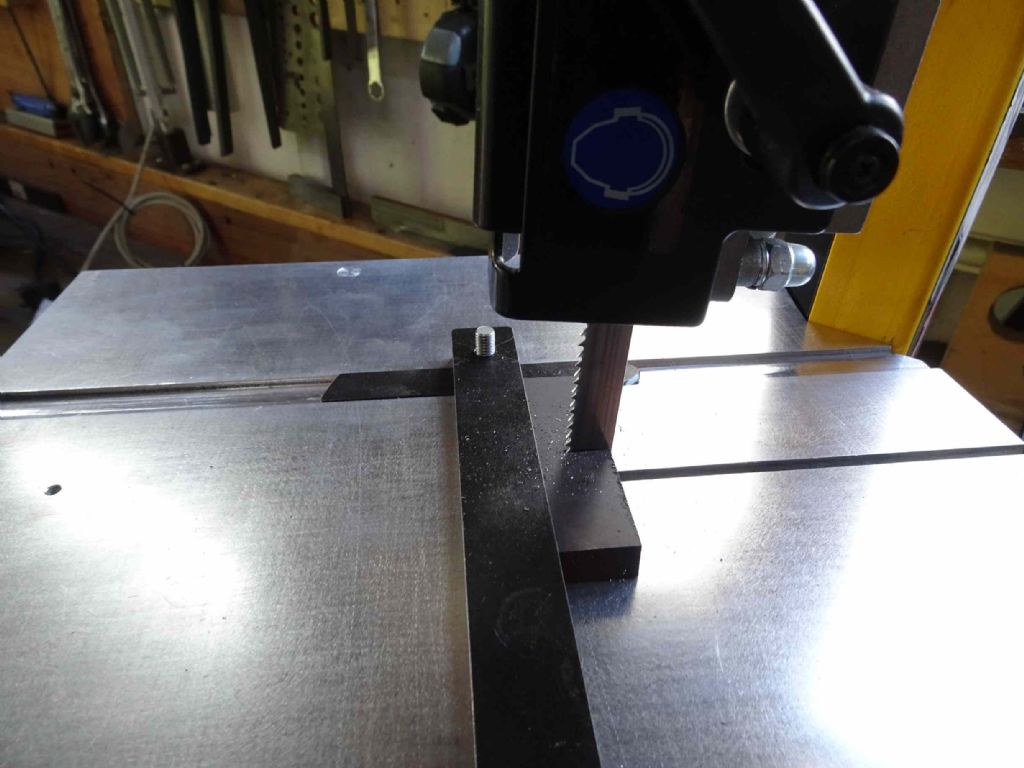
                                    The guide works satisfyingly well and the idea is that I can run it for right angle cuts or

                                    saw table 3.jpg

                                    I can arrange for an angle cut. Most likely using a new piece of 20x10mm steel, but that shows the idea.

                                    Here's a close up

                                    saw table 4.jpg

                                    In my usual spirit of full disclosure, this was one of my first real attempts at welding (the support gripped in the vice) and the job is embarassingly poor. After a few goes, though, I got enough metal there to hold it together. But I wanted to spray the support before photographing it to save my blushes…

                                    Iain

                                    #469814
                                    mechman48
                                    Participant
                                      @mechman48

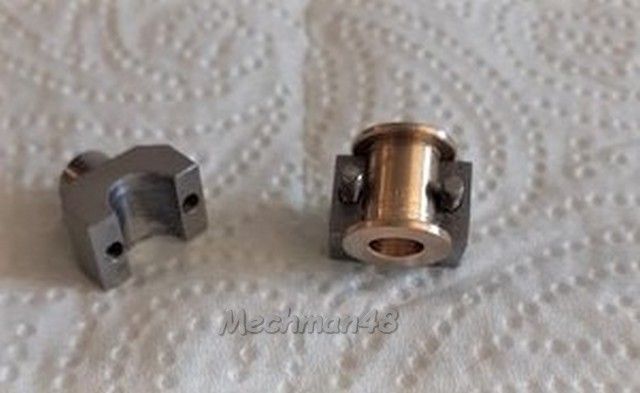
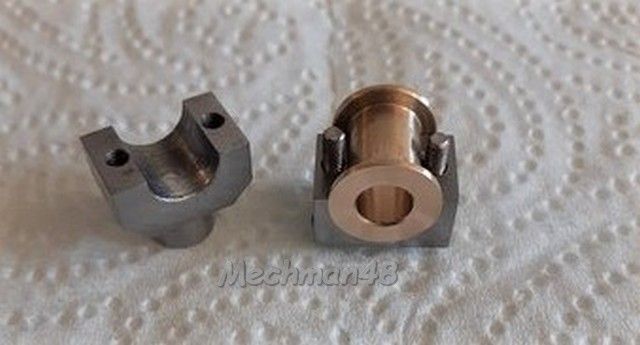
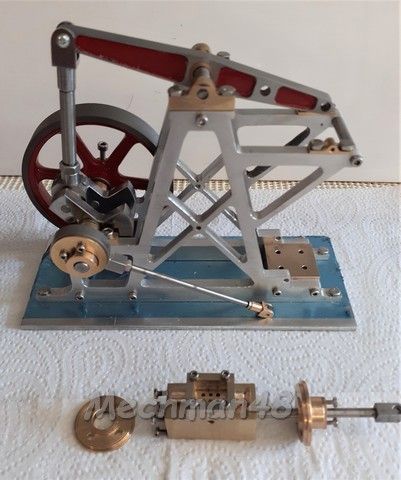
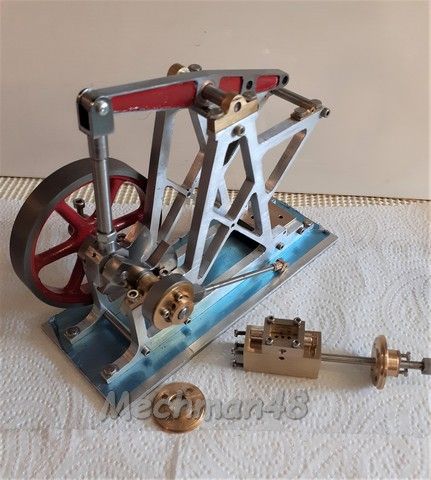
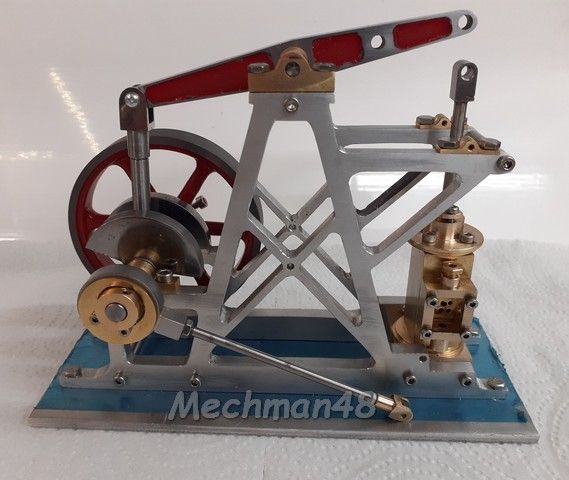
                                      A little more progress on my beam engine, machined up crankcase bearing housing & bearing..

                                      24.crank shaft bearing housing & brg (1).jpg

                                      24.crank shaft bearing housing & brg (2).jpg

                                      slowlee, slowlee catchee monkee. face 18

                                      George.

                                      #469877
                                      mechman48
                                      Participant
                                        @mechman48

                                        More of my beam engine, components completed being assembled for fit..

                                        25. completed component assembled (2).jpg

                                        25. completed component assembled (4).jpg

                                        It's getting there..

                                        George.

                                        #470924
                                        JasonB
                                        Moderator
                                          @jasonb

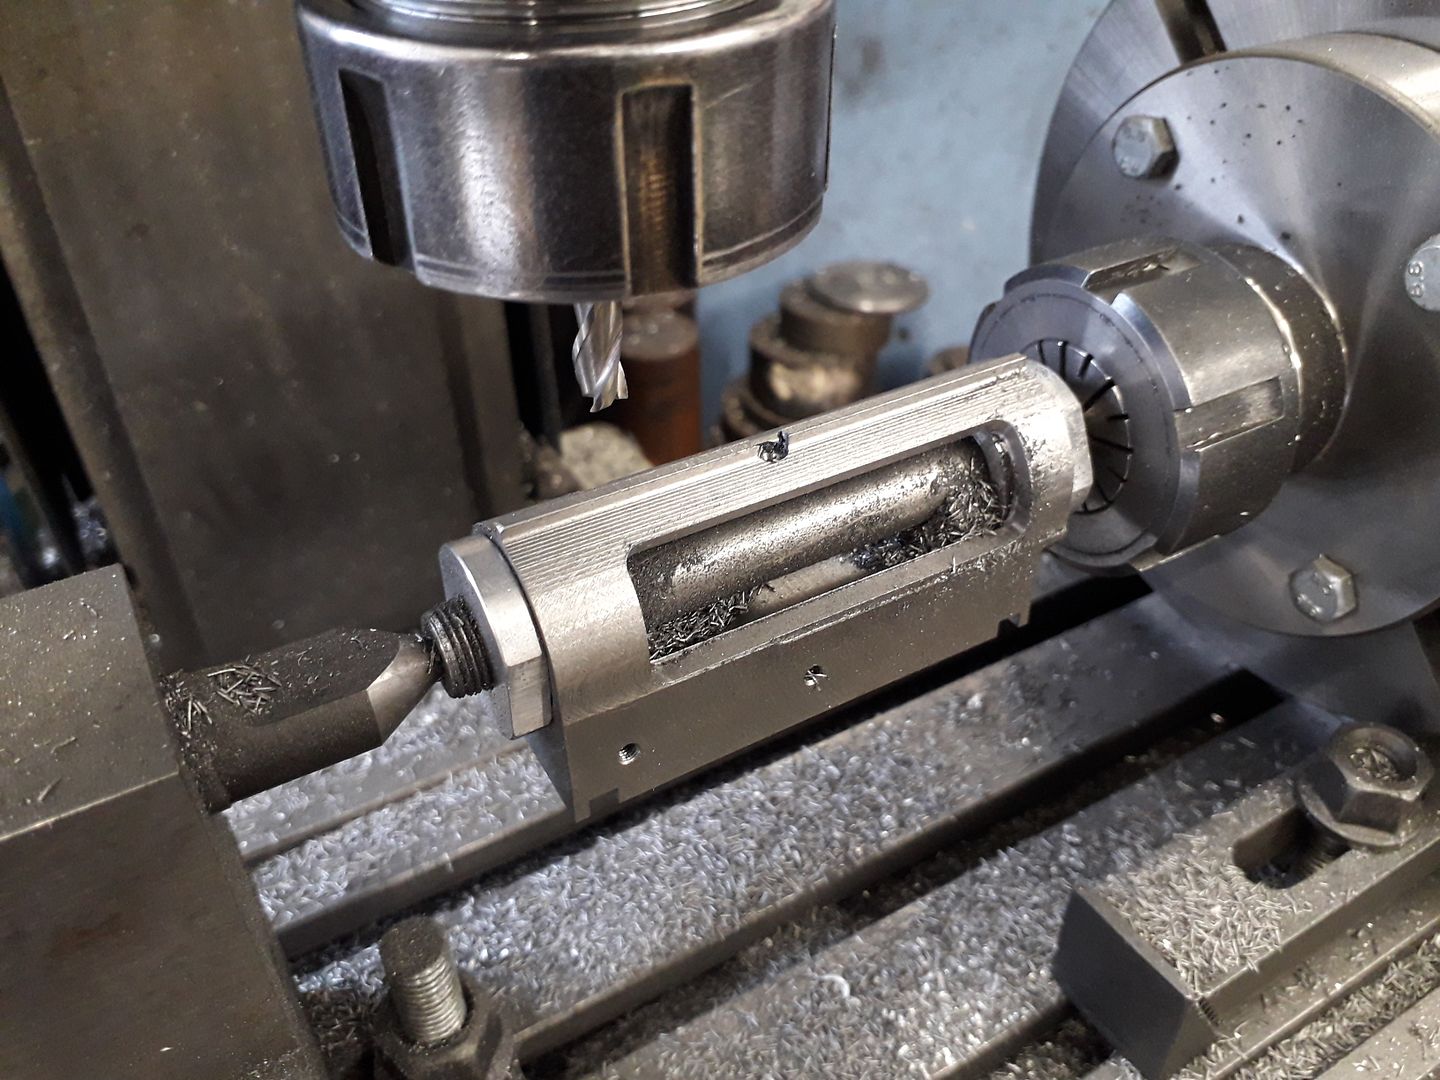
                                          Some of the finishing touches to the Filer & Stowell included the cylinder cleading, I went for the type quite often seen on American engines that have a serices of recessed grooves.

                                          Cut on the SX2.7 as I have a 6mm Weldon type colder for that which made it easier to see that I was doing with the 2mm cutter.

                                          Also made some oilers, had to make the tube first from some 6mm perspex sheet, does not polish up quite as well as Acrylic rod but will do the job.

                                          And I have made a start on the governor


                                          Edited By JasonB on 11/05/2020 16:28:07

                                          #470926
                                          duncan webster 1
                                          Participant
                                            @duncanwebster1

                                            How do you collect doe snot? wink I'll get my coat!

                                            #470942
                                            JasonB
                                            Moderator
                                              @jasonb

                                              You read too quicklysmile p

                                              #470960
                                              Roderick Jenkins
                                              Participant
                                                @roderickjenkins93242

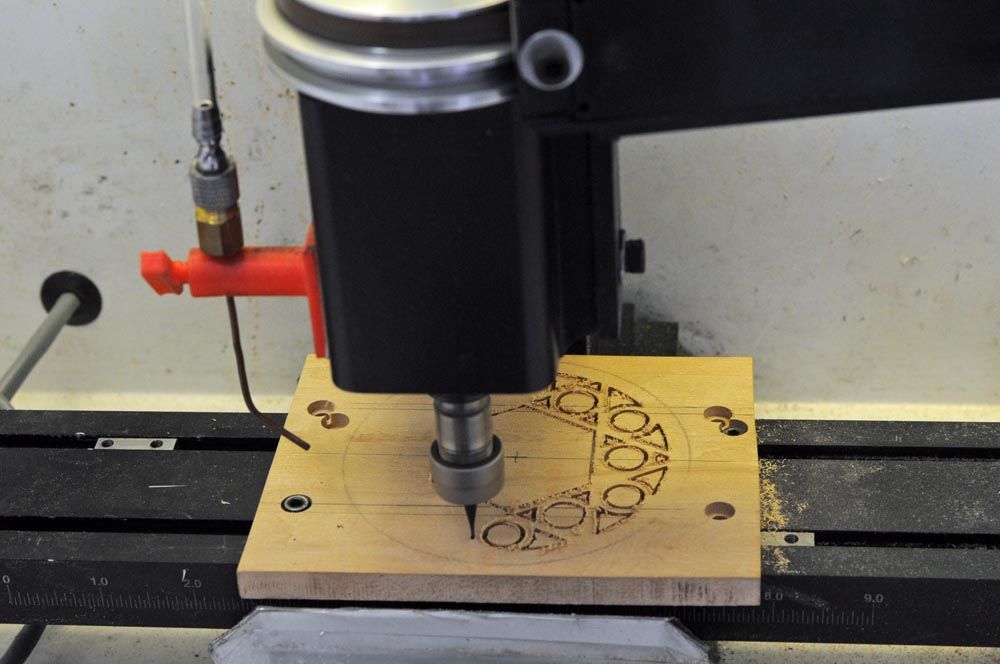
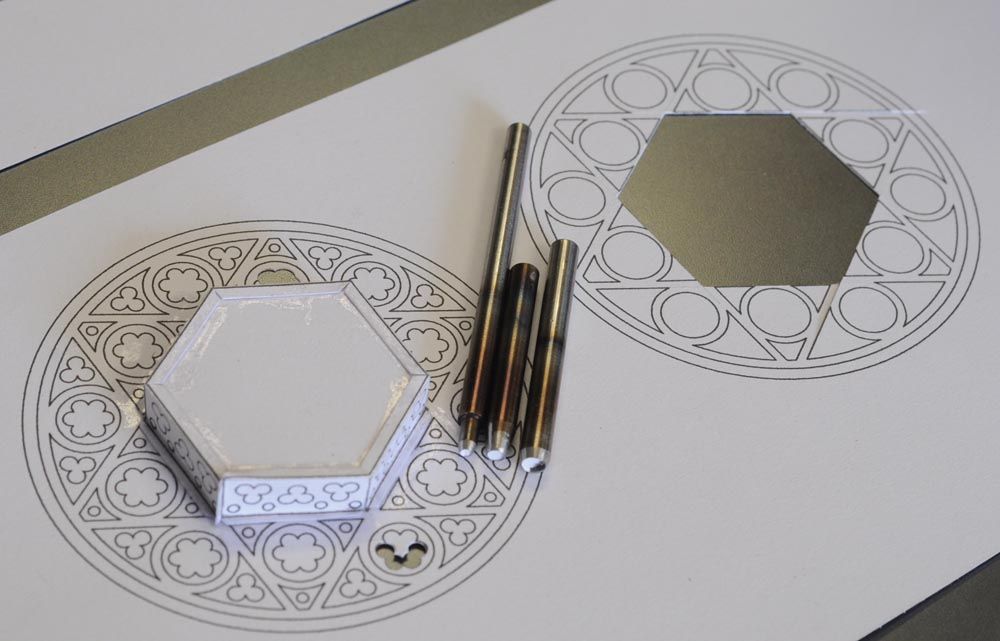
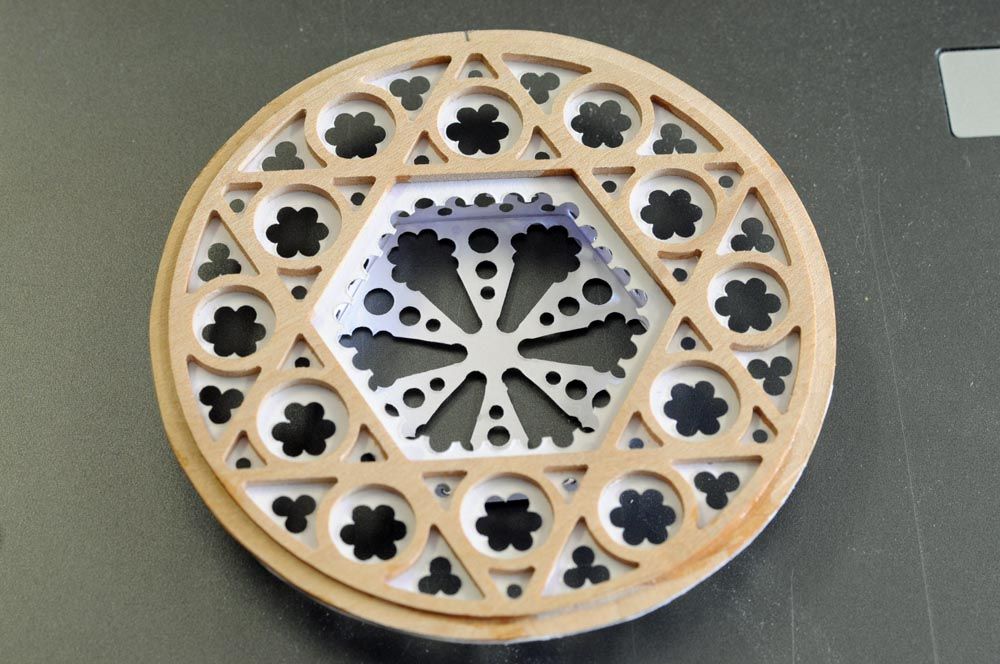
                                                Baroque guitars have very ornate sound holes, usually made from layers of parchment. This is my simpler attempt using the engineering tools to hand. I drew the design up in CAD and used the Denford/Sherline mill (now converted to Mach 3) to profile the wood frame – a piece of hard maple.

                                                bg rose 1.jpg

                                                I cut to 2mm deep using a 1mm diameter carbide 2 flute mill in four passes. The spindle only goes to 2400 rpm but it seems to cut cleanly at 300mm/min. I used my drum sander to thin the job until the pattern was clear.

                                                I printed the "parchment" pattern on to card and made some punches out of silver steel with 2, 3 and 4mm diameter holes. This was a practice go to see if the edifice could be assembled using superglue. Hats off to those guys who make wonderful engineering models from card.

                                                bg rose 2.jpg

                                                This is the result which will be glued into the sound hole from underneath.

                                                bg rose 3.jpg

                                                I'm reasonably happy with it, I don't seem to have much flair for a more artistic design. I'm going to get the 10,000 rpm pulleys for the mill since I think I will be using small tools most of the time

                                                I hope this is of minor interest,

                                                Stay well,

                                                Rod

                                                #470964
                                                Howard Lewis
                                                Participant
                                                  @howardlewis46836

                                                  Fantastic work, Rod!

                                                  Both in programming the machinery and the execution.

                                                  Not for the heavy handed like me!

                                                  Howard

                                                  #470966
                                                  mechman48
                                                  Participant
                                                    @mechman48

                                                    Super intricate work Rod. Like Howard's comment; I have hands that compare well with shovels & fingers that resemble stub drills..face 20

                                                    George.

                                                    #470969
                                                    mechman48
                                                    Participant
                                                      @mechman48

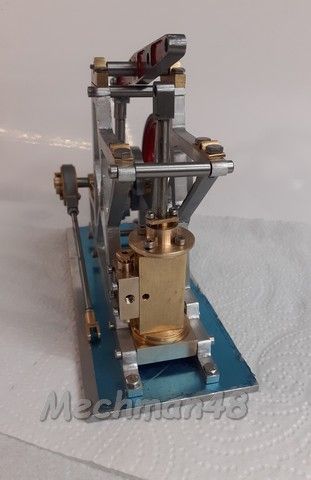
                                                      A bit more on my beam engine, cylinder components assembled & tried for fit…

                                                      26.cylinder assy tried for fit (1).jpg

                                                      26.cylinder assy tried for fit (2).jpg

                                                      The blue colour is just the plastic covering on the aluminium plate which will peel off once I get to cleaning & painting stage.

                                                      George.

                                                    Viewing 25 posts - 126 through 150 (of 284 total)
                                                    • Please log in to reply to this topic. Registering is free and easy using the links on the menu at the top of this page.

                                                    Advert

                                                    Latest Replies

                                                    Viewing 25 topics - 1 through 25 (of 25 total)
                                                    Viewing 25 topics - 1 through 25 (of 25 total)

                                                    View full reply list.

                                                    Advert

                                                    Newsletter Sign-up