The Workshop Progress Thread 2019

Advert

The Workshop Progress Thread 2019

Home Forums Work In Progress and completed items The Workshop Progress Thread 2019

Viewing 25 posts - 201 through 225 (of 261 total)
  • Author
    Posts
  • #436930
    Anthony Knights
    Participant
      @anthonyknights16741

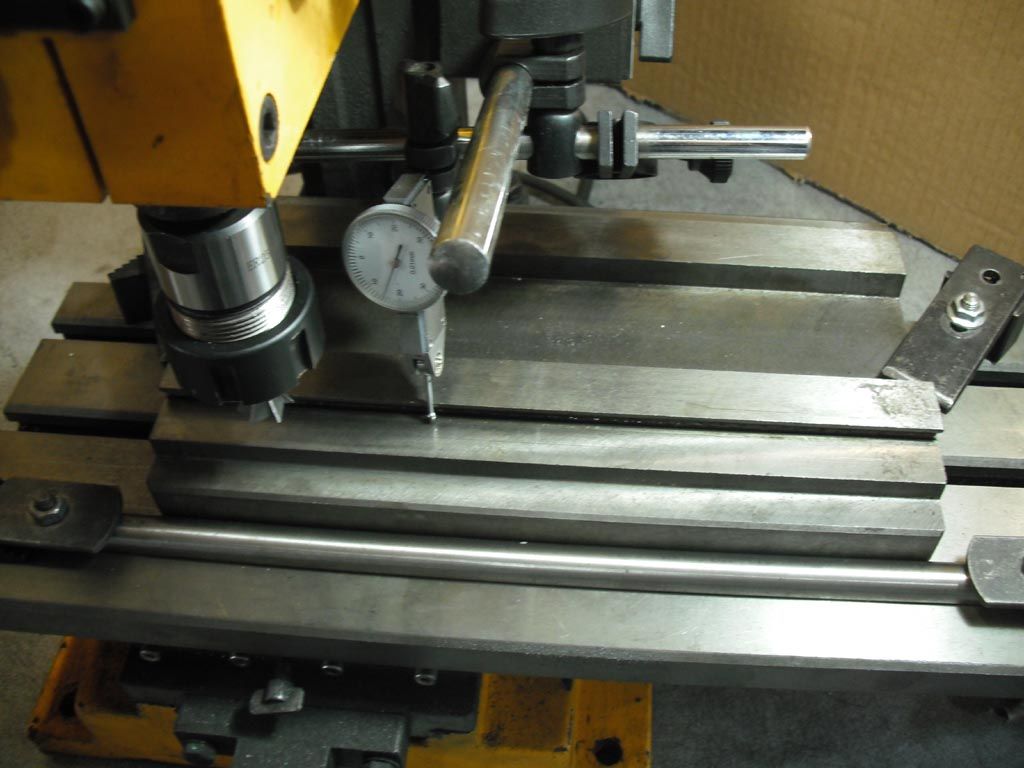
      clocking1.jpg

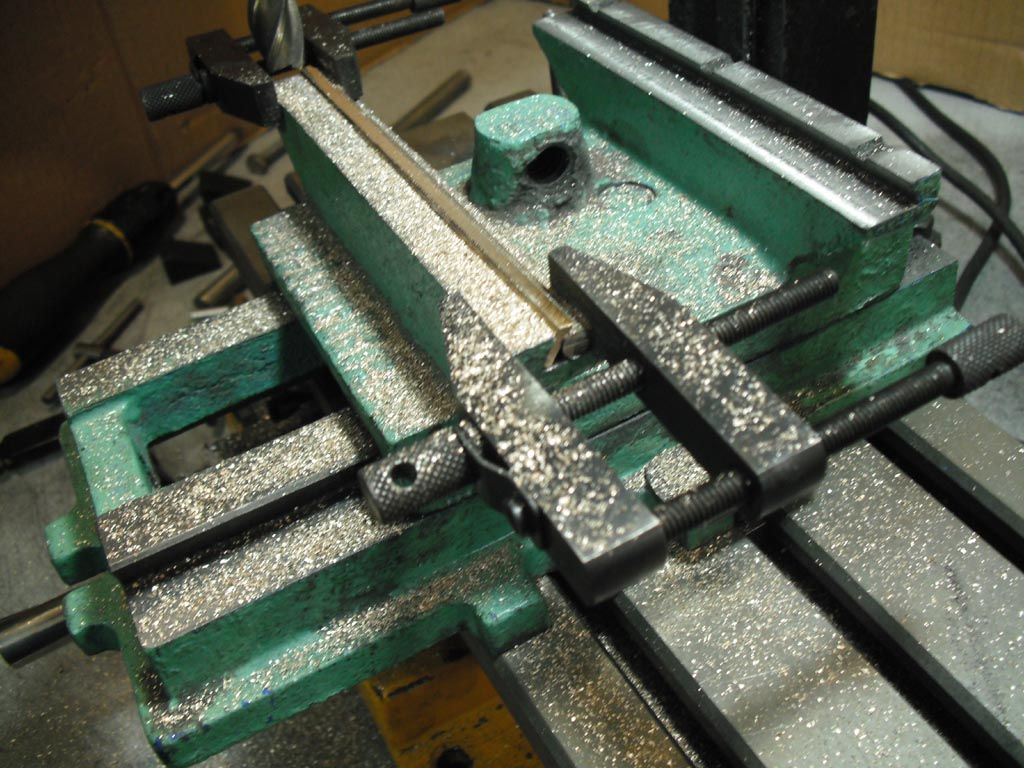
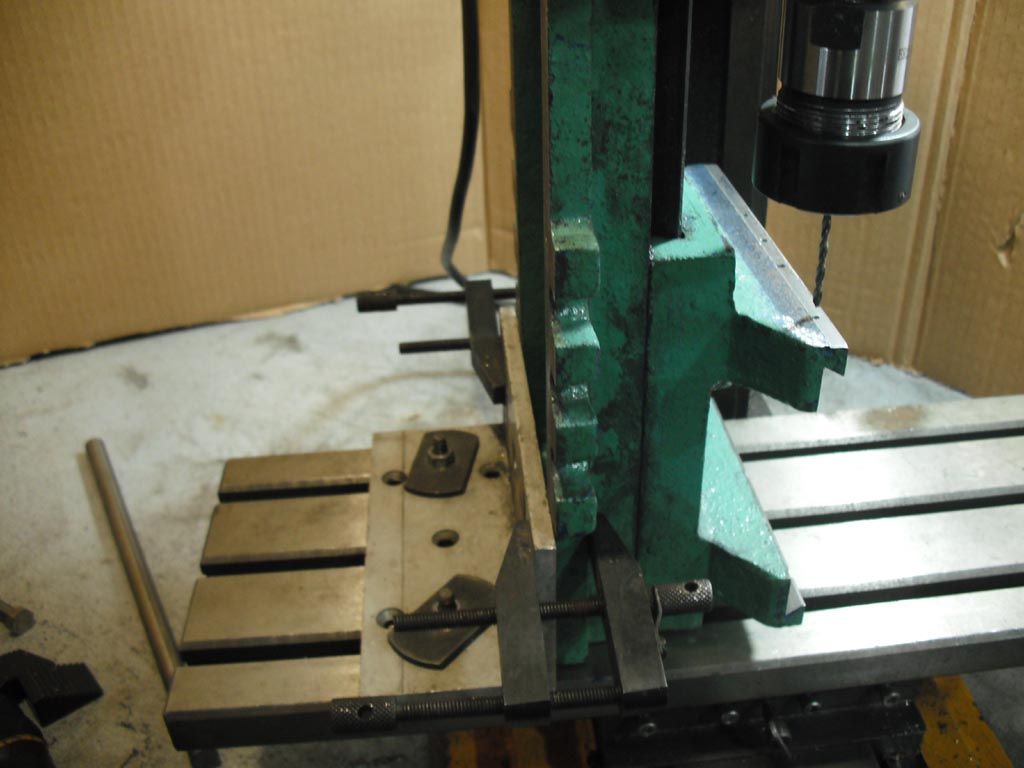
      I clamped a 12mm silver steel bar in the front T slot of the milling machine to act as a guide to clamp the old table up against, ready for machining. Checked alignment with a dial gauge and as expected, it was spot on.

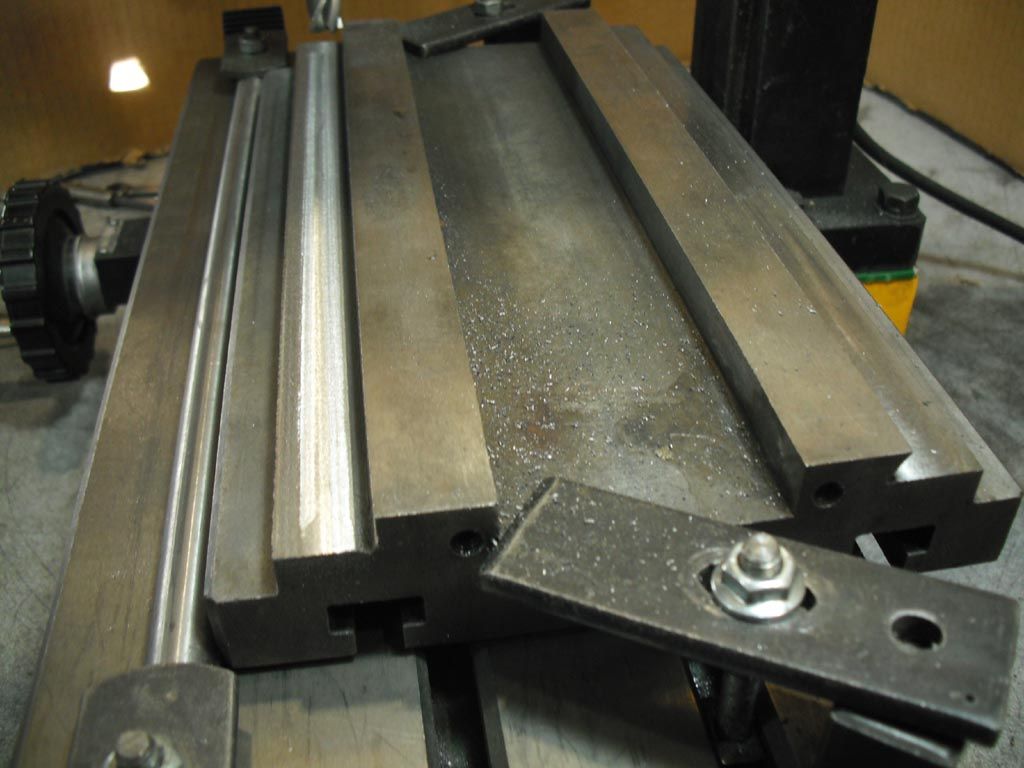
      table4.jpg

      Milled the original dovetail off.

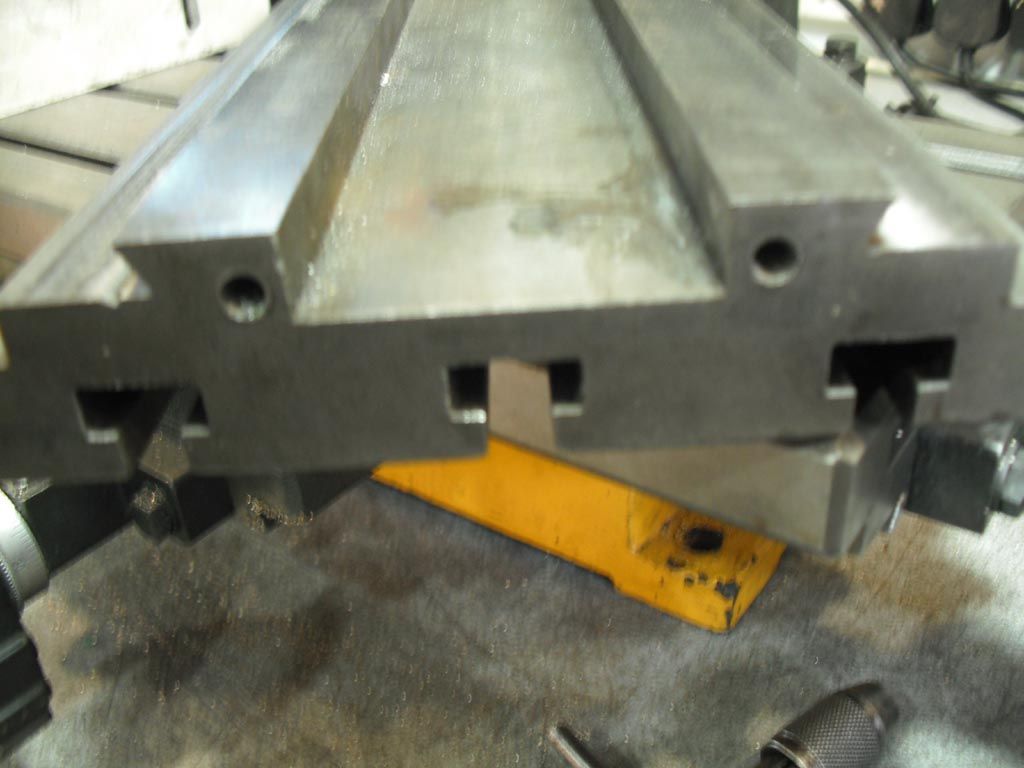
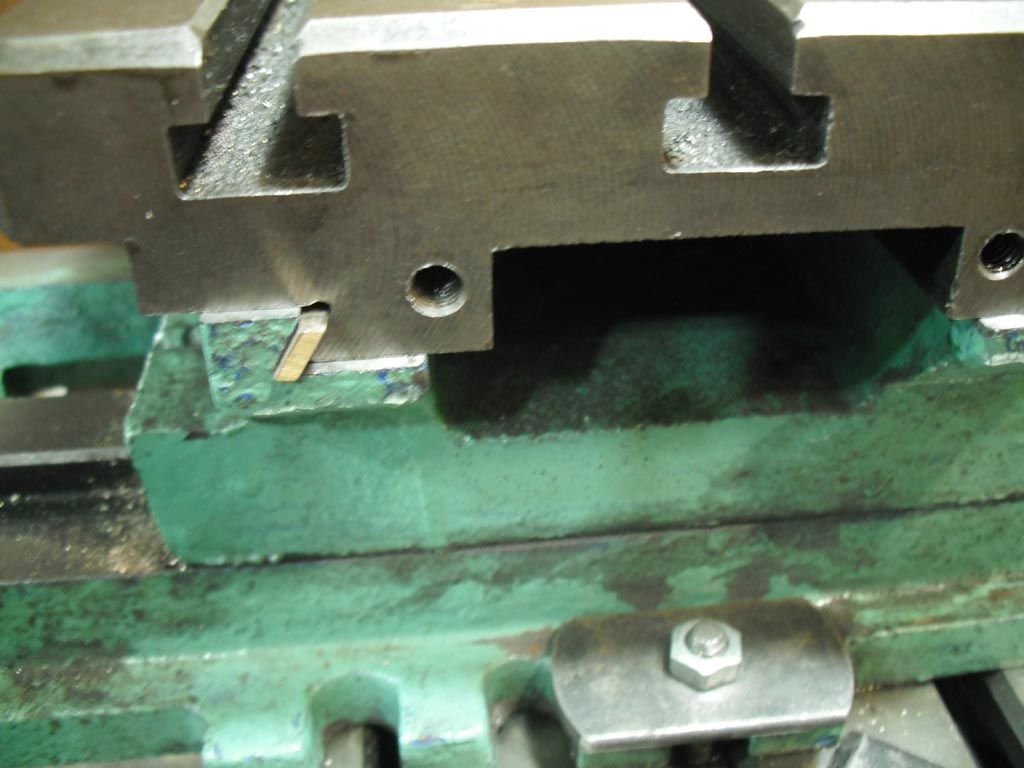
      new dovetail.jpg

      then cut the new dovetail to the width required. Next job is to make the gib strip

      Advert
      #437348
      Ron Laden
      Participant
        @ronladen17547
        Posted by JasonB on 11/11/2019 06:59:22:

        No that's another one of his engine designs, a Type B

        Jason, would I be correct in thinking you have a full set of castings for the engine and going by the picture did you bring them in from the US.

        #437353
        JasonB
        Moderator
          @jasonb

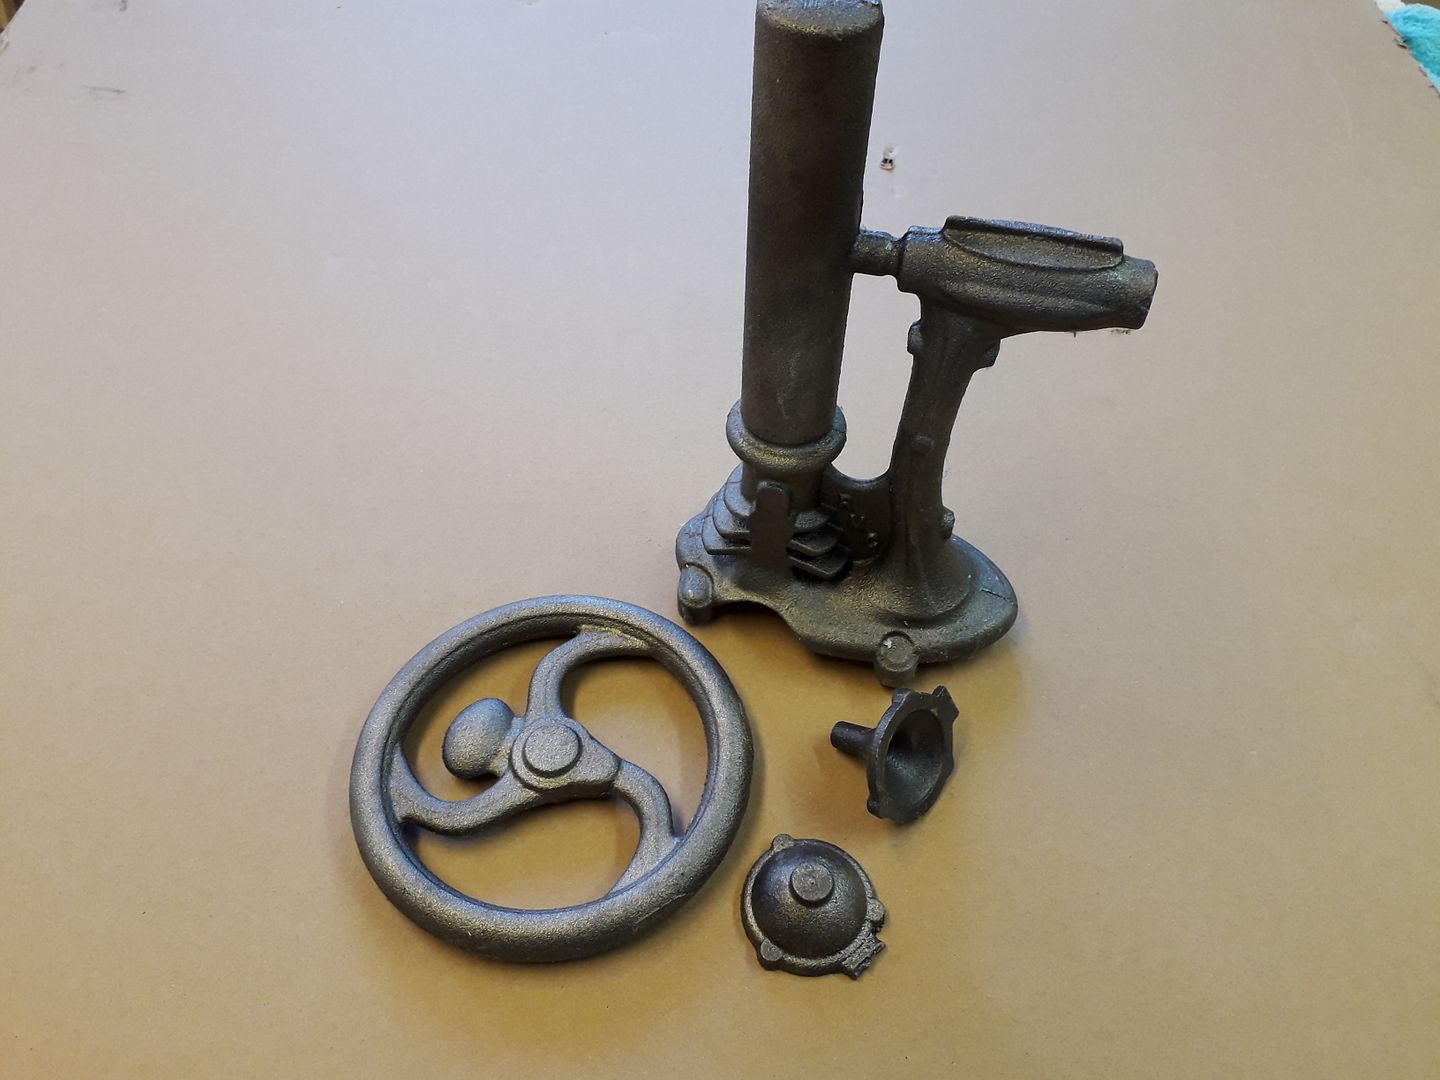
          Morning Ron, yes I have the set of castings for the Type B, there are not that many but they will be are proving "interesting" to machine, particularly the main frame.


          Nick Roland who is RMC had not been producing any engines for a few years but has started up again just getting small batches of 8-10 engines done and selling through e-bay. I spotted this one in February so ordered one. They are not badly priced but coming from the US cost about $70 postage and then you also have to pay VAT and fees on the total.

          Last week he put up a batch of the type D engines so I have just treated myself to a set of those castings for Christmas, as you can see about $100 postage on this as it is a bit heavier but he still has some available if anyone wants a set of castings while they are still hot. Very good quality ductile iron castings and cleanly cast though due to the nature of how the Type D frame is cast there is some flash on that. Some of the best plans and construction notes I have seen plus a CD with several hundred photos taken during construction as well as other helpful info.

          I have also got a type A that was recently completed but not running yet and I may have to do some mods to it as being originally designed to run on MAPP gas which you can't get now, it does not really run on other gasses. This was bought from a collector in the US who was thinning out his collection of unmade kits.

          Also have my name down for a set of plans for his SB2C when they become available.


          J


          PS if anyone knows of a set of type C or E castings looking for a new home I would be interested.

          Edited By JasonB on 15/11/2019 10:14:20

          #437408
          Ron Laden
          Participant
            @ronladen17547

            One thing is for certain Jason, I dont think I would ever get tired of looking at those engines they are different to say the least. I can see that some of the parts may be a bit of a challenge to set up for machining but the end result makes it well worth it, the Type D I think looks amazing.

            Can I ask you keep us up to speed with progress it will be good to see them come together.

            Ron

            p.s. Forgot to say that watching the videos both the Type D and SB2C run very nicely indeed.


            Edited By Ron Laden on 15/11/2019 14:02:37

            #437509
            Ron Laden
            Participant
              @ronladen17547

              Morning Jason

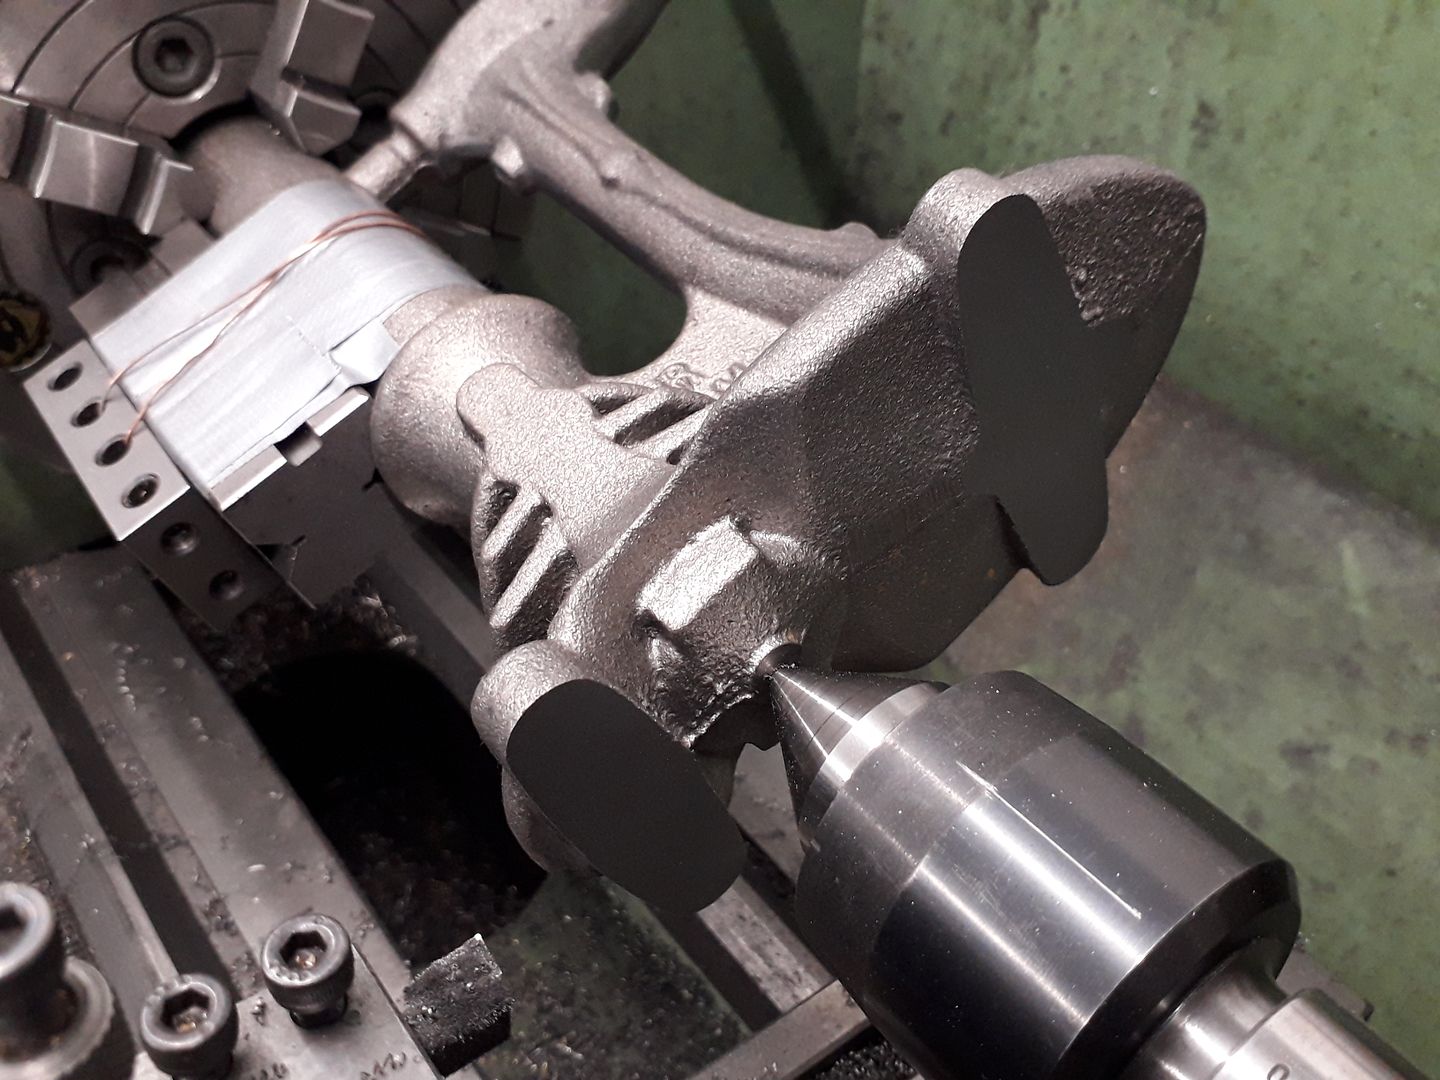
              The picture of the type B main frame set up in the lathe looks interesting I am guessing the V and 123 blocks are balancing out the bulk offset in the casting. Is the V taped on with 123 cross wired over the top..?

              Ron

              #437512
              JasonB
              Moderator
                @jasonb

                Yes, two Vee blocks held with duct tape but they were not enough so added a 15-30-60 block and in the end also screwed a 10-20-40 to that when boring but 300rpm was about as fast as it was happy to run

                #437536
                Anthony Knights
                Participant
                  @anthonyknights16741

                  gibstrip.jpg

                  Got some brass strip to use for the gib. Clamped it to the dovetail to machine the top edge. Turned it over and packed it up with a hacksaw blade and cut the other edge. De-burred it and tried it for fit.

                  it fits.jpg

                  #437694
                  JasonB
                  Moderator
                    @jasonb

                    Some good progress on the RMC Type B engine over the weekend. main casting complete and the pulley made from the now redundant chucking spigot, also got the two main bearings done so things could be slipped together.

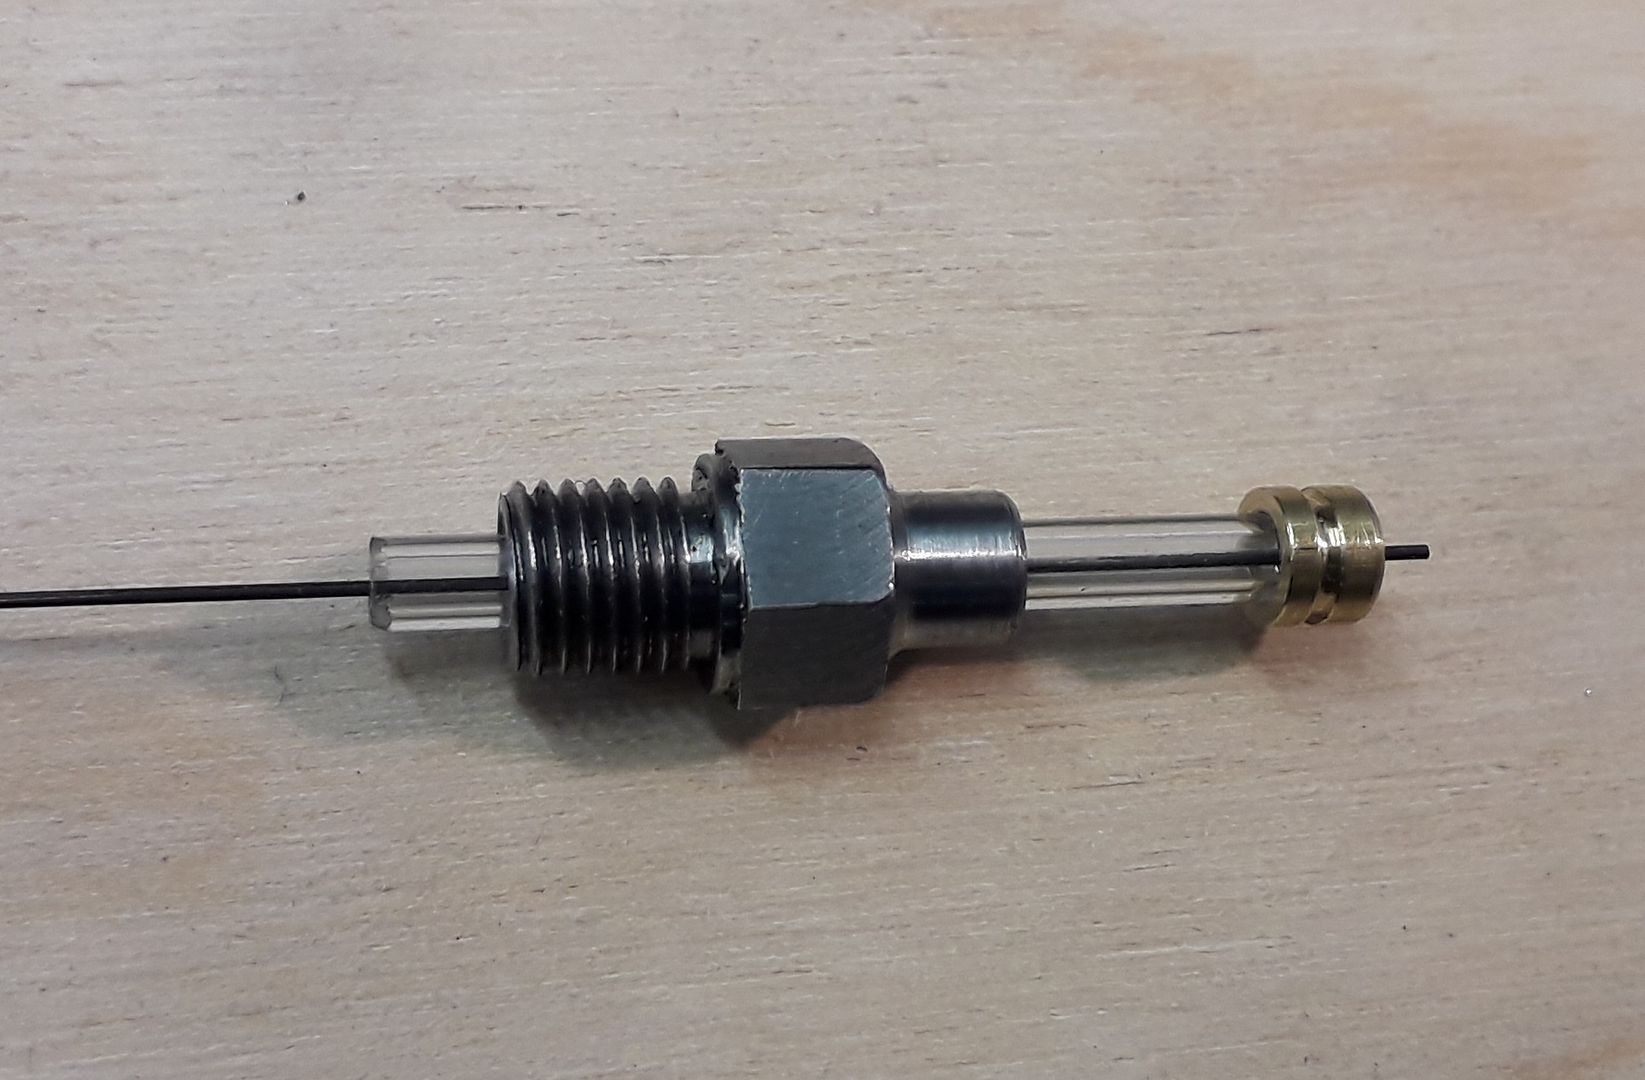
                    The 3mm dia glass tube and 0.5mm tungsten electrode arrived yesterday so a bit of spark plug making may be next on this build though still waiting for the Loctite "Black Max"

                    #437714
                    Ian McVickers
                    Participant
                      @ianmcvickers56553

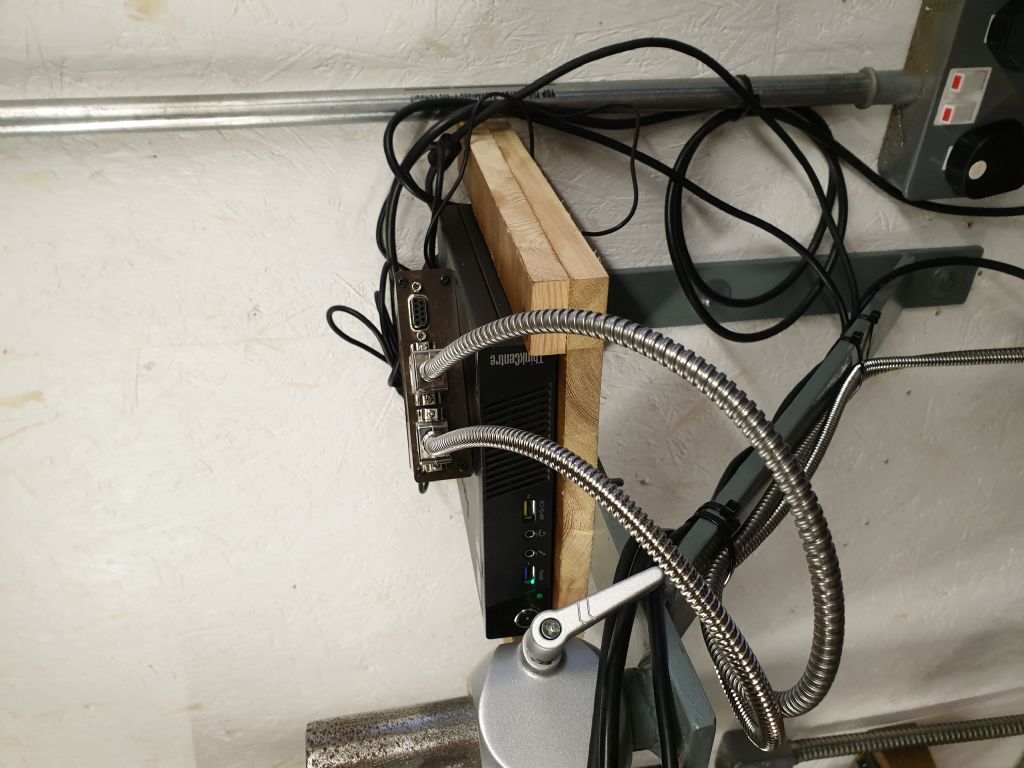
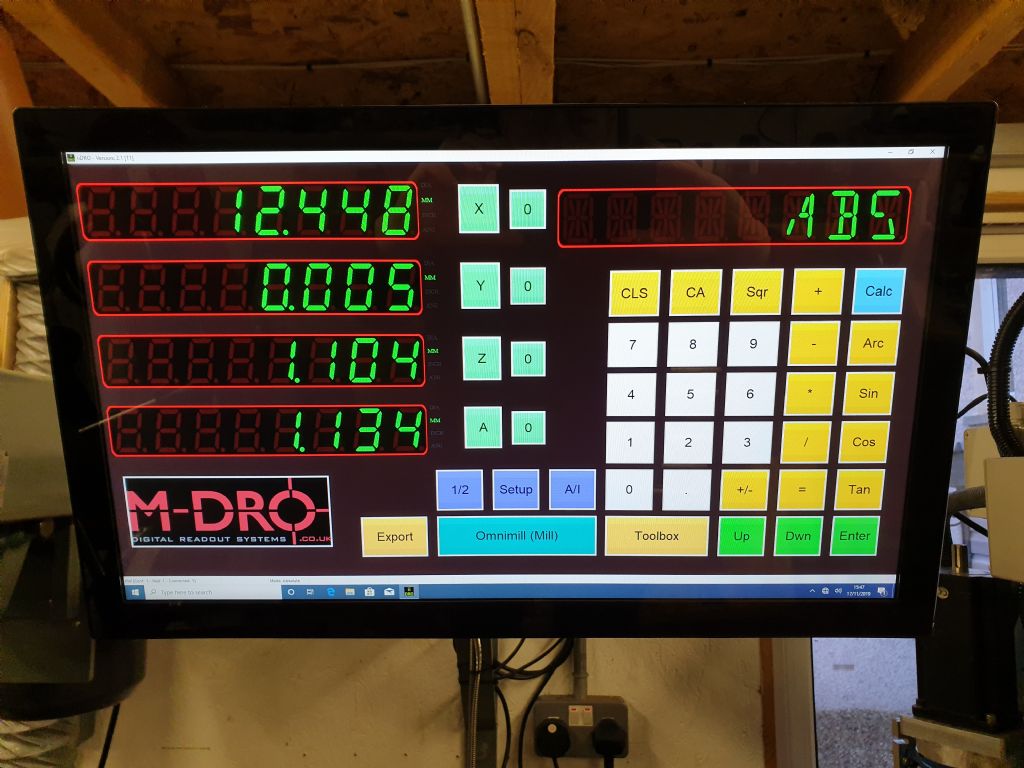
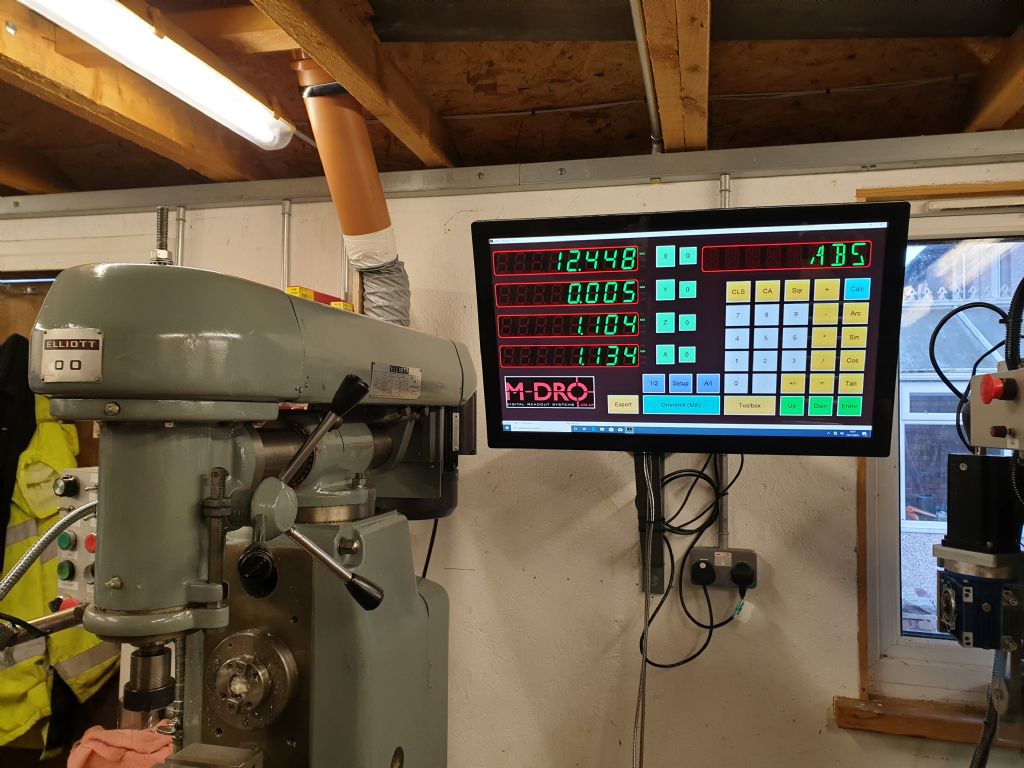
                      Finally managed to get back into the shop and get the dro install finished on the Omnimill. I went down the pc based dro route seeing as I had a small pc and spare touch screen lying around. I had planned on using rotary encoders and rack I have as well but that idea didn't work out so I went for scales.

                      dro pc.jpg

                      dro.jpg

                      Mill dro.jpg

                      The monitor is 21" wide screen so I don't have an excuse for miss-reading the dro now. So far it works well and I plan on fitting further scales on the vertical axis and quill.

                      Edited By JasonB on 17/11/2019 17:17:24

                      #437785
                      Anthony Knights
                      Participant
                        @anthonyknights16741

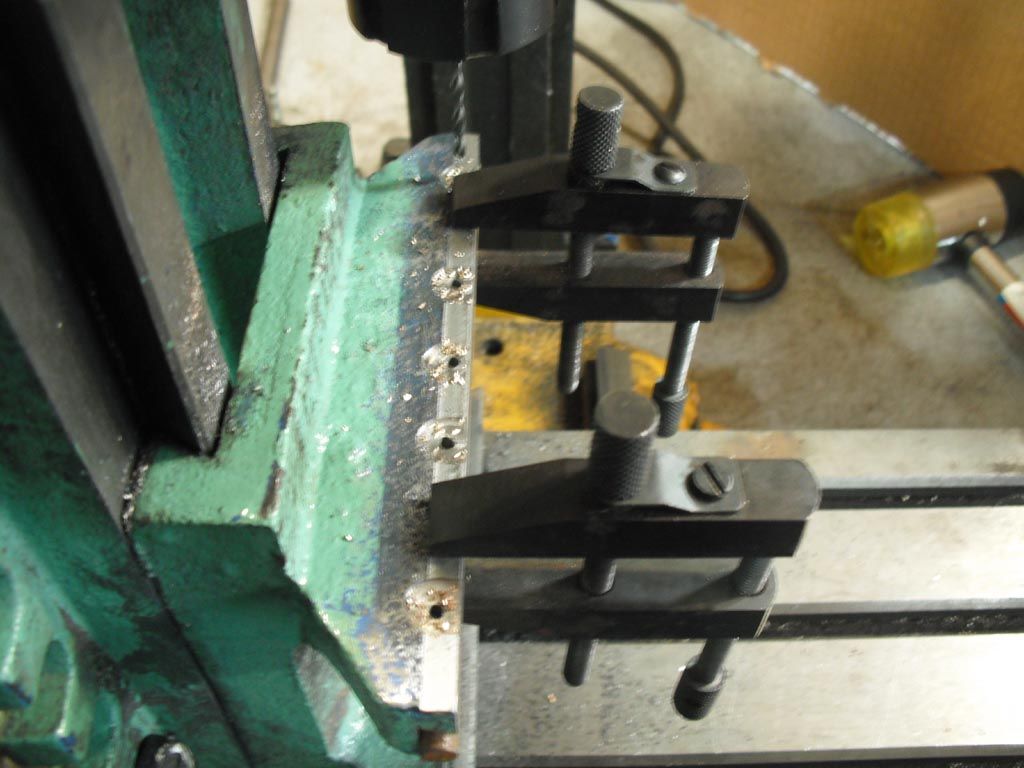
                        Used the set up below to drill the holes for the gib strip adjusters. It was a bit tight and looks a bit precarious, but it's solid enough for drilling.drill gib adjusters.jpg

                        I then clamped the gib strip in place and drilled through to put the dimples in the gib.spot jib.jpg

                        I then removed the work piece from the milling machine and tapped the holes by hand. I haven't got any 3mm hex socket head screws so I've had to use pozi head screws as a temporary measure.

                        #438064
                        Anthony Knights
                        Participant
                          @anthonyknights16741

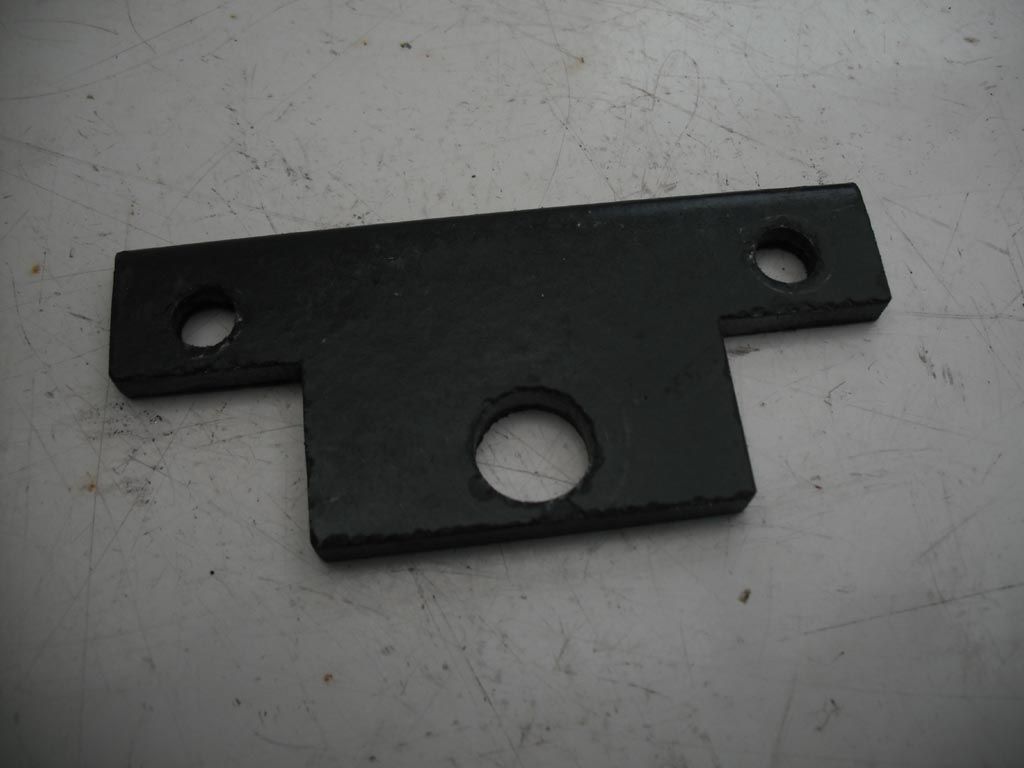
                          It's me again. I must be the only one braving the cold workshop. Made a plate to carry the lead screw.endplate.jpg

                          Then fitted the plate and lead screw to the table.screw_fitted2.jpg

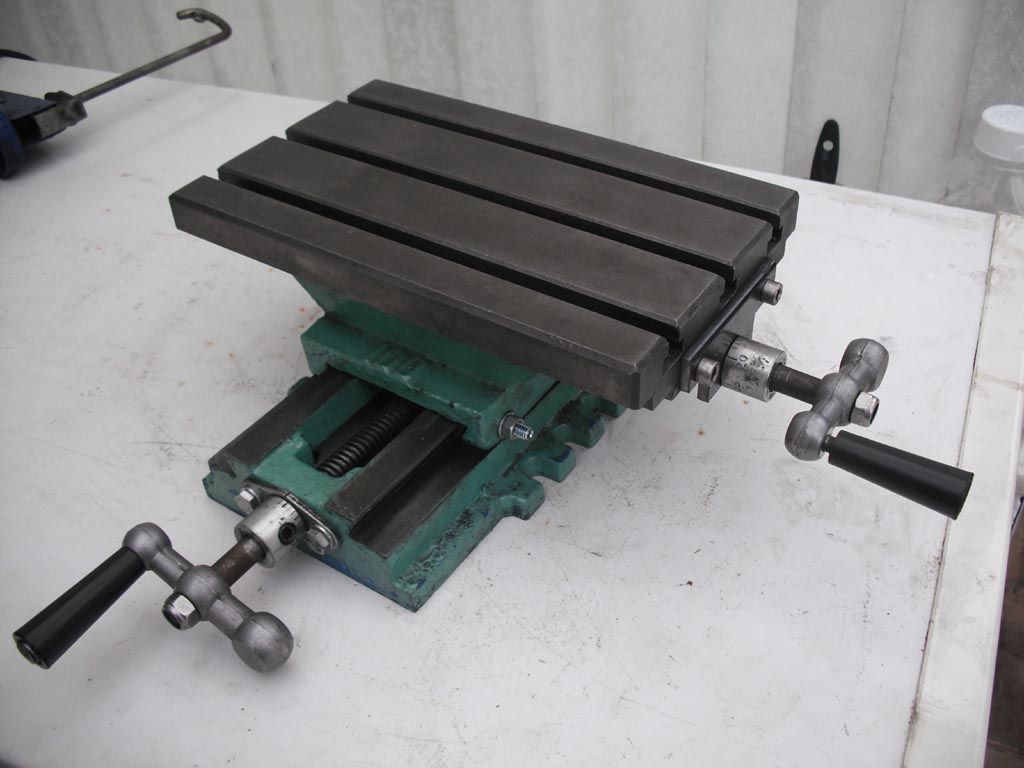
                          Fitted every thing else back together. Job done.assembled1.jpg

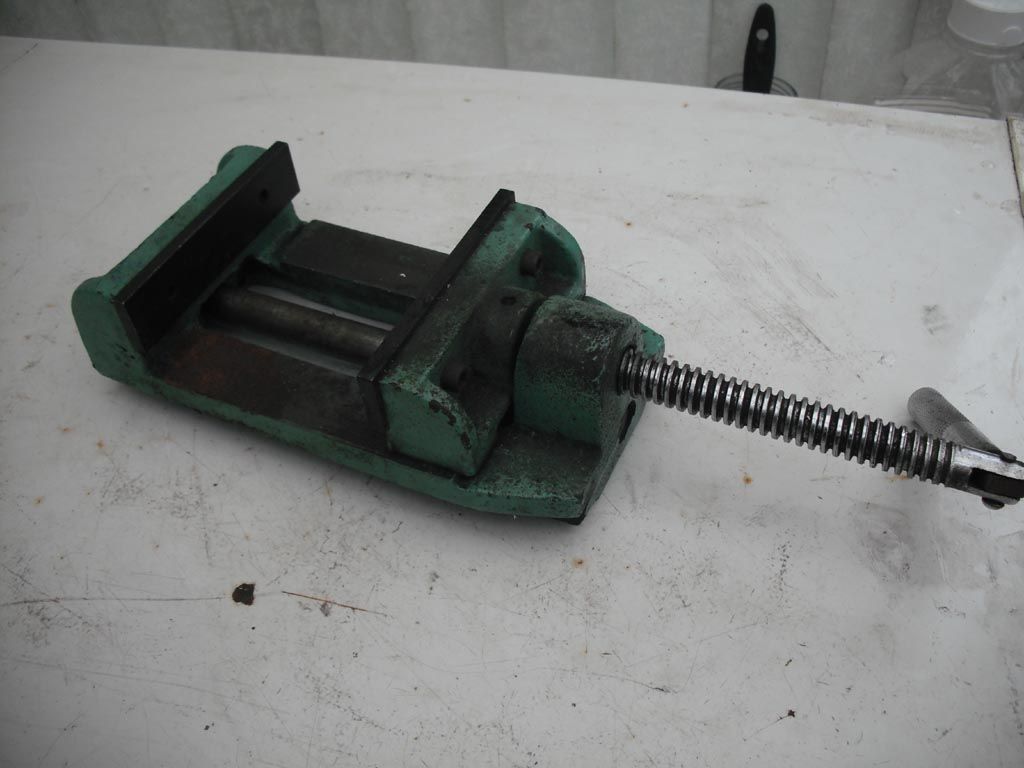
                          I wonder what I can do with this vice?vice.jpg

                          #438152
                          Mark Rand
                          Participant
                            @markrand96270
                            Posted by Anthony Knights on 20/11/2019 03:50:39:

                            It's me again. I must be the only one braving the cold workshop. Made a plate to carry the lead screw.

                            I wasn't braving my cold workshop (which is quite warm, actually). I was on the roof of it replacing some damaged flashing. laugh

                            #438155
                            Ian P
                            Participant
                              @ianp
                              Posted by Ian McVickers on 17/11/2019 17:14:44:

                              Finally managed to get back into the shop and get the dro install finished on the Omnimill. I went down the pc based dro route seeing as I had a small pc and spare touch screen lying around. I had planned on using rotary encoders and rack I have as well but that idea didn't work out so I went for scales.

                              Mill dro.jpg

                              The monitor is 21" wide screen so I don't have an excuse for miss-reading the dro now. So far it works well and I plan on fitting further scales on the vertical axis and quill.

                              Edited By JasonB on 17/11/2019 17:17:24

                              I assume there is a PC with box of tricks driving the monitor, I have looked on the Machine DRO website and cannot see anything that resembles the equipment in the picture. Please could you post a link.

                              Ian P

                              #438177
                              JasonB
                              Moderator
                                @jasonb

                                First picture in Ian's post shows the PC interface sat on top of a small PC.

                                The Main Machine-DRO site has none listed but M-DRO does?

                                EDIT, found it on the main site now

                                Edited By JasonB on 21/11/2019 07:34:11

                                #438185
                                Michael Gilligan
                                Participant
                                  @michaelgilligan61133

                                  Looks a good idea … but:

                                  This product is now discontinued, please contact us for possible alternatives.

                                  MichaelG.

                                  #438219
                                  Ian McVickers
                                  Participant
                                    @ianmcvickers56553

                                    The DRO interface is indeed on top of the small pc. The older model is still on the website but I have one of the first new ones. Looks like they havent got everything finished off yet. Last time I spoke to Tony at M-DRO he said they were waiting on label plates I think. Worth giving him a call if your interested.

                                    #438220
                                    Ian McVickers
                                    Participant
                                      @ianmcvickers56553

                                      Forgot to add that mine has 4 input channels, the other one is on the back. Im sure Tony said that you can choose either 3 or 4 inputs.

                                      #438617
                                      JasonB
                                      Moderator
                                        @jasonb

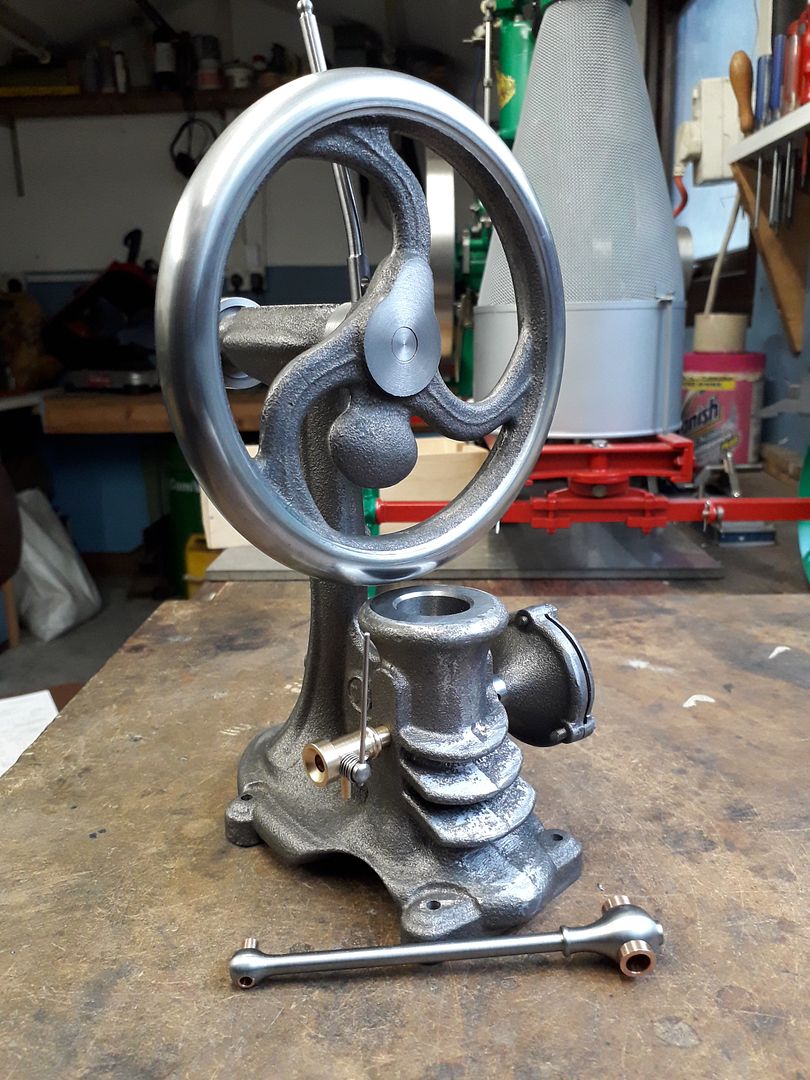
                                        I've remembered one of the reasons I'm not keen on casting kits – they don't take long to dosad Started this one on the 2nd Nov and finished today with the exception of making a couple of screws and waiting for some adhesive to complete the spark plug.

                                        #438677
                                        Mark Rand
                                        Participant
                                          @markrand96270

                                          Darn it, I take longer than that to clean up the mess in the shedsurprise.

                                          #438953
                                          JasonB
                                          Moderator
                                            @jasonb

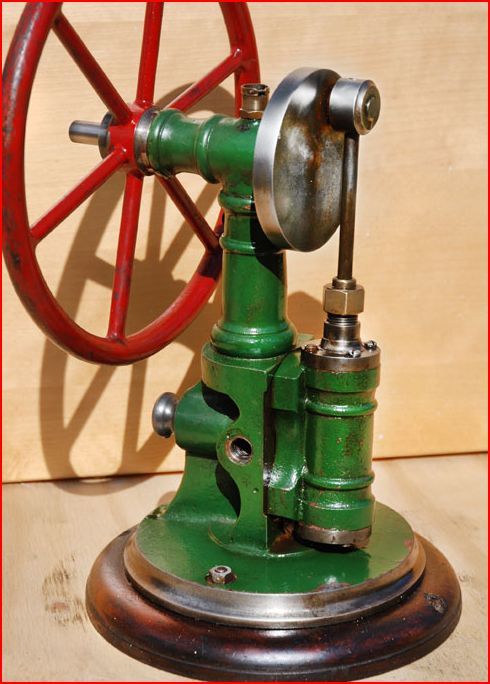
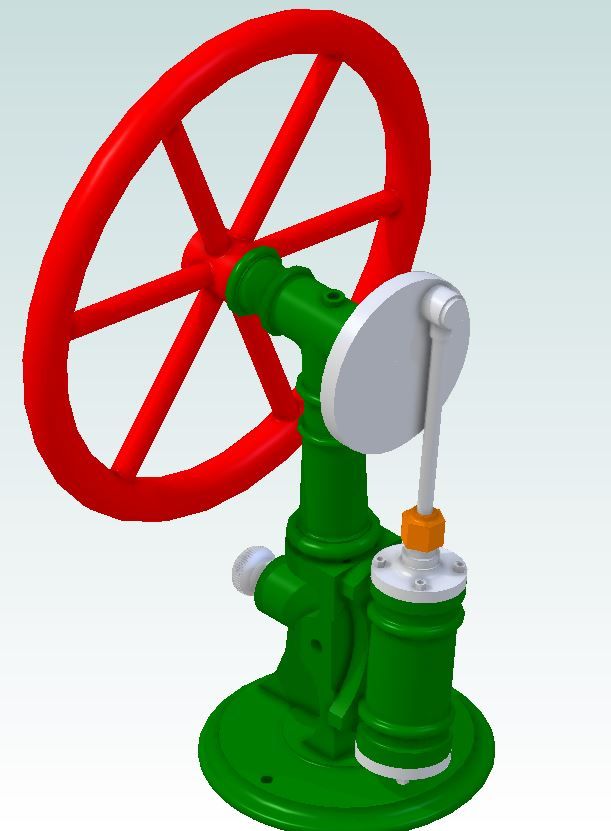
                                            A bit of progress in the "virtual" workshop over the last couple of evenings and I have my next project. I had seen this engine on Preston's site several years ago and liked the look of it so copied the images to my "future projects" file. Size dictated by the offcut of 7" dia thickwall steel tube that I was given which will be used for the flywheel rim.

                                            Still a bit of tweaking needed to the design before I start cutting metal – cylinder may be a bit large in dia and circular base a bit small.

                                            green2.jpg

                                            op.jpg

                                            Edited By JasonB on 27/11/2019 07:37:12

                                            #438955
                                            Ron Laden
                                            Participant
                                              @ronladen17547
                                              Posted by JasonB on 24/11/2019 17:26:02:

                                              I've remembered one of the reasons I'm not keen on casting kits – they don't take long to dosad Started this one on the 2nd Nov and finished today with the exception of making a couple of screws and waiting for some adhesive to complete the spark plug.

                                              Excellent, I really like the look of it, look forward to seeing it run dont forget the video Jason.

                                              #439183
                                              john carruthers
                                              Participant
                                                @johncarruthers46255

                                                After a year or so of renovating the new house I have finally found time to play in my shed.
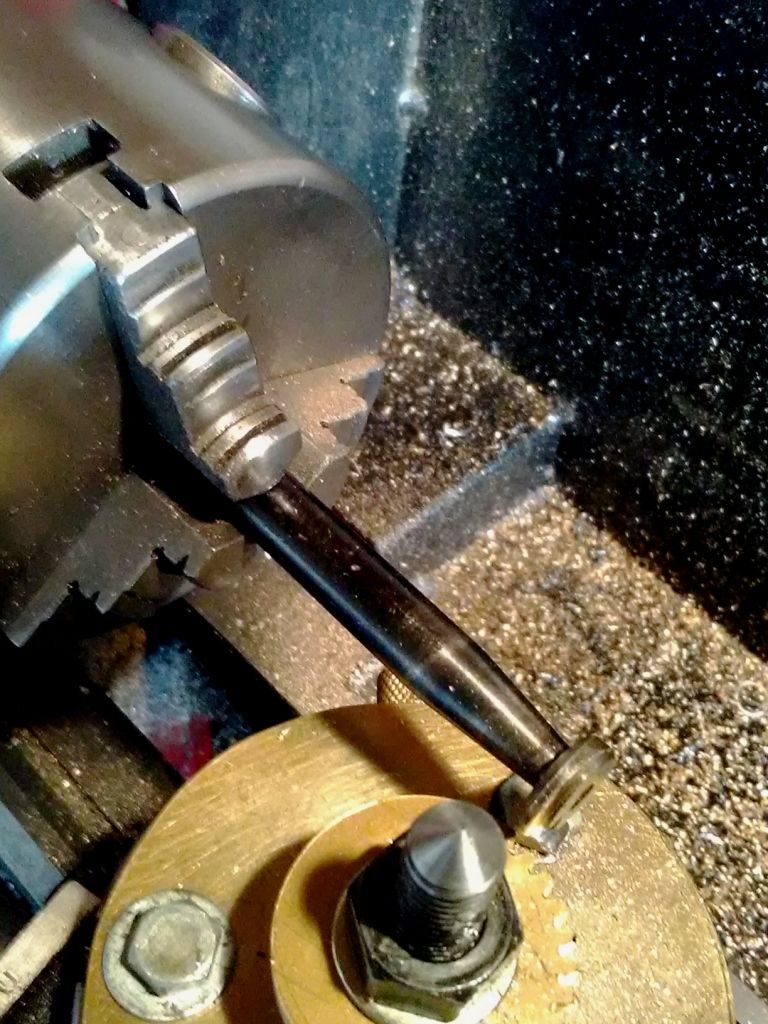
                                                This arrangement allows me to cut spur gears.
                                                I used an old bolt for the single point cutter but will be ordering a cheap set of mod 1 cutters from China.

                                                gearcutter2.jpggear cutter1.jpg

                                                #439688
                                                JasonB
                                                Moderator
                                                  @jasonb

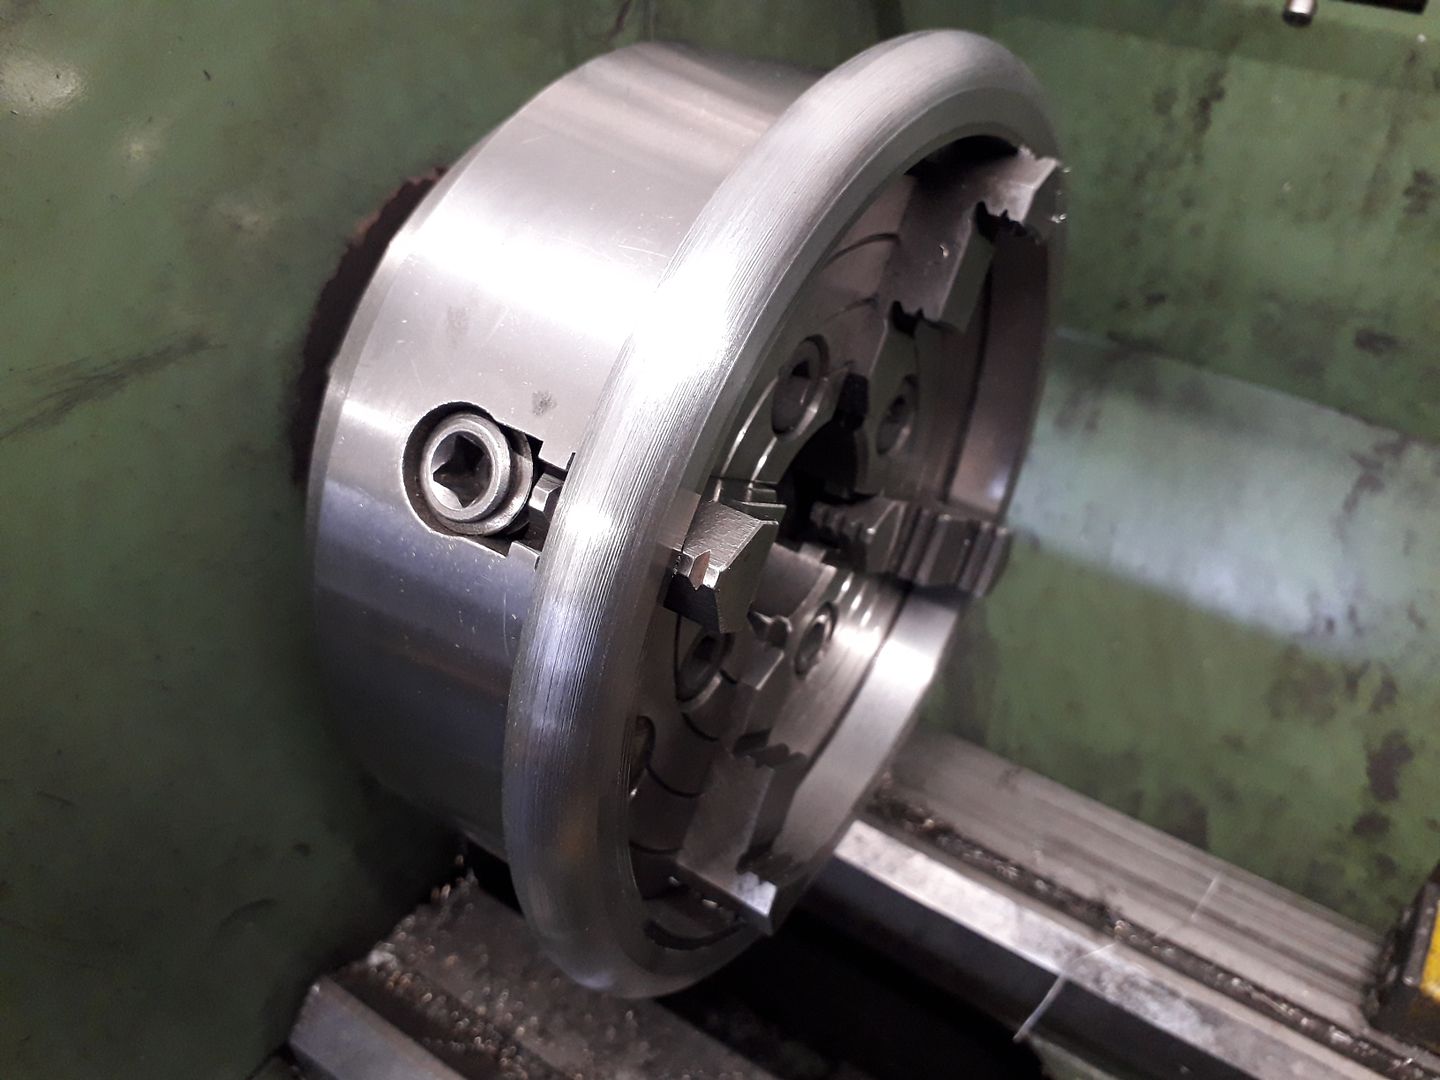
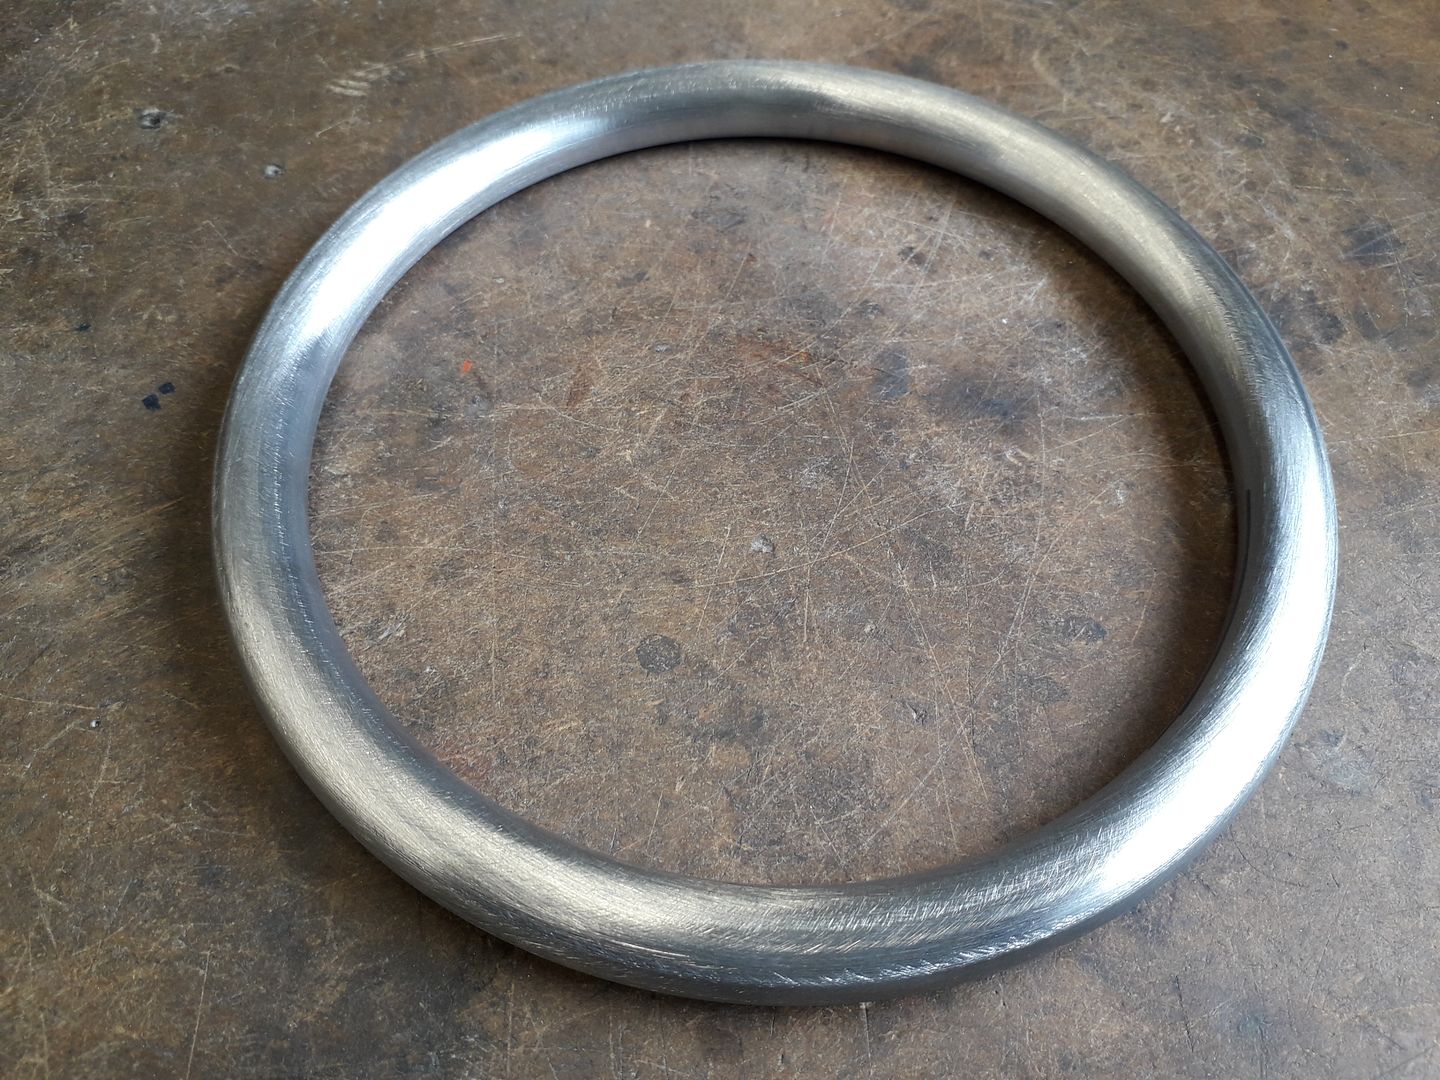
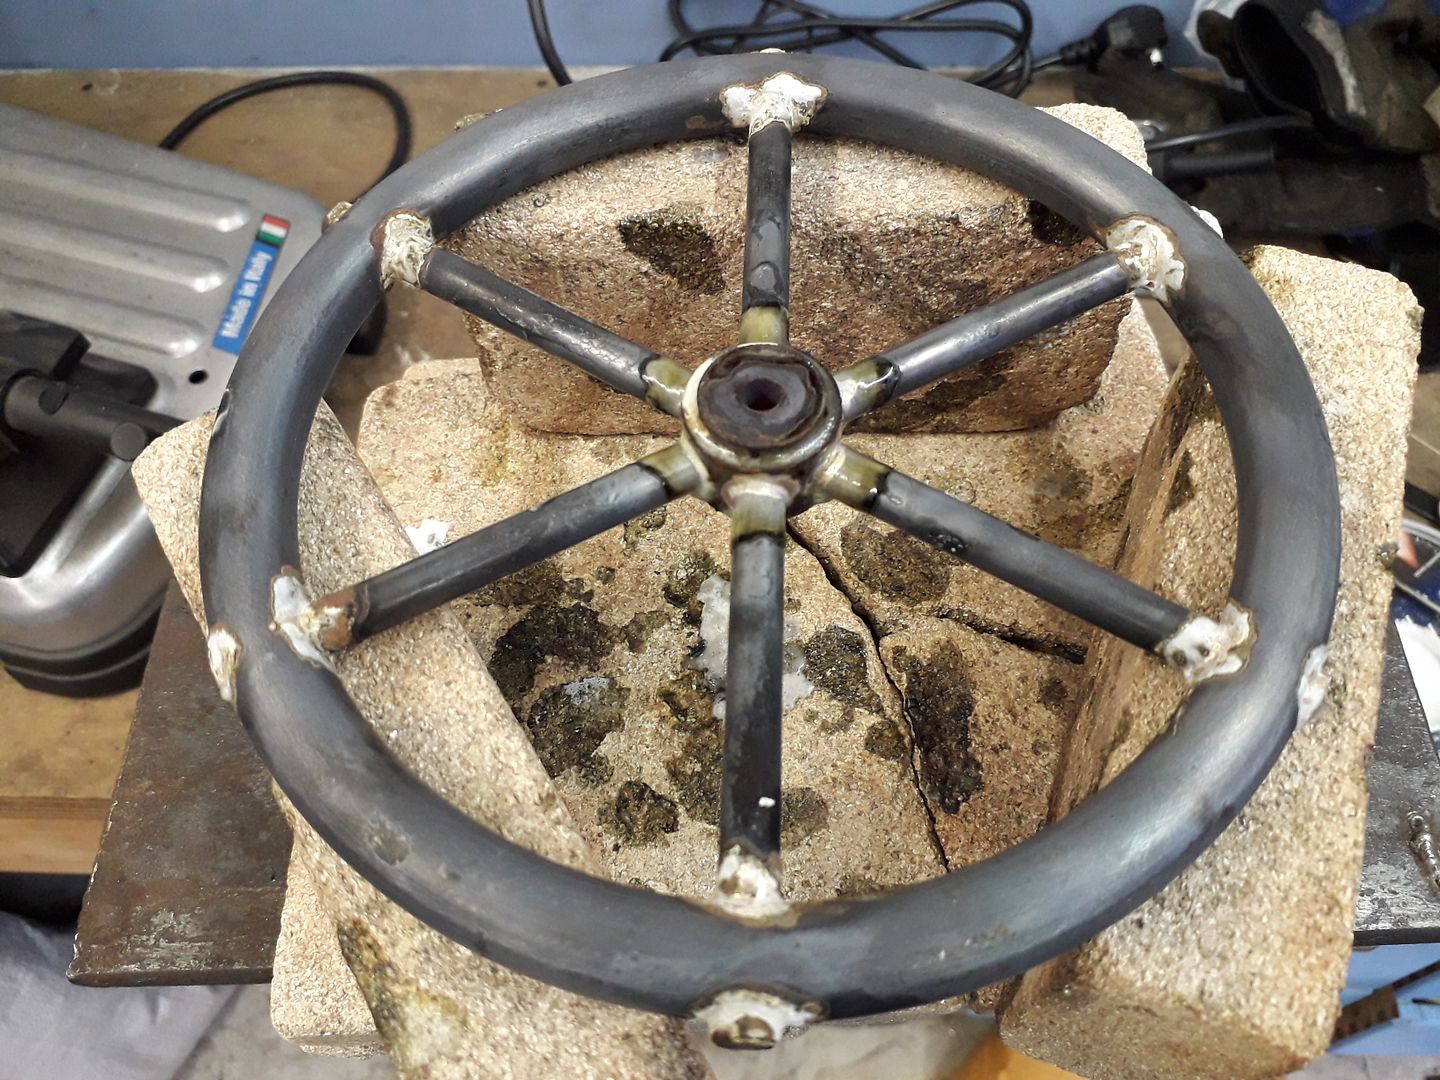
                                                  I decided to have a go at the flywheel for the Oscillator I posted the other day. First thing was to clean up the slice of thick wall tube to 14mm wide x 14mm thick, hope Andrew approves of te swarf colour.

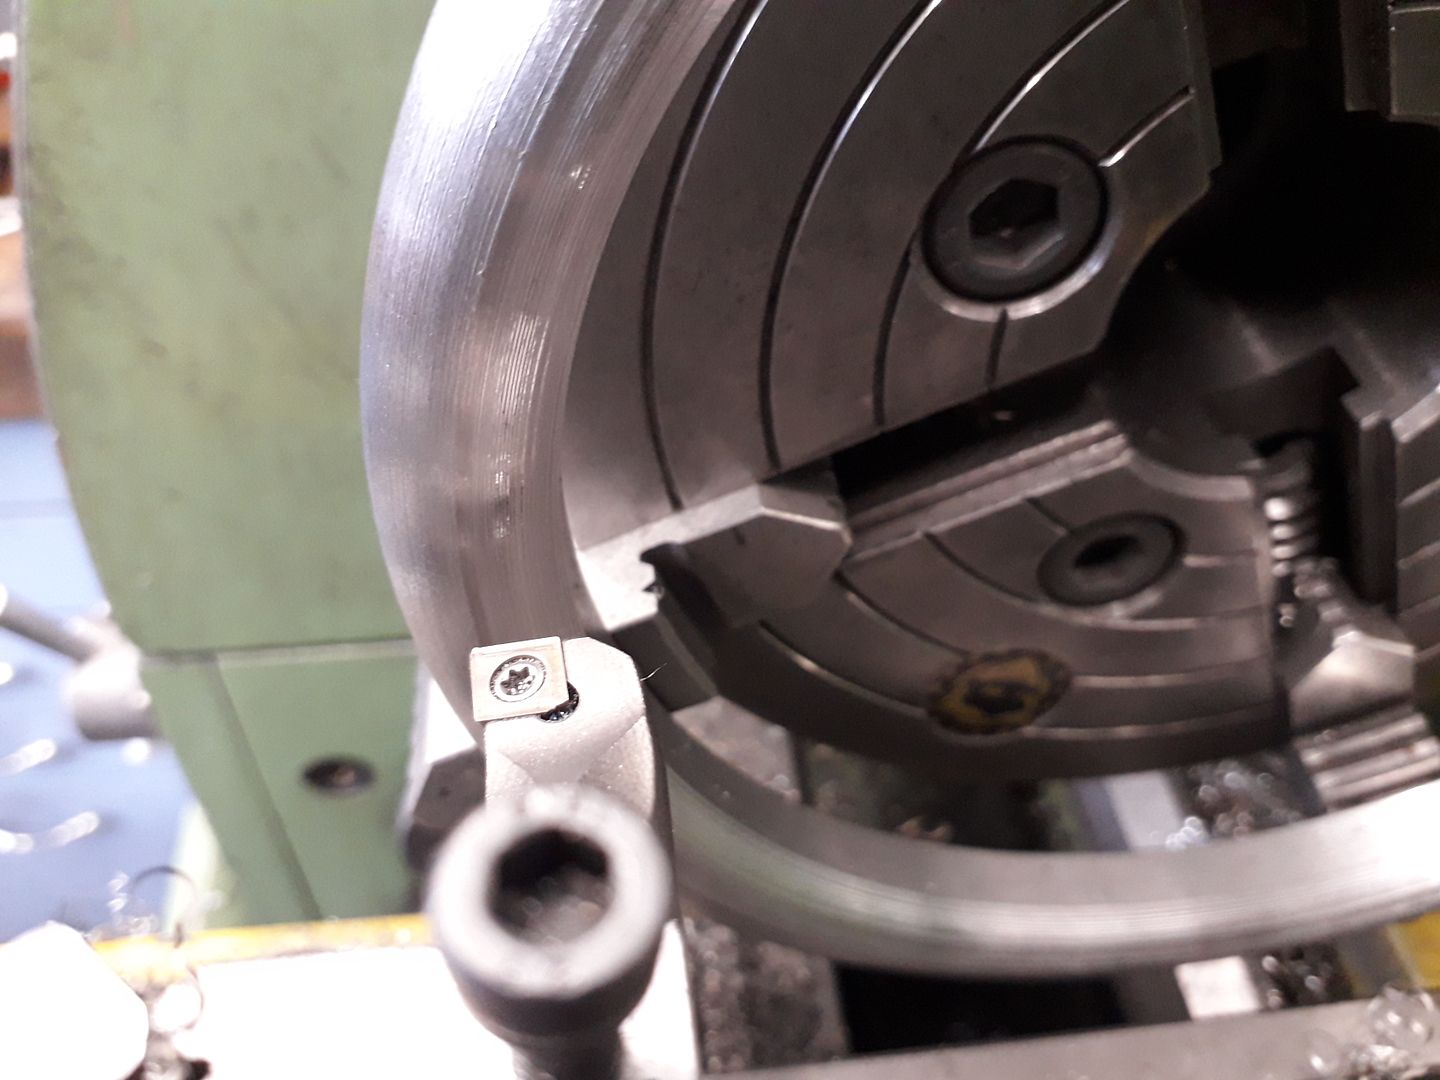
                                                  Then the ring was shaped with a series of cuts at 10thou intervals, first outside then the inside.

                                                  That was followed by blending the cuts with one of the Tome lathe files from ARC and 50mm abrasive discs in the cordless as the ring was turning in the lathe

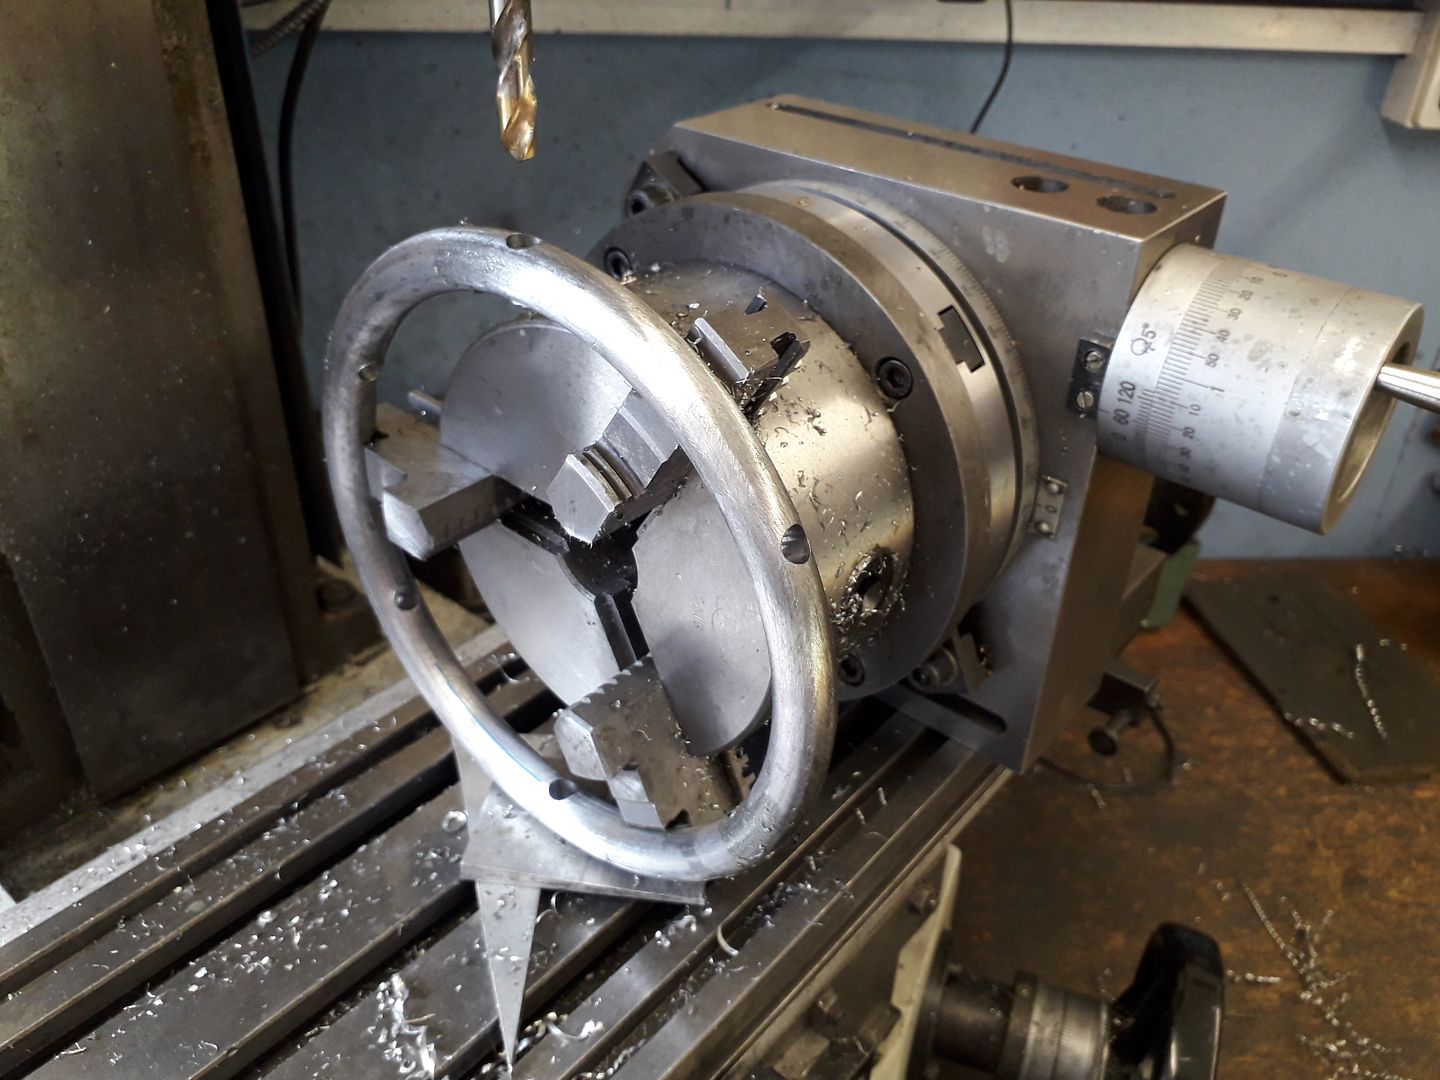
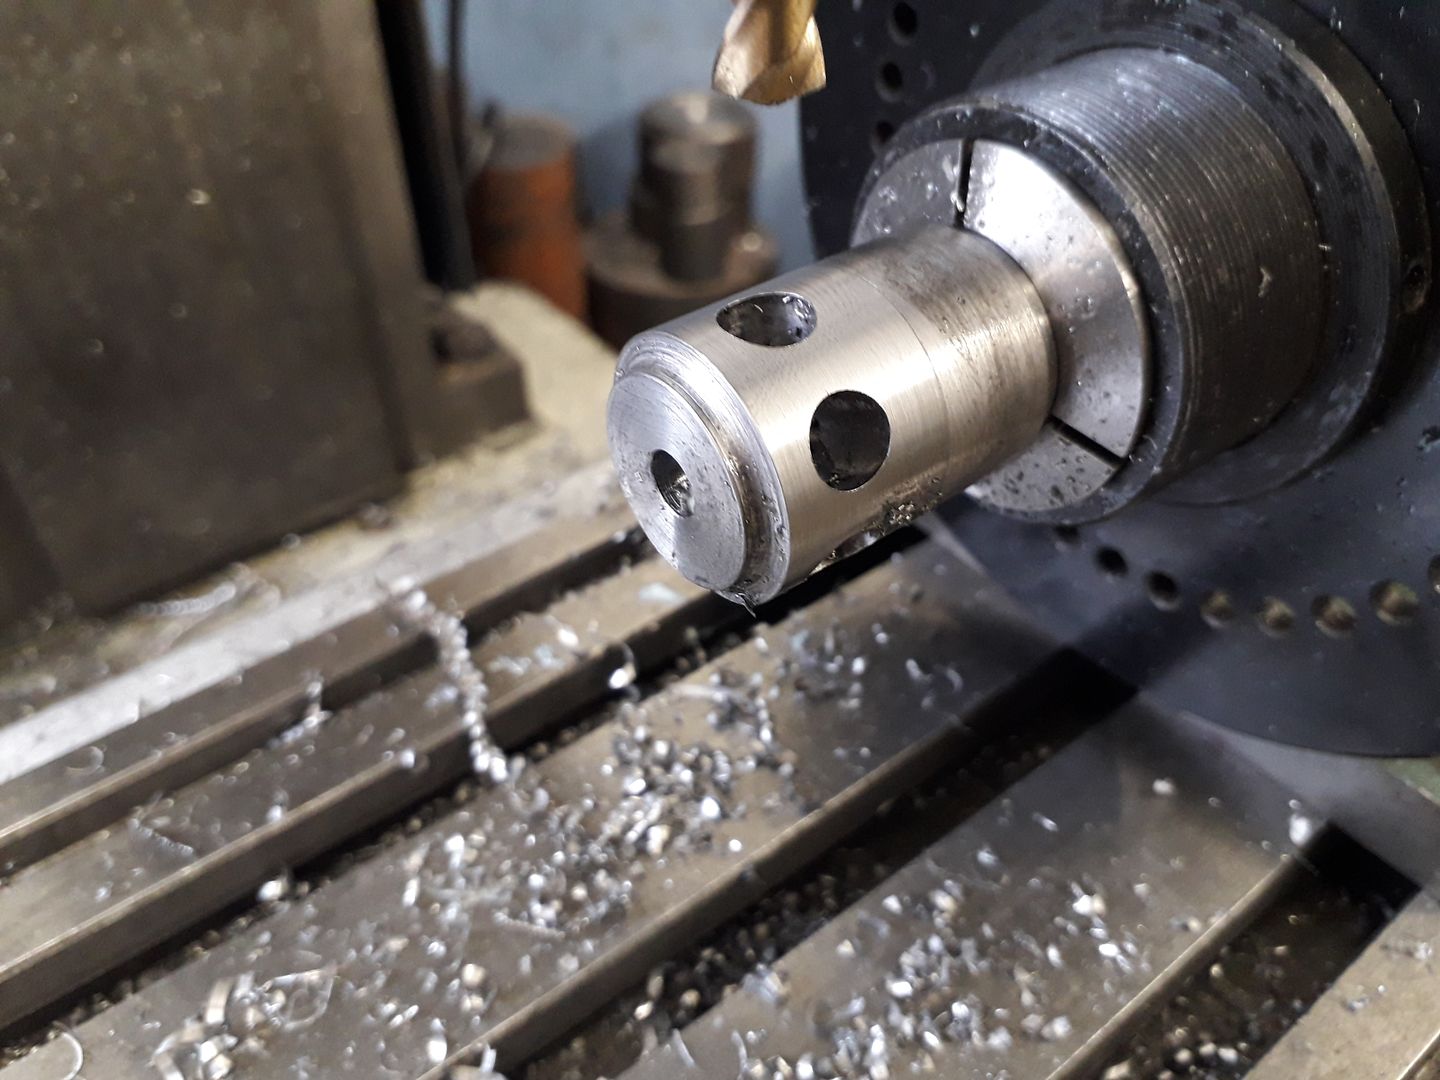
                                                  Then pop a few holes in for the spokes and do the same with a hub

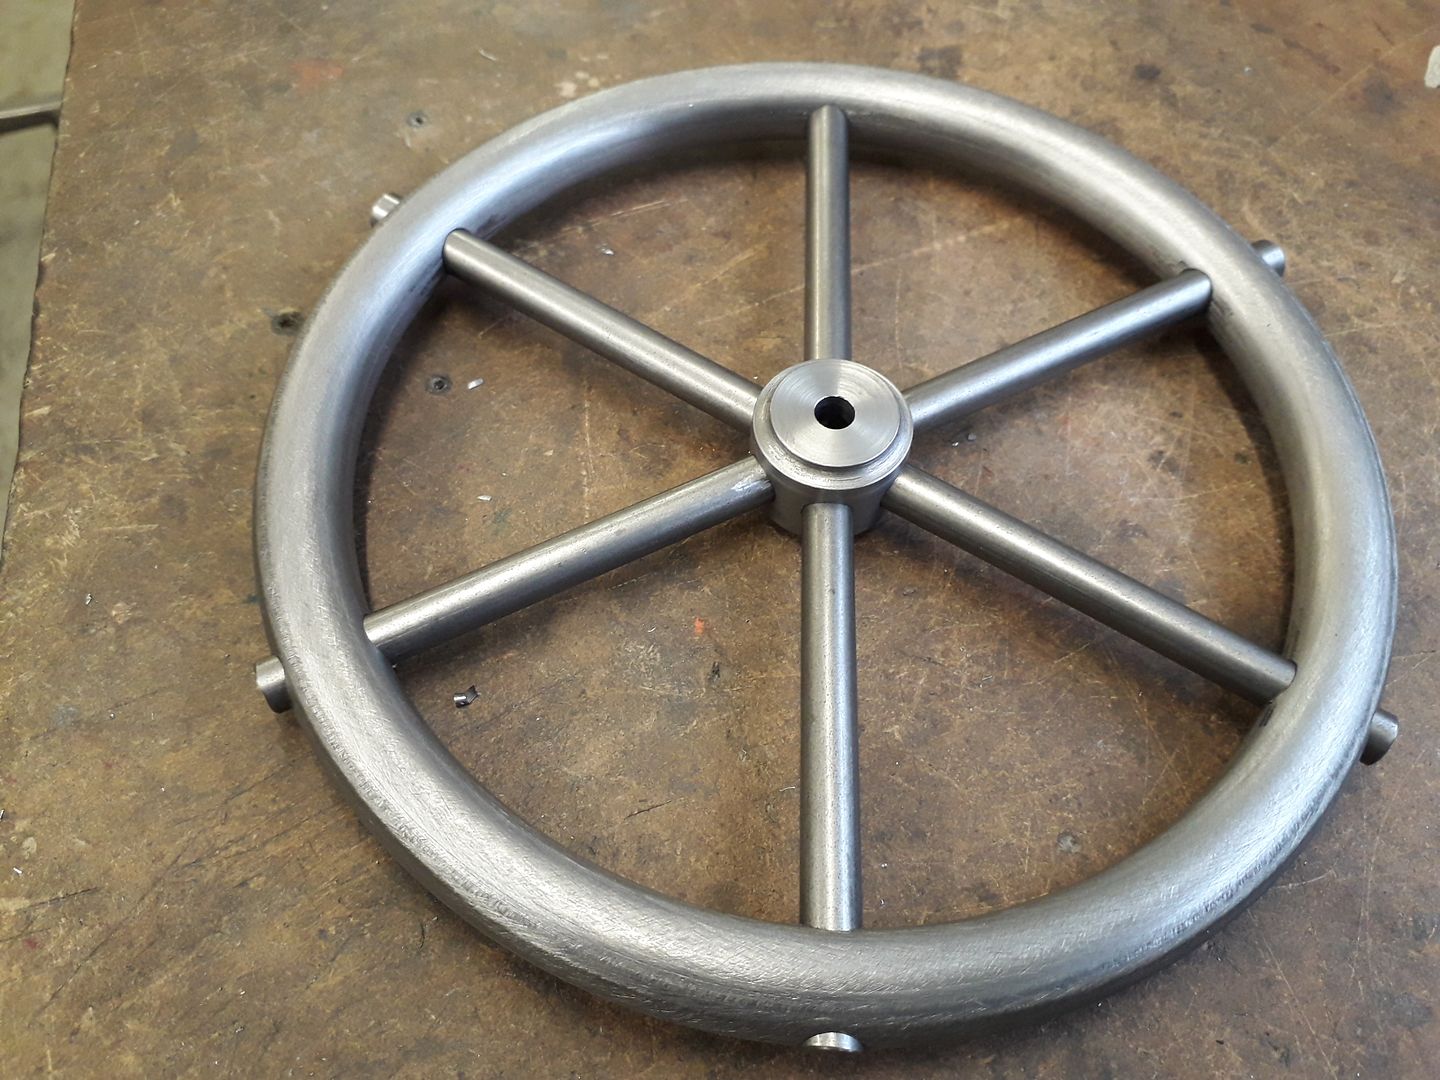
                                                  Trial fit and take a photo while it all looks nice

                                                  Then make a mess of it with heat, flux and solder. I did it in two stages first working around the rim to do teh outer spoke ends. I then let it cool so the rim could contract back to normal size and then soldered the spokes into the hubs.

                                                  It's in the pickle now and once out will go back into the lathe to open the bore out to finished size which should hopefully five a fairly true running flywheel.

                                                  #439697
                                                  john brown 17
                                                  Participant
                                                    @johnbrown17

                                                    That is fine work you are doing jason,well done am following along .

                                                    john

                                                    #439699
                                                    Iain Downs
                                                    Participant
                                                      @iaindowns78295

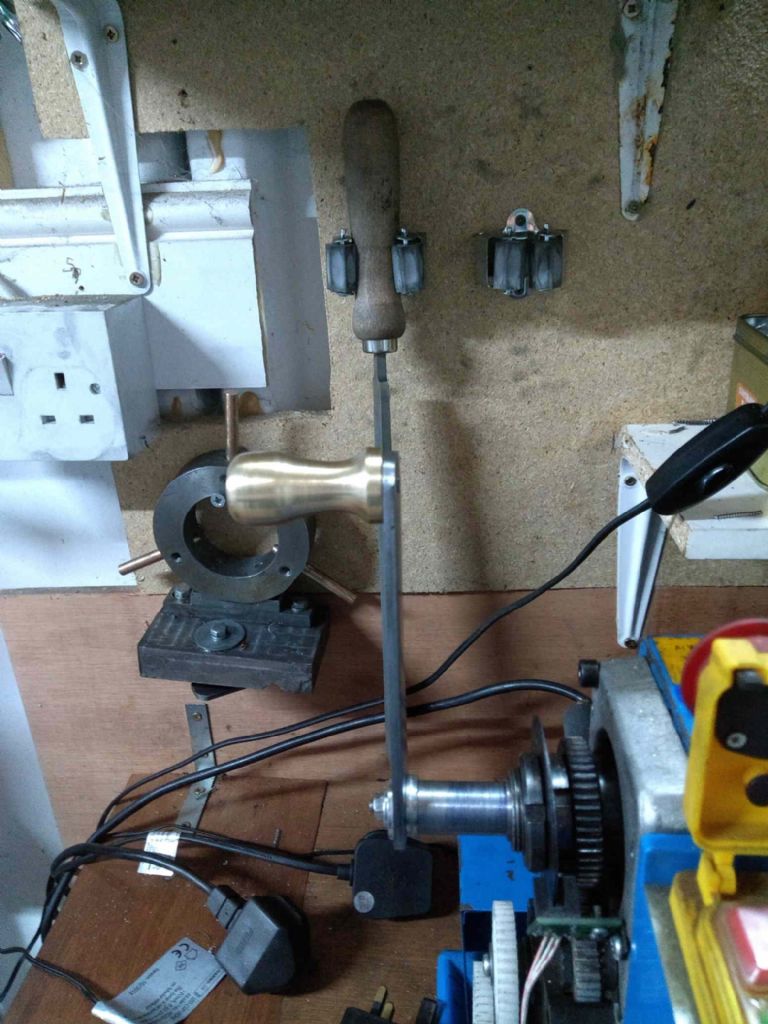
                                                      Over the last couple of weekends I've made a spindle handle, much like the one in MEW (though not the same).

                                                      It's somewhat based on Neil's design from his book, but i decided to have a go at a nice brass handle.

                                                      lathe handle.jpg

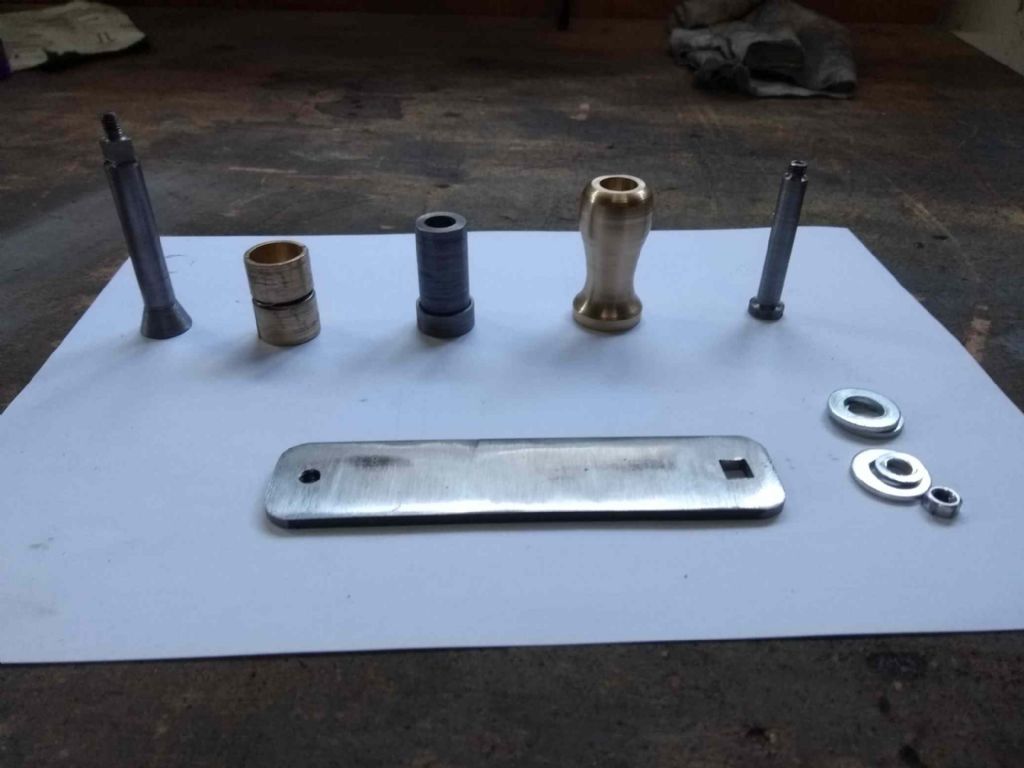
                                                      below being the individual parts

                                                      lathe handle parts.jpg

                                                      The main problem I had with this is that the conical bit on the shaft was attached by super glue. However, this shifted when trying to tighten it up. I had a couple of a goes which failed. So my next attempt was with some Locktite green retainer which has worked ok.

                                                      The other thing I've not quite got is finish. Part is knowledge, most is patience. However one thing that lets it down is that I can't get all the layout blue out where there are fine grooves. I accept that the correct way to sort this out is to lathe a better finish and perhaps one day I'll get there! In the meantime, I've tried meths and Isopropyl alcohol neither have got the blue out of the cracks.

                                                      Any ideas?

                                                      Iain

                                                    Viewing 25 posts - 201 through 225 (of 261 total)
                                                    • Please log in to reply to this topic. Registering is free and easy using the links on the menu at the top of this page.

                                                    Advert

                                                    Latest Replies

                                                    Viewing 25 topics - 1 through 25 (of 25 total)
                                                    Viewing 25 topics - 1 through 25 (of 25 total)

                                                    View full reply list.

                                                    Advert

                                                    Newsletter Sign-up