The Workshop Progress Thread 2019

Advert

The Workshop Progress Thread 2019

Home Forums Work In Progress and completed items The Workshop Progress Thread 2019

Viewing 25 posts - 226 through 250 (of 261 total)
  • Author
    Posts
  • #439975
    mechman48
    Participant
      @mechman48

      Have you tried a wire wheel bench grinder ?

      George.

      Advert
      #440100
      Mark Rand
      Participant
        @markrand96270

        Had one of those days™ in the shed today.

        Cleaning up a bit of thick walled tube on a job for herself, I had to remove the tailstock on the ML7 and support the bar with the chuck and a fixed steady (First time I've used the ML7 in two years but it's a bit longer than the Hardinge). Having got it all mounted I started it turning and prepared to skim the crud/paint/rust off the tube prior to painting it. It turns out that the tube is bent by about 1/4". Ordered some nice new tube and put her job into 'pending' status.

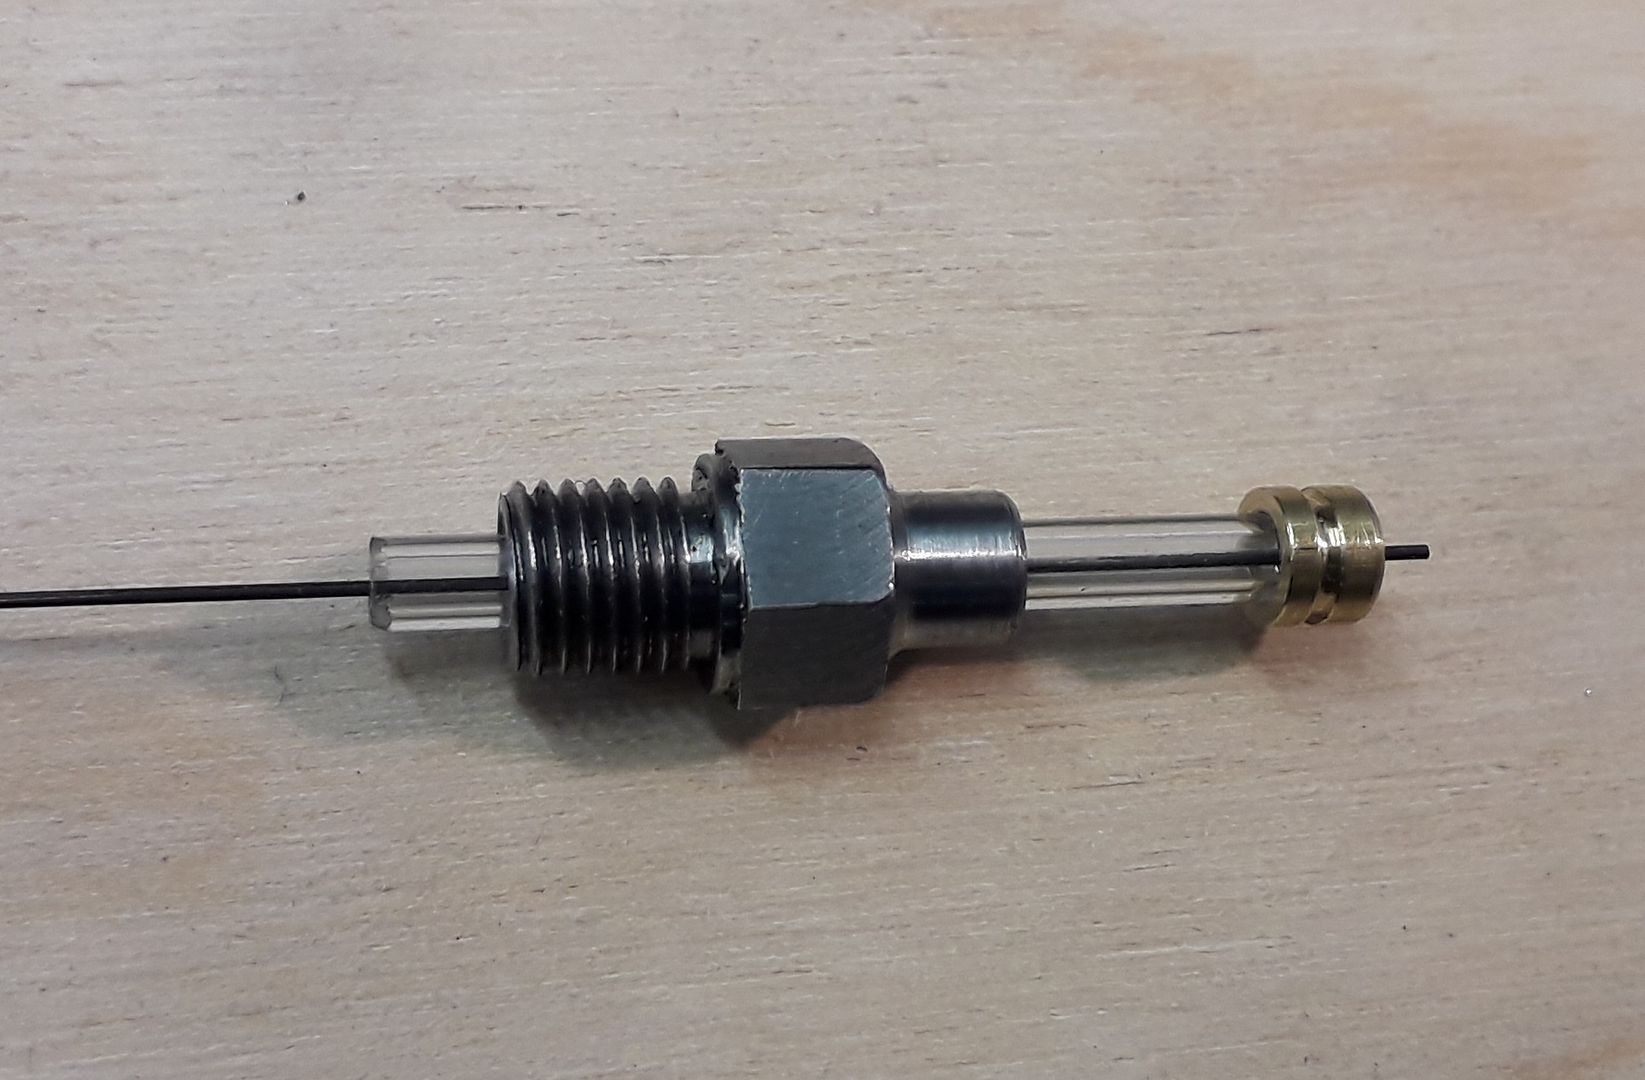
        Decided that I would finally make a start on sharpening quite a number of drills that have wear or chips on the sharp ends. Fitted a new, longer, bit of square bar to the tail end of the Picador sharpening jig so that it can cope with Morse taper drills in the larger sizes. Decided that the jig needed a riser block instead of the previous method of clamping it into a universal vice on the grinder to get it high enough. Found a decent lump of rusty scrap and started milling it flat/square/oblong to make the riser block out of. I'd almost finished cleaning up the third of the six sides when the mill started making an odd banging noise from the head. Since such noises tend to indicate something is falling apart, I stood on the step-stool and looked into the top end to see if I could spot anything. Spindle turned freely by hand, nothing looked out of place, so I slackened off the belt and turned on the motor as the first stage of checking. it was stuttering and looking as if it was dragging/not developing any real torque. Odd! Then I noticed a bit of a burnt smell coming from the switch box on the head, followed by a wisp of smoke. There was a gush of smoke when I unplugged the electric and removed the switch box. The switch was still trailing a bit when I removed it and put it on the bench…

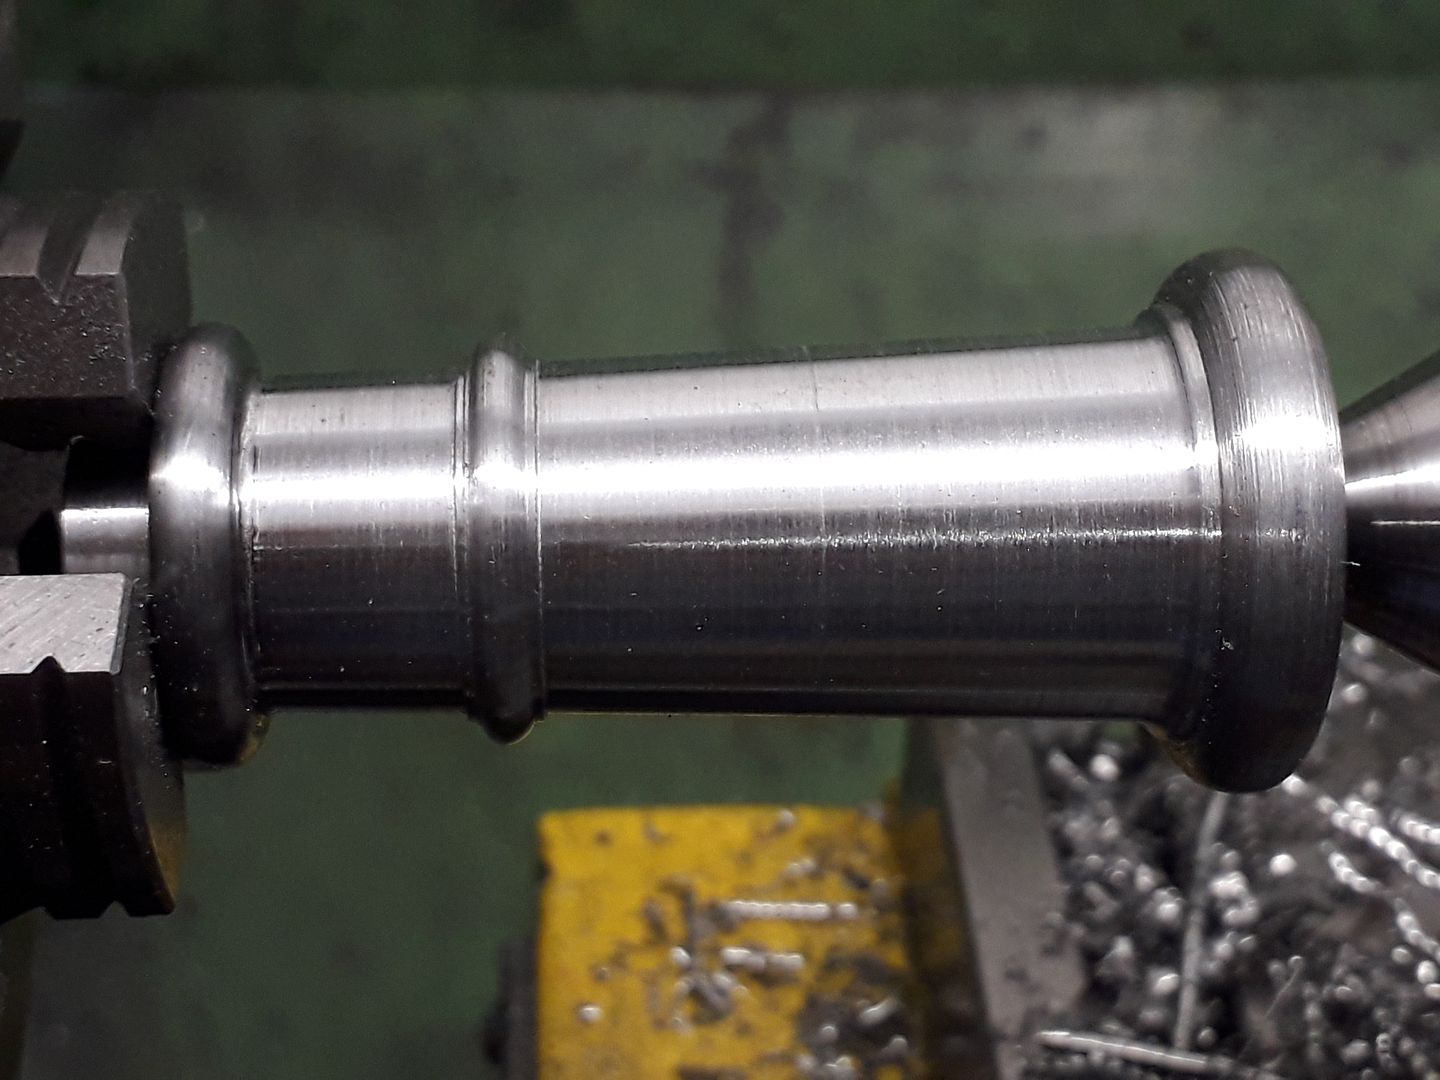
        Barrel/cam switches are a lousy way to turn motors on and off. But they've been used for many years. This one was rated at 7.5kW for motor duty, so should have been ok on the 2hp motor of the mill:-

        Ordered a replacement and am thinking about building a box with some decent contactors for an upgrade in motor control.

        Came in and had a little cry. Tomorrow I'll finish making the scrap iron square with the shaper. laugh

        #440784
        Ian McVickers
        Participant
          @ianmcvickers56553

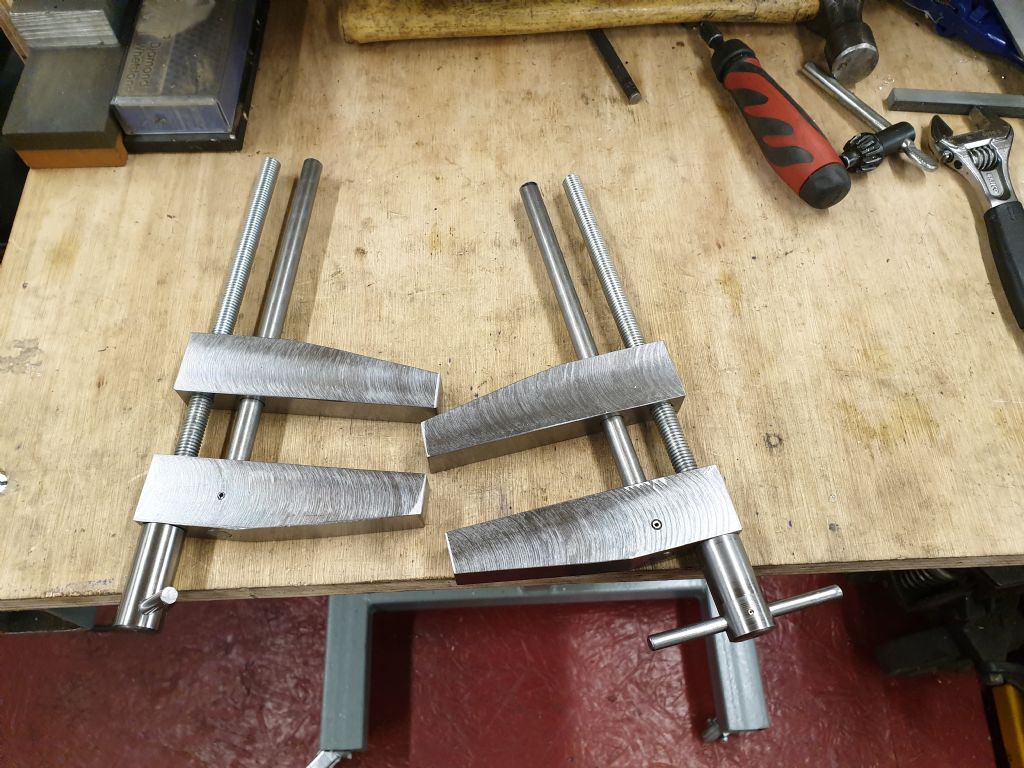
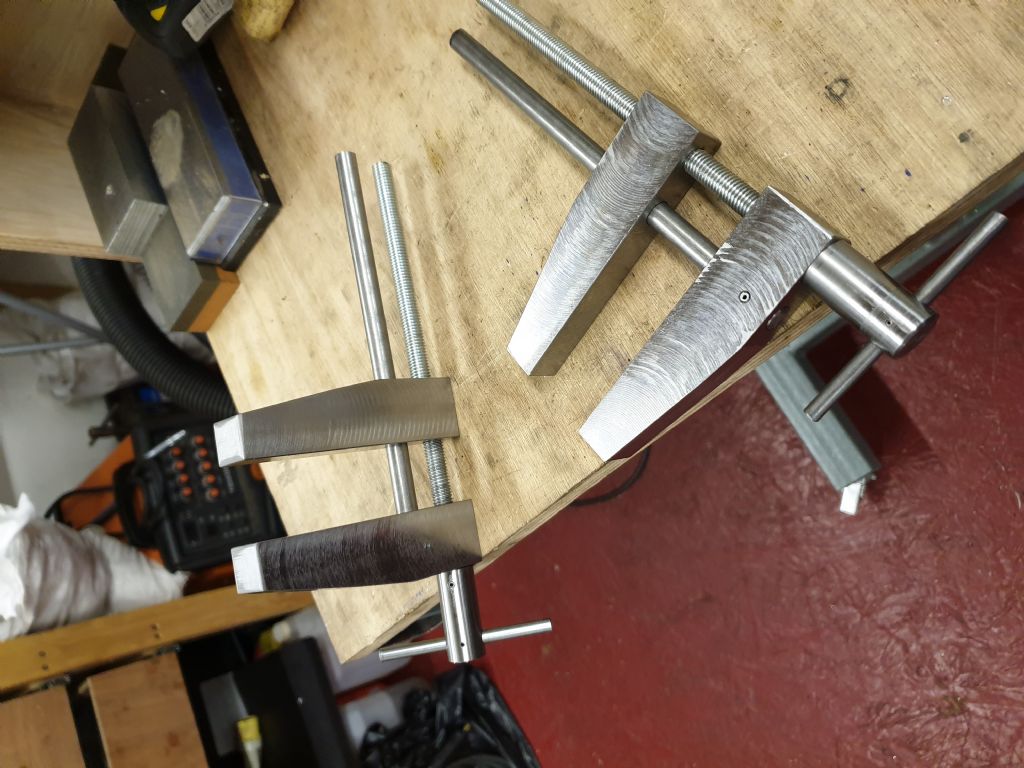
          Decided I needed a few more clamps so went along the lines of the Float Lock vice idea.

          Float lock 1.jpg

          Float Lock 2.jpg

          #440790
          Ian P
          Participant
            @ianp

            Forgive my ignorance, but what is a float lock vice?

            Ian P

            #440792
            Ian McVickers
            Participant
              @ianmcvickers56553

              The float lock is an adjustable position vise used on drill tables. It normally has a clamp which fits to the edge of the drill table and the round sliding bar of the vise goes through it. The vise can then be positioned anywhere on the table and locked in place. A search on google will bring up a full picture which will give idea than my description. Tubal Cain has an excellent video on them.

              #440875
              Ron Laden
              Participant
                @ronladen17547
                Posted by Ron Laden on 27/11/2019 07:51:29:

                Posted by JasonB on 24/11/2019 17:26:02:

                I've remembered one of the reasons I'm not keen on casting kits – they don't take long to dosad Started this one on the 2nd Nov and finished today with the exception of making a couple of screws and waiting for some adhesive to complete the spark plug.

                Excellent, I really like the look of it, look forward to seeing it run dont forget the video Jason.

                Jason, are we quite near to having the engine up and running, I say we as its just that I have been looking forward to seeing it.

                #440898
                JasonB
                Moderator
                  @jasonb

                  It was popping yesterday but not long enough to get a video, stay tuned.

                  #440949
                  JasonB
                  Moderator
                    @jasonb

                    Here you go Ron, I went out in the shed before dinner and gave it a few flicks of the flywheel. The running notes say the vapour carb works well on stale fuel and it ran better today having left the fuel open overnight to gas off a bit.

                    I expect it would run for longer if that bloke in the video would stop fiddling about with the mixture and ignition timingblush

                    #440965
                    Mark Rand
                    Participant
                      @markrand96270

                      Sharpened a few MT2 drills with the Picador drill sharpening jig. Took a while, since they were either chipped ones or hand-ground to interesting proportions by previous owners. Still faster and more consistent than the Drill Doctor was. smiley

                      Lashed up the replacement forwards/off/backwards switch on the Mill. This one's bigger than the one I fitted when I rebuilt the mill, which was bigger than the original. So the extension housing I made for the original switch mounting is too small. It's held up with insulting tape at the moment and I'll cast a custom housing for it when I get the foundry going next year.

                      Used the now-functional mill to make a bit of oblong stock into a DIN/Tophat rail to fix a delay relay into the Chinee multiprocess welding set. It has a tendency to burn out its switch contacts with the inrush current charging its capacitors. A 15Ω resistor in series with the on-switch for half a second will stop the contacts welding together. The resistor has mounting holes, so that was easy.

                      It's nice to get things done!

                      #440979
                      Ron Laden
                      Participant
                        @ronladen17547
                        Posted by JasonB on 09/12/2019 19:09:02:

                        Here you go Ron, I went out in the shed before dinner and gave it a few flicks of the flywheel. The running notes say the vapour carb works well on stale fuel and it ran better today having left the fuel open overnight to gas off a bit.

                        I expect it would run for longer if that bloke in the video would stop fiddling about with the mixture and ignition timingblush

                        Very nice Jason I like the sound of it and it looks different.

                        It seems to be sensitive to mixture and timing but it had a sweet spot towards the end of the video.


                        Edited By Ron Laden on 10/12/2019 06:55:37

                        Edited By Ron Laden on 10/12/2019 06:56:16

                        Edited By Ron Laden on 10/12/2019 07:15:58

                        #441134
                        Mark Rand
                        Participant
                          @markrand96270

                          Got the delay relay and big resistor mounted in the case of the welder and wired them all up. I now have a welder that doesn't try to weld its switch contacts shut every time it's turned on. smiley

                          #441157
                          Johnboy25
                          Participant
                            @johnboy25

                            Really having problems with high humidity in the workshop. Didn’t get time to rebuild the workshop with a pitch roof this year. Next years project all being well. I had to resort to running two dehumidifiers intermittently so they don’t ice up. It upsets me to see my machinery dripping in condensation. 😢

                            Edited By Johnboy25 on 11/12/2019 08:21:35

                            #441192
                            Jim Nic
                            Participant
                              @jimnic

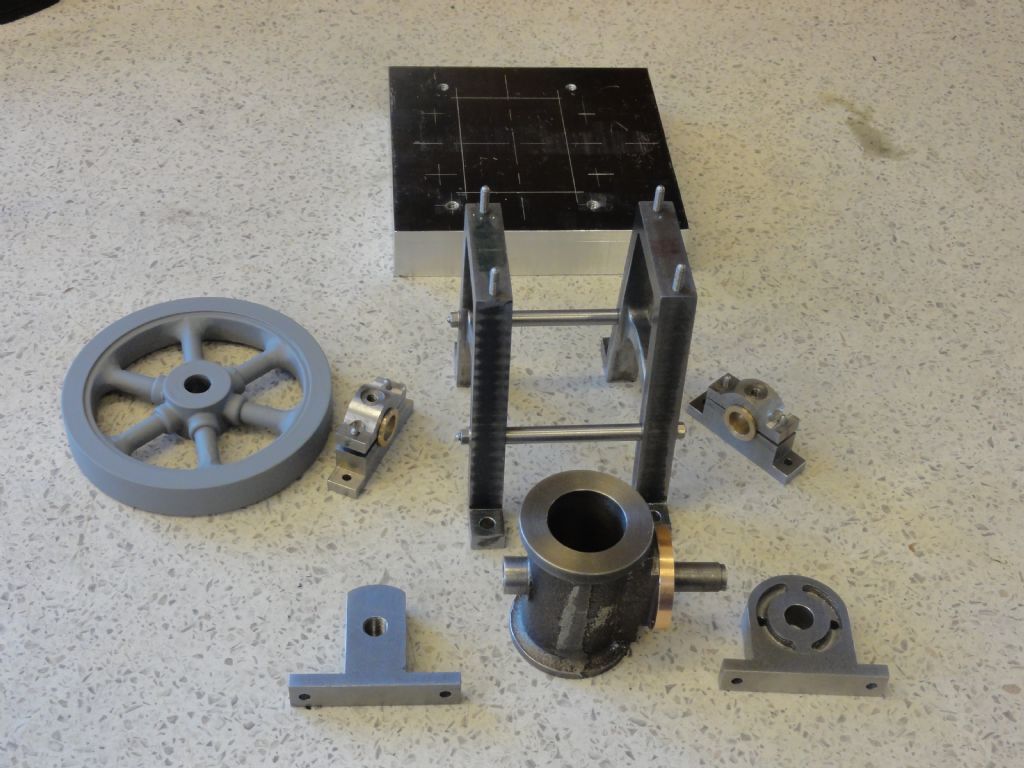
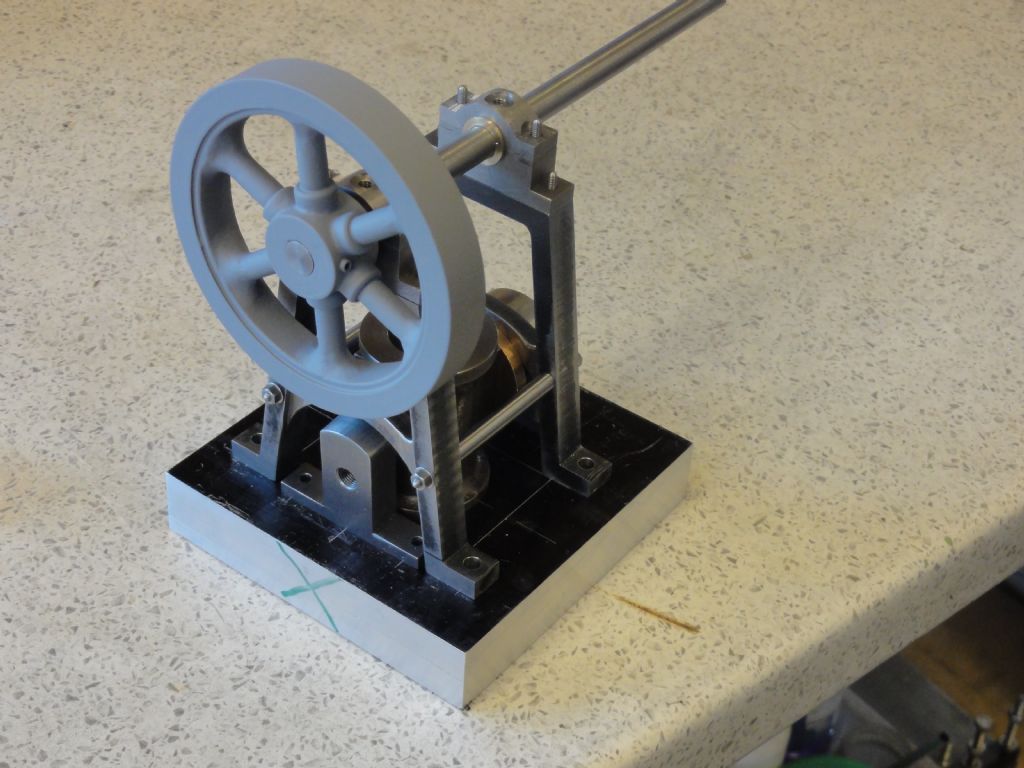
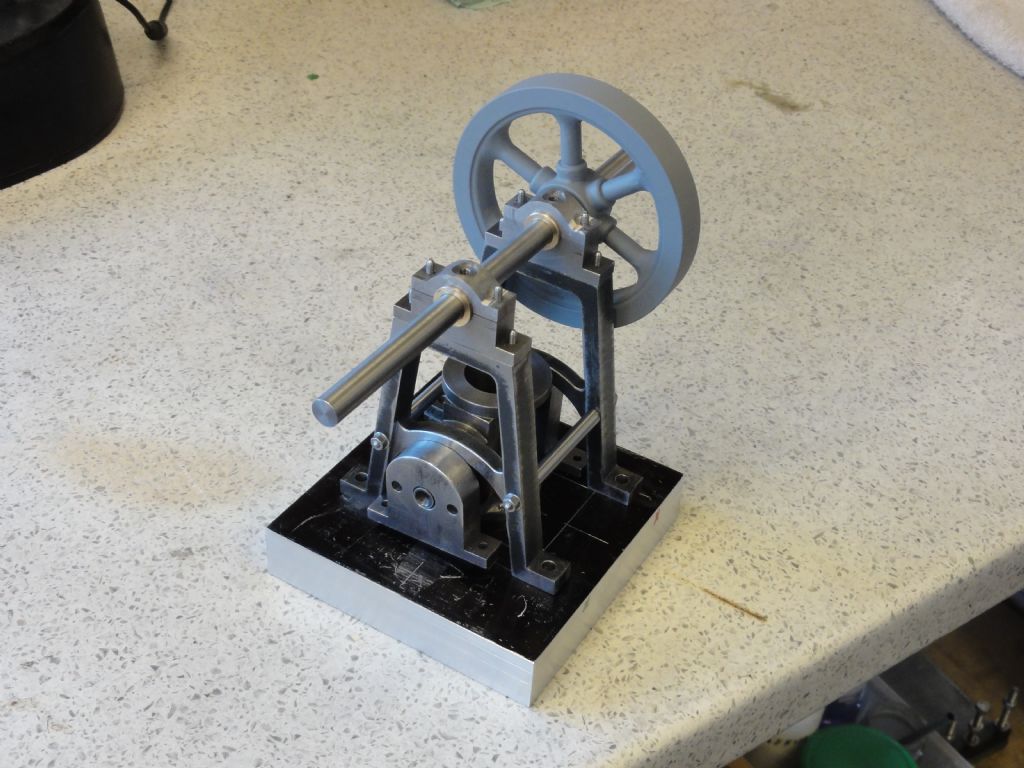
                              Over the last couple of months, while Jason has completed a couple of engines, I have made some snail paced progress on Muncaster's Double Oscillator.

                              A picture of the parts to date:

                              family shot 1.jpg

                              A very loose assembly:

                              family shot 3.jpg

                              family shot 4.jpg

                              Still plenty to do but I can now see an engine in there.

                              Jim

                              #441199
                              IanT
                              Participant
                                @iant

                                I was busy using a piercing saw last night to rough out some swing latches in 1/16th brass – and it was all going very well. I haven't broken a blade for a quite while….

                                I must be getting better at this [I thought] or just plain lucky – Plang!! – at which point the blade broke.

                                OK – it was luck then…

                                IanT

                                #441264
                                mechman48
                                Participant
                                  @mechman48

                                  Gone through a few piercing saw blades lately doing the frames for my beam engine; pushing that bit too fast or twisting out of square, ah well ! all sent to try us. dont know

                                  George.

                                  #441635
                                  JasonB
                                  Moderator
                                    @jasonb

                                    Jim, you engine is coming along nicely. Good things come to those who wait take their time

                                    between making swarf I have had a bit more of a play with the RMC and it is starting to run for longer and stop when I want it too. Sorry for holding the camera in portrait mode though it does suit the upright shape of the engine.

                                    Also did some of the column for the vertical oscillator.
                                    #441648
                                    Richard S2
                                    Participant
                                      @richards2

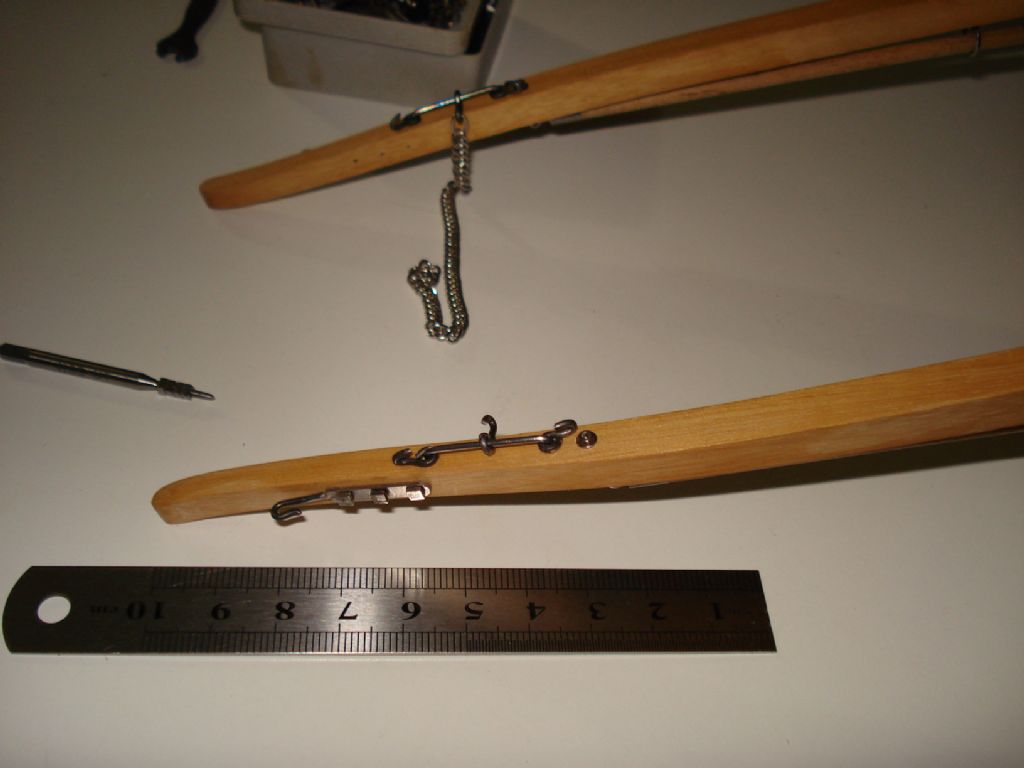
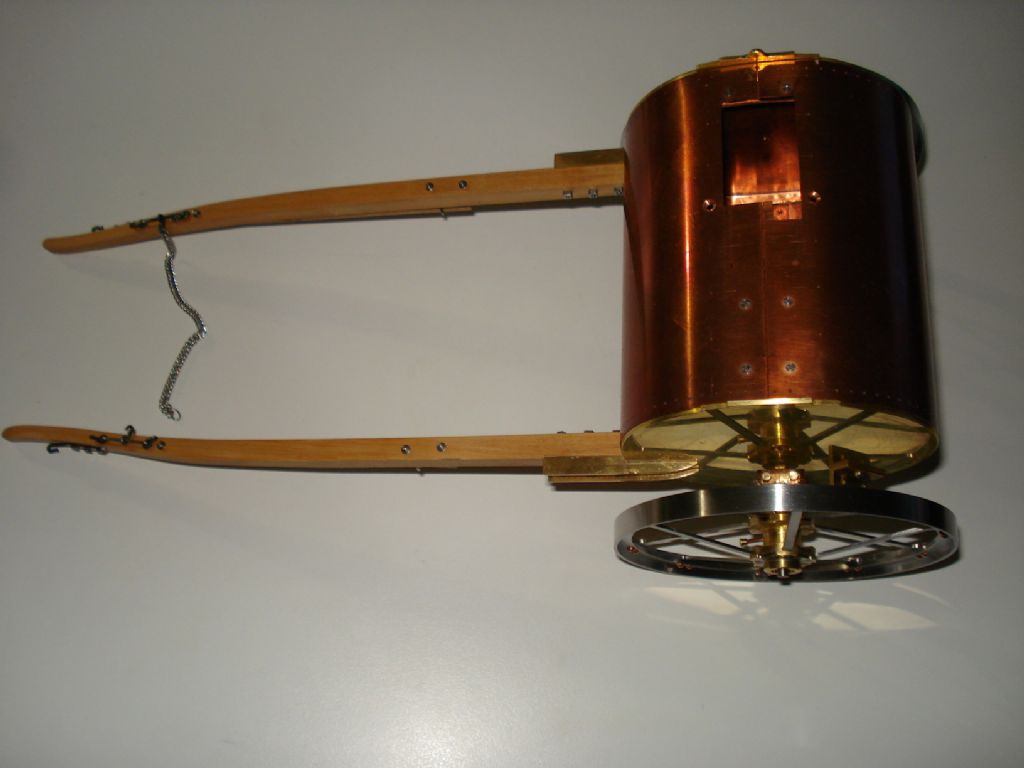
                                      Although I'm making a steel framed drawbar for the 1" scale Water Cart, I deviated to make wooden shafts as well.

                                      Happy with the first attempt at steam bending hardwood, so have been producing the ironwork for them. Even managed to obtain scale double link curb chain.-

                                      dsc02168.jpg

                                      dsc02169.jpg

                                      #441650
                                      martin perman 1
                                      Participant
                                        @martinperman1
                                        Posted by JasonB on 14/12/2019 17:06:27:

                                        Jim, you engine is coming along nicely. Good things come to those who wait take their time

                                        between making swarf I have had a bit more of a play with the RMC and it is starting to run for longer and stop when I want it too. Sorry for holding the camera in portrait mode though it does suit the upright shape of the engine.

                                        Also did some of the column for the vertical oscillator.

                                        Jason,

                                        A lovely looking and running engine, it has the sound of an engine that could improve with a light load, I hear them often on the rally field, particularly Petter two strokes.

                                        Martin P

                                        #441654
                                        Neil Wyatt
                                        Moderator
                                          @neilwyatt
                                          Posted by Richard S2 on 14/12/2019 18:59:46:

                                          Although I'm making a steel framed drawbar for the 1" scale Water Cart, I deviated to make wooden shafts as well.

                                          Happy with the first attempt at steam bending hardwood, so have been producing the ironwork for them. Even managed to obtain scale double link curb chain.-

                                          dsc02168.jpg

                                          dsc02169.jpg

                                          That's nice!

                                          #441753
                                          JasonB
                                          Moderator
                                            @jasonb

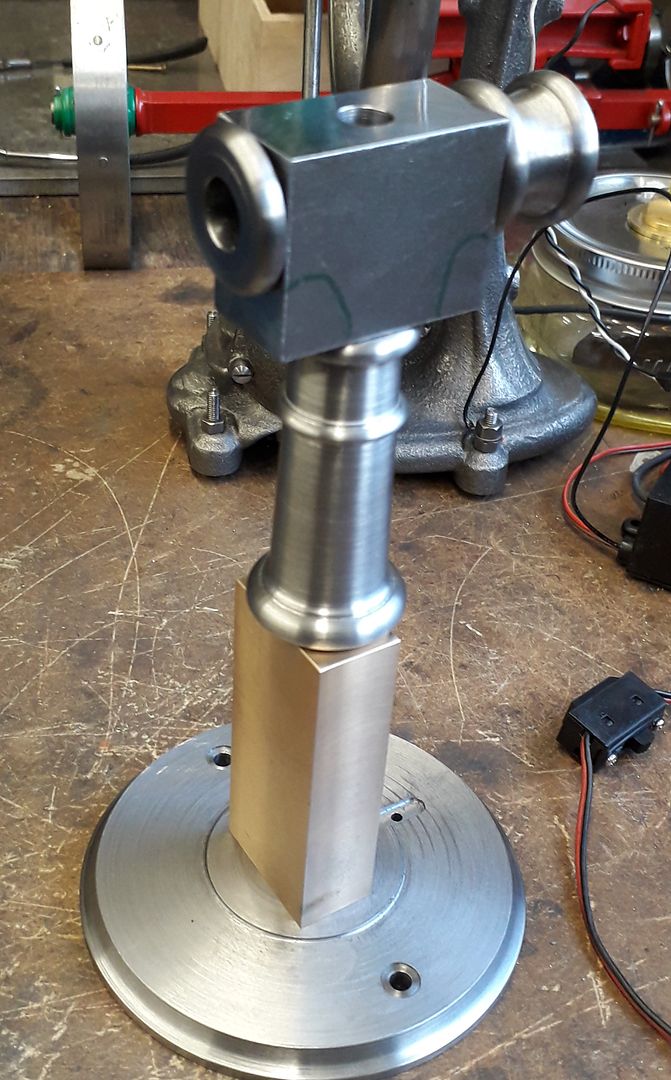
                                            Bit more done on the Vertical oscillator, the two rectangular block will be shaped on the CNC over the Xmas hols. The base wa smachined from a 100mm dia x 10mm waterjet cut disc I have had hanging around for a while, nasty CR4 or S275 which was not that enjoyable to machine.devil

                                            #441770
                                            Gray62
                                            Participant
                                              @gray62

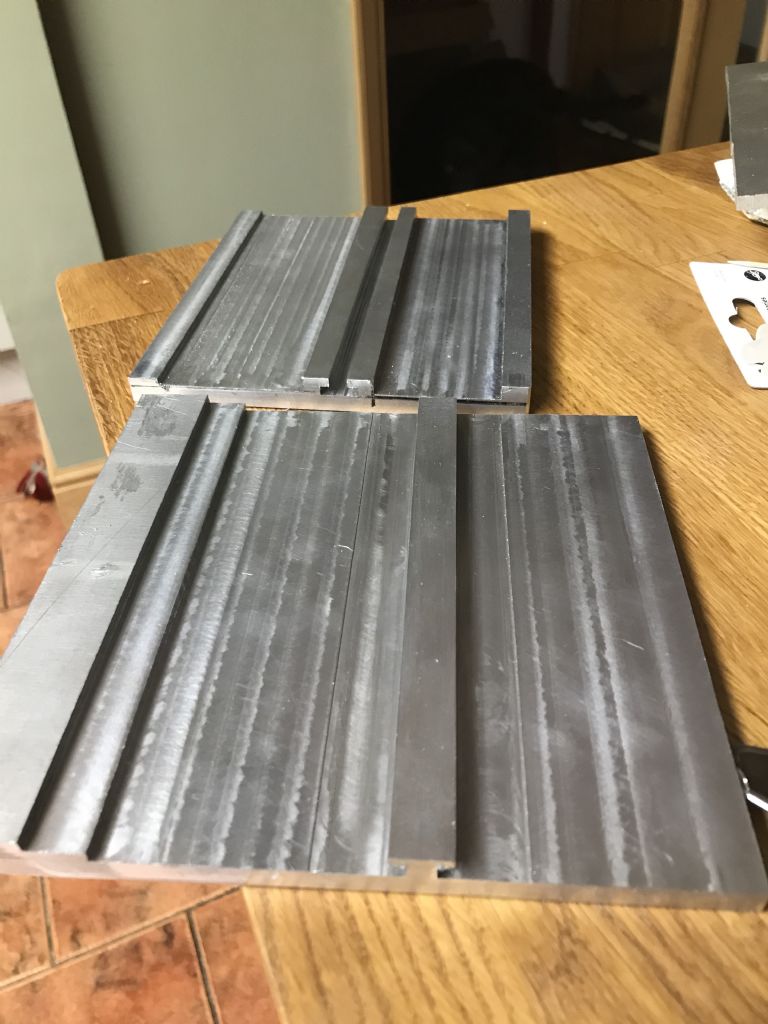
                                              I have wanted a four facet grinding jig for my Scheppach Wetstone grinder but couldn't justify nearly 200 beer tokens for a genuine Tormek jig.

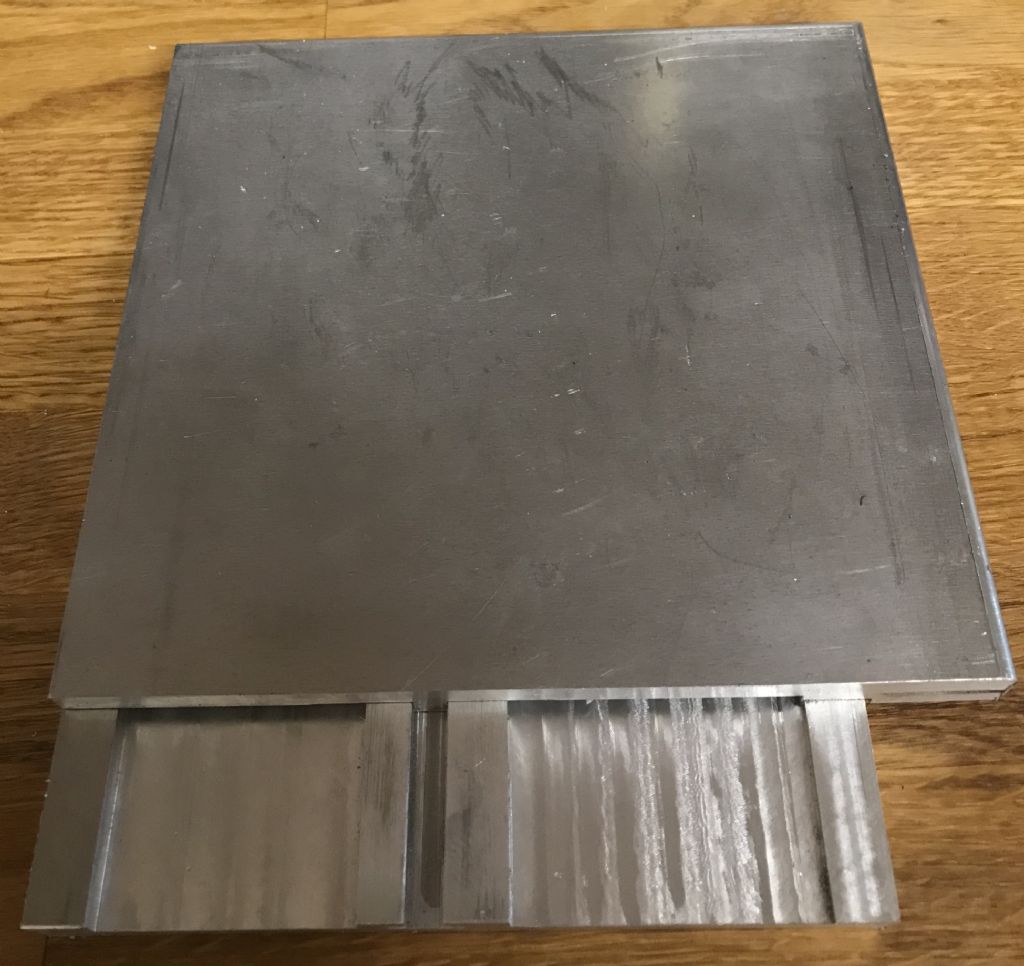
                                              Raided the scrap box and found some 10mm ally plate left over from a commission job with these hiding inside.

                                              4 facet jig-1.jpg

                                              and assembled they look like this

                                              4 facet-2.jpg

                                              These form the fixed base and cross slide of the jig. I need to find some slippery material in a square bar form to make bearing surfaces so I don't have metal to metal contact which will wear over time. Now have to make the top plate which rotates to set the grind point angle and adjust depth of cut and a drill holder, haven't yet decided on the format for that but an ER collet block or 5C are options as I have a good set of both imperial and metric of both types.

                                              #442158
                                              Iain Downs
                                              Participant
                                                @iaindowns78295

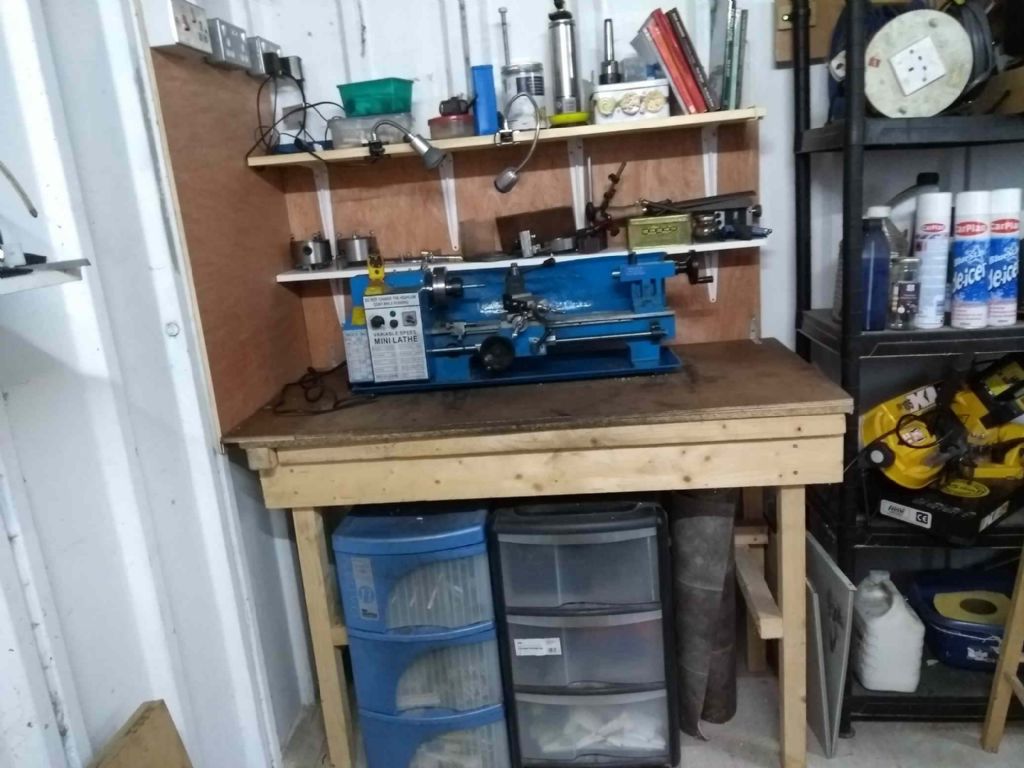
                                                Workshop progress indeed! This last few days has been spent in re-arranging my shed so that a somewhat (vastly) larger mill can fit into it. The Mill will arrive on Friday so I've made sure to have it ready.

                                                The only real space was to move my Lathe stand onto the opposite wall and put the mill in the larger gap where the lathe was.

                                                The new lathe position

                                                lathe stand.jpg

                                                I'm going to make some little plastic doors for the bottom shelf to sop the swarf getting on the various chucks. Probably not soon though as my workshop building gland is exhausted.

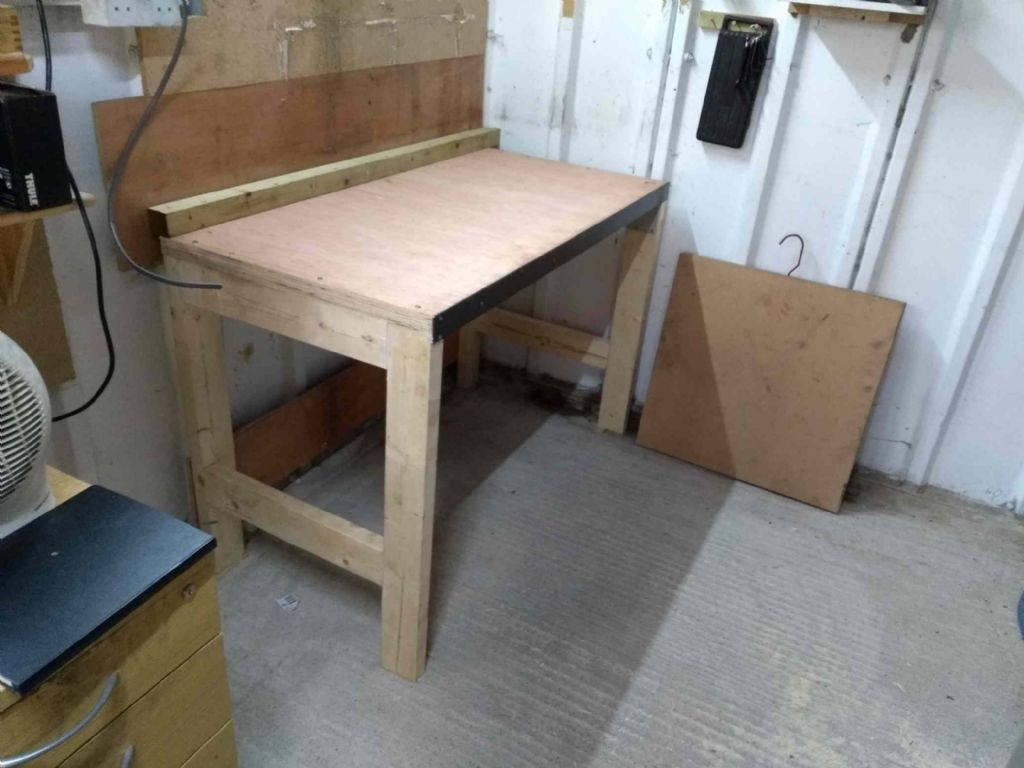
                                                This is the mill table.

                                                mill stand.jpg

                                                The Mill (VM32L) weights 240kG so I'm hoping this is sturdy enough! That's two thicknesses of 18mm ply with a (roughly) 2×4 support at the back and a strip of 50mm x 4mm steel screwed and glued to the front to stop it bowing.

                                                Friday will tell.

                                                I shall publish photos of the machine in place….

                                                Iain

                                                #442172
                                                Bill Davies 2
                                                Participant
                                                  @billdavies2

                                                  Hi, Iain.

                                                  I read what you say about stiffening the top, but I feel a little anxious about sideways deflections under the weight of the mill. It's hard to judge size in a photo, but I think you need something across the front, at least a well-attached rail.

                                                  It appears that you have a wide piece across the back (the dark piece of wood), providing some stiffening in the left-right plane. I would suggest a 4×2 sunk into the front legs. Do others agree?

                                                  Bill

                                                  #442173
                                                  Pero
                                                  Participant
                                                    @pero

                                                    Hi Iain

                                                    From experience, I admit to being a nervous Nellie when it comes to wooden benches ( and I do have several which I am very happy with ) and I take a number of precautions with their construction. These relate primarily to the fact that wood expands and contracts with the seasons ( due to humidity ) causing joints to open up and become subject to movement over time.

                                                    There is also the problem of sagging over time due to weight loading. I don't think your current design will stop the front from sagging over time, even with the metal strip.

                                                    To counter these potential problems I would sheet both ends, or at the very least put in a diagonal brace. I would also put in a wide board at the top front – 6" x 1" minimum ( or alternatively an additional, center, leg ) and also a brace at the front bottom to prevent the legs splaying.

                                                    These do interfere with under bench storage but I think the top support as a minimum will be required. The bottom rail could possibly be incorporated as part of built in storage at a latter date if needed ( occasional check measuring will show if this is so ).

                                                    Painting or varnishing all surfaces, both externally and internally, which is a pain, will also help to stabilize the timber and preserve it. I did mention I was into overkill didn't I?

                                                    My Myford and a heavy weight drill press are both on wooden benches ( both now over 40 years old&nbsp and both are better than new ( I do occasional upgrades! ). However I have noticed that the low shelf, comprised of 19 mm tongue and groove hardwood boards, in my lathe bench have started to sag ( mostly under their own weight – well perhaps with one or two chucks and a few other light accessories! ) and will require some additional support in the near future. As i mentioned occasional maintenance may be required.

                                                    Best of luck with the new mill – just in time for Christmas.

                                                    Pero

                                                    #442174
                                                    Pero
                                                    Participant
                                                      @pero

                                                      Damn! Survived 81 posts without an emoji but it finally got me. Not quite sure what was there before that grinning idiot stepped in – please ignore.

                                                      Pero

                                                    Viewing 25 posts - 226 through 250 (of 261 total)
                                                    • Please log in to reply to this topic. Registering is free and easy using the links on the menu at the top of this page.

                                                    Advert

                                                    Latest Replies

                                                    Viewing 25 topics - 1 through 25 (of 25 total)
                                                    Viewing 25 topics - 1 through 25 (of 25 total)

                                                    View full reply list.

                                                    Advert

                                                    Newsletter Sign-up