The Workshop Progress thread 2018

Advert

The Workshop Progress thread 2018

Home Forums Work In Progress and completed items The Workshop Progress thread 2018

Viewing 25 posts - 76 through 100 (of 456 total)
  • Author
    Posts
  • #344408
    JasonB
    Moderator
      @jasonb

      That's the second one todaysmiley

      Advert
      #344412
      John Haine
      Participant
        @johnhaine32865

        I added a blower to my Novamill for the same reason – I also had to fit a polycarb sheet using magnets to hold it to avoid chips going everywhere in the workshop. (I removed the standard perspex cover as I just didn't have room.) Tend to get little chip-drifts in the back of the housing! Also used an airbrush compressor, but mine didn't have a tank so repurposed a used Bernzomatic oxygen bottle to provide a little bit of a reservoir.

        #344515
        Hopper
        Participant
          @hopper

          dscn3818.jpg

          Bit of progress on the Potty "Lads and Dads" mill engine. The lad is learning a lot. One thing he learned is to check the table on the Chinese drill press for square to the spindle before drilling and reaming a crankshaft. Then he learned how to use a parting tool ground like a turning tool to get in between the webs of teh finished crank and turn the crankpin back true to to the mainshafts. And then how to bodgy up a Chinese drill press with bits of shim to bring the table back to square for next time. He's now using the 60 year old Myford lathe and vertical slide for any drilling that needs to be dead-on.

          So far the engine has come up looking rather well with a flywheel made from an old steam valve handwheel and various bits of scrap brass used to tart things up a bit. Probably will paint that valve chest green along with the cylinder eventually, maybe leave the one side with the nuts etc on it as brass, just for show, ditto the cyl. heads. Paintwork is official Colorbond household roof guttering green left over from an ancient domestic touch up job.

          Edited By Hopper on 05/03/2018 11:27:12

          #344539
          Another JohnS
          Participant
            @anotherjohns

            Shay complete – with the exception of testing the DAG Brown injectors that are almost complete. Will test this summer, as it's too cold outside to do any steaming up, and I don't have an electric test boiler.

            It's to Kozo Hiraoka's first 3-1/2" gauge Shay design, with the exception of a displacement lubricator on the RHS running board, and an injector as opposed to an axle pump.

            A fun project!

            shaycomplete_s.jpg

            #344594
            Roderick Jenkins
            Participant
              @roderickjenkins93242

              That's looking very nice John. I'm sure she'll go as well as she looks.

              Rod

              #344609
              Neil Wyatt
              Moderator
                @neilwyatt

                Well done John, looks great.

                How long did it take you?

                Neil

                #344616
                Another JohnS
                Participant
                  @anotherjohns
                  Posted by Neil Wyatt on 05/03/2018 20:43:20:

                  Well done John, looks great.

                  How long did it take you?

                  Neil

                  In terms of hours or the passage of time?

                  Passage of time – life gets in the way, and people (especially kids) come first. Workshop progress dropped to almost nothing for quite a while. Lets say, 20 years start to finish. Recently, some parts of it can be seen in the couple of ME articles I wrote regarding CNC machining.

                  I'm hoping my long-dormant "Ivatt" 2-6-0 (also in 3-1/2" gauge) will be running in 2019; the remaining big items are the cylinders and running gear. We'll see; crossing fingers that life keeps being stable for a while!

                  #344649
                  Neil Wyatt
                  Moderator
                    @neilwyatt

                    I had a feeling 'A fun project!' was a bit of a simplification

                    Rewarding to reach the end point on such long project,

                    #345077
                    mechman48
                    Participant
                      @mechman48

                      Caught up with my Vertical cross engine. made the base with some MDF offcut & 10mm pine. trial assembled, starting to look like some thing now, still a lot to do, any help with polishing aluminium top plate would be appreciated, I do have wet & dry emery paper plus a couple of buffing wheels & polish, just enquiring about other methods…

                      40. vscross trial assembly (1).jpg

                      40. vscross trial assembly (2).jpg

                      40. vscross trial assembly (5).jpg

                      George.

                      #345170
                      Jim Nic
                      Participant
                        @jimnic

                        Indeed looking like summat now George.

                        Can't offer any advice re polishing the ali top plate, for my Popcorn I engine turned the base and then laquered it for protection. Seems to be working to keep it shiny and easy to wipe away dust and oil so I would certainly recommend a coat of laquer.

                        How are you going to connect the air (or steam) to it? It appears you have a hollow wood base so a connection in the side of the wood and then up through the MDF to the inlet valve would look neat.

                        Popcorn finished 5.jpg

                        This is just a brass turning with an M6 threaded hole for the connector glued in to a hole in the brown stuff and piped to the connector in the ali base.

                        Jim

                        #345198
                        mechman48
                        Participant
                          @mechman48

                          Jim

                          That's precisely what I'm going to do… thumbs up

                          George.

                          #345444
                          mechman48
                          Participant
                            @mechman48

                            Did a bit more on the vertical cross engine, mainly the base, but am having second thoughts on the colour scheme…

                            41. vscross finishing base & trial assembly (1).jpg

                            41. vscross finishing base & trial assembly (4).jpg

                            41. vscross finishing base & trial assembly (7).jpg

                            ​… Considering overlaying some model railway brick work plasticard on the sides…??. Still have the pillars to drill for X arms etc . Open to suggestions!…. nice ones please, lets not degenerate to smuttiness…

                            George.

                            Edited By mechman48 on 11/03/2018 00:49:01

                            Edited By mechman48 on 11/03/2018 00:50:20

                            #345456
                            JasonB
                            Moderator
                              @jasonb

                              I think some thin flat wood or the Brick/Stone on the sides may tone things down a bit particularly if you are still intending to polish the entablature.

                              #345504
                              Jim Nic
                              Participant
                                @jimnic

                                Bricks, for sure.

                                Jim

                                #345517
                                mechman48
                                Participant
                                  @mechman48

                                  thumbs up Thanks guys, got plenty of lolly sticks for cladding the cylinder, also deciding what colour to paint the pillars did get some cream & Aero blue rattle can sprays last week. hmmm decisions, decisions… thinking

                                  George.

                                  Edited By mechman48 on 11/03/2018 12:30:47

                                  #345545
                                  JasonB
                                  Moderator
                                    @jasonb

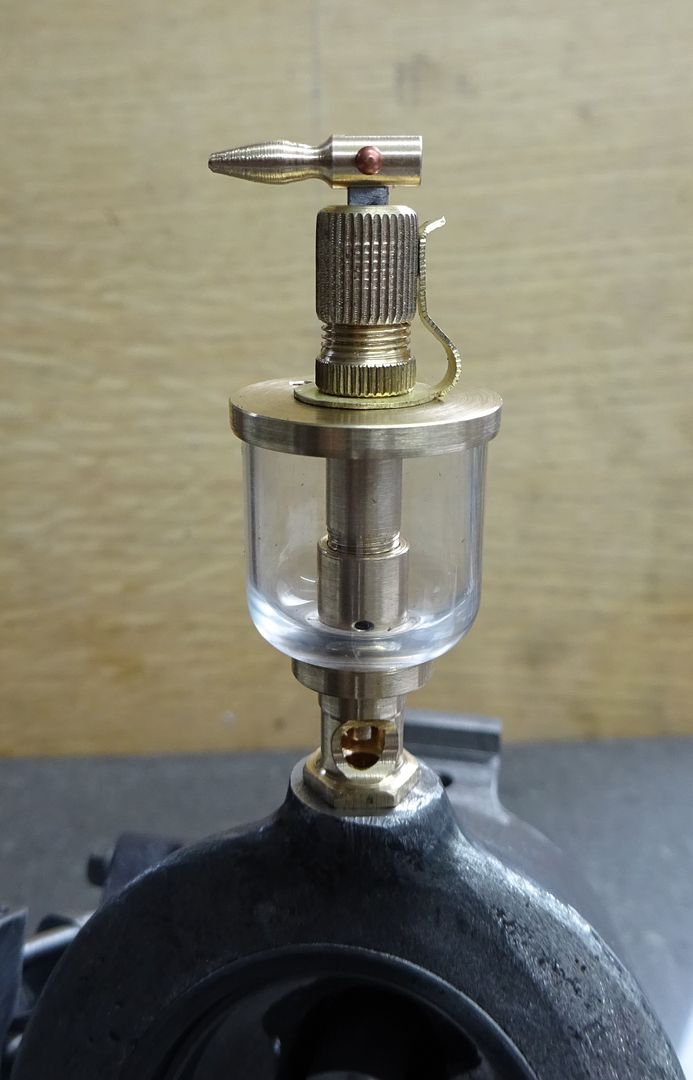
                                    I made up the drip feed oiler for the Robinson X-Type, bit different from the usual ones which just use a short length of glass tube and flat end plates. This one is a wineglass form and the bowl was machined from 20mm acrylic rod, quite please with how it came up after working down through the Micro-Mesh grits.

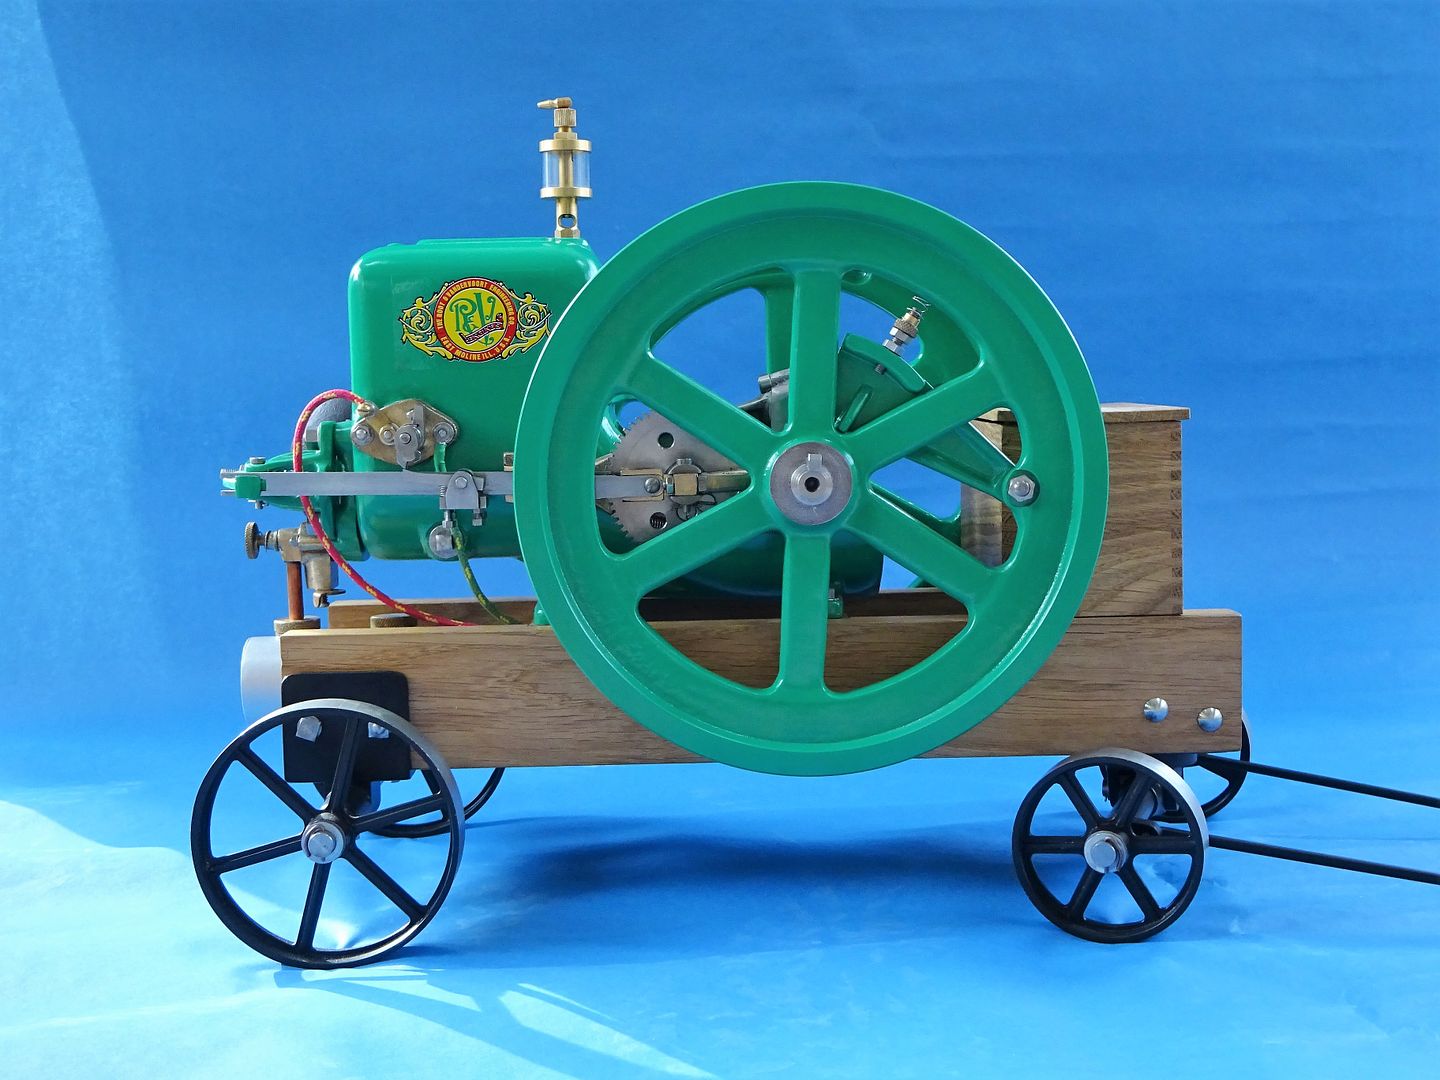
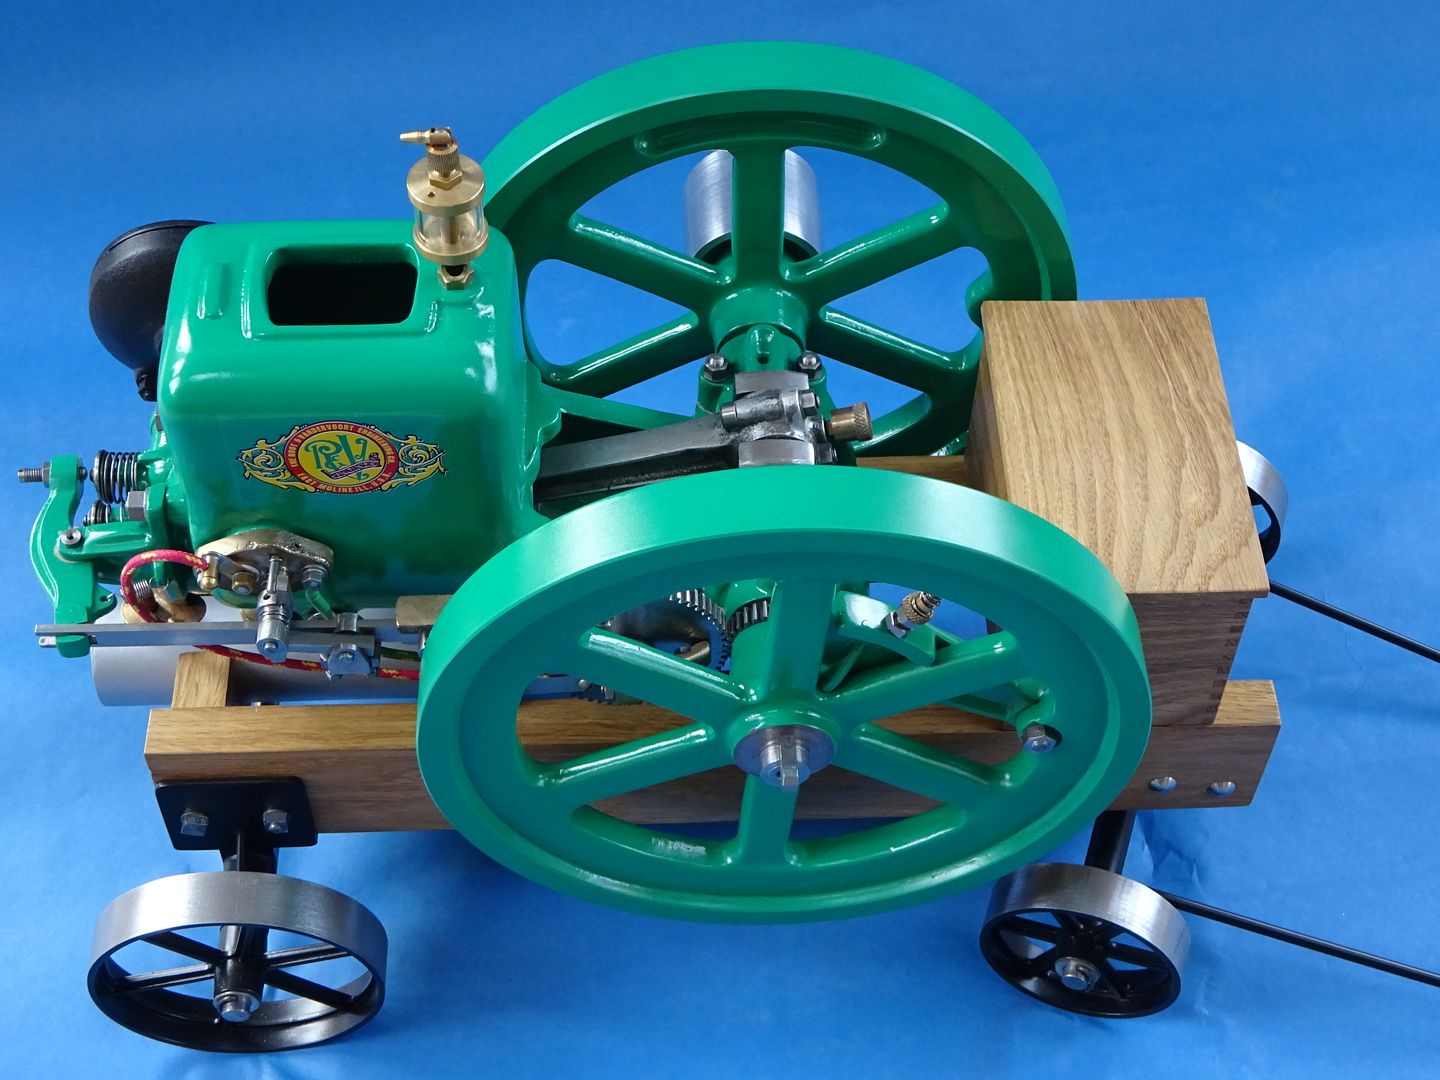
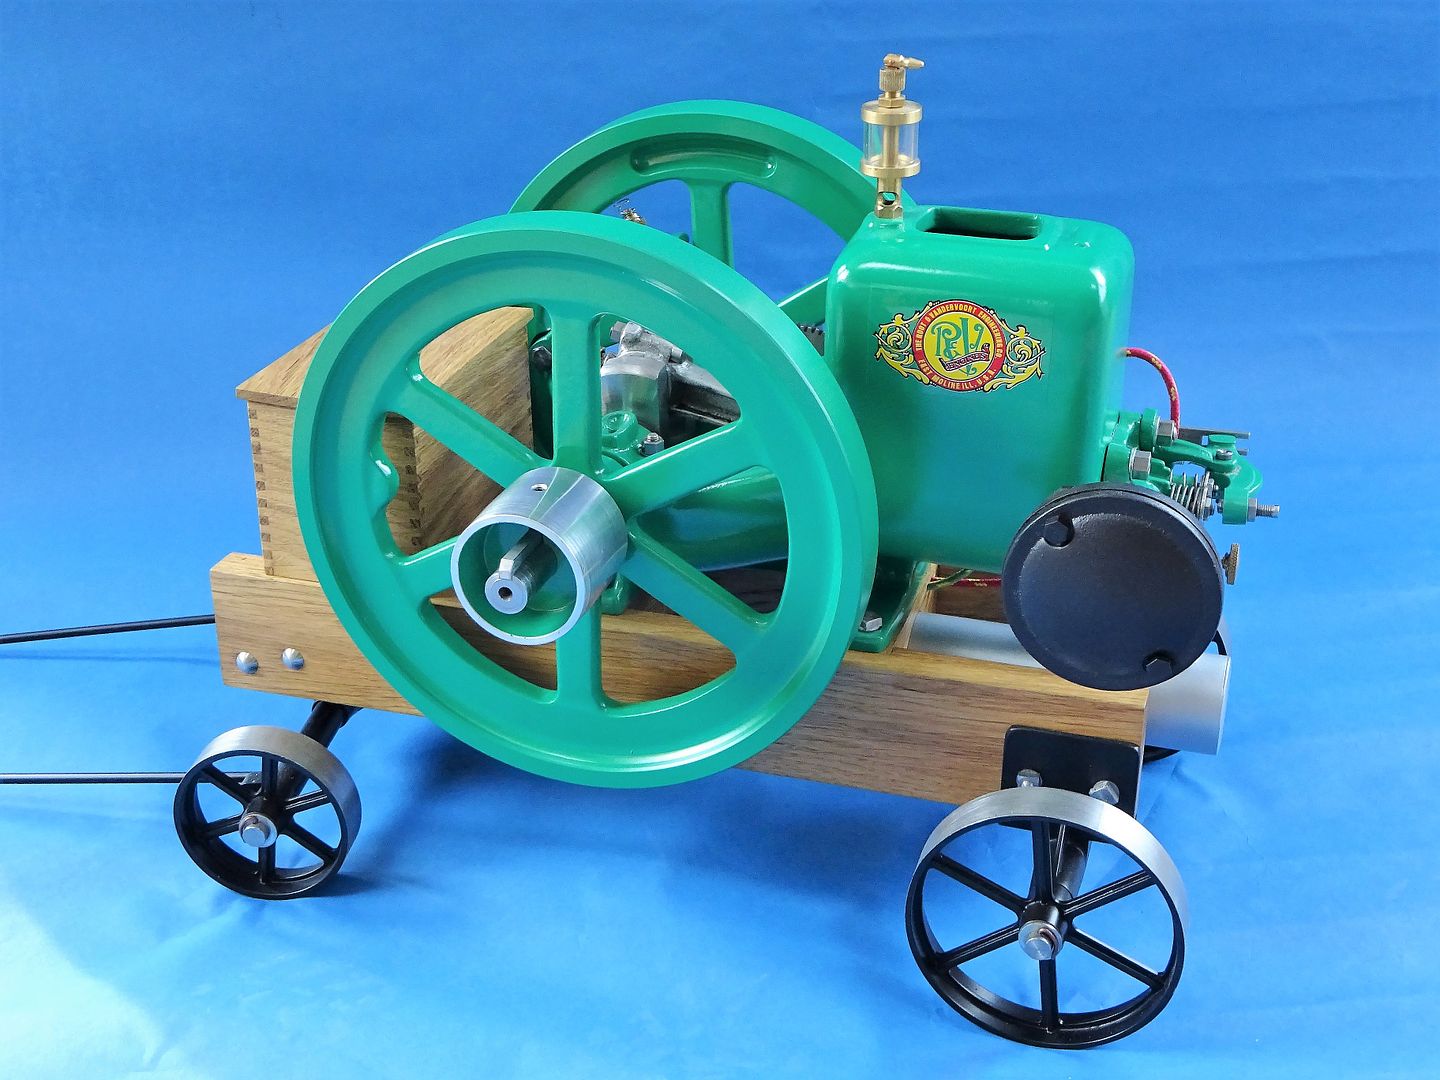
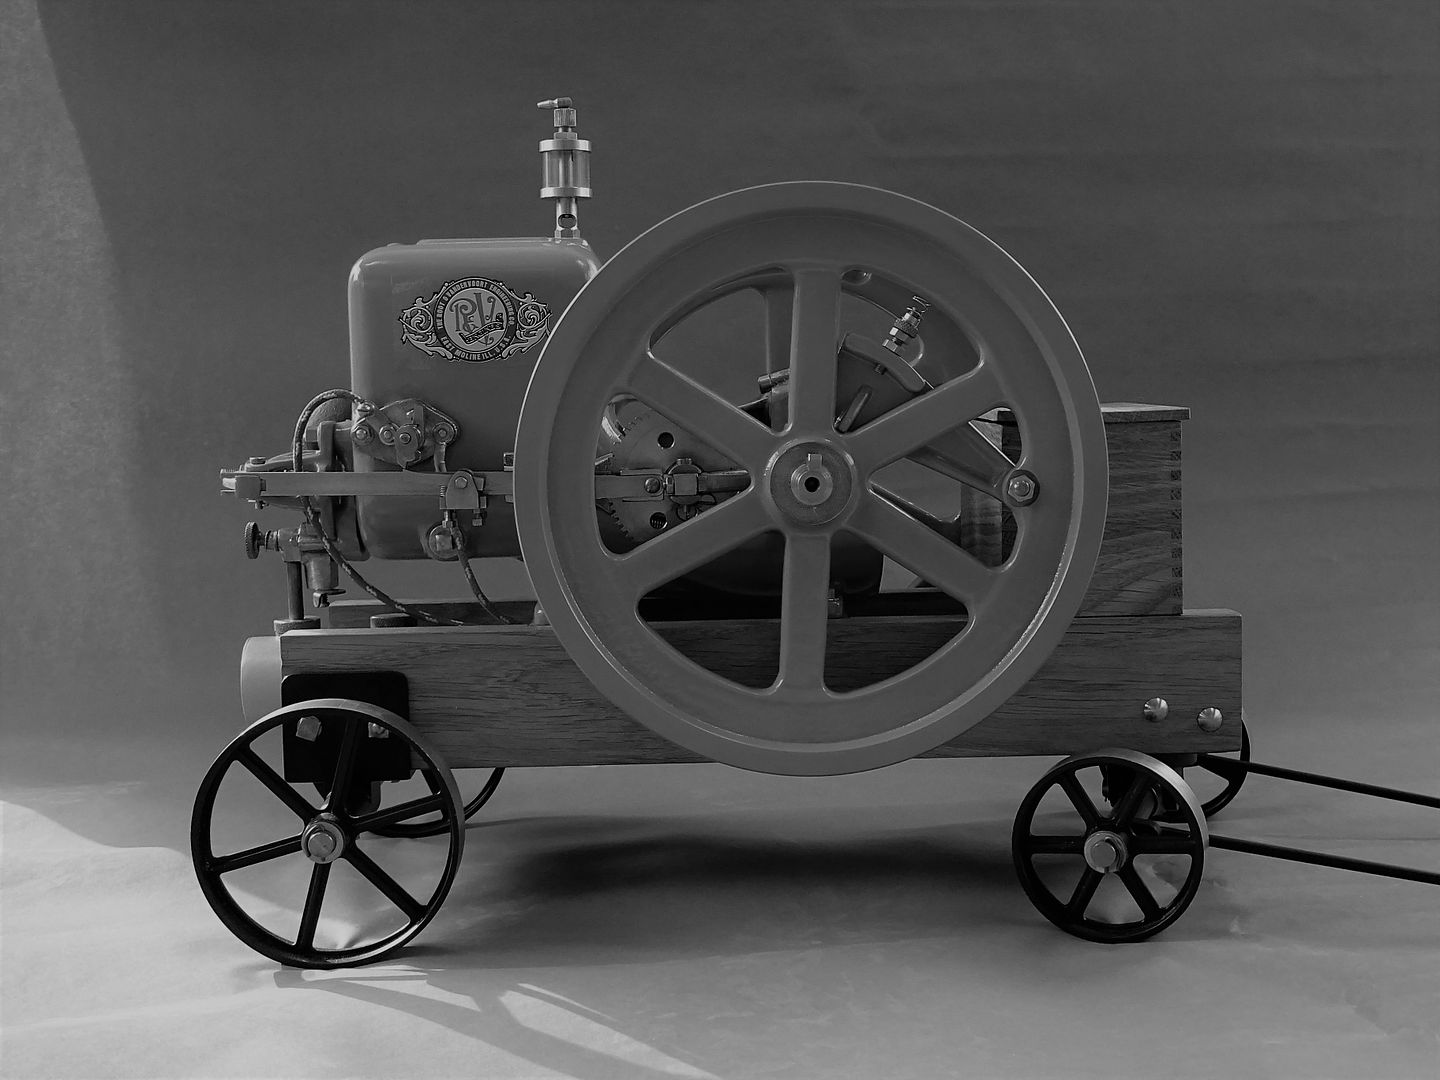
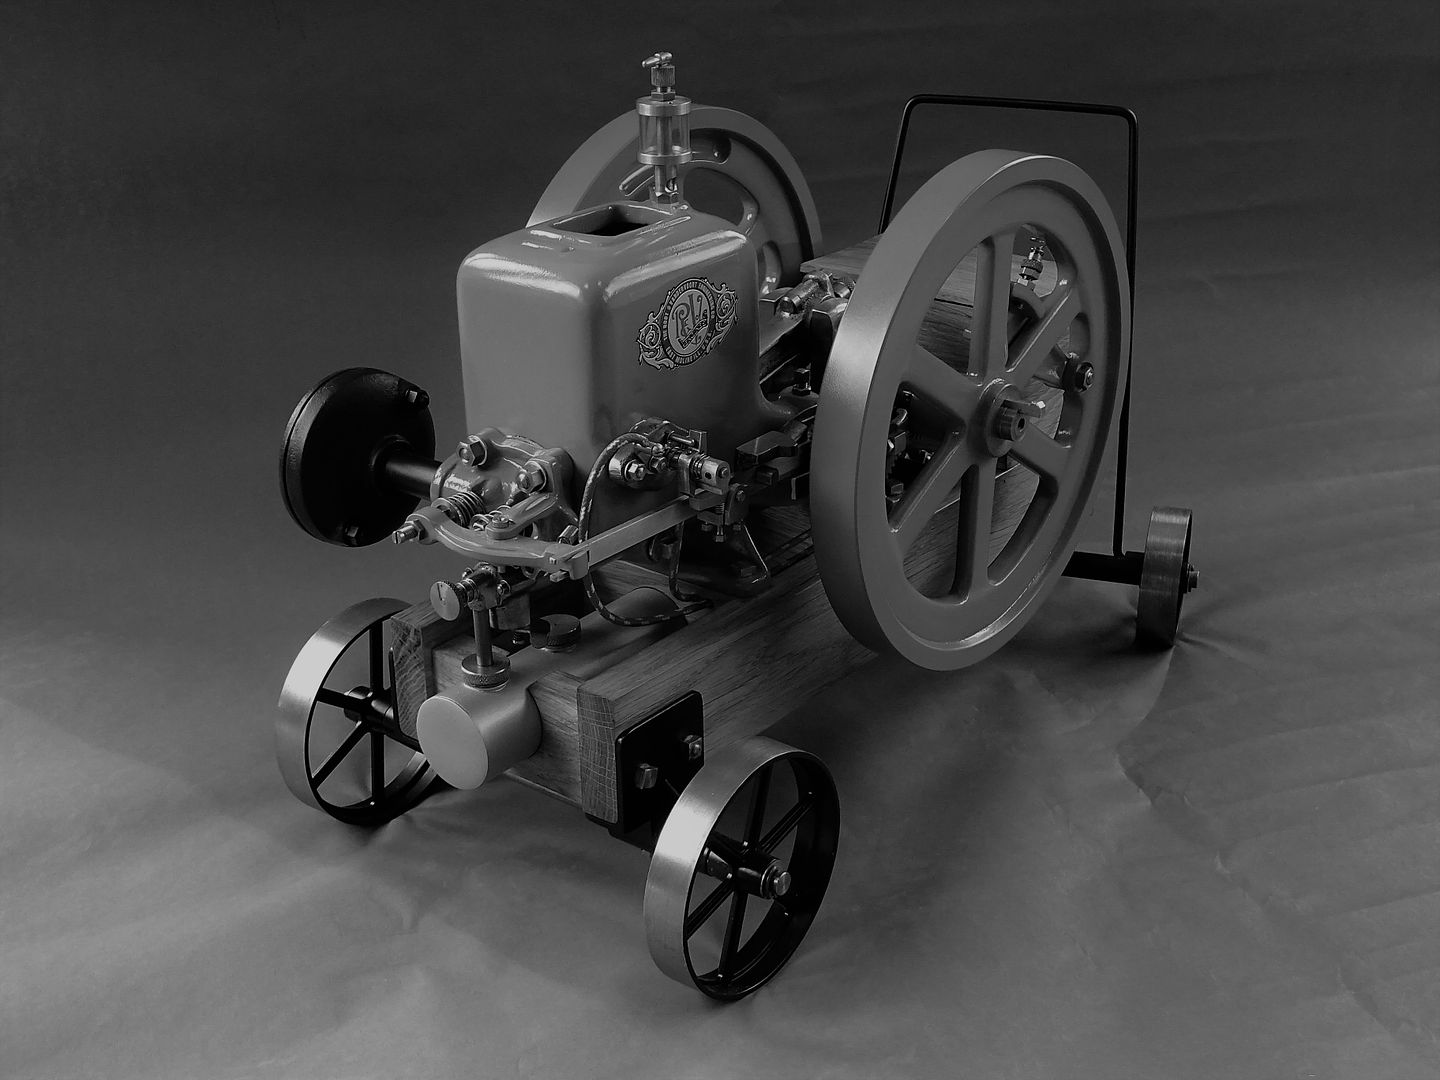
                                    Having painted the Root & Van Dervoort horizontal over the Christmas holiday I thought it was about time to put it together.

                                    The green is a little washed out and is quite a bit stronger more along the lines of John Deere green.

                                    Though when you take them like this the colour is less of an issue

                                    No video of the painted engine running as when I was setting up the timing and governor I found the guy who started the model had made the governor arm 1/16" too short so the latch won't engage, hopefully make a replacement in the week and then give it a spin.

                                    J

                                    #345560
                                    mechman48
                                    Participant
                                      @mechman48

                                      JasonB… Niiiiice!

                                      ​George.

                                      #345576
                                      Samsaranda
                                      Participant
                                        @samsaranda

                                        George, Cream and Aero Blue go well together, they were the colours of our Corporation buses here in Eastbourne, till they went bust, the buses always looked smart in that livery, the Council still paint their street furniture in those colours.

                                        Dave W

                                        #345614
                                        Jim Nic
                                        Participant
                                          @jimnic

                                          Stunning work on the oiler Jason.

                                          And the Root and Van Dervoort is pretty impressive too, I love how the cart turned out.

                                          Jim

                                          #345958
                                          mechman48
                                          Participant
                                            @mechman48

                                            Modified the base colouring to brick effect. I've left the top small layer of tile showing to give the effect of tiling on top of the brick wall…? comments welcome…

                                            42. vscross base colour change (2).jpg

                                            42. vscross base colour change (3).jpg

                                            Still a lot to do… but getting there.

                                            ​George.

                                            #345972
                                            Mark Rand
                                            Participant
                                              @markrand96270
                                              Posted by mechman48 on 13/03/2018 22:43:56:

                                              comments welcome…

                                              Nice!

                                              #345973
                                              Jim Nic
                                              Participant
                                                @jimnic

                                                It's all a matter of personal taste of course but I think the brick effect looks a lot better than the previous all over tiling. Good choice.

                                                Jim

                                                #346095
                                                mechman48
                                                Participant
                                                  @mechman48

                                                  Did a bit more on the vertical cross, drilled & tapped entablature for bearing stands, fitted square pillar bases, found I didn't have long enough M4 fasteners to go through base into pillars so decided to redrill for M5 x 50 shcs which I had. Assembled & checked for operation… B****r me if the piston isn't bottoming in the cylinder…'oh dear me' says I, or words to that effect.
                                                  Stripped it all apart & checked all part dimensions… found the cross head o/all length out by 2 mm fortunately I could machine off he excess from where the piston rod locknut abuts to the cross head, sorted methinks… nooo! still bottoms out, what the dickens is going on I thinks… another strip down, checked again working from base to top, piston rod correct length, crank correct length, crosshead now corrected, pillars correct length etc. etc

                                                  ​Sat there with the old grey matter burning, twiddling with the crankshaft asking myself what the ' fffflip' was going on…I was only twiddling with the problem in front of me wasn't I !, I checked the centre height of the crankshaft against the drawing… I'd only gone & misread the drawing & ended up making the bearing stands centre height 10mm too low… 'what a numb nuts you are George' I tell myself. So I was left with a dilemma, do I make another pair or find another solution. I didn't fancy going through making another pair so opted to make some 10mm packers & solder/ glue/ Loctite them to the bearing stands…sorted, for now!. Just goes to prove the old adage… Measure twice, nay peasants thrice I say, & cut once. Had enough by that time so cleaned up & called it a day…face 19

                                                  ​George.

                                                  #346108
                                                  Jim Nic
                                                  Participant
                                                    @jimnic

                                                    George

                                                    I did notice that you had located your nice brass spacers on top of the entablature whereas Stew's original drawings show them underneath. I thought you had done this to show off your brass polishing skills and had adjusted the pillar length to compensate. The difference would be 10mm.

                                                    The solution to your problem may be as simple as to locate the spacers between the pillars and the entablature.

                                                    Jim

                                                    #346136
                                                    mechman48
                                                    Participant
                                                      @mechman48

                                                      Aha! idea ​… Thanks Jim…. couldn't see the wood for the trees, will move them tomorrow.

                                                      ​George.

                                                    Viewing 25 posts - 76 through 100 (of 456 total)
                                                    • Please log in to reply to this topic. Registering is free and easy using the links on the menu at the top of this page.

                                                    Advert

                                                    Latest Replies

                                                    Viewing 25 topics - 1 through 25 (of 25 total)
                                                    Viewing 25 topics - 1 through 25 (of 25 total)

                                                    View full reply list.

                                                    Advert

                                                    Newsletter Sign-up