The Workshop Progress Thread (2017)

Advert

The Workshop Progress Thread (2017)

Home Forums Work In Progress and completed items The Workshop Progress Thread (2017)

Viewing 25 posts - 251 through 275 (of 356 total)
  • Author
    Posts
  • #308639
    mechman48
    Participant
      @mechman48

      Many thanks Jason, sorted nicely, how did you rectify it & how do I clear my cache?

      G.

      Advert
      #308645
      JasonB
      Moderator
        @jasonb

        The image you had deleted looks like it was the one that was set as the "cover" image for that album and it seems if no cover is set then the rest of the images in that album won't show up. So I just set a new cover one and that seems to have sorted it out.

        You won't need to clear your cache if it looks OK now.

        #309079
        mechman48
        Participant
          @mechman48

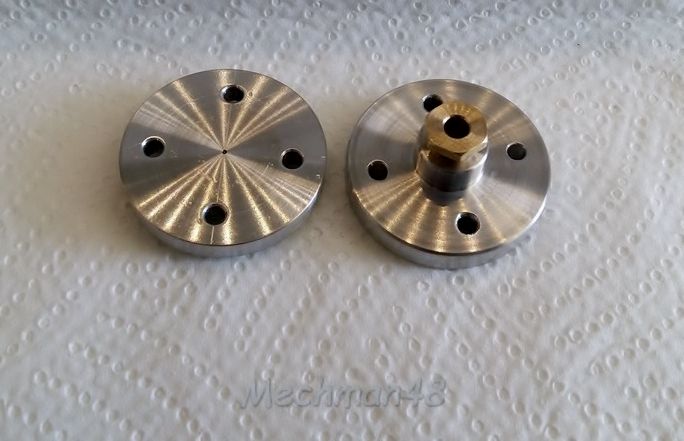
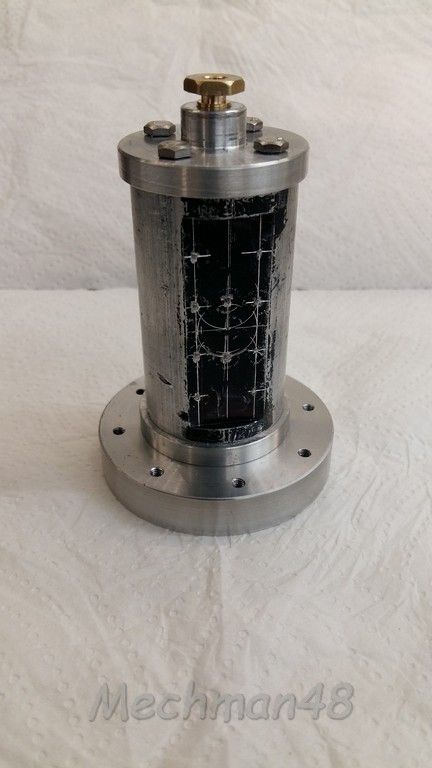
          Vertical cross progress, Top & bottom cylinder end plates…

          10.vscross machined top & bottom end plates (2).jpg

          George.

          #309153
          Jim Nic
          Participant
            @jimnic

            They look nice George, pity the bottom one won't be seen. sad

            Jim

            #309336
            JasonB
            Moderator
              @jasonb

              Continuing to make my Otto Langen look a bit more like the first engine made rather than the patent drawings I reworked the column capital

              And made the top plate to suite. I have also opted to use metric 1.5MOD gears which will give me the correct number of teeth on the three gear wheels rather than using DP gears with the wrong tooth count. 1.5MOD works out quite nicely on the 1/4 scale model as it seems the original used 6MOD. The plate was cut from 150×8 black flat bar and machined down to the required 7mm thickness.

              #309339
              Jim Nic
              Participant
                @jimnic

                That Otto Langen top plate looks to be a fair old chunk of steel Jason, did it warp at all when you thinned it down?

                Jim

                #309348
                JasonB
                Moderator
                  @jasonb

                  I took about 0.4mm off with a 40mm dia insert cutter and it did bow a fraction so tried the opposite side in the 4-jaw but the corners seemed to flex away from the cutter slighty leaving a convex side. So put it back on the mill and took a final skim of each side with a 12mm 4-flute endmill and it flattened out nicely.

                  The whole thing is beginning to become quite a lump and there is a lot more metal still to add.

                  #309400
                  thaiguzzi
                  Participant
                    @thaiguzzi

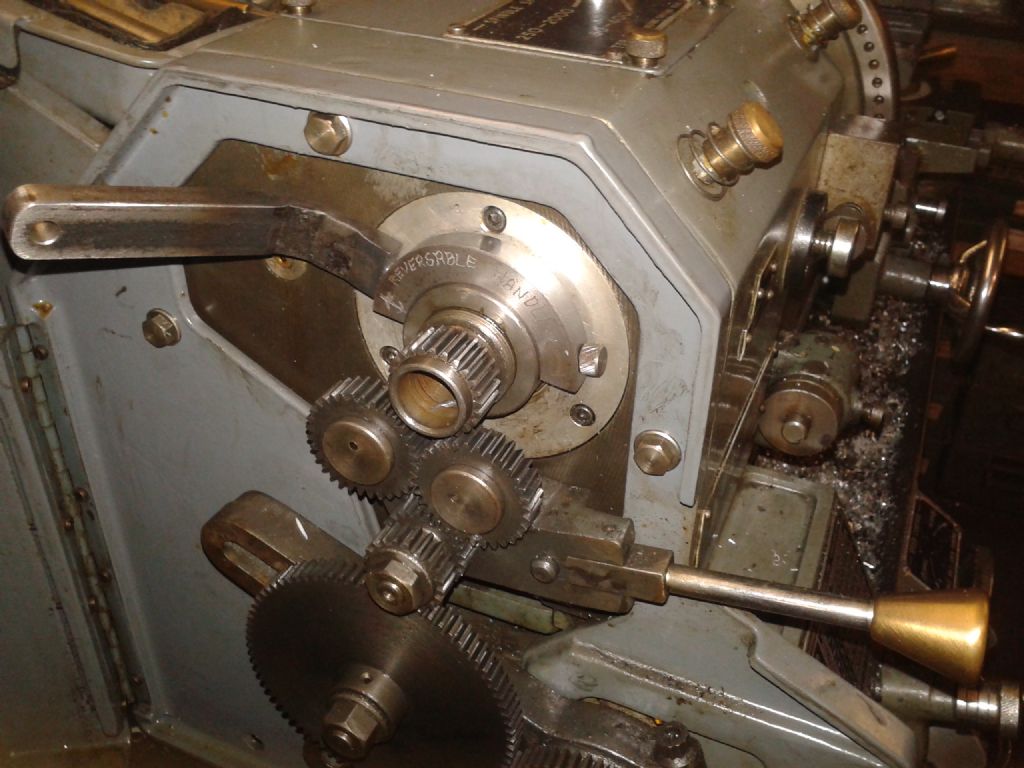
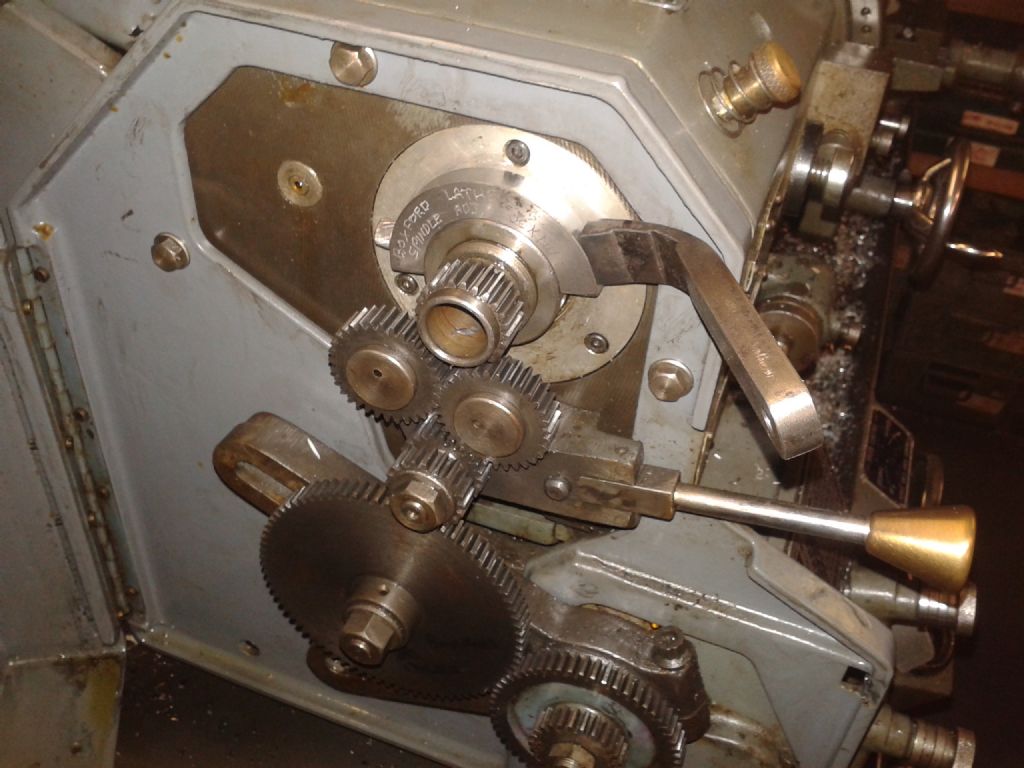
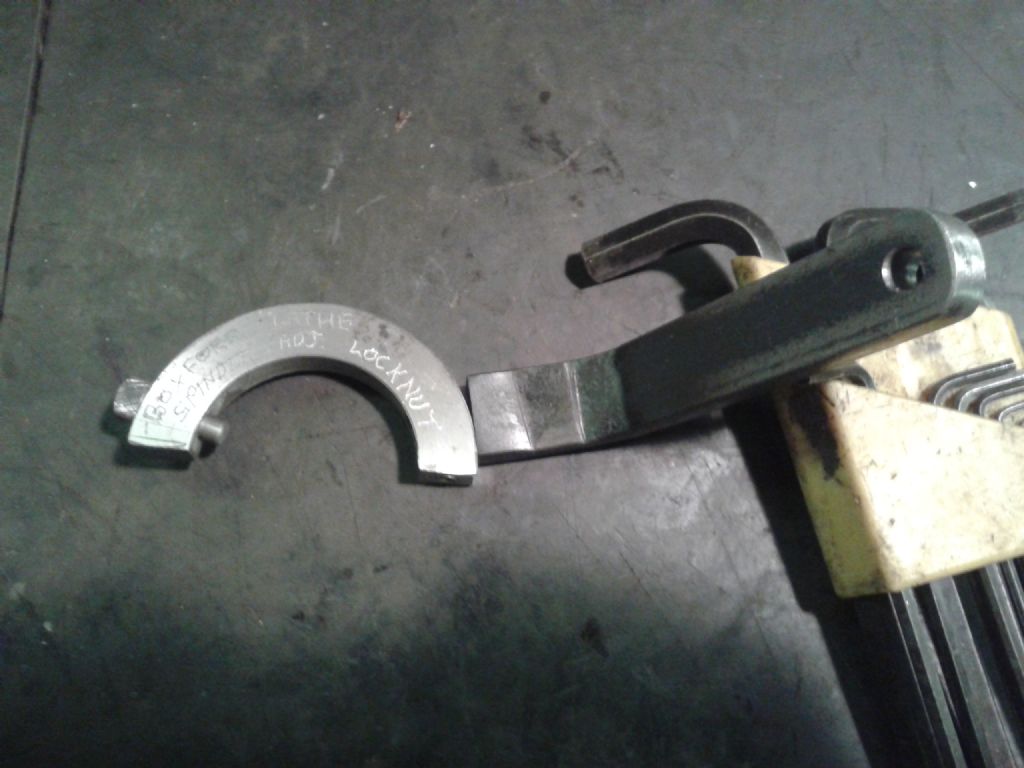
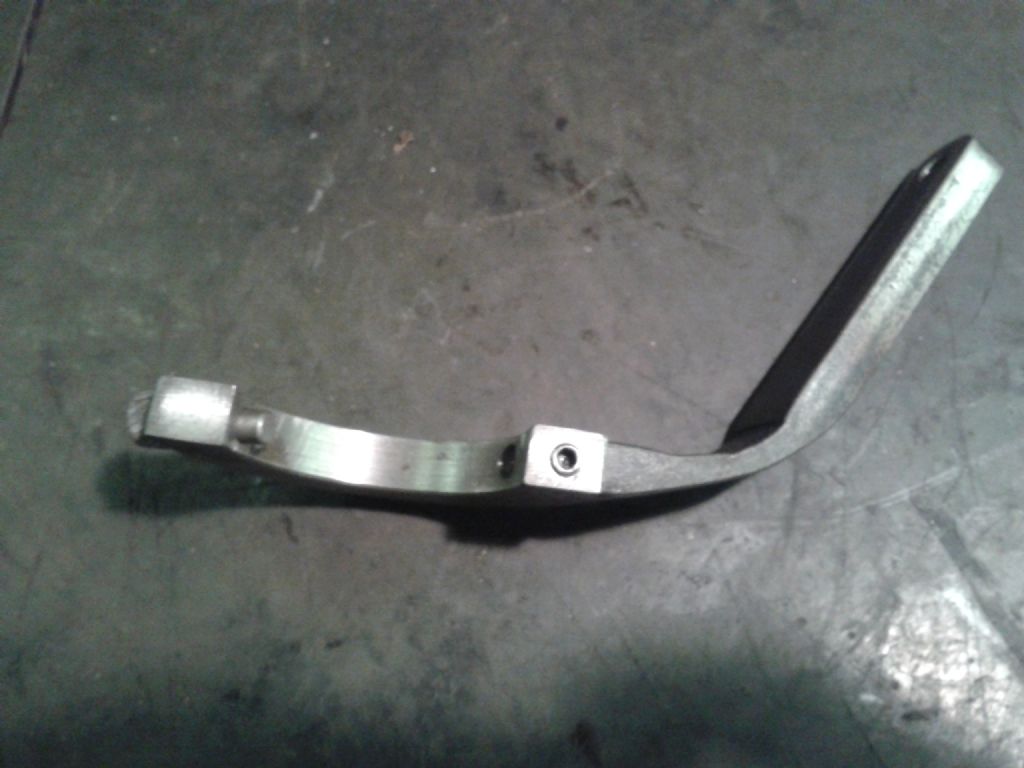
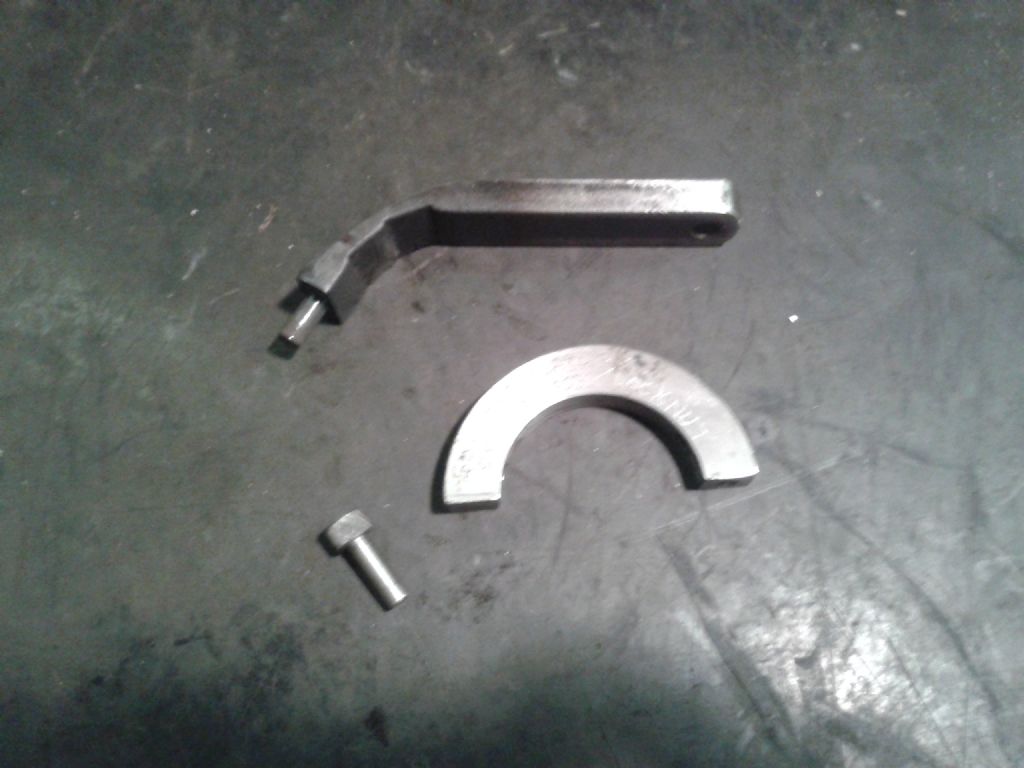
                    20170629_145534.jpg20170629_145444.jpg20170629_145407.jpg20170629_145341.jpgMany years ago, i had to adjust the pre load on my headstock spindle bearings on the Boxford VSL.

                    Adjusted they were, with a pin punch and hammer, and on that day, an adjusting / tighten / loosen peg type spanner was added to my to-do-list.

                    Fast forward many years, and i finally got round to making it…. works a treat.

                    20170629_145236.jpg

                    #309484
                    JasonB
                    Moderator
                      @jasonb

                      I've been working on the cooling system for the vertical R7V engine over the last few weeks as well as doing the Otto. With the arrival of a 10×1 flat belt the water pump could be positioned and various fittings made up to plumb it in.

                      I got the mesh cooling screen done this weekend which sits ontop of a cut down 2.5lts paint can which looks more true to the original than the 6" dia coffee can suggested on the drawings which had too many ribs.

                      And while I was playing about with the plumbing I also ran the fuel lines.

                      J

                      #309488
                      Bazyle
                      Participant
                        @bazyle

                        Thaiguzzi that was interesting. My 1950's version has 2 thin locknuts so I made 2 off pin spanners. Never noticed my 1970's model, still in kit form, has your style. Drat. Will have to find my spanner after tea and see if it fits.

                        #309568
                        thaiguzzi
                        Participant
                          @thaiguzzi
                          Posted by Bazyle on 30/07/2017 16:55:58:

                          Thaiguzzi that was interesting. My 1950's version has 2 thin locknuts so I made 2 off pin spanners. Never noticed my 1970's model, still in kit form, has your style. Drat. Will have to find my spanner after tea and see if it fits.

                          MY serial no. = 1969 manufacture.

                          A pin/peg spanner is a helluva nicer way of doing things than a hammer…

                          #310503
                          JasonB
                          Moderator
                            @jasonb

                            As neil likes the "church font" I showed the other day that it would be nice to do a bit or ornamental turning and add a couple of candle stick holders to go with it.wink

                            Mostly turned with 1.0m and 2.2mm insert parting tools and a 2mm dia MRMN grooving insert. the part you can see is 65mm high and 22mm dia at the base.

                            #310583
                            JasonB
                            Moderator
                              @jasonb

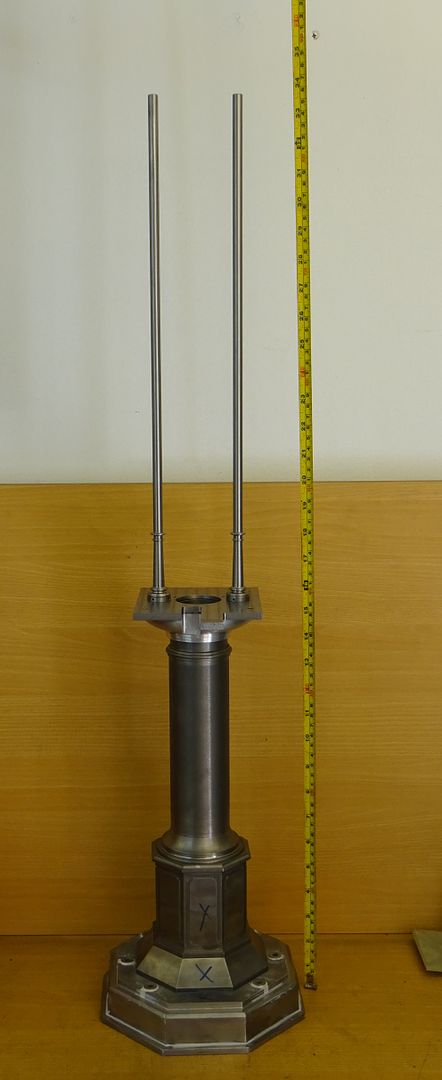
                              Well with the guide rod bases done I could not resist the temptation to add the rods to see how tall the engine will end up. So chopped a couple of 430mm bits off a 1.0m length of 9mm silver steel and then turned and threaded the ends. Did someone recently say silver steel doe snot thread well with a die?

                              Looks about 34" tall to me. Quiet pleased as there is only a couple of thou difference between the crods top to bottom at the moment and once the top bar is in place that should be sorted

                              Edited By JasonB on 05/08/2017 20:05:56

                              #310652
                              mechman48
                              Participant
                                @mechman48

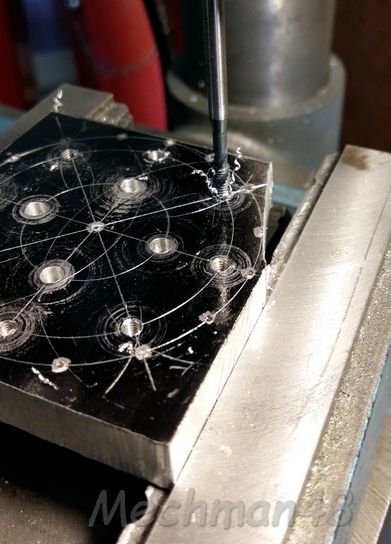
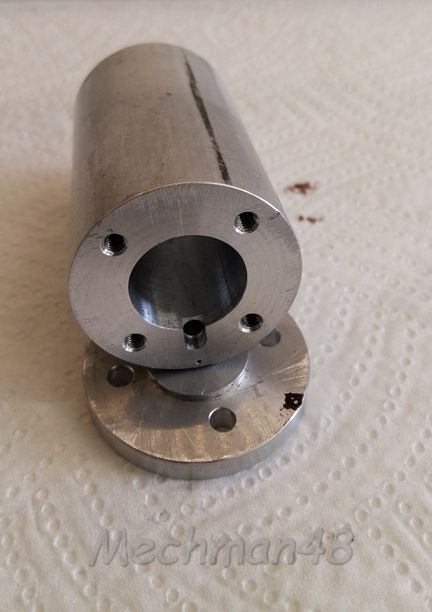
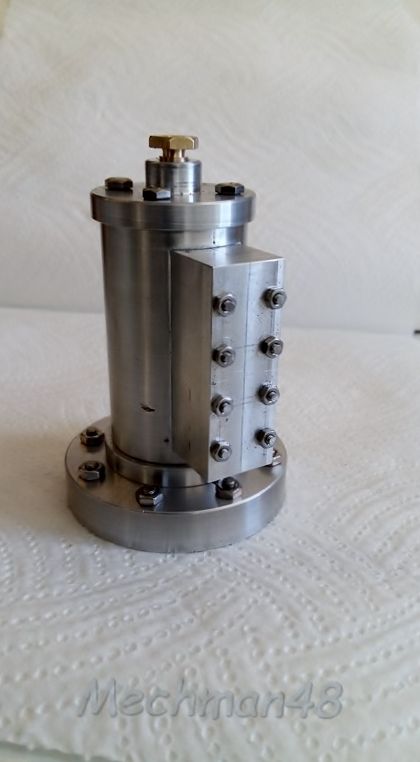
                                A bit more done on my version of the Vertical Cross engine to Stewart Hall's drawings. I didn't have any ally bar of 55mm dia. for the base, so marked out, drilled, tapped, & turned a piece of 10mm ally plate to required dimensions. The tapping mode gave me the chance to try out a 3mm spiral flute tap I picked up at a car boot fair some time ago as the tapped holes were shown as 5.5mm deep so not through holes, all tapped out nicely with cuttings coming up & out as designed to do. Must keep my eyes peeled for more spiral flute taps…

                                12.vscross spiral flute tapping (1).jpg

                                ​Cylinder machined & marked out for steam ports & valve chest location studs, partially assembled…

                                13.vscross cylinder partial assembly.jpg

                                ​Jim Nic, on your model which avenue did you take to mate up your valve chest on the cylinder, the two options I can think of are…1) mark out the valve chest separately & hopefully the drilled chest will mate up with the cylinder studs ( always seem to get one hole out of line with mating hole / stud on other pieces ) … 2 ) locate the drilled valve chest in position & spot through to the cylinder, which I take is the best method that most members would do ?… going through brain fade episode at the mo' dont know

                                George.

                                #310674
                                Jim Nic
                                Participant
                                  @jimnic

                                  Hi George

                                  As I recall I drilled the cylinder and steam chest to drawing and luckily got it right. I do have a DRO on my mill/drill which makes that a better option for me than spotting through and picking up the marks. This part actually allows a little inaccuracy especially if you clad the cylinder devil

                                  Also I normally make clearance holes a tad big, normally 0.1mm, to give a bit of wriggleability. As Stew Hart (not Hall, he was the giggling fool off "It's a Knockout " from the telly wasn't he?) says "A little bit of clearance never got in the road."

                                  Jim

                                  #310761
                                  David Standing 1
                                  Participant
                                    @davidstanding1

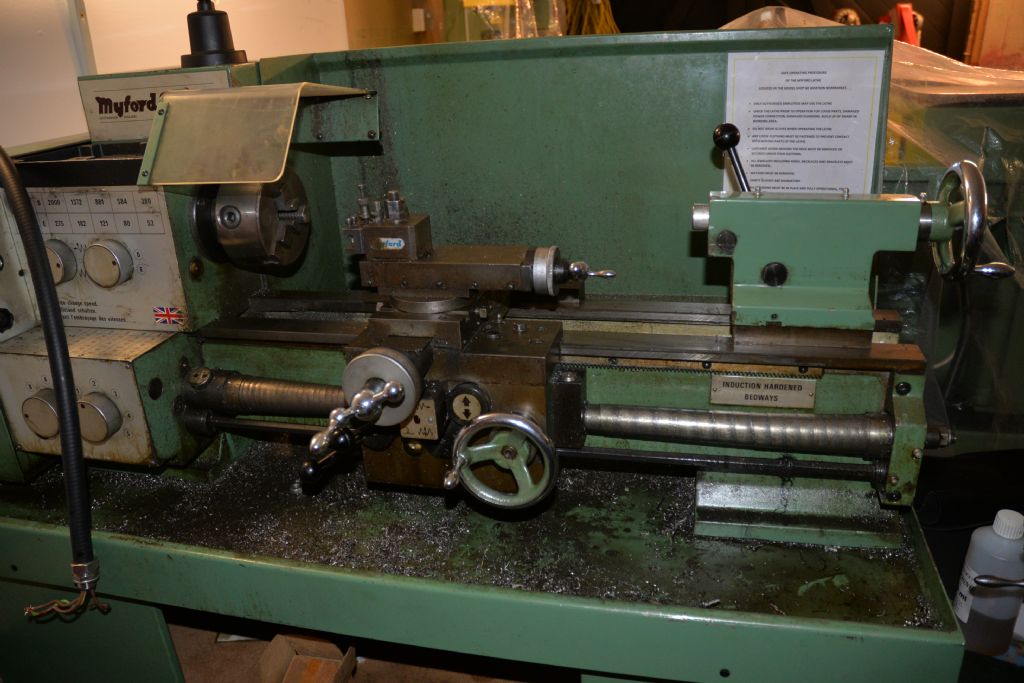
                                    As part of my ongoing machinery upgrade policy, A Myford 254S mysteriously founds its way into my workshop this week, to replace my Super 7.

                                    It was obtained via a dealer, and came out of a workshop that had gone into liquidation.

                                    Condition was as per it was dragged away from the operator, and he clearly didn't have time to clean it!

                                    it's actually in good condition, little wear in gibs and ways, and underneath all the grime there was quite a nice lathe struggling to get out.

                                    Above all, it was very cheap!

                                    It had been used for turning plastic as well as metal, and everything was spattered in a weird sticky plastic jelly type gunge.

                                    About six hours hard work with a big can of petrol, brushes and scrapers, and here's the before and after pictures:

                                    dsc_1129.jpg

                                    dsc_1166.jpg

                                    #311064
                                    mechman48
                                    Participant
                                      @mechman48

                                      Niiiice! looks like you got a bargain there, any extras included?

                                      George.

                                      #311069
                                      mechman48
                                      Participant
                                        @mechman48

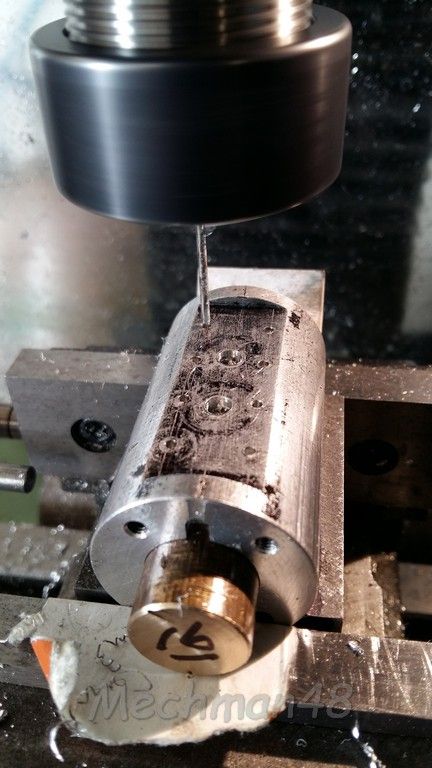
                                        Bit more done on the Vert' cross … drilling for valve chest studs, 1.6mm drill… DRO's certainly help with the hole spacing …

                                        14.vscross drilling valve chest stud locatoions & steam passages (3).jpg

                                        ​Steam passages milled & drilled… not seeing any dimensions for depth of milled slot for steam /air entry passage on dwg, calculated out for 1.5mm boss on cyl. end cover ( sitting on ) milled out to 2.5mm depth, I'd decided on 1mm steam / air entry clearance. The slot was calculated ( guesstimated thinking ) to leave a 1mm wall thickness taking into account the 3mm dia. drilled passage, making distance from inside cyl.dia.to end of milled slot 4mm… not taken gasket thickness into account… haven't measured yet, but there is still 0.56mm – .021" to come off overall cylinder length as it now stands at 52.56mm so a clean up on both ends will bring it to spec. So unless I've missed something off the dwg…I don't see why it shouldn't work ?. Maybe Jim Nic / others could clarify?

                                        15.vscross. steam passage..jpg

                                        ​George.

                                        #311083
                                        David Standing 1
                                        Participant
                                          @davidstanding1
                                          Posted by mechman48 on 08/08/2017 19:33:11:

                                          Niiiice! looks like you got a bargain there, any extras included?

                                          George.

                                          It also came with a 4 Jaw Pratt Burnerd chuck (looks pretty much unused), Albrecht keyless tailstock chuck, brand new genuine Myford operating manual (these are around £50), 4 QC toolholders, decent live centre.

                                          I paid £1,450 for the lot so I didn't think that was bad.

                                          #311085
                                          Roderick Jenkins
                                          Participant
                                            @roderickjenkins93242

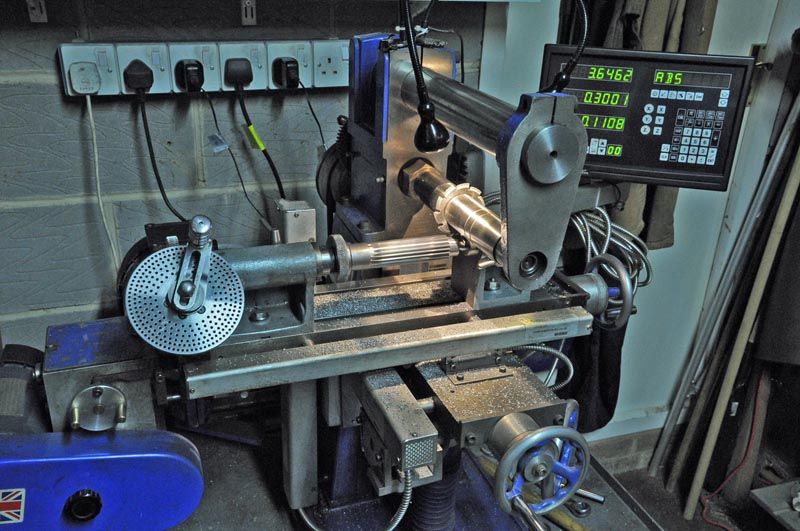
                                            I'm having a go at George Thomas' bending rolls. Made the gears today, a stick of 20t 20DP. The gear cutter came from RDG, still sharp, no sign of any wear on the teeth.

                                            rolls milling.jpg

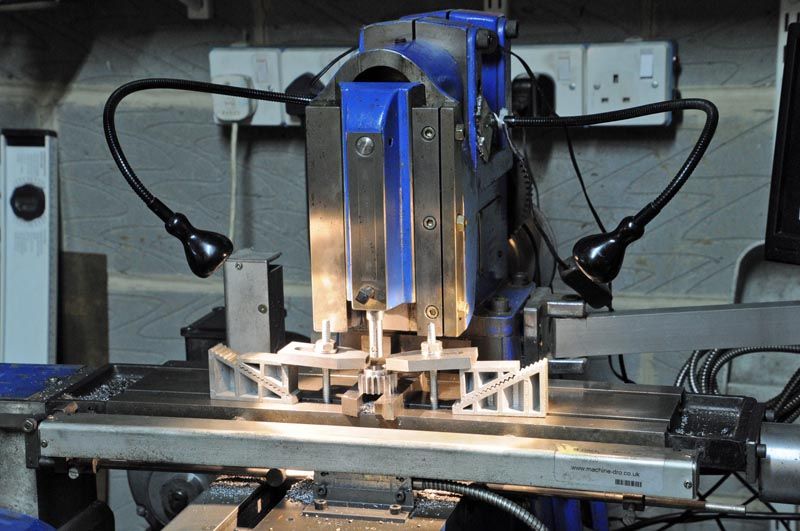
                                            Parted off, bored and tidied up in soft jaws in the lathe. Seeing as the mill was in horizontal mode I thought I'd use the slotting attachment to make the keyway in two of the gears.

                                            rolls slotter.jpg

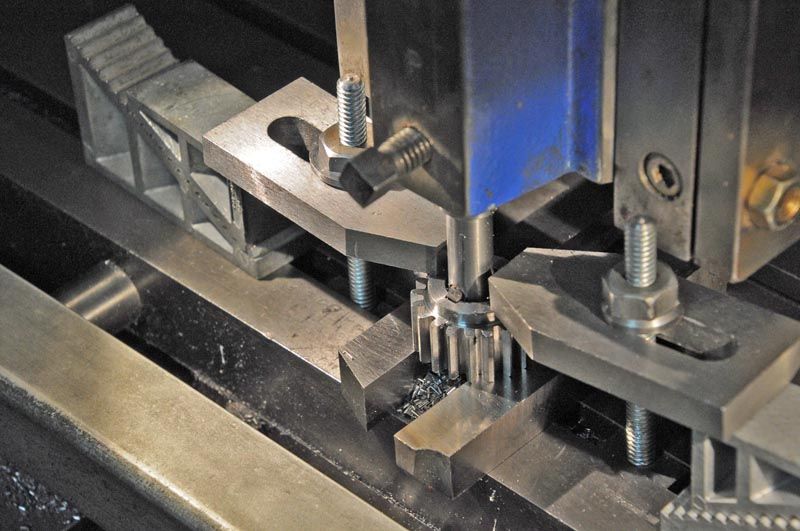
                                            I had to make the slot tooling, I've never used the slotting attachment beforesurprise

                                            rolls slot cu.jpg

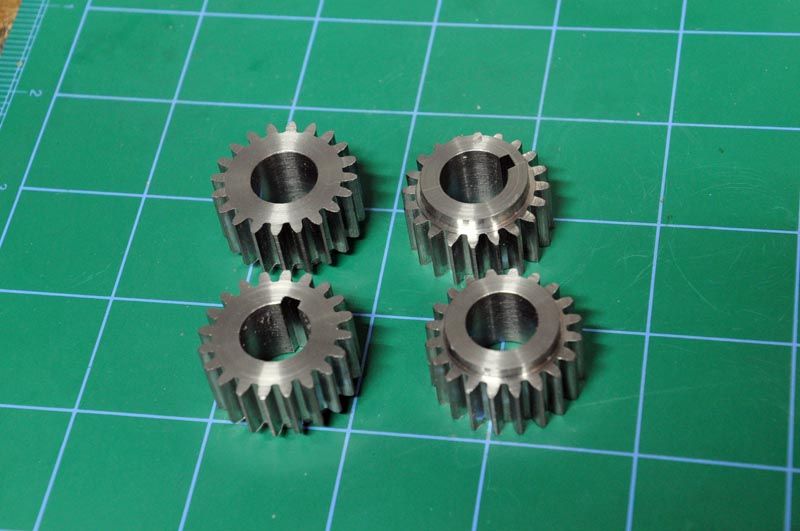
                                            Nice bit of kit but probably simpler and quicker to use the hand shaper for little slotting jobs like this.

                                            rolls gears.jpg

                                            Rod

                                            #311088
                                            Anonymous

                                              Lovely looking gears. thumbs up They'll be 14½°PA if it's an RDG cutter?

                                              Andrew

                                              #311093
                                              Roderick Jenkins
                                              Participant
                                                @roderickjenkins93242

                                                Indeed it is. Presumably focussed on making Myford change gears. Free cutting mild steel – very flattering to average technique.

                                                #311099
                                                thaiguzzi
                                                Participant
                                                  @thaiguzzi

                                                  That Sharp mill – horizontal, vertical AND slotting – nice bit of kit.

                                                  #311121
                                                  mechman48
                                                  Participant
                                                    @mechman48

                                                    Super bit of kit there Rod, like the set up for horizontal, vertical & slotting capability thaiguzzi says it's a 'Sharpe' any particular model? I'll nose around 'Lathes.co.uk' to have a look see details.

                                                    George.

                                                    ​p.s. just had a look see… nice compact design, looks like you got all the additions too.

                                                    Edited By mechman48 on 09/08/2017 10:13:35

                                                    #311420
                                                    mechman48
                                                    Participant
                                                      @mechman48

                                                      Vertical Cross progress… tapped out valve chest for studding, machined up valve chest, drilled for studs, nice to have DRO's to help … still managed to get one stud out of alignment, always seem to do that…. dont know. A tad extra clearance drill sorted it, Still need to drill for inlet / exhaust ports, piston valve etc…

                                                      16.vscross valve chest & studs trial fit (2).jpg

                                                      George.

                                                    Viewing 25 posts - 251 through 275 (of 356 total)
                                                    • Please log in to reply to this topic. Registering is free and easy using the links on the menu at the top of this page.

                                                    Advert

                                                    Latest Replies

                                                    Viewing 25 topics - 1 through 25 (of 25 total)
                                                    Viewing 25 topics - 1 through 25 (of 25 total)

                                                    View full reply list.

                                                    Advert

                                                    Newsletter Sign-up