The Workshop Progress Thread (2016)

Advert

The Workshop Progress Thread (2016)

Home Forums Work In Progress and completed items The Workshop Progress Thread (2016)

Viewing 25 posts - 151 through 175 (of 457 total)
  • Author
    Posts
  • #233463
    Nicholas Farr
    Participant
      @nicholasfarr14254

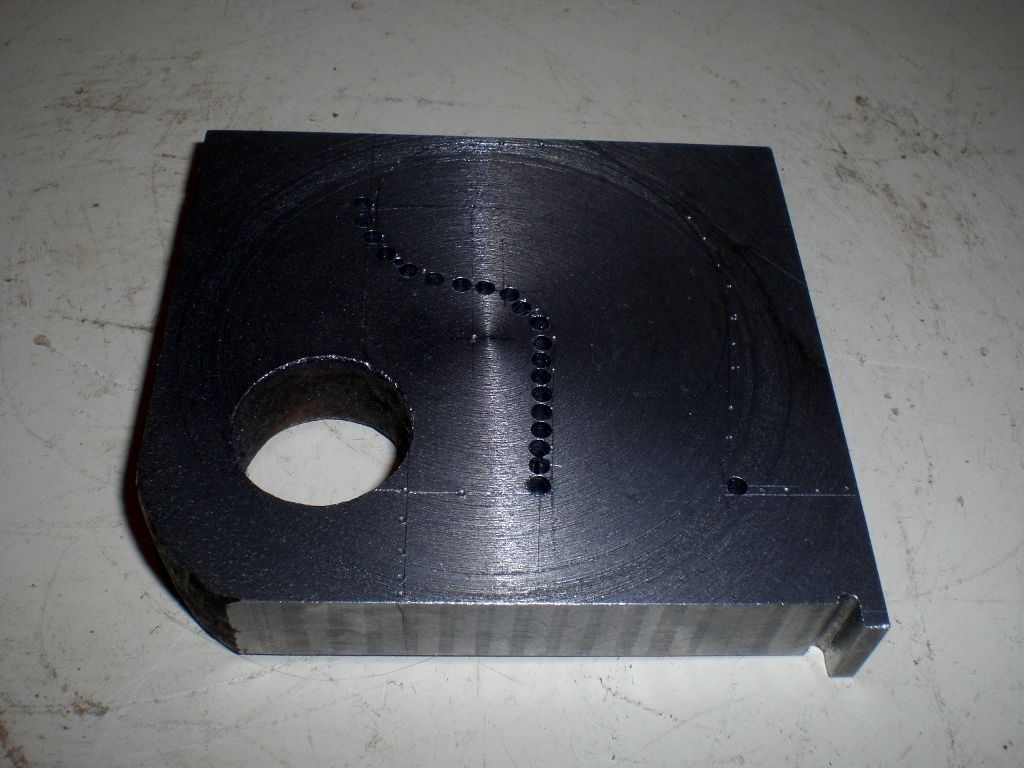
      Hi, this evening I made a bit more progress on my traveling steady. I've marked it out and chain drill part of it to make it easier to cut and I've also milled the underside of the base to incorporate a register for easy repositioning into the same place.

      cimg2178 (1024x768).jpg

      Regards Nick.

      Advert
      #233475
      Ed Duffner
      Participant
        @edduffner79357

        Mein panzer is genackered!

        Was doing well today initially, fettled the muzzle break onto the end of my Tamiya 1/16th Tiger tank barrel – tested her out, (started first time!). Had a cuppa with my Brother and then cleared out a space in the shed/workshop to put a set of Bisley drawers in. I now have somewhere to put my milling and turning tools plus loads of other stuff. I then installed a second tubular heater ready for next winter and made a start on a spline cutting toolbit.

        When I went back in the house I realised I'd left the Tiger power switched on although I had switched off the tranceiver. The tiger decided to go for a run by itself, off the chair it was perched on, landing on the front wheel and it's a heavy beast with metal tracks. So it looks like I have a modelling job to do at last.

        I'll have to have a look at some of JS's threads to see how spindle repairs are done.

        Ed.

        #233588
        Nicholas Farr
        Participant
          @nicholasfarr14254

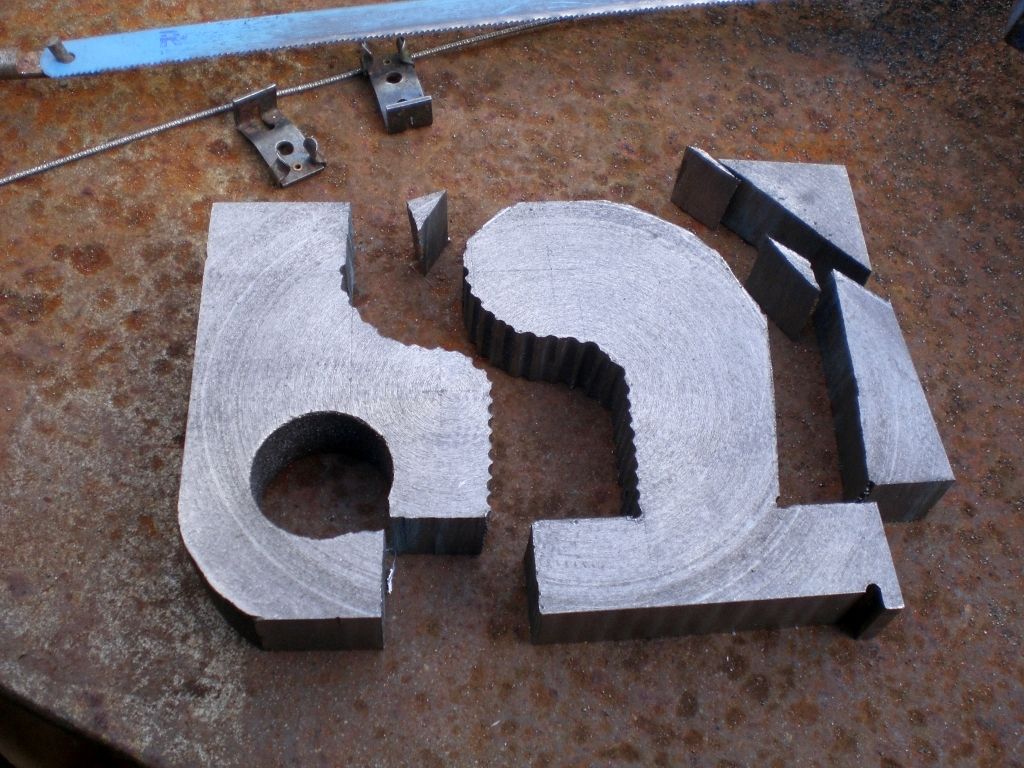
          Hi, this evening I hacksawed my traveling steady to the kinda shape that I was aiming for.

          cimg2180 (1024x768).jpg

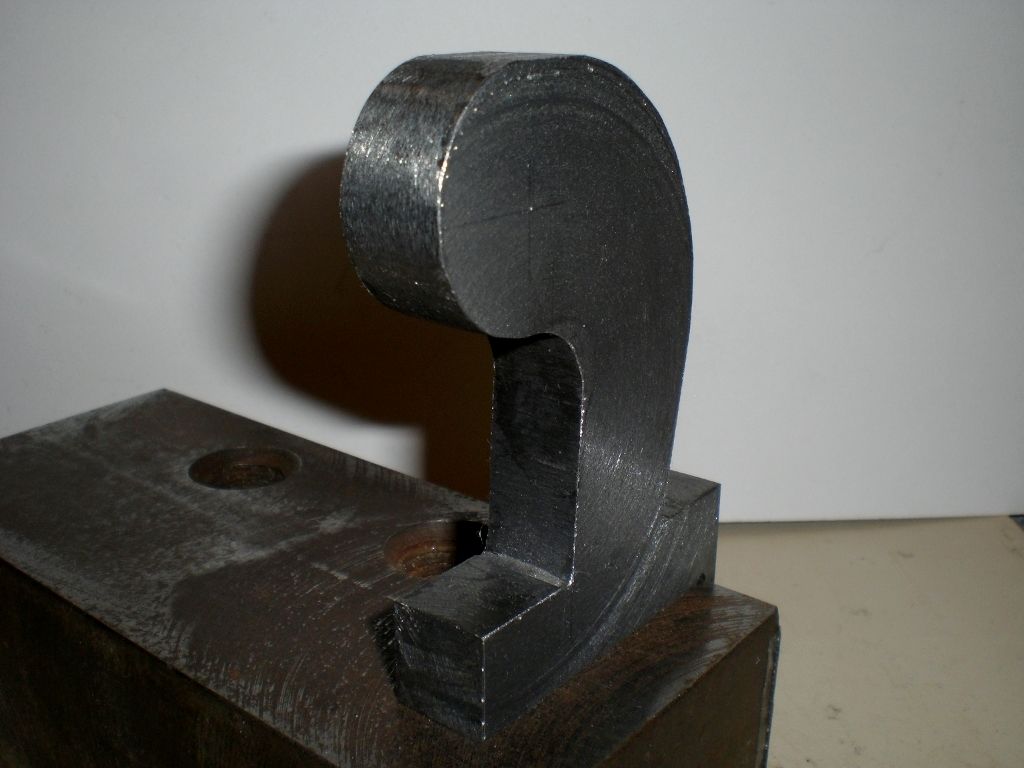
          Then after initial filing towards its final shape, it looks like this.

          cimg2183 (1024x768).jpg

          Regards Nick.

          #233726
          Nicholas Farr
          Participant
            @nicholasfarr14254

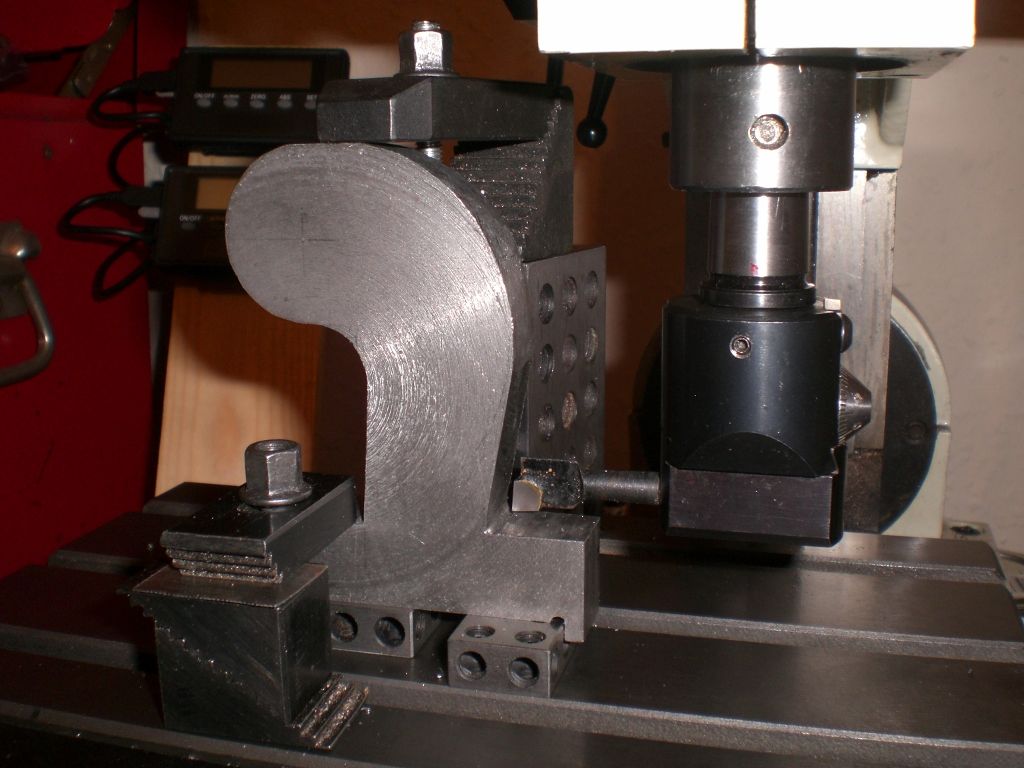
            Hi, this evening I only had time to set up my traveling steady on my mini mill, to skim the faces which the hold down bolt heads will be in contact with.

            cimg2185 (1024x768).jpg

            But before I could use my boring head in reverse, I had to drill and tap it for a small grub screw to prevent it from undoing.

            Regards Nick.

            Edited By Nicholas Farr on 07/04/2016 22:45:22

            #233808
            MW
            Participant
              @mw27036

              I had a problem where i needed to make 3 miniature "lock handles" for my home made mill, i was going to thread them but to no avail as i only had the wall thickness to thread into (1-2mm), it couldnt go all the way through because i needed to have an M5 thru hole which would cross it's path, so instead i brazed them with success;

              img00633-20160408-1637.jpg

              And a close up of the almost cleaned up one.

              img00632-20160408-1637.jpg

              I only used a common butane/propane torch, i prepared the surfaces by sanding and fluxing the join, then i arrange them assembled on a 5 inch square block of mild steel i use, as i dont have a fire brick, then heated them both to cherry red and slowly poured the brazing wire onto the join.

              Never successfully brazed before so i'm proud =)

              Michael W

              Edited By Michael Walters on 08/04/2016 16:52:44

              #233834
              Nicholas Farr
              Participant
                @nicholasfarr14254

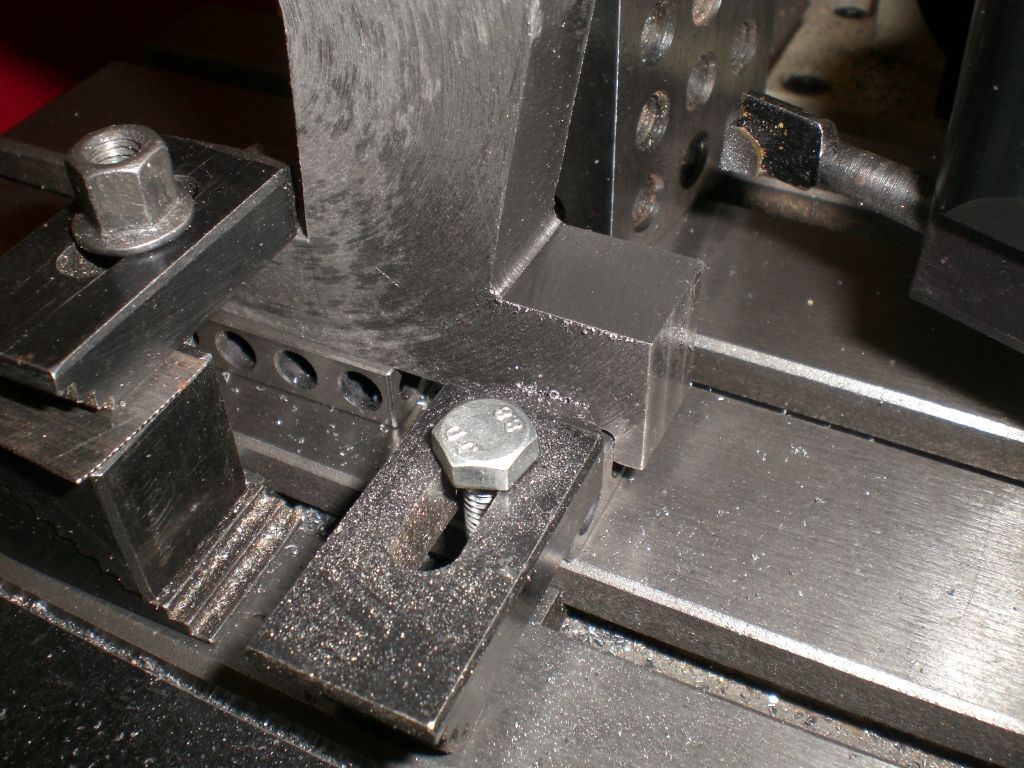
                Hi, this evening I skimmed the bolt head faces on my traveling steady, but just as I had thought, I had to stop the steady from twisting when the tool started to cut, even with a fairly light cut. So it was reset and a clamping bar was fixed against the side at the bottom.

                cimg2186 (1024x768).jpg

                When this face was skimmed, the clamps at the bottom were rearranged so that the other face could be done.

                cimg2187 (1024x768).jpg

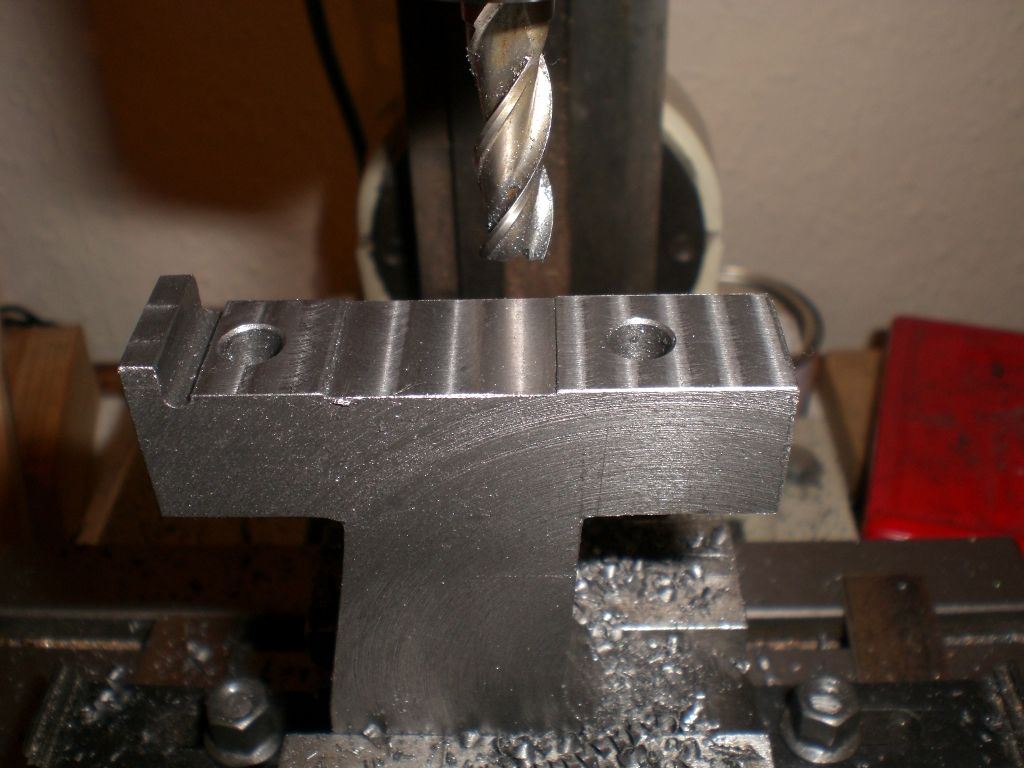
                After both faces were done, the steady was set up in a vice upside down and the two bolt holes were drilled.

                cimg2189 (1024x768).jpg

                After drilling the holes, a 0.5mm deep relief 25mm wide was milled midway between the holes, this helps to ensure that there is a good contact on the lathe saddle at the bolt hole locations.

                cimg2190 (1024x768).jpg

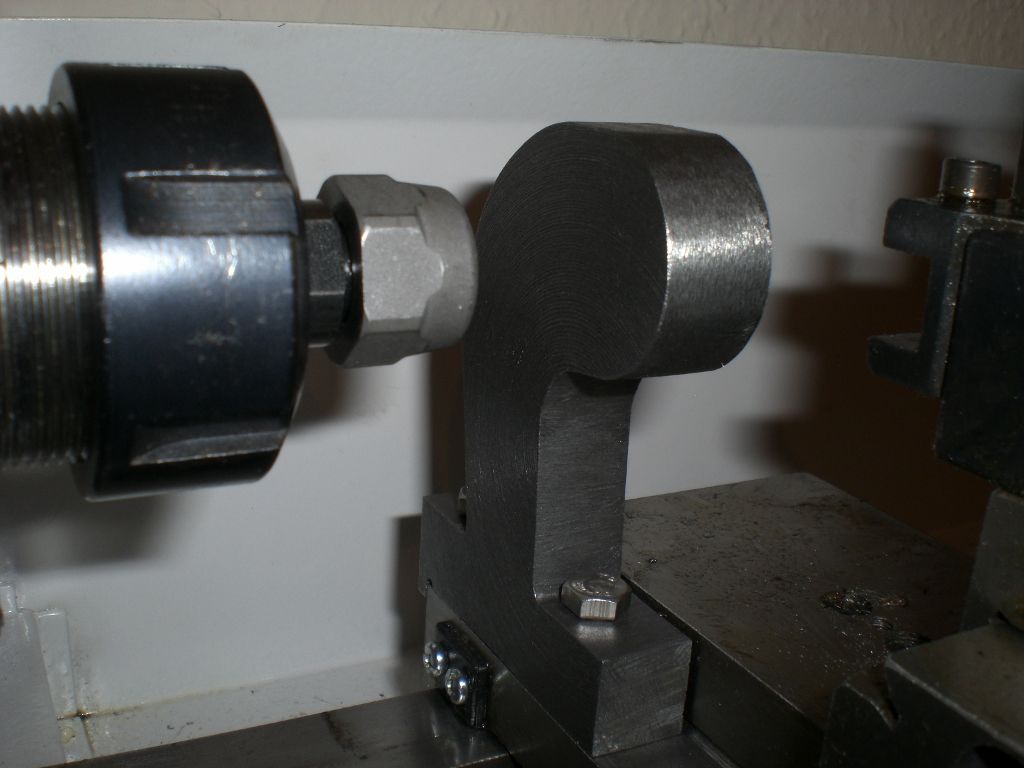
                I next fitted the steady to the lathe saddle without any issues and the area that I intended to line up with the mandrel axis, does so very well.

                cimg2191 (1024x768).jpg

                cimg2192 (1024x768).jpg

                Regards Nick.

                Edited By Nicholas Farr on 08/04/2016 21:16:14

                #233835
                Neil Wyatt
                Moderator
                  @neilwyatt
                  Posted by Nicholas Farr on 03/04/2016 00:44:41:

                  cimg2168 (768x1024).jpg

                  Proof this forum is full of old buffers!

                  & well done Michael.

                  Neil

                  #233844
                  S.D.L.
                  Participant
                    @s-d-l
                    Posted by Michael Walters on 08/04/2016 16:43:43:

                    And a close up of the almost cleaned up one.

                    img00632-20160408-1637.jpg

                    I only used a common butane/propane torch, i prepared the surfaces by sanding and fluxing the join, then i arrange them assembled on a 5 inch square block of mild steel i use, as i dont have a fire brick, then heated them both to cherry red and slowly poured the brazing wire onto the join.

                    Never successfully brazed before so i'm proud =)

                    Michael W

                    Edited By Michael Walters on 08/04/2016 16:52:44

                    Glad it worked. The steel will act as a heat sink, go to Wicks or any builders merchant and buy 2 lightweight building blocks (celcon or thermalite), you can saw the second one in half longways with a hand saw (wood) and make a mini hearth that will keep the heat in and make it easier and quicker.

                    Steve

                    #233952
                    MW
                    Participant
                      @mw27036

                      Thanks for the compliments,

                      I have a wickes shop nearby and i may take you up on that advice, my only reason for using a block of a steel was because my workshop is comprised mainly of wood, and it's an afforded luxury to be able to use a metal work surface that isn't my cross slide or milling table!

                      Michael W

                      Edited By Michael Walters on 09/04/2016 23:21:45

                      #233959
                      Nicholas Farr
                      Participant
                        @nicholasfarr14254

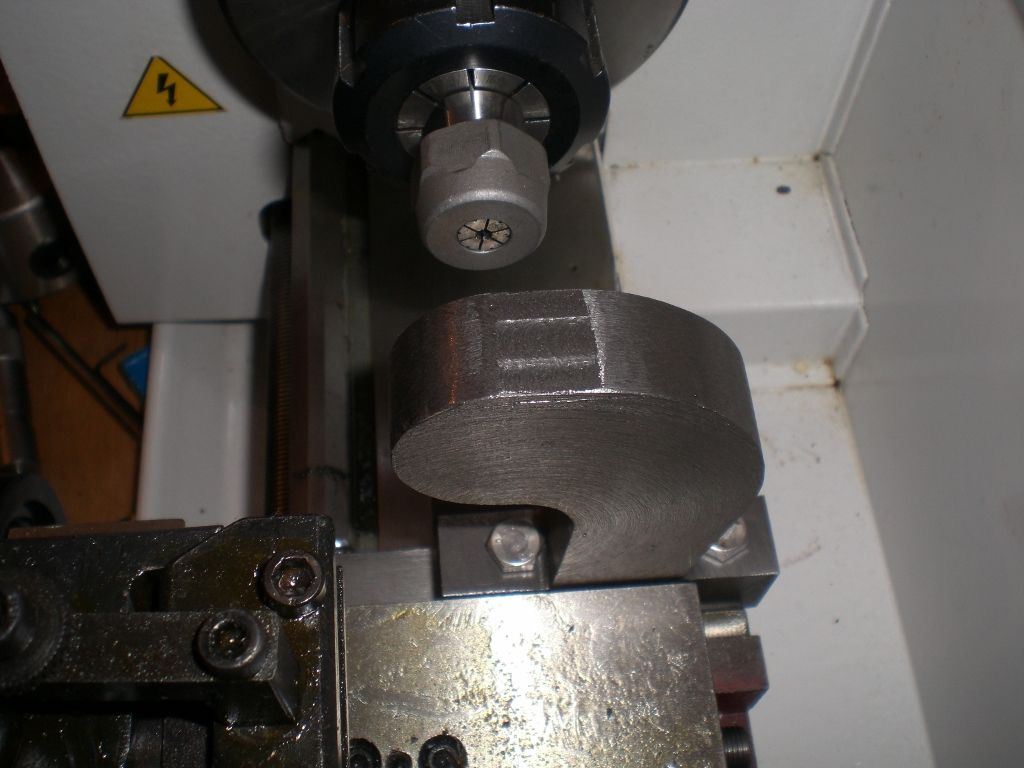
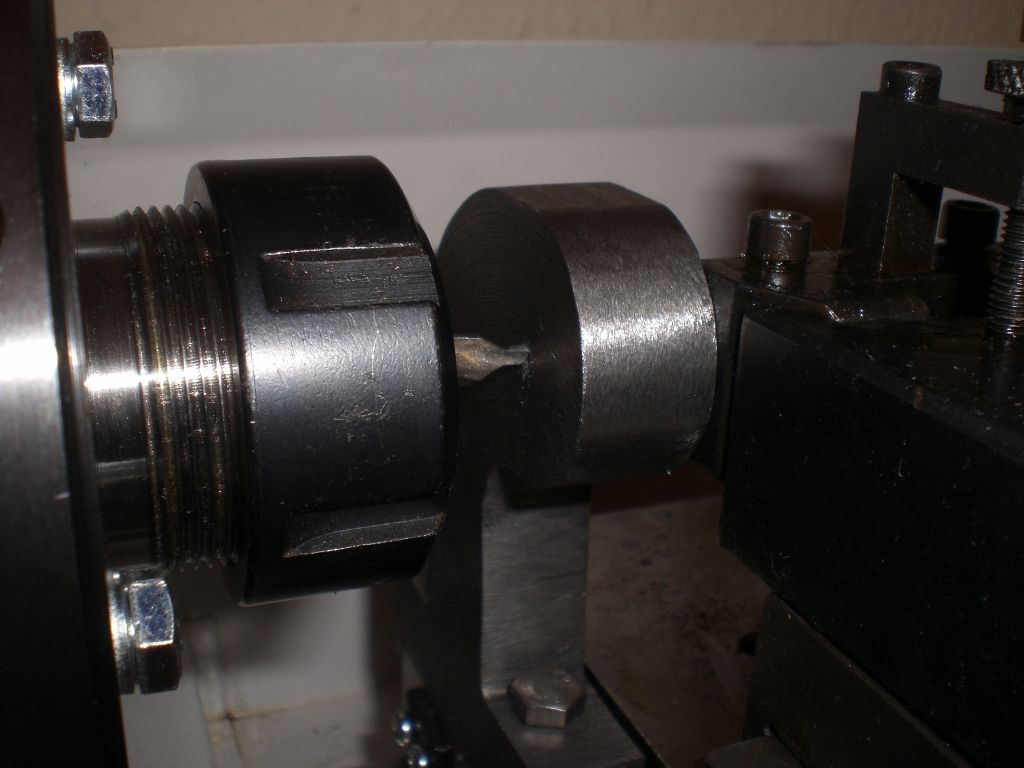
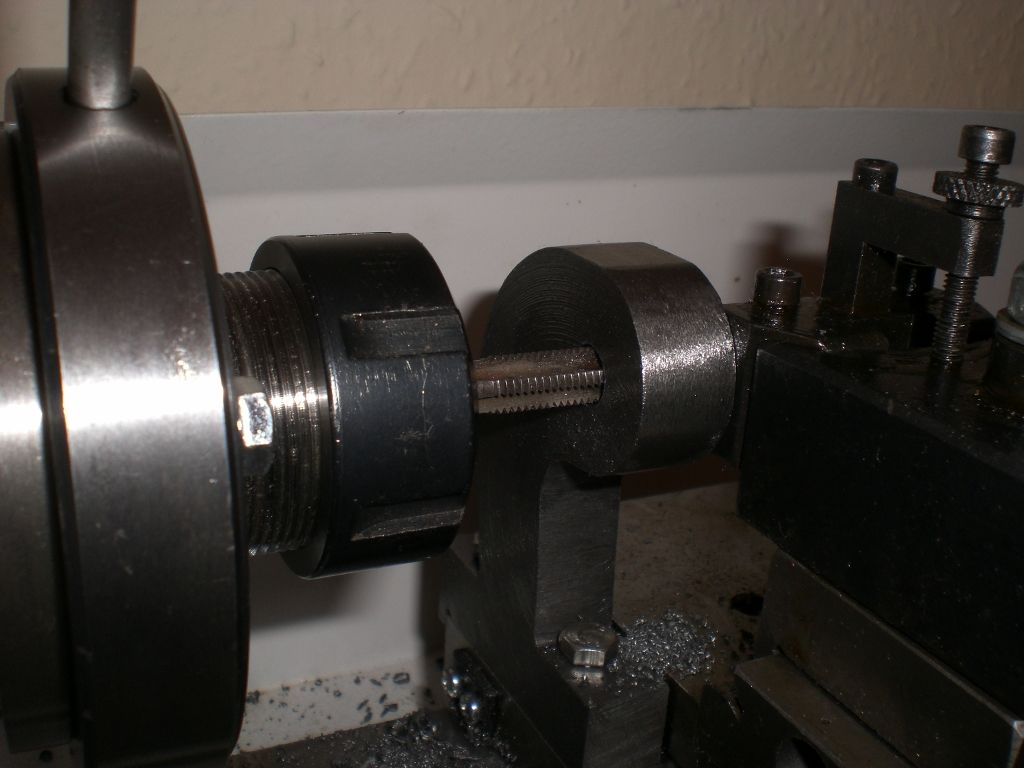
                        Hi, this evening I did a little more on my traveling steady while still being mounted on my lathe saddle. Firstly, using a centre drill held in a collet chuck on my lathe, the steady was centred on the chuck side with the tool post against the other side to stop the steady deflecting.

                        cimg2193 (1024x768).jpg

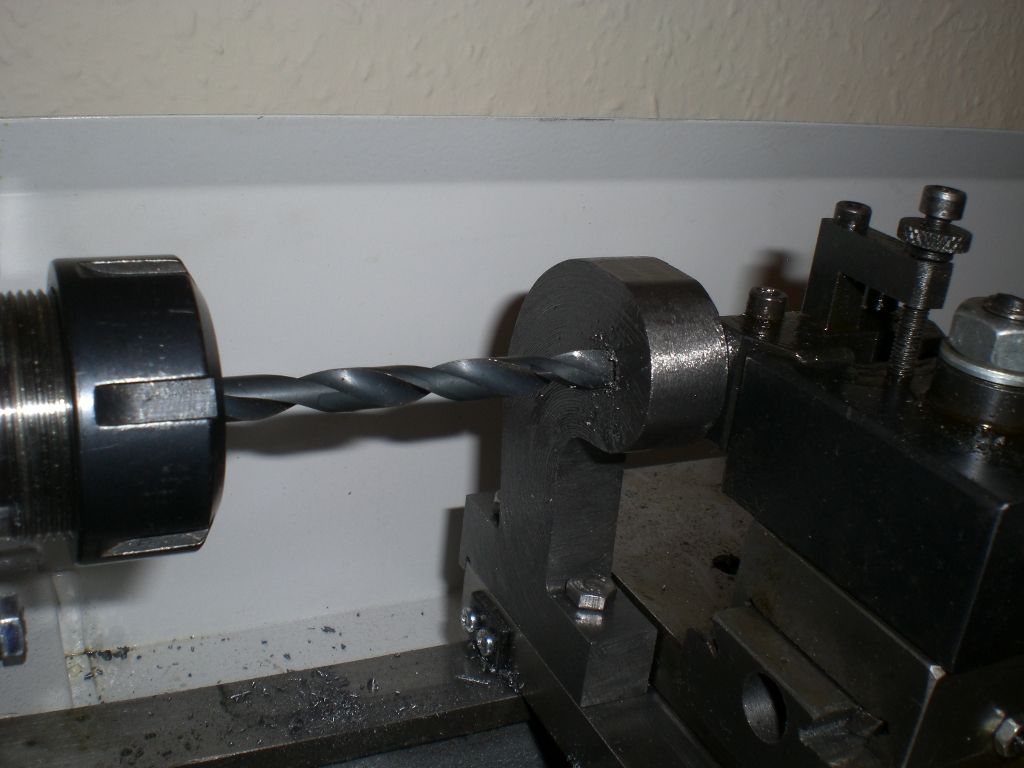
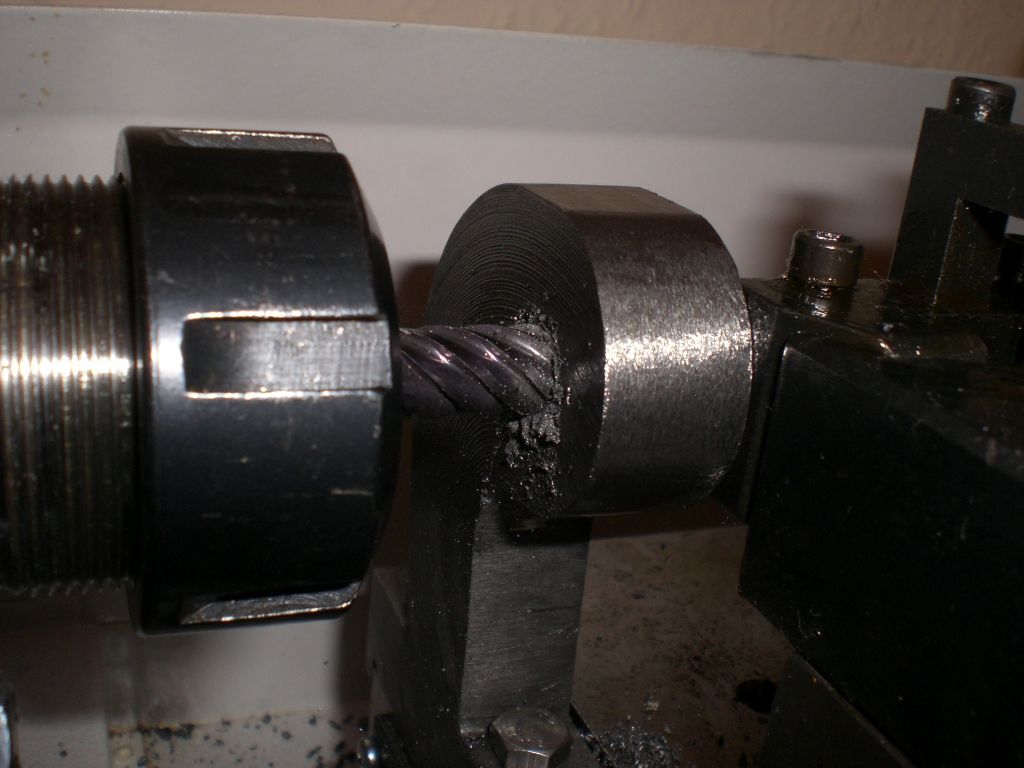
                        It was then piloted and then drill for tapping M9.

                        cimg2195 (1024x768).jpg

                        The drilled hole was then milled out to 10mm to a depth of about 8mm.

                        cimg2196 (1024x768).jpg

                        It was then tapped M9.

                        cimg2197 (1024x768).jpg

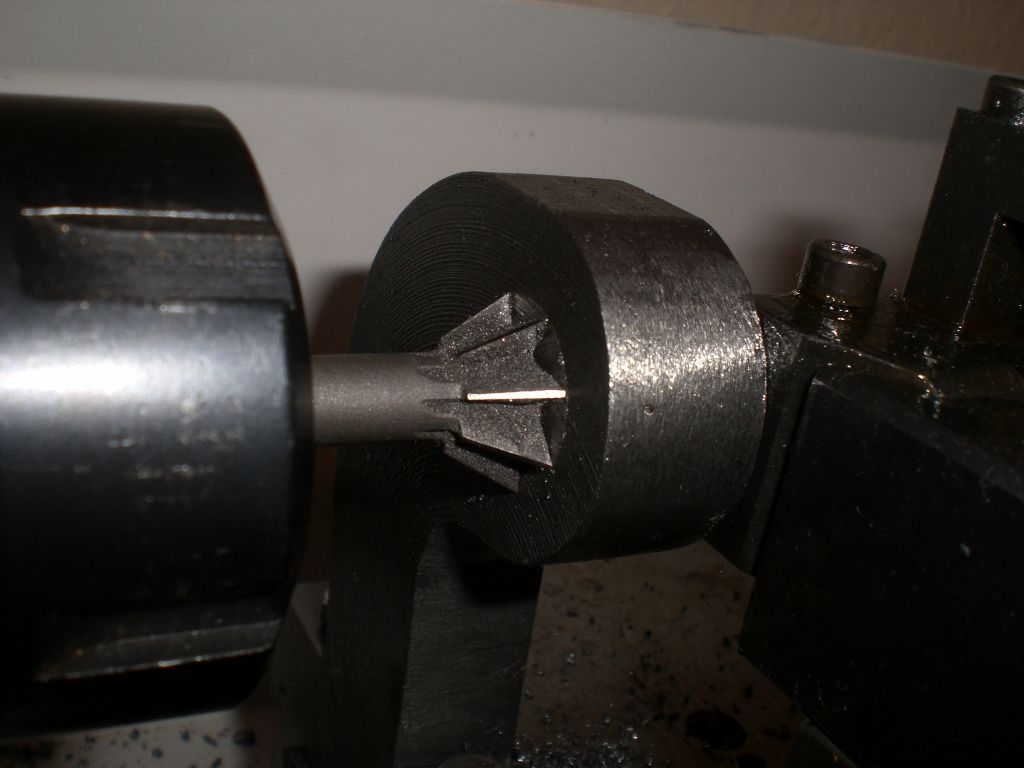
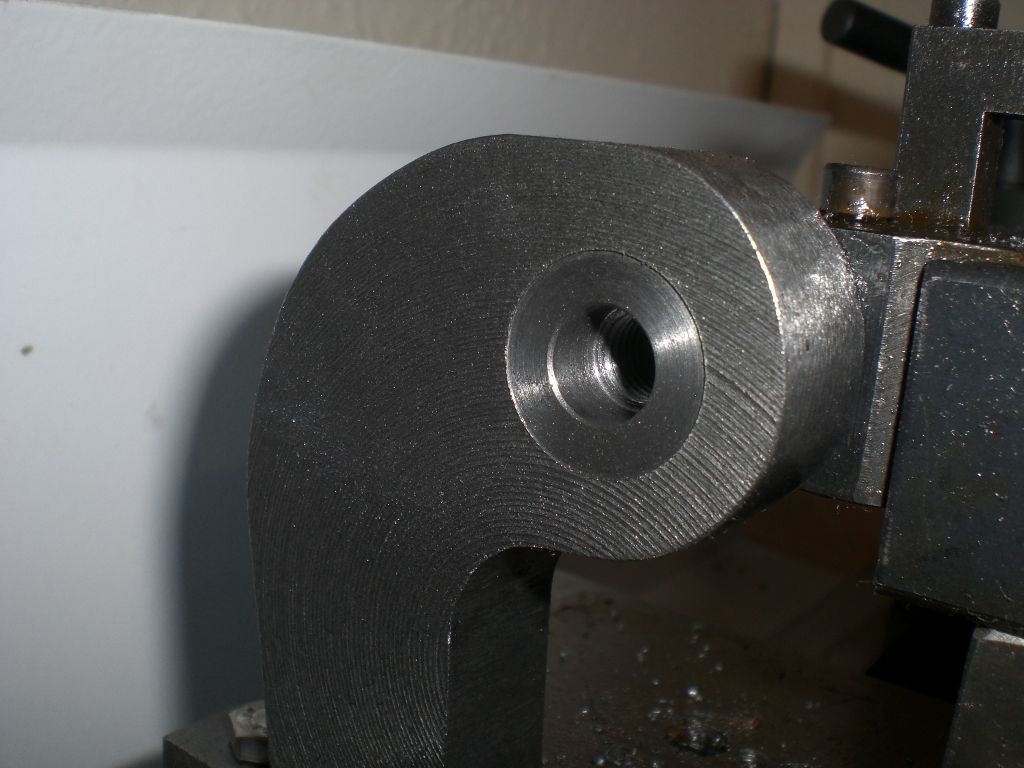
                        I then used a 3/4" dovetail cutter to counter bore the hole very slightly.

                        cimg2198 (1024x768).jpg

                        The steady is now ready for blank brass inserts.

                        cimg2200 (1024x768).jpg

                        Regards Nick.

                        Edited By Nicholas Farr on 10/04/2016 00:24:20

                        #233964
                        Hopper
                        Participant
                          @hopper
                          Posted by Nicholas Farr on 06/04/2016 20:55:26:

                          Hi, this evening I hacksawed my traveling steady to the kinda shape that I was aiming for.

                          cimg2180 (1024x768).jpg

                          Then after initial filing towards its final shape, it looks like this.

                          cimg2183 (1024x768).jpg

                          Regards Nick.

                          Great to see there is someone among us who remembers how to hacksaw and file! Well done indeed.

                          #233965
                          Nick_G
                          Participant
                            @nick_g

                            .

                            Its taking shape very nicely smiley

                            Nick

                            #234053
                            Nicholas Farr
                            Participant
                              @nicholasfarr14254

                              Hi Hopper and Nick_G, thanks for the comments. Nothing done on it today, as I've been too busy doing shopping and visiting my daughter, granddaughter and son-in-law.

                              Regards Nick.

                              #234067
                              Bob Rodgerson
                              Participant
                                @bobrodgerson97362

                                Last week I posted a bit on making an end cover/points housing for a magneto, In it I showed using Florists Brick to check out the machining.

                                I have since then made a bit more progress, here are a couple of youtube clips showing there use of the Kress spindle for the first time

                                #234381
                                Neil Wyatt
                                Moderator
                                  @neilwyatt

                                  Here are some CNC-free end caps

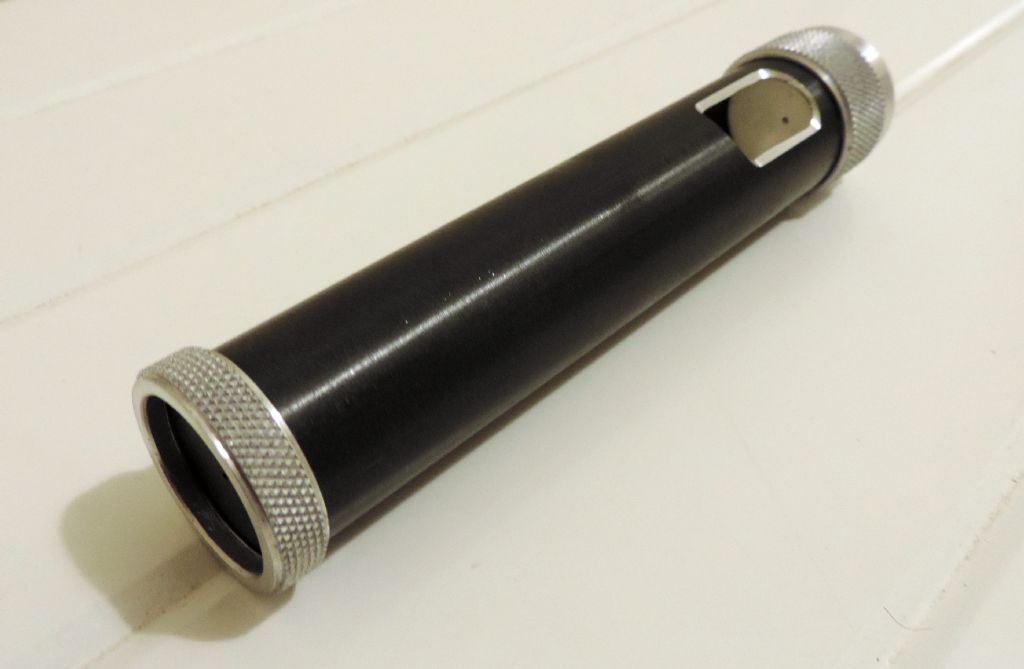
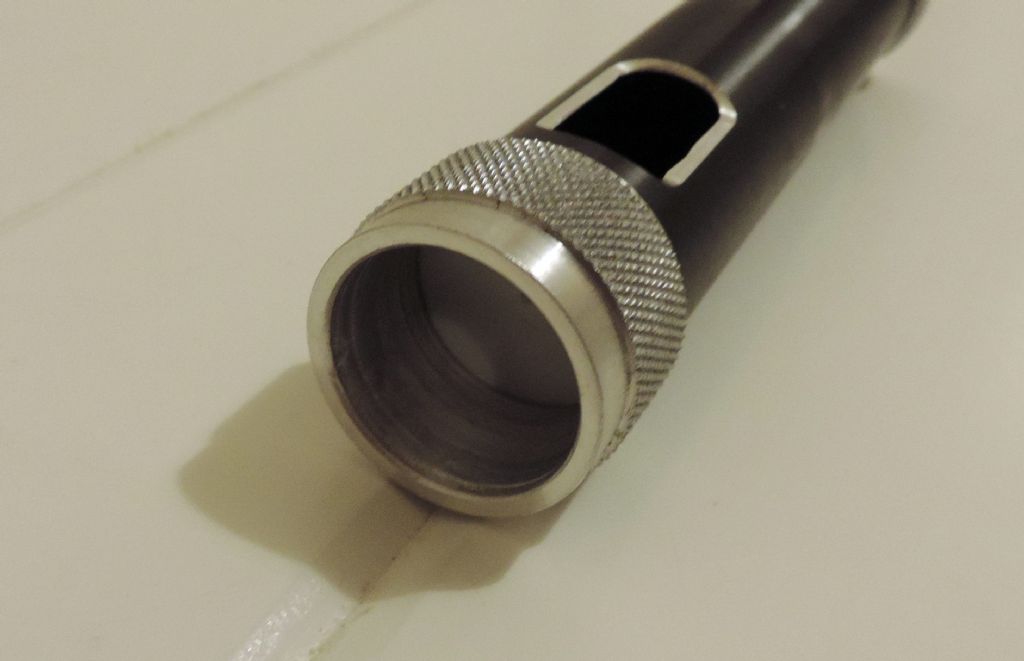
                                  Made this this evening, can anyone guess what it is?

                                  Neil

                                  solar finder 4.jpg

                                  solar finder 5.jpg

                                  #234383
                                  Ed Duffner
                                  Participant
                                    @edduffner79357

                                    One of those plunger things for starting fires?

                                    An off-axis guider for your telescope?

                                    Ed.

                                    #234407
                                    john carruthers
                                    Participant
                                      @johncarruthers46255

                                      Collimator?

                                      #234482
                                      Neil Wyatt
                                      Moderator
                                        @neilwyatt

                                        Solar finder, pinhole at the front, translucent screen at the other.

                                        Almost comically simple to use.

                                        Neil

                                        #234522
                                        Ed Duffner
                                        Participant
                                          @edduffner79357

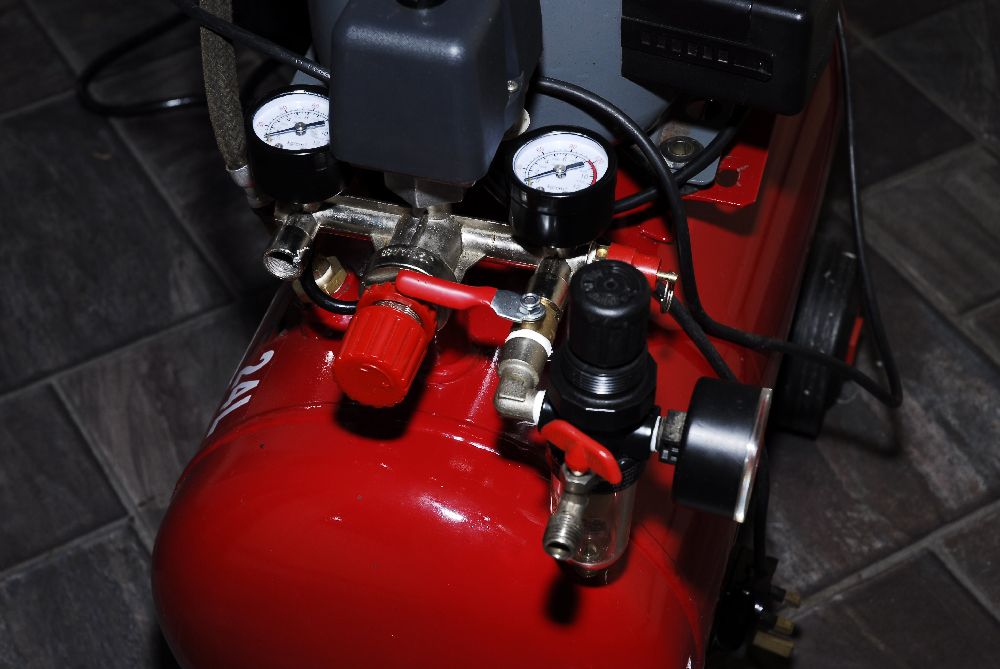
                                          Spent part of yesterday and today swapping the air tank/receiver from a new very noisy compressor over to my old silent compressor. Made an adaptor for the inlet pipe, 1/2"BSP male to 1/4"BSP female. The only thing I had to make it from was a piece of hex stock about 3mm longer than the finished part.

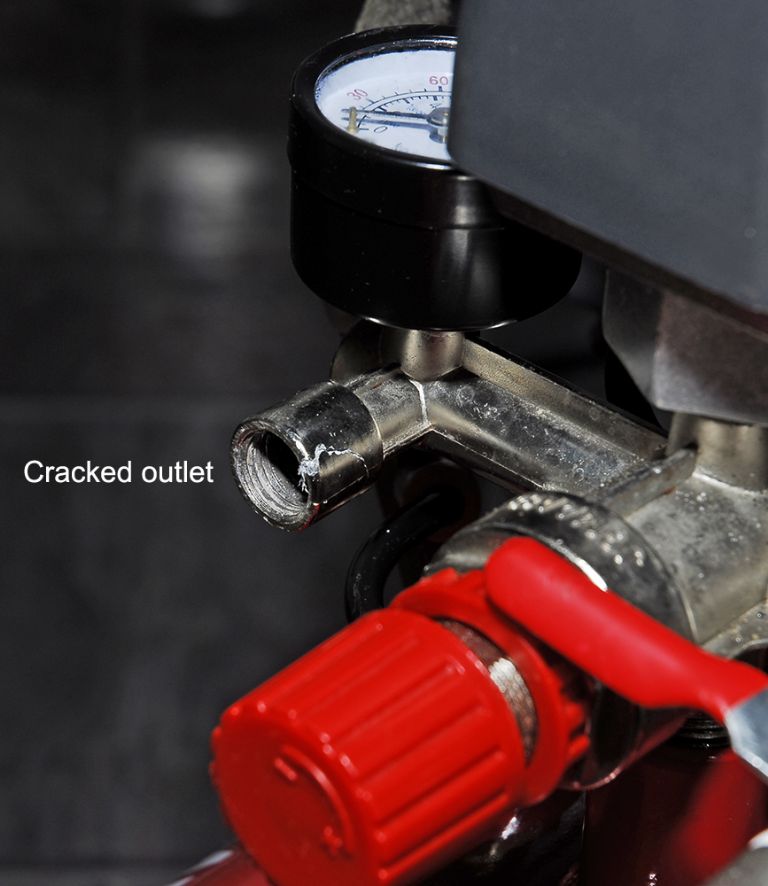
                                          Had a slight mishap somehow in that the regulated outlet connector cracked, so I need to make a repair to that. It's a very brittle, cast material. I was thinking of turning a thick walled sleeve to fit snugly over the outlet and solder in place. Any comments/ideas welcome. Buying a replacement outlet connector bar/tube is possible from Ebay.

                                          Ed.

                                          comp1.jpg comp3.jpg

                                          comp2.jpg

                                          #234533
                                          Neil Wyatt
                                          Moderator
                                            @neilwyatt

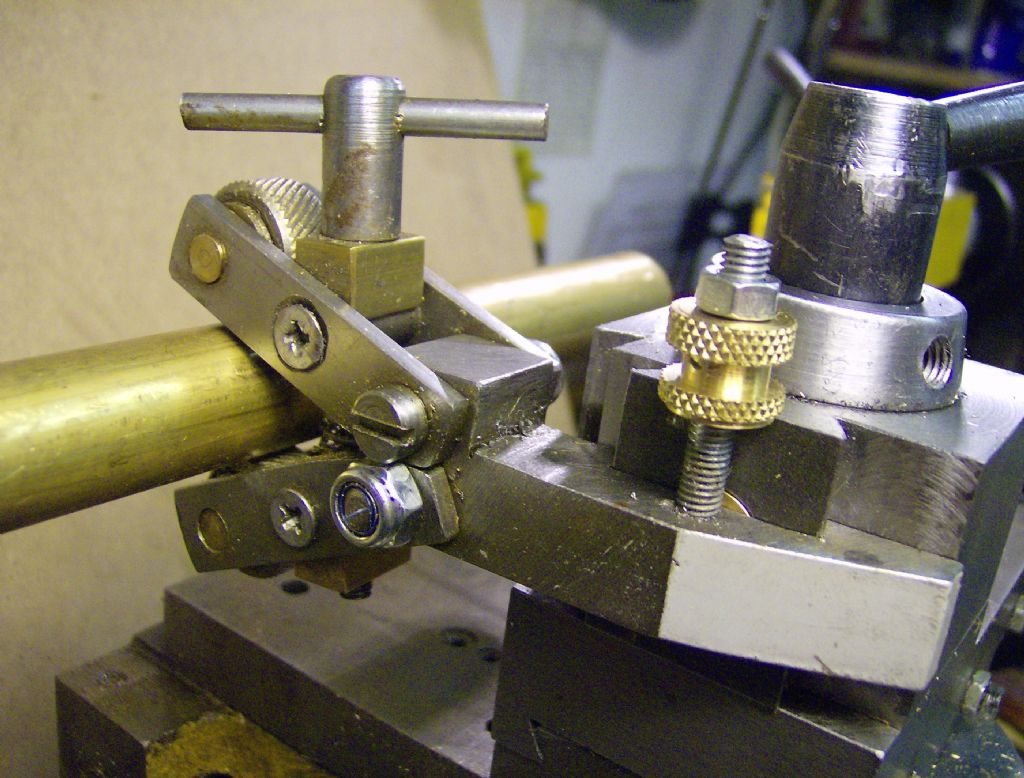
                                            Just thought I'd share the elegant tool that knurled that 1 1/4" aluminium tube, given the sophistication of some we have seen recently:

                                            QCTP Knurling Tool

                                            #234563
                                            Chris Evans 6
                                            Participant
                                              @chrisevans6

                                              Neil, I am going to make one of those knurling devises. What size knurl wheels did you use ? It will be on the list of jobs, I am still doing bits on making my new lathe cross slide in between other jobs. All squared up/tee slots and dovetails in. Hope to do the drilling/tapping/oiler positions today then on with the radial tee slot and angel engraving for the top slide.

                                              #234698
                                              Hopper
                                              Participant
                                                @hopper

                                                Speaking of elegance, I got the welding done on my fabricated version of GHT's Versatile Dividing Head.

                                                I have to say, the elegance of my stick welding was greatly enhanced by the layer of scale from an hour in the furnace and an overnight rest in a bucket of lime for stress-relieving/annealing.

                                                Edited By Hopper on 15/04/2016 12:14:24

                                                #234707
                                                Michael Gilligan
                                                Participant
                                                  @michaelgilligan61133

                                                  That looks promising, Hopper

                                                  I would be interested to follow the progress of your build.

                                                  … Please keep the photos coming.

                                                  MichaelG.

                                                  #234719
                                                  duncan webster 1
                                                  Participant
                                                    @duncanwebster1

                                                    A good source of air receivers for your compressor is a lorry scrap yard. If you want bigger just use more in parallel. Make sure you fit a drain and remember to let out the water every now and again.

                                                    #234725
                                                    modeng2000
                                                    Participant
                                                      @modeng2000

                                                      Duncan, that is where I got mine from.

                                                      I liberated a tyre inflating pump from a closing down garage, the sort where you put 20p in the slot to turn it on. There is no receiver with these save for the length of hose to connect to the tyre. So with the pressure limit and safety valve fittings etc I had a compressor from redundent parts. Unfortunately when I eventually got the cabinet open there were no 20ps inside!

                                                      John

                                                    Viewing 25 posts - 151 through 175 (of 457 total)
                                                    • Please log in to reply to this topic. Registering is free and easy using the links on the menu at the top of this page.

                                                    Advert

                                                    Latest Replies

                                                    Viewing 25 topics - 1 through 25 (of 25 total)
                                                    Viewing 25 topics - 1 through 25 (of 25 total)

                                                    View full reply list.

                                                    Advert

                                                    Newsletter Sign-up