The Workshop Progress Thread (2016)

Advert

The Workshop Progress Thread (2016)

Home Forums Work In Progress and completed items The Workshop Progress Thread (2016)

Viewing 25 posts - 401 through 425 (of 457 total)
  • Author
    Posts
  • #264757
    JasonB
    Moderator
      @jasonb

      Photobucket is down for maintanence, they have had a few issues over the last week or two.

      Advert
      #264760
      Anonymous
        Posted by JasonB on 04/11/2016 18:23:21:
        ……………..they have had a few issues over the last week or two.

        I used some rather ruder words to describe the problems……………..face 12

        Andrew

        #264840
        JasonB
        Moderator
          @jasonb

          Looks like your quiet word in Photobucket's ear worked Andrew as it is back up and runningwink

          An hour or two last night got the crank webs blended in and I have enough bar left for another engine.

          The bearings were turned on Wednesday, last night I added the oil holes and anti rotation pins, all seems to turn over OK.

          J

          #264874
          Anonymous
            Posted by JasonB on 05/11/2016 08:01:29:

            Looks like your quiet word in Photobucket's ear worked Andrew as it is back up and runningwink

            That's good, I can now start boring the socks off people about the design and manufacture of internal gears.

            Andrew

            #264893
            JasonB
            Moderator
              @jasonb

              Looking foprward to it, I've not been able to sleep well latelysmile p

              #264897
              Anonymous
                Posted by JasonB on 05/11/2016 12:51:53:

                …….. I've not been able to sleep well latelysmile p

                No problem, I'll rabbit on about the parametric equations for the involute of a circle, in both cartesian and polar co-ordinates, and which system is best for creating CAD models of internal gears…………

                Andrew

                #265113
                Iain Downs
                Participant
                  @iaindowns78295

                  After months of stumblings, I've finally done something constructive enough to post on here!

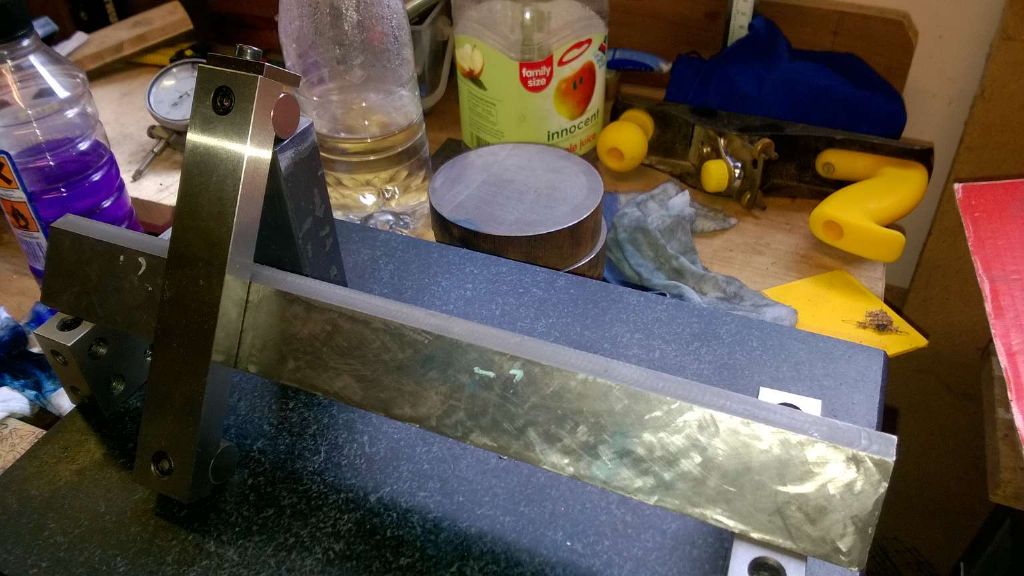
                  Following advice in another thread, I've invested in a sine bar to check the angle of my prism. A back of the spreadsheet calculation showed that the height needed to be 104.03mm.

                  So I've milled, filed and scraped a piece of steel to be 104.03 mm as the riser for the sine bar. That is assuming my height gauge is accurate, which I can't check.

                  Actually, the top varies by +0.01 / -0.02 mm or so, but for something made with my own fair hands I regard this as the ultimate in precision! That would put the angle out by something like 2% of a degree. Far better than I can work to!

                  prism with sine.jpg

                  Next step is to actually check and correct the angle. Well next but one; I'm still working on getting the base flat. I currently on scrape 180 and counting. I expect I'm doing something wrong for it to take so much work, but no doubt I'll get there!

                  Next time I try something like this I'll try and find a bit of cast. scraping mild steel is rather more difficult.

                  Iain

                  #265118
                  MW
                  Participant
                    @mw27036
                    Posted by Iain Downs on 06/11/2016 13:25:59:

                    Next time I try something like this I'll try and find a bit of cast. scraping mild steel is rather more difficult.


                    Iain

                    Looking good, Iain. I'd imagine you'd be pushing the limits of a garden variety vernier to measure 0.01/0.02 given that would be it's standard deviation anyway. Hence the necessity of your dial indicator. I dont think i've ever hand filed anything smaller than 0.1 tolerance, so it's commendable handiwork. Well done.

                    Michael W

                    Edited By Michael Walters on 06/11/2016 14:05:25

                    #265130
                    JasonB
                    Moderator
                      @jasonb

                      Did some bits for the Root & Vandervoort ignitor yesterday and today got the R&H silencer "casting" done, just needs a pickle to clean up the inside a bit. Looks like I got my co-ordinates right as the tool did not come through the side and it seems to have an even 1/16" wall thickness. I used Alibre to work out the length of each cut at 0.020" steps, about 35 cuts each side then blended by hand.

                      #265666
                      JasonB
                      Moderator
                        @jasonb

                        A little more done on the Ruston tonight.

                        Two bits of scrap MDF, one with a hole through, the other with a 5/8" dia hemisphire and a sheet of 20g steel sandwiched between. Make a form tool from a bar end of ali and shove the lot in the bench vice and give it a good squeeze and out comes a plate with a dimple.

                        The form tool was held in the chuck then the work held against that with a bit of tube and tailstock ctr to apply pressure and the edge turned to dia

                        Add a couple of screw holes and that is the silencer baffle plate crossed off the list.

                        #265957
                        Bob Rodgerson
                        Participant
                          @bobrodgerson97362

                          Not sure if this should be in the Motorcycle related forum or this one but here it is anyway.

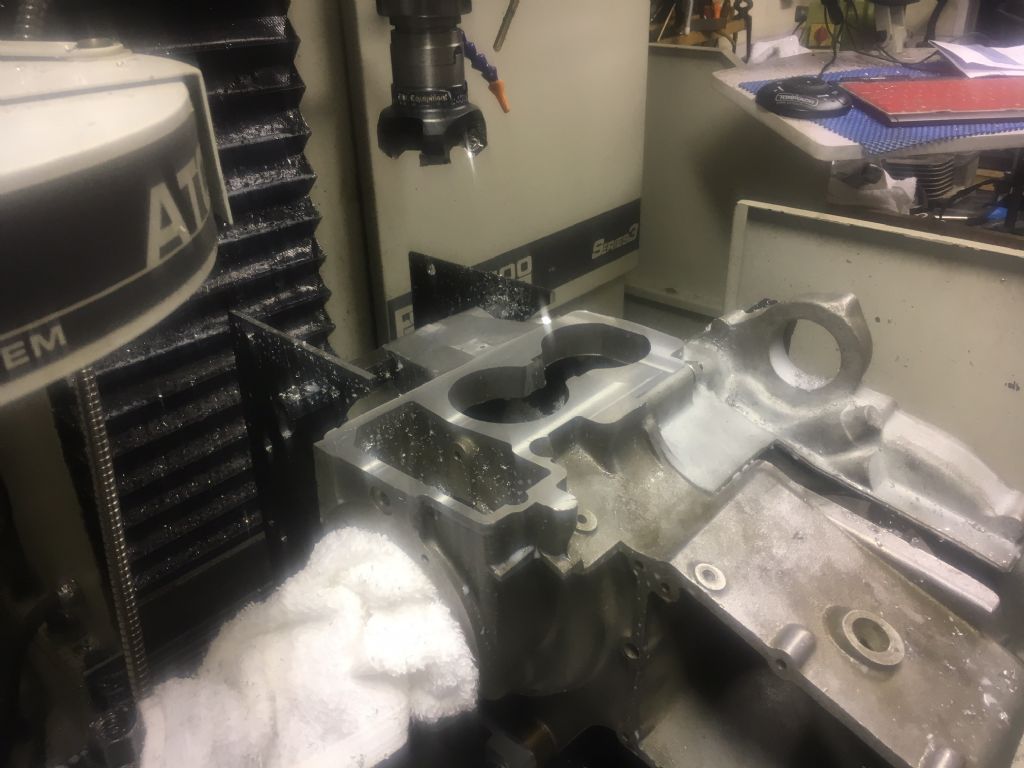
                          At last I have managed to get a set of crank cases for a 1970's British Motorcycle engine set up on the mill and get the cylinder base machined. The problem with this job is that I have no dimensioned drawings and the timing side casing had already been part machined so I was having to reverse engineer things.

                          In order to machine the cylinder base at the correct angle and parallel to the mill table I had to make a dummy crankshaft with extended spindles so that I could place the extensions on raised Vee blocks, align the shaft with the mill X axis and clamp it in position using a couple of adjustable engine mounting plates and various clamps. It took me about 6 hours to make all the bits and mount the engine on the table just so that I could programme the mill and machine the base in about an hour.

                          I have machined the crankshaft journal bearing housings and installed the bearings and the next job will be to fit the crankshaft into the engine and install the crank in the correct position. In order to do this I have made a jig/fixture that will allow me to fit the pistons and land the cylinder block into the fixture aligning the X axis face of the jig with the mill and clamp the jig to the castings. I can then remove the cylinder and then either spot through the jig or centre each hole using the mill coordinate read outs and my centre finder and drill the tapping holes for the cylinder head studs.

                          img_2249.jpg

                          #265993
                          Hopper
                          Participant
                            @hopper
                            Posted by Bob Rodgerson on 11/11/2016 09:27:26:

                            Not sure if this should be in the Motorcycle related forum or this one but here it is anyway.

                            At last I have managed to get a set of crank cases for a 1970's British Motorcycle engine set up on the mill and get the cylinder base machined. …

                            img_2249.jpg

                            Bob, what particular Brit bike engine of the 70s is this one? Not a BSA Fury/ Triumph Bandit is it? Cavity on the left looks very cam-chainish and gearbox cover coming off on the left is very non-British-tradition. Please tell us more about this project. Are you machining cases from raw castings?

                            #266003
                            Bob Rodgerson
                            Participant
                              @bobrodgerson97362

                              Hi Hopper,

                              you aren't wrong in your assumption. I was asked if I could get the engine to the stage where the crank would turn and the pistons go up and down so that further work can be carried out to get the engine into running condition.

                              The drive side casting was completely raw and the timing side partly machined. I can't tell you an awful lot more about it because of confidentiality issues.

                              #266118
                              Hopper
                              Participant
                                @hopper

                                Haha, all very Secret Squirrel. I think there are only a very tiny handful of complete examples in existence so will be interesting to see when this one pops up into public view. I never could get particularly excited about them myself. Trying to be a Honda 450 twin but not quite getting there, they seemed to me at the time. But certainly a collectible historical machine today. And an interesting machining project, to boot.

                                The REALLY interesting one would be Turner's original prototype with the 360 degree crank that flew apart every few thousand miles. I've never even seen a photo of that one. Wonder what ever happened to it?

                                Edited By Hopper on 12/11/2016 05:24:55

                                Edited By Hopper on 12/11/2016 05:44:15

                                #266120
                                Bill Pudney
                                Participant
                                  @billpudney37759
                                  Posted by Hopper on 12/11/2016 05:24:01:

                                  ………………………The REALLY interesting one would be Turner's original prototype with the 360 degree crank that flew apart every few thousand miles. I've never even seen a photo of that one. Wonder what ever happened to it?………

                                  I used to work with someone who had seen it, even more impressive was that he had seen it run. He jokingly suggested that observers needed ear defenders because of the racket, and leather aprons (well it was before the days of body armour!) for protection from bits of exploded engine. Maybe he wasn't joking. To end up with something that worked and became the Fury/Bandit the only remaining feature of the Turner engine was the height!

                                  Personally I'd rather have a Fury/Bandit than the Turner prototype, but that's just my opinion!

                                  cheers

                                  Bill

                                  #266206
                                  Iain Downs
                                  Participant
                                    @iaindowns78295

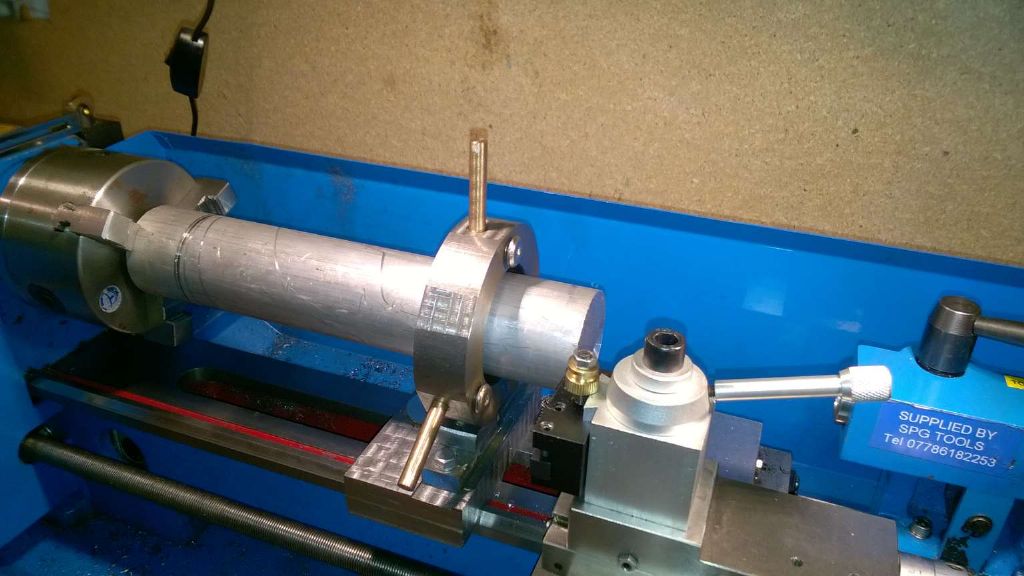
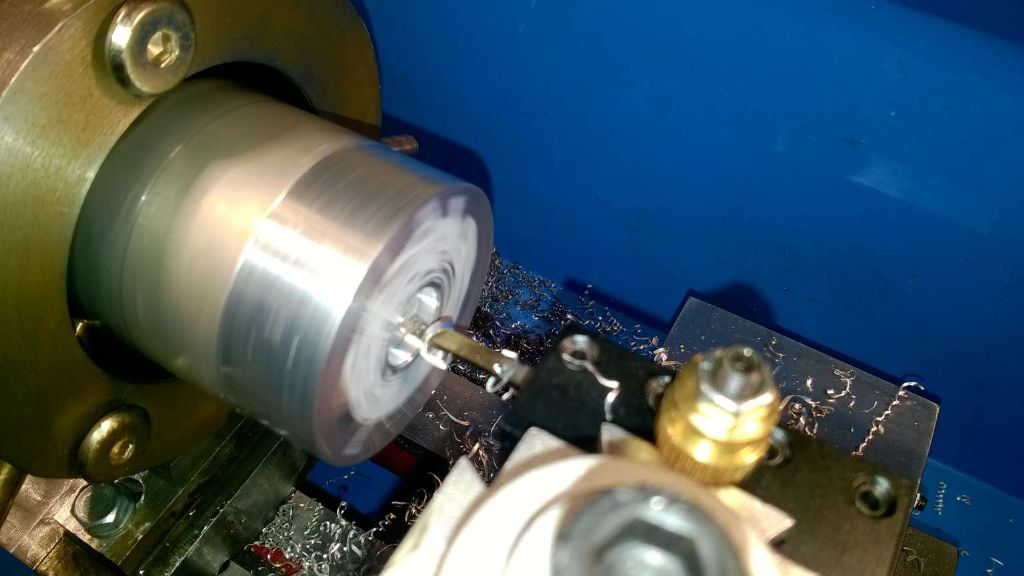
                                    A year after I made my Fixed steady, I've finally got to use it!

                                    I'm making a mount for my indicator and all I had was a very long piece of 50mm ally.

                                    Facing off

                                    steady facing.jpg

                                    Boring

                                    steady boring.jpg

                                    And finally, parting off the bit at the end.

                                    steady parting off.jpg

                                    Dead chuffed I am.

                                    Iain

                                    #266209
                                    mechman48
                                    Participant
                                      @mechman48

                                      Well done that man…

                                      George.

                                      #266216
                                      Michael Gilligan
                                      Participant
                                        @michaelgilligan61133
                                        Posted by Iain Downs on 12/11/2016 16:18:43:

                                        A year after I made my Fixed steady, I've finally got to use it!

                                        I'm making a mount for my indicator …

                                        .

                                        Looks good so far, Iain yes

                                        MichaelG.

                                        #266251
                                        JasonB
                                        Moderator
                                          @jasonb

                                          Thought I may as well give my early Xmas present a decent test to sliced up some 100x 50 CI bar to get a suitable bit to make the Ruston cylinder head from. Its a Femi 782XL, can be locked with teh blade flat and carried in one hand and will also convert to vertical use with an optional table.

                                          Not a bad finish

                                          I squared it up, nice bit of iron which cut well and made good chips and not dust

                                          Then reamed for the valve guides, bored the recesses and cut the seats

                                          Finally for today tapped 1/4" BSP for teh exhaust and drilled the passage which is angled in two directions

                                          J

                                          #266541
                                          mick70
                                          Participant
                                            @mick70

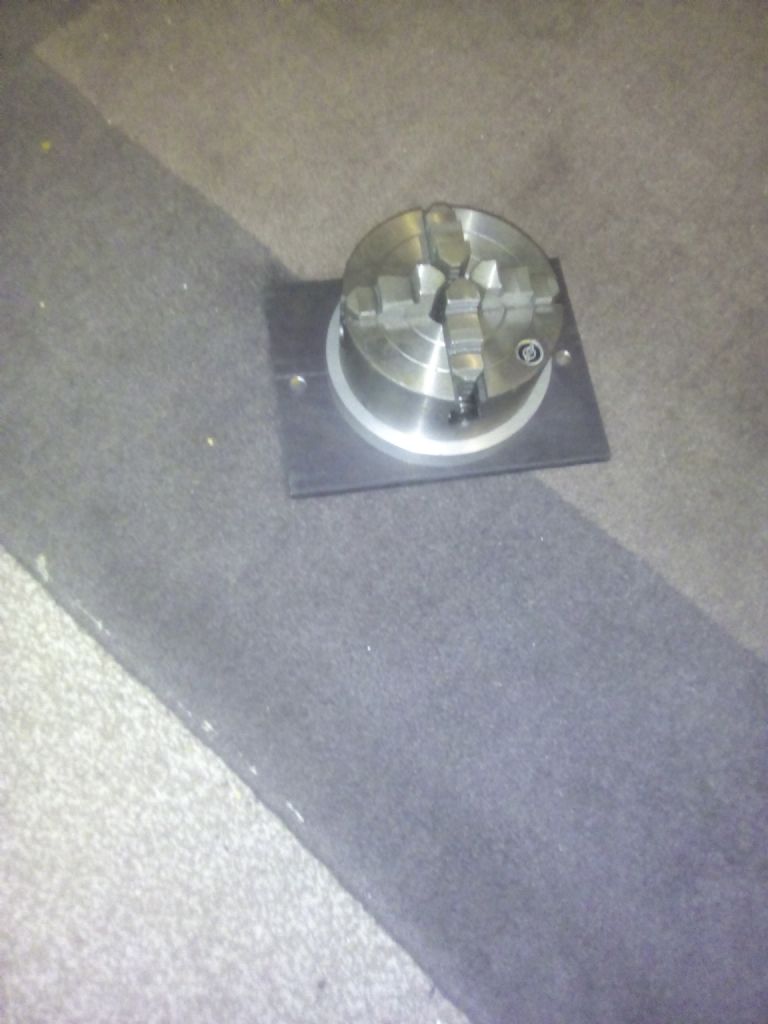
                                            chuck

                                            got rd to mounting my 4 jaw on a plate that i can bolt to drill press.

                                            got some odd shape bits to drill for a project that can't hold securely in drill vice.

                                            also fit's my 3 jaw.

                                            #267558
                                            JasonB
                                            Moderator
                                              @jasonb

                                              Lots of handle turning this weekend to get some shape into the Ruston Hornsby cylinder head.

                                              Started by roughing out in teh vice then screwed it to a tooling plate so it was easier to clamp in various positions. Milled the two valve guide stems first

                                              Then worked out some co-ordinates to shape the bulge where the exhaust socket blends into the head. I made a slight mistake on the first couple of passes so will have to get the JB weld out later. Must remember to mahe sure the rotary table is directly under the spindle when locating work under the spindle!

                                              Then the raised bosses for the studs, rest of the exhaust and the inlet flange were shaped.

                                              #267561
                                              martin perman 1
                                              Participant
                                                @martinperman1

                                                Jason,

                                                When you go into your workshop does time slow down, I'm finding I don't have time to think about projects let alone do them.

                                                I do enjoy reading about your exploits though, looking at the silencer I reckon you would have a market if you started making them full size smiley

                                                Martin P

                                                #269735
                                                Iain Downs
                                                Participant
                                                  @iaindowns78295

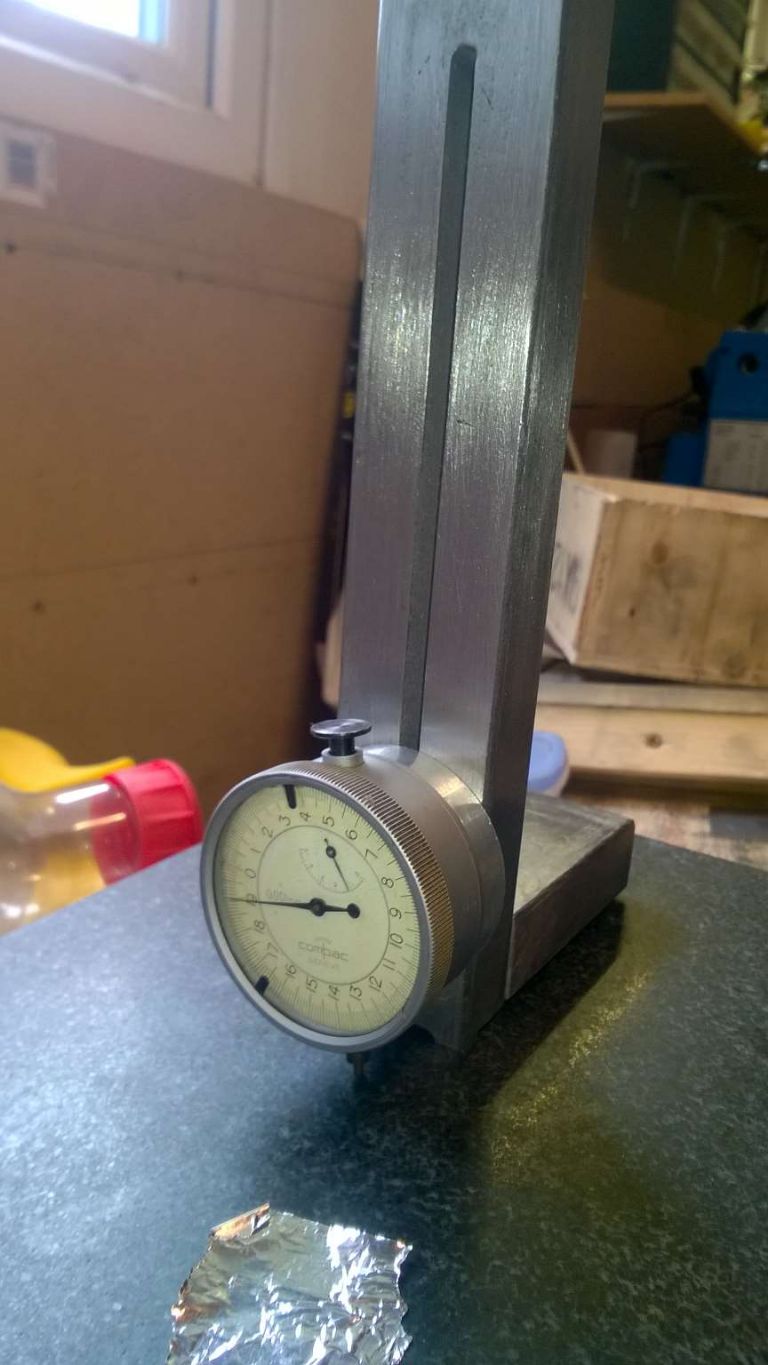
                                                  Last weekend I was on a roll – my PCs were finally back together and working (don't ask) and I was on the verge of completing an indicator stand for my Compac micron indicator.

                                                  I was so looking forward to posting a 'look I've finished something!' rather than a 'er…. how do you'.

                                                  Then disaster struck. My 6mm tap snapped in the hole. My own fault. Having a choice between a 5mm and a 5.5mm drill I went the wrong way. And I would be every so grateful if those who so magnificently contributed to my question about M8 tap drills would refrain from any comment on this one.

                                                  Some searching on this forum and a few minutes with eBay found me a 5mm carbide end mill and a new Volker tap (also a spiral tap which is what I actually used – I think I might get more of those…) and a set of 0.1mm separated drills.

                                                  This morning I machined out (high speed and slow feed) the offending tap, re-drilled, re-tapped and assembled and here it is!

                                                  indicator stand.jpg

                                                  It seems to be very stable with it's 3 feet (and in a pinch I can stick a weight on the back).

                                                  Happy again – until my next disaster!

                                                  Iain

                                                  #269741
                                                  Anonymous

                                                    I couldn't possibly comment – Andrew

                                                    #269778
                                                    Daniel
                                                    Participant
                                                      @daniel

                                                      Refraining . . .angel

                                                    Viewing 25 posts - 401 through 425 (of 457 total)
                                                    • Please log in to reply to this topic. Registering is free and easy using the links on the menu at the top of this page.

                                                    Advert

                                                    Latest Replies

                                                    Viewing 25 topics - 1 through 25 (of 25 total)
                                                    Viewing 25 topics - 1 through 25 (of 25 total)

                                                    View full reply list.

                                                    Advert

                                                    Newsletter Sign-up