The Workshop Progress Thread (2016)

Advert

The Workshop Progress Thread (2016)

Home Forums Work In Progress and completed items The Workshop Progress Thread (2016)

Viewing 25 posts - 301 through 325 (of 457 total)
  • Author
    Posts
  • #245175
    Andrew Hutchinson
    Participant
      @andrewhutchinson12802

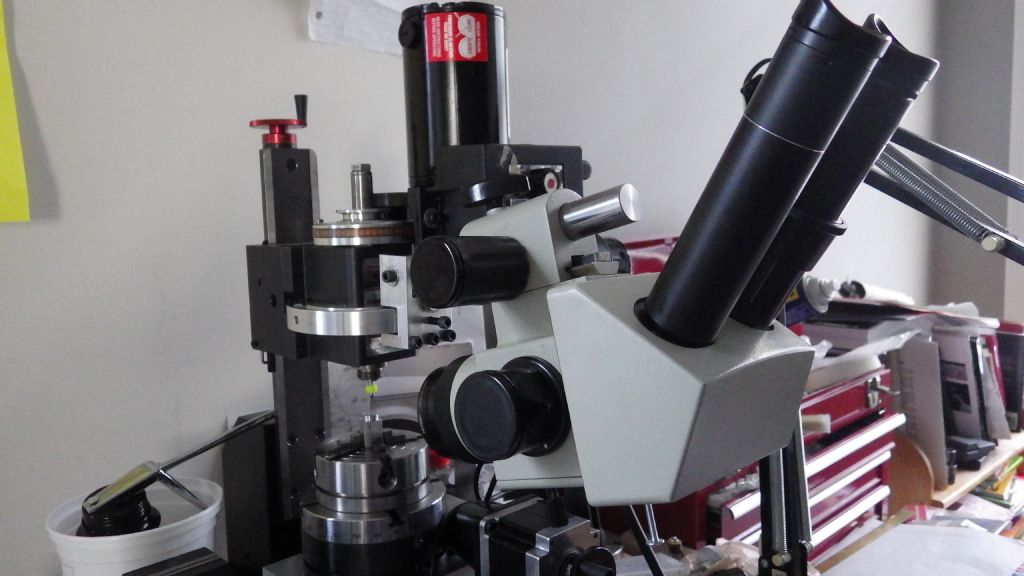
      I made a mill headstock microsope mount based on pictures of the OOP Sherline version. The boom mount swivels and tracks the cutter. I'll probably remake the carriage out of hot-roll and cut a slot for a stop yoke to fit in lieu of the bronze washer. Other details will probably need similar treatment. I'm eager to take it home and give it a whirl. Turning under glass has been a revelation and I'm hoping for much the same on the mill.

      RIMG0662

      RIMG0663

      PS I tried to link from my flickr account per the instructions but I ended up with a busted link and then proceeded to accidentally delete the text as well…


      Andrew Hutchinson

      Surrey BC Canada

      Edited By JasonB on 02/07/2016 20:28:32

      Advert
      #245176
      Andrew Hutchinson
      Participant
        @andrewhutchinson12802

        Thanks again Jason,

        I'm trying but I am not learning fast enough. I put them in an album just now but you beat me to it.

        Cheers,

        AH

        #245233
        Anonymous

          Yesterday, after it started raining and thus killed any hope of flying the big glider (see note), I started roughing out the eccentric sheaves:

          eccentric sheaves.jpg

          Next job is to make a jig to hold each sheave to clean up, and bring to thickness, the back face. Bit of a pain, but previous experience has shown that using a chuck can damage the running surfaces and results in thickness variations round the circumference of a thou or two. After cutting a deep groove final 'parting off' was done with a hacksaw. This was mainly due to the workpiece hanging out of the chuck by 6" to start with, and the inevitability of failing to catch the part as it separates and dinging it as it bounces off the lathe bed.

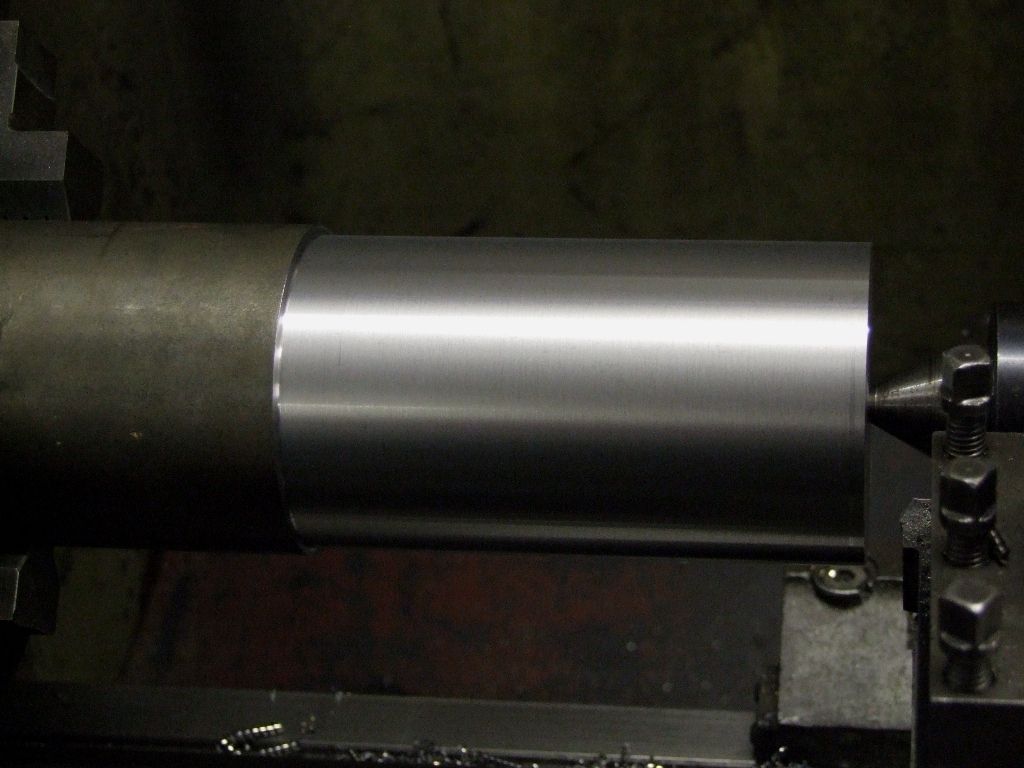
          I was quite pleased with the finish obtained on the 3" bar when taking the diameter down to the initial 2.75":

          finish.jpg

          I haven't bothered to measure it, but by finger comparison with Rubert it's probably ~1µm Ra. Even better the diameter only varies by a few of tenths over the length. Final cut (insert tooling 0.4mm radius) was 82 thou off the diameter at 370rpm and 6 thou/rev. All the grooving was done with a 3/8" square HSS toolbit.

          In due course I will be boring holes for the crankshaft on the sheaves for the water pumps, as I know the throw. The sheaves for the valve gear will have to wait until I have re-designed said valve gear, or not, depending upon the maths.

          Andrew

          Note: All was not lost at the gliding club; I picked up a tugging duty for the forthcoming young persons day and Interclub league. Our recently acquired second tug still has a D (German) registration, and both of the rostered tug pilots have NPPLs, and so can't fly it. Fortunately I have an EU PPL(A) and Class 2 medical so I can step into the breach. teeth 2

          #245247
          Ian S C
          Participant
            @iansc

            I suppose pilot licencing, and other Av regs will change over the next couple of years or so, IF they go ahead, some seem to think the govt will chicken out. Ian S C

            #245254
            Anonymous
              Posted by Ian S C on 03/07/2016 13:15:55:

              I suppose pilot licencing, and other Av regs will change over the next couple of years or so…………

              I'll transfer a discussion of this to the 'Aircraft Discussion' thread rather than clutter up this thread.

              Andrew

              Edited By Andrew Johnston on 03/07/2016 13:37:12

              #245535
              John Hinkley
              Participant
                @johnhinkley26699

                I've finally got the boring/facing head to work. I had to alter the profile of the star wheels and fettle the drive pins, but it now works as I intended. The feed is VERY fine, even with both drive pins inserted but it remains to be seen how it performs when cutting metal (hopefully tomorrow). While it was stripped down, I tidied up the gib screw locations and re-drilled the slide stop screw location, misplaced due to reading the drawing incorrectly and reduced the size of the travel stops. The feed screw dial has not yet been engraved as I need to decide how to mount the rotary table securely at 30° to the mill table.

                Here's what it looks like now:

                Ready for a test run

                John

                #245645
                Anonymous

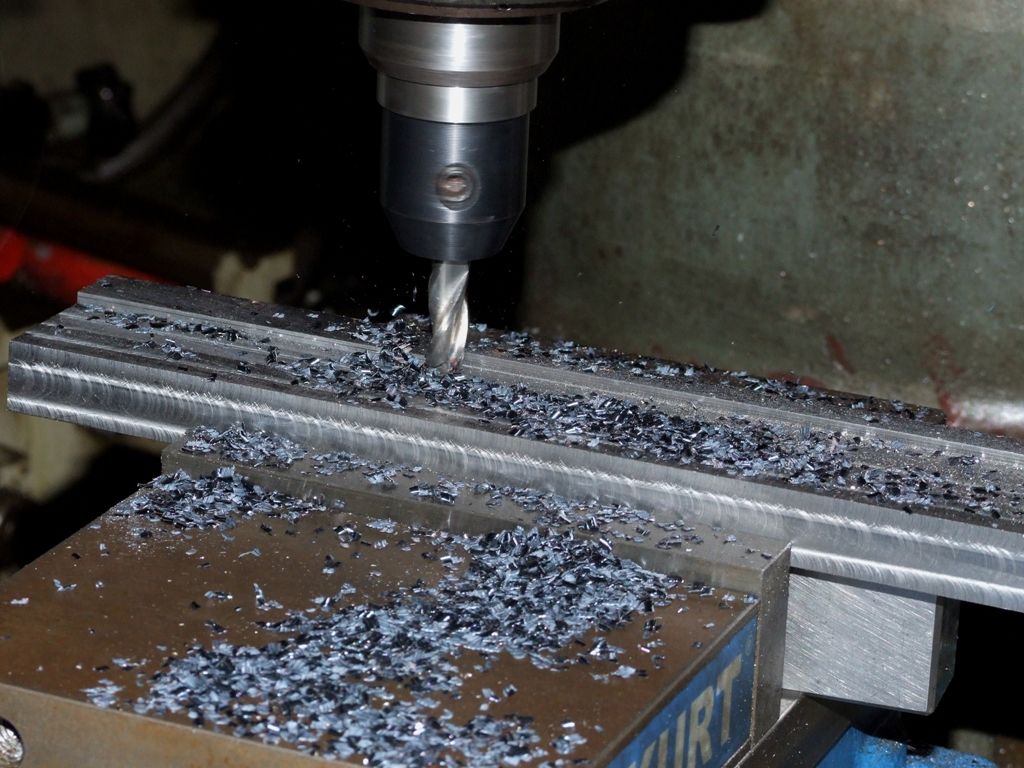
                  Spent an hour this evening hogging out a 10" lump of hot rolled steel to make the water pump eccentric rods. The exercise brought the lump to size in width and depth, plus a 1/16" give or take:

                  eccentric rod roughing.jpg

                  The cutter is 10mm uncoated carbide, three flute and is running at 2000rpm, 3mm doc, 7.5mm woc and 500mm/min. The chips are **** hot, enough to turn the air a rather deeper blue than the chips if one drops on the skin. The picture was taken from 4 feet away. smile

                  Andrew

                  #245941
                  Hopper
                  Participant
                    @hopper

                    Made some progress on the fabricated Versatile Dividing Head after a bit of a hiatus. Got the last ball handle done. Glad to see the back of those critters! My homemade ball turner was never intended for stuff that small.

                    So it was on to the 60-tooth gear. Now if you buy the kit, you get a nicely made helical cut gear that engages nicely with a worm to provide the compound indexing. But this being a scrap-box special, I am using an old 60T change gear off an unknown lathe. Maybe an early Myford or Raglan? I dont know. The worm will be mounted at a 4.5-degree angle so it meshes correctly with the straight-cut gear. Maybe later on I will use the completed VDH to make a proper helical gear. Maybe.

                    Problem using this gear for now is that the gear is cast and has a recess on each side. BUt one side at least needs to be flat and without recess in order to be able to drill the 24 holes used for direct indexing with a spring loaded plunger. OK says I, machine the recess out nice and round and square, turn up a suitable large washer to fit and loctite it in place before machining the face nice and flat all across.

                    Done, but my piece of scrap used for the washer had a big dint in the middle, which left a slight .005" deep  "witness mark" but, hey it will be covered by the retaining nut.

                    I cut the 5/32" keyway (good old GHT could not go with plain old 3/16 or 1/8" ) using a boring bar with the toolbit ground to 5/32 wide and running the carriage back and forth with the rack feed as I fed the tool outwards in two-thou cuts. Actually did not take that long to do and came up quite nice.

                    But on assembly, I still think the recess on the back side of the gear needs filling in, just for aesthetic reasons.

                    After that it will be on with cutting the keyway in the spindle, and drilling the locking holes and spanner holes on the gear retaining nuts and the main spindle collar.

                    Edited By Hopper on 09/07/2016 12:37:57

                    Edited By Hopper on 09/07/2016 12:41:46

                    Edited By Hopper on 09/07/2016 12:44:07

                    #245948
                    Michael Gilligan
                    Participant
                      @michaelgilligan61133

                      That's looking very tidy, Hopper star

                      MichaelG.

                      #246141
                      JasonB
                      Moderator
                        @jasonb

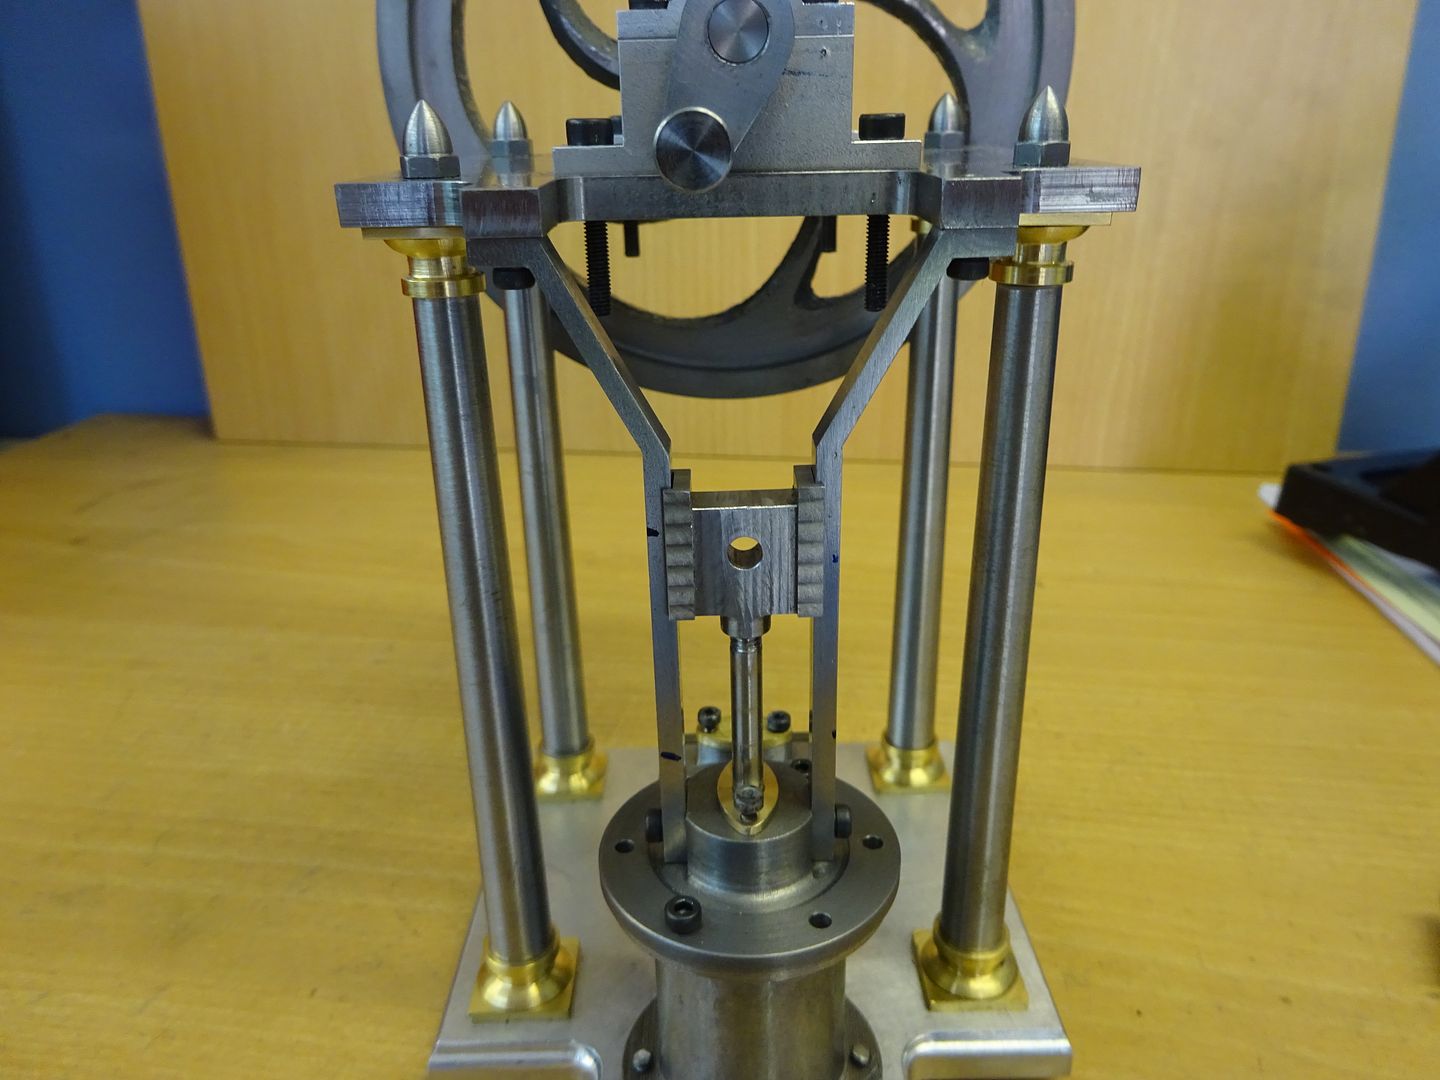
                        Some more progress on the Entablature engine, I now have piston, piston rod, gland, crosshead and crosshead guides.

                        Also having replenished my stock of brass at the Guildford show I turned quite a bit backinto swarf making some of the parts to fabricate the Lightweights carb from.

                        #246149
                        Andrew Hutchinson
                        Participant
                          @andrewhutchinson12802

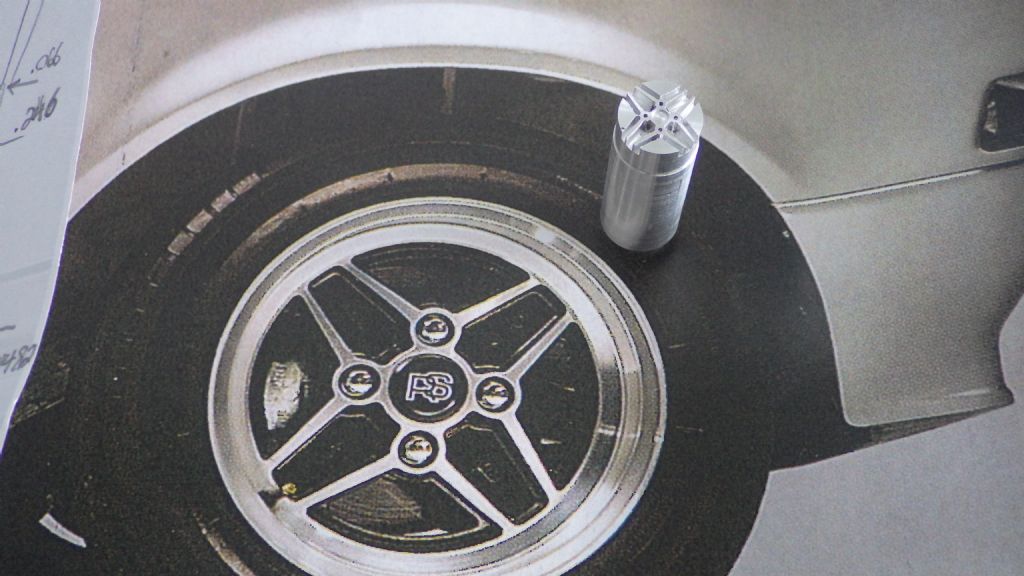
                          Got around to using my microscope mount to make a part. One problem with the mount (among several) is that it needs an alternate boom with an offset in order to view stub tooling at a decent level of magnification and at a high enough level of inclination to give the lay of the land. As it is currently, I'm good to use my 8 mm gear with the adaptor dropping the cutter 3/16" or so, but drilling in milling collets is mostly at the top of the view almost out of sight.

                          rimg0667.jpg

                          That said, I managed along well enough roughing out a wheel centre for a Ford Harrier. At Vancouver mini makerfaire one of the automobile modelling clubs had a flyer saying they were after someone to do up the part. It looked interesting so I bit. Machining it at the show was a bust as I had to first scale it and then draw it out for the angle offsets and only managed to rough out and drill the first blank in the wrong place before I slunk back to making chimneys and sand domes on the lathe.

                          rimg0724.jpg

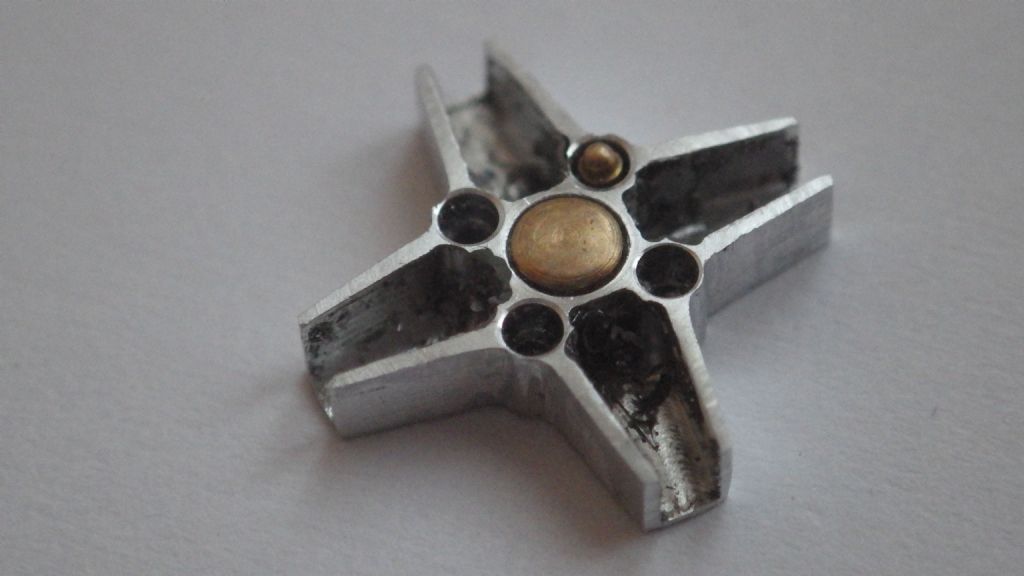
                          Working with the microscope at home I still managed to knick the centre of the part in a couple of places. I think I can fill them and fix up before parting off the wheel centre. I'm sort of looking forward to hand finishing the little inner radii after all those passes it took to get the endmill to full depth. Tests so far with a sharp exacto seem promising enough. The bolt holes also need counter boring.

                          Andrew Hutchinson

                          #246151
                          JasonB
                          Moderator
                            @jasonb

                            Looks good, My brother used to have a Harriersmiley

                            #246851
                            JasonB
                            Moderator
                              @jasonb

                              I got some work done on the Entabliture engine's crank in the week and finished it off today, now I have something to play withsmiley. Hope to get the eccentric and strap done tomorrow.

                              Excuse the local parrakeet populationdevil

                              #247011
                              JasonB
                              Moderator
                                @jasonb

                                Eccentrc, strap and rod done.

                                #247655
                                JasonB
                                Moderator
                                  @jasonb

                                  Got the last bits for the entablature engine done this evening so just had to push a bit of air through it. Set the valve by eye to lead the crank by about 90 + 7 degrees, connected the air and turned on the compressor and it self startedsmiley

                                  Bit of air escaping here and there but as there are no gaskets, gland packing or piston ring fitted and half the fixings are not there I'm happy with how its first run went.

                                  No micrometers were used on its production and I only have those nasty far eastern machines so not too bad for about 5 weeks work allowing for loosing a weekend to Guildford show and working on other models during that time.

                                  #247659
                                  Jeff Dayman
                                  Participant
                                    @jeffdayman43397

                                    Looks like another great runner Jason. I see it has Muncaster's Patent Dynamic Nutless Cylinder Gland….

                                    Just kidding, great job. JD

                                    #247673
                                    Anonymous

                                      Ah well, no point in me posting the latest work done this evening then, as not only did I use a mill bought from the USA but I also used a micrometer. embarrassed

                                      Andrew

                                      #247998
                                      Andrew Hutchinson
                                      Participant
                                        @andrewhutchinson12802

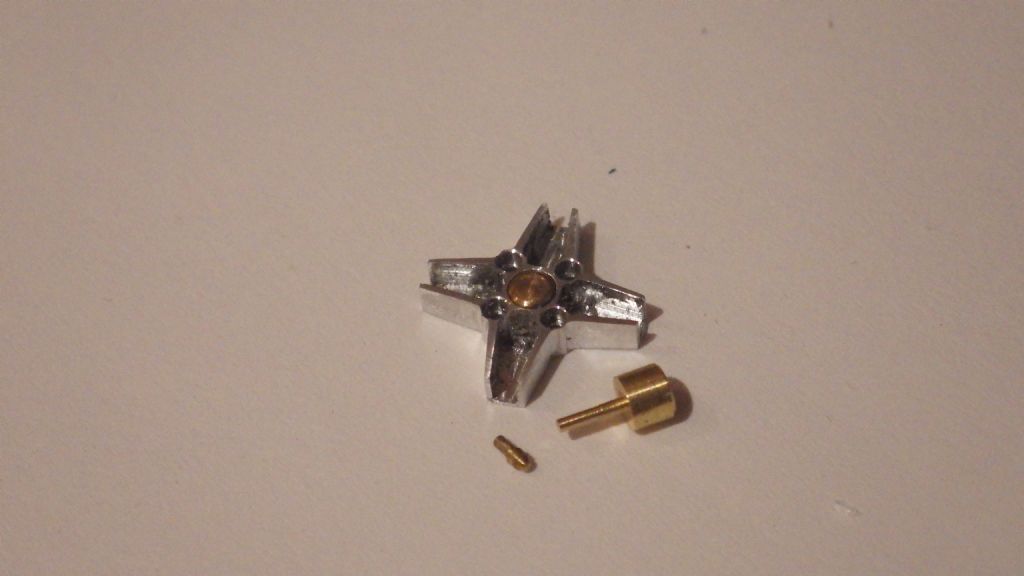
                                        Lost a week to the usual stuff but I managed to make a spindle lock for my Sherline mill. The lock was needed to make a series of small slots around a crcumference that I didn't end up doing. The headstock bearings are from a well used CNC machine due to be replaced sooner or later so I thought it couldn't hurt too much (cuts in the .001"X01" range in 6061). The lock will get used on the lathe until I make a shaper head to work against my rotary table.

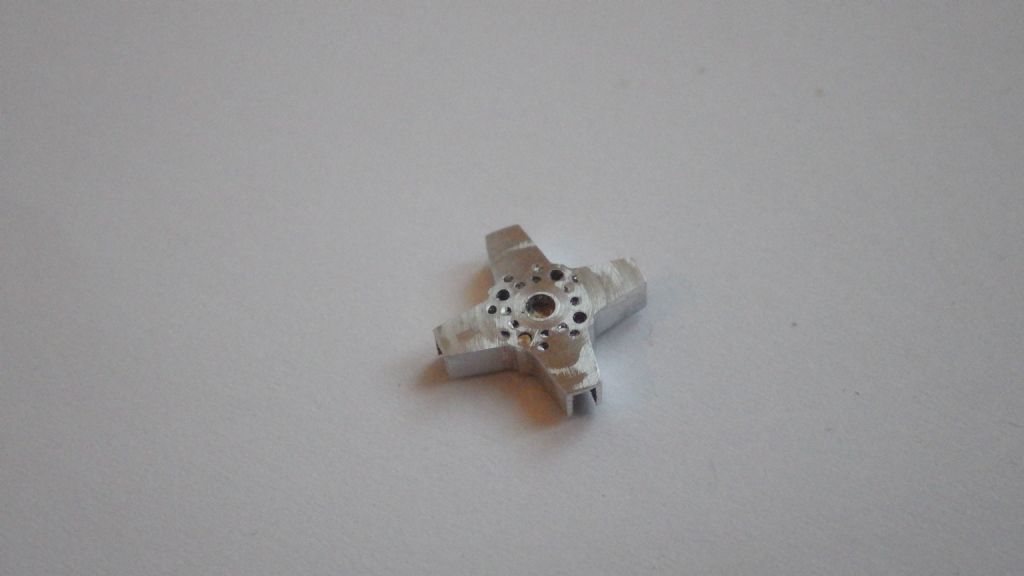
                                        Spindle lock precluded doing anything else on the harrier wheel until Friday night when I counterbored it a smidge too large. The button was to pick up the holes. Didn't have the D-bit when I needed it and had to pull the part from the set-up. I raised a burr and will have to face down a couple of thou to get back to the good stuff. In more successful business I made a go at the retaining nuts. So far they're un-hexed. The one in the shot I did by numbers but I've since been to my parents to use the torch and made a small form tool for the domed end of the nuts. That sort of stuff is fun. Cleaning up the wheel would have been a breeze had I been able to mill the part to depth but I had to extend it manually and that precluded parting /facing it off at a million miles an hour. I've made some small steel blocks to sand/ grain with that I haven't tried yet. Most of the epoxy held up. I suspect that which didn't got contaminated. It has mostly been fun and very educational for the next couple of jobs I have lined up. If I get asked to do it again or have to remake I suspect I'll CNC it but I'm worse at that and it's never any fun.

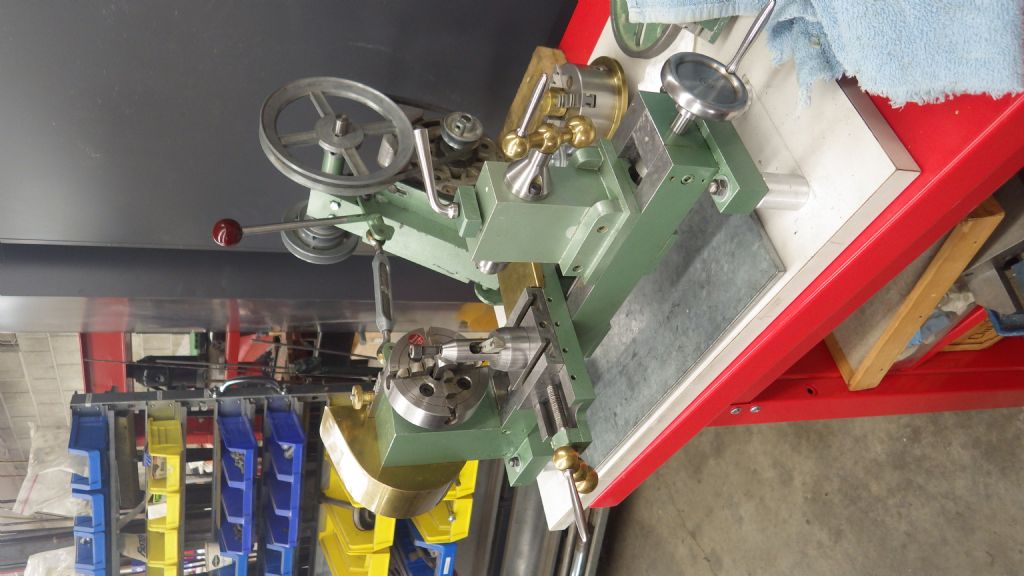
                                        rimg0758.jpgrimg0762.jpgrimg0763.jpgThe photo below is a lathe that one of the BCSME shop gurus built forty odd years ago when he had a highschool gig showing kids how to build machines. A friend of mine with limited resources wants to get a lathe and so Ian MacGregor brought his machine into the shop. The feeling is that there are enough unfinished spare parts around that my friend could be up and running with his own variant for a minimal outlay and the machine would also work well with his living arrangements. I believe it is to the 1937 woodson design with updates as Ian saw fit. Topslide is just out of picture.

                                        rimg0747.jpg

                                        PS Jason B: Beautiful!

                                        Andrew Hutchinson

                                        Surrey BC Canada

                                        Edited By Andrew Hutchinson on 25/07/2016 06:15:30

                                        #248016
                                        Neil Wyatt
                                        Moderator
                                          @neilwyatt
                                          Posted by JasonB on 22/07/2016 20:59:42:

                                          Got the last bits for the entablature engine done this evening so just had to push a bit of air through it. Set the valve by eye to lead the crank by about 90 + 7 degrees, connected the air and turned on the compressor and it self startedsmiley

                                          Great to see a relatively simple model made so well. Should be an inspiration for beginners.

                                          @Andrew H – that lathe would make an interesting article for MEW.

                                          @Andrew J – go on, it's always nice to see what people achieve despite struggling with primitive equipment

                                          Neil

                                          #248389
                                          Ken Bevan
                                          Participant
                                            @kenbevan42381

                                            Nice work!smiley

                                            #249754
                                            JasonB
                                            Moderator
                                              @jasonb

                                              Well hopefully this won't put Andrew off postingwink 2

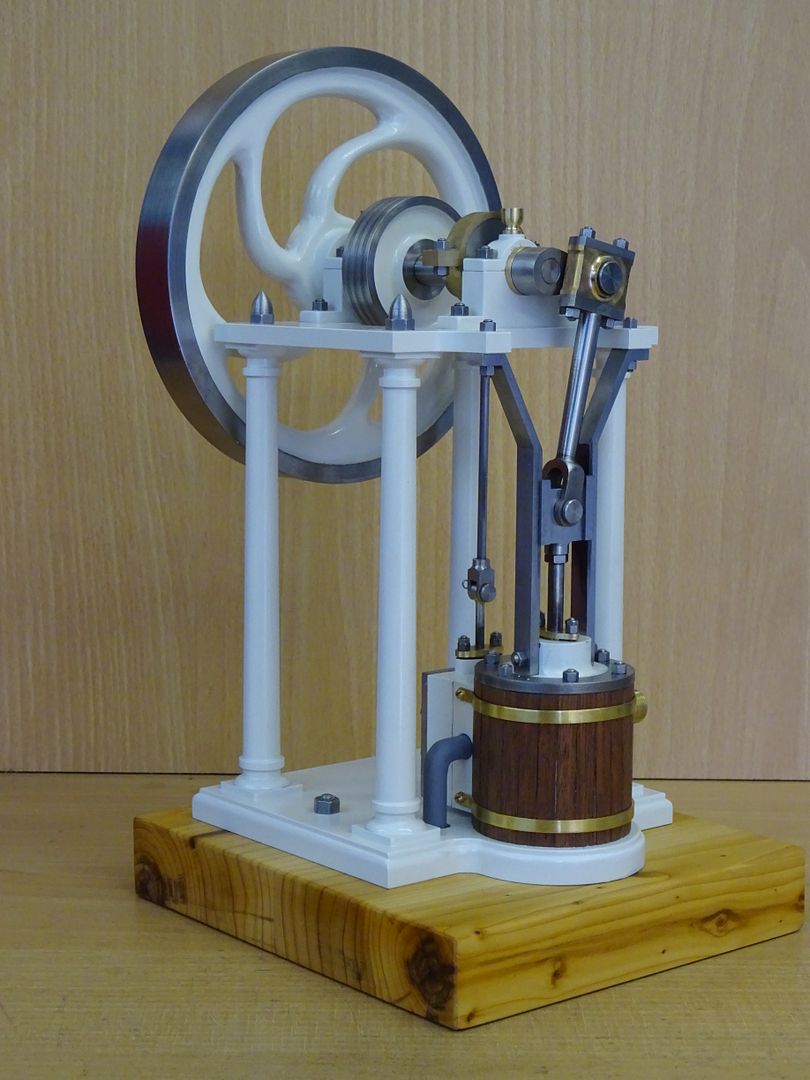
                                              Last weekend I got the Entablature engine painted and assembled but had to leave the base until yesterday as I had several 100kg of oak sitting on one of my machines. I went with another bit of Yew, the same as the Jowitt as these are similar engines sharing the same 24mm bore. The colour is infact a pale cream not white as it may look in the photos.

                                              Once I get the 2D drawings sorted out I'll write this one up.

                                              With the pressure gauge on the compressor not registering anything so less than 5psi it seems to run OK, not jumping about when run at a fair lick and also able to tick over nice and slowly.


                                              Again not wishing to upset Andrew but the lightweight's carb silver soldered together quite nicely.

                                              Edited By JasonB on 07/08/2016 16:37:13

                                              #249765
                                              duncan webster 1
                                              Participant
                                                @duncanwebster1

                                                What a lovely little engine. Definitely merits a write up so I can find out how you did the bent crosshead slides. Doesn't look as tho' you actually bent them. SWMBO has banned any more locos, so a nice stationary engine could be on the list.

                                                On another point; isn't it time ths forum had a spell checker.

                                                #249799
                                                Neil Wyatt
                                                Moderator
                                                  @neilwyatt
                                                  Posted by duncan webster on 07/08/2016 18:18:41:

                                                  What a lovely little engine. Definitely merits a write up so I can find out how you did the bent crosshead slides. Doesn't look as tho' you actually bent them. SWMBO has banned any more locos, so a nice stationary engine could be on the list.

                                                  On another point; isn't it time this forum had a spell checker.

                                                  Two things:

                                                  1 Time for a traction engine.

                                                  2 Try clicking the icon with ABC and a tick on it, it's been there for years (although I use a spellcheck plugin in Firefox).

                                                  Neil

                                                  #249904
                                                  Jonathan Garside
                                                  Participant
                                                    @jonathangarside40968

                                                    I have just completed converting an old Wolf drill stand into a Tapping stand. Photo in my album.

                                                    Not quite finished needs painting.

                                                    It has a lockable rotary table machined from a cast iron 4" faceplate casting bought some years ago at Harrogate show for £1. Everything else used including the chuck is from stock and parts to hand. The spindle was machined with a Jacobs No2 taper to suit the Jacobs chuck. The good news is it works for a nil outlay, (well just £1)

                                                    Jonathan

                                                    #249907
                                                    Michael Gilligan
                                                    Participant
                                                      @michaelgilligan61133
                                                      Posted by Jonathan Garside on 08/08/2016 16:23:56:

                                                      I have just completed converting an old Wolf drill stand into a Tapping stand. Photo in my album.

                                                      .

                                                      A useful bit of 'up-cycling' yes

                                                      MichaelG.

                                                    Viewing 25 posts - 301 through 325 (of 457 total)
                                                    • Please log in to reply to this topic. Registering is free and easy using the links on the menu at the top of this page.

                                                    Advert

                                                    Latest Replies

                                                    Viewing 25 topics - 1 through 25 (of 25 total)
                                                    Viewing 25 topics - 1 through 25 (of 25 total)

                                                    View full reply list.

                                                    Advert

                                                    Newsletter Sign-up