Surface grinder reassembly

Advert

Surface grinder reassembly

Home Forums General Questions Surface grinder reassembly

Viewing 25 posts - 1 through 25 (of 53 total)
  • Author
    Posts
  • #607881
    Steve355
    Participant
      @steve355

      Hi all

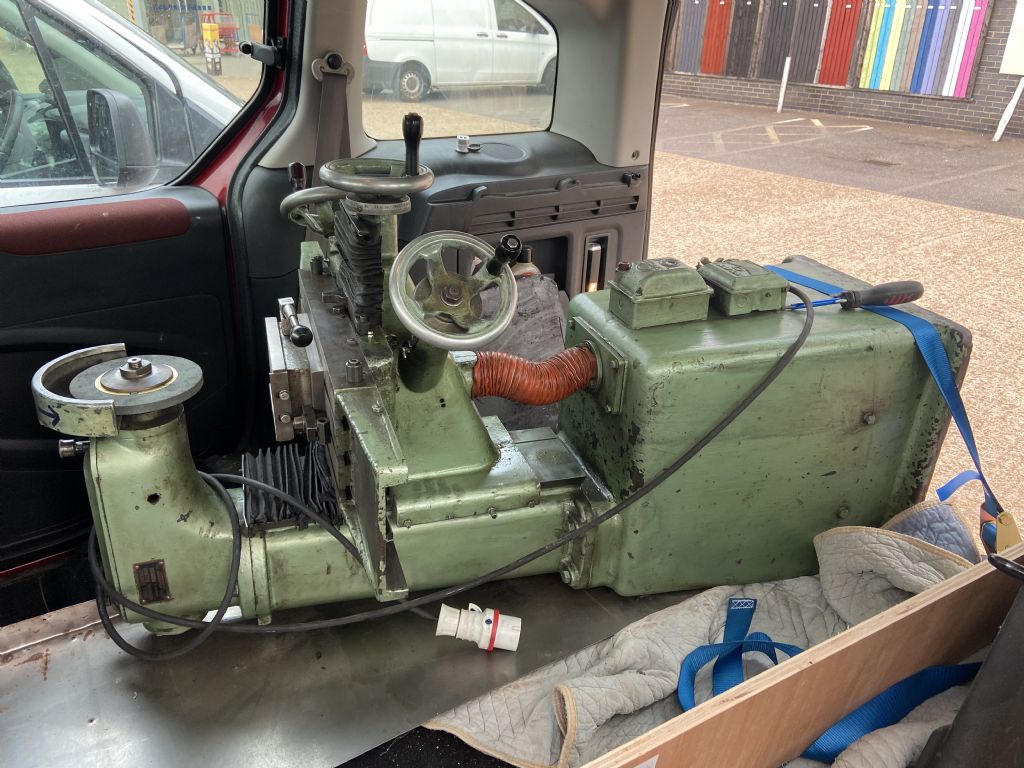
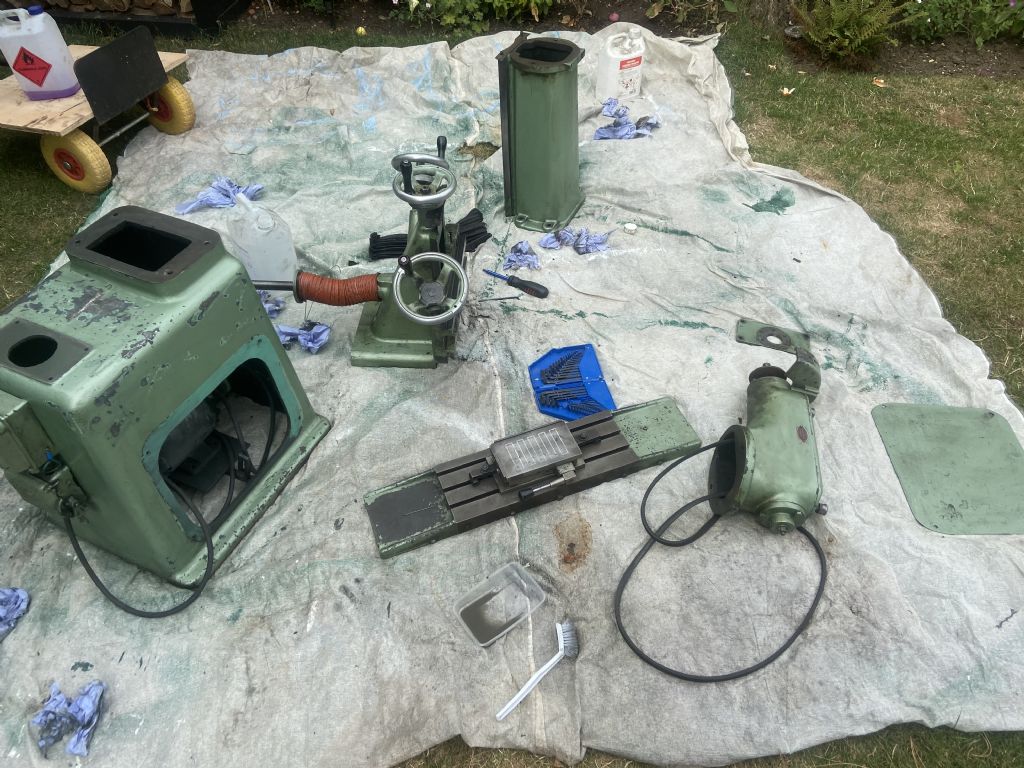
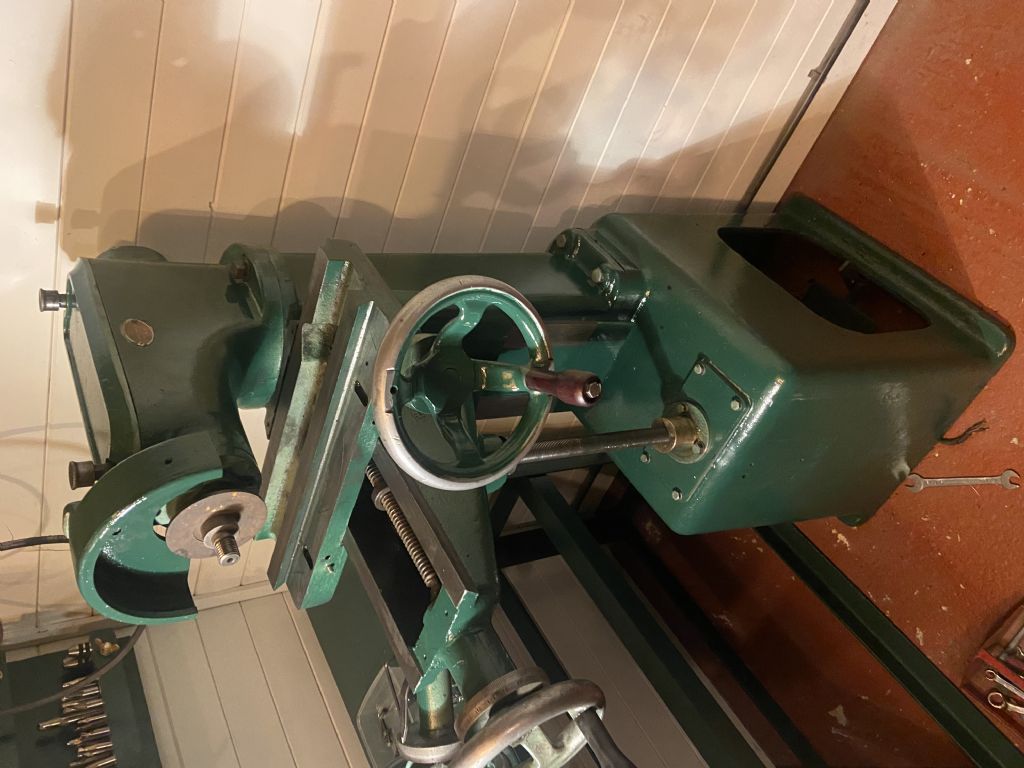
      I picked up an Eagle surface grinder from eBay. It was pretty mucky, so en route to the shed I took it to bits, cleaned it up, rubbed it down and gave it a coat of paint. Now I can see what I have it doesn’t look in bad nick, and I can make sure it’s properly lubricated as it goes back together. Then the DTI will tell me what I really have.

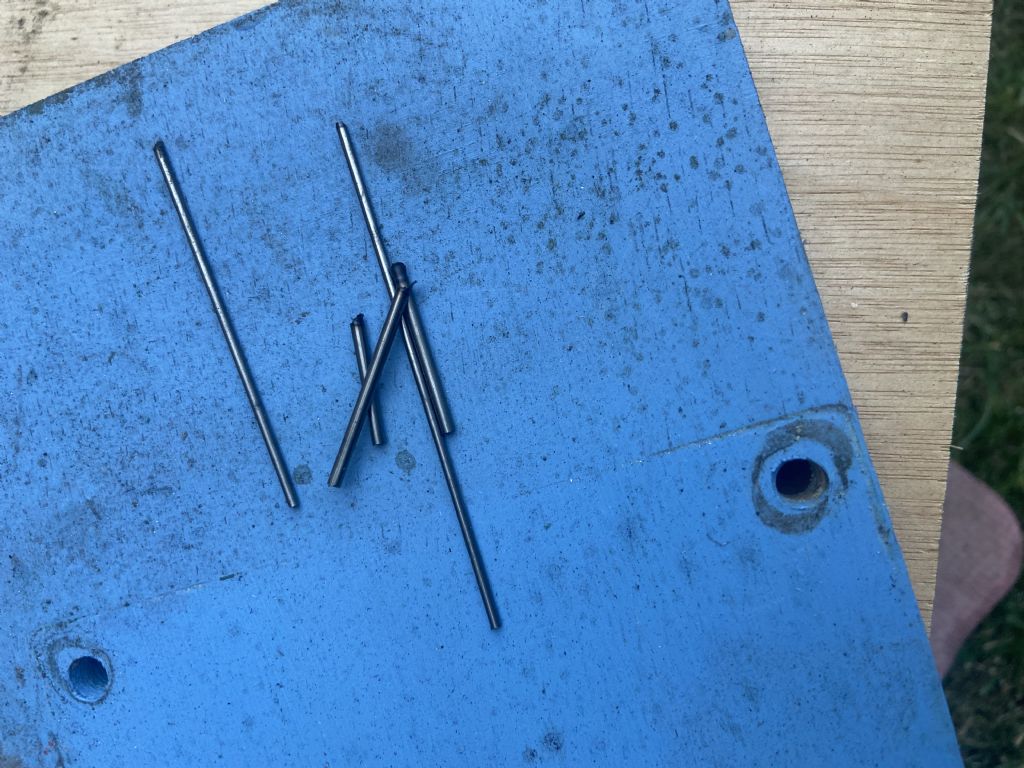
      A couple of questions… When I loosened the gibs, a number of small wires fell out, I’m not sure exactly from where, but they look like they were used to adjust the ways, or two reduce movement. Picture below, can anybody explain what these before and how I can reinstall them?

      1f039fcc-b93f-42ba-a4e2-f6f8684f32be.jpeg

      Second, the bellows were completely shot. They are not really installable. I found some reasonably priced bellows on eBay, but they are simply flat and the original bellows had 90° bends to wrap around the ways. Does anybody know whether these kind of bellows can be modified to work better with the machine?

      https://www.ebay.co.uk/itm/195174551731?mkcid=16&mkevt=1&mkrid=711-127632-2357-0&ssspo=bap–a-2t-y&sssrc=2349624&ssuid=yn_RRMPtS_W&var=&widget_ver=artemis&media=COPY

      Cheers

      Steve

      caff144e-0d30-4760-a866-9e114d976f63.jpeg

      b4a4a076-6753-4819-8d7e-94a39c29d041.jpeg

      96bdaa28-126a-4089-af34-836273b23fd9.jpeg

      Advert
      #28787
      Steve355
      Participant
        @steve355
        #607891
        Trevor Drabble 1
        Participant
          @trevordrabble1

          Steve , For your bellows , I would suggest you try Arc Eurotrade or Machgard in Rotherham .

          #607895
          Tony Ray
          Participant
            @tonyray65007

            Hi Steve,

            I too have recently acquired an Eagle but I have not yet stripped it down. I am sure however that those wires are not original to the machine, and are therefore a bodge to compensate for wear, I would suggest that properly shimming the gibs is the way forward or making new ones. Shims could be cemented to the backsides ( i.e. the side that does not contact the sliding surface. With that amount of “shimming” I would be prepared for the ways to be worn unevenly. I’m not saying this is a disaster only any ~70 or so year old machine one has to be prepared for these things. How far you go as regards rebuilding will depend on what you want to achieve and how much time you can put into it. I would address the shimming and as you say see how it performs.

            The bellows on mine do not look too bad but I am prepared for them to disintegrate on removal. I recently found a video on the Tube search for Machine Way Coves, Hand Made Bellows. I plan to make them if needed.

            Tony

            #607943
            Kiwi Bloke
            Participant
              @kiwibloke62605

              I have a Superior surface grinder, which is very similar, and doesn't contain such 'wires'. I'm sure Tony Ray is correct.

              20 years ago, when I was in UK, there were a few bellows suppliers, with a wide range of off-the-shelf sizes and shapes. Some were prepared to make 'specials'. I expect the price would be alarming…

              #607959
              not done it yet
              Participant
                @notdoneityet

                I dismantled mine to move it. Those pieces of wire should not be there. Your machine may need a fair bit of attention, to get it working satisfactorily!

                #607964
                Steve355
                Participant
                  @steve355

                  Hi all

                  Tony – interesting you are doing a similar project at a similar time!

                  I got it running for the first time yesterday and overall was pleased with the finish result, considering I hadn’t yet dressed the wheel or even really done any adjustment other than tightening it all up. There were some very light marks on the finish that looked to me might be caused by the ratchet mechanism for the table – something worn must be causing that.

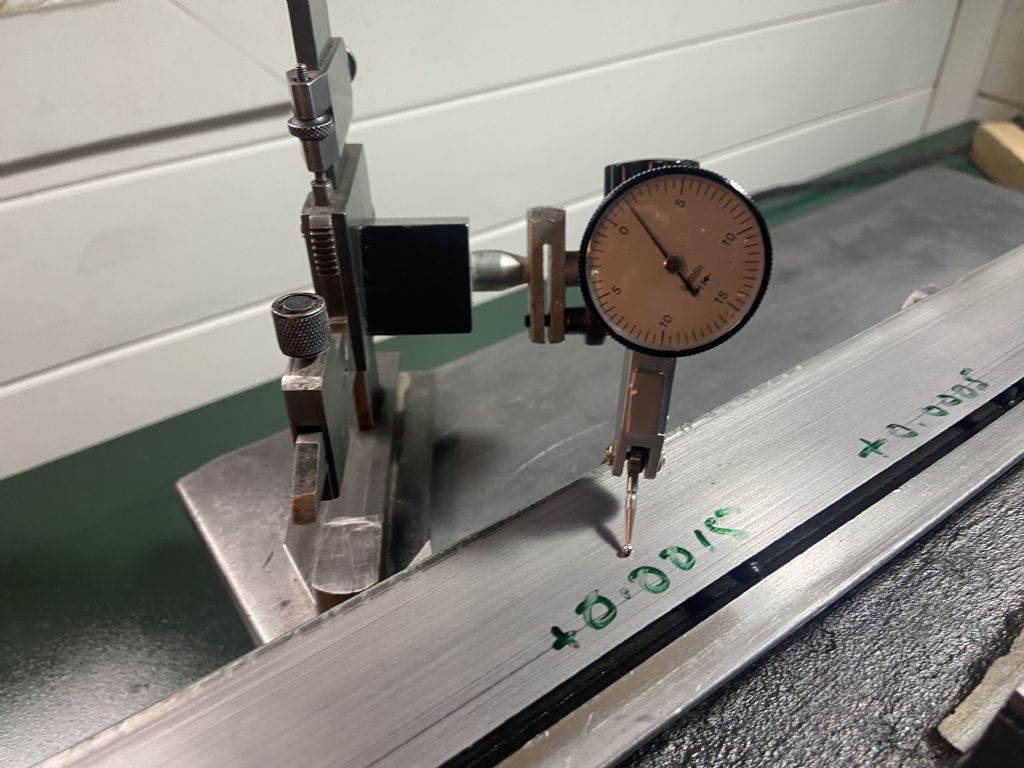
                  I put a clock on the table and it showed 0.0005-0.001 deviation across most of its length left to right, but headed off a cliff (!) of a few thou at the right hand end. Clearly that needs to be looked into.

                  Interestingly I discovered that This Old Tony’s surface grinder refurb video on YouTube is him restoring a Capco grinder. I didn’t even know they had them over there. He identifies all the areas of problem and scrapes the bed to fix it. I’ve played with scraping and have a few scrapers but never done it in anger. Let’s see how it all shapes up first. I’m sure I’ll probably be posting about it for weeks.

                  Steve

                  #607970
                  Steve355
                  Participant
                    @steve355

                    So, after a bit more playing with it this morning, a couple of things are apparent.

                    The clock needle vibrates slightly as is moved left to right, as I suspected, seems like the rack and pinion are meshing too much, or the gibs on the work table are not stable enough.

                    It all looks nice and stable as I move the table left to right, +/- 0.00025 until it gets to about 3/4 movement then it falls off the cliff of about 0.003. BUT when I move the table back leftwards it does not return to zero. This to me seems like the Z axis is not stable and I need to concentrate on that. When the table is at one end the weight of the table is moving the Z axis. Im pretty sure I can see it moving slightly. So back to basics, get the Z axis stable and tracking correctly, followed by Y, followed by X.

                    Anyone got any better ideas? Skip not ordered yet.

                    Edited By Steve355 on 31/07/2022 10:02:06

                    #607983
                    peak4
                    Participant
                      @peak4

                      Steve, if I can sort one, so can you.

                      At 3 thou yours is a lot better than the little Herbert junior I picked up cheaply, which tailed off by about 12 thou.
                      I fettled mine during the first lockdown, as I wasn't going anywhere anyway.
                      I was inspired by this series of videos, but don't have access to a large surface table like the one shown.
                      There are ways around it.

                      There's plenty of videos about on the net showing ways to measure wear on Vs, Dovetails etc.

                      I adapted them to suit the kit I had available, as I wasn't in a position to go out shopping due to Covid restrictions.

                      I've a large album on Flickr, which mainly documents the setups for machining, scraping and measuring; I'm not saying that they are the best way of doing it, as I'd no previous experience, but it did work.
                      Many of the photos are just different angles to show the setups
                      https://www.flickr.com/photos/peak4/albums/72157715281085636

                      However worn it is, don't get too disheartened, as you can mend it, but don't waste time trying to find a source of cheap carbide to make your scraper(s) I was trying to save a few quid by not buying one of the specialist Sandvic blades, but wasted a lot of time.
                      I've not used them, but this chap on eBay seems to be selling the right grade of carbide, at a quite competitive price.
                      https://www.ebay.co.uk/itm/333846693741?var=542908166952

                      I did buy a box of 10 Linbide type carbide blades which held a fine edge quite well.

                      Bill

                      #607991
                      Pete Rimmer
                      Participant
                        @peterimmer30576
                        Posted by Steve355 on 31/07/2022 08:58:14:

                        Hi all

                        Tony – interesting you are doing a similar project at a similar time!

                        I got it running for the first time yesterday and overall was pleased with the finish result, considering I hadn’t yet dressed the wheel or even really done any adjustment other than tightening it all up. There were some very light marks on the finish that looked to me might be caused by the ratchet mechanism for the table – something worn must be causing that.

                        I put a clock on the table and it showed 0.0005-0.001 deviation across most of its length left to right, but headed off a cliff (!) of a few thou at the right hand end. Clearly that needs to be looked into.

                        Interestingly I discovered that This Old Tony’s surface grinder refurb video on YouTube is him restoring a Capco grinder. I didn’t even know they had them over there. He identifies all the areas of problem and scrapes the bed to fix it. I’ve played with scraping and have a few scrapers but never done it in anger. Let’s see how it all shapes up first. I’m sure I’ll probably be posting about it for weeks.

                        Steve

                        Don't presume that because the table moves the needle when it's moved to it's extremes of travel it's because there's wear in the table. It might be that the weight of the table being transferred from one side to the other is causing movement in the Y-axis or Z-axis ways.

                        #607995
                        Steve355
                        Participant
                          @steve355

                          Don't presume that because the table moves the needle when it's moved to it's extremes of travel it's because there's wear in the table. It might be that the weight of the table being transferred from one side to the other is causing movement in the Y-axis or Z-axis ways.

                          Pete – yes that’s exactly what I’d surmised. And that’s why I need to take a step back and start from the beginning, measuring the Z axis to make sure it is working acceptably, there is a lot of evidence of scraping on the Z axis ways, so I’m hoping that at least that part is in reasonable nick.

                          Steve

                          #607997
                          Steve355
                          Participant
                            @steve355
                            Posted by peak4 on 31/07/2022 12:22:25:

                            Steve, if I can sort one, so can you.

                            At 3 thou yours is a lot better than the little Herbert junior I picked up cheaply, which tailed off by about 12 thou.
                            I fettled mine during the first lockdown, as I wasn't going anywhere anyway.
                            I was inspired by this series of videos, but don't have access to a large surface table like the one shown.
                            There are ways around it.

                            There's plenty of videos about on the net showing ways to measure wear on Vs, Dovetails etc.

                            However worn it is, don't get too disheartened, as you can mend it, but don't waste time trying to find a source of cheap carbide to make your scraper(s) I was trying to save a few quid by not buying one of the specialist Sandvic blades, but wasted a lot of time.

                            Hi Bill, thanks for your post – very inspirational. Your Flickr album too was really interesting, all the setups you devised to measure the different dimensions and angles too.

                            As for my equipment, I basically have a 12×18” cast iron surface plate and a bunch of DTIs, mics etc.I have a Dore Westbury mk 1 and a Burke #4 horizontal, both of which work ok but part of the point of getting a surface grinder was that I would be able to sort them out properly.

                            My question is, having done this, where would you start? I don’t want to do any work that isn’t required, but I do want to do the work that is required, if you see what I mean. I’m thinking I strip back to the Z axis, indicate that and see how it is. If it’s fine, all well and good, if not, then that’s where I need to start.

                            Steve

                            #608003
                            peak4
                            Participant
                              @peak4

                              In my case, the wear was so much on the main table and the top of the knee, that it was the obvious place.
                              Both ends of the underside of the table were higher than the centre of it due to wear, as it overhangs in use.
                              Similarly the top of the knee was worn down at the ends, rather than the middle.
                              This meant that the table followed a slight arc, rather than a horizontal plane.
                              A workpiece 6" long and flat on one side, was about 6 thou thicker in the middle than the ends.
                              As such this is where I started, only deciding to get involved in the column later.

                              It's perhaps the wrong approach, compared to the chap in the video, but I didn't have a large enough surface table to work on the face of the column.

                              I scraped the top of the table flat to my surface plate; that is flat, but not removing any indentations, as that would have been too much work. I also flattened and squared the front edge @ 90°
                              This gave me two planes to act as datums for all other measurements.

                              I then worked on bottom flats, and then the dovetails underneath the table, which need to be parallel, straight and in line with the front. The two ends of the bottom of the table needed something like 12 and 15 thou taking off to get them parallel to the top. Lots of elbow grease and re-sharpening of carbide scrapers.
                              I used my spare Myford, with a home made magnetic faceplate and diamond disk for the sharpening, the saddle was wound out of the way, and an angled table used to present the scraper at the correct angle.
                              Obviously everything was well taped up, and I used a mask to avoid inhaling carbide dust.
                              There is a photo in the album somewhere.

                              Everything else followed on from that, but the advantage of flattening the top of the table first, was that it effectively gave me a long portable surface plate to work on the column later on, as well as allowing me to get the top and bottom of the table in two parallel planes.

                              Whilst I did do some milling on the Centec, all of it could have been done on my DW Mk1, though mine is a long column machine.
                              The swivelling head meant that I could traverse a longer workpiece, than the travel on the DW's table.

                              Bill

                              Edited By peak4 on 31/07/2022 14:46:38

                              #608025
                              Steve355
                              Participant
                                @steve355

                                Thanks Bill, seems like the place to start is the table then. On the surface plate I can’t get a 0.0015 feeler gauge under it anywhere, so I guess I can assume it can be used as a reference surface, I don’t want to resurface that unless I have to,

                                I’ve started to take readings along the bearing surfaces and the worst it gets is about 0.004 with the expected dip in the middle. One problem I have is that I don’t really have a proper stand for the DTI. I’m using a height gauge attached magnetically, but I’m not confident that if I move it to measure the other side, it won’t wobble. I can’t seem to find a suitable stand on RDG/Chronos.

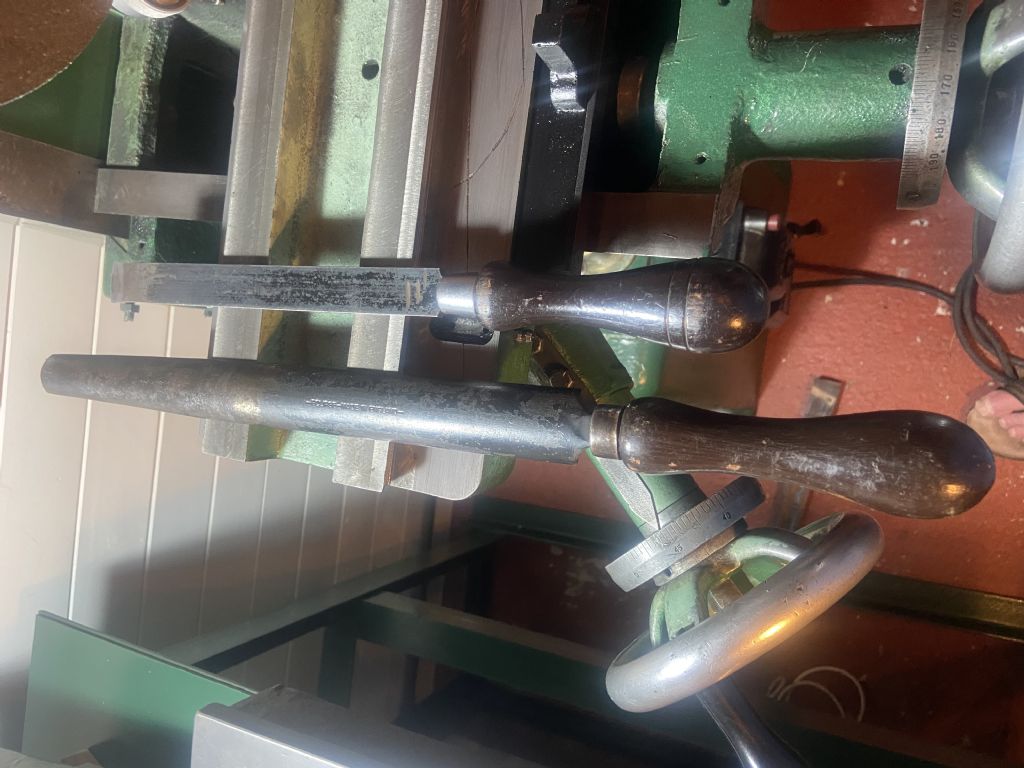
                                I have a few old eclipse scrapers I bought from eBay. I doubt they are carbide, but I expect they were perfectly usable once upon a time, one has a rounded end but I could easily grind it more flat. Do I really need to invest in a carbide scraper? Are they that much better ?

                                0218b83b-5702-4e48-89f5-9d8aaffe80ff.jpeg
                                c9de8f3e-91df-4704-af60-6ecc191888b8.jpeg

                                #608026
                                Tony Ray
                                Participant
                                  @tonyray65007

                                  Steve,

                                  it’s good that you have some scraping experience. What you also need to gain is a feel for surface grinding and knowing what your machine is capable of delivering in terms of surface finish. A 46 grit wheel will do pretty much any task, unlike finer grit abrasive paper finer wheels will not necessarily give a better finish. Washing soda in water is said to make a good coolant and I was advised not to rush into grinding the magnet as this takes some skill do do well. Dressing the wheel is a must, balancing is said to have minimal effect on the diameters of wheel used on this and similar grinders, my view is if you can balance it why wouldn’t you?

                                  Once you have resolved the gib issue I would grind some test pieces, typically 5 pieces of the same material eg 1” dia. are ground on one side then flipped, they are arrange one on each corner of the magnet and one in the middle. There should be no difference in thickness. I would mark the so you know this position on the table and orientation as this may give you a clue as to which axis is most worn.

                                  if you have not come across the Machine Rebuilding Scraping and Inspection forum on Practical Machinist it is a great resource.

                                  #608029
                                  peak4
                                  Participant
                                    @peak4

                                    I'm absolutely no expert in scraping at all, so wait until someone more experienced comes along to check anything I suggest.
                                    I think your round scraper is for internal bearings etc, whereas the squarer one is for flat surfaces.

                                    See you you go on a piece of scrap after watching some of the better youtube videos, but I found I was constantly re-sharpening my own steel scraper(s) which is why I started playing with carbide.
                                    Richard King, Abom69, Sefan Gotteswinter, suburban tool inc. and various others.
                                    I has a couple of weeks doing little more than watching video, as I was an early adopter of C19 before it became popular.

                                    At least you have less work than me, as your 1½ thou dip is an order of magnitude smaller than my 15 thou one.

                                    I also used a vertical height gauge as a DTI holder, but used the clock in the place where the sharp scribing block fits.

                                    Bill

                                    Edited By peak4 on 31/07/2022 22:39:17

                                    #608032
                                    Steve355
                                    Participant
                                      @steve355

                                      I basically saw some scraping coming on one project or another, so I got a few old scrapers from eBay, and practiced on some mild steel. It worked ok, was interesting to watch the blue spots spreading as the piece flattened. But that’s all I did really, and yes I was regularly honing the edge. You are correct that the larger scraper it for curved surfaces but I can grind it square.

                                      I think I may have a flat bar DTI holder somewhere that would allow me to attach it to the height gauge.

                                      Perhaps tomorrow I can start!

                                      #608331
                                      Steve355
                                      Participant
                                        @steve355

                                        This scraping business is not as much fun as I had imagined!

                                        It’s very slow going
                                        it is hard work
                                        it’s easy to go too far

                                        its difficult to get into tight spots

                                        I watched a video on YouTube where the chap measured the depth of the scrape at up to 0.0005. If only,

                                        I can see why this old Tony started by milling his, I have to take off up to 0,005 in some places. Perhaps it’s time for that long carbide scraper, if I can find one.

                                        #608334
                                        Tony Ray
                                        Participant
                                          @tonyray65007

                                          Yes it’s hard work. You can make the scraper. I bought a Sandvik insert & made the rest. The inserts is very hard wearing but you will need a way of lapping it. There is a knack to it once you have it it does get a bit easier. Someone mentioned C19 carbide I’d be interested to know where they bought the blank.

                                          #608335
                                          Pete Rimmer
                                          Participant
                                            @peterimmer30576

                                            Yep it's slow and hard work but going too far isn't as easy as you at first think..

                                            Half-thou deep scrapes are not normal more like 2 tenths. So if you think that you'd have trouble milling off only 1 thou of cast iron, that's a good 4-5 rounds of scraping.

                                            What tight spots are you trying to get into? Ways inherently have open ends so I guess you must mean a dovetail? If so then just get yourself a big mechanical hacksaw blade and use it manually to cut a healthy relief in the corner.

                                            Like most things there are a number of ways of doing this stuff. What I would advise is don't strive for perfection. So what if you dig a few double-depth holes in the work? It'll still function as intended. So what if the best flatness you can achieve is 1 thou? That's 5 times better than the 5 thou you have now.

                                            #608341
                                            peak4
                                            Participant
                                              @peak4
                                              Posted by Tony Ray on 03/08/2022 21:35:43:

                                              Yes it’s hard work. You can make the scraper. I bought a Sandvik insert & made the rest. The inserts is very hard wearing but you will need a way of lapping it. There is a knack to it once you have it it does get a bit easier. Someone mentioned C19 carbide I’d be interested to know where they bought the blank.

                                              Twas me that mentioned C19 as an early adopter, but that's an abbreviation for Covid, not a grade of carbide.
                                              I keeled over at the end of January before anyone really realised it had arrived, and picked up the blank virus in Buxton somewhere; probably Morrisons.

                                              See my post of 31/07/22 @ 12:22:25 for a link to an eBay sell of a suitable grade of insert.

                                              Bill

                                              #608342
                                              Steve355
                                              Participant
                                                @steve355

                                                The tight spots are simply spots at edges or corners where there is a high spot surrounded by low spots, so not even real tight spots yet!

                                                Because the ways are long and thin, it’s difficult to do a nice pattern. Much easier to scrape along the ways. It that way leaves behind high spots.

                                                if it’s 2 tenths then that’s 5 passes for 1 thou. I reckon I’m doing about half that,

                                                measuring is really difficult. I have managed to attach the DTI firmly to a height gauge at last, but it easily gets out of kilter If the probe gets knocked. I could have a go with a plunger type dial indicator, but it’s less accurate.

                                                my surface plate is too small, but there’s not much I can do about that,

                                                All good learning experience!

                                                #608343
                                                Steve355
                                                Participant
                                                  @steve355
                                                  Posted by peak4 on 03/08/2022 21:58:03:

                                                  Posted by Tony Ray on 03/08/2022 21:35:43:

                                                  Yes it’s hard work. You can make the scraper. I bought a Sandvik insert & made the rest. The inserts is very hard wearing but you will need a way of lapping it. There is a knack to it once you have it it does get a bit easier. Someone mentioned C19 carbide I’d be interested to know where they bought the blank.

                                                  Twas me that mentioned C19 as an early adopter, but that's an abbreviation for Covid, not a grade of carbide.
                                                  I keeled over at the end of January before anyone really realised it had arrived, and picked up the blank virus in Buxton somewhere; probably Morrisons.

                                                  See my post of 31/07/22 @ 12:22:25 for a link to an eBay sell of a suitable grade of insert.

                                                  Bill

                                                  Hi Bill

                                                  I did see that, and I’m considering getting one of that guy’s scrapers. But I’m off to the US on Monday, I wonder if in can find something cheap and good over there.

                                                  #608346
                                                  Pete Rimmer
                                                  Participant
                                                    @peterimmer30576

                                                    You can evaluate most small surface grinder tables just with a micrometer. So long as the mic can span from top to way you can make it as flat as the top to within a couple of tenths at least. It'll be fatter at the ends and more worn in the middle and the bottom ways will match that bow. You'll be able to see that by the wear ridges left behind.

                                                    Get a micrometer and go along the ways every couple of inches. Measure the table thickness and mark it on the way with a sharpie. Remove the wear ridges and high spots with a file if you have to. If your ends are 5 thou higher than the middle don't fanny around trying to scrape them – get a good large flat file and file a few thou off. It's a lot faster thn scraping and so long as you carefully keep track so you don't overshoot you can get within scraping distance very quickly. My eagle table had the two long ways raised higher than any other features so I just laid the file across both and it kept them planar. It's not so difficult as you might imagine.

                                                    The numbers below are tenths of a thou.

                                                    If you're near Kent I could give you some pointers or even lend a straight edge.

                                                    Edited By Pete Rimmer on 03/08/2022 22:21:59

                                                    #608354
                                                    Steve355
                                                    Participant
                                                      @steve355
                                                      Posted by Pete Rimmer on 03/08/2022 22:20:59:

                                                      You can evaluate most small surface grinder tables just with a micrometer. So long as the mic can span from top to way you can make it as flat as the top to within a couple of tenths at least. It'll be fatter at the ends and more worn in the middle and the bottom ways will match that bow. You'll be able to see that by the wear ridges left behind.

                                                      Get a micrometer and go along the ways every couple of inches. Measure the table thickness and mark it on the way with a sharpie. Remove the wear ridges and high spots with a file if you have to. If your ends are 5 thou higher than the middle don't fanny around trying to scrape them – get a good large flat file and file a few thou off. It's a lot faster thn scraping and so long as you carefully keep track so you don't overshoot you can get within scraping distance very quickly. My eagle table had the two long ways raised higher than any other features so I just laid the file across both and it kept them planar. It's not so difficult as you might imagine.

                                                      The numbers below are tenths of a thou.

                                                      If you're near Kent I could give you some pointers or even lend a straight edge.

                                                      Edited By Pete Rimmer on 03/08/2022 22:21:59

                                                      Pete, that’s really interesting, thanks for the tips. Using a file to get down to a flatness that is practical for scraping will surely save a lot of time and effort, I have a 2” micrometer, but it’s not a vernier one, but nevertheless is probably ok?

                                                      what’s the next step? Do you blue up the straight edge and use that to “print” the surface for scraping?

                                                      not too close to Kent, I’m in Herts

                                                      Steve

                                                    Viewing 25 posts - 1 through 25 (of 53 total)
                                                    • Please log in to reply to this topic. Registering is free and easy using the links on the menu at the top of this page.

                                                    Advert

                                                    Latest Replies

                                                    Home Forums General Questions Topics

                                                    Viewing 25 topics - 1 through 25 (of 25 total)
                                                    Viewing 25 topics - 1 through 25 (of 25 total)

                                                    View full reply list.

                                                    Advert

                                                    Newsletter Sign-up