supercharged V12 2 stroke

Advert

supercharged V12 2 stroke

Home Forums I/C Engines supercharged V12 2 stroke

Viewing 25 posts - 101 through 125 (of 273 total)
  • Author
    Posts
  • #166038
    dean clarke 2
    Participant
      @deanclarke2

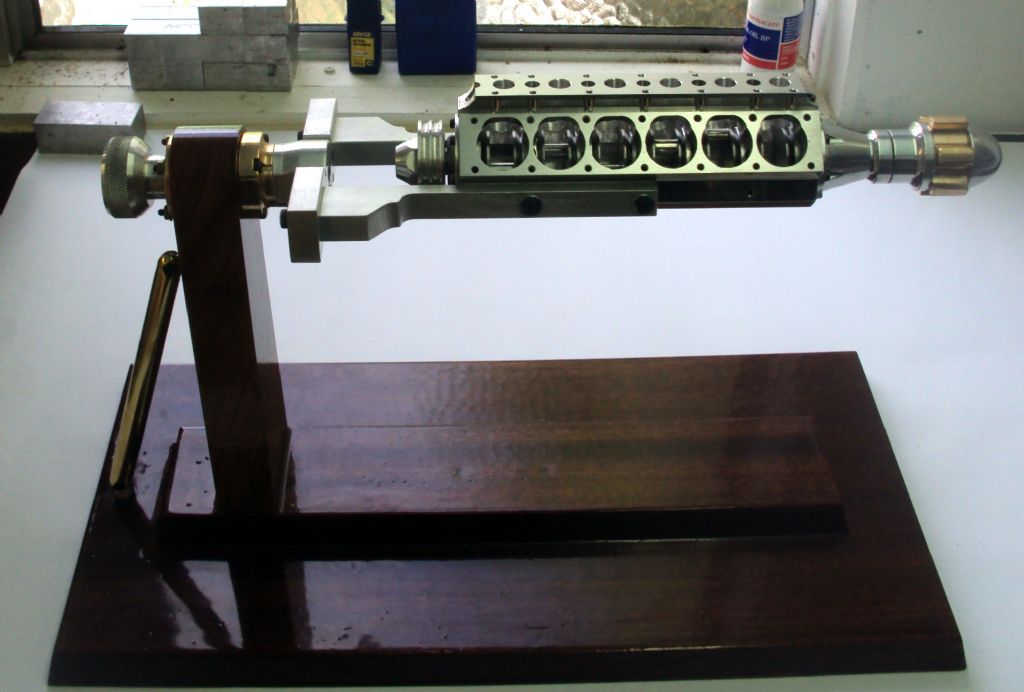
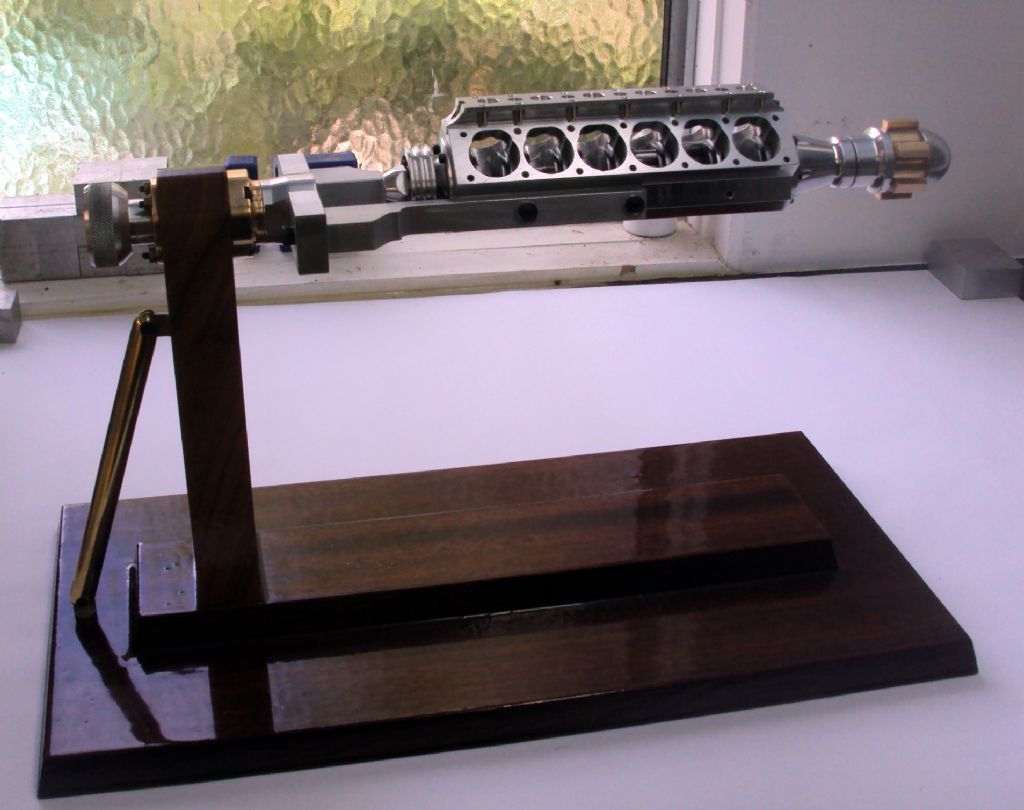
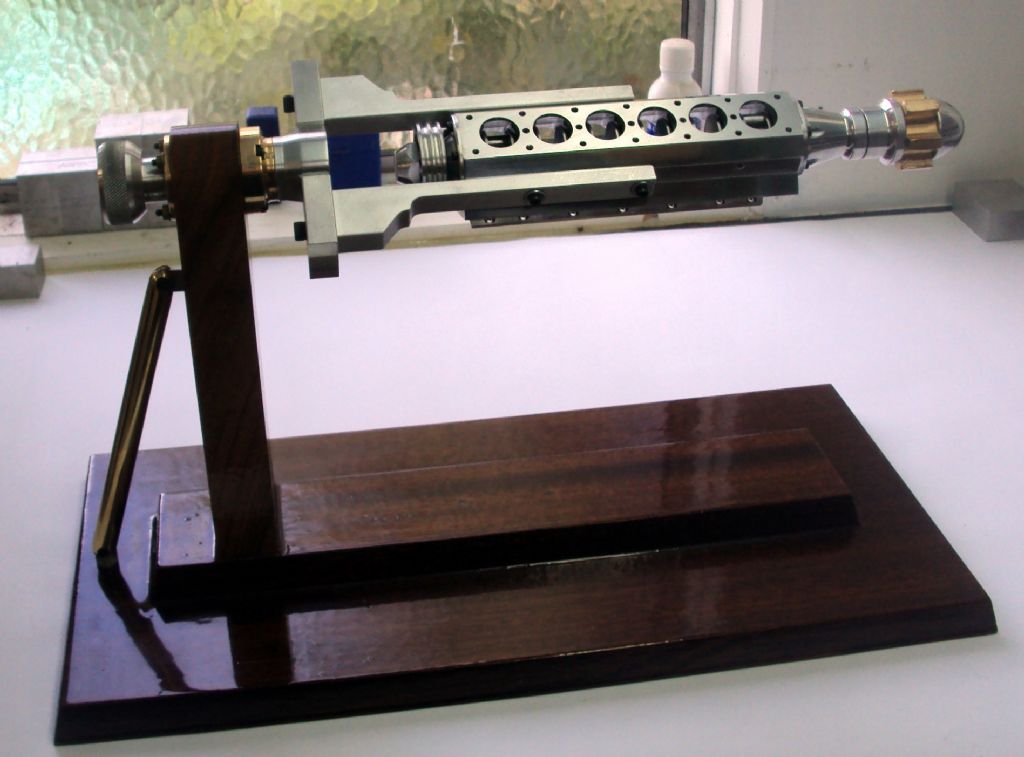
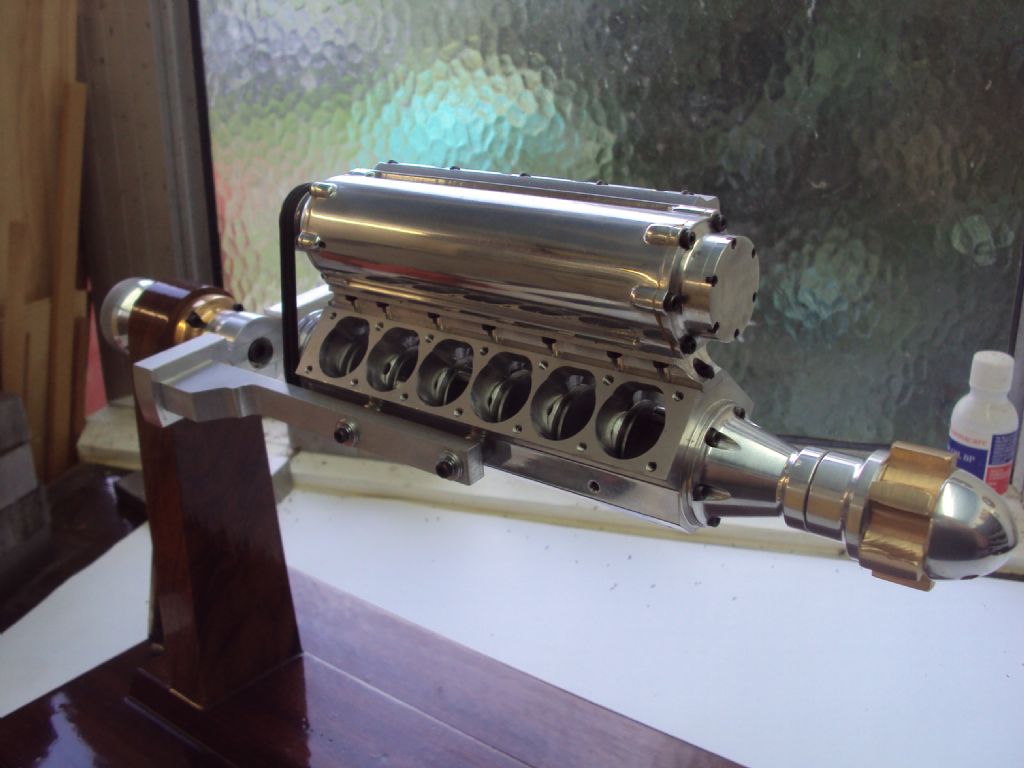
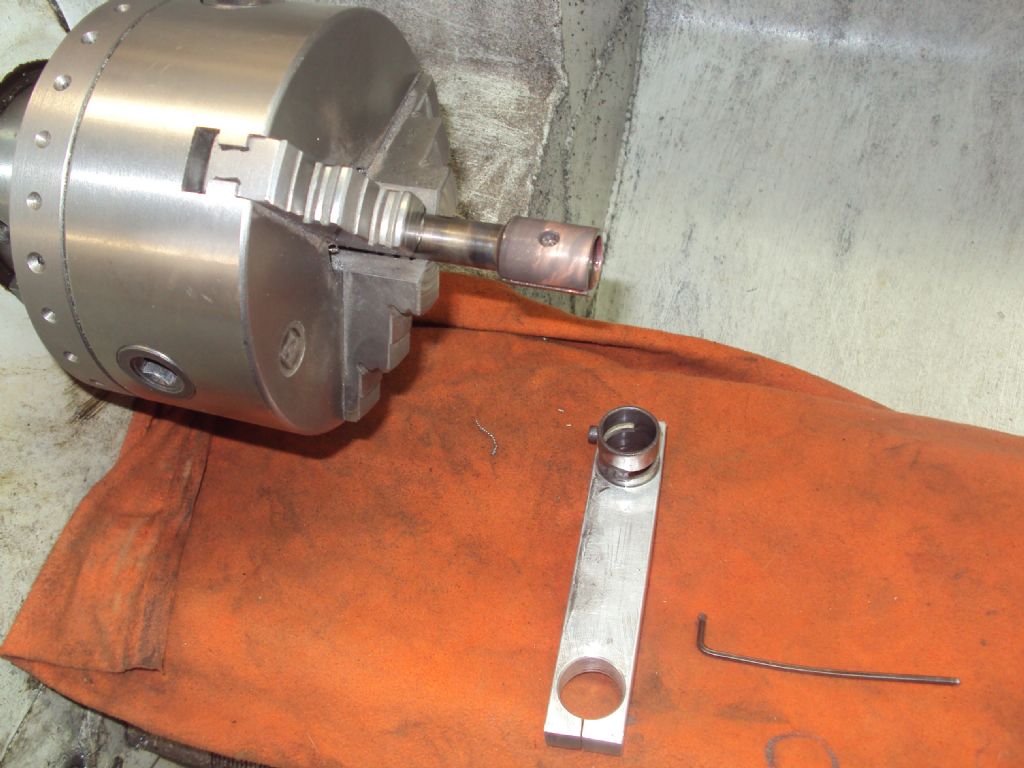
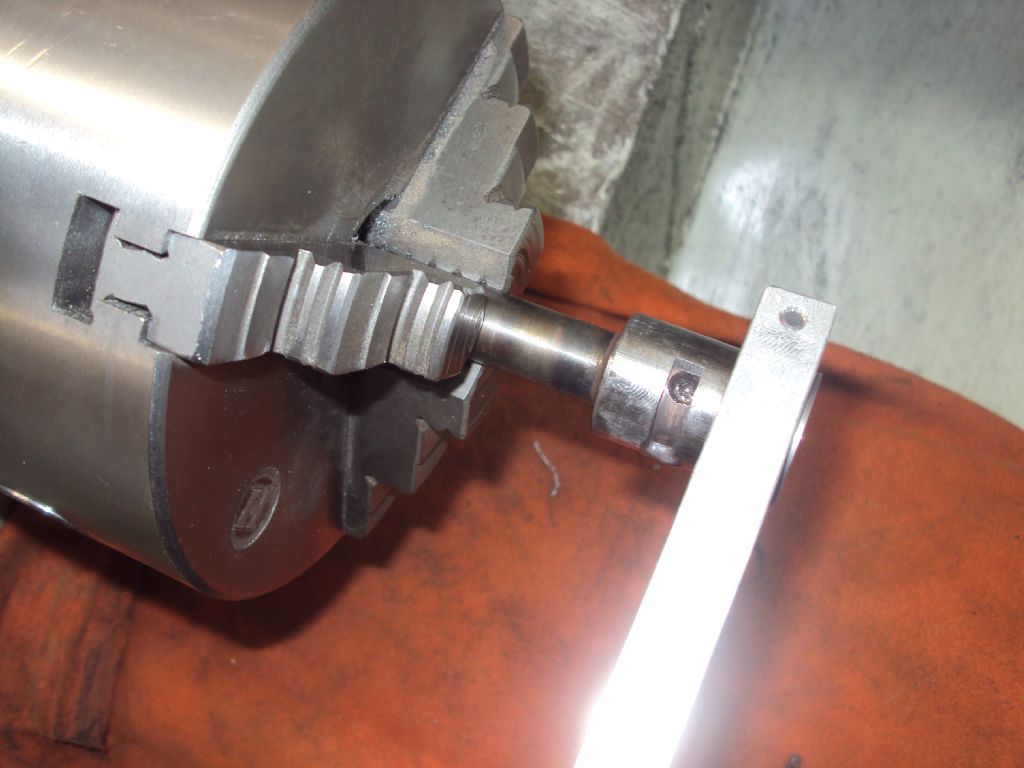
      OK so i have a fairly decent excuse for the delay in updating this thread this time, called a burst appendix!!! which as it turns out was nearly responsible for me checking out of life way too early!!!!! Thankfully i have learned to listen to my wife in times of crisis and let her take me to the docs who immediately put me in an ambulance and sent me on my way to hospital. Surgery on the same afternoon saw me alive but stuck in hospital for the next week, but alive none the less. so just before i went to hospital i had started to make an engine assembly stand so i didn't need four pairs of hands to put these engines together. Below are some photos of said stand with the V12 fitted and undergoing final assembly. hope to have this engine finished and running by the end of November, here's hoping anyway.

      cheers for now

      dean


      assembly stand 1.jpg

      assembly stand 2.jpg

      assembly stand 3.jpg


      The brass gear looking thing is just a fitting to enable turning the engine over by hand without having the prop fitted. Makes life a bit easier when assembling the engine.

      dean

      Edited By dean clarke 2 on 09/10/2014 01:03:00

      Advert
      #166048
      David Colwill
      Participant
        @davidcolwill19261

        I’m glad to hear that you are well. What ever you say about not getting enough time in your workshop ( which looks great by the way ) you are still making fantastic progress. Keep up the good work.
        David.

        #166051
        John Olsen
        Participant
          @johnolsen79199

          Hi Dean, Hope you are feeling more comfortable now.

          John

          #166062
          dean clarke 2
          Participant
            @deanclarke2

            Thanks guys, yes i am feeling much perkier now. Sometimes life throws you a bit of a curve ball, good thing i have an excellent catcher looking after me.

            dean

            #166063
            Ady1
            Participant
              @ady1

              Glad you're ok Dean

              #166135
              Howard Lewis
              Participant
                @howardlewis46836

                Coming in late, have to say that I am staggered by the quantity and quality , not to mention rapidity, of the work!

                Firstly, a distinction has to be drawn between two stroke engines which are Loop Scavenged, Opposed Piston, or Uniflow. All use different methods of controlling Induction and Exhaust events.

                Having spent a lifetime in diesel engine production and development, I disagree with those who say that a two stroke cannot be pressure charged. And there are numerous practical examples to back that view.

                General Motors Electro Motive Division have made MANY turbocharged two stroke engines to power locomotives. The EMD engines were, and are, Uniflow engines, with Inlet ports low down in the cylinder, and Exhaust valves located in the cylinder head.

                The diesel engine is an ideal candidate for pressure scavenging, in that, unlike a carburetted petrol engine, no fuel is introduced, and therefore lost, during the scavenging part of the cycle.

                As already mentioned, currently, the largest and most powerful two stroke diesel engines are the those made for the "Emma Maersk" and her sister container ship. These enormous engines are turbocharged and charge cooled and deliver 108,000 h.p. at about 102 rpm.

                The GM V71 and V92 engines were blower scavenged, uniflow, naturally aspirated engines.

                Each cylinder had an injection pump and injector, operated by a third rocker lever, between those operating the valves. Fuel delivery was by a control rod acting on each element, connected to the adjacent cylinder by a connecting linkage, which, in turn was connected to the governor.

                If air is forced into the Induction side of any engine, after the exhaust ports are closed, even in a loop scavenged engine, cylinder pressure must rise above atmospheric.

                Many two strokes were blower scavenged. The Commer TS3 was one. It was an opposed piston engine using one crankshaft located beneath the cylinders, and operating both pistons in each cylinder by means of large rocker levers. The Roots blower was purely for scavenging.

                In this context, it is coincidental that Commer were part of the Rootes Group. The Roots type supercharger was invented long before that amalgamation took place. The "TS" indicates that the engines were made in the Tilling Stevens (again, part of the Rootes group organisation), factory in Maidenhead. If the exhaust ports became obstructed by carbon, the boost pressure gauge reading would increase.

                The Foden 4 and 6 cylinder engines were Roots blower scavenged In Line engines, used in vehicle, industrial and marine applications. As an experimental unit, Fodens added an exhaust driven turbocharger, and obtained 200 hp from a 4 cylinder, 4 Litre diesel engine, at about 2500 rpm.

                For its day, 50 bhp/Litre was quite impressive. Iin contrast, the contemporary Rolls Royce C Range 4 stroke, (2 Litres/cylinder) in Turbocharged and Charge Cooled form were delivering 25 bhp/Litre at 2100 rpm.

                The two stroke has an advantage in that every cylinder has a power stroke every revolution, whereas a four stroke has one on alternate revolutions.

                Despite this, the pressure charged two stroke is poor on torque back up, and tends to be better suited to more or less constant speed applications, such as marine or locomotive, rather than vehicle.

                The Fairbanks Morse, Napier Deltic, Rolls Royce K Range, and Leyland L10 engines were all opposed piston two stroke diesels. The Deltic had three banks of six cylinders, operating three crankshafts, which were interconnected by a geartrain at the front of each bank.

                Opposed piston engines use a difference in piston phasing to control port openings for induction and exhaust.

                An early opposed piston two stroke petrol engine was the Trojan. Post WW2, Sachs made opposed piston two stroke engines for motorcycles. The engines were made compact by "folding" the cylinder, so that the Inlet port controlling piston ran in a bore which was nearly parallel to that of the Exhaust port controlling piston. The combustion space was at the intersection of the two bores.

                The Rolls Royce K Range and Leyland L10 , as primarily military engines, were intended to run on whatever fuels were immediately available, by changing compression ratio and port timings. To do this, the phasing of the upper and lower crankshafts was altered by changing the relationship of the gears in the train connecting the two crankshafts.

                So, armed with the confidence of your superb work so far, carry on, and be assured that you CAN pressure charge your engine! For aircraft use it will be great,since the torque requirement will decrease very rapidly as the speed falls. (German aircraft used supercharged two stroke diesel engines during WW2)

                Howard

                #166584
                dean clarke 2
                Participant
                  @deanclarke2

                  Thanks for the info and encouragement, must confess the latest health drama has taken a bit more of a toll on me than I cared to admit. I find it difficult to keep moving, just not so much energy back yet. Will be a little bit before anything happens again I think but hopefully not to long before progress is restored to the shed and consequently the v12 build. Till then I'm resting up.

                  cheers

                  Dean

                  #166585
                  Michael Gilligan
                  Participant
                    @michaelgilligan61133

                    Wishing you the speediest possible recovery, Dean.

                    Best Wishes

                    MichaelG.

                    #167842
                    dean clarke 2
                    Participant
                      @deanclarke2

                      Well back again everyone, well rested but still in recovery mode. have the shed cleaned up a bit and am now setting up to machine the supercharger rotor vanes and slots. will update photos when done.

                      Dean

                      #171047
                      dean clarke 2
                      Participant
                        @deanclarke2

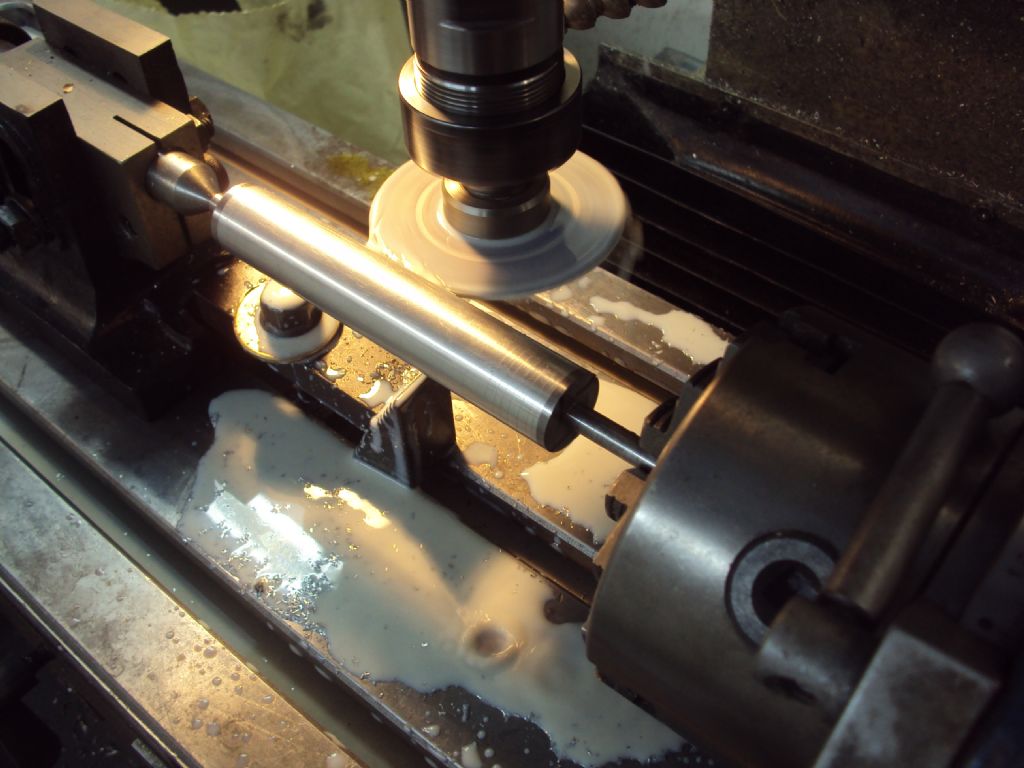
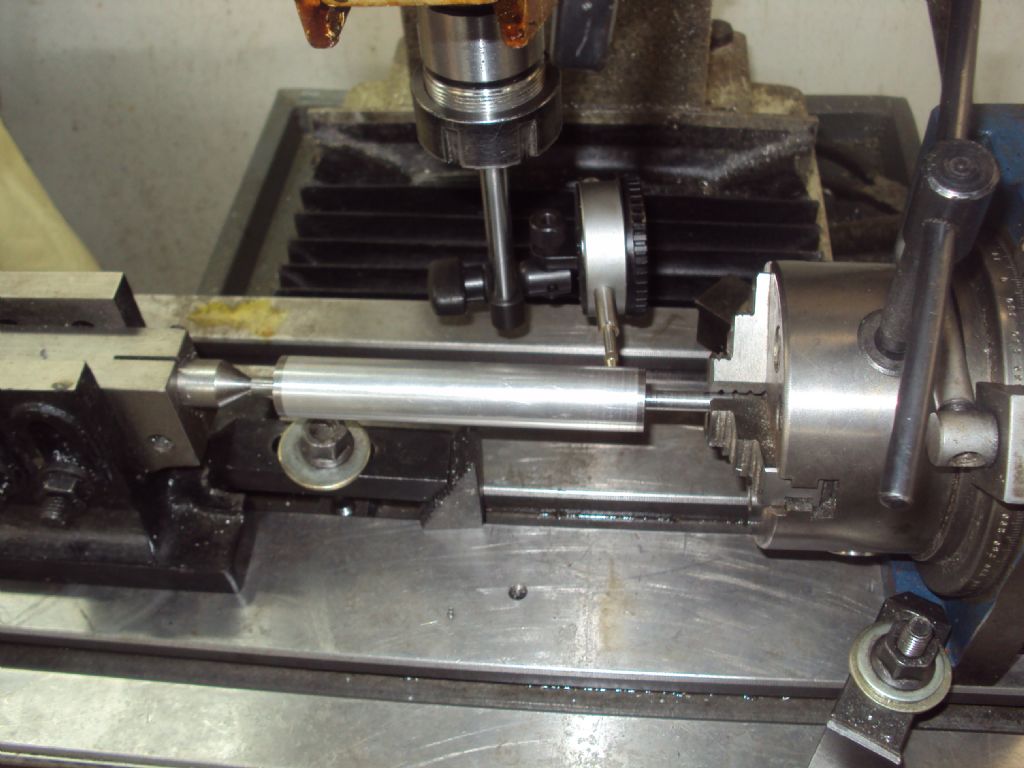
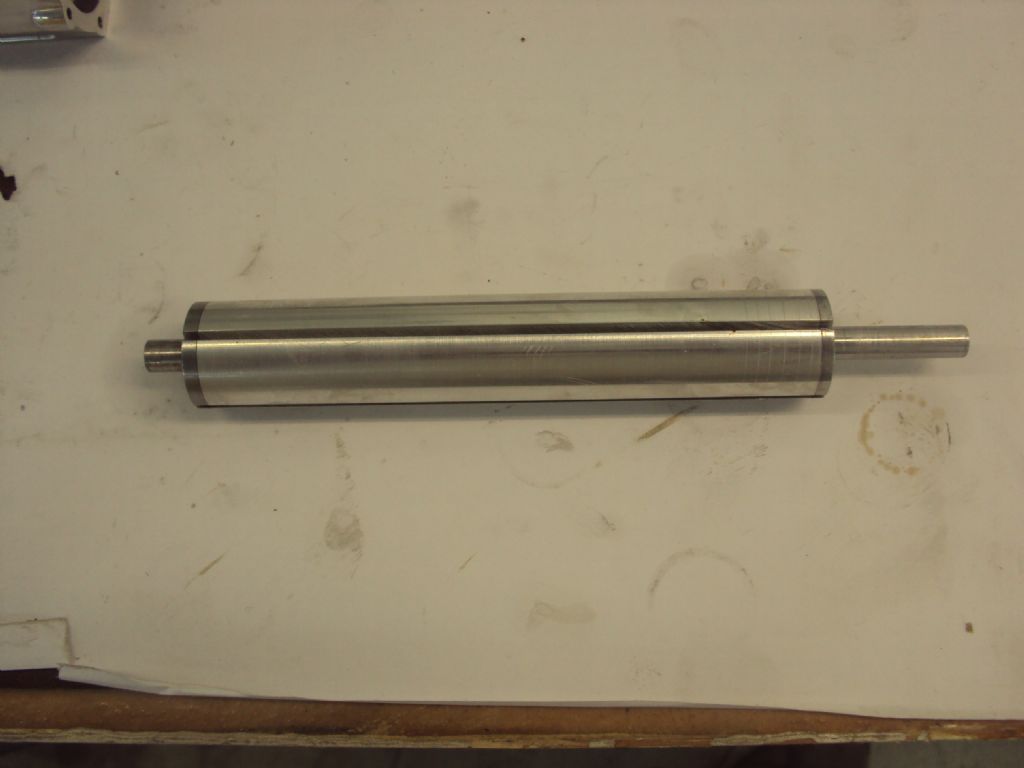
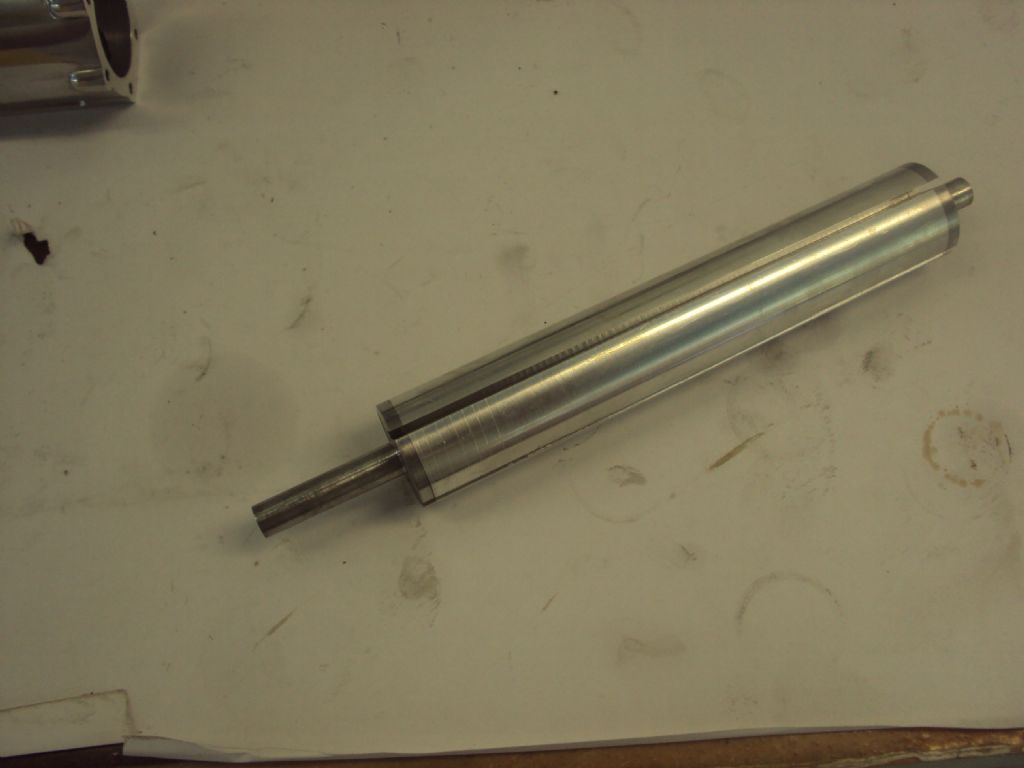
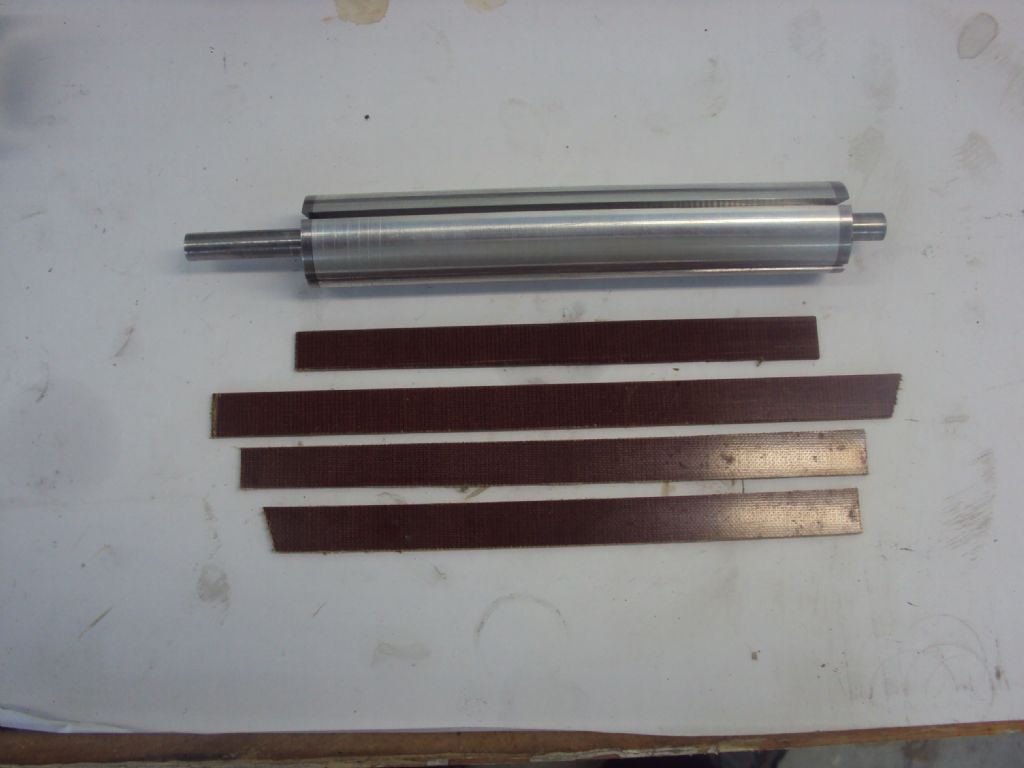
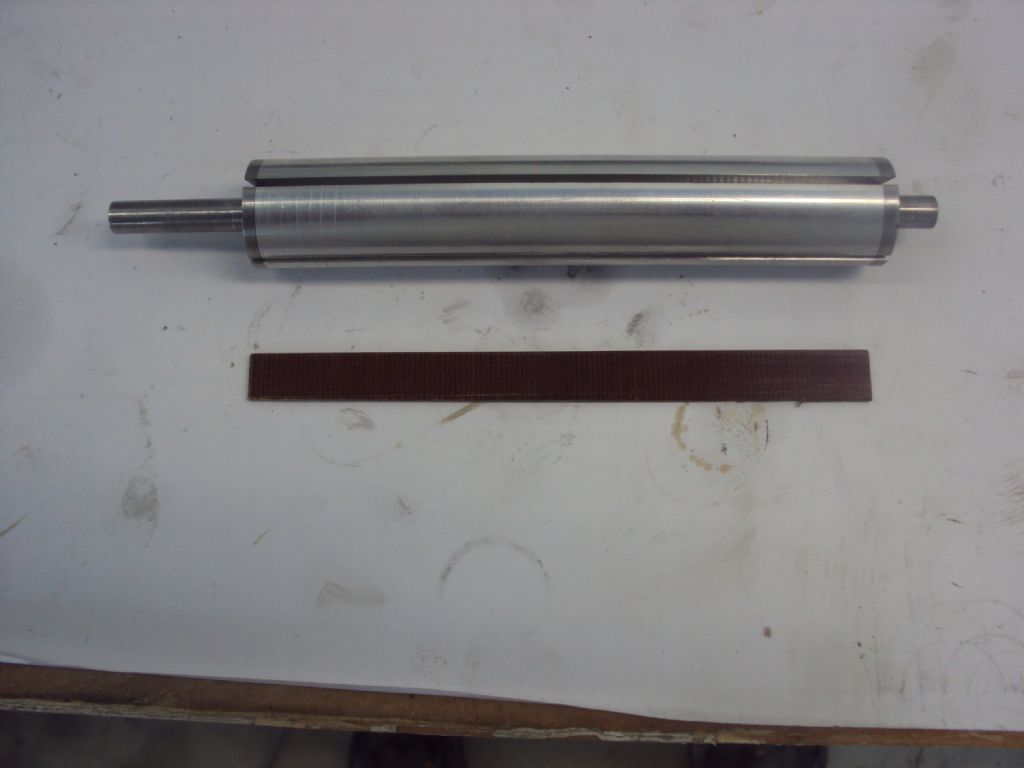
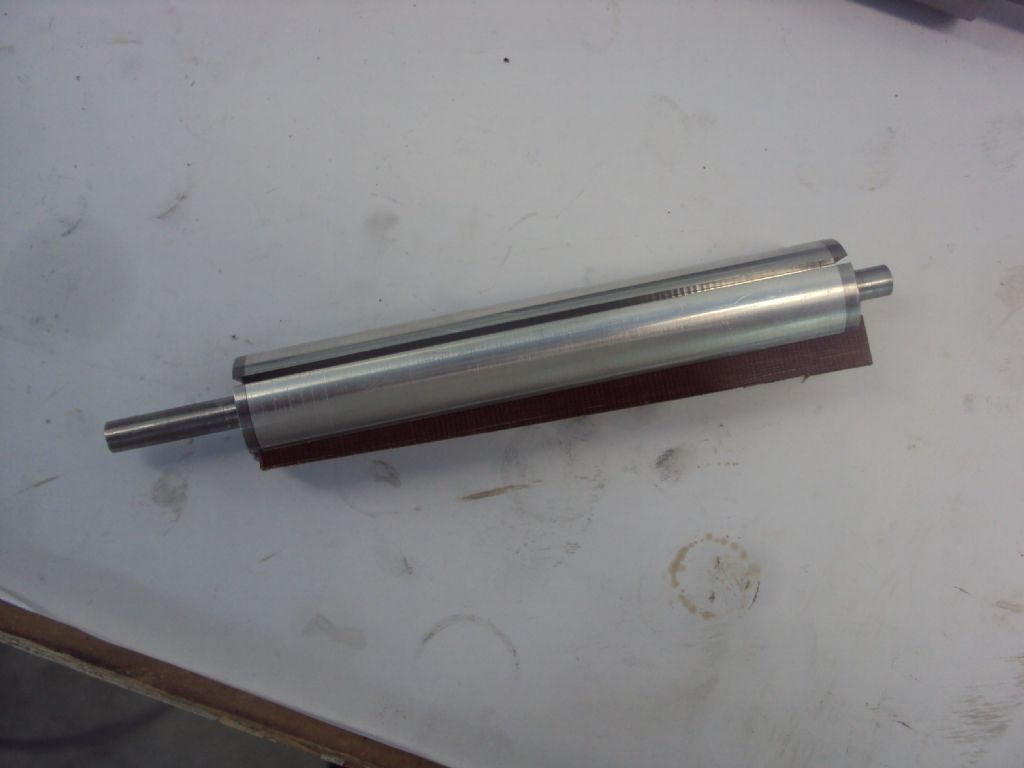
                        Well it's been awhile i know but I been kinda busy, but i finally found a roundtooit for this V12 project. Been working on the supercharger recently and have just finished machining the rotor vane slots into the rotor, took a bit of fiddling around to setup but got there in the end. All that's left to do now is polish the vane slots to allow a slippery slippery fit of the phenolic vanes.

                        here's some update photo's

                        cutting the rotor vane slots.jpg

                        setting up for cutting the rotor vane slots.jpg

                        super charger rotor.jpg

                        super charger rotor finished.jpg

                        rotor and vanes.jpg

                        rotor with phenolic vane.jpg

                        fitting the phanolic vanes.jpg

                        Hope to have it all done in the next few days or so………………………………………..hopefully lol

                        Dean

                        #171196
                        Muzzer
                        Participant
                          @muzzer

                          Hi Howard

                          The crank case is shared by all the cylinders in this design, so there is no possibility of using crankcase scavenging to charge the cylinder, as is common in small (<1 litre) 2-stroke engines. And there is little chance of accommodating 12 tuned exhaust systems to achieve the exhaust scavenging that is seen on a normal bike engine for instance. Without assistance, it's not going to be possible to get mixture into the cylinders.

                          Most of the large diesels mentioned have defined, mechanical exhaust (and inlet) valve arrangements, whether poppet valves (like most marine and rail diesels) or sleeves (opposed piston engines) or ports (for the inlets). However, the volumetric efficiency of a large marine diesel without a blower of some form would be pretty miserable. The thermodynamic efficiency of a diesel engine (and gasoline) is improved by supercharging and unlike a gasoline engine, there is no issue with detonation which limits the compression ratio and ultimately the maximum cylinder size of gasoline engines.

                          Whether you call it scavenging, charging, supercharging, blowing or whatever, this fine little engine will need some form of positive charging if it is ever to fire up. It's a pragmatic and sensible realisation. Besides, it gives us armchair experts something to pontificate about!
                          I'm fascinated by Dean's incredible work here. I couldn't achieve anything in the same class as this and I'm marveling at the progress. Keep it up Dean – hope your health doesn't keep you out of the workshop too much! Looking forward to each update and hopefully some engine noises soon.
                          Merry

                          #171275
                          Mick Dobson
                          Participant
                            @mickdobson
                            Posted by Howard Lewis on 09/10/2014 21:57:59:

                            The Fairbanks Morse, Napier Deltic, Rolls Royce K Range, and Leyland L10 engines were all opposed piston two stroke diesels. The Deltic had three banks of six cylinders, operating three crankshafts, which were interconnected by a geartrain at the front of each bank.

                            An excellent sumary of 2 stroke engines by Howard, as used in industrial, automotive and marine applications.

                            Just a quick note (as an ex-Leyland test engineer), the Leyland engine was designated L60. It was developed primarily for use in battle tanks. The L10 was a more recent Cummins truck engine of 10 litres, a conventional 4 stroke and nothing to do with Leyland.

                            Dean, always look forward to seeing the latest update on this amazing build.

                            Regards, Mick

                            #172481
                            dean clarke 2
                            Participant
                              @deanclarke2

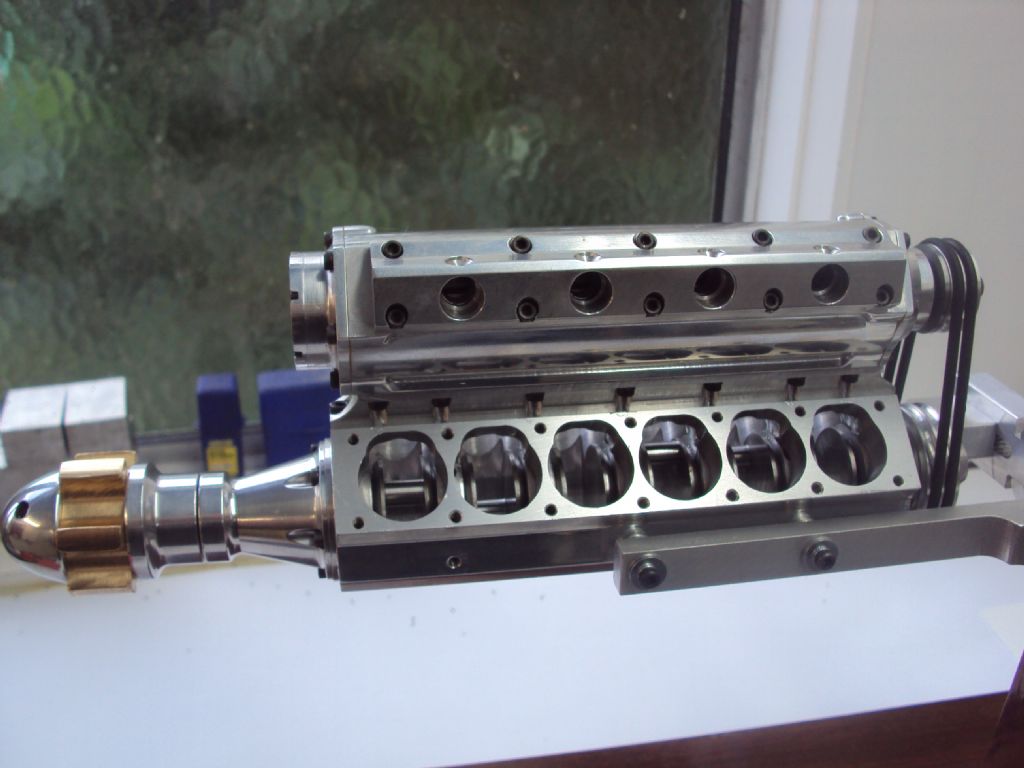
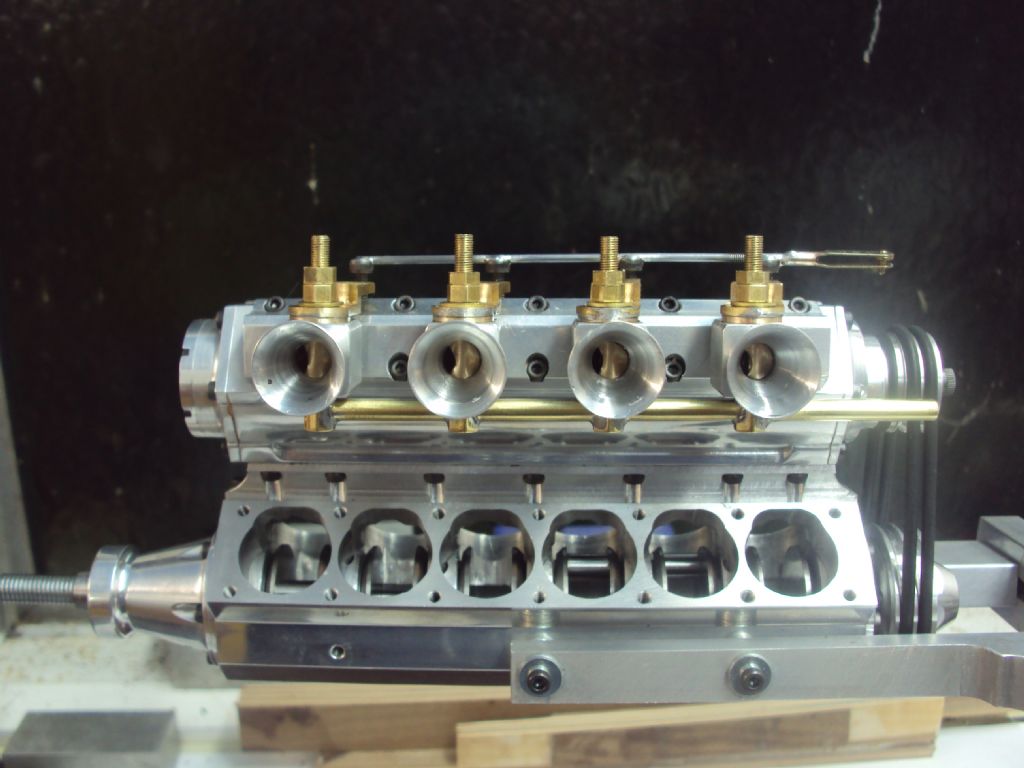
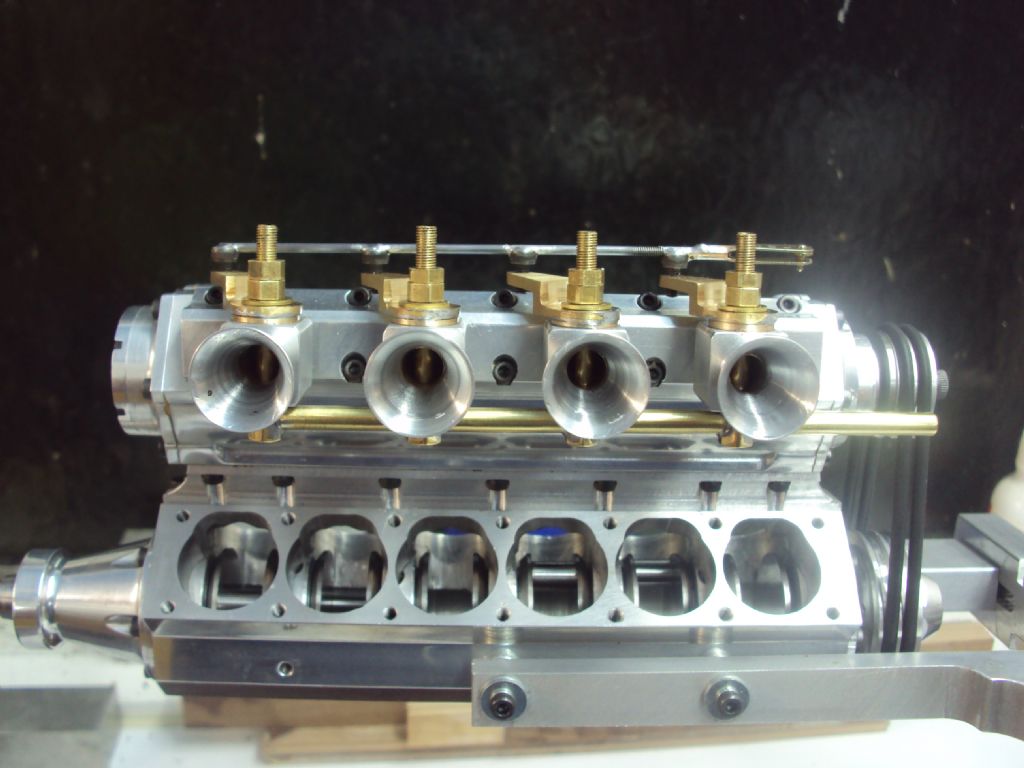
                              OK soooo………………….. I managed to find a few more roundtoits and have finished fitting the super charger rotor vanes to the rotor. They all have a nice and free sliding fit and good end clearance, made all the gaskets for the two end covers and the manifolds. Below are some photos showing the finished blower assembly fitted to the rest of the engine.

                              super charger fitted (1).jpg

                              super charger fitted (2).jpg

                              super charger fitted (3).jpg

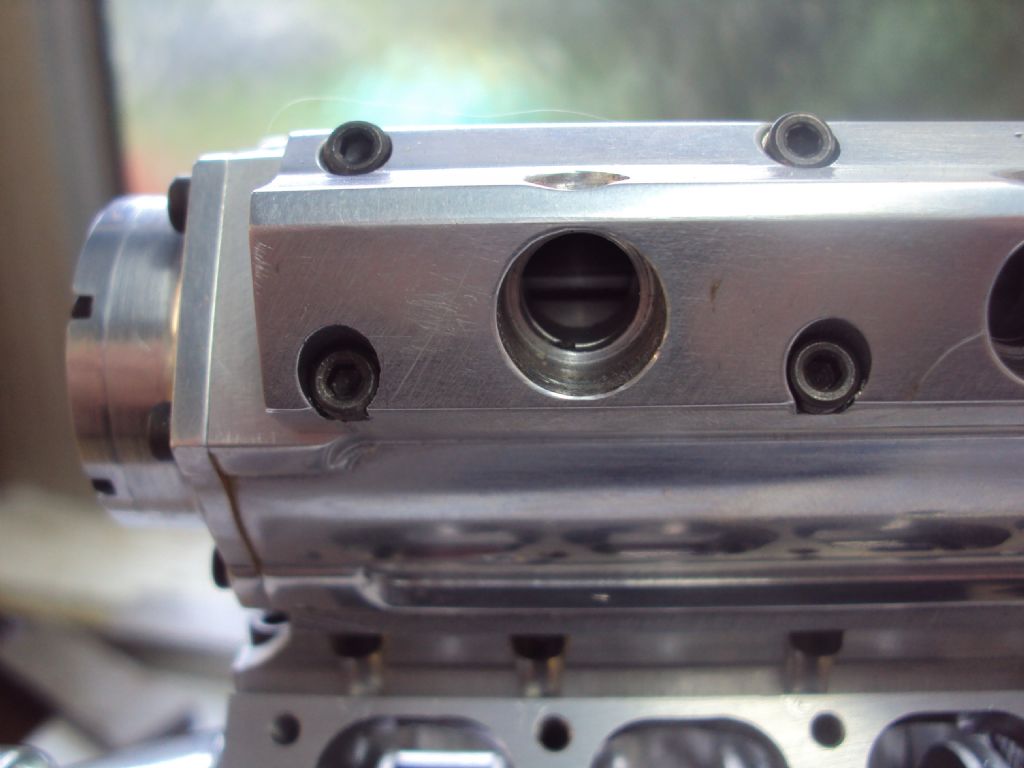
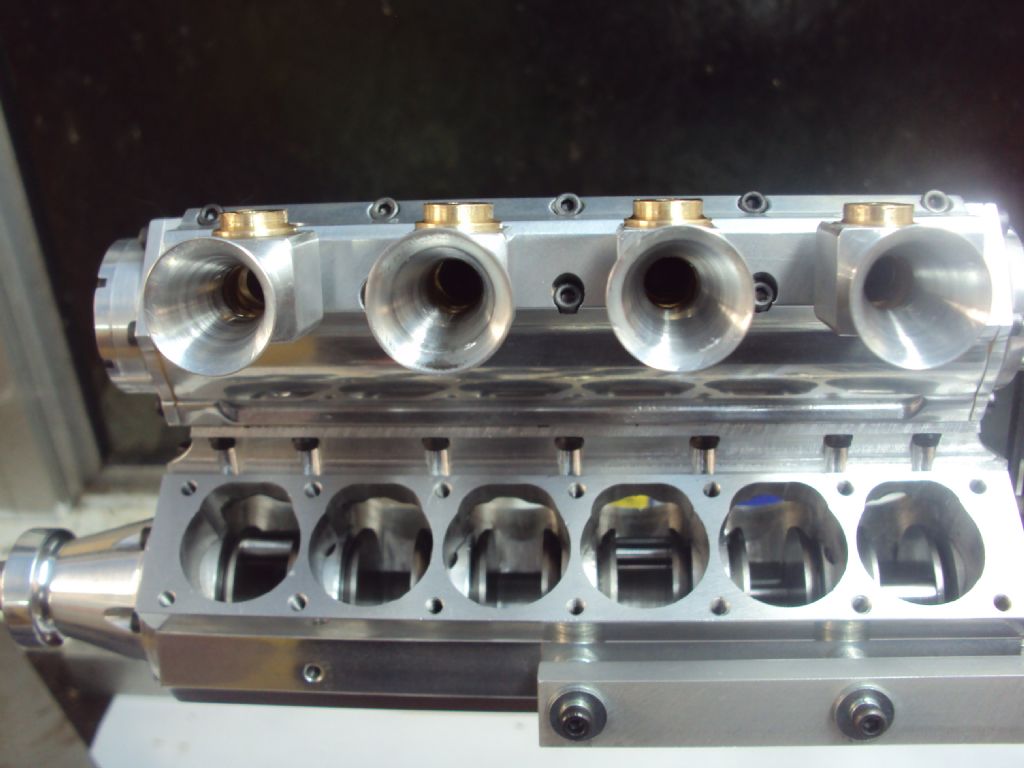
                              This photo is a view down the carb intake hole and shows the vane in the slot. Once I got the whole assembly together I couldn't resist trying the supercharger out to see how much blow it would give. I hooked up the starter motor to it and there was a very definate blowing of the air coming out through the sump holes in the bottom of the block!!!!!!!!!! Fantastic I would say!!! Quite a loud noise from the blower so I think it might have a very interesting sound when its running.

                              So the next step in the construction is the finishing of the liners. I have started lapping these using the same technique that Ramon describes in his ETA build thread. I have used this system before when i made the V8 (here's a link to the youtube video of the v8 being hand started for anyone interested. https://www.youtube.com/watch?v=Np7zvGrc3U0 )

                              The liners are firstly honed and then lapped with 14 micron diamond paste, then cleaned. When they are all at this stage the lap is then cleaned and reloaded with 0.5 micron diamond paste and all the liners are then brought up to a mirror finish before fitting the pistons to each individual liner making up 12 matched piston liner assemblies.

                              Here's a couple of photos of the start of the lapping process.

                              lapping the liners.jpg

                              lapping the liners 2.jpg

                              Hope this keeps the interest satisfied for a few more days, hopefully i will be able to finish the lapping of all the liners in the next couple of days, untill then……………………………………………………………..

                              Cheers

                              dean

                              #172485
                              Michael Gilligan
                              Participant
                                @michaelgilligan61133
                                Posted by dean clarke 2 on 07/12/2013 04:12:58:

                                v12 block bored.jpgv12 block.jpg

                                here is the first stage of the block.

                                .

                                Dean,

                                I have "quoted" your first two photos of this amazing thread, as a qick reminder of how it started.

                                Thank You for sharing your journey.

                                Beyond that: Words fail me.

                                MichaelG.

                                #172554
                                dean clarke 2
                                Participant
                                  @deanclarke2

                                  Thanks for the kind words, It has been a very long road for me and somewhat longer than i expected but the end is in sight.

                                  cheers

                                  dean

                                  #172578
                                  LADmachining
                                  Participant
                                    @ladmachining

                                    Can't wait to hear this fire into life!

                                    Excellent work, Dean!

                                    #174164
                                    dean clarke 2
                                    Participant
                                      @deanclarke2

                                      Well, hope you guys n gals all had a very merry christmas and sante brought you all the hoped for goodies? Here's wishing you all a very happy new year with plenty of shed time and productivity with all the new toys you got for xmas……………….

                                      Cheers

                                      Dean

                                      #182509
                                      dean clarke 2
                                      Participant
                                        @deanclarke2

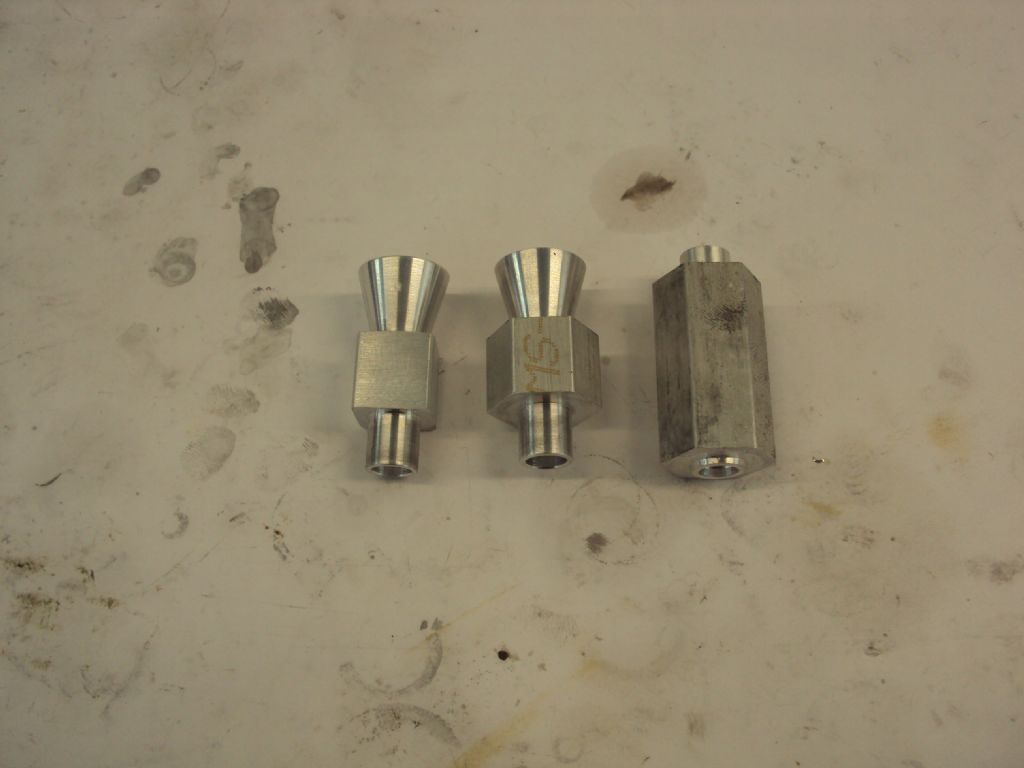
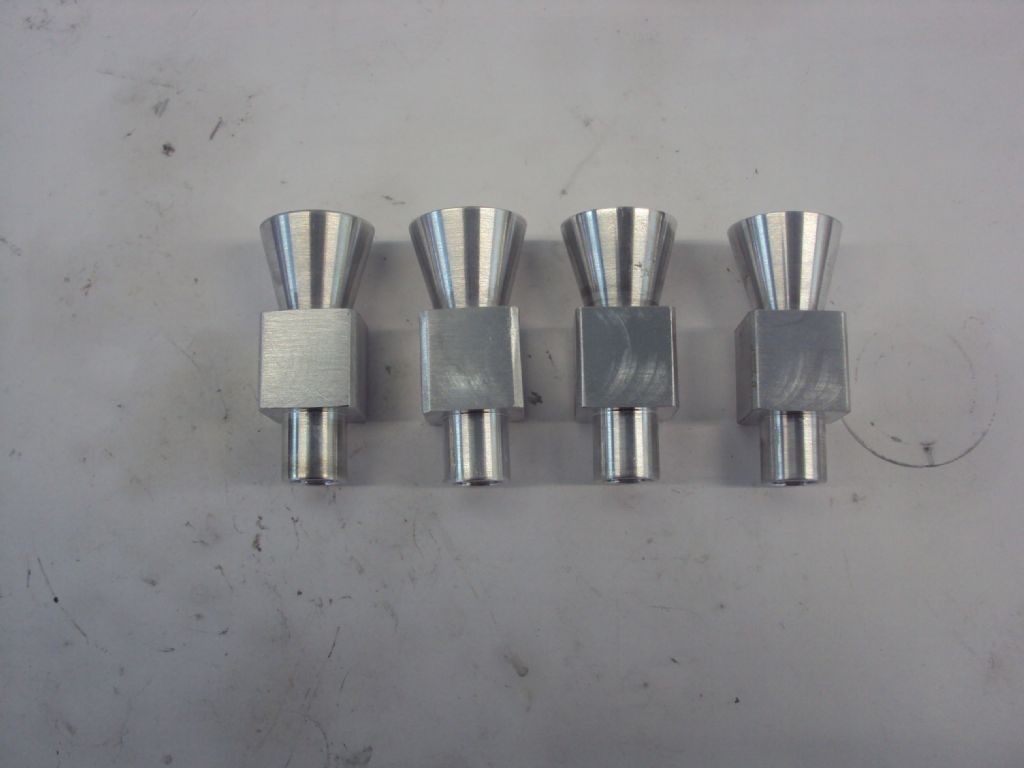
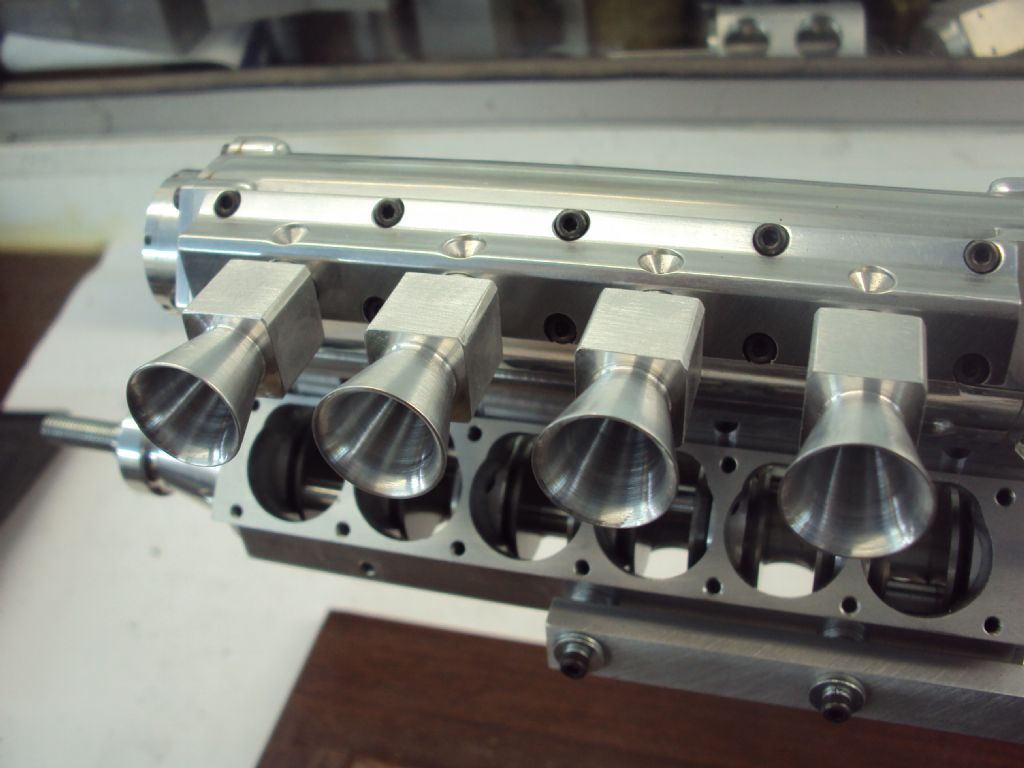
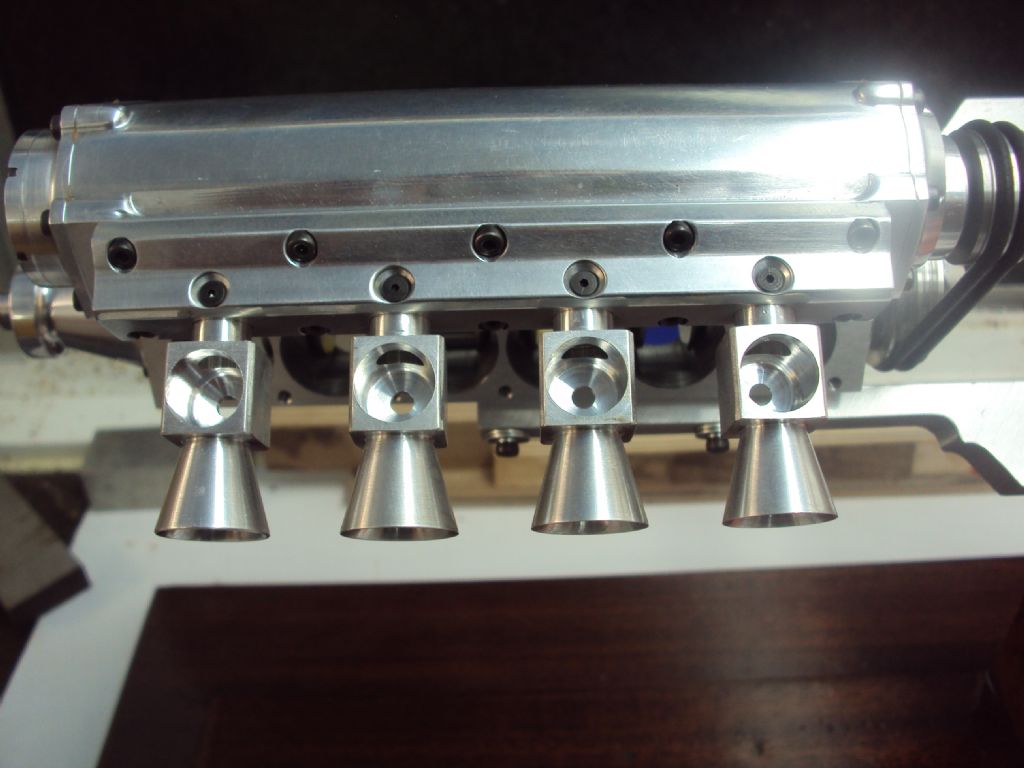
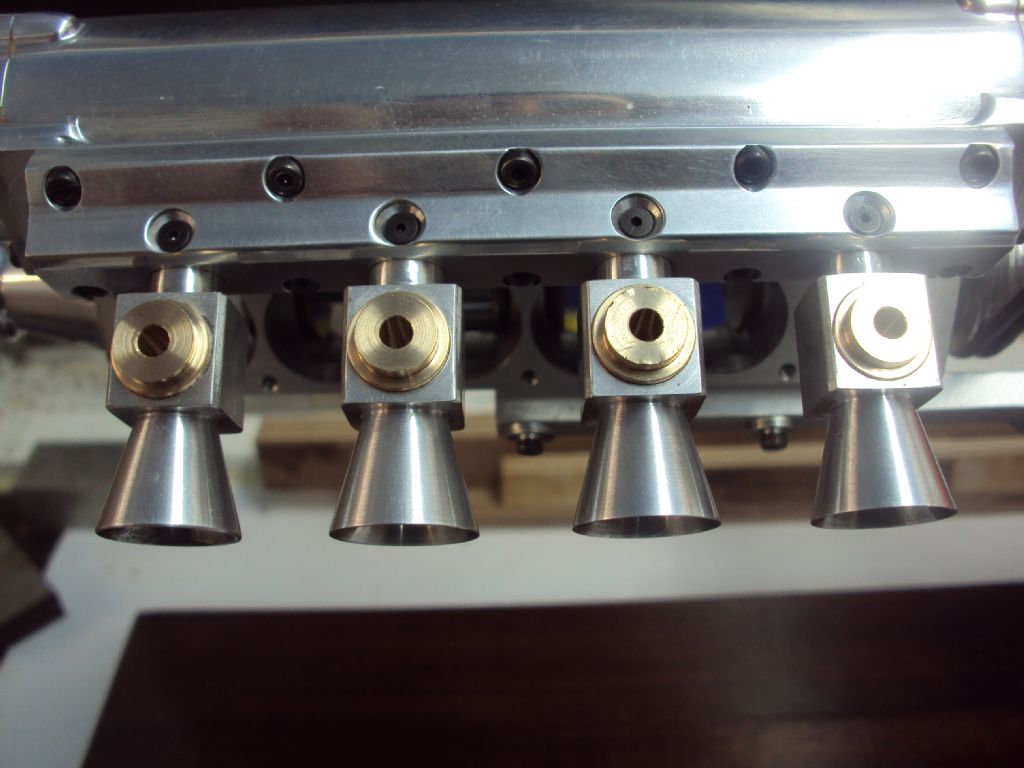
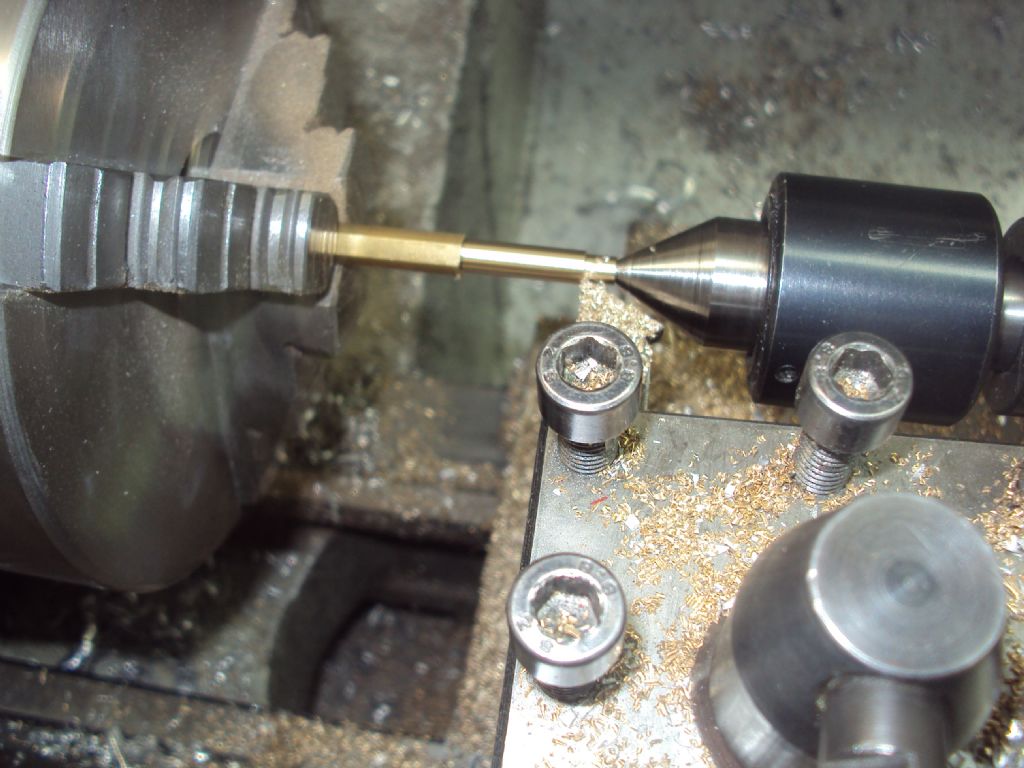
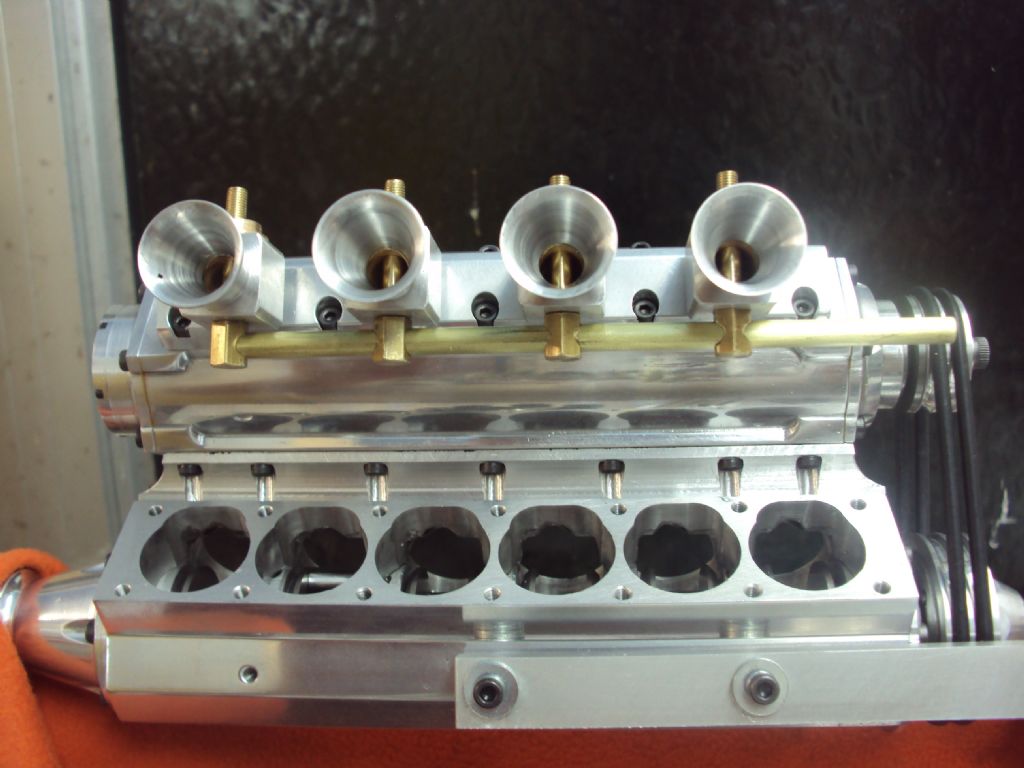
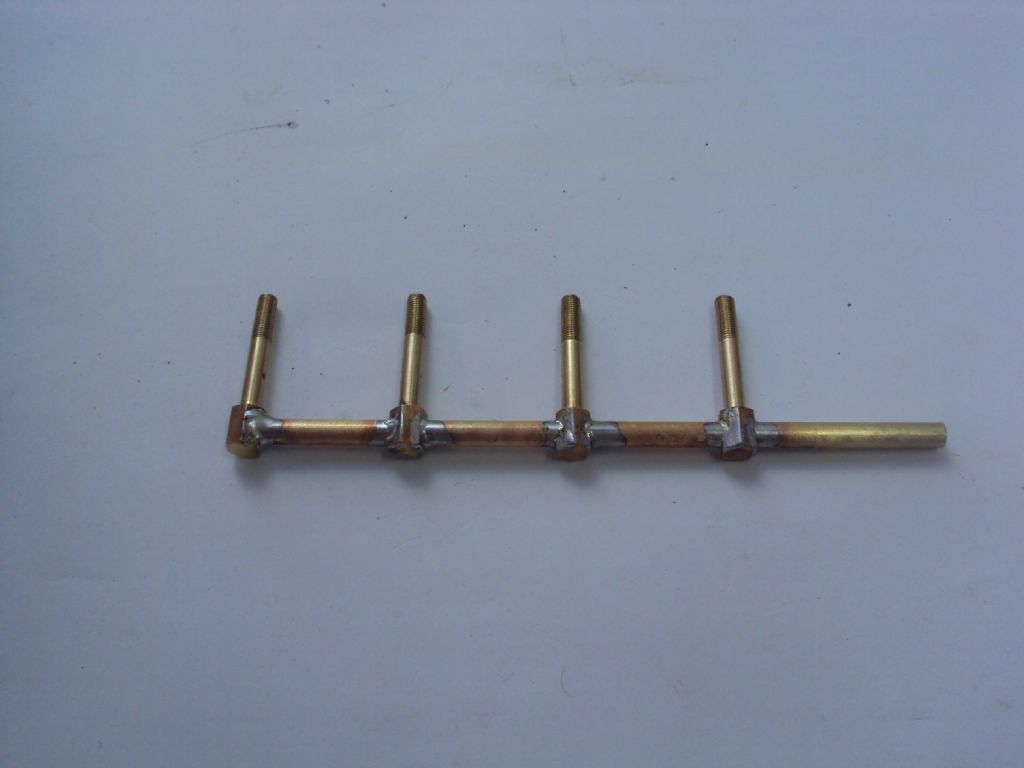
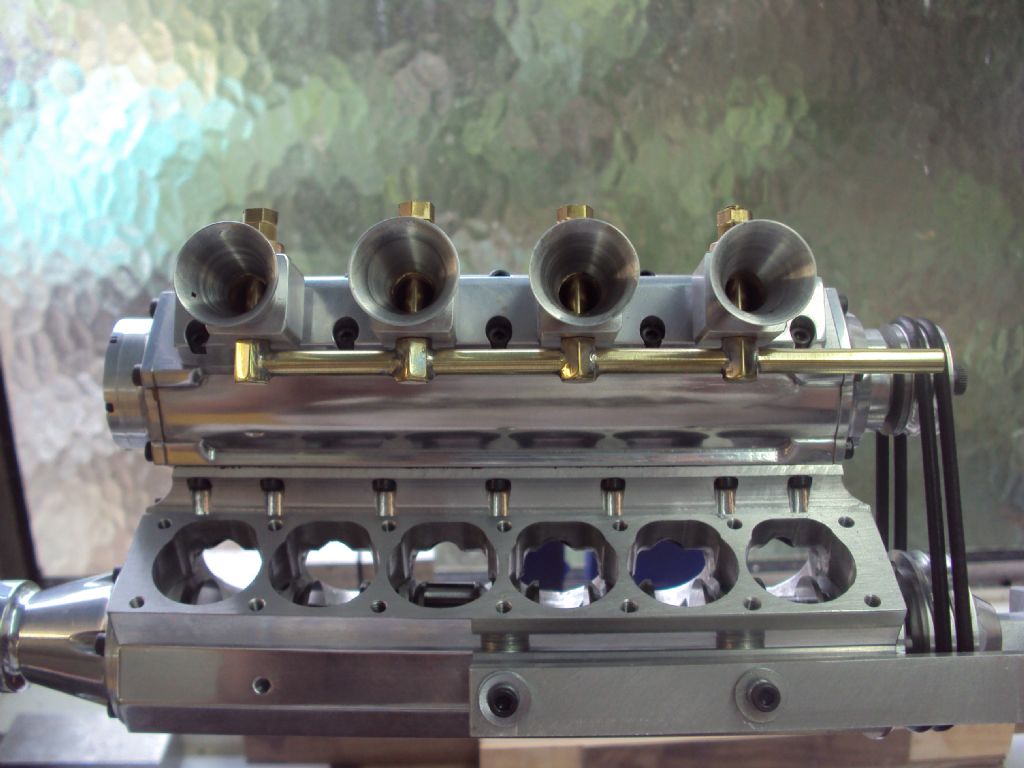
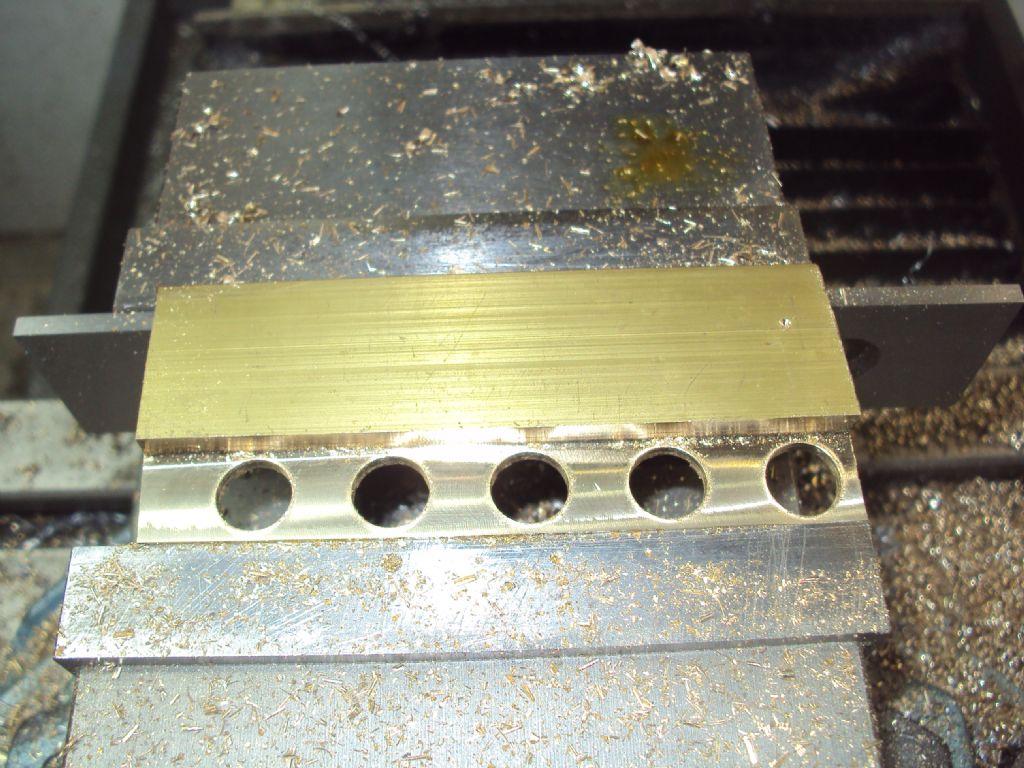
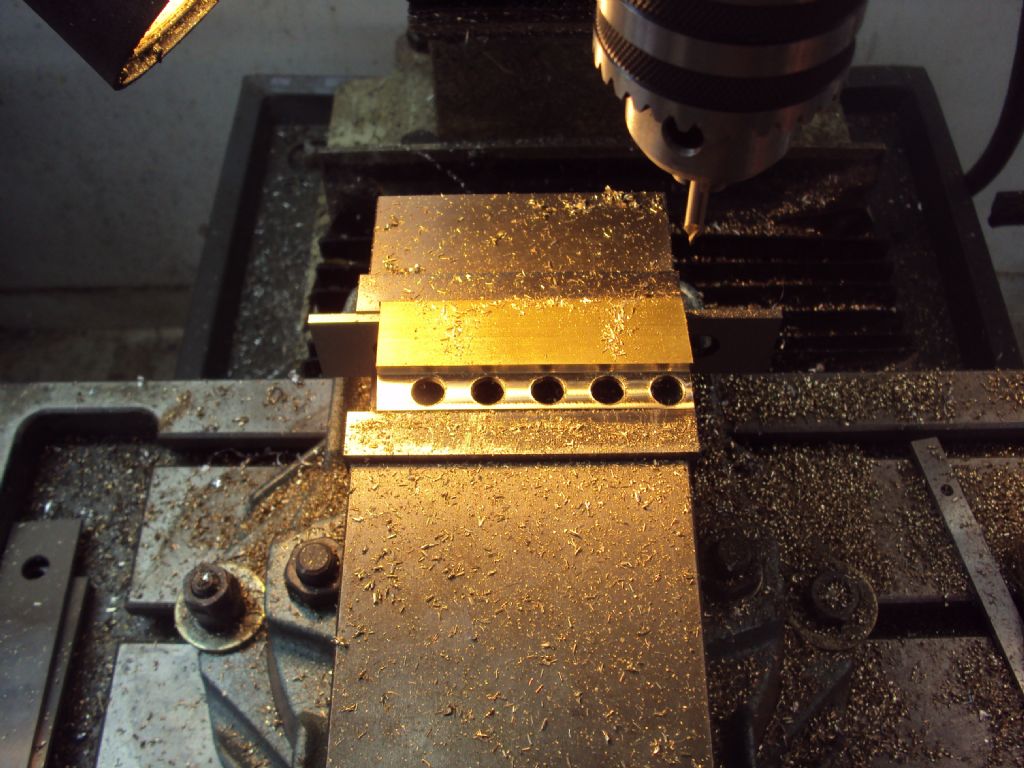
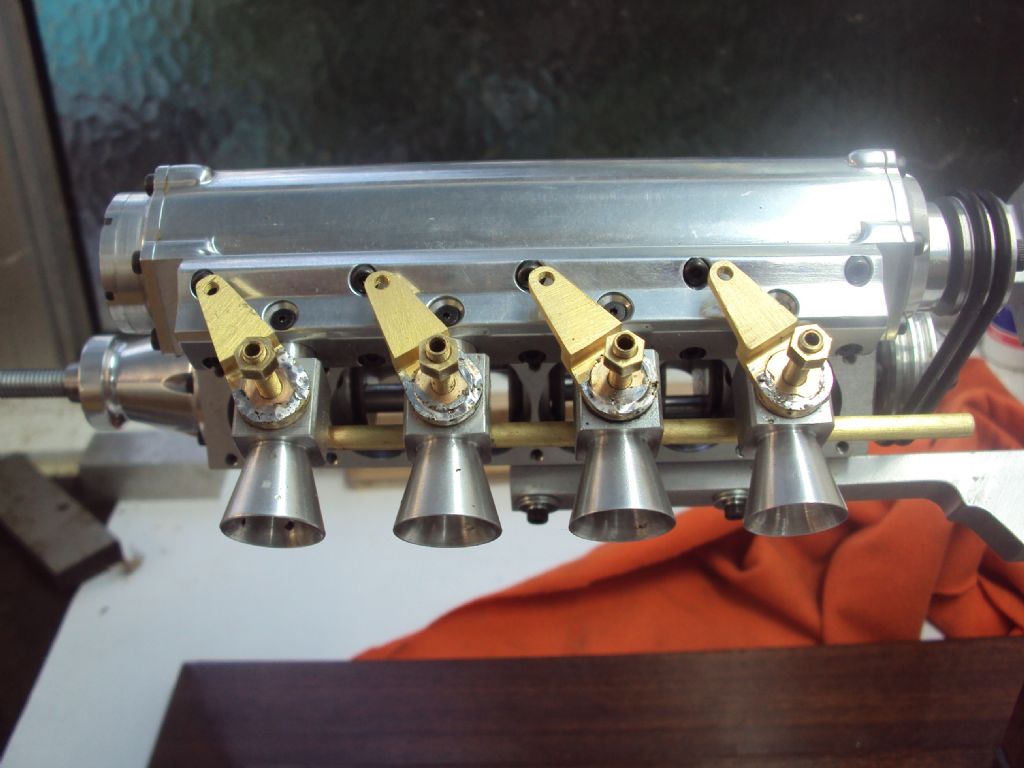
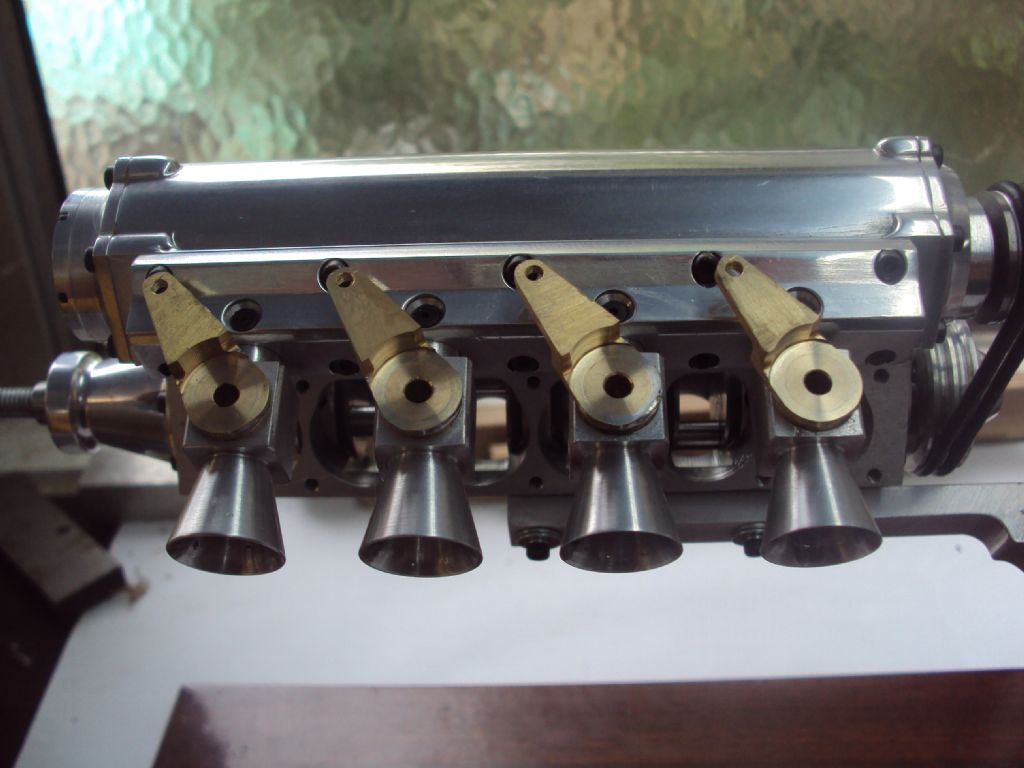
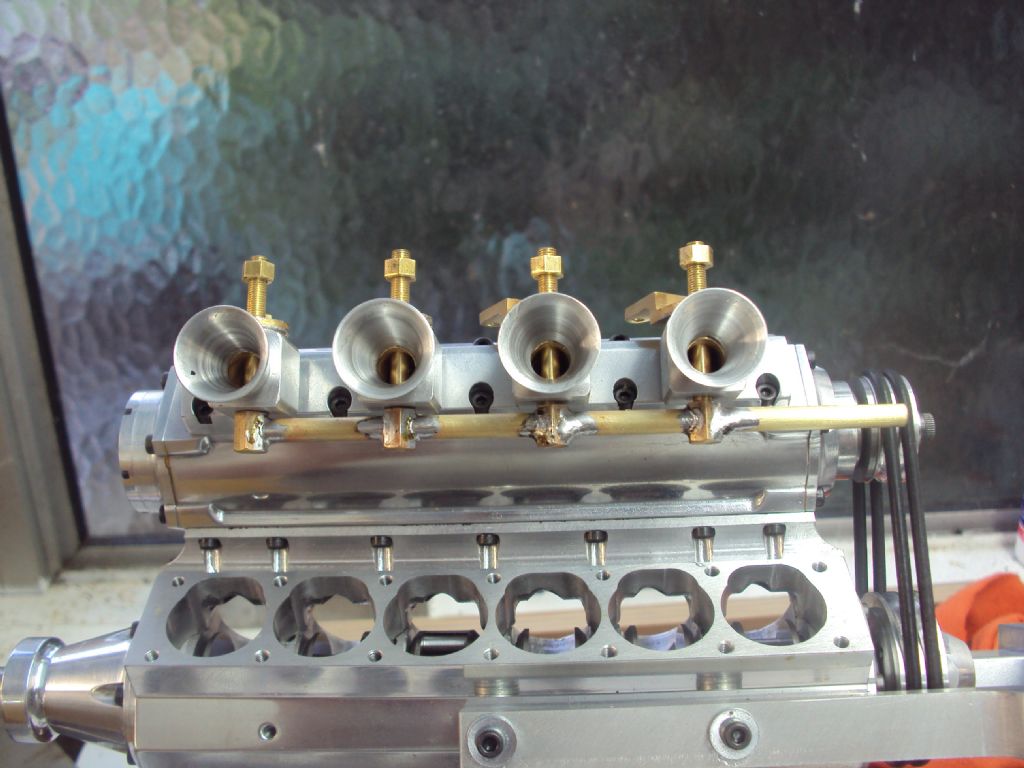
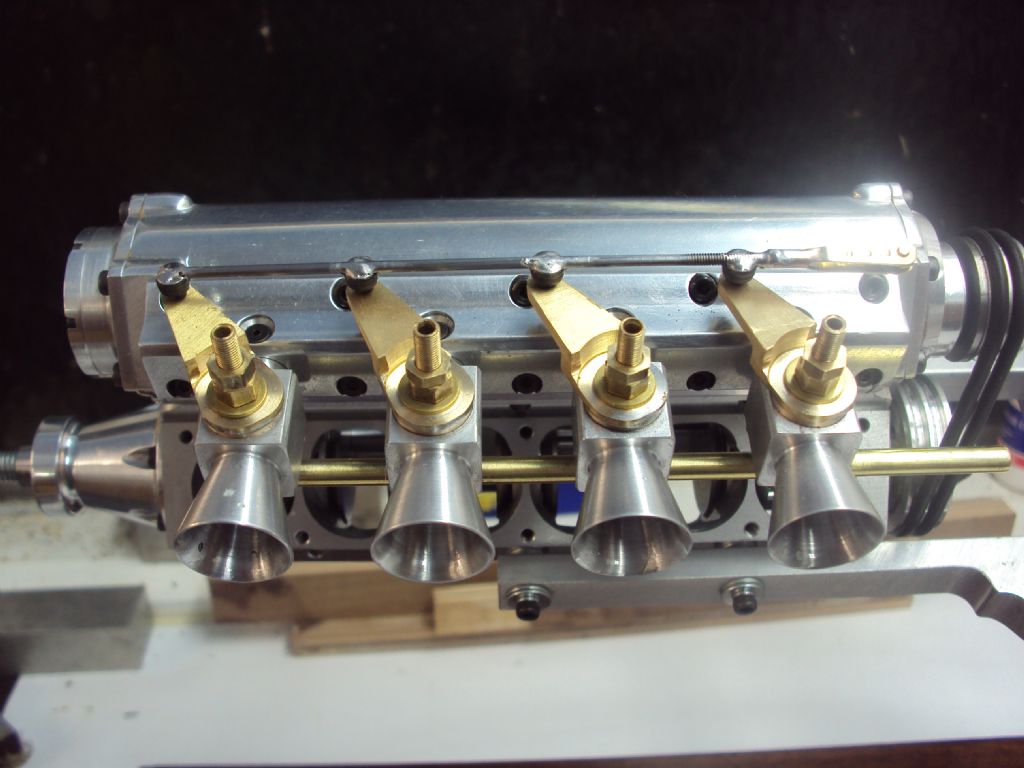
                                        Hi all, once again sorry for the tragically long time between updates, pressures of life and all that drama, but never mind I have managed to find a small bit of shed time and I have taken a break from the unimaginablely boring task of lapping 12 cylinder liners to save my sanity and have gotten on with the four carbs. I have finished machining the bodies and throttle barrels, fuel jets and fuel delivery rail. Photos below show the progress to date

                                        carb body machine stages.jpg

                                        carb bodys finished.jpg

                                        carb bodies test fitted (2).jpg

                                        carb barrel holes machined.jpg

                                        carb throttle barrels fitted.jpg

                                        carb fuel jets being machined.jpg

                                        carb fuel rail test fitting.jpg

                                        carb fuel rqil after soldering.jpg

                                        carb fuel rail fitted after soldering and cleaning.jpg

                                        carb throttle levers 1st stage machining.jpg

                                        carb throttle levers being machined.jpg

                                        carburettor throate view.jpg

                                        Well thats all for now, hopefully i'll find a few more roundtuits and get the rest finished soonish LOL

                                        Cheers for now

                                        Dean

                                        #182530
                                        Ady1
                                        Participant
                                          @ady1

                                          Was wondering how you were just the other day Dean. Keep on trucking.

                                          #183494
                                          dean clarke 2
                                          Participant
                                            @deanclarke2

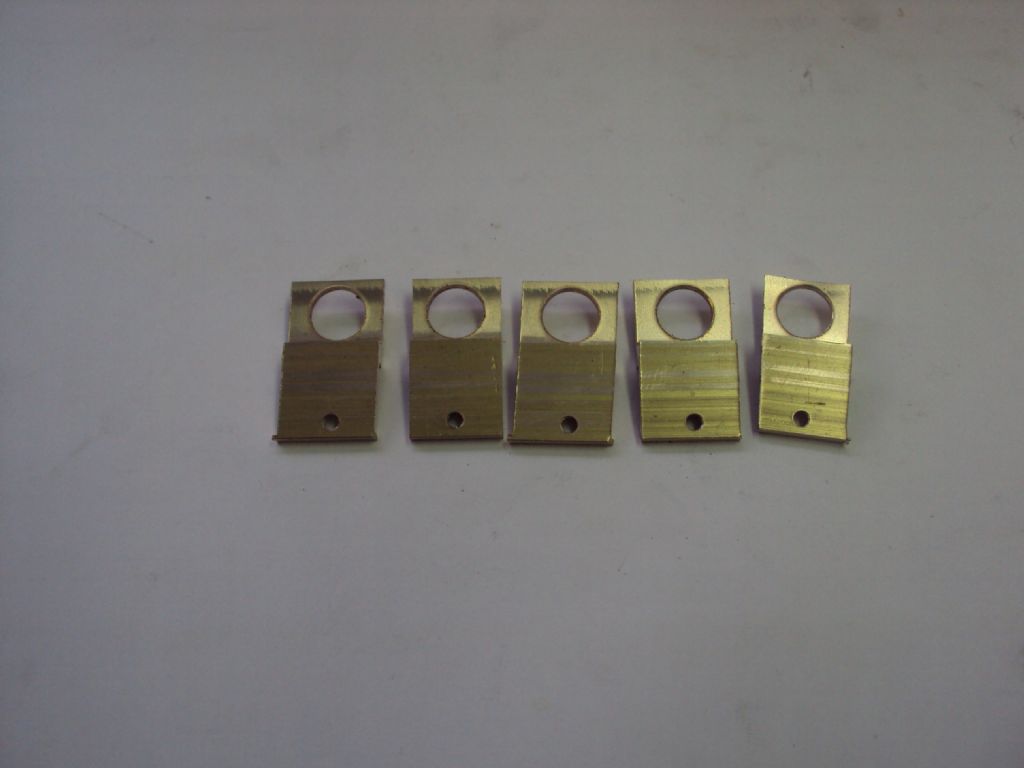
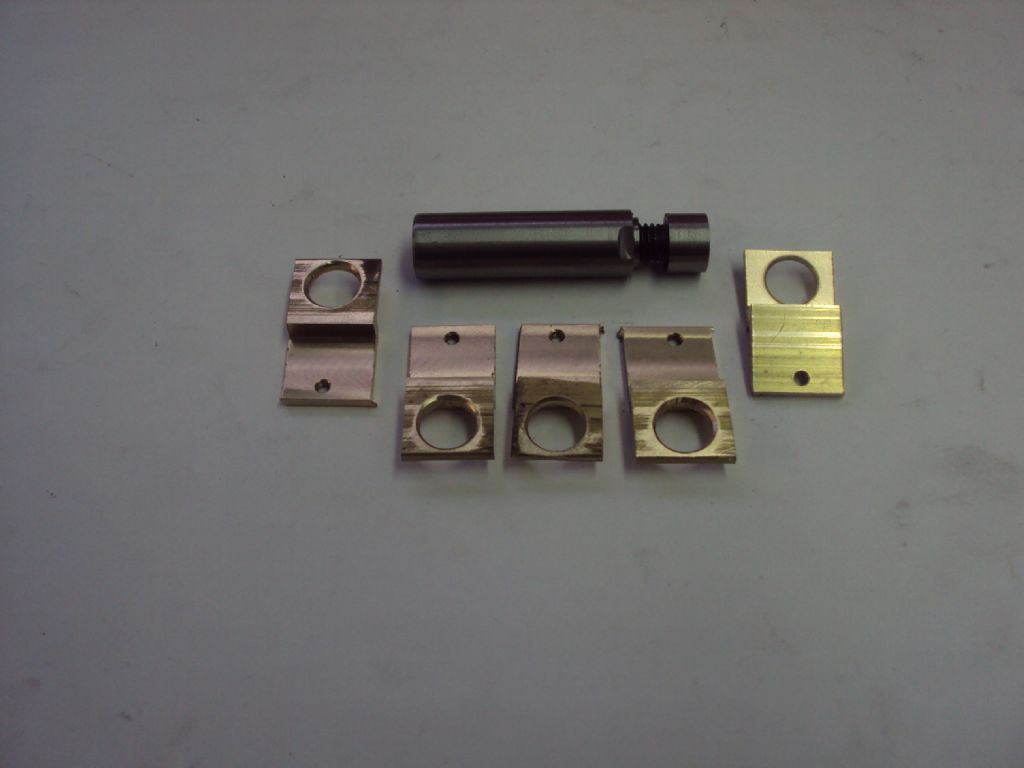
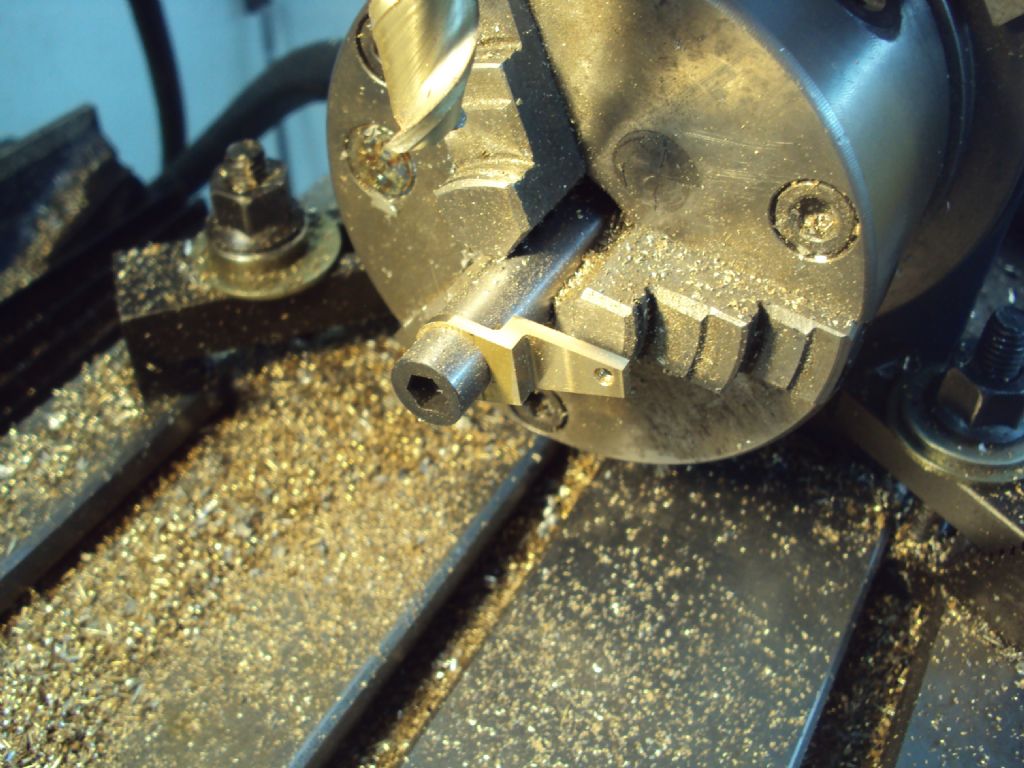
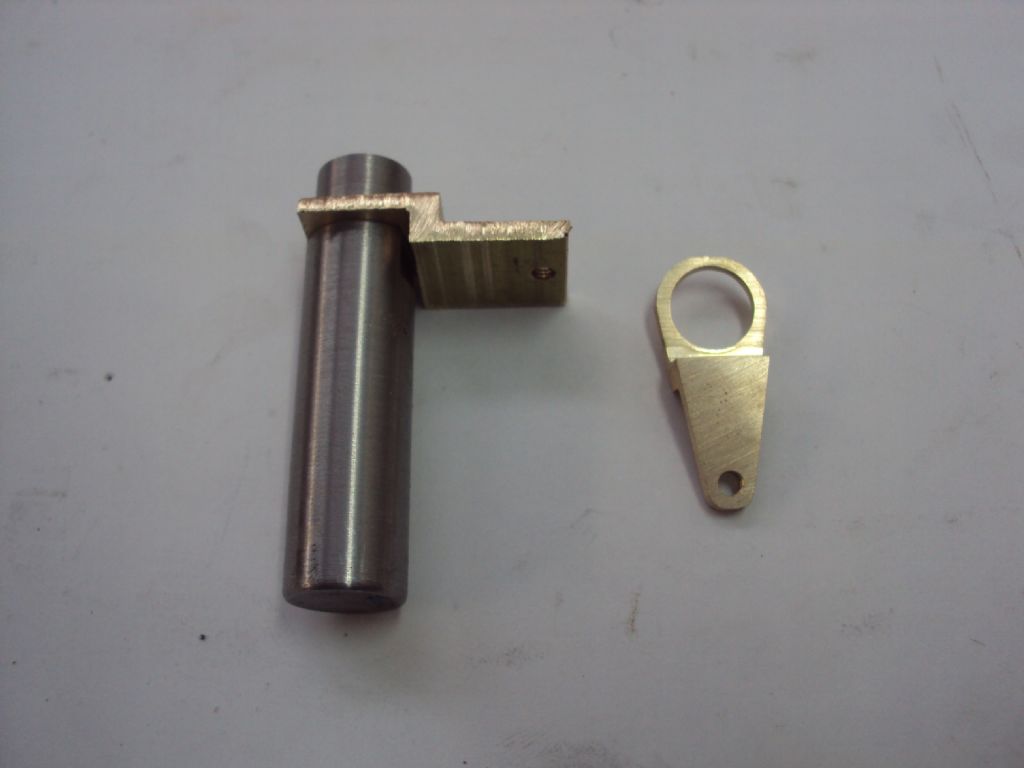
                                            OK So it's kind of a miracle I know but here is the next little bit achieved on the V12 build. I have managed to get the throttle levers built and ready to fit to the throttle barrels, then onto the throttle linkage system. Here are some photos for you………

                                            carb throttle levers stage 2.jpg

                                            carb throttle levers seperated.jpg

                                            carb levers and tooling.jpg

                                            carb levers being machined.jpg

                                            carb levers setup on mandril.jpg

                                            carb levers finished ready to fit.jpg

                                            Hopefully I'll be able to get a bit more done this weekend

                                            Cheers for now

                                            Dean

                                            #184794
                                            dean clarke 2
                                            Participant
                                              @deanclarke2

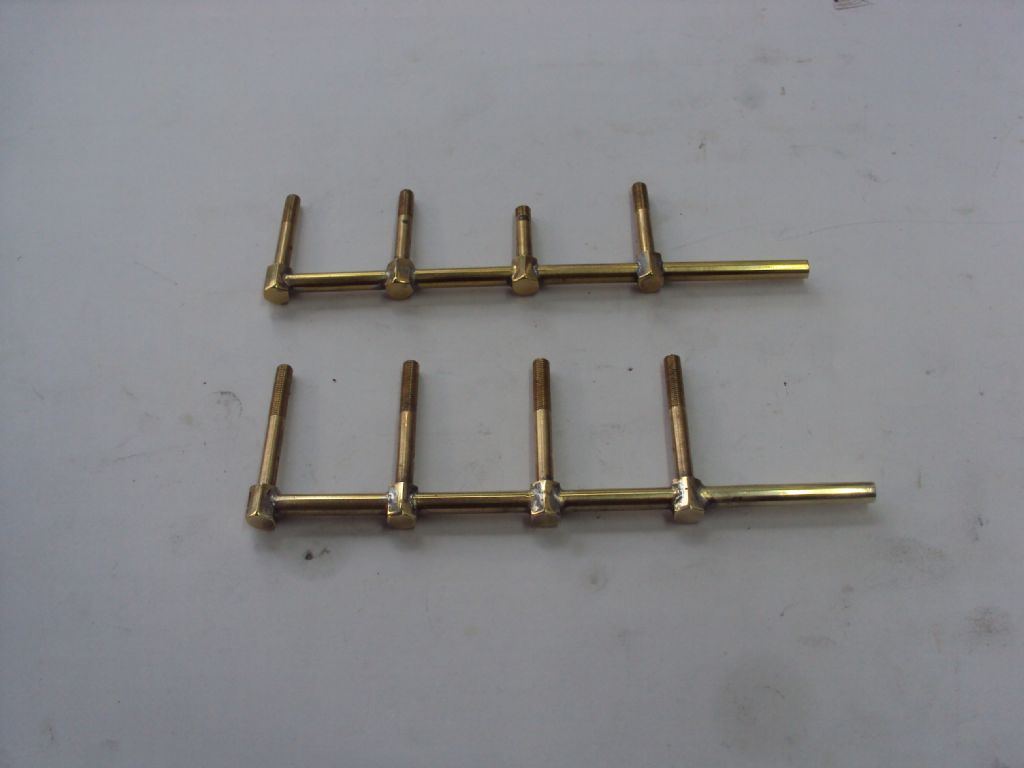
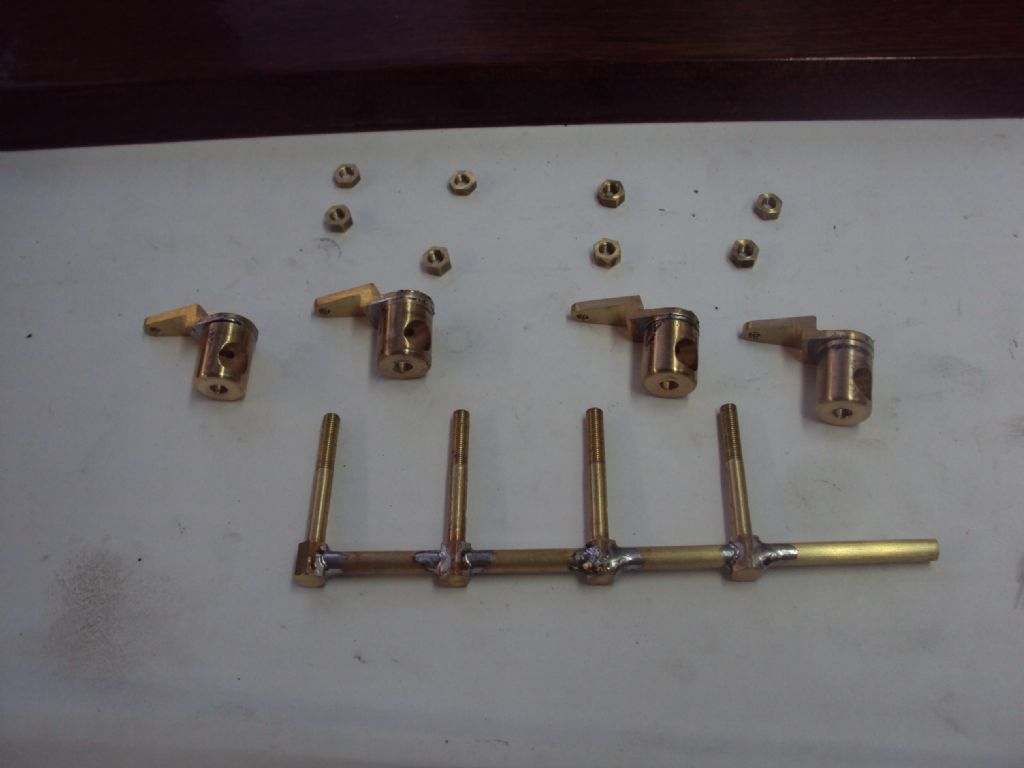
                                              Well progress has been somewhat slower than I had hoped and plagued with a few problems, but I guess if it was easy everyone would be doing right? I have managed to get the four carbs finished and the throttle linkage assembled but not without some frustrations photos below show some of them

                                              carb fuel rail oops.jpg

                                              So those of you with a keen eye will probably notice the overtly shorter fuel jet in the top fuel rail, This was the first rail I made and it had been threaded internally for a threaded needle assembly, This proved to be a mistake as there wasn't enough meat in the wall thickness and the one became two!!!! bugger!!! Hence the second fuel rail redesigned for a needle carrier and not a threaded needle. Oh well live and learn I guess.

                                              carb fuel rail and barrels.jpg

                                              This photo shows the new rail and the levers fitted to the barrels before being cleaned up.

                                              carb throttle levers soldered on.jpg

                                              carb throttle levers fitted and finished.jpg

                                              carb fuel rail replacement.jpg

                                              This photo shows the replacement fuel rail being test fitted, Who can see a small problem here i wonder?!!!!

                                              carb throttle assembly all finished.jpg

                                              So here we have the finished article and although it hopefully looks all good there is a rather annoying large problem I discovered upon trying the throttle travel movement………………. as in it doesn't……………. move that is…………………… BUGGER!!!!!!!!!! I found the reason after looking at the photos. There is a slight difference in the height of the the fuel jet base after being soldered together. This meant that when the nuts were done up and the preload set it pulled the jets out of true inside the barrel, thus causing the barrel to bind in the carb body. I am looking at how to fix this at the moment probably just separate the jets and use silicone fuel tube in between each jet. below is a couple of photos showing idle and wide open throttle postions.

                                              carb linkages movement check.jpg

                                              carbs at wide open throttle, yea.jpg

                                              Thats all folks will call again later

                                              cheers

                                              Dean

                                              #204818
                                              dean clarke 2
                                              Participant
                                                @deanclarke2

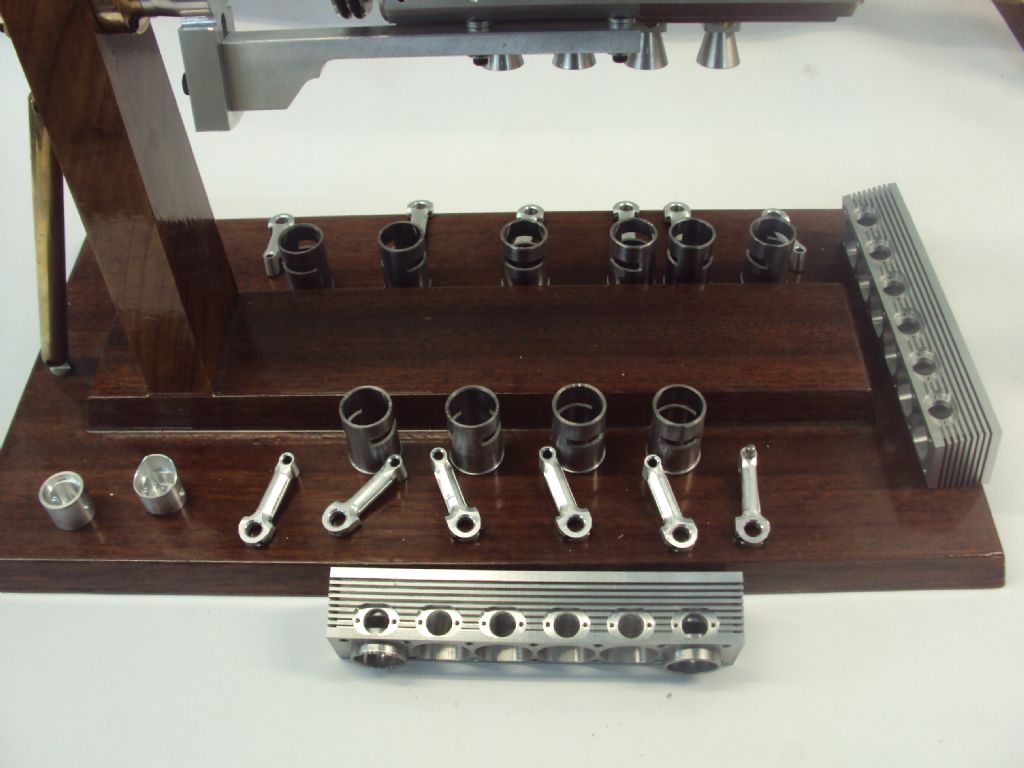
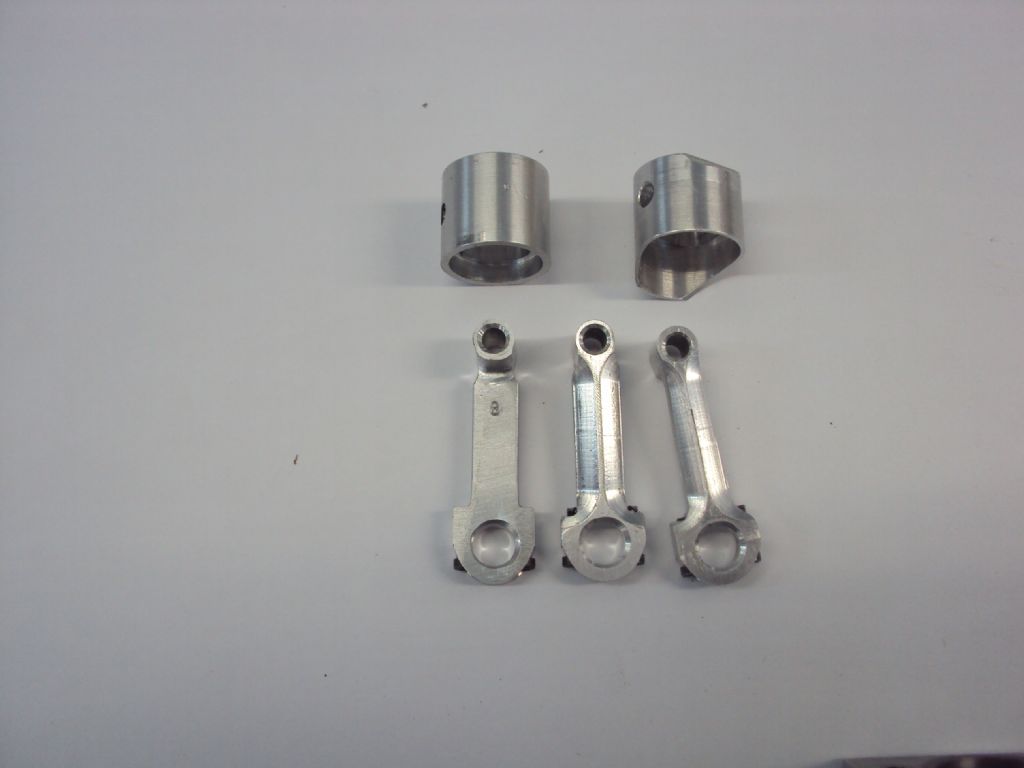
                                                Well, I'm still alive and kicking just in case anyone was starting to wonder?? Um been a little while since I updated this thread so I thought I should probably get onto it. So here it is, the next installment of this build. Having gone slowly mad trying to lap and polish 12 liners I have finally been able to finish this step of the build. I have also managed to make a pattern piston from ally to figure out the final dimensions of the pistons. This was somewhat of a frustrating excercise but I'm glad to have done it now as I think I have managed to get it sort of right at last.(joys of scratch building without any drawings lol). here's a photo of the progress to date including a couple of further mods to the conrods.v12 liners and rods (1).jpg

                                                v12 liners and rods (2).jpg

                                                v12 liners and rods (3).jpg

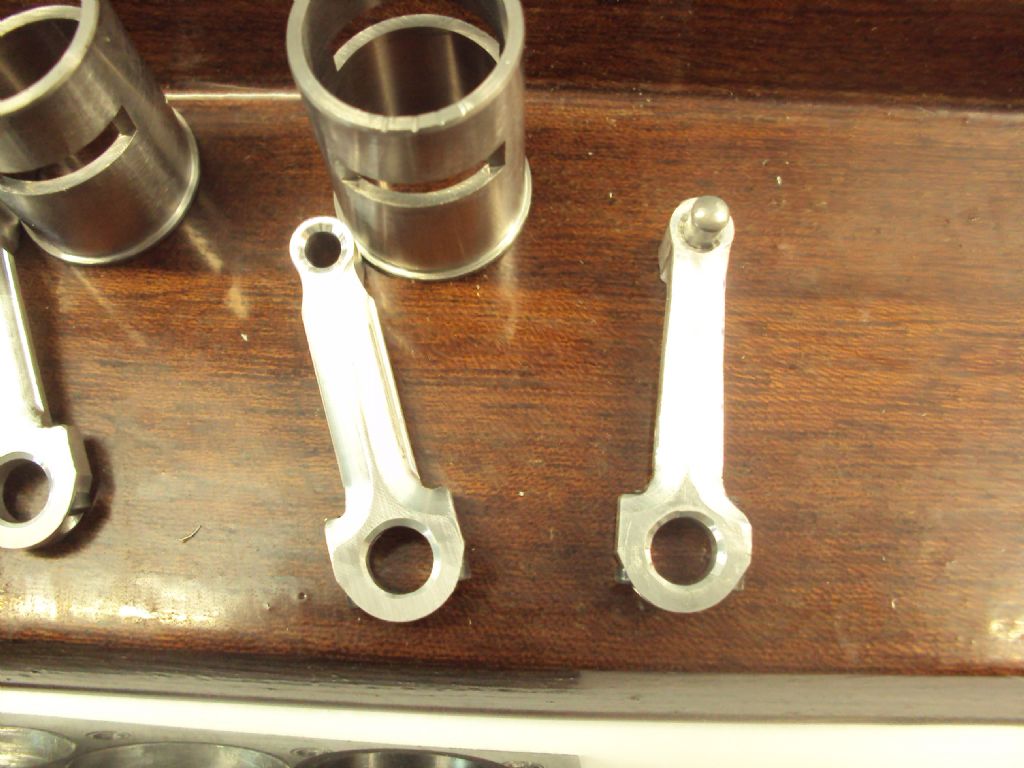
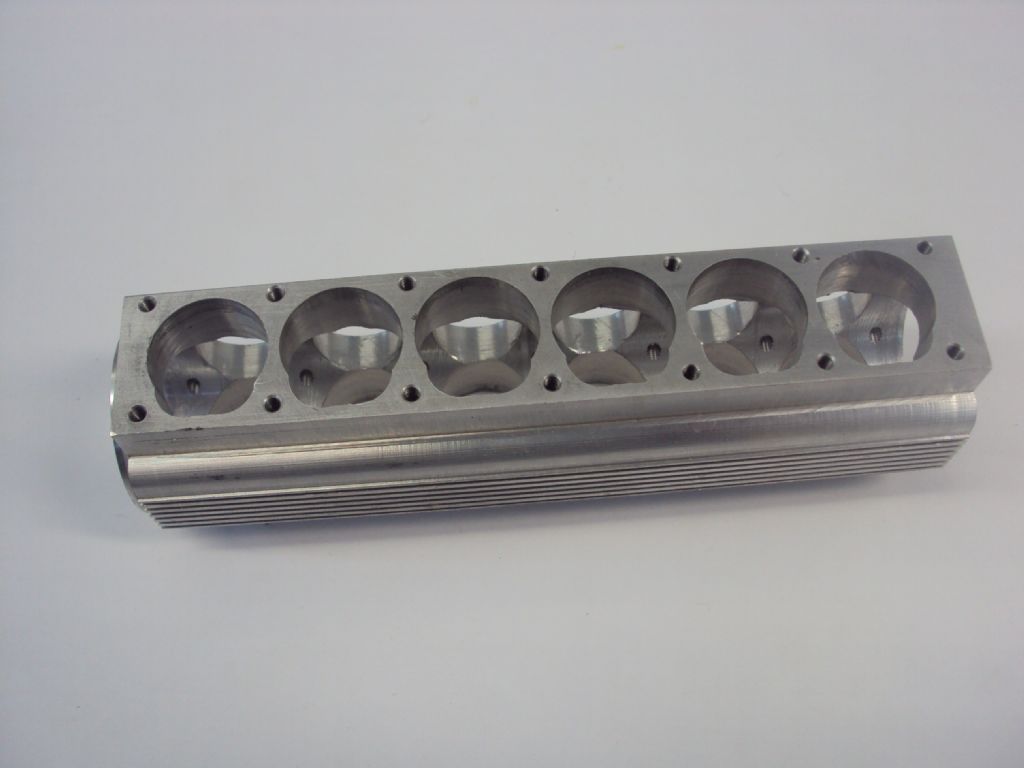
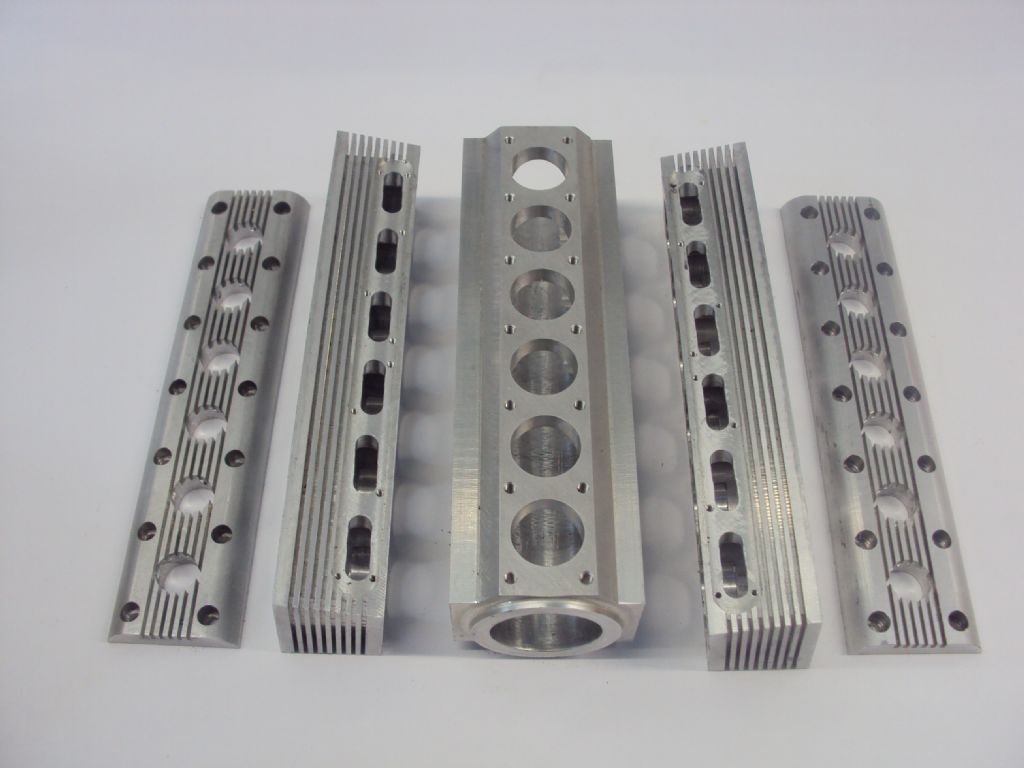
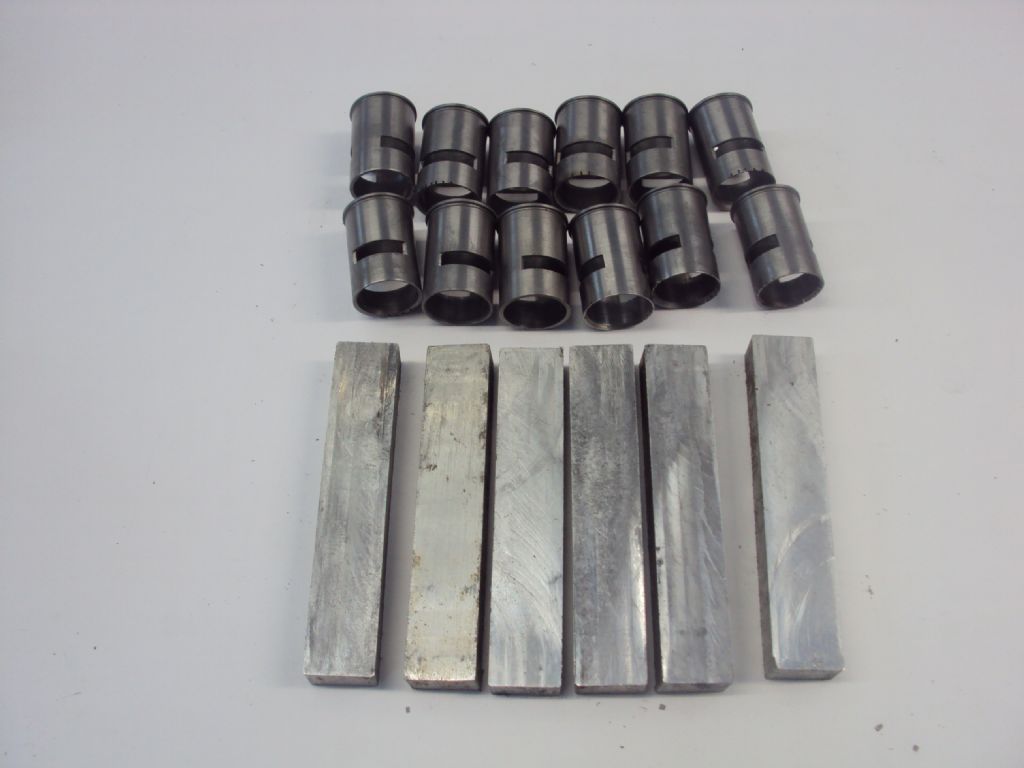
                                                This last shot shows the development of the conrod profiles to get them to rotate through the full cycle without fouling on the piston anywhere. The piston on the left was the first try and the one on the right is the final design ready for machining the cast iron pistons, which is the next step in this long drawn out saga of a build. Apoligies for taking so long but I have been sidetracked countless times with work and home demands. Also there is another slight confession I have to make……….The cylinder block at the start of this thread is actually the second attempt at said part…… the first one was almost left as scrap after i accidentally machined one cylinder bank off while milling in the valley section of the block, luckily I hadn't started on the sump side so I just put it aside and made a new one. However being the tiger for punishment and possibly slightly rattly in the head I had another look at it a while ago and prompted by the comments from some about fuel consumption I thought I'd salvage it into a flat 12 engine block and build it the same as the v12 but naturally aspirated. The flat 12 will be identical to the v12 in everything except the fact that its a flat instead of a vee design and it's not supercharged, The cylinders are setup in the same matched pairs but will be running on separate big end journals so that each pair will reach tdc simultaniously, the crankcase being sealed into individual compartments by the center main bearings. Below are some photos of the progress to date……….. Once both engines are finished and running I'll be able to do a few tests on fuel consumption and power output..

                                                flat 12 block.jpg

                                                flat 12 block 2.jpg

                                                flat 12 cylinder blocks and heads.jpg

                                                flat 12 liners and conrod blanks.jpg

                                                And yup thats another set of 12 liners to hone, lap and polish…………… someone shoot me will ya.

                                                Well thats it for now I'll try and be a bit more onto it in future

                                                Cheers for now

                                                Dean

                                                #204829
                                                Nick_G
                                                Participant
                                                  @nick_g

                                                  .

                                                  Totally fantastic. smiley (that is all to be said)

                                                  Nick

                                                  #204837
                                                  Michael Gilligan
                                                  Participant
                                                    @michaelgilligan61133

                                                    Great to see you posting again Dean

                                                    Amazing Work

                                                    MichaelG.

                                                    #204840
                                                    Ady1
                                                    Participant
                                                      @ady1

                                                      Well, I'm still alive and kicking just in case anyone was starting to wonder??

                                                      Was wondering last week. Didn't want to post a query though.

                                                      I think I have managed to get it sort of right at last.(joys of scratch building without any drawings lol)

                                                      I know. V12s can be a bit of a bugger when you have no drawings

                                                      Glad to see you're still going Dean, inspirational stuff

                                                      I thought I'd salvage it into a flat 12 engine block and build it the same as the v12 but naturally aspirated. The flat 12 will be identical to the v12 in everything except the fact that its a flat instead of a vee design

                                                      So you're doing a flat 12 AND a V12 now. I'm lost for words


                                                      Edited By Ady1 on 18/09/2015 15:44:20

                                                    Viewing 25 posts - 101 through 125 (of 273 total)
                                                    • Please log in to reply to this topic. Registering is free and easy using the links on the menu at the top of this page.

                                                    Advert

                                                    Latest Replies

                                                    Home Forums I/C Engines Topics

                                                    Viewing 25 topics - 1 through 25 (of 25 total)
                                                    Viewing 25 topics - 1 through 25 (of 25 total)

                                                    View full reply list.

                                                    Advert

                                                    Newsletter Sign-up