Stuart ‘Victoria’ : a beginners tale..

Advert

Stuart ‘Victoria’ : a beginners tale..

Home Forums Work In Progress and completed items Stuart ‘Victoria’ : a beginners tale..

Viewing 25 posts - 176 through 200 (of 432 total)
  • Author
    Posts
  • #135985
    JasonB
    Moderator
      @jasonb

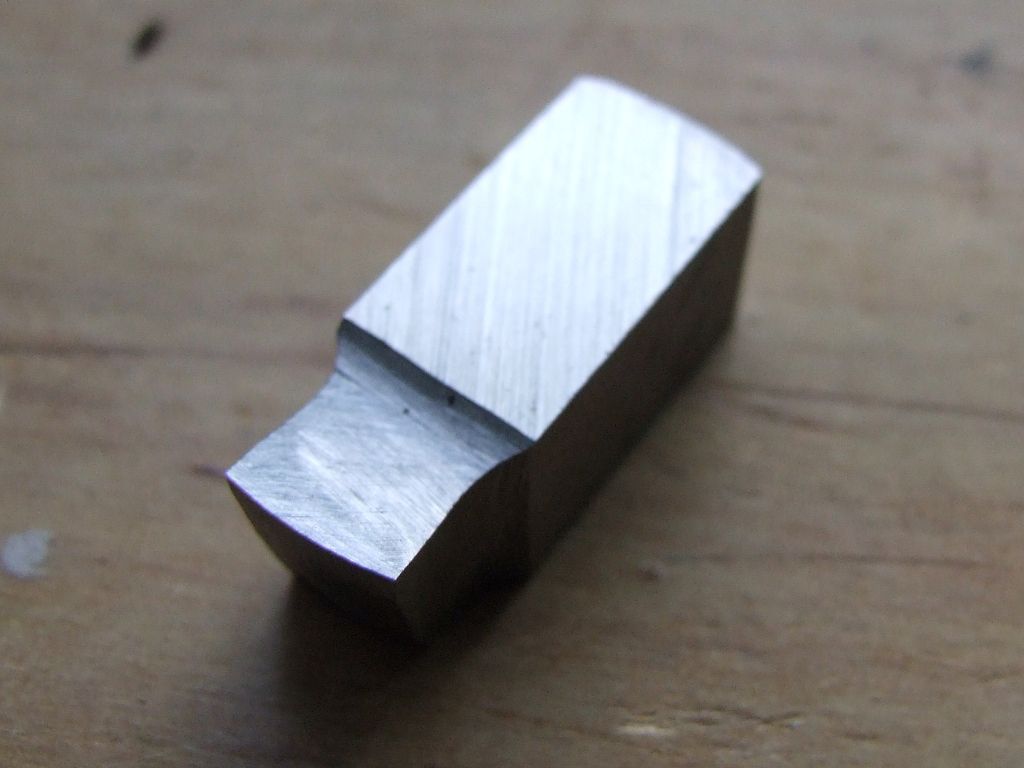
      Your best bet would have been to grind up a "knife tool" from HSS which would have allowed you to get close enough with the tailstock ctr in place when turning the long end. Something like this that I pinched from one of Ramons engine build threads

      To face off the ends of parts like this where there is a larger dia that stops the chuck gripping near the end I drill a suitable hole through a bit of aluminium, in this case 1/4" OD by about the same length would do. You can then slit this with a junior hacksaw making a split bush. When held in the 3-jaw the jaw pressure will close it around your 1/8" dia part.


      J

      Edited By JasonB on 19/11/2013 17:14:34

      Advert
      #135989
      Steve Withnell
      Participant
        @stevewithnell34426

        Allan. Can I make a request? Please post some photo's of the build with the machine covered in chips laugh

        Jason's just put me at ease…

        Steve

        #135990
        Steve Withnell
        Participant
          @stevewithnell34426

          Seriously though, I would have used a 4 jaw chuck or a collet chuck to grip the body and turn both ends. I would also have used a piece of HSS ground for the job as Jason recommends. For very light cuts, carbide tips need grinding to reduce the edge radius anyway – or a least that's what I do.

          Steve

          #135998
          GarryC
          Participant
            @garryc

            Thanks both, sounds like I need to get in a few more Lathe tools..

            Cheers.

            Allan.

            #136029
            GarryC
            Participant
              @garryc

              Can I ask a quick question please – going to make this little stud next but could anyone please tell me what the O/Size reference means – it seems to be the only such reference on the whole drawing?

              168. the stud drawing.jpg

              Thanks very much.

              Cheers.

              Allan.

              #136040
              JasonB
              Moderator
                @jasonb

                Not knowing where the part goes makes it a bit difficult but I would assume it goes through a part or parts that total 3/8" thick.

                If you made it exactly 3/8" then as the nuts are tightened it would lock the assembly solid, if you make it a few thou "Oversize" the pin will be free to allow the parts to move around its axis but not have excessive sideways movement.

                J

                #136043
                GarryC
                Participant
                  @garryc

                  Ah, thanks again Jason.

                  Cheers

                  Allan.

                  #136308
                  GarryC
                  Participant
                    @garryc

                    Day 37.

                    Stud.

                    Just another very small update – all the smaller studs are ready supplied with just this one to make. No problems with this although it would have been good to have had a smaller parting tool to have cleaned the unthreaded 'shoulder' to allow the nuts to travel fully. The thread lengths will likely need to be shortened slightly when it comes to assembly. The central unthreaded section is 11 thou oversize, don't know if that was a bit too much, have to see when it comes to assembly..

                    My shopping list is growing but hopefully will start the next project slightly better equipped – long way from that yet though..

                    The Stud Drawing.

                    168. the stud drawing.jpg

                    Turning the Stud.

                    169. turning the stud.jpg

                    Threading the Stud 5BA. Pulled the chuck around by hand to thread.

                    170 threading the stud 5ba.jpg

                    The finished Stud 1.

                    171. the finished stud 1.jpg

                    The finished Stud 2.

                    172. the finished stud 2.jpg

                    Regards.

                    Allan.

                    #136790
                    GarryC
                    Participant
                      @garryc

                      Day 38.

                      The Eccentric Strap.

                      The main problem here was not having a suitable tool to do the recess on the internal diameter. I did look on the internet and expected to find something like a parting tool set at 90 degrees but couldn't see anything. Could someone please tell me what I should have used and possibly where to get one (10mm shank) – I used the boring tool which was definitely not the thing to have done…. thanks.

                      The Eccentric Strap, Rod and Clevis Drawing.

                      173. the eccentric strap, rod & clevis drawing.jpg

                      The Eccentric Strap Gunmetal casting as supplied.

                      174. the eccentric strap gunmetal casting.jpg

                      Facing the Eccentric Strap.

                      175. facing the eccentric strap in the 4 jaw chuck.jpg

                      Drilling the bolt holes in the Eccentric Strap, starting with the Centre Drill.

                      176. drilling the bolt holes in the eccentric strap.jpg

                      The Eccentric Strap cut into two. My saw cut was not too good and so had to mill the joins back flat – resulting in loosing some excess material… I have a small slitting saw which I think I will try for doing this next time around.

                      177. the eccentric strap cut into two.jpg

                      Tapping the Eccentric Strap bolt holes.

                      178. tapping the eccentric strap bolt holes.jpg

                      Had to extend the 7BA bolts thread because of the lost material in the casting in having to mill flat the poor saw cut..

                      (the left one as supplied).

                      179. the 7ba bolts with thread extended.jpg

                      The two half's of the Eccentric Strap bolted back together.

                      180. the two halfs of the eccentric strap bolted back together.jpg

                      Initial drilling of the Eccentric Strap bore, started at 3mm and used a drill bit up to 10mm.

                      181. drilling the eccentric strap bore.jpg

                      then over to boring to the final diameter..

                      182. boring the eccentric strap.jpg

                      Checking the Eccentric Strap bore size 1.

                      183. checking the eccentric strap bore size.jpg

                      Doing the internal diameter recess on the Eccentric Strap. Used the boring tool which was a big mistake..

                      184. doing the eccentric strap internal diameter recess.jpg

                      Milling down the fixing arm for Eccentric Rod.

                      185. milling the eccentric strap 1.jpg

                      Tidying up the Eccentric Strap on the mill.

                      186.milling the eccentric strap 2.jpg

                      Drilling the Eccentric Strap Rod fixing holes.

                      187. drilling the eccentric strap rod fixing holes.jpg

                      The finished Eccentric Strap.

                      188. the finished eccentric strap.jpg

                      Regards

                      Allan.

                      #136792
                      NJH
                      Participant
                        @njh

                        Hi Allan

                        For cutting that groove in the eccentric strap I made a little boring tool.

                        The left hand one is a boring tool(!) and the right hand one is like a tiny parting tool and this was used ( in the left hand holder) to make the slot.

                        Tool bits were made from 5mm dia silver steel hardened and tempered. The holders are just mild steel with the tool bit held in place by a grub screw. Not pretty maybe but quick, simple and effective. ( The sit in a drawer with lots of other "special" tools awaiting the next occasion!)

                        Good progress on your Victoria.

                        Regards

                        Norman

                        tiny boring tools.jpg

                        Edited By NJH on 01/12/2013 11:55:00

                        #136793
                        Sub Mandrel
                        Participant
                          @submandrel

                          Hi Allan,

                          For the internal recess you need a tool that you can hold with its shank along the axis of the lathe and a cutter that protrudes back towards the operator. A bit like an internal boring or threading tool.

                          I would use a boring bar I have that takes 1/8" square HSS toolbits at either 45 or 90 degrees. One at 90 degrees with the end ground down to match the width of the groove would do it.

                          Another way would be to turn a disk of suitable diameter on the end of a piece of silver steel with a suitably narrow neck. grind or file away a quarter of the disk that harden and temper to 'straw colour'. I have a small version of such tool that can be poked into really small holes to cut grooves. If you have a suitable grinder you can make a tool from HSS rod, but not a practical proposition with an offhand grinder.

                          Neil

                          #136797
                          Ian S C
                          Participant
                            @iansc

                            I made a suitable tool(used it when I made an eccentric strap for the Stuart S9), it is a bit of 1/2" dia. steel from the junk box, with a chip off an industrial hack saw blade brazed at right angles, it's rough, but it works.

                            Ian S C

                            #136820
                            Steve Withnell
                            Participant
                              @stevewithnell34426

                              Still NO chips or swarf to be seen. Clearly new to this model engineering game smiley

                              Really good to see the engine coming to life picture by picture.

                              This is the tool I made to cut the groove. It's an old letter stamp, warmed up and bent through 90, then ground to shape.

                              https://www.dropbox.com/s/aihoogln882mgy0/P1030393.JPG

                              Before you turn the eccentrics really think through how you are going to sequence the turning jobs so that that the groove is in good alignment to the male part of the eccentric – I'm scratching my head but can't quite remember, one of the other guys will be able to call it out.

                              Steve

                              #136917
                              GarryC
                              Participant
                                @garryc

                                Thanks everyone, thats really useful. I don't have a grinder at the moment but I'm beginning to see that I should maybe get one, I can remember grinding is a very skilled task but It would be good to at least have a go at some of the 'simpler' looking jobs – although I don't have room on the bench for a fixed one so have to see if I can find a portable bench type. I guess one with an integral work piece / tool steel holder would be too much to hope for?

                                Cheers

                                Allan.

                                #136920
                                NJH
                                Participant
                                  @njh

                                  Allan

                                  You will, without doubt, need bench grinder pretty soon! Yes precision grinding is very skilled but we are not talking about that here! A simple double ended bench grinder is all that is required. You do need to keep this away from your lathe etc though as grinding dust is bad news for machinery. My solution is to do my grinding in the garage ( OK – general store/ junk area – a car has never been in there). Mount the grinder on a piece of board and , on the underside of the board, screw a length of 2"x2" timber. Use this to hold the board and grinder in your workmate. ( OK it doesn't need to be a workmate – I bought one like THIS in one of their sales for very little money.) HSS tool blanks are cheap and easily ground for those special fiddly little bits of turning.

                                  Have a look at Harold Halls site for various accessories you can make to help with grinding

                                  Regards

                                  Norman

                                  #136922
                                  GarryC
                                  Participant
                                    @garryc

                                    Hi Norman

                                    Thanks very much for that, it sounds a perfect solution for me – and I do already have a workmate!

                                    That's exactly what I'll do then!

                                    Cheers.

                                    Allan.

                                    #136924
                                    Anonymous

                                      Allan: Contrary to popular opinion there is nothing difficult about freehand grinding HSS toolbits. Here's one I made earlier:

                                      internal_spline_tool.jpg

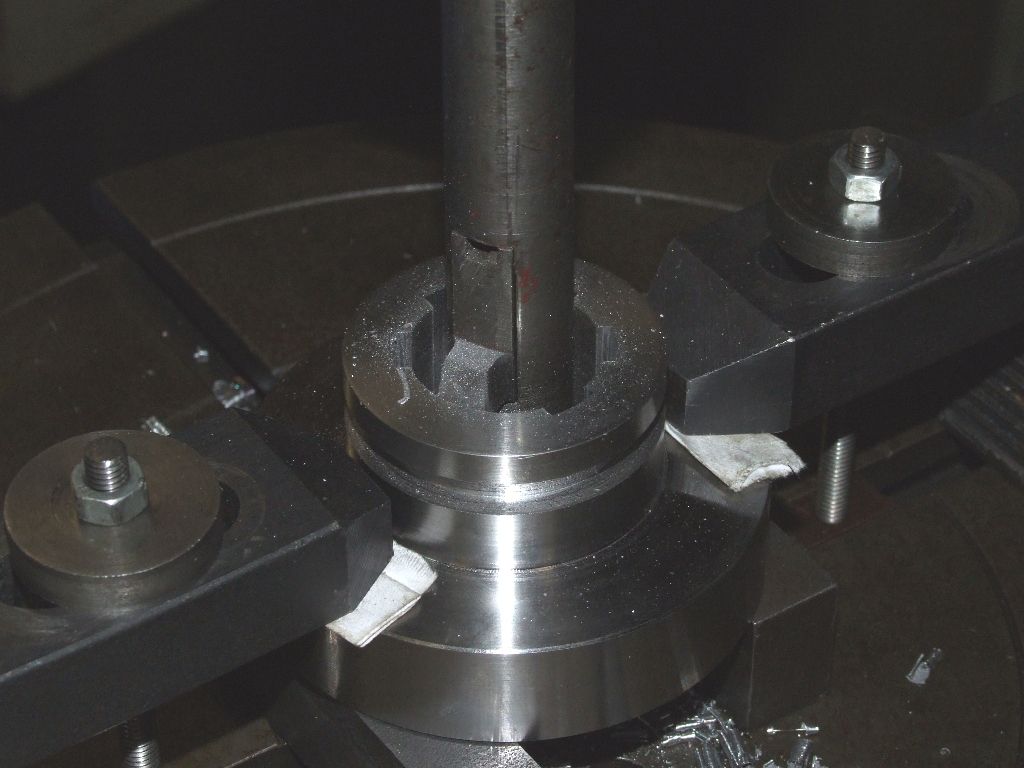
                                      I will admit that the curve on the front was done on a cylindrical grinder, but everything else, rake, side and front clearances and side relief, were done by hand on a small bench grinder that my father bought 45+ years ago. And here is the tool in action, the material is EN8:

                                      cutting_internal_spline.jpg

                                      I'll say it again; it's an urban myth that it is difficult to grind basic HSS tool bits on a bench grinder, so go for it. laugh

                                      Regards,

                                      Andrew

                                      #136929
                                      NJH
                                      Participant
                                        @njh

                                        One other thing Allan – when you buy your grinder buy some safety specs too, keep them with the grinder and ALWAYS wear them when you use it. A bit of hot steel in the eye is something to be avoided at all costs. ( Even if you are a spectacle wearer bits of steel embedded in those expensive glasses are a bad idea!)

                                        How do I know this? – well happily not from first hand experience! I can though remember my Dad coming back from the hospital where he had just such a piece removed from his eye. ( He had a joinery business and often spent time grinding up complicated cutters for the spindle moulder)

                                        Regards

                                        Norman

                                        #137116
                                        GarryC
                                        Participant
                                          @garryc

                                          Hi Norman

                                          Yes thanks, I have some and always use them when using the Lathe, Mill and Drill – think I would likely use a full face mask though when using a grinder…

                                          and cheers Andrew, can but give it a try! My Lathe tools are all very small so not sure if that will make things more awkward..

                                          Regards

                                          Allan.

                                          #137117
                                          Steve Withnell
                                          Participant
                                            @stevewithnell34426

                                            Grinding HSS tools on a bench grinder is not difficult, bit of patience bit of practice. In fact it can be quite relaxing smiley

                                            Apart from grinding HSS blanks, I've made few boring tools from silver steel rod bent to requisite shape, ground to the right profile (ish), hardened and titivated and they can be as good as anything at a fraction of the cost of a tip tool. Actually, I do enjoy making these tools, even though they might turn out a bit ugly!

                                            Steve

                                            #137185
                                            GarryC
                                            Participant
                                              @garryc

                                              Day 39.

                                              The Last of the 4 Glands.

                                              After not doing a very good job with the first three glands I was hoping to do better with this one after now having a bit more practice, and a with slightly different approach…

                                              First time around I did the central hole on the Lathe and the fixing holes on the drill not marking out the fixing holes until after parting off in the Lathe ( mistake I think and didn't manage to get the holes lined up as a result..) – this time around as Jason suggested I marked out the three holes first, and then did all three on the lathe, a much better way I think..

                                              ( As I haven't filed the Gland boss profiles on the Cylinder Covers / Valve Chest I flattened off the Elliptical shape on this one slightly as for me it looks better ).

                                              The Gland drawing.

                                              189. the gland drawing.jpg

                                              After facing off the bar in the Lathe the holes marked out first.

                                              190. the gland holes marked out first.jpg

                                              Drilling all three Gland holes on the Lathe. The fixing holes done first and then the central hole, outside diameter and another light facing cut done on the same and final 'chuck setting' before parting off…

                                              191. drilling the gland holes on the lathe.jpg

                                              The Cylinder Cover without the Gland.

                                              192. the cylinder cover without the gland.jpg

                                              Test fitting the Gland to the Cylinder Cover.

                                              193. test fitting the gland to the cylinder cover.jpg

                                              The Gland after parting off in the Lathe.

                                              194. the gland after parting off.jpg

                                              Setting the depth stop on the drill before spotting through the 7BA holes from the Gland to the Cylinder Cover.

                                              195. spotting through the 7ba holes from the gland to cylinder cover.jpg

                                              Tapping the Gland fixing holes in the Cylinder Cover.

                                              196. tapping the gland holes in the cylinder cover.jpg

                                              Test fitting the Gland with the bolts to the Cylinder Cover.

                                              197. test fitting the gland with bolts.jpg

                                              The Gland fitted to the engine.

                                              198. the gland test fitted to the engine.jpg

                                              Regards

                                              Allan.

                                              #137728
                                              GarryC
                                              Participant
                                                @garryc

                                                Day 40.

                                                The Eccentric Sheave.

                                                I found this quite difficult – not having a suitable 'grooving' tool when I did the Eccentric Strap resulted in the internal recess being slightly off centre and made doing the Sheave more awkward. The overall finished size came out at 10 thou over, so hoping I can at least skim a little if it helps with alignment when it comes to assembly..

                                                The Eccentric Sheave Drawing.

                                                199. the eccentric sheave drawing.jpg

                                                The bar supplied for the Eccentric Sheave.

                                                200. the bar supplied for the eccentric sheave.jpg

                                                The Eccentric Sheave faced and turned to the overall maximum diameter.

                                                201. the eccentric sheave faced off and turned to overall diameter.jpg

                                                Turning the Eccentric Sheave raised 'lip'.

                                                202. turning the eccentric sheave raised lip.jpg

                                                Test fitting the strap to check for the recess alignment.

                                                203. test fitting the eccentric strap to the eccentric sheave.jpg

                                                Finding the Eccentric Sheave bar centre to mark out for the off centre bore.

                                                204. finding the eccentric sheave bar centre.jpg

                                                Starting the Eccentric Sheave bore 9/64" off centre with a Centre Drill.

                                                205. starting the eccentric sheave bore with a centre drill.jpg

                                                Reaming the Eccentric Sheave bore.

                                                206. reaming the eccentric sheave bore.jpg

                                                The Eccentric Sheave so far.

                                                207. the eccentric sheave so far.jpg

                                                Turning the other side of the Eccentric Sheave with a parting tool.

                                                208. turning the other side of the eccentric sheave.jpg

                                                Finding the centre to drill for the Eccentric Sheave grubscrew.

                                                209. finding the centre to drill for the eccentric sheave grubscrew.jpg

                                                Tapping the grubscrew hole in the Eccentric Sheave.

                                                210. tapping the grubscrew hole in the eccentric sheave.jpg

                                                The finished Eccentric Sheave.

                                                211. the finished eccentric sheave.jpg

                                                The Eccentric Sheave in the strap 1.

                                                212. the eccentric sheave in the strap 1.jpg

                                                The Eccentric Sheave in the strap 2.

                                                213. the eccentric sheave in the strap 2.jpg

                                                Regards

                                                Allan.

                                                #137735
                                                MM57
                                                Participant
                                                  @mm57

                                                  Another really good installment Allan – great photos in a great sequence.

                                                  Have been (silently) watching this thread since the start – as a raw beginner (really raw) myself, it's been a great education of tools and techniques

                                                  Many thanks, and look forward to more

                                                  #137774
                                                  GarryC
                                                  Participant
                                                    @garryc

                                                    Thanks very much Martin, its good to hear someone else has also been following – sounds like we may be on the same learning curve..

                                                    Cheers.

                                                    Allan.

                                                    #137785
                                                    Alan .204
                                                    Participant
                                                      @alan-204
                                                      Posted by Martin Millener on 13/12/2013 12:06:29:

                                                      Another really good installment Allan – great photos in a great sequence.

                                                      Have been (silently) watching this thread since the start – as a raw beginner (really raw) myself, it's been a great education of tools and techniques

                                                      Many thanks, and look forward to more

                                                      Totally agree with Martin a great read been following from the start, keep up the good work.

                                                      Al.

                                                    Viewing 25 posts - 176 through 200 (of 432 total)
                                                    • Please log in to reply to this topic. Registering is free and easy using the links on the menu at the top of this page.

                                                    Advert

                                                    Latest Replies

                                                    Viewing 25 topics - 1 through 25 (of 25 total)
                                                    Viewing 25 topics - 1 through 25 (of 25 total)

                                                    View full reply list.

                                                    Advert

                                                    Newsletter Sign-up