Stuart ‘Victoria’ : a beginners tale..

Advert

Stuart ‘Victoria’ : a beginners tale..

Home Forums Work In Progress and completed items Stuart ‘Victoria’ : a beginners tale..

Viewing 25 posts - 51 through 75 (of 432 total)
  • Author
    Posts
  • #126998
    GarryC
    Participant
      @garryc

      Day 9.

      Replacement Crank arrived – its good to be able to get back on track..

      2nd attempt at the crankweb. I stupidly turned into the 'rib', silly mistake but not crucial and once painted I can live with it (the photo makes it look worse than it is).. Just need to clean up the scratch marks from the parralles another lesson learned..

      This time done on the Lathe and the bores should be parrallel.


      Regards

      Allan.

      Edited By JasonB on 31/12/2014 15:11:10

      Advert
      #127062
      GarryC
      Participant
        @garryc

        Day 10.

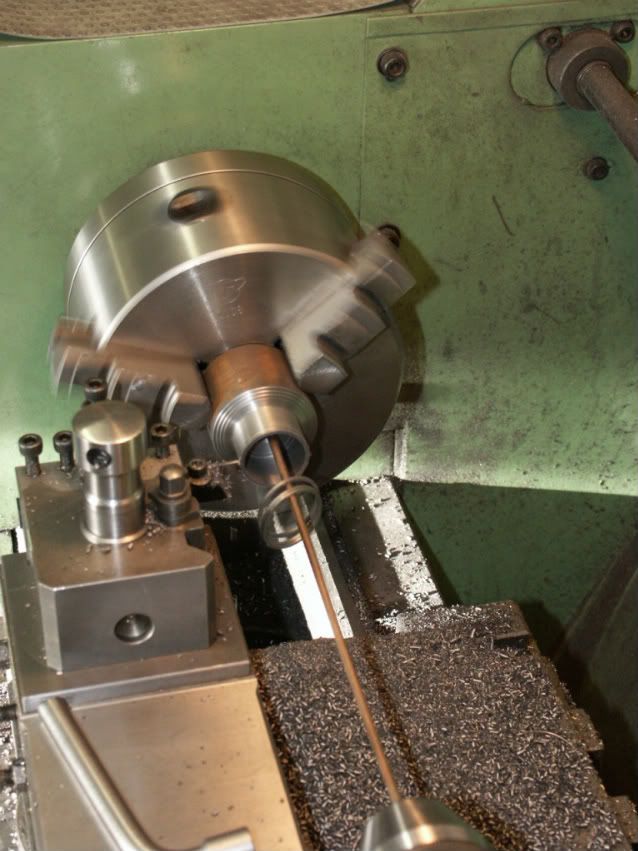
        So far so good with the Crankpin. Just need to face the threaded section to length and Part Off..

        Turning down the Crankpin.


        Threading the Crankpin.


        The Crankpin Thread. Had to remove an annoying small burr 'blob' at the end of the thread which prevented the Crank from fitting again after I had threaded, used a needle file and magnifying glass…You can see it in the photo..


        Testing the 2BA Thread. Nut fits very well..


        Regards

        Allan.


        Edited By JasonB on 31/12/2014 15:14:20

        #127072
        Steve Withnell
        Participant
          @stevewithnell34426
          Posted by Allan. on 15/08/2013 16:43:59:

          Day 9.

          Replacement Crank arrived – its good to be able to get back on track..

          2nd attempt at the crankweb. I stupidly turned into the 'rib', silly mistake but not crucial and once painted I can live with it (the photo makes it look worse than it is)

          Hmmm, I deliberately machined the rin away on my Victoria, didn't realise I shouldn't have until I read your post blush

          Anyway, this is my attempt

          **LINK**

          Took me almost two years to get this done. Looks like you have made more progress in 9 days than I did in 9 months!

          #127095
          GarryC
          Participant
            @garryc

            Hi Steve

            Yes I did too on my first attempt (although I simply filed it away), but after Ian mentioned it I took a closer look at the Photo of Victoria in the current Stuart Catalog (76th edition) and the rib is visable in the photo. Don't know why it's not shown on the drawings though.

            Your model looks terrific and runs superbly, far above what I can expect myself at the moment – but I hope to improve on future projects…

            Regards

            Allan

            #127102
            GaryM
            Participant
              @garym
              Posted by Steve Withnell on 16/08/2013 20:07:20:

              Anyway, this is my attempt

              **LINK**

              Took me almost two years to get this done. Looks like you have made more progress in 9 days than I did in 9 months!

              Very nice, Steve. I'm hoping to have a go at something similar in a few years. Note to self: must get more done on my S50 and spend less time on here.

              Gary

              #127119
              Ian S C
              Participant
                @iansc

                You could salvage the crank web rib with JB Weld or similar, and no one would know the difference. Don't throw it away, you might need it for another engine, perhaps one you design your self. Ian S C

                #127136
                GarryC
                Participant
                  @garryc

                  Day 11.

                  Getting on with the Crankshaft. Need to drill and fit the crosspin next..


                  Parting off the Crankpin. First time I have used the Glanze Tool. Much easier and a far better job than the 'ordinary' parting blades that I struggled with before, not even a hint of binding or having to wind out..


                  The Crosspin cut to approx length.


                  The finished Crankpin.


                  The Crankshaft. No Crosspin yet..


                  Regards

                  Allan.

                  Edited By JasonB on 01/01/2015 08:13:33

                  #127145
                  NJH
                  Participant
                    @njh

                    Good progress Allan

                    I'm not too happy though with your piece of cloth draped across the bed – presumably to catch the parted-off bit . Cloth can all too easily get caught in rotating machinery with possibly dire consequences. (I know, I know there are those who sneer at the health and safety approach but they've probably still got all their fingers! )

                    A quick project is to make a little tray to fix to the cross slide which will catch the chips and small parted bits – and help when cleaning up!  Here is one ( click on the image to see the drawing) available from Hemmingway for Myford lathes but something similar could quickly be made for yours.

                    Norman

                    Edited By NJH on 17/08/2013 19:07:58

                    #127155
                    GarryC
                    Participant
                      @garryc

                      Hi Norman

                      Thanks for the comments, I agree the cloth is far from ideal / dangerous – I do only place when parting off, the tray is a neat idea – I assume there must be a 'correct' procedure for protecting the bed when parting off, especially larger heavier items?

                      Regards

                      Allan

                      #127159
                      NJH
                      Participant
                        @njh

                        Hi Allan

                        |" a 'correct' procedure for protecting the bed when parting off "

                        Hmmm – well I tend to make small things so my major fear is losing the parted off bit in the swarf – hence I need to find some way of catching it. ( A small tray usually) A large heavy bit dropping could be a problem. – letting it fall onto the bedways is not ideal ! – what do other folk do?

                        I suppose a strategically placed bit of wood might serve. I certainly have a piece ( made up like an inverted U) which fits over the bedways and I use this when changing a chuck – just in case I drop it.!

                        N

                        #127162
                        JasonB
                        Moderator
                          @jasonb

                          Use the same piece of MDF that I put over the bed when changing the chuck if there is a risk of a big bit of metal dropping. I suppose it would be easy enough to add a small timber bead around the edge to catch the odd small part but you may want a bit of foam in the bottom to stop the part bouncing.

                          If you are parting small parts that have a hole in them then a bit of wire or scriber in the hole will catch them, for multiple parts a thin rod or wire in the tailstock works well

                          #127166
                          Anonymous
                            Posted by Allan. on 17/08/2013 21:54:19:

                            I assume there must be a 'correct' procedure for protecting the bed when parting off, especially larger heavier items?

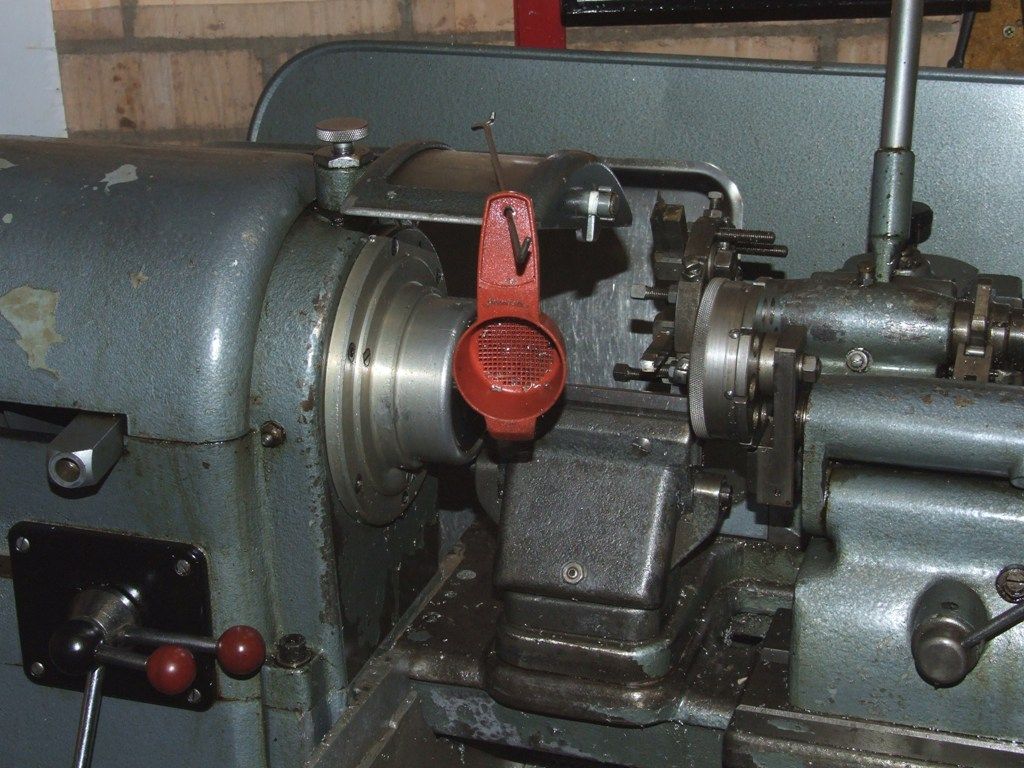
                            The cloth is a definite no-no. The only time I use a board on the bed is when clamping a casting to the large faceplate before fitting same to the spindle. It's much easier to adjust the casting when everything is flat. Final adjustment and tightening of clamps is done once the faceplate is mounted. One of my lathes came with this special accessory, in a fetching red, for catching items during parting off:

                            tea_strainer.jpg

                            Regards,

                            Andrew

                            #127167
                            NJH
                            Participant
                              @njh

                              Hi Andrew (1207!)

                              Useful at tea break too I guess? You got a bargain there!

                              Norman

                              Edited By NJH on 18/08/2013 09:37:24

                              #127169
                              NJH
                              Participant
                                @njh

                                Jason

                                Wire in tailstock drill chuck – brilliant idea! Thanks.

                                Norman

                                #127181
                                GarryC
                                Participant
                                  @garryc

                                  Day 12.

                                  Just drilled and fitted the Crosspin today.

                                  Used a 2.4mm drill for the 3/32 supplied Crosspin (although 2.3mm may have been a tighter pressfit) -applied some adhesive to the pin (Bondloc B601).

                                  Thanks for the parting off suggestions, I will stop using the cloth!


                                  Setting the depth stop and lining up to fit the Crosspin.


                                  The Crosspin fitted.

                                  Regards

                                  Allan.


                                  Edited By JasonB on 01/01/2015 08:15:33

                                  #127185
                                  Sub Mandrel
                                  Participant
                                    @submandrel

                                    I use similar approaches to Jason – drill bit or similar to catch small hollow parts, a nice bed of impact-absorbing swarf to stop other parts rolling away

                                    Neil

                                    #127236
                                    Anonymous
                                      Posted by NJH on 18/08/2013 09:32:37:

                                      Hi Andrew (1207!)

                                      Useful at tea break too I guess? You got a bargain there!

                                      Norman

                                      Hi Norman,

                                      Quite, but it does give the tea a slightly odd taste and aroma! The seller went to great pains to draw attention to the tea strainer and it's use. It's a bit of a pain to use in practise as there's normally a coolant shield in the way. On the other hand it's also a PITA ferreting around amongst all the swarf trying to find the parts.

                                      Andrew (1209)

                                      #127271
                                      GarryC
                                      Participant
                                        @garryc

                                        The Cylinder and associated bits next..

                                        But first can I ask a question please – The first thing I was going to do is face the port face. The only measurement on the drawings that seems relevant to the amount to face off is a measurement of 7/8 inch to the port face from the centre of the cylinder bore. It seems that with the cylinder port face outwards in the chuck I need to be able to measure from the bore centre to the chuck face and add the 7/8 inch to know how much to face off. Could anyone please suggest the best way to measure this? The only way I can think off is to measure the bore as cast then measure the thickness of the cylinder wall etc but I can see the potential to get this wrong – is this the only method or is there a better way?

                                        Hope that makes sense..

                                        Thanks very much.

                                        Regards

                                        Allan

                                        #127274
                                        JasonB
                                        Moderator
                                          @jasonb

                                          The usual way with a part that has a cored out middle is to plug the end or ends first. A bit of hardwood roughly shaped and hammered in will do and then file or sand it flush.

                                          You can then use odd leg callipers or whatever you have that is close to mark where the centre of the bore should come by striking several arcs from around the edge of the flange.

                                          Lay the cylinder on a flat surface, valve face upwards if you don't have a marking out table then a thick bit of glass, granite chopping board or porcelain tile will do. Measure how high the previously marked centre if off your table and then add 7/8" to that. use a height guage or scribing block to then mark this measurement around the edge of the valve face, that will give you a line to machine to.

                                          If thats not clear ask again.

                                          #127279
                                          Anonymous

                                            I'd machine the bore first. With the casting in a 4-jaw chuck one end and the bore can be machined, ensuring squareness. The use a tapered, or expanding, mandrel in the bore to machine the other end to length. Then you've got a reference to machine the valve face.

                                            Technically measuring from the side of the bore to a flat face with a pair of calipers will give an error due to the blade of the caliper having a finite width, but it'll be smaller than you need to worry about. Of course the above depends on the bore being on size, if not, you'll need to take that into account too.

                                            If you're really worried about accuracy you can always use a pipe micrometer to measure instead of calipers. Or you can buy hemispherical add-ons for ordinary micrometers for measuring from curved to flat surfaces.

                                            Regards,

                                            Andrew

                                            #127280
                                            JasonB
                                            Moderator
                                              @jasonb
                                              Posted by Andrew Johnston on 19/08/2013 16:39:45:

                                              Or you can buy hemispherical add-ons for ordinary micrometers for measuring from curved to flat surfaces.

                                              A ball bearing and blob of grease does the same job.

                                              The other similar cylinders in the Stuart books are done in the 4-jaw with the valve face being the first surface machined

                                              #127281
                                              GarryC
                                              Participant
                                                @garryc

                                                Found all that very interesting, thanks very much Jason and Andrew.

                                                I think I will go with doing the ends and bore first…

                                                Regards

                                                Allan.

                                                #127567
                                                GarryC
                                                Participant
                                                  @garryc

                                                  Day 13.

                                                  Things not going very well lately..

                                                  Yesterday I ordered a (cheap) set of boring bars to include the longest one at 4 1/2 inches, but it turns out when it arrived to be 3/12 inches – there won't be much to hold on to in the tool holder when doing the cylinder. Think I may have to reorder..

                                                  After more thought I plan to use the faceplate to face the ends and bore the cylinder as per the book 'Building The Victoria' (not used one before). The one suppled with the Lathe has a note to say that the chuck guard has to be removed to use it (bit surprised with that, especially these days..), also the guard mounting bolt catches on the back of the plate, preventing its use. I managed to modify so that it now fits and runs ok (still no guard though.) but not without totally blunting the lathe tool – something I had not realised until spending some time today trying to face the cylinder ports with it, it has left some marks and resulted in my going slightly undersize on the main port face (thats my excuse anyway), so also not so good. The book says to remove 'just over 1/32 inch' from the port face as cast (hadn't noticed that when asking for help on here earlier)…..

                                                  Its surprising how easy it is to forget the obvious when trying to learn new things.. The main thing is though that I am learning!

                                                  Having a go with the faceplate next..

                                                  The port faces faced off. (photo is a bit distaughted)..

                                                  Regards

                                                  Allan.

                                                  Edited By JasonB on 01/01/2015 08:16:26

                                                  #127673
                                                  Ian S C
                                                  Participant
                                                    @iansc

                                                    You could make your own boring bar, for that cylinder say about 120 mm to 150 mm x 12 mm 8.8 steel bolt, take the head off. Find a bit of HSS, an old centre drill, tap, end mill. Drill through the bolt near the end for the tool piece, drill and tap in the end for a grub screw to hold the tool in the bar, your more or less finished with that. That tool will do a good few holes, it's a bit rough, but it's not the model on show. Ian S C

                                                    Edited By Ian S C on 23/08/2013 13:35:46

                                                    #127755
                                                    GarryC
                                                    Participant
                                                      @garryc

                                                      Day 14.

                                                      My woes continue..

                                                      Failed at the 1st attemp with the Cylinder. After the problems with the blunt tool spoiling the port faces I continued and started to face off the ends and bore the Cylinder on the faceplate. With hindsight I think for me at the moment it would have been better to have put into the 4 jaw – I was stating to feel a little easier with the dti and 4 jaw. I just could not center the bore correctly on the faceplate… But in addition to my own shortcomings there seemed to be something else not quite right as the facing off was not very good – I eventually relised that the top slide had massive free play, loose even as I could see it moving! A slight tighting with the spanner and all was well but not before me having been attacking the end faces with it….

                                                      To be honest though I t was always unlikely I would get the through the Cylinder at the 1st attempt – have ordered another one. Meantime as the faceplate is on I can have a go at the flywheel..

                                                      Thanks Ian for the boring bar info, I may have a go at that one day….

                                                      The Cylinder on the faceplate.


                                                      A real shocker all round..

                                                      Regards

                                                      Allan.

                                                      Edited By JasonB on 01/01/2015 08:17:58

                                                    Viewing 25 posts - 51 through 75 (of 432 total)
                                                    • Please log in to reply to this topic. Registering is free and easy using the links on the menu at the top of this page.

                                                    Advert

                                                    Latest Replies

                                                    Viewing 25 topics - 1 through 25 (of 25 total)
                                                    Viewing 25 topics - 1 through 25 (of 25 total)

                                                    View full reply list.

                                                    Advert

                                                    Newsletter Sign-up