Stuart Twin Victoria (Princess Royal) Mill Engine

Advert

Stuart Twin Victoria (Princess Royal) Mill Engine

Home Forums Work In Progress and completed items Stuart Twin Victoria (Princess Royal) Mill Engine

Viewing 25 posts - 1,026 through 1,050 (of 1,206 total)
  • Author
    Posts
  • #638261
    Dr_GMJN
    Participant
      @dr_gmjn
      Posted by JasonB on 18/03/2023 20:23:02:

      I tend to start with round stock, turn the shank, thread the end and then mill the head, that way you get a nice crisp head to whatever size you want and don't have to use the 4-jaw. Should be able to use just the bolts & nuts to complete machining.

      Don’t have to use the 4-jaw for what bit?

      Advert
      #638271
      JasonB
      Moderator
        @jasonb

        Holding small square stock while you turn the shank of the bolt

        #638351
        Dr_GMJN
        Participant
          @dr_gmjn

          Ah – I’d already forgotten about holding the square stick!

          This evening I got the straps set up in the mill and decked the bolt faces, milled the sides to clean-up and to size, and drilled/tapped the holes. Then split and milled the cut faces.

          I drew it so that a flat of the 7BA bolt head would be against a milled flat, and the nuts would turn without hitting a milled edge, nor overhang the side.

          Not much problem until I tried the bolts. To cut a long story short, the centre spacing is fine, but the centres are both offset to one side. No idea why, since everything was offset from the same zero datum in the middle of the two outer faces. The bolt/nut flats were also milled from the same datum, and their sides are all spot-on according to my depth gauge.

          The bolts and nuts look like if there were correctly centred, my dimensions would have been spot-on for retaining the bolts and turning the nuts…of course everything needs further machining to get to size, but it was a good trial of how things would fit

          So I need to either:

          1) Use a mill to make them oversized, but the correct centres

          2) Fill the holes somehow and re-drill

          3) Get a new casting and start again.

          Slight worry is that they will turn out the same again – I have no idea why they’re offset to one side. They were centred on a freshly milled pad, and there appeared to be no issues during drilling.

          There is excess material everywhere, apart from the overall width (the castings were very tight on the excess there for some reason) so plenty of room for adjustment…apart from where I now need it. Seems like overhanging fasteners are a recurring issue for me!

          #638352
          Dr_GMJN
          Participant
            @dr_gmjn

            By the way I think the offset error is about 0.007” – 0.010”.

            #638356
            JasonB
            Moderator
              @jasonb

              It would be worth putting it back in the vice and going through your edge finding and centring procedure again, then put a drill bit in the chuck the wrong way round and see if it goes straight into the holes. If not then you got something wrong first time. If it does then rotate the work 180 deg and centre up again and test, if drill shank is off to the same side it will easily show and you need to look deeper into why. possibly checking column squareness.

              #638370
              Dr_GMJN
              Participant
                @dr_gmjn

                These are the figures (blue is what they should be, Red what they are). The holes were actually measured from the non-joint line faces, so not as the sketch might imply:

                They are for the hole centres and the abutments, measured from the centreline derived from each milled side.

                It looks like the top is pretty much OK – very slight difference in abutment distance preventing the screw head from seating.

                The right side hole goes through pretty much straight, and is OK.

                However the left side seems to wander over towards the edge, and this is where my problem is, because the nut point overhangs.

                The holes were drilled immediately after facing the sides, and in the same setup, facing the bolt head seatings on the spigot end, all in the same setup.

                So I think the initial measurement was OK, and maybe the drill wandered – more on the left side?

                #638393
                Dr_GMJN
                Participant
                  @dr_gmjn

                  For the next one, I might try centering all four flats with the stub drill (as per previously), and drilling half way with a 2mm drill, then turn it over and centre the other end and drill.

                  Then drill with the 2.4mm drill all the way through. At least if the drill starts to wander, it might correct itself,,and the hole ends would be where they should be.

                  If it works I'd just buy another casting for the sake of £5. There wasn't much work in cleaning it up and facing it, so not much lost really.

                  #638394
                  JasonB
                  Moderator
                    @jasonb

                    Don't be in such a rush to get a new casting. As you are going for fitted bolts you can make then to fit what is needed to get over the problem.

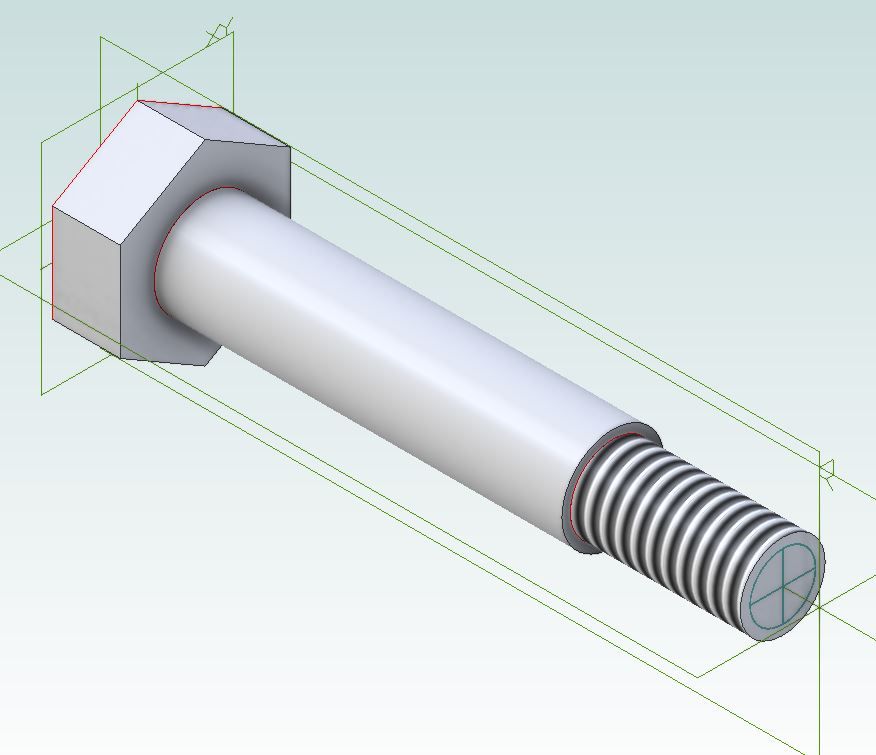
                    If you set up each half and plunge cut with a 3mm or 1/8" endmill in the correct position that will pull the hole back to where it should be. You then just make your fitted bolts with a 3mm or 1/8" shank and still put the 7BA thread on the end and size the head to your original hex A/F

                    fitted bolt.jpg

                    #638415
                    Dr_GMJN
                    Participant
                      @dr_gmjn
                      Posted by JasonB on 20/03/2023 10:10:37:

                      Don't be in such a rush to get a new casting. As you are going for fitted bolts you can make then to fit what is needed to get over the problem.

                      If you set up each half and plunge cut with a 3mm or 1/8" endmill in the correct position that will pull the hole back to where it should be. You then just make your fitted bolts with a 3mm or 1/8" shank and still put the 7BA thread on the end and size the head to your original hex A/F

                      fitted bolt.jpg

                      Thanks Jason.

                      That was my Option 1) above, but I assumed that the potential issue with re-boring the holes after splitting would be a mis-match of the faces and/or sides (since the point of a fitted bolt is to maintain precise alignment)? Obviously the centre hole isn't a problem because it will be bored.

                      I was going to make the bolts similar to what you 've shown, but with a square head which will be a good fit against the milled flat.

                      I do have a new 3mm end mill. Since it is short, I'd have to bore each hole in turn, from the mating face.

                      The only way I could do this accurately I think is by using an x-axis stop for the vice, where the parts are pushed against it, clamped, and the hole bored with everything locked apart from the z-axis. I'd have to turn the lower halves 180 degrees to make sure any side-to-side mis-match was compensated for (I think that would work) Obviously the supporting parallel would be removed just before the cutter broke through. Does that sound feasible?

                      Faces "A" & "B" below indicate the faces facing the camera, with the opposites facing the page, so when assembled "A"s and "B"s would go together.

                      ll

                      #638428
                      JasonB
                      Moderator
                        @jasonb

                        I would do the half without the lug up the other way which will keep matching sides against the rear fixed jaw

                        #638433
                        Dr_GMJN
                        Participant
                          @dr_gmjn
                          Posted by JasonB on 20/03/2023 13:03:45:

                          I would do the half without the lug up the other way which will keep matching sides against the rear fixed jaw

                          OK. I might move the hole centres in by 0.25mm so if there’s a slight mis-match of the outer faces, I’ve got something to machine off if necessary.

                          I’ll just hope for the best with the main faces.

                          #638498
                          Dr_GMJN
                          Participant
                            @dr_gmjn

                            So I had a bit of time tonight, and tried the end mill and hard-stop method:

                            It seemed to work fine, with the holes moved in by 0.25mm. I'm thinking a 6BA thread and nuts might look better than 7BA – 6BA nuts fit pretty much perfectly on the footprint now:

                            I've been thinking again how I might have messed up the initial hole drillings, but I've concluded it must have been the drill wandering. With this in mind I think I might use this end-mill and hard stop method for the second one. Unfortunately the mill isn't long enough to go through both parts in one go, but it doesn't seem to matter. A 2.9 drill slies through ok, but a 3.01 drill won't. I wonder if a 3mm reamer would now align everything perfectly and make the fitted bolts easier to make?

                            The central hole is now pretty much spot-on in terms of circularity (or as good as it can be as a cast finish), so the 0.7 thick slitting saw seems to be the one to use.

                            #638526
                            Hopper
                            Participant
                              @hopper

                              I'm thinking you could get away without using fitted bolts there. The eccentric would hold the two halves of the strap in alignment and the bolts just provide the clamping force to keep them together.

                              Looks like you are making good progress. And learning how to fix problems along the way, which is the secret to good machining.


                              Edited By Hopper on 21/03/2023 09:18:51

                              #638737
                              Dr_GMJN
                              Participant
                                @dr_gmjn

                                Thanks Hopper. I think I'd like to try the fitted bolts – if nothing else it's another bit of machining to try.

                                I do already have a 1/8" reamer, so I wouldn't mind trying that. I've got a 3mm hole currently so it should be OK.

                                Is the best way of going about it to align the faces and one end face on a surface plate, temporarily bolt one side and then ream?

                                Thanks.

                                #638740
                                Hopper
                                Participant
                                  @hopper

                                  That sounds like it would work. That is assuming you will bore the hole in the middle to fit the eccentric afterwards and not before.

                                  Yes might as well do the fitted bolts now you have solved the problem of the nut hanging over the edge etc.

                                  #638745
                                  Dr_GMJN
                                  Participant
                                    @dr_gmjn

                                    Hopper, yes the hole centres on the first strap are now OK, although one is slightly 'bulged'. It would be good to ream them as a pair (as Jason suggested initially), but obviously it's not great because they are now separate pieces. Since I already have a 1/8" reamer, I can't see a disadvantage?

                                    I will bore the central hole once the fitted bolts are in place and tight.

                                    I'm going to mill the holes in the second one later, because I can see no reason why drilling again would give better results this time. Unfortunately the mill isn't long enough to go through both at once, but the hard stop method worked fine.

                                    #638889
                                    Dr_GMJN
                                    Participant
                                      @dr_gmjn

                                      Got the main flat surfaces completed on both straps, and machined the holes. Everything lines up fine, and all but one of the holes look to be good quality (at least when assembled using a twist drill as a spigot). The remaining hole has a slight bulge, but it’s cylindrical over about 270 degrees so it should be ok at least in function. I don’t think the holes are worth reaming after all:

                                      I did notice a flaw in one of the halves, which I hadn’t picked up on before:

                                      I don’t think it will machine out at the diameter specified. Is there any way of filling it before machining that wouldn’t be too obvious when finished (I won’t be painting the straps?

                                      Anyway, next job is to make the four bolts from mild steel.

                                      Thanks.

                                      #638915
                                      JasonB
                                      Moderator
                                        @jasonb

                                        If you have any offcuts of the same material you could plunge mill a hole and turn up a small plug to Loctite into place

                                        #638918
                                        Dr_GMJN
                                        Participant
                                          @dr_gmjn

                                          I don’t have any off-cuts, but I wonder if it’s the same material as the main bearing pedestals that I no longer need?

                                          The other thing is I’m not that keen on the flat bar eccentric rods. I’ve seen some with parallel round bar screwed into a flat plate with a boss for the rod, the plate is in turn bolted to the eccentric. If I got some of the right diameter rod I might consider doing that, then I’d have the rectangular tail off-cuts spare.

                                          I might see how much material I’d have for a pad on the eccentrics and take it from there.

                                          #639125
                                          Dr_GMJN
                                          Participant
                                            @dr_gmjn

                                            Would it be possible to solder the plug in place rather than Loctite? I guess I’ll be soldering the joint faces anyway, so I could do the plug at the same time before final machining.

                                            #639131
                                            JasonB
                                            Moderator
                                              @jasonb

                                              You could do, just be careful that any hot flux in the bottom of the hole does not pop the plug out.

                                              I thought you were going to just bolt it together for boring?

                                              #639134
                                              Dr_GMJN
                                              Participant
                                                @dr_gmjn
                                                Posted by JasonB on 26/03/2023 07:07:31:

                                                You could do, just be careful that any hot flux in the bottom of the hole does not pop the plug out.

                                                I thought you were going to just bolt it together for boring?

                                                Thanks Jason, I’m making some ‘fitted’ bolts at the moment, so depending on how they end up I might just bolt it.

                                                I think the bearing pedestals are the same material as the straps, so I guess I could bore right through and plug to avoid any push-back, then machine?

                                                #639143
                                                JasonB
                                                Moderator
                                                  @jasonb

                                                  Yes likely to be the same so would not affect the cut

                                                  #639161
                                                  Weary
                                                  Participant
                                                    @weary

                                                    Re: your 'plug' to cover strap-blemish:

                                                    How about drilling all the way through a small size (say 1mm), then drilling the 'plug' size part way through.

                                                    This would allow flux to escape down the 'pilot vent' and save re-machining inside the straps? The pilot hole would be invisible once assembled. Additionally I note that your flaw appears to be very close to the strap-edge = watch for drill break-through! Maybe worth using a suitable sized end-mill as a drill?

                                                    Regards,

                                                    Phil

                                                    #639184
                                                    Dr_GMJN
                                                    Participant
                                                      @dr_gmjn
                                                      Posted by Weary on 26/03/2023 11:36:26:

                                                      Re: your 'plug' to cover strap-blemish:

                                                      How about drilling all the way through a small size (say 1mm), then drilling the 'plug' size part way through.

                                                      This would allow flux to escape down the 'pilot vent' and save re-machining inside the straps? The pilot hole would be invisible once assembled. Additionally I note that your flaw appears to be very close to the strap-edge = watch for drill break-through! Maybe worth using a suitable sized end-mill as a drill?

                                                      Regards,

                                                      Phil

                                                      Thanks Phil, yes the idea is to use the end mill again – I realise it's close to the edge, but at least the flaw tapers, so the very edge of it might get machined away anyway.

                                                      I'll see how it goes with the milling – I might just mill right through it it's possible. As you say whatever the inner end looks like, won't be visibe anyway.

                                                    Viewing 25 posts - 1,026 through 1,050 (of 1,206 total)
                                                    • Please log in to reply to this topic. Registering is free and easy using the links on the menu at the top of this page.

                                                    Advert

                                                    Latest Replies

                                                    Viewing 25 topics - 1 through 25 (of 25 total)
                                                    Viewing 25 topics - 1 through 25 (of 25 total)

                                                    View full reply list.

                                                    Advert

                                                    Newsletter Sign-up