Stuart Twin Victoria (Princess Royal) Mill Engine

Advert

Stuart Twin Victoria (Princess Royal) Mill Engine

Home Forums Work In Progress and completed items Stuart Twin Victoria (Princess Royal) Mill Engine

Viewing 25 posts - 301 through 325 (of 1,206 total)
  • Author
    Posts
  • #556237
    Ramon Wilson
    Participant
      @ramonwilson3

      Agreed Jason, but are the feet not going to be brought true to the bore after ?

      Edited By Ramon Wilson on 29/07/2021 07:28:58

      Advert
      #556238
      JasonB
      Moderator
        @jasonb

        So they are.

        Though probably better to just alter the vertical slide than add slippery shims, will be a lot easier to do that particularly now it's on a vertical surface. 

        Also not sure if Doc redid the punch marks on the plugs as I think they were done on the lathe and the plugs then driven in which would put them at ctr of the core not flange

        Edited By JasonB on 29/07/2021 07:44:21

        #556245
        Dr_GMJN
        Participant
          @dr_gmjn

          Thanks Both.

          Yes, the plugs were centred in the late. After the comments about the core/flange alignment, I checked the centre marks both with dividers from the edge of the flanges, and scribing a circle around the centre points on the flanges, and couldn't really see much concentricity error at all, ie they seemed to be both centred on the core, and a best fit to the flanges. All a bit subjective, but they looked OK to me. I suppose I can take a cut and measure the wall thicknesses all around before going much further?

          #556252
          Ramon Wilson
          Participant
            @ramonwilson3

            You can only position it as best you can Doc and take that first cut.

            Remember that you need to get under the skin of the casting so don't make that too shallow. The first boring pass may look as if the boring bar is moving out of round due to the uneven cut – just return and take a spring cut before measuring. Make the cut towards the headstock and keep the speed and feed rate down too – this is one time where being slow pays off.


            Ramon

            Edited By Ramon Wilson on 29/07/2021 09:25:35

            #556256
            ChrisH
            Participant
              @chrish

              Good tip learned there Ramon, for me who hasn’t done much work on boring castings

              Chris
              PS – loved the new set up Doc

              Edited By ChrisH on 29/07/2021 09:49:24

              #556264
              Dr_GMJN
              Participant
                @dr_gmjn
                Posted by Ramon Wilson on 29/07/2021 09:24:31:

                You can only position it as best you can Doc and take that first cut.

                Remember that you need to get under the skin of the casting so don't make that too shallow. The first boring pass may look as if the boring bar is moving out of round due to the uneven cut – just return and take a spring cut before measuring. Make the cut towards the headstock and keep the speed and feed rate down too – this is one time where being slow pays off.

                Ramon

                Edited By Ramon Wilson on 29/07/2021 09:25:35

                Thanks Ramon, what kind of rpm would you advise? I've got three speeds and backgear for each on the ML7.

                Is it worth increasing the speed for the final cuts?

                Would you use any lubrication for this?

                Also, The way I've ground the tool I'll be moving the saddle from left to right, so the cut effectively goes from the tailstock end of the casting to the headstock. Is that what you meant?

                #556270
                Ramon Wilson
                Participant
                  @ramonwilson3

                  Back gear only Doc. Start with the slowest and move up if all's well. Doing it the opposite way risks the tool point if it hits a hard spot. This is one op done at a slow pace for best results – that said the tool does need to cut and not rub. If you feel it can go up one then do so. If you get chattering go down a speed but if you are in the lowest gear a regrind of the tool is worth considering.

                  I don't usually increase speed on final cuts on cast iron but I do regrind a radius on the tool before the last two cuts. If the cast is good the surface finish will be as good as you need save a light honing/lapping.

                  No lubrication at all on cast iron – it's not required and besides will create an awful mess on your machine. I was also taught to oil the machine before hand then wipe all traces of oil off as the graphite in the cast will provide lubrication on the dry surfaces – mixed with oil and you have an unwanted gritty lapping compound!

                  If you are cutting with the saddle moving left to right the cutting forces on the boring bar tool are toward the tailstock – you might be okay but personally I would regrind the tool and cut toward the headstock to keep the bar firmly in contact with the driving centre.

                  #556279
                  Dr_GMJN
                  Participant
                    @dr_gmjn
                    Posted by Ramon Wilson on 29/07/2021 11:52:03:

                    Back gear only Doc. Start with the slowest and move up if all's well. Doing it the opposite way risks the tool point if it hits a hard spot. This is one op done at a slow pace for best results – that said the tool does need to cut and not rub. If you feel it can go up one then do so. If you get chattering go down a speed but if you are in the lowest gear a regrind of the tool is worth considering.

                    I don't usually increase speed on final cuts on cast iron but I do regrind a radius on the tool before the last two cuts. If the cast is good the surface finish will be as good as you need save a light honing/lapping.

                    No lubrication at all on cast iron – it's not required and besides will create an awful mess on your machine. I was also taught to oil the machine before hand then wipe all traces of oil off as the graphite in the cast will provide lubrication on the dry surfaces – mixed with oil and you have an unwanted gritty lapping compound!

                    If you are cutting with the saddle moving left to right the cutting forces on the boring bar tool are toward the tailstock – you might be okay but personally I would regrind the tool and cut toward the headstock to keep the bar firmly in contact with the driving centre.

                    OK thanks. The tool needed some work anyway so I'll grind it the other way around.

                    Back gear is really, really slow, but I'll start as you say and see what happens.

                    #556283
                    Ramon Wilson
                    Participant
                      @ramonwilson3

                      Yes it is Doc but you can't push cast iron with HSS tooling. If you put the speed up too far then the tool will very quickly wear and glaze the surface. Take your time – this is, generally, a slow process compared to usual turning.

                      You'll soon see the benefit of between centres boring and get a good result but don't be in hurry to begin with.

                      I'd grind the tool much like a knife edge lathe tool to get under the skin on that first cut – put the radius on when you have around .5 mm on diameter left to come off.

                      #556334
                      Dr_GMJN
                      Participant
                        @dr_gmjn

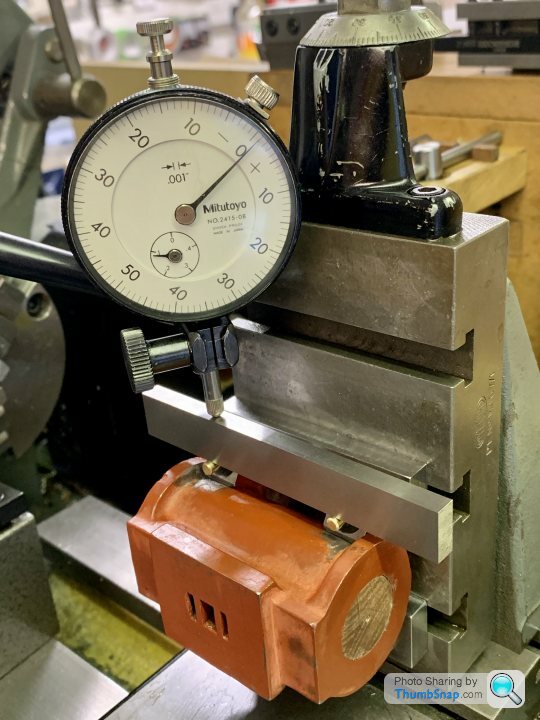
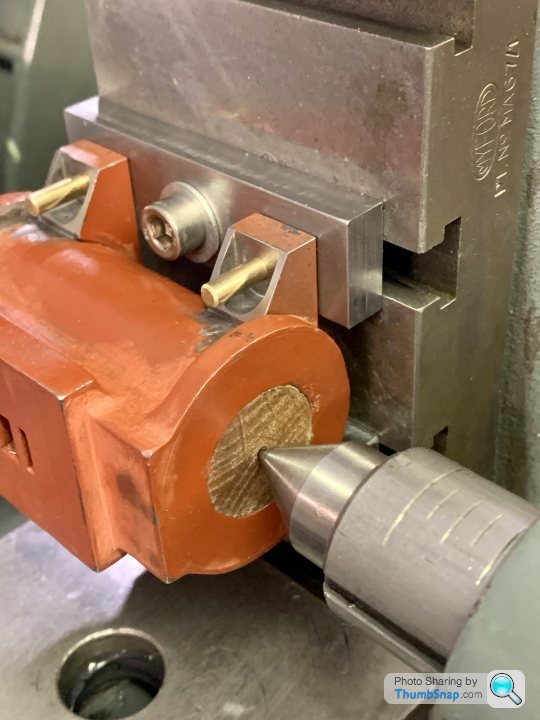
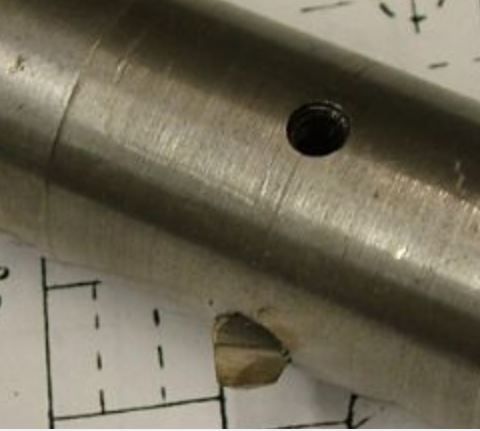
                        Made some brass pins to check that alignment with the foot holes matches alignment with the bore plug centres:

                        Seemed spot-on, at least by eye.

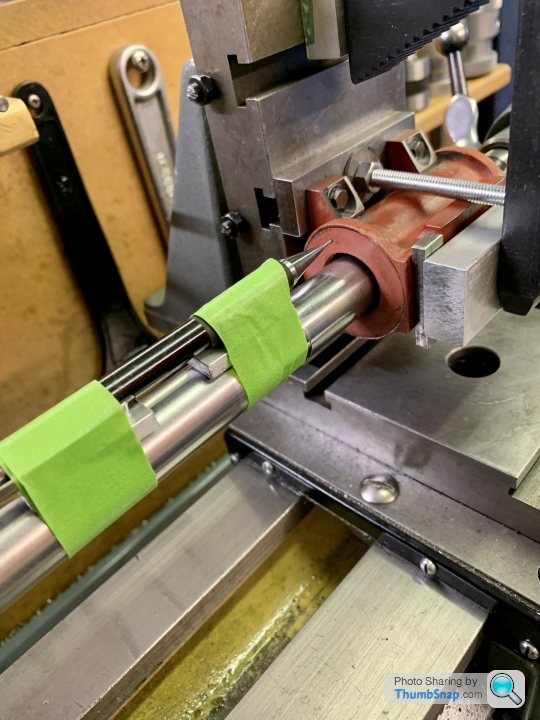
                        Then taped a pencil to the boring bar to check for concentricity with the flanges:

                        Seemed acceptable, considering the flange o/ds aren’t round?

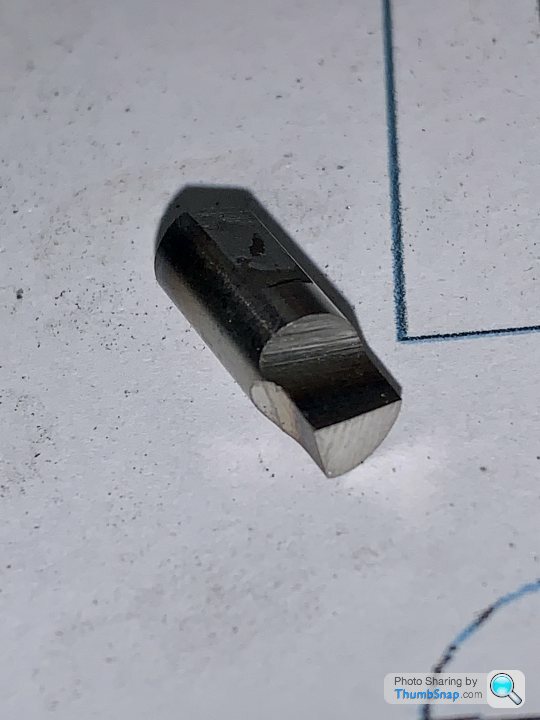
                        Then re-grinding the tool to give cutting load towards the headstock as per Ramon’s comment. I’ve ended up with this:

                        And am aiming to set it like this:

                        Unfortunately the flat will need re-grinding to enable this.

                        The gears are currently set to the lowest feed rate, so with backgear it will take forever to do this operation. What kind of feed/Rev should I be looking at?

                        Any comments much appreciated before I start to cut…

                        #556337
                        Ramon Wilson
                        Participant
                          @ramonwilson3

                          All looking good Doc and I really like the pencil idea – great tip yes

                          Theres nothing more I can say to convince you that this is a back gear op. Cutting speed of cast iron is around 40-50 feet per min for HSS tooling so with a 1" bore that's around 160 rpm. It's a long time since I had an ML7 so not sure what speed the lowest back gear is but my previous comment is the best I can offer – start low and increase rather than the otherway round. I'm pretty sure the lowest top speed will be way too fast certainly for an initial cut. You should try to acheive a nice matt uniform grey colour, if the surface is bright and looks burnished the speed is to high. Machining cast iron (with HSS) is always well down on speed (and feed) compared to mild steel.

                          It all looks good to go however so all that's left is make sure everything is tight that should be (my S7 is set at the second lowest feed – without checking I think that may be 3 thou/possibly 5 a rev unless screwcutting) and give it a try. The higher the feed rate the more pressure you place on the set up of course

                          If it protests at first then reduce the depth of cut but as said don't make that first cut too fine as you need to get under the skin.

                          It will take time but engage the self act and keep an eye on it as it passes through – surprising once you get into it how soon the jobs done in actual fact

                          Remember – 'There are no shortcuts' wink

                          Ramon

                          PS Don't forget to remove the pencil smiley

                          Edited By Ramon Wilson on 29/07/2021 22:50:31

                          Edited By Ramon Wilson on 29/07/2021 22:51:56

                          #556338
                          Dr_GMJN
                          Participant
                            @dr_gmjn

                            Thanks Ramon – no issue with using backgear – it’s already set up and ready to go. Real question was feed/Rev, because with the feed I’ve currently got it’s almost imperceptible movement of the saddle…

                            No problem – there’s no rush, And obviously I want a good finish, just didn’t want to be wearing the tool out during a cut – or something like that. I’ll check the feed I’ve got, and if it’s near what you’re saying I’ll leave it at that.

                            Cheers.

                            #556355
                            Ramon Wilson
                            Participant
                              @ramonwilson3

                              Hi Doc, just been and checked my lathe – it's set on .0037 inches per rev according to the (Myford) chart so just under 4 thou

                              I don't usually bother to increase above that unless, as said, for screwcutting so you should be okay if you are around or slightly above that figure.

                              Good Luck yes

                              Ramon

                              #556360
                              JasonB
                              Moderator
                                @jasonb

                                lowest backgear is going to be quite slow, about 25rpm so you may want to find something a bit faster as at 1/2hr per pass you wuill be there a long time, try what rpm Ramon suggests though I tend to run faster though with a slightly lower feed rate..

                                #556362
                                Ramon Wilson
                                Participant
                                  @ramonwilson3

                                  Is the lowest backgear on an ML7 as low as that Jason? – I'll have to check my 7 .

                                  I would agree that that would be well slow but as said it's best to work up rather than burn the tool out and have to regrind.

                                  I fitted a VFD to my lathe so don't tend to use back gear like I used to but I'll stand by being cautious but defer to that that lowest speed may be too slow. Theres only six set speeds available on Docs Myford so you have to accept at times that things are a compromise.

                                  Two things, to me, to bear in mind – it's a flimsy set up at best and Doc is new to it. We would set up and do it without a second thought, hence my cautiousness – for him.

                                  Regards – Ramon

                                  #556370
                                  Dr_GMJN
                                  Participant
                                    @dr_gmjn

                                    According to the specs, the back gear speeds are 35, 62 and 110 rpm.

                                    #556371
                                    Ramon Wilson
                                    Participant
                                      @ramonwilson3

                                      Okay Doc, start with the 62 and see how it goes – it should be okay at the 110 too but I would definitely go upwards rather than down if I were you.

                                      So – lets see some swarf then wink

                                      #556375
                                      Dr_GMJN
                                      Participant
                                        @dr_gmjn
                                        Posted by Ramon Wilson on 30/07/2021 10:00:31:

                                        Okay Doc, start with the 62 and see how it goes – it should be okay at the 110 too but I would definitely go upwards rather than down if I were you.

                                        So – lets see some swarf then wink

                                        OK. See you back here later on…

                                        #556470
                                        Dr_GMJN
                                        Participant
                                          @dr_gmjn

                                          I think overall it went OK, but I'll let the experts be the judge. I started the first cut at 62 rpm, and initially, all seemed well. Then I thought something wasn't quite right, so stopped and found this:

                                          I realised that the bottom of the cutting face was probably scraping on the bore, so I ground some material back:

                                          Not sure how it formed the ridge, but anyway it was fine after that. These were the chips:

                                          So I measured the bore, incremented the bit a tiny amount, and went again, this time at 110 rpm. All seemed OK, took about 12 minutes. These were the chips:

                                          And the bore:

                                          So I've now got within about 0.025" on diameter after two cuts. Surface finish isn't quite as good as on the 10V, but of course that was with a Sandvik tip:

                                          So how should I proceed? Modify the bit, or will lapping with a wooden plug be OK? And how much should I leave on for final lapping?

                                          Thanks!

                                          #556483
                                          Ramon Wilson
                                          Participant
                                            @ramonwilson3

                                            That's a good result and looks fine for the initial cuts Doc so if you don't want to radius that tool bit take the tool out ready for the second one and grind another up with a slight negative leading edge and a decent radius on and take a couple of cuts to size. If done right the finish will be much improved.

                                            This is what I used to do the cylinder in the post back a bit – the leading edge of the bit is the left side as you look at the image. The finish straight off the tool was fine enough to just lightly hone with a brake cylinder hone. Bear in mind if you are only going to run on air then the piston can be fitted with PTFE impregnated yarn as discussed before. With a one thou or so annular gap on the piston the friction will be minimal but the seal will be as good as you could wish for.

                                            dscf0422.jpg

                                            You will of course need to redo all that for the second cylinder but you should be able to get them close to diameter if not exactly identical – any discrepancy easily taken up by making pistons to fit.

                                            Unless you get some major turning marks (radiusing the tool should eliminate those for the greater part) lapping (as opposed to honing) should not really be neccesary

                                            Good outcome – twelve mins is not long really though I bet it felt like an hour eh

                                            Ramon

                                            Edited By Ramon Wilson on 30/07/2021 23:05:24

                                            #556484
                                            Dr_GMJN
                                            Participant
                                              @dr_gmjn

                                              Thanks Ramon. Any chance you could post a close-up of that tool please? And when you say negative leading edge – is that different to what I have now?

                                              Re. the time to cut – as soon as I could see (and hear) it was cutting nicely, I knew it would be ok. I inspected the tool and bore after the first cut, and then knew I’d done it more or less right, so I’m encouraged by that. Also, having a sharp point was always going to leave a spiral cut with tiny ridges, hence the question about tool mods/rads. I assume about 2mm (max) rad should do it?

                                              Thanks again for the continued advice.

                                              #556488
                                              JasonB
                                              Moderator
                                                @jasonb

                                                Any help, the leading edge on the left is angled back about 20-30deg

                                                round tip.jpg

                                                Edited By JasonB on 31/07/2021 07:01:08

                                                #556493
                                                Dr_GMJN
                                                Participant
                                                  @dr_gmjn
                                                  Posted by JasonB on 31/07/2021 06:59:50:

                                                  Any help, the leading edge on the left is angled back about 20-30deg

                                                  round tip.jpg

                                                  Edited By JasonB on 31/07/2021 07:01:08

                                                  OK thanks I’ll have a go.

                                                  How come that angle is much larger now? What would happen if I duplicated what I have, but with a radius?

                                                  #556496
                                                  Ramon Wilson
                                                  Participant
                                                    @ramonwilson3

                                                    Thanks Jason yes

                                                    I have found the tool as above works well on cast Doc but it's not specific. If you are happy with your toolbit then by all means duplicate it with a decent radius – make sure that radius is backed off so it doesn't rub behind the cutting edge though.

                                                    I'm off out for a family get together today so have a good session – hope it all goes well

                                                    Ramon

                                                    #556554
                                                    Dr_GMJN
                                                    Participant
                                                      @dr_gmjn

                                                      Thanks both. Ground another tool, this time with a radius:

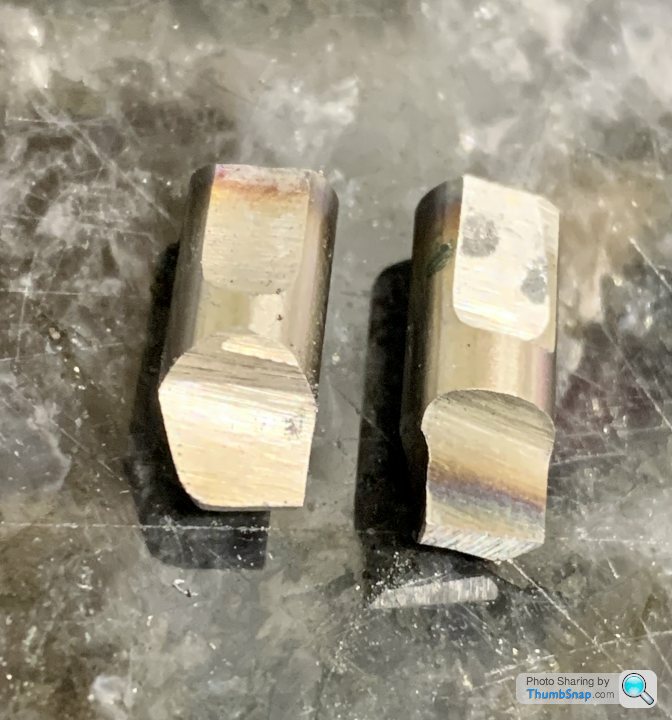
                                                      But unfortunately it wasn’t great – got chatter and I could hear it was rubbing not cutting. I tried slower speeds to no avail. I reduced the radius slightly, and increased all the angles – not very scientific, but basically made all the edges ‘sharper’. This time it worked. I stuck with 110 rpm. These were the tools I’ve used:

                                                      The final cut chips were small curls of material, which looked ok to me:

                                                      Surface finish is much better, I might do lapping anyway as per the 10V, mainly because I liked doing it. The bore did break into the feet screw holes, but that was expected.

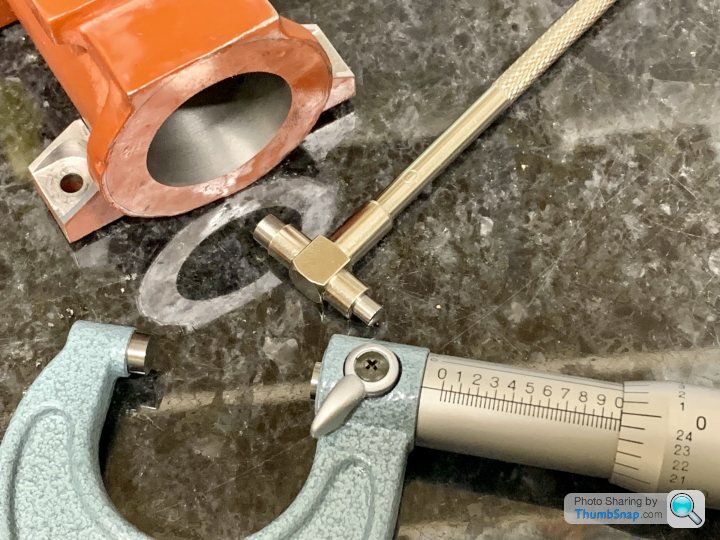
                                                      I measured the bore in several places with the gauge and micrometer:

                                                      And with the verniers, both ends the same. It really did measure 1” at both ends. I know verniers aren’t the best for I/Ds, but it’s close enough I think, and I was somewhat startled at the result, so took a picture before it changed!

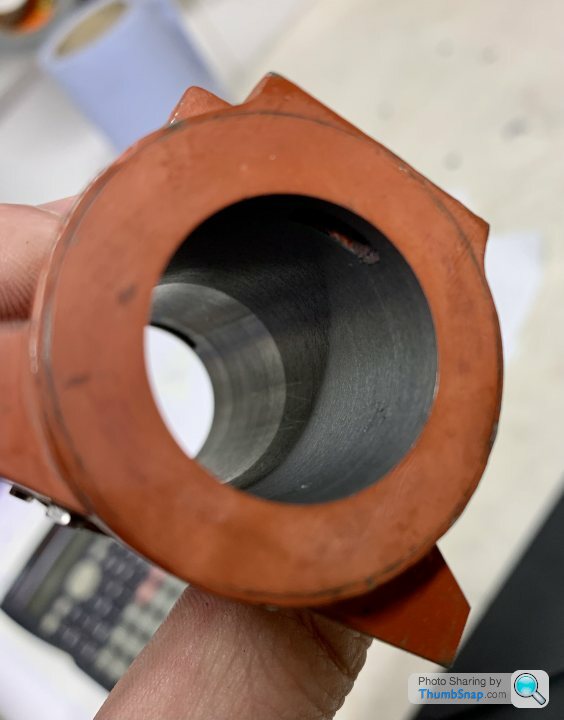
                                                      Now for an issue. I had a small heart attack when I first saw this:

                                                      …but there is no ridge at all, confirmed as I said because the bore seems very consistent (almost unbelievably consistent I know). Any idea what this colour difference us? The last cut was continuous, and there was nothing at all to suggest anything changed during the cut. No discernible change in surface finish either.

                                                      Cheers!

                                                    Viewing 25 posts - 301 through 325 (of 1,206 total)
                                                    • Please log in to reply to this topic. Registering is free and easy using the links on the menu at the top of this page.

                                                    Advert

                                                    Latest Replies

                                                    Viewing 25 topics - 1 through 25 (of 25 total)
                                                    Viewing 25 topics - 1 through 25 (of 25 total)

                                                    View full reply list.

                                                    Advert

                                                    Newsletter Sign-up