Stuart ‘No.1’ : a beginners tale..

Advert

Stuart ‘No.1’ : a beginners tale..

Home Forums Work In Progress and completed items Stuart ‘No.1’ : a beginners tale..

Viewing 25 posts - 51 through 75 (of 245 total)
  • Author
    Posts
  • #150905
    GarryC
    Participant
      @garryc

      Both the bottom bearing half's in the housings now. Next the top half's which I need to temporally solder together to turn on the lathe.

      Test fitting the bottom bearing half's. Think I did a slightly better job on the second one – which is as it should be second time around, but both seem to fit ok and feel solid with no movement.. The second one done is on the right in the photo..

      55. 55. test fitting both bottom bearing halfs.jpg

      My new 'very basic' soldering kit. Not much idea how to use it yet….

      I wanted to ask if it's just a matter of applying the solder paint on both surfaces of the 2 'top bearing half's', clamping together and heating? Do I need to heat from both sides or can I just lay them on the vermiculite fire brick without moving, (have more than one of these bricks of course..)? I assume I just heat up afterwards to separate and wipe the surfaces off while hot, do I need a solvent for this?. Do I need to wait long after cooling before I can put it in the Lathe or do they have to be left to stand… How hot do I heat?

      Sorry lots of questions there – but thanks to anyone for any pointers, even one or two would be a great help..

      56. new soldering equipment.jpg

      Regards

      Allan.

      ps. won't do it next to the straw of course..

      Advert
      #150915
      roy entwistle
      Participant
        @royentwistle24699

        Alan I would think that you need to machine the bottom of the top half of the bearings and then solder one top to one bottom and then machine that   I would also mark each pair so that they go together as a pair and the right way round if that makes sense

        Roy

        Edited By roy entwistle on 28/04/2014 13:11:47

        #150927
        roy entwistle
        Participant
          @royentwistle24699

          Alan    I may have jumped in with both feet there I now assume that you intend sweating the two top halves together so that you can bring to width (7/8" and face the ends in the lathe that's ok but it looks to me as if there is a lot cleaning up with the file to be done
          Are tops of the lower bearings flush with where the top caps sit they will need to be

          Roy

          Edited By roy entwistle on 28/04/2014 16:11:15

          #150928
          Anonymous

            The method of sweating bearing halves together before machining the bore has never worked for me; the joint just isn't strong enough. I much prefer to make a simple jig to hold the bearing halves, like this:

            Crankshaft Bearings

            As a bonus you don't muck up a nice machined finish by heating the bearings up twice.

            Andrew

            #150930
            JasonB
            Moderator
              @jasonb

              I think sweating will be OK in this case as you don't need to machine the outside and there is a large area for the solder to stick to.

              First machine the underside if the castings so you have a good smoothe surface to solder. Apply a light coat of solder paste to both surfaces and heat, you will see the flux bubble off and the grey liquid turn to silver when the temp is right. Now take acotton rag (not manmade as it melts" and wipe the surface to remove any excess solder.) These are two parts that have been tinned

              As you are using paint this is probably the best way to continue, allow to cool. Then apply a little more paint to one face this will provide some flux, place the other half ontop and then heat until you see the solder flow, give a gentle push together to expell any excess solder and leave to cool.

              Then into the 4 jaw to face one side does not have to be spot on. Once you have a clean face accurately mark the centre point, you should be able to see a faint line where the solder joint is so the centre should be along this line. Set it back up in the 4 jaw and get your punch mark to run true, Face back to width and machine the 1" OD. Turn round in the chuck and do the same on the other side.

              Drill the two mounting holes then heat to seprate the halves, rub on a sheet of Emery to remove any solder and then bolt to the casting to bore between centres.

              #150950
              GarryC
              Participant
                @garryc

                Hi Roy

                Thanks, sorry, I should have explained a little more to make what I intended to do clearer – yes you are quite right in your second post, and there is as you say quite a bit of cleaning up with the file to do first – seems crazy to me now looking back at how I thought I could avoid the file – quite enjoy using it these days and can certainly see how important it is to be able to have at least some skills with. The bottom bearing half's are flush with the tops of the housings.

                Hi Andrew

                Thanks, the jig looks like a great way to hold the two half's – also pleased to say I can understand how it works from your photo as well..! I'm still short of 'stock' material for things like that but also at the moment with the little Lathe etc would likely take quite a while to do. It will be great to have a go at though when I have upgraded – definitely remember that one I'm sure it will come in useful.. Still regretting not going for larger with my 'first' Lathe..

                Hi Jason

                Thanks, that's a great step by step to be able to print off and follow for this now. Glad I waited to post here first otherwise I would have definitely gone about it the wrong way.. Making a start with it in the morning..

                and its good to be having a go and finding out about some soldering techniques..

                Cheers all.

                Allan.

                #151006
                roy entwistle
                Participant
                  @royentwistle24699

                  Alan When youv'e got the two top bearing caps soldered together DO NOT bore the 1/2" hole for the crank shaft

                  Remember that the cap is only half of the bearing the other half is the bottom Top and bottom should be bored together

                  Roy ( Does this make sense ? )

                  #151010
                  GarryC
                  Participant
                    @garryc

                    Hi Roy

                    Thanks very much, really appreciated – its great to have input like that. In this case though yes I did know not to do that. Hope you will continue to follow and if you do please let me know again if you see any problems I may get into.

                    In having breakfast now but have been busy filing earlier. I won't go on about it in case it makes me look totally mad, but the filing has really clicked this morning and its been brilliant. The 'lumps' on the end of the top bearing half's needed lots of filing around the 'curve' and 'rubbing' the file around there has given me a new insight – what a great feeling…

                    My distant Grandfathers were from a line of Stone Mason's and another Grandfather line were Blacksmiths – I couldn't help wonder this morning if there might be some hope for me yet!

                    Thanks again Roy.

                    Allan.

                    #151031
                    GarryC
                    Participant
                      @garryc

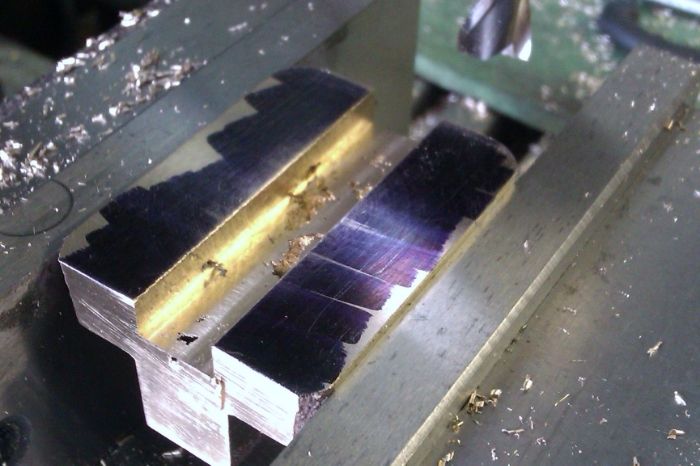
                      Didn't get to make as much progress as I thought I would this morning but am now at the point of being ready to solder. Just managed to clean up the 'top bearing half' castings and faced the surfaces ready for soldering. Had some strange marks though left on the surfaces afterwards that I haven't seen before…

                      The top bearing half castings after cleaning up with the file. They took quite a bit of filing.

                      57. the bearing top half castings after cleaning up.jpg

                      Setting up to face the bottom surfaces.

                      58. setting up to face the bottom of the bearing top halfs.jpg

                      I only took a light skim off ready for soldering, 3 thou at 380 rpm, maybe I should have taken off more, or I'm using the wrong speed (they are Gunmetal). I don't know if these marks were already there under the surface or the tool was digging in. The carbide insert has I suppose done a lot of work, may need changing, but it looks ok under a 'glass', like new in fact – there was absolutely no sign from the lathe when facing that there was anything untoward happening – bit of a mystery to me. As the surfaces are completely flat and I will be boring through most of it shortly rather than take any more material away I thought it would still be ok for temporary soldering and plan to go ahead like this – unless anyone is kind enough (if thought necessary) to advise me otherwise that is..

                      59. strange marks after skimming the bearings on the lathe.jpg

                      Regards.

                      Allan.

                      #151033
                      Anonymous

                        If you mean the small indentations, they look like inclusions in the casting to me, possibly caused by gassing. They will mostly disappear when the bearings are bored, but if there is enough allowance on the casting I would have been inclined to take a bit more than 3 thou off.

                        Regards,

                        Andrew

                        #151035
                        GarryC
                        Participant
                          @garryc

                          Thanks Andrew, that would seem to make sense to me i.e.. that they were there beforehand, one of them in particular is quite deep and as I said the Lathe made no sign of any problem. Interesting, its the first time I've seen anything like that after machining. Agree as well I should have taken a bit more off…

                          Cheers.

                          Allan.

                          Edited By Allan. on 29/04/2014 16:04:46

                          #151037
                          JasonB
                          Moderator
                            @jasonb

                            Poke someting sharp like a scriber into one of the indentations, it could well be a blow hole and the slightly dull tool has pushed the soft GM into the ole rather than cutting it off. As Andrew says it looks like its all within the area to be bored out.

                            Similar thing here but the sharper tool cut the skin off


                            And then when it was milled a bit deeper

                            Next time you are buying carbide inserts try one of the CCGT or DCGT ones which work a treat on GM, Bronze, Brass and Aluminium

                            Edited By JasonB on 29/04/2014 16:15:43

                            #151043
                            GarryC
                            Participant
                              @garryc

                              Hi Jason

                              Thats interesting to see, I hadn't even thought to look more closely at the different types of carbide inserts, just checked and I'm using CCMT. Definitely makes sense to increase options and get some different types when I order next time.. Hardly a day goes by when I don't learn something new, thanks…. Can't get enough of it!

                              Cheers.

                              Allan.

                              #151048
                              Nick_G
                              Participant
                                @nick_g
                                Posted by Allan. on 29/04/2014 17:16:08:

                                Hi Jason

                                Hardly a day goes by when I don't have to get my card out and spend lot's more money ….

                                Cheers.

                                Allan.

                                You got that wrong.!

                                Don't worry I corrected it for you. winkwinkwink

                                Nick laugh

                                #151072
                                GarryC
                                Participant
                                  @garryc

                                  I know nick was just joking but its given rise to a rather horrible thought this morning – because I've tried to include everything that I'm doing my posts may read to some just starting out that you have to be spending money all the time, putting them off. The very very last thing I would want. I just want to say that for me I have found that compared to what I know others spend on some other common interests e.g.. Supporting Football, Golf, Motorcycling etc the costs to 'get going' are far less. A lot depends on your skill level and what you want to do – I need all the help I can get from bits and pieces but there are some on here who could have put together my projects with little more than a pen knife and a piece of string as it were… and I've not looked at the second hand market..

                                  As its all still fresh in my mind – If anyone setting out is interested I could put together a list of all the bits and pieces that I considered were essential to have had so far, it really need not be that bad / expensive – just let me know here or pm…

                                  All the 'tooling up' for me is an investment for all the future projects to come..

                                  Nick – hope your own workshop is coming along well..

                                  Cheers.

                                  Allan.

                                  #151077
                                  roy entwistle
                                  Participant
                                    @royentwistle24699

                                    Alan During the past 50 years at least I have built several of Stuarts engines including Victoria I have also made

                                    3 long case clocks and 5 other clocks with only a lathe a bench drill and hand tools    I find filing and the use of a piercing saw very therapeutic

                                    Roy

                                    Edited By roy entwistle on 30/04/2014 09:58:08

                                    #151100
                                    GarryC
                                    Participant
                                      @garryc

                                      Hi Roy

                                      It's been brilliant to see some of the 'old skills' still alive and well on here. You confirm what I was trying to say above.

                                      I would suggest that given the way the world is moving on this very place not only now but will in the future become more and more important in keeping the 'hand down' of such knowledge and skills ongoing…

                                      Someday the country may well be very grateful..!

                                      Cheers.

                                      Allan.

                                      #151157
                                      GarryC
                                      Participant
                                        @garryc

                                        Great fun before breakfast this morning – soldering the top bearing half's together.

                                        Thought I would quickly put up the sequence of soldering steps in case anyone like me who's not tried it before may be interested..

                                        Hopefully if I've messed up someone will explain..

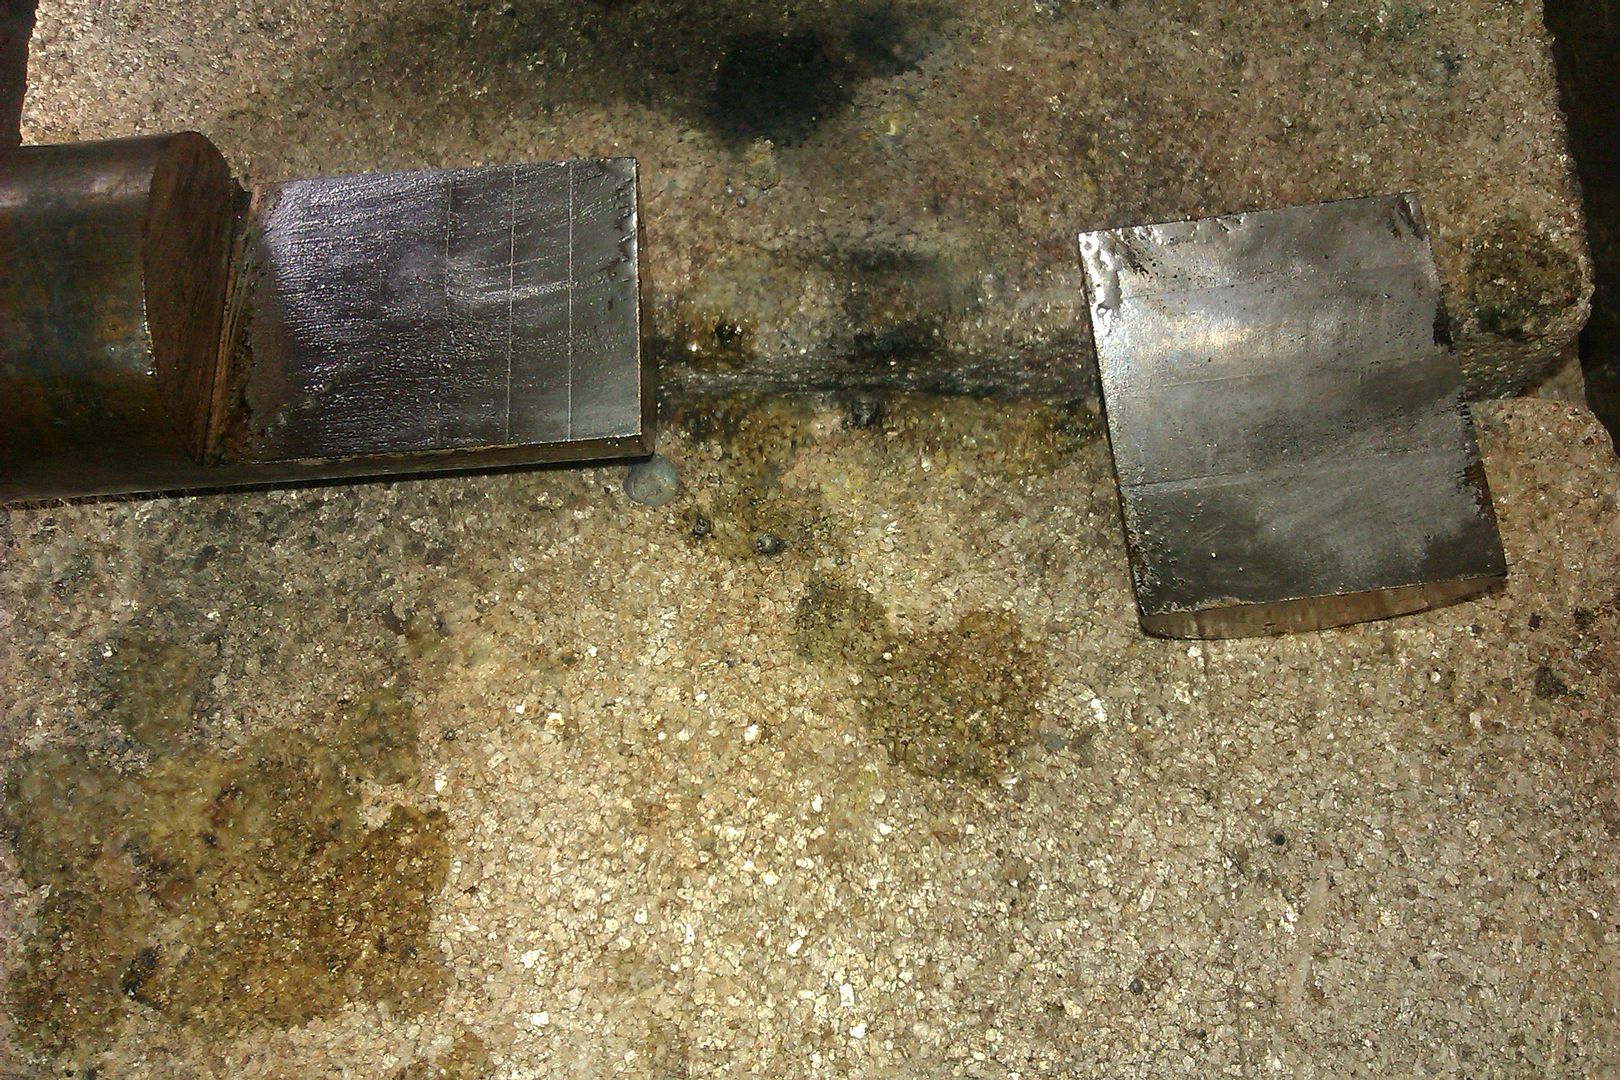
                                        My little soldering hearth…

                                        60. setting up to solder the top bearing halfs 1.jpg

                                        The solder paint applied when cold – i don't  know if this was maybe too much. Applied with a matchstick I'm afraid..

                                        61. the solder paint applied when cold.jpg

                                        Initial heating.

                                        62. heating the top bearing halfs.jpg

                                        After heating and wiping off the excess solder.

                                        63. after heating and wiping off the excess solder.jpg

                                        Solder paint reapplied to one surface after cooling.

                                        64. after cooling and applying more solder paint to one surface.jpg

                                        The two half's placed together.

                                        65. the two bearing halfs placed together while still cool.jpg

                                        Reheating.

                                        66. reheating.jpg

                                        I think I heated too much as they slid apart slightly.

                                        67. heating too much - they slide apart.jpg

                                        Back in line and cooling.

                                        68. the top bearing halfs reset and allowing to cool before machining.jpg

                                        Cooling before machining..

                                        69. cooling 2..jpg

                                        On to the lathe now  – after breakfast..

                                        Hope some found it interesting.

                                        Regards.

                                        Allan.


                                        Edited By Allan. on 01/05/2014 08:17:16

                                        Edited By Allan. on 01/05/2014 08:30:48

                                        #151158
                                        roy entwistle
                                        Participant
                                          @royentwistle24699

                                          Alan What happened ?

                                          #151159
                                          GarryC
                                          Participant
                                            @garryc

                                            Sorry Roy – should be ok to see now..

                                            Cheers.

                                            Allan.

                                            #151178
                                            roy entwistle
                                            Participant
                                              @royentwistle24699

                                              Alan Just a thought but I think I would have drilled two small holes where the bolt holes will be and pinned them together so that they couldn't move Pin with something like copper wire so that it is softer than the caps so it could be drilled out after

                                              I'm not trying to teach you to suck eggs

                                              Roy

                                              #151184
                                              Ian S C
                                              Participant
                                                @iansc

                                                Allan, you would be best if you don't apply the heat / flame directly to the solder surface, but to the metal from beneath, if the solder gets too hot it will boil off, and the lead in the air is not supposed to be good for you. I'v never tried the solder paint, I either use a stick of plumbers solder, or cored electricians solder, just heat up, touch the solder to the metal, use a bit of COTTON cloth to wipe off any surplus solder. Ian S C

                                                #151185
                                                GarryC
                                                Participant
                                                  @garryc

                                                  Hi Roy

                                                  Just came back in and seen your post – so too late for me to try really as I've already started turning in the Lathe, but it does sound a very good and a useful idea, something else I will remember thanks..

                                                  Hi Ian

                                                  Thanks very much, I'll know to do that now in future, and it's great to know I could have used the cored electricians or plumbers solder – I thought the solder paint was a bit pricey, I've just checked and 'electricians' is about 75% cheaper!! I owe you one there Ian…

                                                  and Jason if you read this – many thanks again to you for the steps to follow through in doing this for the first time…

                                                  I've made a little more progress on the lathe since the soldering and will post up again later..

                                                  Cheers.

                                                  Allan.

                                                  #151188
                                                  JasonB
                                                  Moderator
                                                    @jasonb

                                                    One thing I would say is don't use that nice little vice, flux will make things rust and the flux in the solder paint is quite a corrosive one.

                                                    I keep a couple of old toolmakers clamps just for soldering, as you can see they are not in pristine condition.

                                                    Probably a bit too much solder which will make the parts squirm about a bit. If using stick solder or electricians cored solder on large areas you will also want to flux them first.

                                                    J

                                                    #151201
                                                    GarryC
                                                    Participant
                                                      @garryc

                                                      Hi Jason

                                                      Yes, that makes sense and will do – I was quite surprised it wasn't more 'messy' than it was when doing it, I'd imagined it running lots more..

                                                      A little more progress in the Lathe – it will be worth in the future trying some of the CCGT carbide inserts for Gunmetal I think..

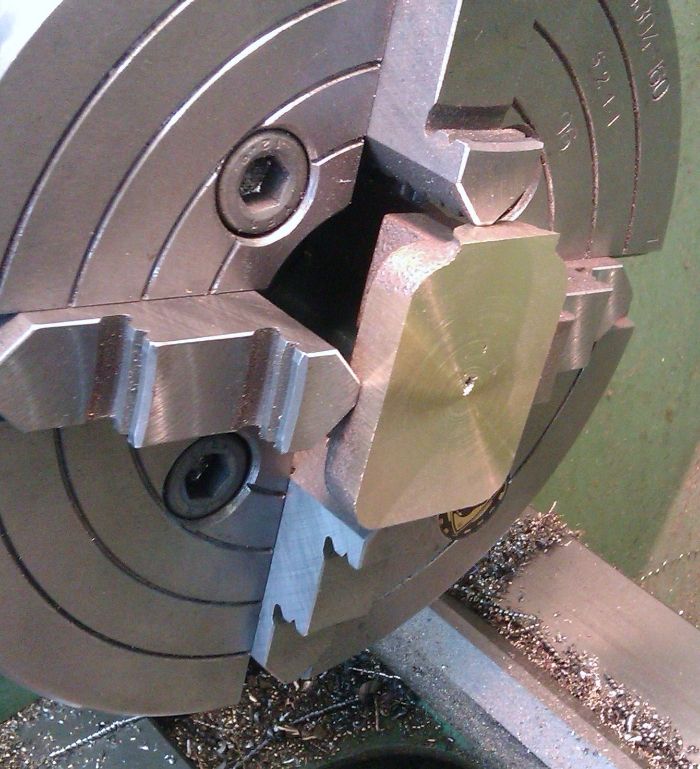
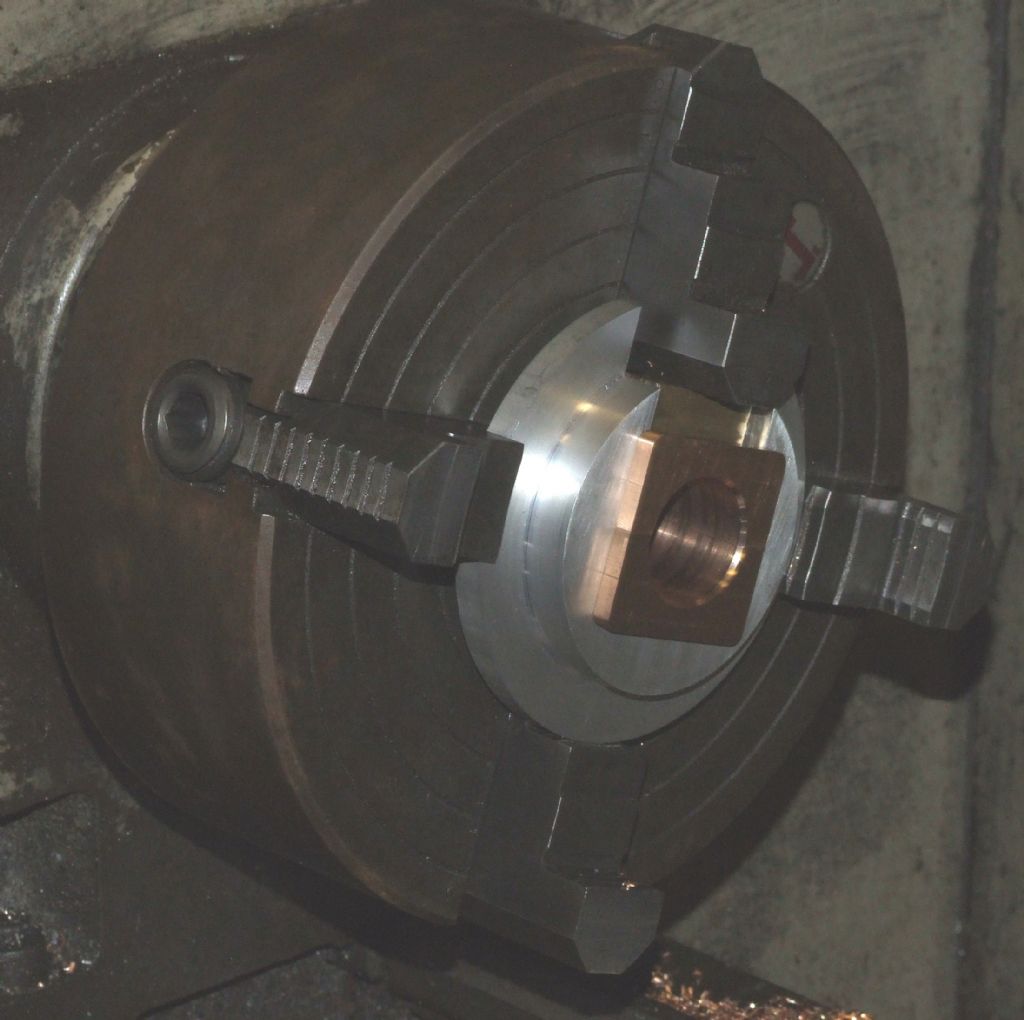
                                                      The bearing 'tops' in the lathe ready for the initial facing.

                                                      70. the bearing tops together on the lathe.jpg

                                                      Facing in order to be able to mark the centre..

                                                      71. initial facing of the bearing tops.jpg

                                                      After marking the centre, setting the bearing 'tops' to run true..

                                                      72. setting the bearing tops to run true.jpg

                                                      The bearing 'tops' so far 1.

                                                      73. the bearing tops so far 1..jpg

                                                      The bearings tops so far 2.

                                                      74.the bearing tops so far 2.jpg

                                                      Regards

                                                      Allan.

                                                    Viewing 25 posts - 51 through 75 (of 245 total)
                                                    • Please log in to reply to this topic. Registering is free and easy using the links on the menu at the top of this page.

                                                    Advert

                                                    Latest Replies

                                                    Viewing 25 topics - 1 through 25 (of 25 total)
                                                    Viewing 25 topics - 1 through 25 (of 25 total)

                                                    View full reply list.

                                                    Advert

                                                    Newsletter Sign-up