Stuart 10V Build Log – Complete Beginner…

Advert

Stuart 10V Build Log – Complete Beginner…

Home Forums Work In Progress and completed items Stuart 10V Build Log – Complete Beginner…

Viewing 25 posts - 326 through 350 (of 385 total)
  • Author
    Posts
  • #501092
    Nigel McBurney 1
    Participant
      @nigelmcburney1

      I have had the same experience,with me,brass and bsp.eg taps that have no clearance and jam in holes,plus dies that do not cut, nowadays I tend to bite the bullet and get HSS ground thread. I have British made BA and 40 tpi taps/dies,carbon steel cut thread now over 50 years old which still cut to size,its the source thats the problem,too much made from "bamboo"

      Advert
      #501253
      Dr_GMJN
      Participant
        @dr_gmjn

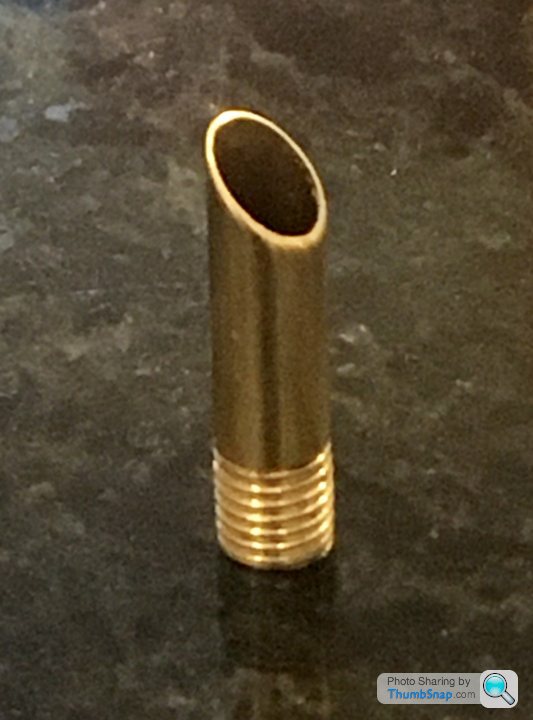
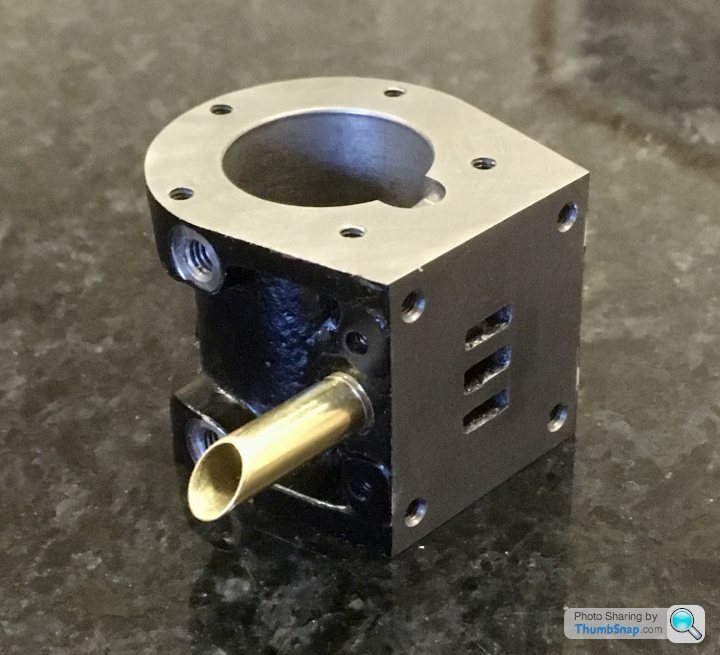
        Made a simple exhaust stub by threading some brass tube:

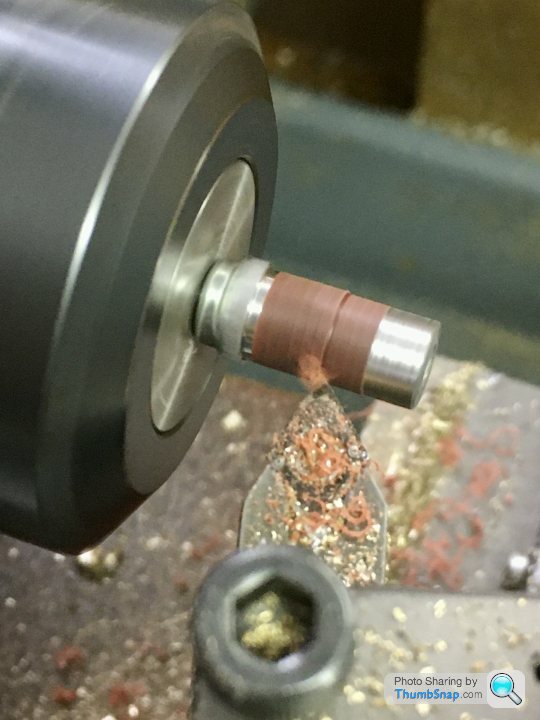
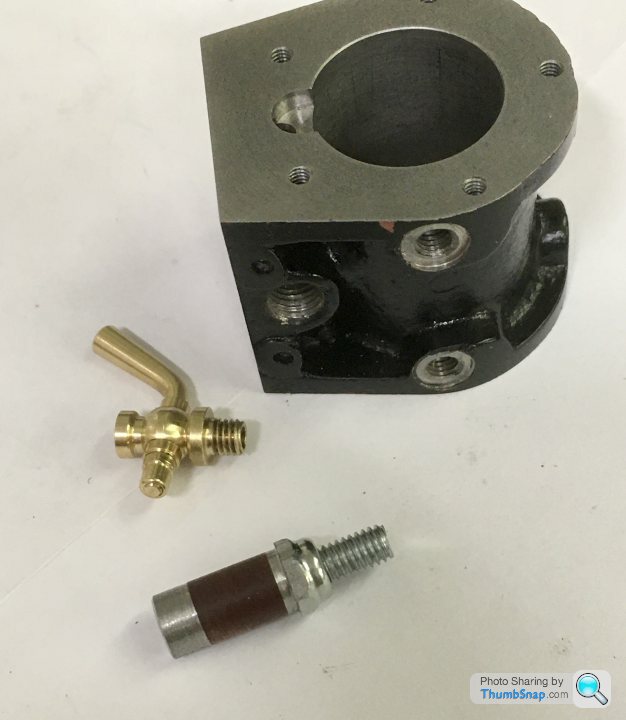
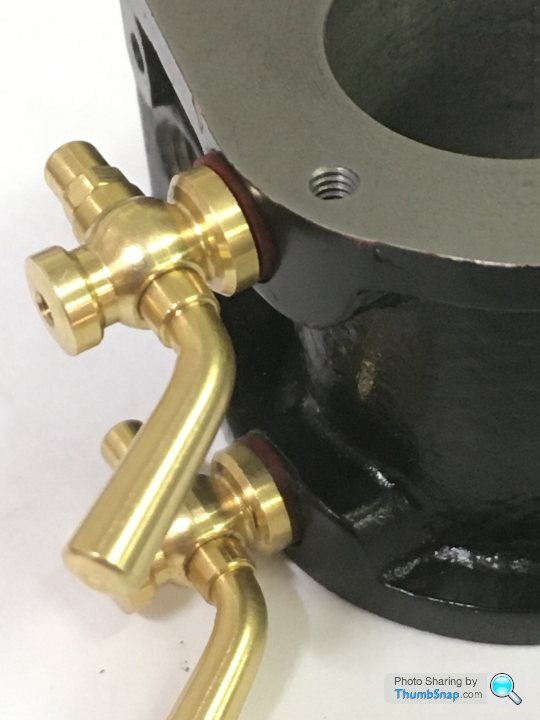
        Also turned down some fibre washers so they fit on the drain cock spot-faces. I can adjust the washer thicknesses until the orientation of the drains is right when tight:

        Still waiting for a step drill for the cladding, then that’ll be it.

        #501449
        Dr_GMJN
        Participant
          @dr_gmjn

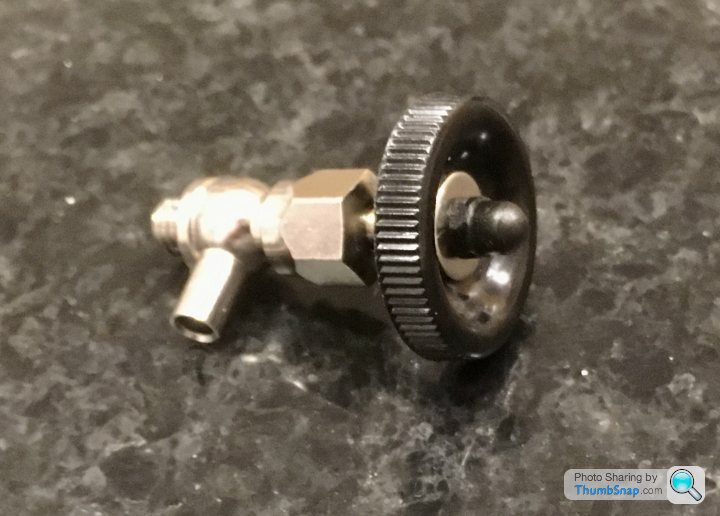
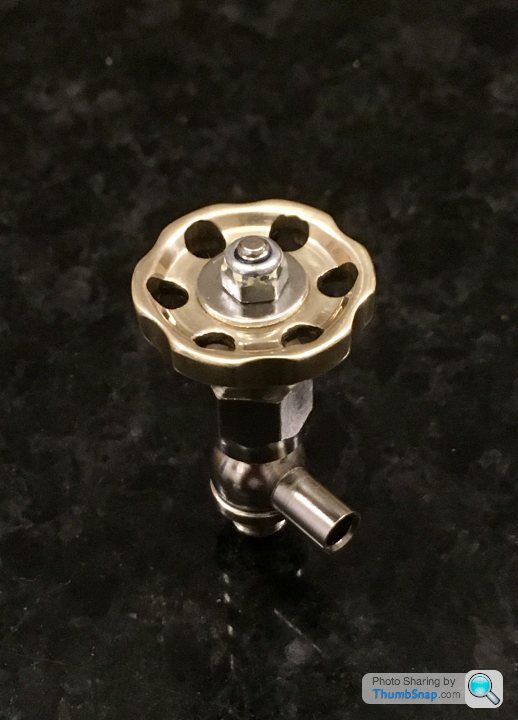
          I’ve got a Wilesco valve that I might try to use on the 10V somehow:

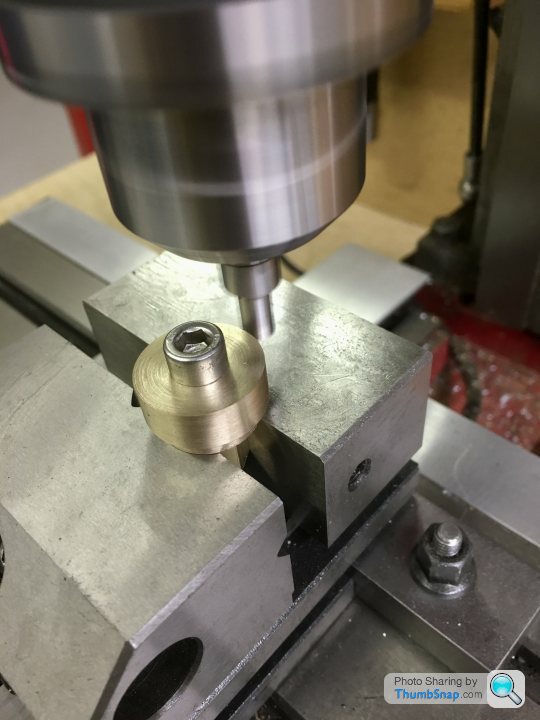
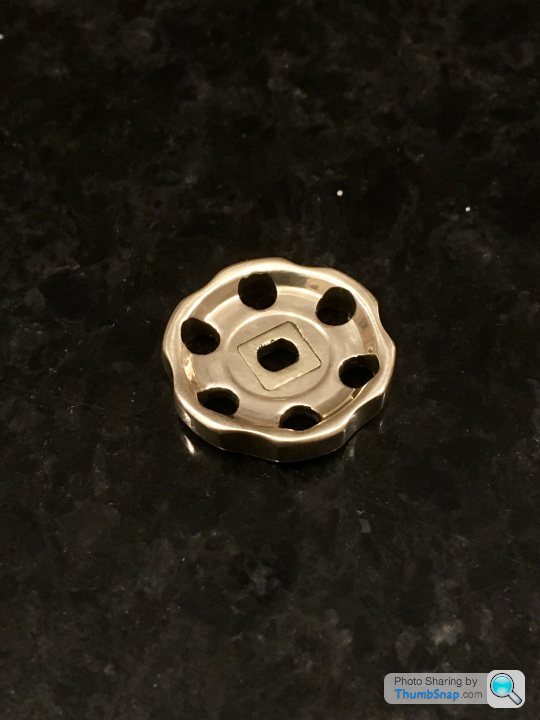
          I suppose I’m scratching about looking for things to make until the step drill arrives and I can call it done, but anyway. The black plastic wheel looked a bit cheap, so I made a replacement out of scrap brass:

          Bolted it to some brass hexagon bar and put in the vice, then got the centre using the edge finder:

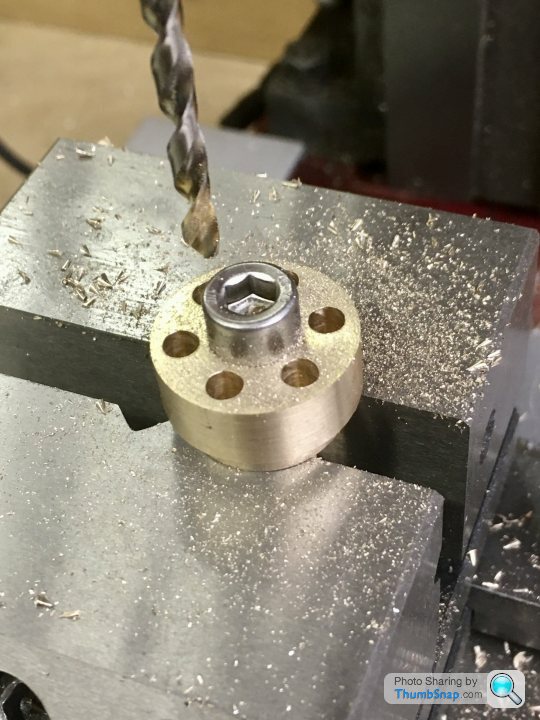
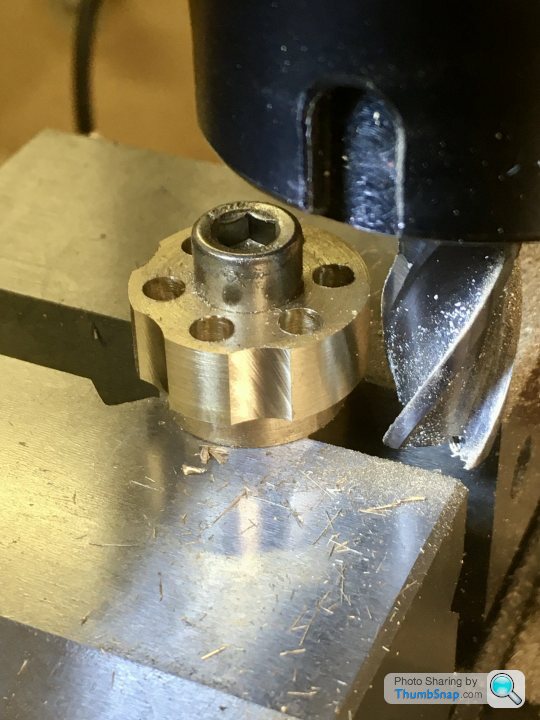
          Then co-ordinate drilled the holes in the correct orientation for milling the edge detents using the hexagon bar as a 60 degree angle fixture:

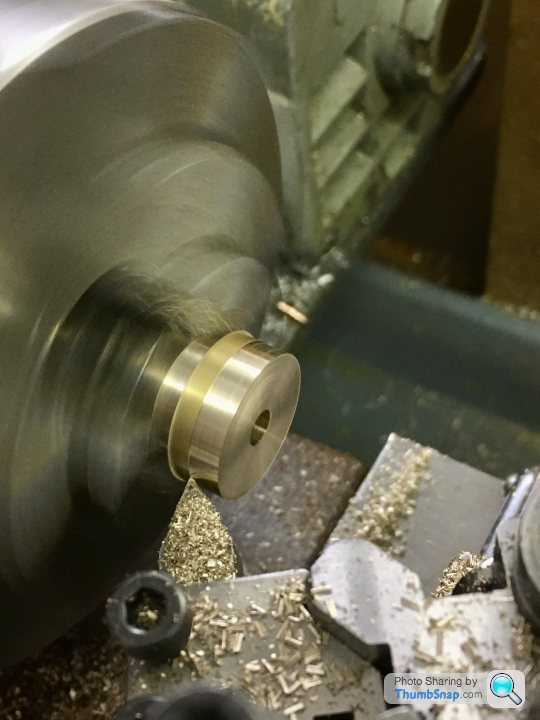
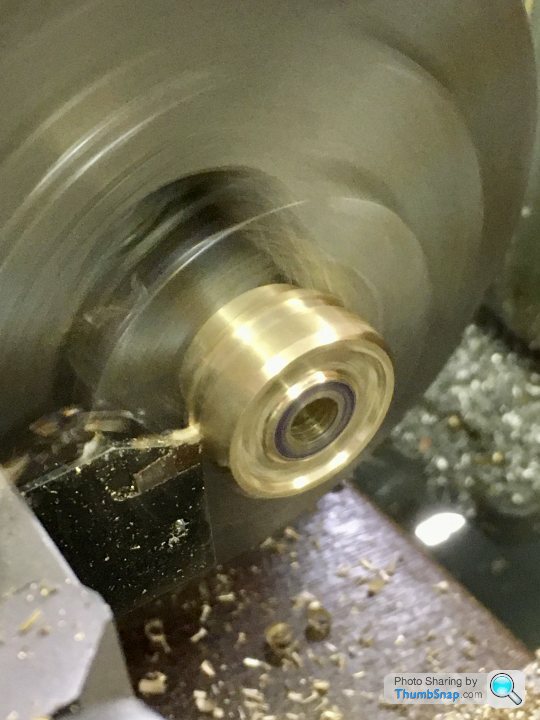
          Then back in the lathe for parting off and profiling the faces:

          Used a square file to open up the central hole to suit the original slotted plate. I’d used a 4mm drill so the circumference quadrant points could be used a filing limit for the square edges:

          #501605
          Dr_GMJN
          Participant
            @dr_gmjn

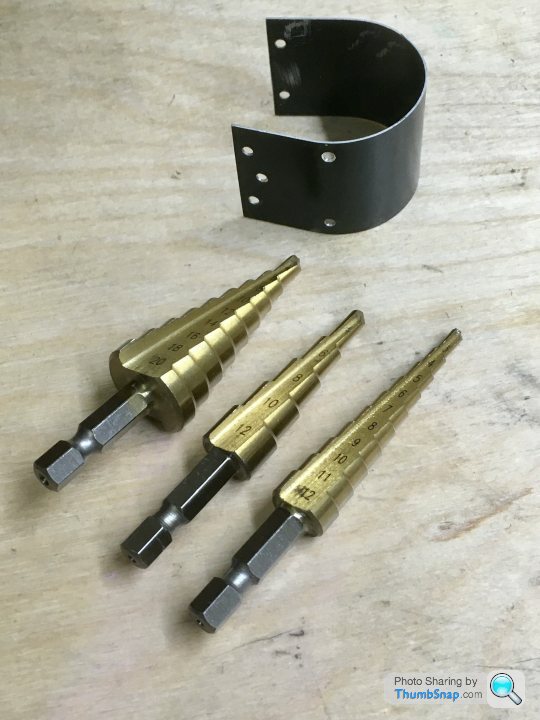
            Step drills arrived today:

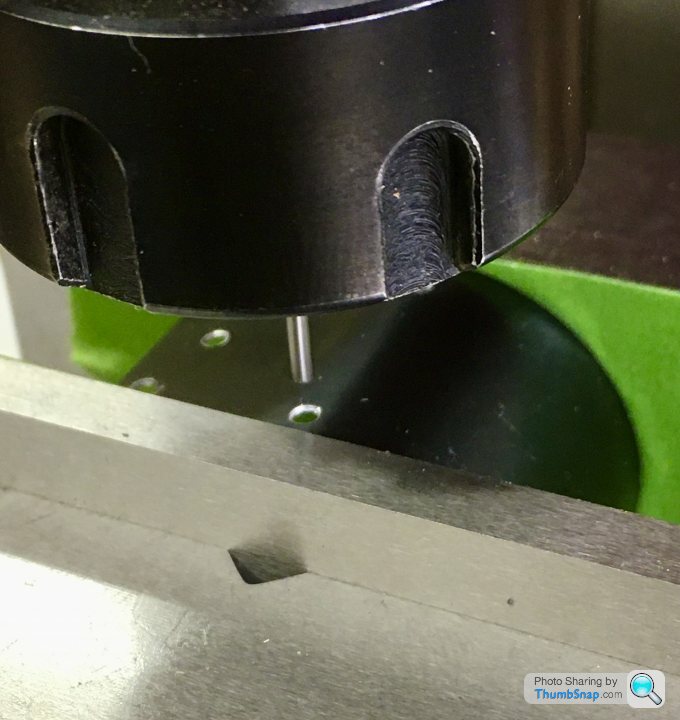
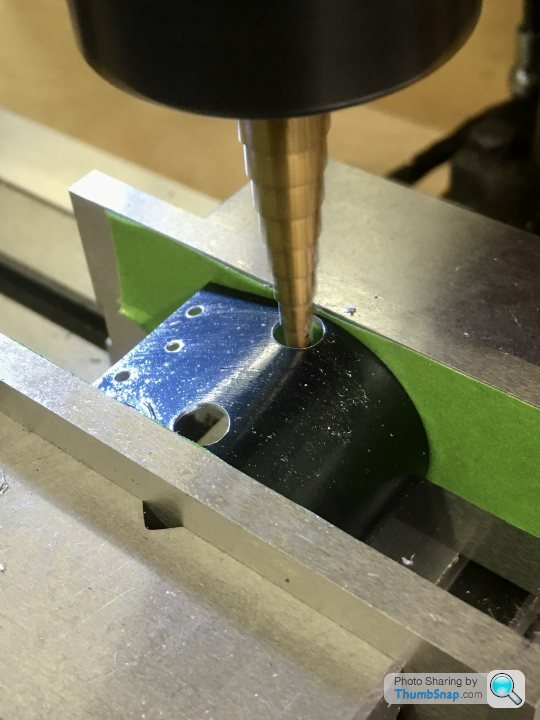
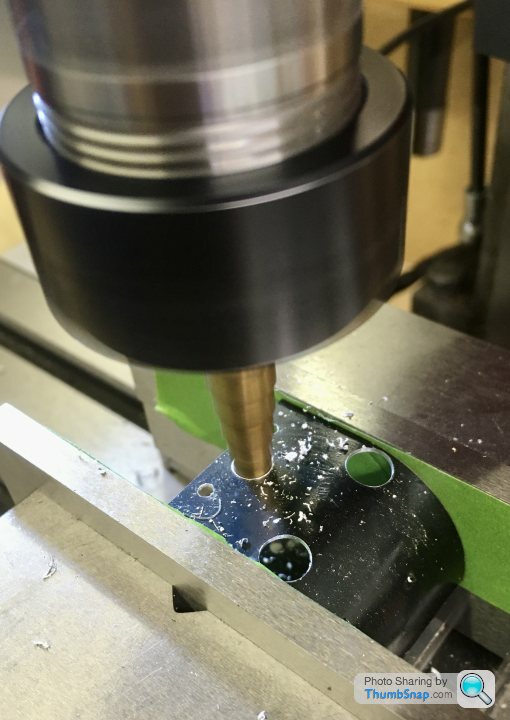
            I used some parallels to extend the jaws upwards, and put masking tape on the surfaces to give some extra grip, then re-aligned the pilot holes:

            The drain cock holes were less than 1mm from the edge, but the drills worked really well:

            Exhaust hole wasn’t a problem:

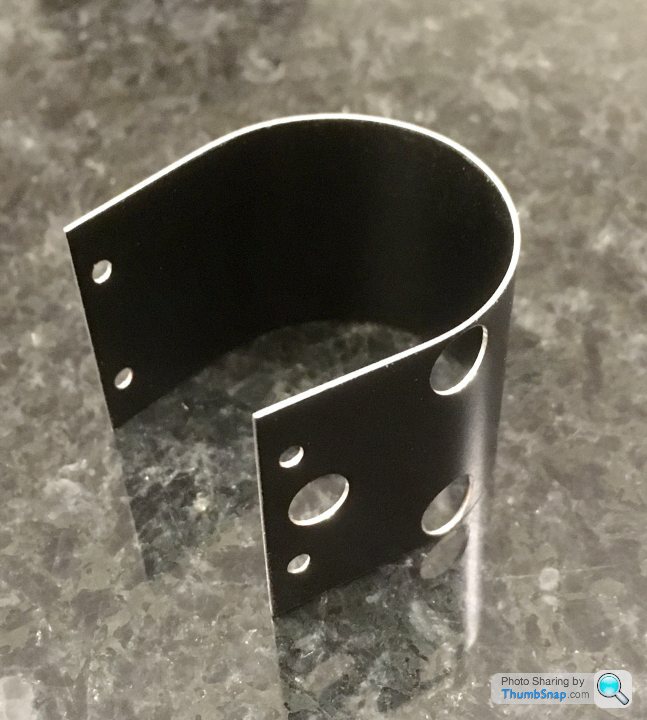
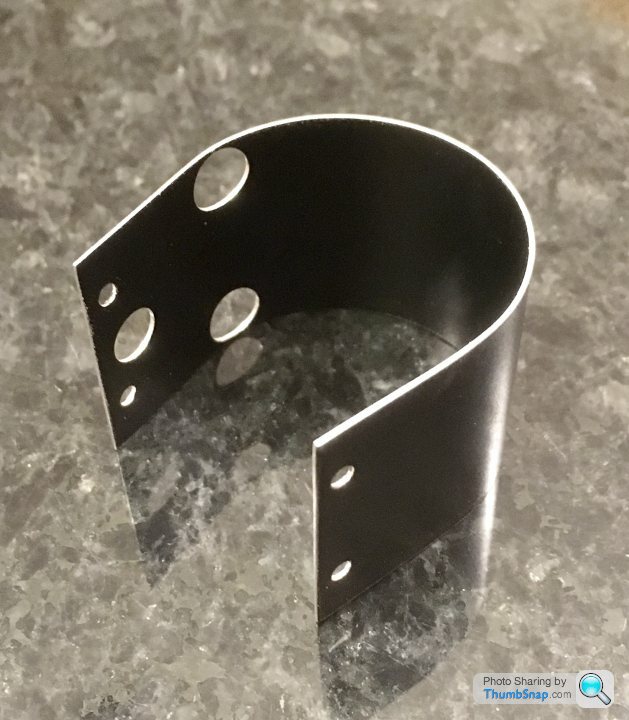
            I ended up spraying it satin black, then cleaned up the edges with wet & dry:

            So final assembly and testing next.

            #501846
            Dr_GMJN
            Participant
              @dr_gmjn

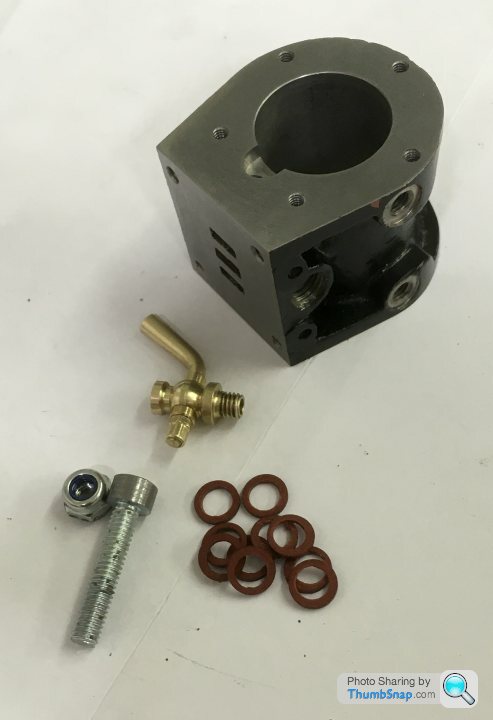
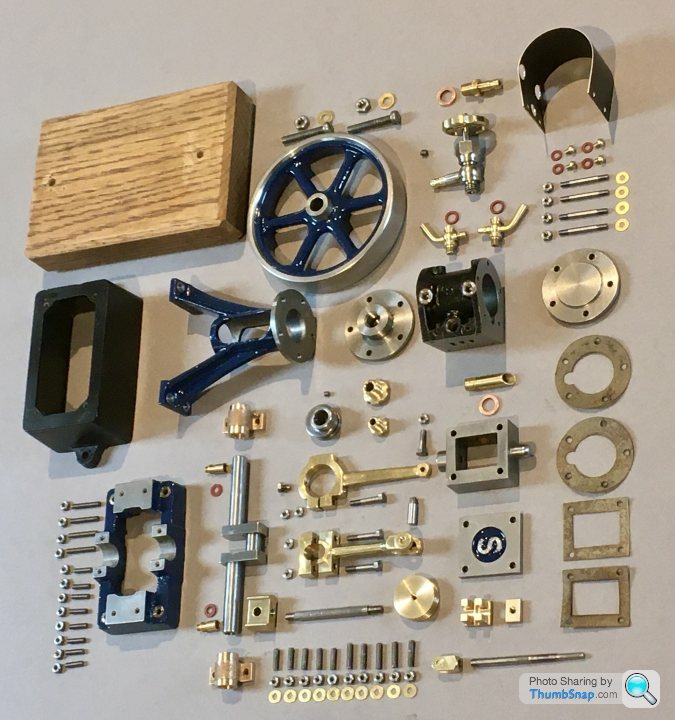
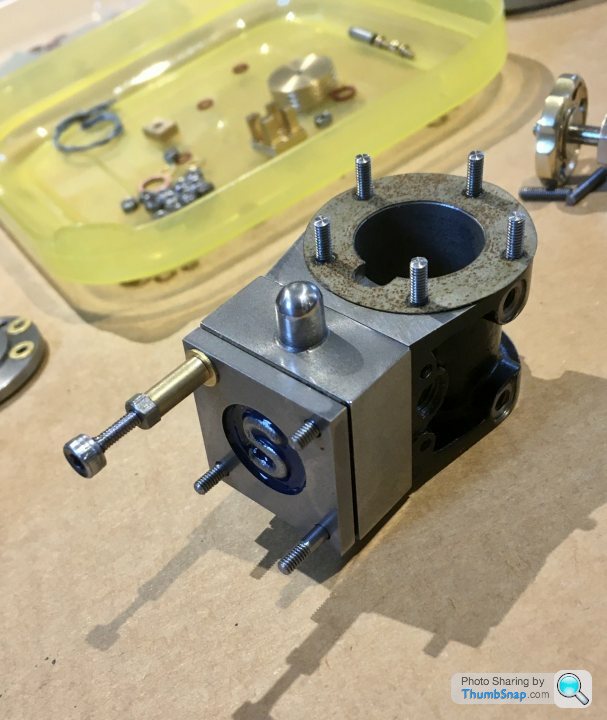
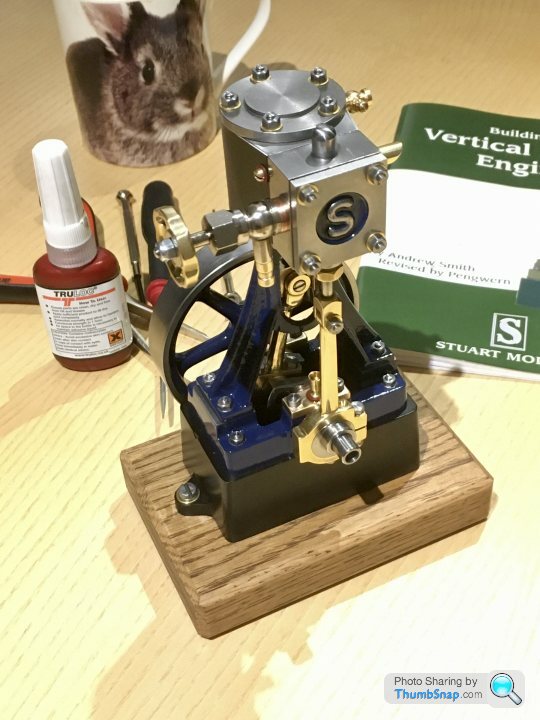
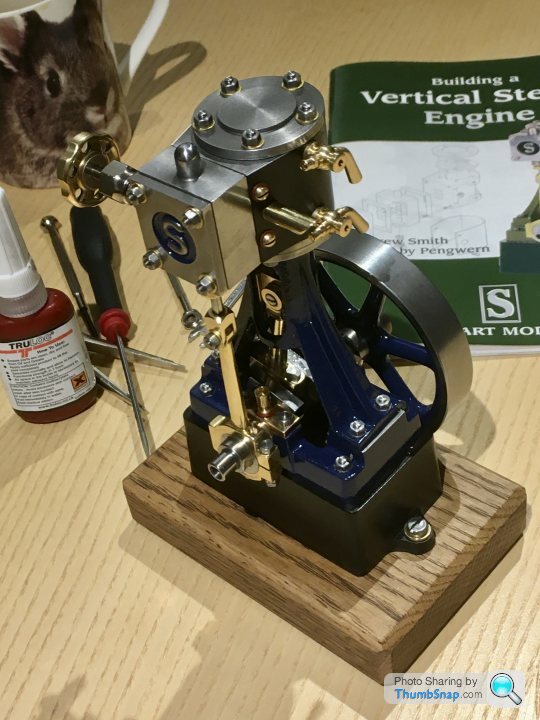
              Final assembly time. Here are the component parts:

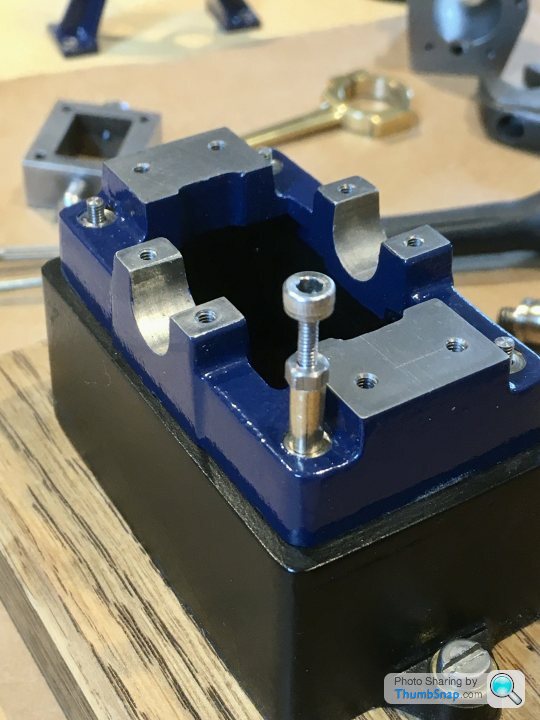
              I made an adjustable stud insert tool to get all the heights the same:

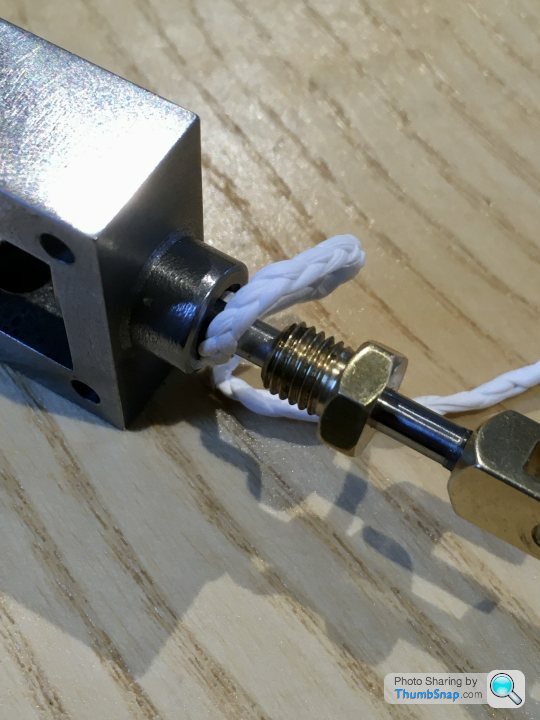
              I used PTFE tape, as per Jason's suggestion, but plaited to give some bulk, instead of using the rather flaky stuff in the kit:

              Ready for testing:

              I’ll post some better pics and a video of it running when I get chance. Thanks!

              #501857
              mechman48
              Participant
                @mechman48

                Dr_GMJN

                …'Also cleaned up all the Little end pin end, the stud ends and bolt heads – most of them had prominent pips:…

                These generally indicate that your tool tip centre height is incorrect; either too high or more is the probability too low, needs adjusting. Never the less superb workmanship, looking to see it running, well done that man!.

                George.

                #501863
                Dr_GMJN
                Participant
                  @dr_gmjn
                  Posted by mechman48 on 17/10/2020 10:41:06:

                  Dr_GMJN

                  …'Also cleaned up all the Little end pin end, the stud ends and bolt heads – most of them had prominent pips:…

                  These generally indicate that your tool tip centre height is incorrect; either too high or more is the probability too low, needs adjusting. Never the less superb workmanship, looking to see it running, well done that man!.

                  George.

                  Thanks very much George. The studs and bolts were supplied with the kit, so not guilty on those! I made the pin, and it did have a pip – In general getting tool height right is something I need to work on. It’s a pain whenever I change an insert tip to a different type for example.

                  #501866
                  roy entwistle
                  Participant
                    @royentwistle24699

                    When you bolt it to the wooden base. I personally would like to see nuts on top rather than screw heads.

                    For a first build, very well done. I admire your attention to detail.

                    Roy

                    #501868
                    Mick B1
                    Participant
                      @mickb1

                      That's a pretty impressive result, paying off a lot of assiduous work.

                      #501903
                      Dr_GMJN
                      Participant
                        @dr_gmjn
                        Posted by roy entwistle on 17/10/2020 11:22:34:

                        When you bolt it to the wooden base. I personally would like to see nuts on top rather than screw heads.

                        For a first build, very well done. I admire your attention to detail.

                        Roy

                        Thanks Roy – I'll turn the bolts round.

                        #501904
                        Dr_GMJN
                        Participant
                          @dr_gmjn
                          Posted by Mick B1 on 17/10/2020 11:35:11:

                          That's a pretty impressive result, paying off a lot of assiduous work.

                          Cheers Mick. Much appreciated.

                          #501905
                          Dr_GMJN
                          Participant
                            @dr_gmjn

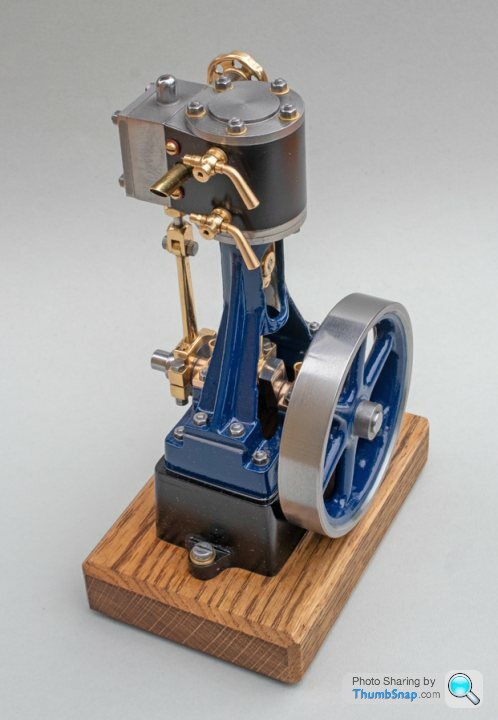
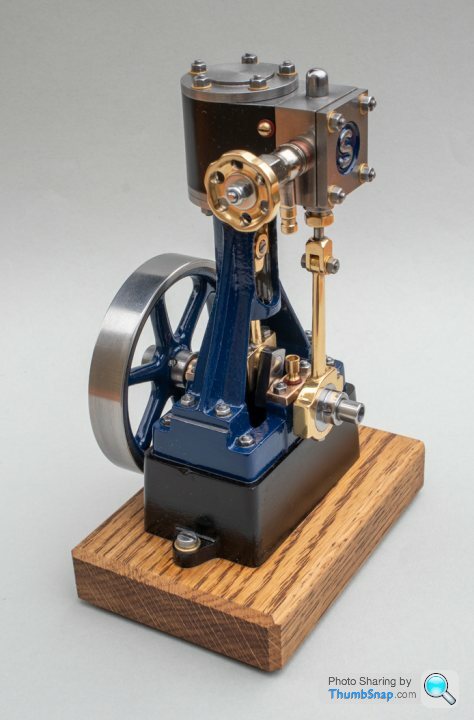
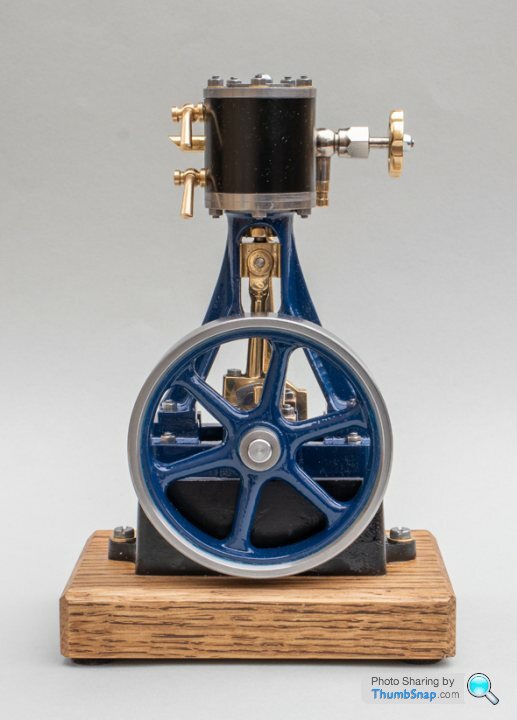
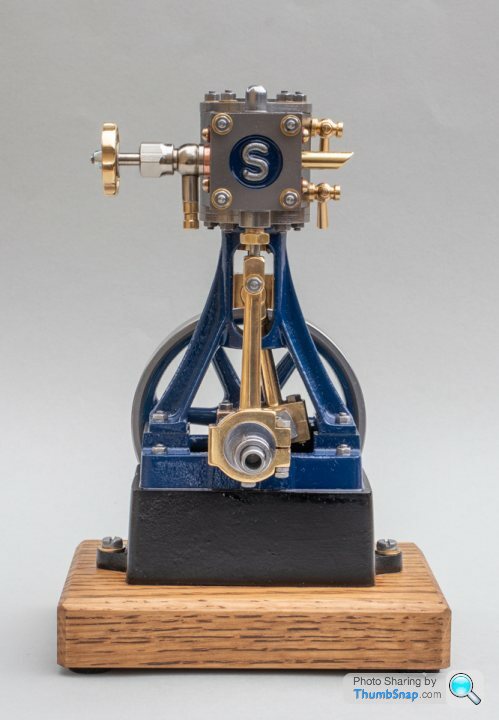
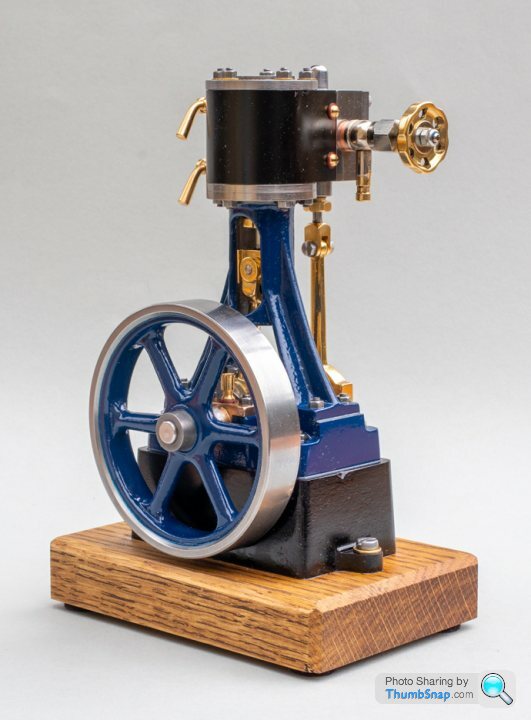
                            Here are some better finished images:

                            Thanks for all the help and advice over the past 5 months everyone; I'll post some videos up in a minute for comments. Cheers!

                            #501907
                            Dr_GMJN
                            Participant
                              @dr_gmjn

                              Guys, I ran the engine for the first time last night. It worked first time on a rough valve setting, which I got from this thread and reading the "Building the Stuart 10V" book. It had a tight spot at the bottom of the crank throw, but nothing serious. I did put the gland packing in, but just nipped up. The rods slide freely up and down. The valve timing hasn't been touched, but the tight spot has now eased considerably.

                              You may notice the screw in lace of the upper drain cock. It snapped off on tightening, I probably shouldn't have used PTFE tape. Anyway, minor detail.

                              You have NO IDEA how amazing it was for me (and the family!) to see this engine running for the first time. I know its about as simple as it gets, and it's no big deal for the old hands on here, but I can tell you I'm hooked. I'm already looking forward to my next build.

                              I quickly realised that despite me thinking it sounded brilliant, I have no real idea what a 10V should sound like, or what noises it should make under various loads and conditions. With this in mind – and also to show the results of a lot of great help and advice from this forum, I've made some video clips. I would really appreciate any comments on how you think it's running, and any adjustments I might need to make. In many ways it's irrelevant: I've built it, it runs, and I love it, but still I need to know. I hope these links work. They are posted on my son's drawing channel, so if you stray on to any of his videos by mistake, please trun the music volume down, as it may be bad for the hearing/wellbeing.

                              Slow/Medium speed, 10 psi (air)

                              **LINK**

                              Fast/Medium speed, 30 psi (air)

                              **LINK**

                              Turning by hand, 30 psi (air)

                              **LINK**

                              Under light load, 30 psi (air)

                              **LINK**

                              Muffled exhaust (ie mainly mechanical noise), 30 psi (air)

                              **LINK**

                              I am also going to post this in the "Beginners" forum. Thanks.

                              #501928
                              Ramon Wilson
                              Participant
                                @ramonwilson3

                                You certainly deserve to be congratulated on such a stunning result for your first attempt at ME yes

                                A superb log throughout and an excellent outcome. A fine runner too – superb tickover

                                Only one minor observational critique – the cheese head mounting screws are out of place to my mind – nuts would be much more in keeping.

                                Well done indeed

                                Looking forwards to what you will do with that Twin Victoria

                                Ramon

                                #501929
                                Dr_GMJN
                                Participant
                                  @dr_gmjn
                                  Posted by Ramon Wilson on 17/10/2020 17:54:57:

                                  You certainly deserve to be congratulated on such a stunning result for your first attempt at ME yes

                                  A superb log throughout and an excellent outcome. A fine runner too – superb tickover

                                  Only one minor observational critique – the cheese head mounting screws are out of place to my mind – nuts would be much more in keeping.

                                  Well done indeed

                                  Looking forwards to what you will do with that Twin Victoria

                                  Ramon

                                  Much appreciated Ramon, and thanks for your comments and advice throughout this thread.

                                  Roy also commented about the screws. I have already put the nuts on top, but they are standard nuts, not the ME types on the rest of the engine. I will swap them out when I order the fasteners for the Victoria.

                                  #501942
                                  geoff walker 1
                                  Participant
                                    @geoffwalker1

                                    Great finish Doc, well done, I love the parade of parts, very regimental not a part out of place.

                                    Well you've set the standard now, no going backlaugh.

                                    I suspect you will have no problem maintaining it.

                                    Geoff

                                    #501983
                                    Dr_GMJN
                                    Participant
                                      @dr_gmjn
                                      Posted by geoff walker 1 on 17/10/2020 19:08:43:

                                      Great finish Doc, well done, I love the parade of parts, very regimental not a part out of place.

                                      Well you've set the standard now, no going backlaugh.

                                      I suspect you will have no problem maintaining it.

                                      Geoff

                                      Thanks Geoff. I wanted to see all the parts I’d machined together in one place before they got lost in the assembly. It was a satisfying review of all the work Id put in.

                                      #501990
                                      David Noble
                                      Participant
                                        @davidnoble71990

                                        Very nice job, I'm more of a clock man but I certainly appreciate your craftsmanship.

                                        David

                                        #502000
                                        Dr_GMJN
                                        Participant
                                          @dr_gmjn
                                          Posted by David Noble on 18/10/2020 11:46:37:

                                          Very nice job, I'm more of a clock man but I certainly appreciate your craftsmanship.

                                          David

                                          Thanks for that David.

                                          #509177
                                          Roger Benson
                                          Participant
                                            @rogerbenson45349
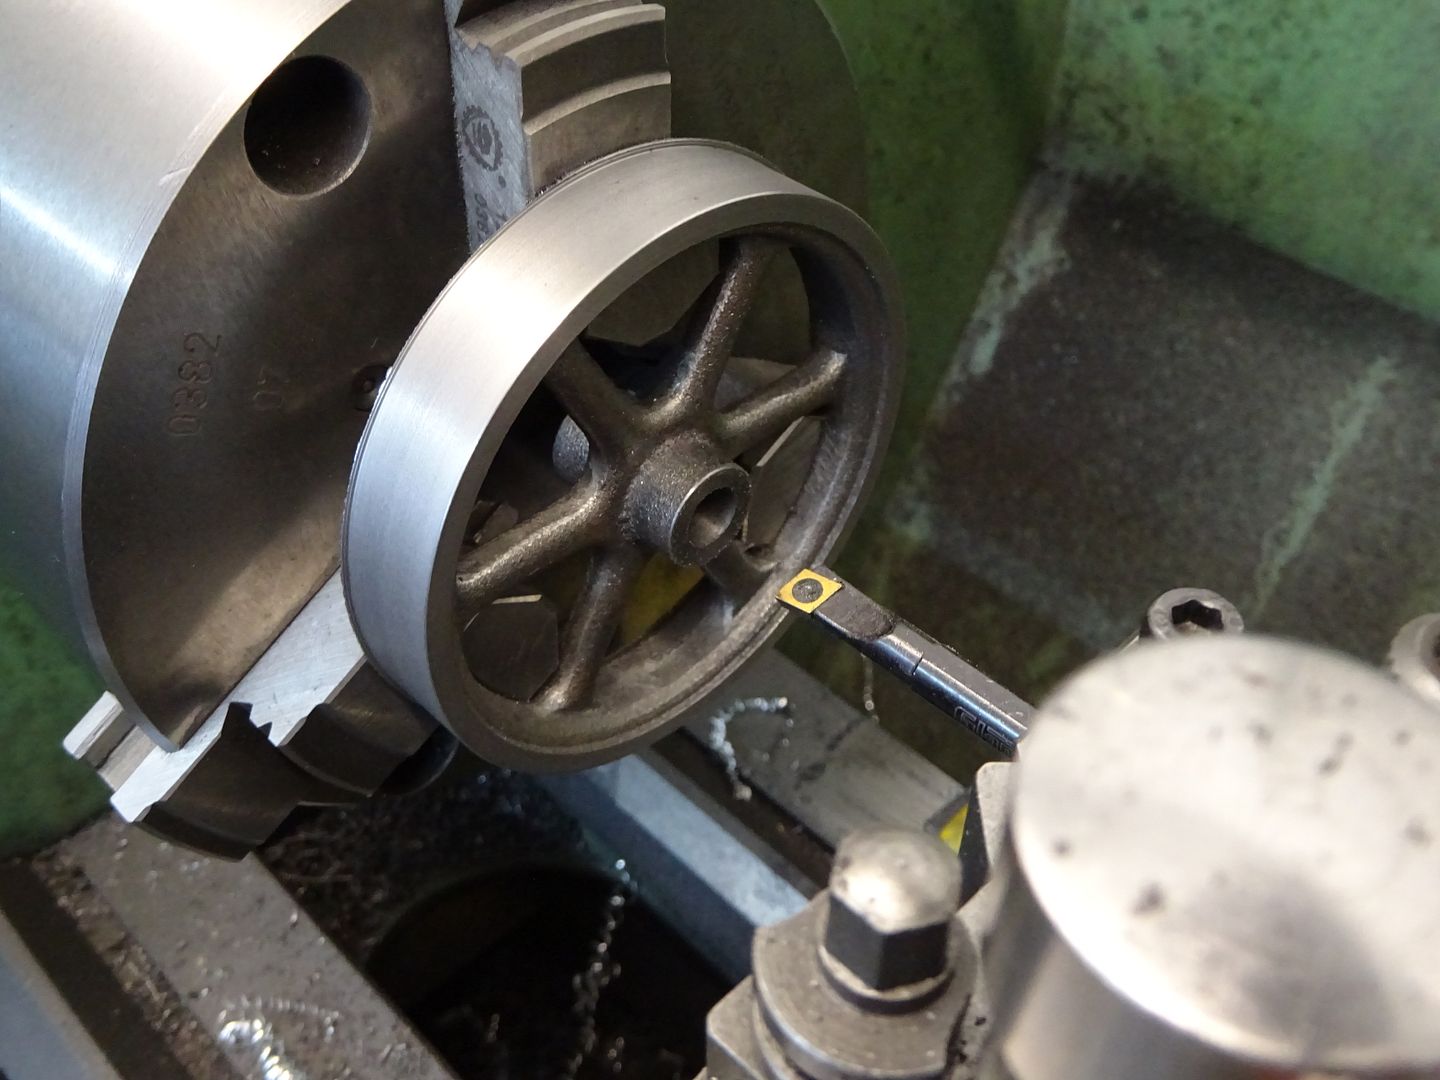
                                            Posted by JasonB on 28/06/2020 10:07:33:

                                            Personally I never machine flywheels on an arbor and it is just asking for chatter and a poor finish. If possible hold by the inside of the rim in either 3 or 4 jaw chuck. Stuarts are usually fairly true once cleaned up with files so 3 jaw will do. This way you can machine the face, 1 side, hub face and then finally bore all at one setting ( I don't ream) then just flip it over to do the other side of rim and hub which don't need any concentricity.

                                            Drill drains first, 1/16" or 1.5mm hole will do, threaded hole about 1/16 to 3/32 short of cylinder

                                            Edited By JasonB on 28/06/2020 10:08:58

                                            What is the thread size for the drain holes? I cannot find any reference to them on the drawing or in the booklet.

                                            #509178
                                            JasonB
                                            Moderator
                                              @jasonb

                                              You would have to use the smallest Stuart ones which are 5/32" x 40ME

                                              #509187
                                              Roger Benson
                                              Participant
                                                @rogerbenson45349

                                                Thank you Jason. Strange how it is missed on both documents.

                                                #509614
                                                Dr_GMJN
                                                Participant
                                                  @dr_gmjn
                                                  Posted by Roger Benson on 22/11/2020 14:39:45:

                                                  Thank you Jason. Strange how it is missed on both documents.


                                                  It's not missed – it's on page 54 of the booklet, and the part number for them, 34-50-71960, is on the bottom right table ( "Additional Items For This Model"  )on the assembly drawing.

                                                  Edited By Dr_GMJN on 24/11/2020 15:46:57

                                                  #509633
                                                  Ian Johnson 1
                                                  Participant
                                                    @ianjohnson1

                                                    Just been browsing your build thread and what a great result! I like the way you overcame problems and cleverly sorted them out.

                                                    And those finished photos should be in the Stuart catalogue!

                                                    IanJ

                                                    #509675
                                                    Dr_GMJN
                                                    Participant
                                                      @dr_gmjn
                                                      Posted by Ian Johnson 1 on 24/11/2020 16:47:54:

                                                      Just been browsing your build thread and what a great result! I like the way you overcame problems and cleverly sorted them out.

                                                      And those finished photos should be in the Stuart catalogue!

                                                      IanJ

                                                      Thanks Ian! Too kind – Most of the issues I had were resolved just by asking questions on here. Looking back, it was pretty straightforward, but all the same daunting for a beginner.

                                                    Viewing 25 posts - 326 through 350 (of 385 total)
                                                    • Please log in to reply to this topic. Registering is free and easy using the links on the menu at the top of this page.

                                                    Advert

                                                    Latest Replies

                                                    Viewing 25 topics - 1 through 25 (of 25 total)
                                                    Viewing 25 topics - 1 through 25 (of 25 total)

                                                    View full reply list.

                                                    Advert

                                                    Newsletter Sign-up