Stirling Engine : Laura

Advert

Stirling Engine : Laura

Home Forums Stationary engines Stirling Engine : Laura

Viewing 25 posts - 276 through 300 (of 764 total)
  • Author
    Posts
  • #219937
    Michael Gilligan
    Participant
      @michaelgilligan61133

      Back on page 11, there was some discussion about graphite:

      For info … Bengs

      MichaelG.

      Advert
      #219942
      Howi
      Participant
        @howi

        Brian the displacer needs to be a loose fit, make to size that is per plan. The displacer moves air from the hot end to the cold end. You need a a certain minimum volume of air in the engine for it to work. The driving piston is the one needed to be made to close tolerance I.e no air leakage.

        In a Stirling engine the air contained within the system relies on the following variables :- volume, temperature and pressure. You have a fixed volume of air, the heat source increases the temp which increases the pressure to the driving piston, the displacer then moves the hot air to the cold end, temp of air now decreases causing drop in pressure which pulls the piston back in, sort of double acting piston.

        #219948
        Michael Gilligan
        Participant
          @michaelgilligan61133
          Posted by Brian John on 08/01/2016 05:35:31:

          … using the supplied aluminium. This was much better : the aluminium machined like brass and my lathe did not get hot either. I wish I knew what it was so I could buy more from somewhere.

          .

          Brian,

          So far as I can see, the aluminium supplied by Bengs is not listed as a stock material [on the web shop] … so it seems reasonble to assime that it is nothing particularly exotic.

          Look back at my post of 08:40:18 yesterday.

          Norweld should be able to tell you what they sold you … so you know you need something with better machinability than that … It's a start, anyway.

          MichaelG.

          #219997
          Ian S C
          Participant
            @iansc

            Another way of making displacers, and hot caps is to use thin walled stainless tube, and Find a tame TIGer (if you can't DIY), and weld a disc to one end, assemble as before.

            I have not looked at the plans for this engine, but I would imagine that the displacer would be about 2 mm less than the inside dia of the test tube, and it would still work ok at 3mm. It is a worthwhile experiment to try a number of different diameters. The displacer MUST NOT touch the displacer cylinder, the only time contact may occur is if you use a porous displacer made of steel wool, or stainless gauze, in these cases, minimal clearance is required to force the air through the displacer.   Sorry for the double image, if someone can clear one of them, OK.

            Ian S CNew displacerNew displacer

            Edited By Ian S C on 08/01/2016 13:00:28

            #220172
            Brian John
            Participant
              @brianjohn93961

              I have made another displacement piston today : this time it is the required 12.5mm as per the instructions. So now I have three : 12.9mm,  12.7mm, and 12.5mm ! When it comes time to assembling and running this engine for the first time, I will have a number of parts which I can quickly exchange to see which one works the best. I will also have three work pistons made up for the same reason.

              Andrew : any luck with your engine yet ?

              Is that graphite bar stock hard like metal ? What does it feel like to touch ie. does it rub off in your hands ?


              Edited By Brian John on 09/01/2016 08:10:17

              #220173
              Hopper
              Participant
                @hopper

                Brian, be warned that if you do get hold of some graphite, do not machine it inside the flat! The mess will make the angle-grinder incident look clinically clean.

                You can buy the graphite bar online, either from eBay where it is sold for jewellers to use for stirring molten gold and silver etc, or there is a graphite supplier that is something like graphite.com or some such.

                #220176
                Brian John
                Participant
                  @brianjohn93961

                  Thank you for the warning Peter : I will give the graphite bar a miss

                  #220181
                  Michael Gilligan
                  Participant
                    @michaelgilligan61133

                    I have no experience of working graphite for pistons; but I am definitely interested in the possibilities.

                    This brief summary from JEH looks worth 'bookmarking'

                    MichaelG.

                    #220188
                    Brian John
                    Participant
                      @brianjohn93961

                      So the pistons in a Stirling engine should never be oiled at all…that is news to me.

                      How about using powdered graphite to lubricate the brass work piston/cylinder….or do not lubricate at all ?

                      #220189
                      Michael Gilligan
                      Participant
                        @michaelgilligan61133
                        Posted by Brian John on 09/01/2016 09:58:02:

                        …that is news to me.

                        .

                        Good … That's what forums are for.

                        We've both learned something useful.

                        ['though, of course, someone may contradict what JEH states]

                        MichaelG.

                        #220228
                        Ian S C
                        Participant
                          @iansc

                          If in future you want to try graphite, when you machine it mount the suction end of the vacuum cleaner just opposite the tool on the lathe. Yes you will get black hands.

                          Metal pistons sometimes need a very light/low viscosity oil, the same oil is ok for the bearings, and in most circumstances the gland for the displacer rod. Some of the gland bushes in my motors are made of Carbon impregnated Teflon, and should not be oiled, nor should the one with a cast iron bush. Some "experts" say that ball raced should have the seals removed, the grease removed and replaced with low viscosity oil, I leave them alone.

                          I think foundries use graphite in block form, I'd like to try it one day. There used to be a company in Christchurch (NZ) that made carbon motor brushes, but I have not seen them since the earth quake 5 years ago, business's have moved all over the place, it's hard to find some of them, others closed or left town.

                          Ian S C

                          #220504
                          Brian John
                          Participant
                            @brianjohn93961

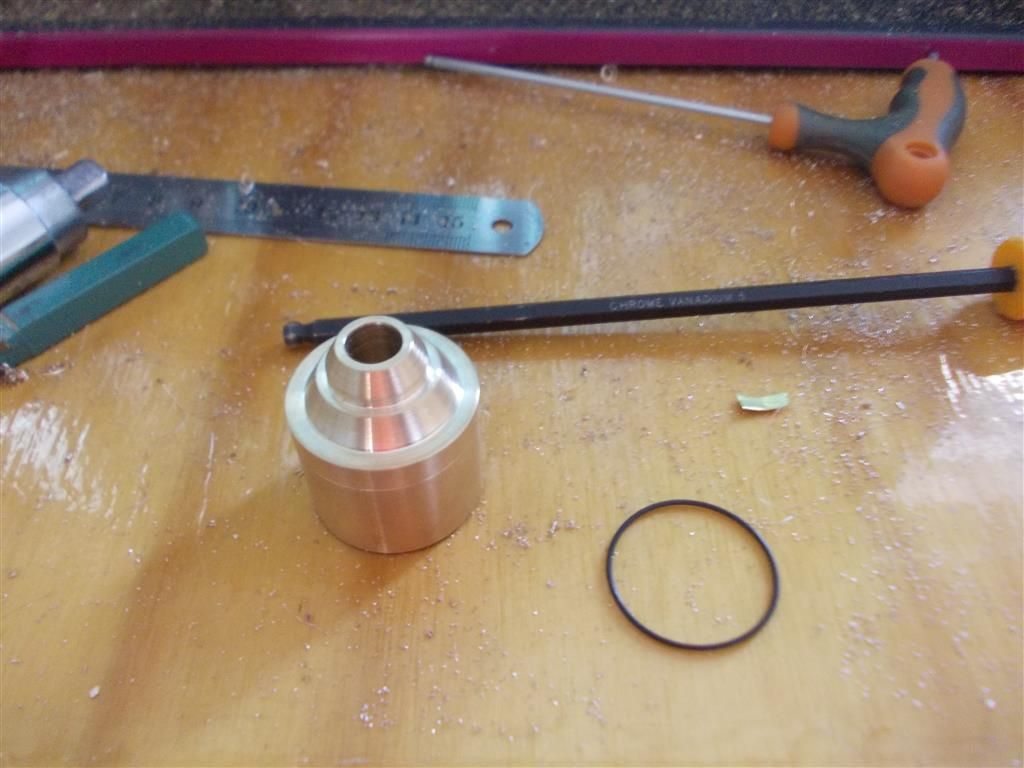
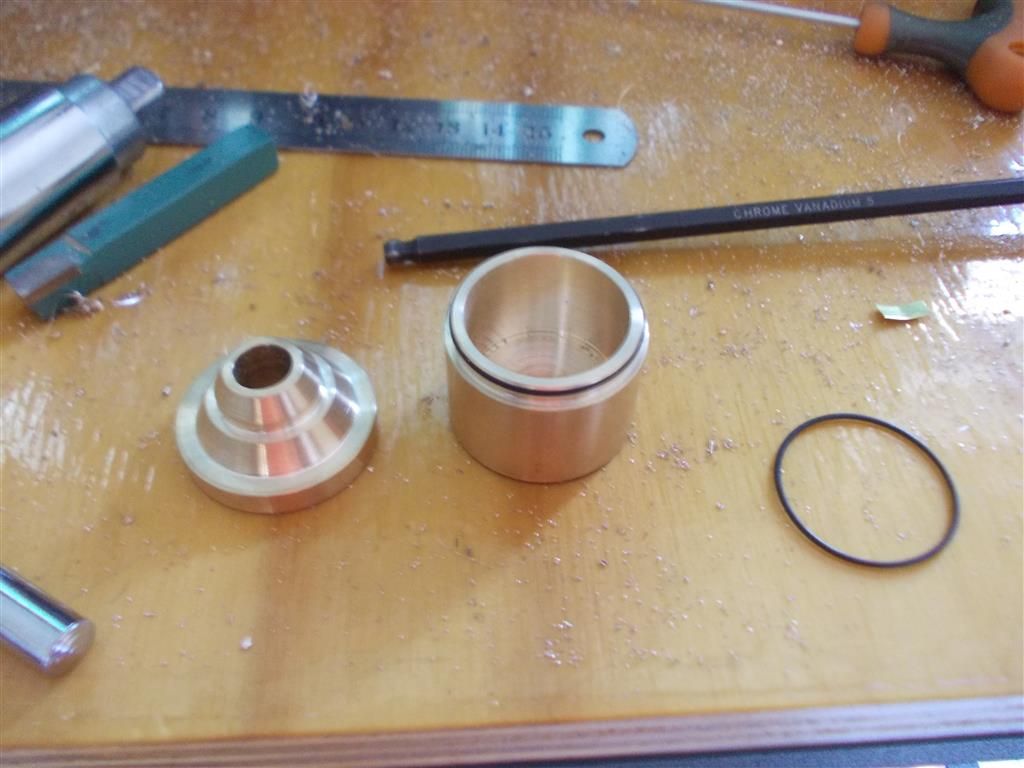
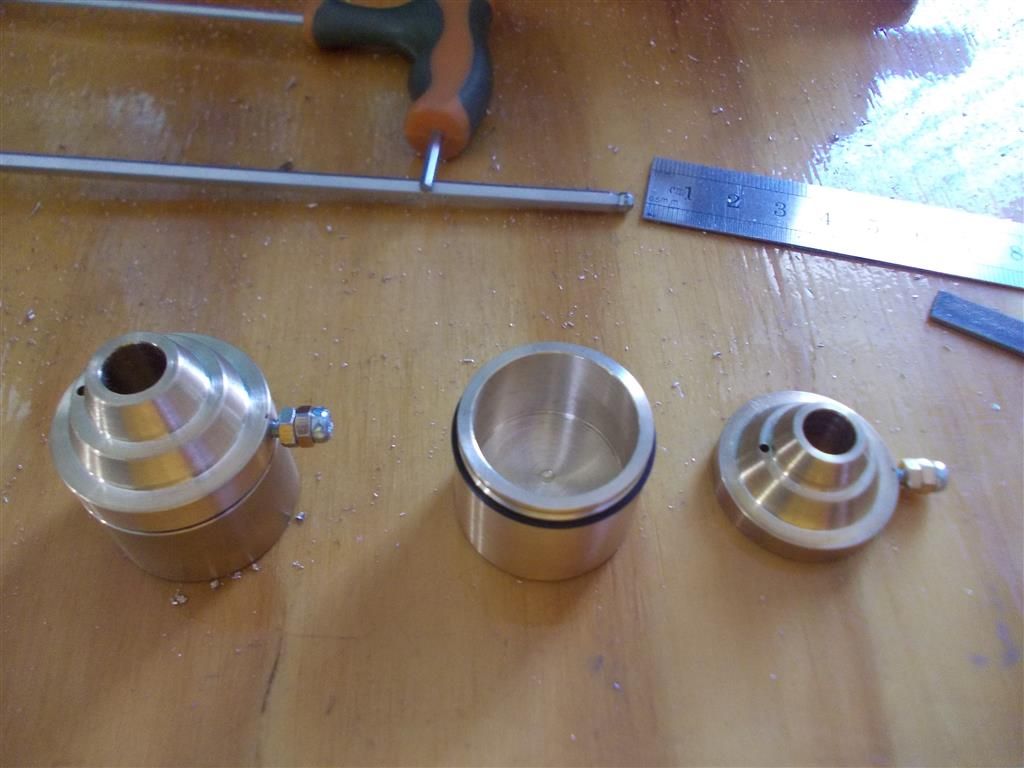
                            I tried to make the burner today : bit of a disaster ! It is a good exercise in turning tapers and using the boring bar. I successfully made the base including a recess for the rubber O ring. Then I made the top for it. I carefully made the top to fit the base and I ended up with a great interference fit…without the O ring ! So I then tried to take a bit more from the inside of the top to accommodate the O ring and now it is too big….bugger.

                            I can salvage the situation by drilling and tapping for an M3 socket screw on the side of the top ; that way I can just finger tighten it. This is not a bad idea ; the more I think about it, the more I like it.

                            Or I could make another top to fit this base and another base to fit this top. That would be a good exercise in turning and boring. I will end up with two burners but they are useful things and they have given me two O rings in the kit.

                            I will be extra careful tomorrow. How necessary is the O ring anyway ? I am thinking of doing without it and just using an interference fit (maybe with the M3 locking screw as well).

                            burner 1.jpg

                            burner 2.jpg

                            Edited By Brian John on 11/01/2016 07:08:34

                            Edited By Brian John on 11/01/2016 07:12:05

                            #220505
                            pgk pgk
                            Participant
                              @pgkpgk17461

                              I'm guessing the o-ring is there to make this a firm pushfit and to prevent leakage from carrying/vibration that could lead to ignition around the tank. Perhaps an O-ring with a thicker ring is availaable?

                              #220546
                              Brian John
                              Participant
                                @brianjohn93961

                                That is a good idea if I can get the correct size O ring : I have 28 x 26 x 1mm. I think I will need 29 x 26 x 1.5mm

                                Edited By Brian John on 11/01/2016 11:33:31

                                #220559
                                Ian S C
                                Participant
                                  @iansc

                                  I think you may find that with out an O-ring it may leak meths when it gets a bit warm.

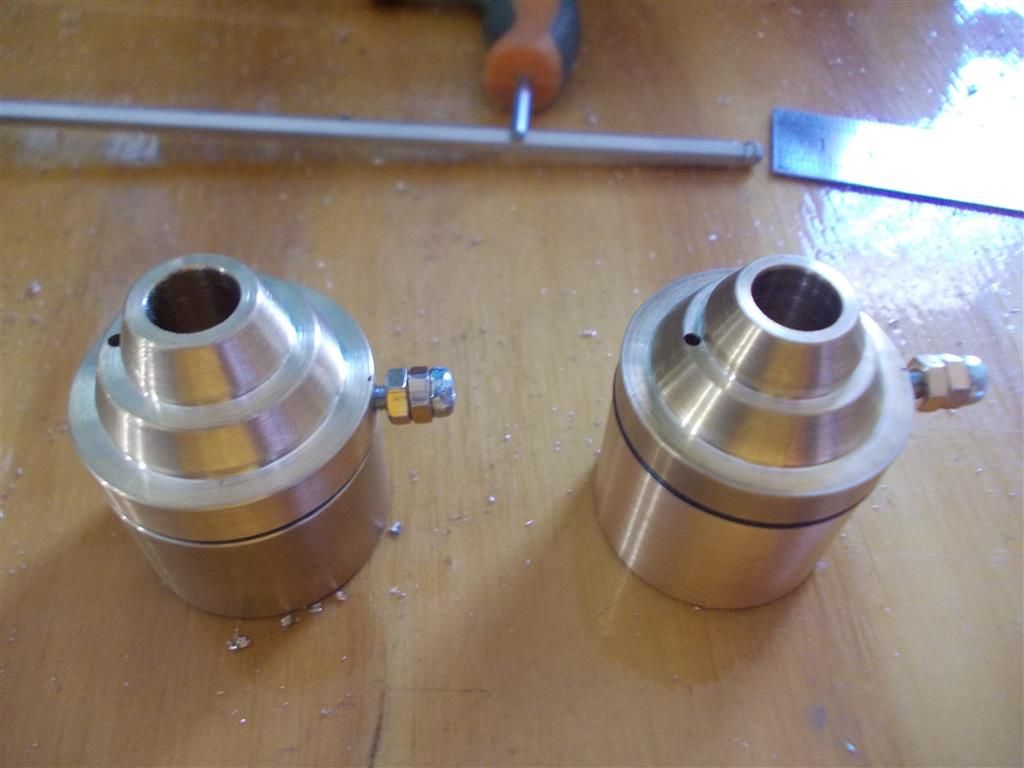
                                  I don't see it, but is there a wee hole (1.5 mm/ 1/16&quot in the top of the burner, this is needed to allow air in as the meths is burnt.
                                  Ian S C

                                  #220563
                                  Brian John
                                  Participant
                                    @brianjohn93961

                                    Yes, I know. I have not forgotten the breather hole. I just ran out of time this afternoon

                                    #220565
                                    Ajohnw
                                    Participant
                                      @ajohnw51620

                                      2nd Hopper's comment but on small thread and crap dies I might reverse every 1/4 to 1/3 turn.

                                      Keeping the die square to the axis is really important especially when starting and until the die has cut most of it's own depth. The work can be held in the chuck and the nose of the tail stock used to help with that aspect. Advance tail stock, take a cut, back off the tail stock, break the chip, wind forwards again, advance tail stock, take a cut and so on.

                                      Dies are sometimes one sided when used – one side has a bit of a lead in chamfer, the other hasn't. The sharp side can sometimes be used to clear the last part of the thread up to a shoulder with care.

                                      John

                                      #220825
                                      Brian John
                                      Participant
                                        @brianjohn93961

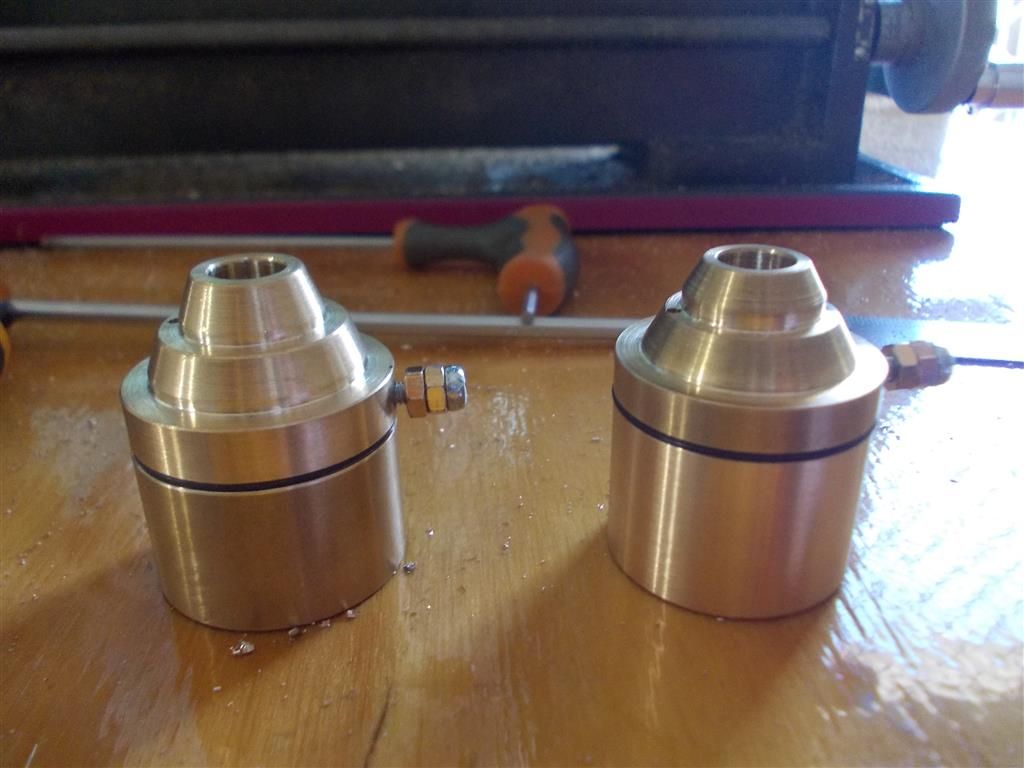
                                        I gave up trying to get the O ring to sit in the recess and have the top fit snugly over it. I can good a great interference fit between the top and the base but not with the O ring….bugger of a thing ! So I modified the design by drilling and tapping the side of the top to take a 3mm screw at the side. The nuts are just to give me something to grip with my fingers. It is not very elegant but it will do for now. The rubber O ring is not really doing anything now. I will make some wicks and try out both burners tomorrow. Yes, I drilled the breather holes too.

                                        I am still waiting for my square brass bar to arrive (parts 12, 14 and 18). It was supposed to be here last week. The supplied brass bar has been used for other things…don't ask !

                                        I have also been putting off making the crank arms ( 8 and 9). You might remember that I stuffed up my first attempt to make them. I will have to have another go soon because I am running out of other parts to make

                                        Andrew : any luck with your engine ?

                                        burner 3.jpg

                                        burner 4.jpg

                                        burner 5.jpg


                                        Edited By Brian John on 13/01/2016 07:02:06

                                        Edited By Brian John on 13/01/2016 07:04:23

                                        #220864
                                        Ajohnw
                                        Participant
                                          @ajohnw51620

                                          Personally I would put the O ring in a groove in the cap. So make the bottom, add bit of a chamfer to the inside edge of the top, polish and then make the cap. Aim for around 10% compression on the O ring but fit it in the groove and then try the base on it. Adjust accordingly while it's still on the lathe. This would mean that the total height of the top would have to be less than the depth of the cup – or it would be as I would make it.

                                          I have a small spirit burner that has a ground glass cap to go with it. Trouble is that when it's filled with meths and left for a while the stuff still evaporates so I would make a cap for the burner as well. In that case it may be best to put the O ring in a groove in the cap then fit that to the top part again while it's still in the lathe. Polishing it in the area the O ring slides over.

                                          The other way of course is to trap the O ring between surfaces and try some screw cutting. Aluminium isn't the best choice for that. It helps if it's anodised but it can still bind.

                                          John

                                          #220870
                                          Ian S C
                                          Participant
                                            @iansc

                                            One problem some people have with O-rings. If an O-ring is to fit in a gap, like the top on a burner, it must have side clearance in the groove, because rubber can not be compressed, only distorted, so make the groove about 1.5 the width of the O-ring. You may know all this, but maybe someone doesn't.

                                            Ian S C

                                            #220876
                                            Hopper
                                            Participant
                                              @hopper

                                              If you should decide to try graphite (with the lathe outside!) here is a good source of material and not too expensive. Shipping from the US will probably be more than the cost of 12" of 5/8 rod.

                                              **LINK**

                                              #221012
                                              Brian John
                                              Participant
                                                @brianjohn93961

                                                I will not be trying the graphite : it is too messy.

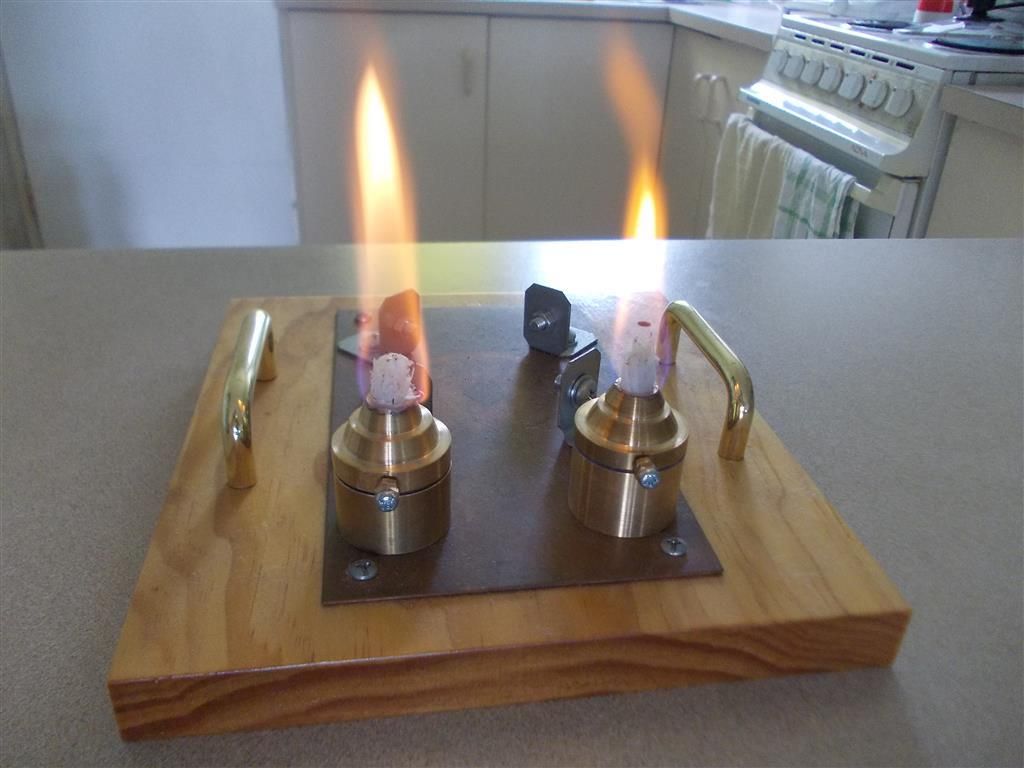
                                                The burners work okay : 10 minutes of burn time with 5mls of meths.

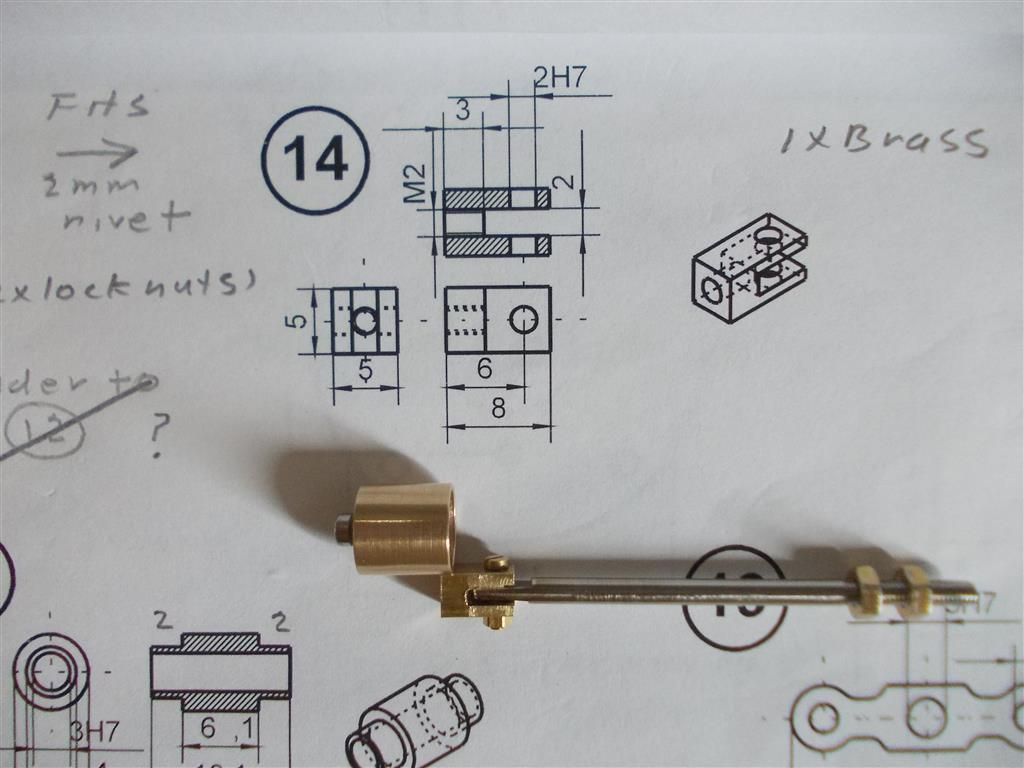
                                                I made part 14 today( I found a small piece of square brass in the bottom of the box). I am bit puzzled how it fits to the cylinder. I assume it is fixed in place with an M2 socket cap but this will prevent a close fit between the top of the piston and the cylinder cover. I thought a close fit was important…am I missing something here ?

                                                NOTE : This was my first use of the slitting saw…..a very useful tool ! The nut is 23.85mm AF so what size spanner should be used to tighten it ? None of mine are big enough.

                                                burner 6.jpg

                                                part 14.jpg

                                                Edited By Brian John on 14/01/2016 07:04:50

                                                Edited By Brian John on 14/01/2016 07:13:35

                                                #221014
                                                Kettrinboy
                                                Participant
                                                  @kettrinboy

                                                  Hi Brian

                                                  a 24 mm AF spanner will be the right fit on the nut , nuts and bolts are generally 0.1-0.2mm undersize across the flats.

                                                  #221037
                                                  Ajohnw
                                                  Participant
                                                    @ajohnw51620

                                                    Having a couple of sizes of these about Brian saves buying spanners of specific sizes.

                                                    Ebay 111839246996

                                                    That's what I use for things like slitting saws and a number of other things.

                                                    John

                                                     
                                                    #221047
                                                    Ian S C
                                                    Participant
                                                      @iansc

                                                      I,v got a good collection of Crescent adjustable spanners, they are ok if all else fails, for heaven's sake don't do what I saw today, a mate had been trying to undo an oil bung from a Perkins engine on a Chamberlin tractor that had been used on a beach launching boats, and the bung was rusted solid, so after sockets being tried, he had a go with a pipe wrench. When I saw the mess, the only thing I could think of was to weld a bar on top, or drill it out. We.re getting a bit off course, but I had to get it off my chest.

                                                      Ian S C

                                                    Viewing 25 posts - 276 through 300 (of 764 total)
                                                    • Please log in to reply to this topic. Registering is free and easy using the links on the menu at the top of this page.

                                                    Advert

                                                    Latest Replies

                                                    Home Forums Stationary engines Topics

                                                    Viewing 25 topics - 1 through 25 (of 25 total)
                                                    Viewing 25 topics - 1 through 25 (of 25 total)

                                                    View full reply list.

                                                    Advert

                                                    Newsletter Sign-up