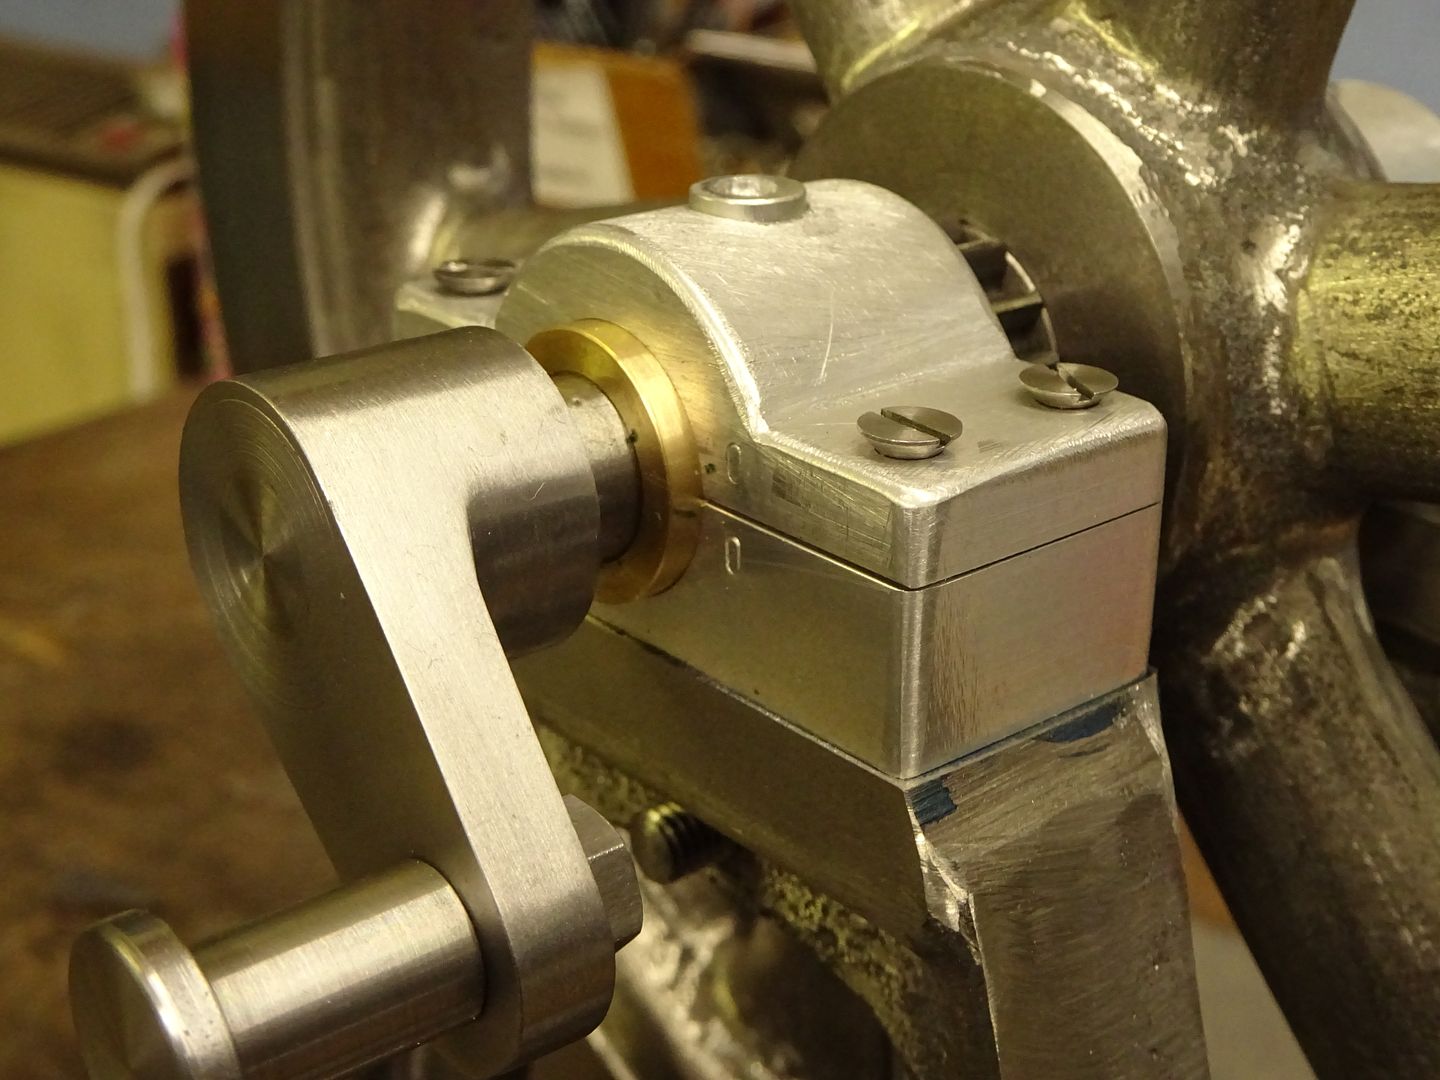
Steam Engine Number One

Advert

Steam Engine Number One

Home Forums Stationary engines Steam Engine Number One

Viewing 25 posts - 26 through 50 (of 208 total)
  • Author
    Posts
  • #382801
    Iain Downs
    Participant
      @iaindowns78295

      Yes, well, I hear you say. That design baloney is all very well, but when are you going to start making iron filings!

      Your wish is going to come true.

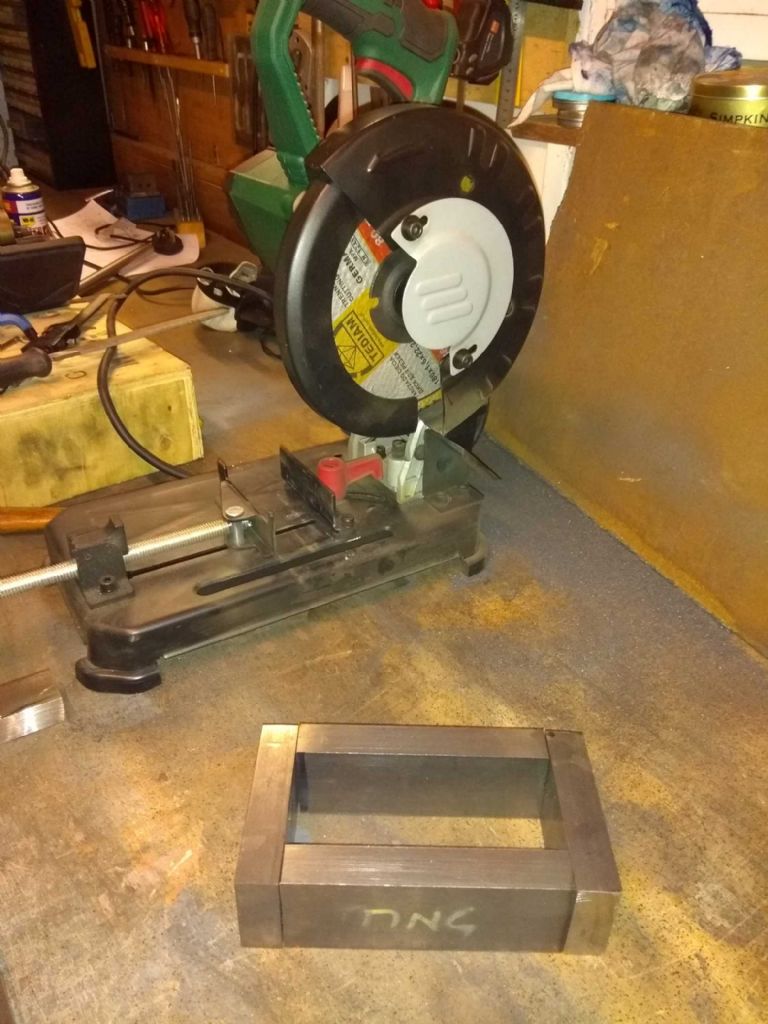
      First up the bits for the crank case. 4 bits of steel cut by the rather marvelous Aldi chop grinder.

      crankcase bits with chopsaw.jpg

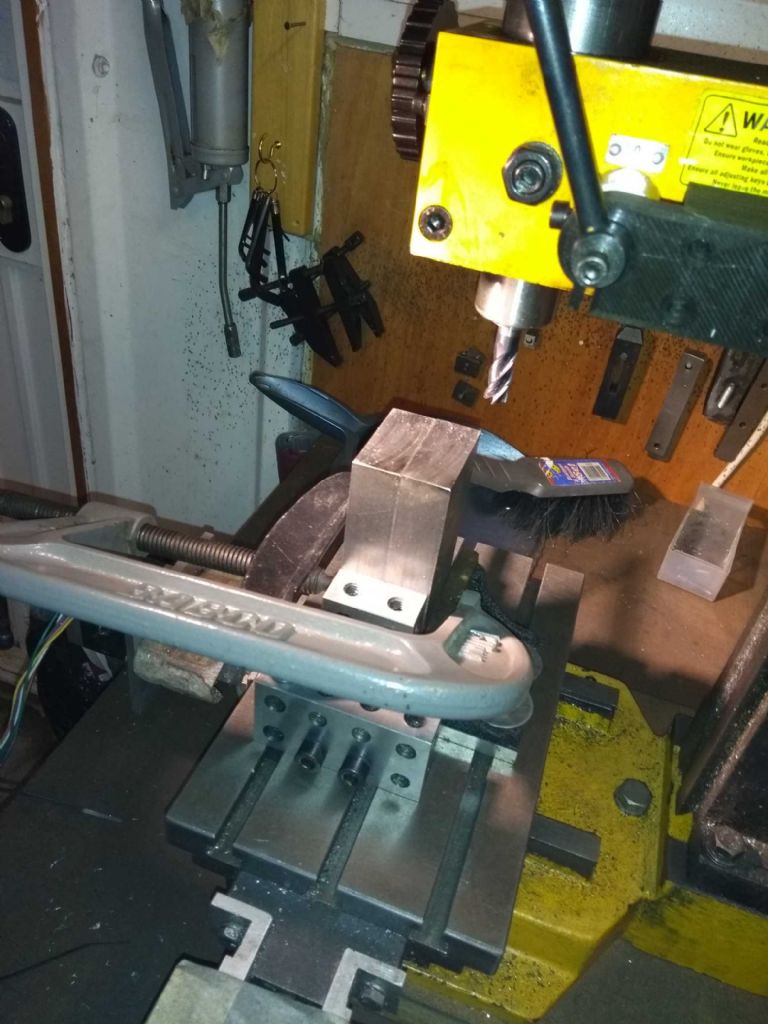
      Square up the pieces and mill to approximate size.

      squaring crankcase ends.jpg

      This was my first attempt, but I realised on checking that something was wrong and it turns out that my angle plate does indeed have an angle, however it's not right. Not a right angle that is! for the crank I ended up using my angle table and setting it at right angles with a 20 40 80 block.

      With this and the journal I found I could get my measured end with a thou (0.02mm), but that the other end could be up to 3 thou out (thats over about 100mm or so). Not precision engineering, but I suspect a decent result with a CMD10 micro mill.

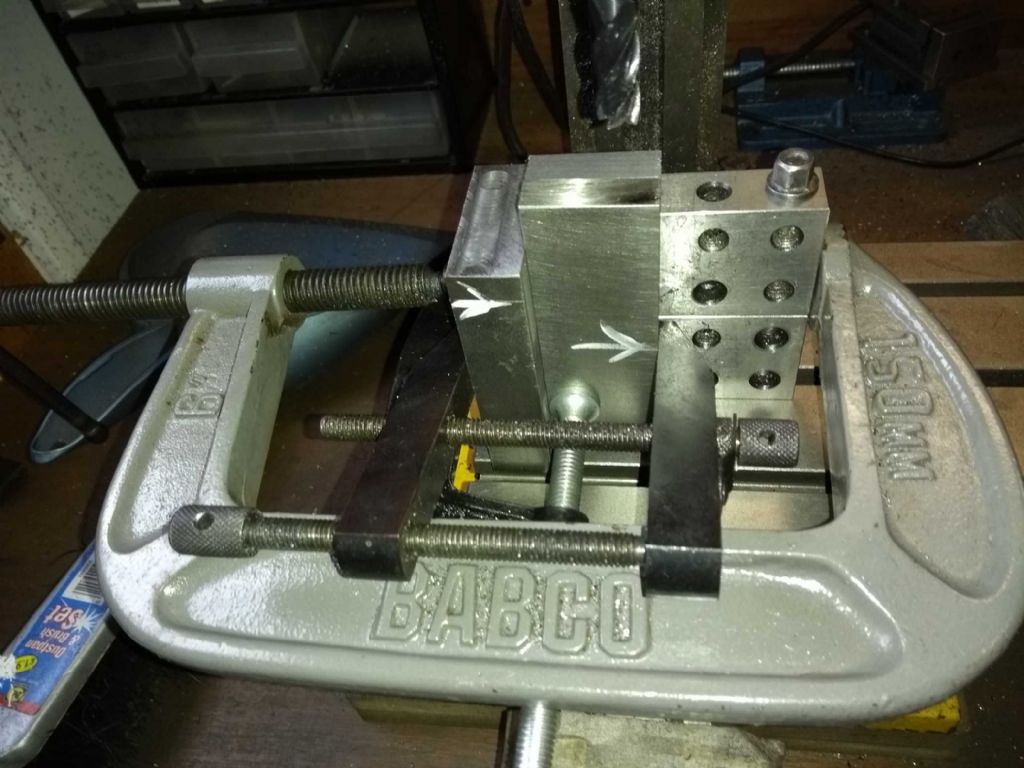
      Next the journals cut, squared and milled to size.

      squaring journals.jpg

      squaring journal ends.jpg

      This, by the way is the first time I've glued bits together – a bit of superglue to make sure the journals exactly match. I just hope I can get them apart!

      Next up us putting a nice round end on the big end end of the journal. I'' put that in a new post so the forum doesn't explode.

      Advert
      #382804
      Iain Downs
      Participant
        @iaindowns78295

        So the Journals will have a nice round end for the big end and a counter weight (yet to be worked out) on the opposite end. My first proper use of a rotary table….

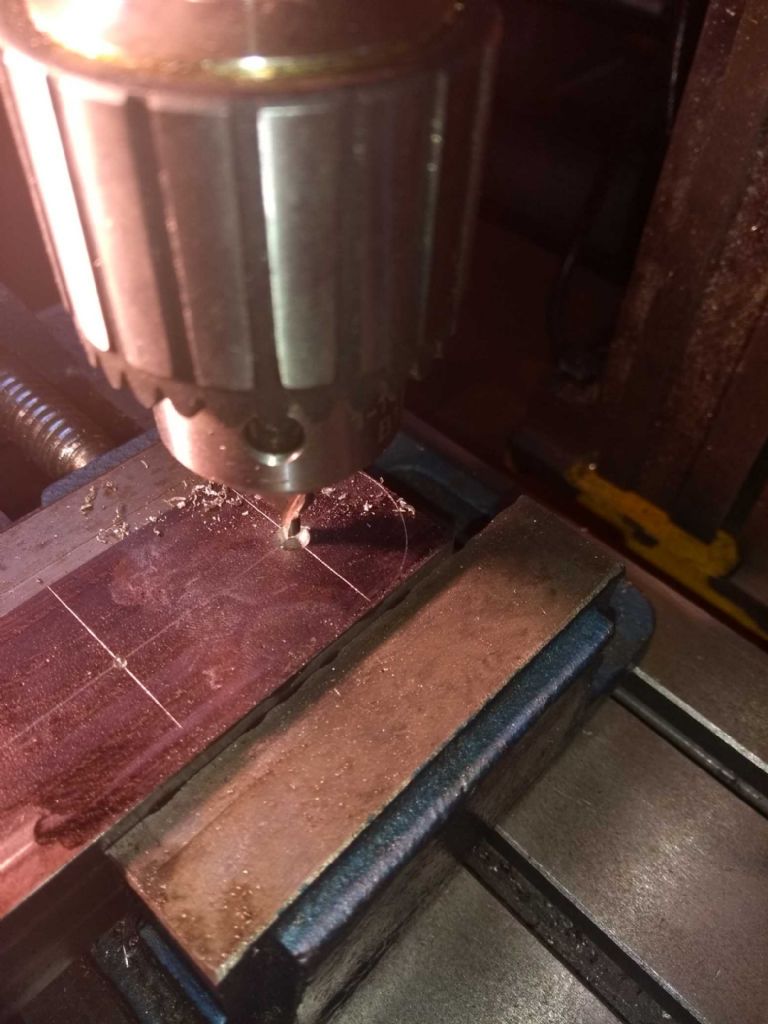
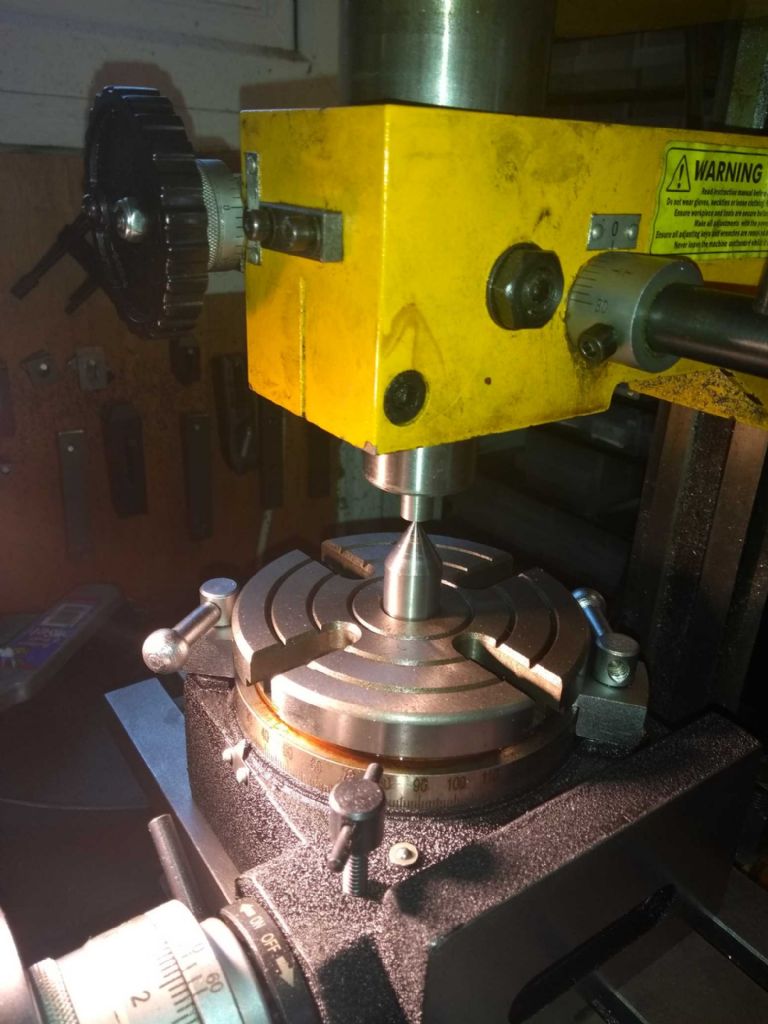
        I've turned a reasonably accurate 10mm round bar with a centre drilled end. The idea is that I mount this in the mill collet and an MT2 centre in the rotary table. bring the bar onto the center wiggle the table a bit and the table should be centred. I mean, I didn't try and measure this afterwards, but it makes sense.

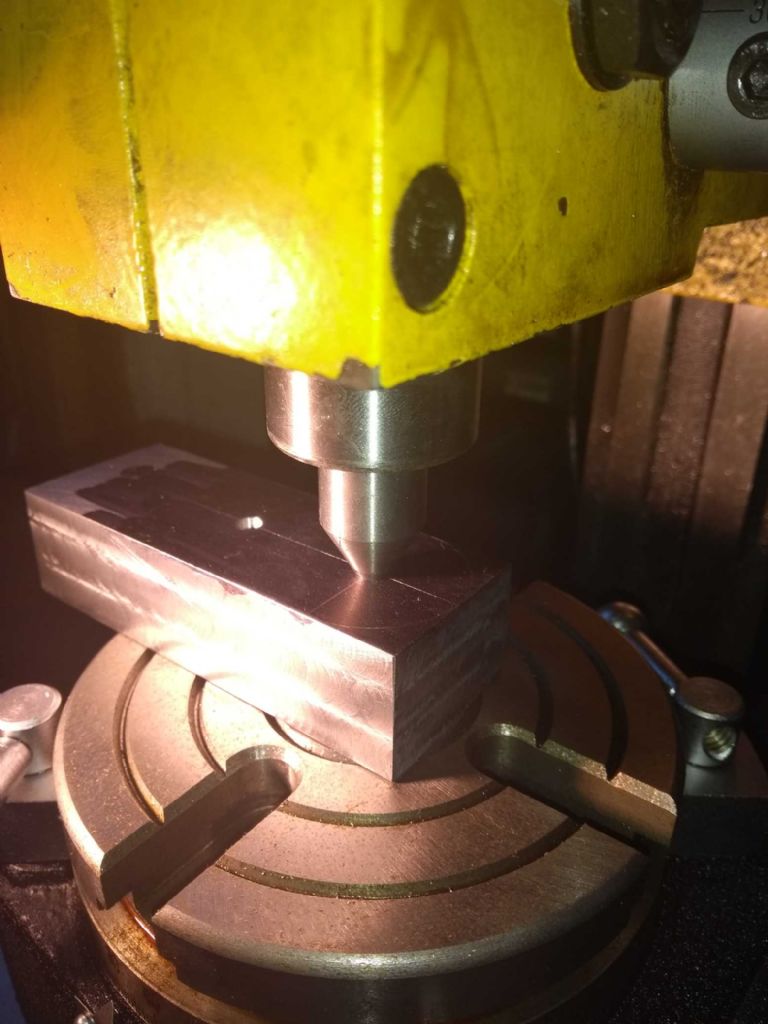
        Then put the MT2 centre in the mill spindle and lower into the centre drilled hole in the journal exactly where the bearing centre will be.

        drilling shaft centres.jpg

        centre rotary table.jpg

        centre journal on table.jpg

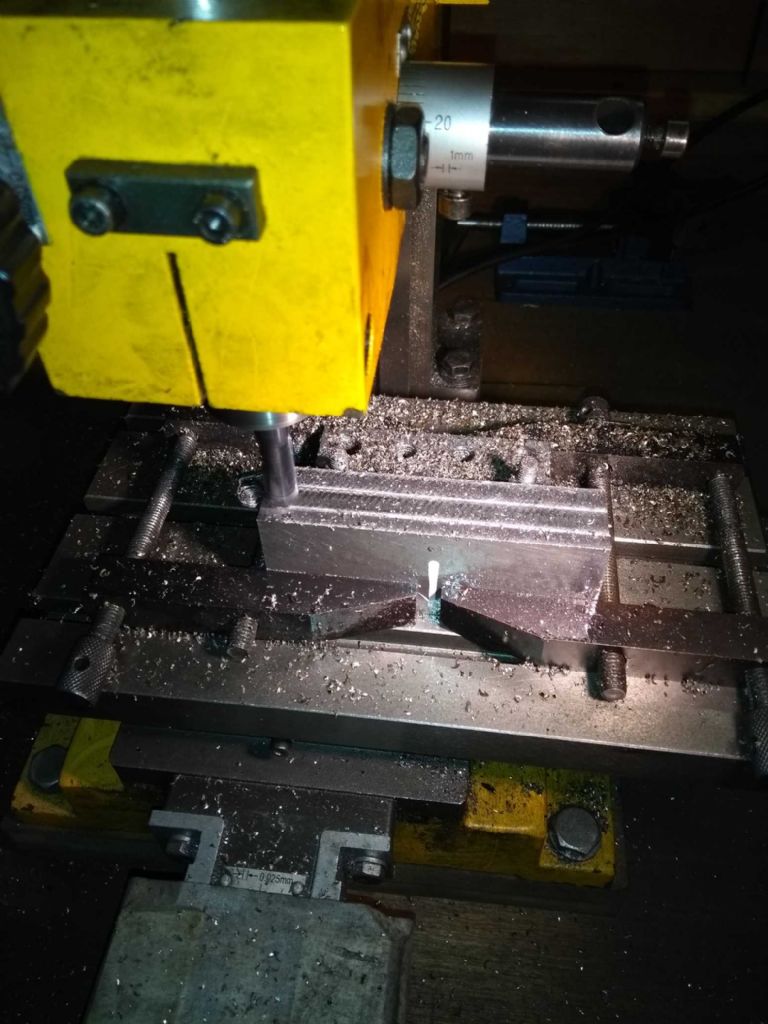
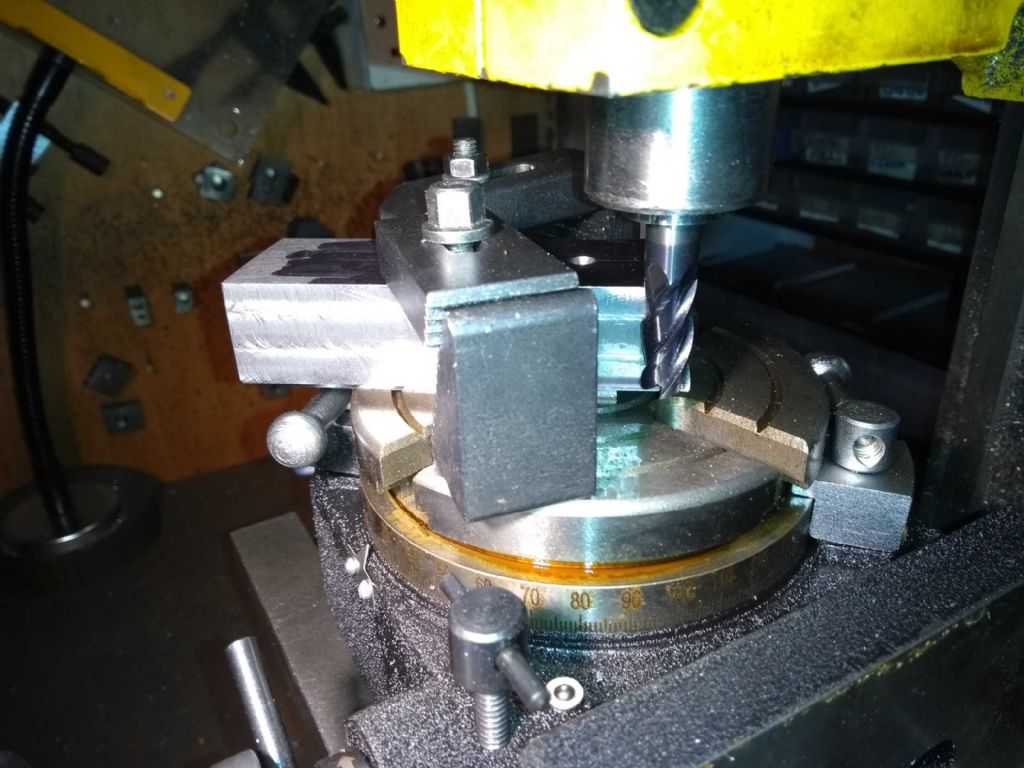
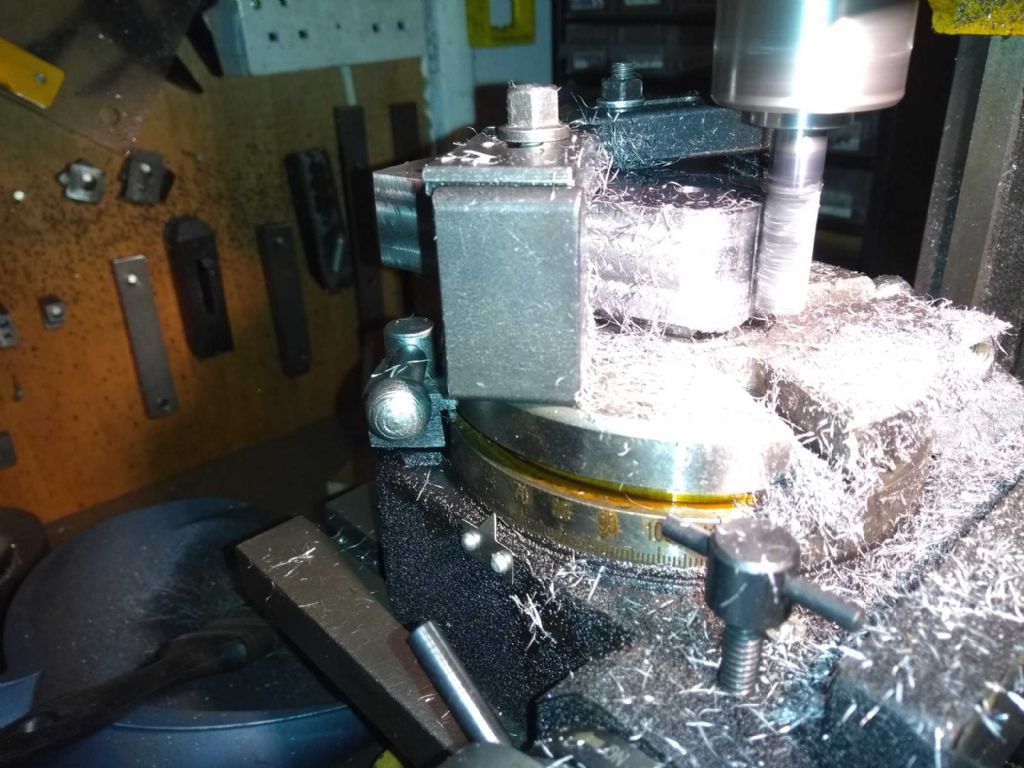
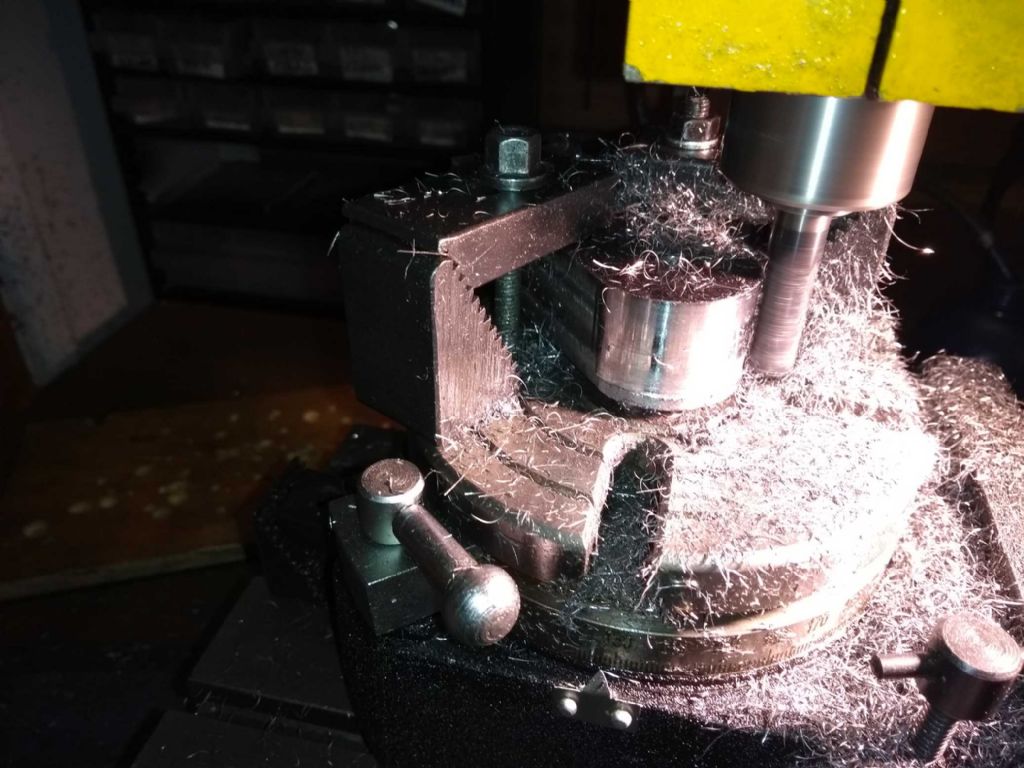
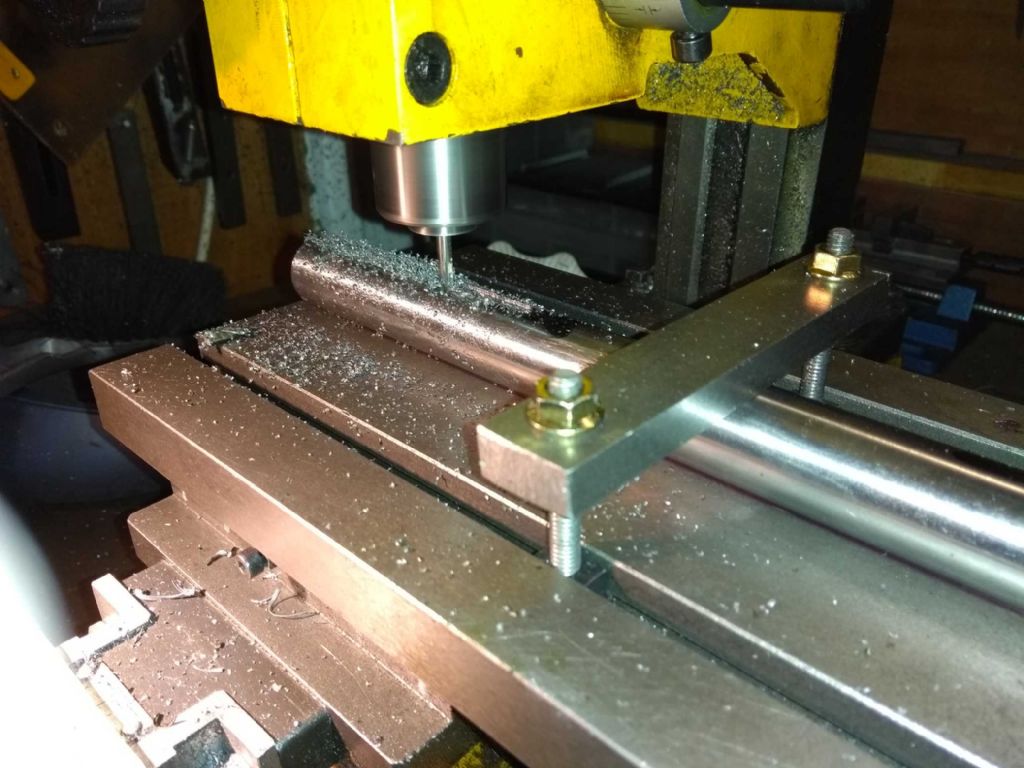
        Now for the exciting part! Clamp the journal (sitting on a 4mm parallel) back off the X axis rotate and then cut.

        I took off about 1mm each time (10mm 4 flute carbide cutter at 2000rpm).

        making journal end circular 1.jpg

        making journal end circular 2.jpg

        making journal end circular 3.jpg

        The cutter isn't quite long enough so I lowered by 4mm and took a second pass every couple of turns – you can just see the ridge at the bottom before the second pass.

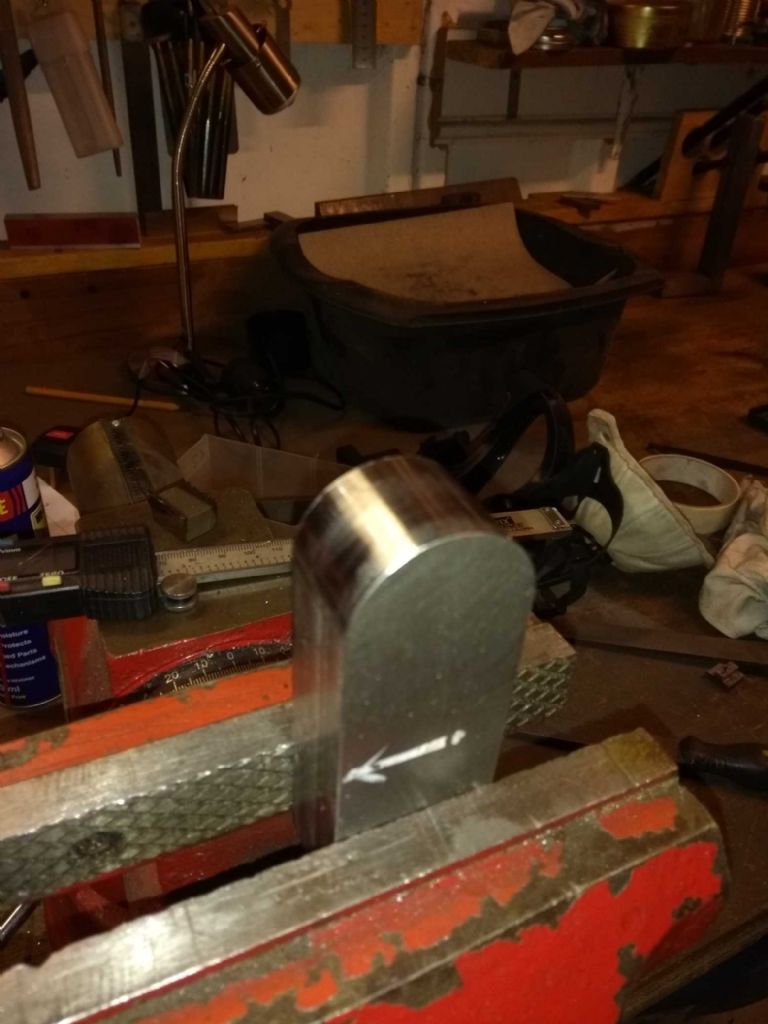
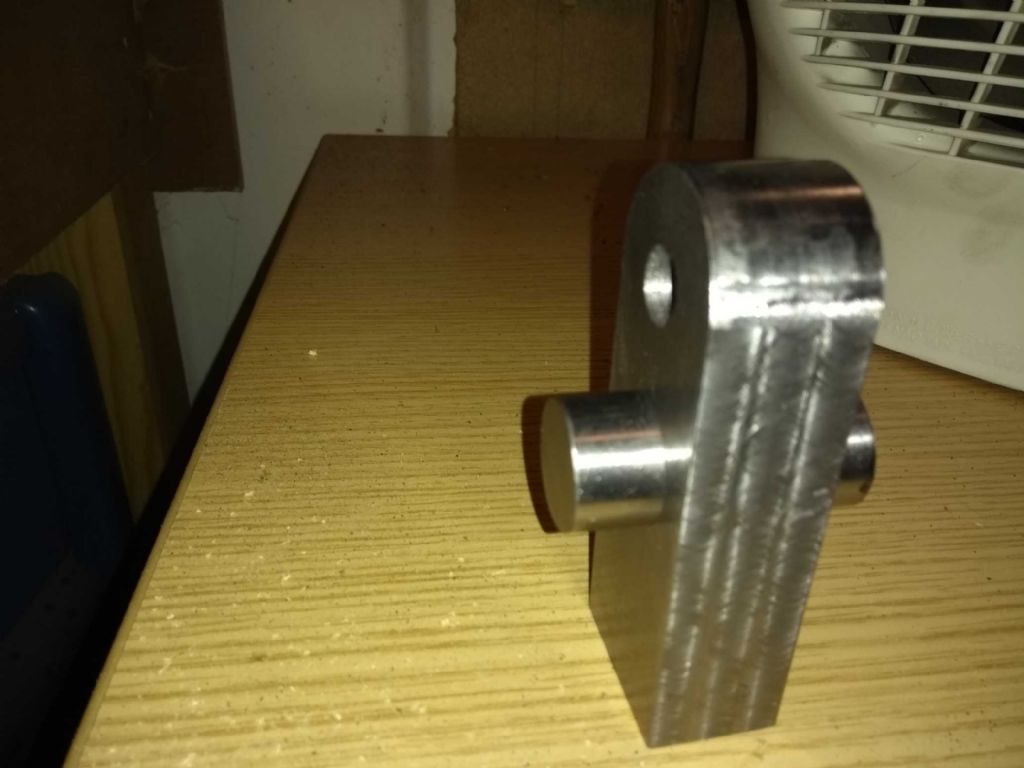
        And the result?journal end machined.jpg

        Which I'm unreasonably pleased with!

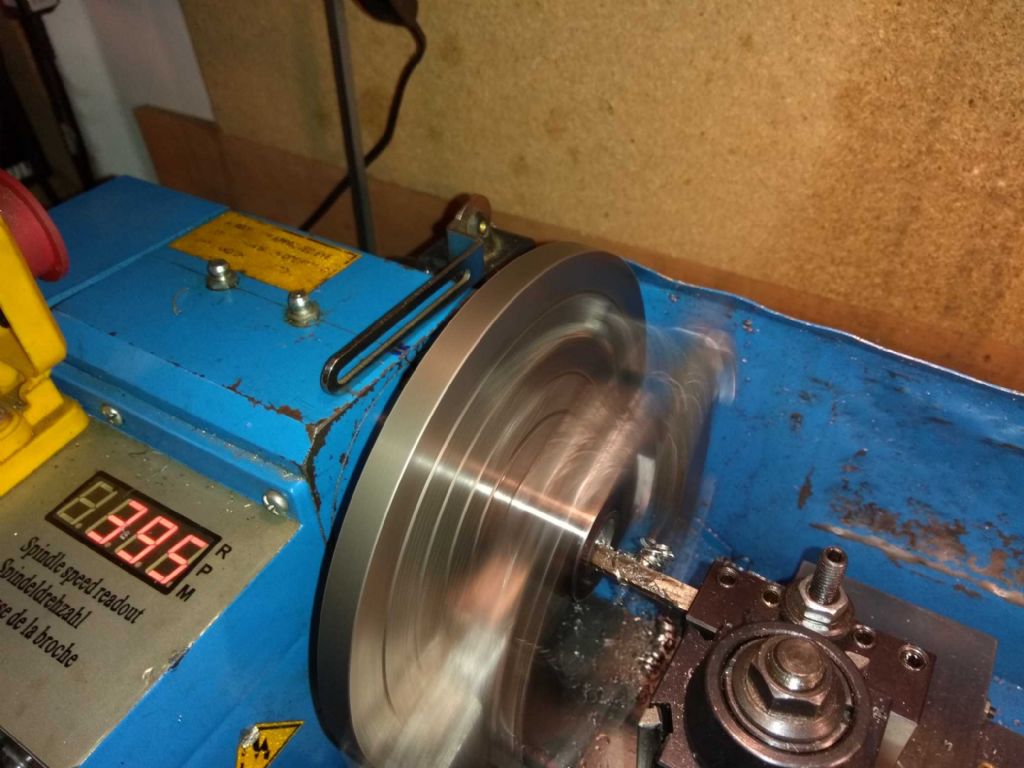
        Next up (not today) is to bore out the 20mm holes for the shafts proper. At the moment I'm planning to mount the journals on a faceplate (another first – I buy these things and EVENTUALLY I find a use). I'm thinking to use a similar technique for centring. Put the journal loosely on the face plate and offer a centre up to if from the tailstock. Having said that, I need to recheck the accuracy – it's OK forward backwards, but I thought it too high by 0.25 mm when messing with it a year or two back.

        The other task I have ahead of me is to work out the counterbalance. I think that's a bit of trigonometry and integration. I've asked my son for help (Year 2 maths degree) but as he has demanded payment and I'm a Yorkshire man I might just try and puzzle it out.

        Thanks for your patience.

        The redesign by the way is nearly done and I will upload design baloney sometime soon. Still mulling guides for cross head and eccentric rod.

        #382833
        JasonB
        Moderator
          @jasonb

          Off to a good start and the little mill seems to have done a good job on that rounded end.

          #383262
          Iain Downs
          Participant
            @iaindowns78295

            Yesterday and today I continued to work on the journals.

            First task was to drill out the centre-drilled shaft centres to be big enough to bore on the lathe. I do have a boring head for the mill, but the mill and it are far to non-rigid for something requiring a reasonable level of precision.

            I started off trying to do the job quickly. Mounted the journal in a drill vice, and centred it using a centre drill (not turning!) in the chuck. This seemed to centre, but when I secured the drill vice, the centre drill no longer entered the hole smoothly! I guess that tightening the vice mounting bolts applied some torsion and shifted something. Tried a variety of combinations and didn't like what I was seeing.

            drilling borehole in journal - failed.jpg

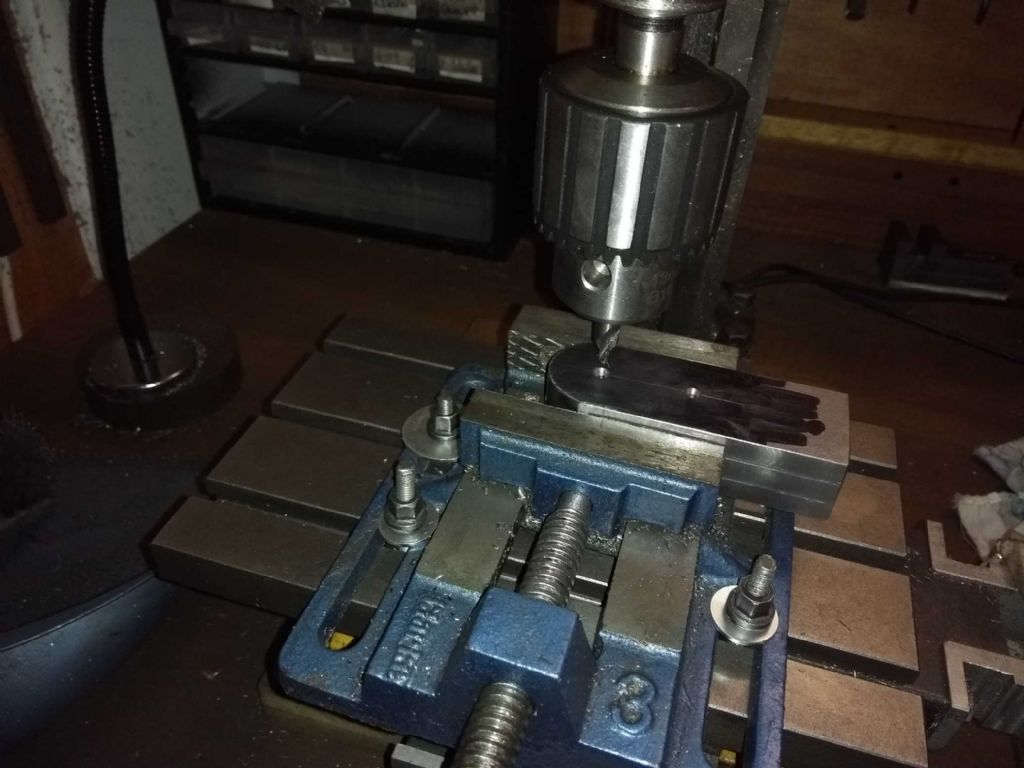
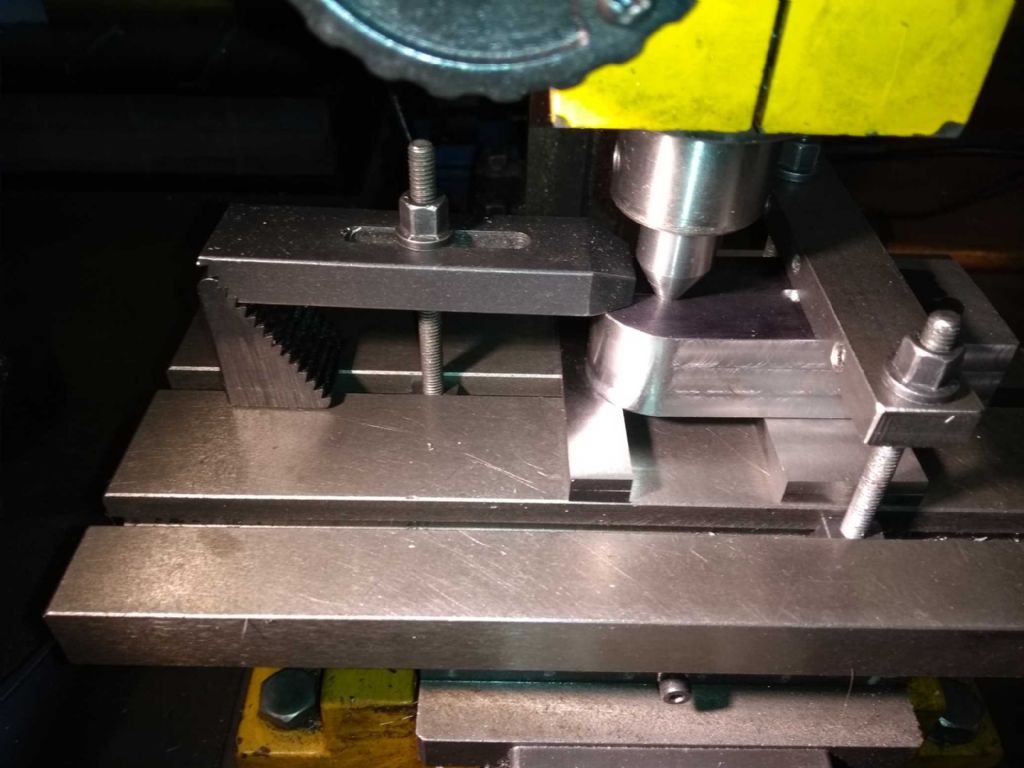
            So back to an MT2 centre and mounting the journals directly on the table with some parallels and clamps.

            drilling borehole - centring.jpg

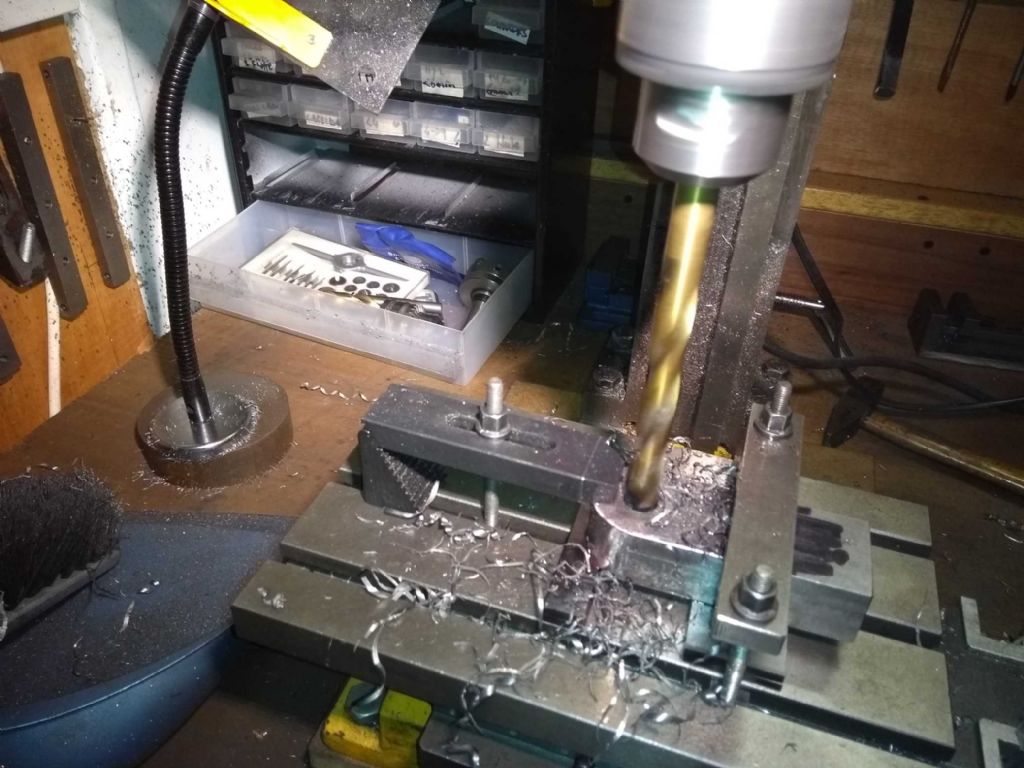
            Drilled with 4mm, 6mm, 10mm and finally 13mm.

            drilling borehole 13mm.jpg

            The big drill here turns out to have a chip out on the end, which was more apparent when drilling the other hole. Somewhere i have a drill sharpener that sometime I will try and use to fix it.

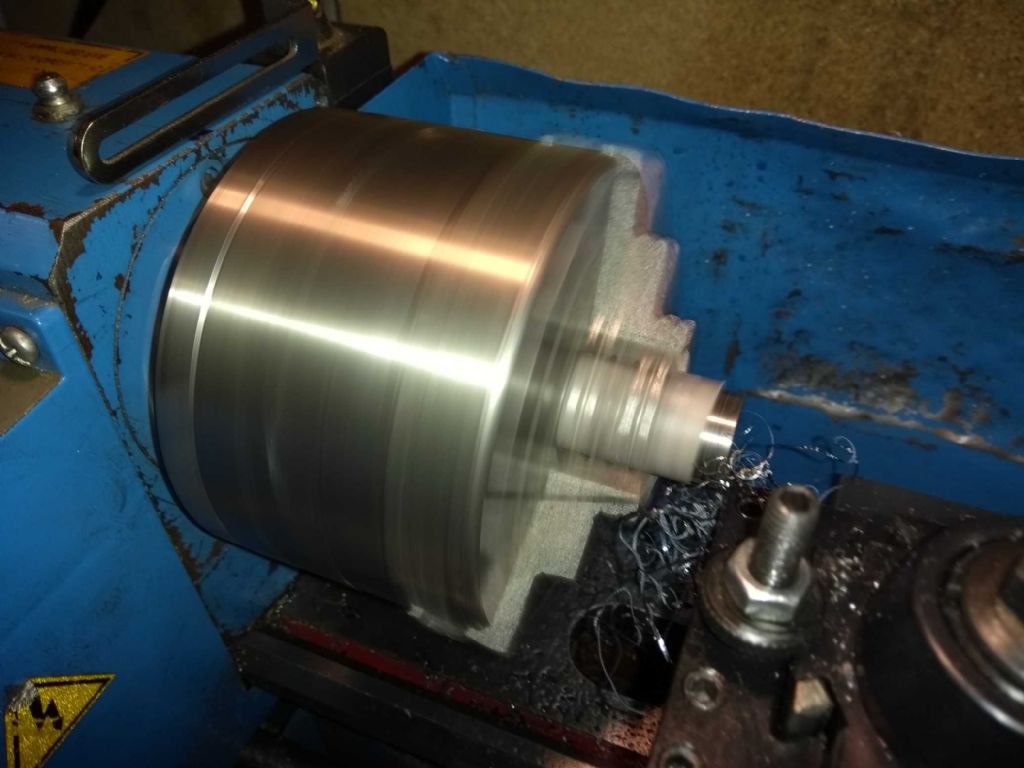
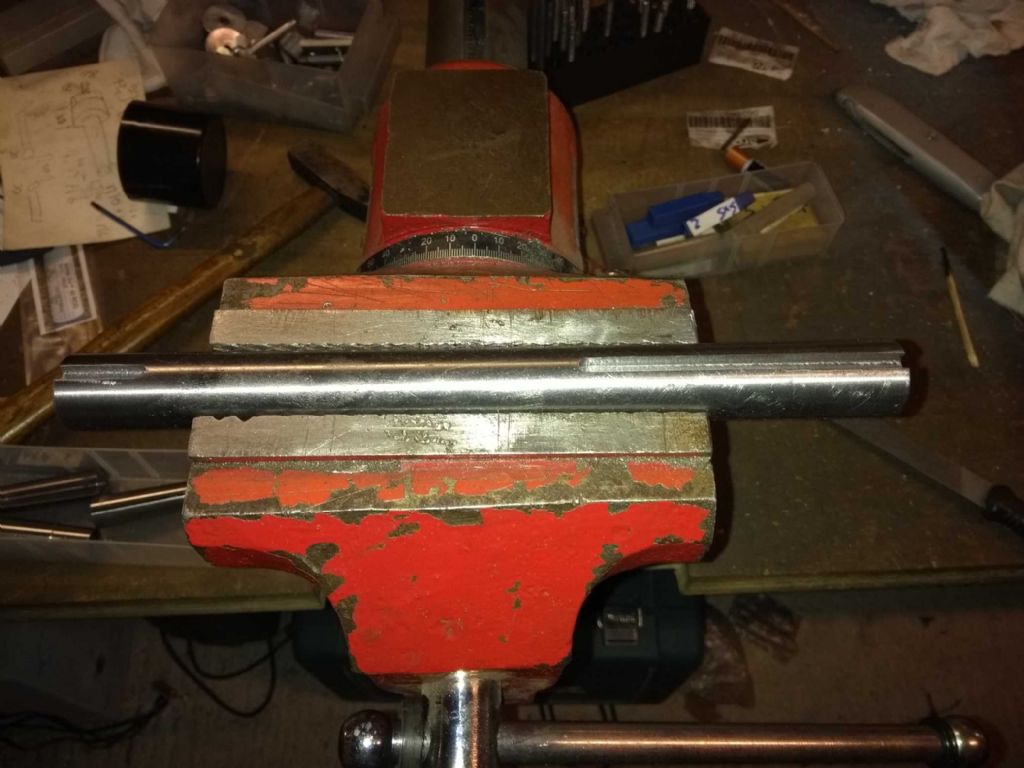
            Before mounting the journal on my faceplate and boring, I checked that there was enough clearance. yes, but only by using low profile nuts. However, first I thought I should cut the big and shaft and main shaft and trim them. I'm thinking to use the main bearing shaft (44mm) as a try fit when approach the 20mm internal diameter of the shaft bore.

            trimming main bearing shaft.jpg

            Perhaps tomorrow I will get round to doing the faceplate work and boring out the journal for the shafts. A bit nervous about that – it requires a level of accuracy which I don't normally manage!

            Iain

            #383639
            Iain Downs
            Participant
              @iaindowns78295

              Crisis!

              I've overbored the journals. The main axis bore turns out to be about 20.35 and a wiggle fit for the shaft angry

              In the traditional amateur way, I'm going to make an excuse.

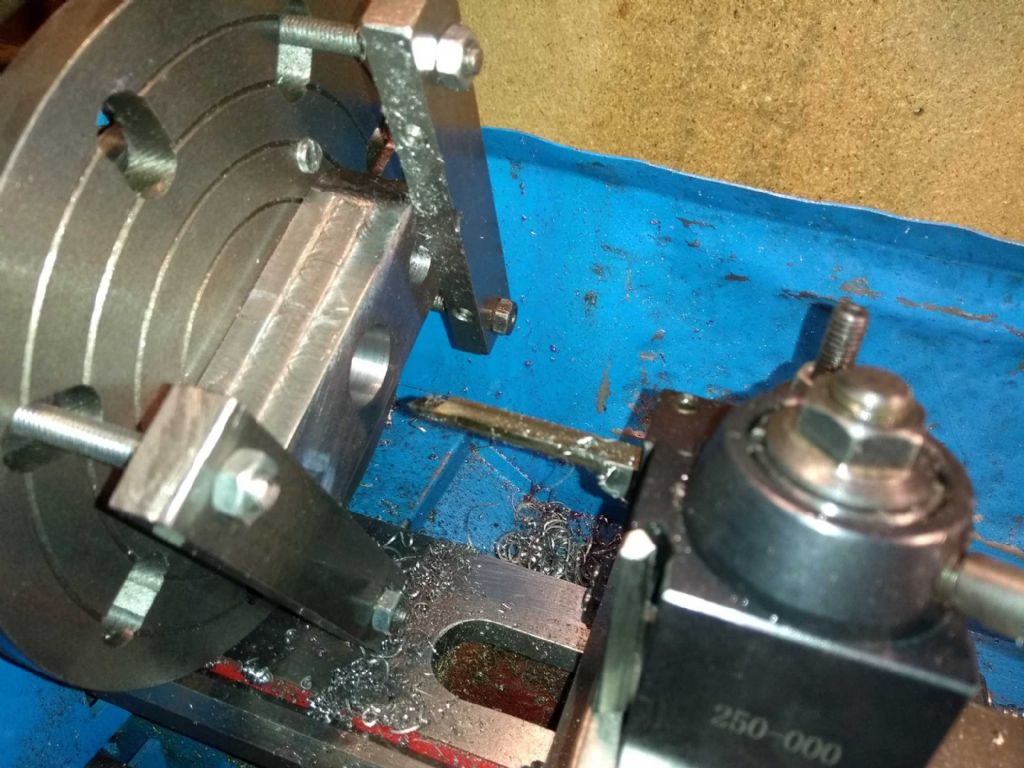
              The plan was to drill to 13mm (my biggest drill) rough it out with my carbide insert boring bar and finish to size with a self ground hss boring bar.

              I managed to get the 13mm bore centred on the faceplate to about 2 thou with aid of a rubber mallet and a bit of wood. I was reasonably pleased with that! My first faceplate work!

              The carbide insert boring did not go well. To start with it seemed incapable of actually cutting and it graunched and groaned as it went into the rougher parts of the bore.

              So I swapped out for the hss tool (specially sharpened). that cut nicely enough and I have about 3 miles of 1 thou thick coiled steel as it pulled in and out and took just a bit off.

              My mistake was to get to what I thought was about 5 thou under with 3 or 4 runs through of the tool and then pull back that 5 thou. Then kept cutting until there was no more coming off the inside.

              What's happened (I think) is that the spring in the tool (it started live as a 5/16th toolbit) was much bigger than I thought. So the last cut but one had not finished cutting when I measured. When I kept on in the final cut I was obviously still pulling against the spring, hence the over cut.

              Sadly, I don't see any way of rescuing this piece, though advice from experts is welcome.

              Which means ordering some more steel and starting again sad.

              Ah the joys of amateur engineering!

              Iain

              #383798
              JasonB
              Moderator
                @jasonb

                Can you not just turn a bit of bar down to fit the 20.35mm hole, as it is only the pin you won't have too long a length to turn.

                #383831
                Iain Downs
                Participant
                  @iaindowns78295

                  If by 'pin' you mean the bit that connects to the big end / piston, then sadly, it's not that bit. It's the main bearing shaft.

                  One thing I did find strange is that after the first cut as I took the spring out moving in and out of the bar, only the backstroke was cutting.

                  Having thought about that, I'm wondering if the boring bar was a bit blunt on the forward end (I did try and sharpen it on a stone, but perhaps not enough). I may try and make a more substantial boring bar (12mm bar with a hss bit in the end…) before trying this again.

                  On the shaft – I've bought ground silver steel for this for two reasons. Firstly, my research seems to show this as a shaft material more than anything else (though I'm not sure it's any harder untempered than mild steel) and secondly, I don't have to worry about turning a bar to a very accurate diameter along the length – perhaps on Steam Engine Number Three I will have acquired the skill and courage…

                  As usual thanks for the advice.

                  Iain

                  #383832
                  JasonB
                  Moderator
                    @jasonb

                    21mm and 0.8125" Silver steel are available

                    #383857
                    Iain Downs
                    Participant
                      @iaindowns78295

                      Aye.

                      Sorry I just had a moment. In my head was – 'oh yes, Jason means me to get a 21mm bar and turn it down to 20.38mm. Hmm, how would I do that on my minilathe'.

                      And I was writing to express my challenges with taking an accurate 0.62mm off a long bar…

                      Then, I thought, 'Prat' and realised that all I need to do is to overbore the hole by another 0.62mm and I'm spot on. Which I expect is what you meant since you are quite clearly not as dim as me!

                      I have just ordered some more steel for the journals, but I'm sure I'll find a use for it elsewhere at some point!

                      Off to ebay now….

                      Iain

                      #383861
                      Boiler Bri
                      Participant
                        @boilerbri

                        Great job Ian. I love all your fixtures etc.

                        I am currently machining a cast bracket for the governor on my Durham engine. It was difficult deciding where to start 🤔

                        Your doing it. For me that's what counts. As for the overboring I have four wheels for my sweet pea with different size bore. In the end I reamed them all and made the axles oversize 👍

                        Bri

                        #383888
                        JasonB
                        Moderator
                          @jasonb

                          Iain, My first suggesting of turning something down assumed it was the short bit in the middle, later suggesting was to open up the hole to take the next stock size.

                          #384229
                          Iain Downs
                          Participant
                            @iaindowns78295

                            Thanks to the advice of Jason and the Gods of eBay, I've ordered a 22mm silver steel shaft, got it delivered and VERY CAREFULLY trimmed out the centre bore to fit.

                            cutting main shaft bore.jpg

                            The end result appears to be just a tad tappered. the mouth is a reasonably easy fit for the shaft, but the part by the faceplate is tight. That is it needed a little tap to get through the last few mm.

                            I think the difference in diameters at each end is sub-thou (guess) and most probably outside my ability to measure accurately.

                            Good enough for me!

                            main shaft at 22mm.jpg

                            hopefully, this weekend I will bore the pin (20mm) trim the main shaft and add a keyway. If I get really excited I will try and glue them together!

                            Iain

                            #384577
                            Iain Downs
                            Participant
                              @iaindowns78295

                              Journals: Done! Main Shaft. Done!

                              Pin bored out to 20mm. I must say I'm seeing the same thing with this bore. The outer diameter is just a little bit bigger than the inner one (by the faceplate). The only thing I can think is that the head isn't exactly in line with the ways that that might be awkward to fix.

                              pin shaft bore 2.jpg

                              You can't see it in this picture but I was able to balance the faceplate with a bit of steel clamped on the periphery. It was good to about 400rpm with negligible vibrations.

                              Next to cut the key way.

                              Used a wobbler to centre the head – then double checked by eye and found I'd added up wrong . Corrected!

                              cutting keyway.jpg

                              And the result!

                              main shaft with keyways.jpg

                              I have to say that it looks a lot better in real life than in the picture.

                              Next step, separate, glue and pin.

                              Iain

                              #384589
                              Michael Gilligan
                              Participant
                                @michaelgilligan61133

                                Posted by Iain Downs on 08/12/2018 17:48:25:

                                … must say I'm seeing the same thing with this bore. The outer diameter is just a little bit bigger than the inner one (by the faceplate). The only thing I can think is that the head isn't exactly in line with the ways that that might be awkward to fix.

                                .

                                Another possibility is 'spring' of the boring tool …

                                Have you tried a few finishing cuts with the slide locked at the same setting ?

                                This will often produce tiny slivers of swarf [from the depths of the hole] for several passes.

                                End result will [should be] a less tapered bore.

                                MichaelG.

                                #384590
                                Iain Downs
                                Participant
                                  @iaindowns78295

                                  I have run back and forward a few times with the same slide setting. However, I have to say that I can't see what's happening at the bottom of the bore so it could be I just need to keep trying.

                                  I will to a trial bore with some scrap and see if I can get it better. Now you mention it I think I had a similar discussion when building my oscillating engine.

                                  Thanks

                                  Iain

                                  #384591
                                  JasonB
                                  Moderator
                                    @jasonb

                                    You need the tool to be really sharp to get the little whispy cuts that Michael mentions, if the tool is even slightly dull it will get pushed off of the surface.

                                    #384600
                                    Iain Downs
                                    Participant
                                      @iaindowns78295

                                      Crank Balance

                                      One of the things I've been working on is how to get the crank balance – by science rather than trial and error.

                                      I started trying to use maths – without the aid of my Mathemetician son who demanded payment!

                                      I had quite a few goes at this – with online resources doing the calculation, but despite having put quite some time into it, it soon became obvious that solving complex integration is something I'm going to have to look back on and not forward to.

                                      My next though followed the hammer and nail principle (if the only tool you have is a hammer) and, as software chap, I thought I'd write a program which would calculate the balance numerically rather than analytically.

                                      Fortunately, before I dove into this task (fun though it may have been), it occurred to me that this was an everyday task for proper engineers and perhaps OnShape had something built in!

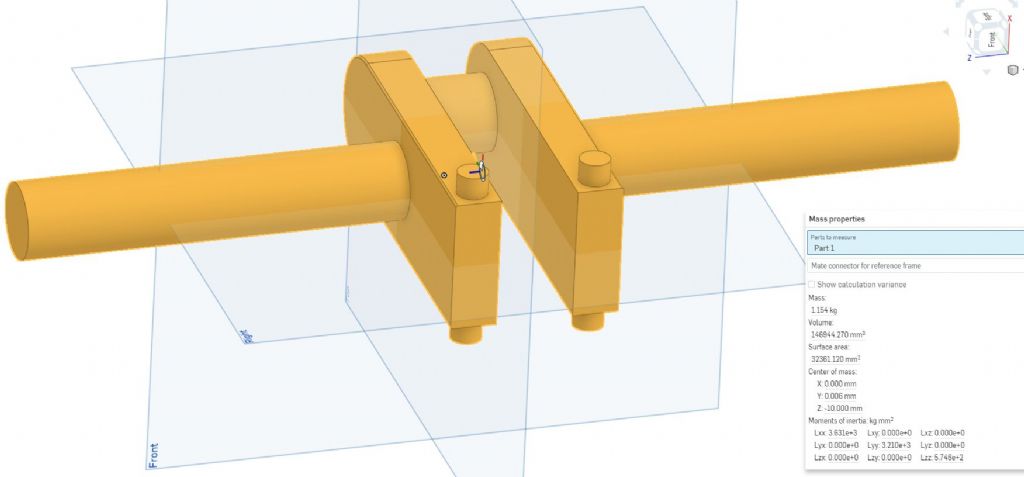
                                      It does and with a bit of trial and error it would seem that the crank as designed is nearly in balance and just needs some 8×6 mm cylinders attaching!

                                      balance.jpg

                                      Iain

                                      #384601
                                      JasonB
                                      Moderator
                                        @jasonb

                                        The crank itself may be in balance but once you have the mass of a conrod and piston attached that is going up and down all hell breaks loose.

                                        The balance weight is generally more than is needed to balance just the pin.

                                        #384648
                                        Iain Downs
                                        Participant
                                          @iaindowns78295

                                          Ah. So wrong again! But learning smiley.

                                          So what does one do? Is it trial and error? Can I start by balancing the mass of the big end bearing?

                                          Should I just put a threaded hole through for now so I can experiment?

                                          Iain

                                          #384650
                                          JasonB
                                          Moderator
                                            @jasonb

                                            There are methods for doing it but not something I have really gone into. I seem to recall that the conrod complere with big end bearing is held horizontally with the big end resting on scales and the small end otherwise supported so you can get the weight. Though the piston must come into it somewhere.

                                            You then add this weight around the pin and calculate the weight needed to bring this into balance.

                                            May be best to ask in a new thread which may attract more attention of those that know about these things.

                                            Definately add the threads for the weights as then you can always play about later.

                                            #384778
                                            Iain Downs
                                            Participant
                                              @iaindowns78295

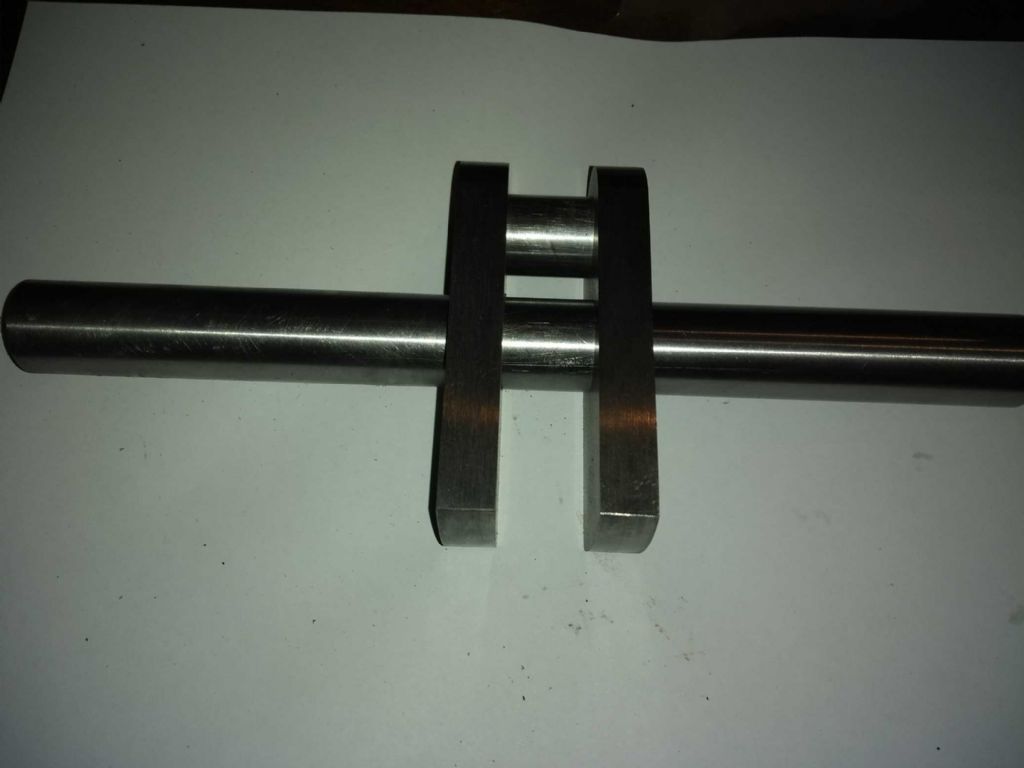
                                              Today, I trimmed the non pin end of the journal to be a bit nicer, split the journals apart with some heat and cleaned them up a bit.

                                              crank unassembled 1.jpg

                                              crank unassembled 2.jpg

                                              Next step is to glue the pin end.

                                              My plan (subject the sage advice of my elders and betters), is to

                                              • rough up the ends of the shaft and bore for the pin side of the journal
                                              • keep the main shaft in place
                                              • spread the journals out and apply some loctite 638 to the bores ( i think bores rather than shaft, but I'm not sure why)
                                              • push the journals into the pin shaft (with a couple of bits of scrap to get the position right.
                                              • Leave it for a bit.

                                              I'm thinking that I want to leave the main shaft out until I've done the main bearings and I can use it with a bit of grinding diamond paste to lap them in. The glue the main shaft in, cut the middle out and finish.

                                              Originally, I'd got another 20mm bar to act as a lap, but I'm loathe to buy yet more silver steel (main shaft now 22mm).

                                              Iain

                                              #384847
                                              Neil Wyatt
                                              Moderator
                                                @neilwyatt

                                                A rule of thumb for a single cylinder is balance the rotating weight then add 50% of the reciprocating weight.

                                                Will have some tearing their hair out, but for an engine of the size you are building it should be fine.

                                                Neil

                                                #385352
                                                Iain Downs
                                                Participant
                                                  @iaindowns78295

                                                  So after a few digressions, a bit more work on the engine.

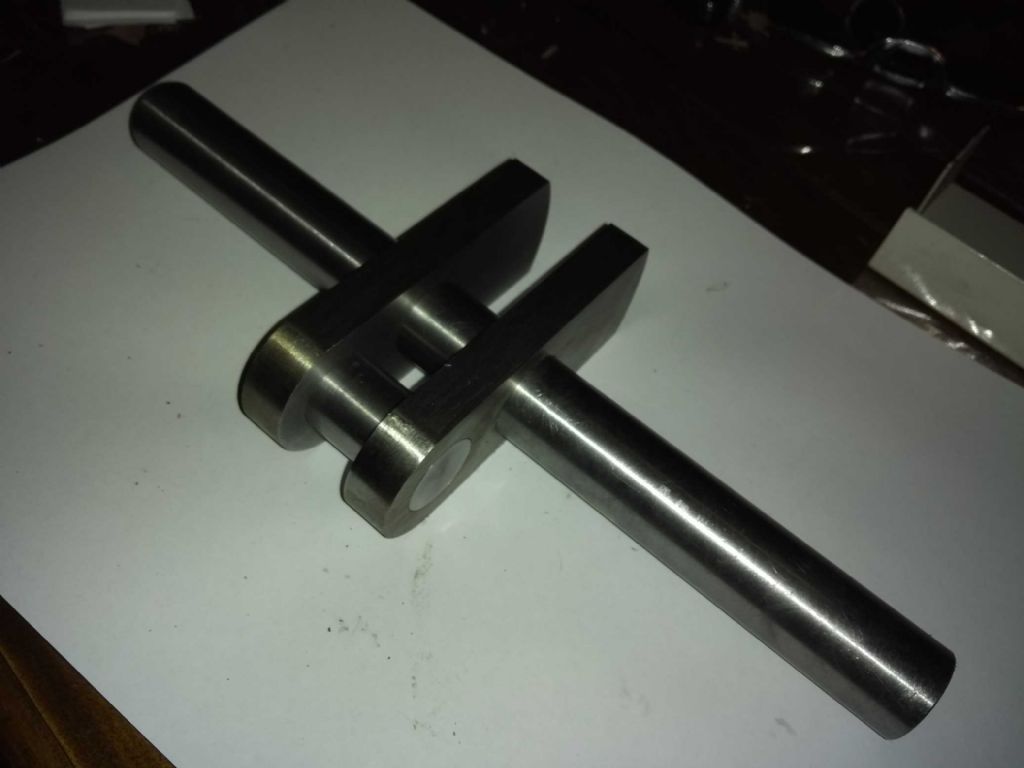
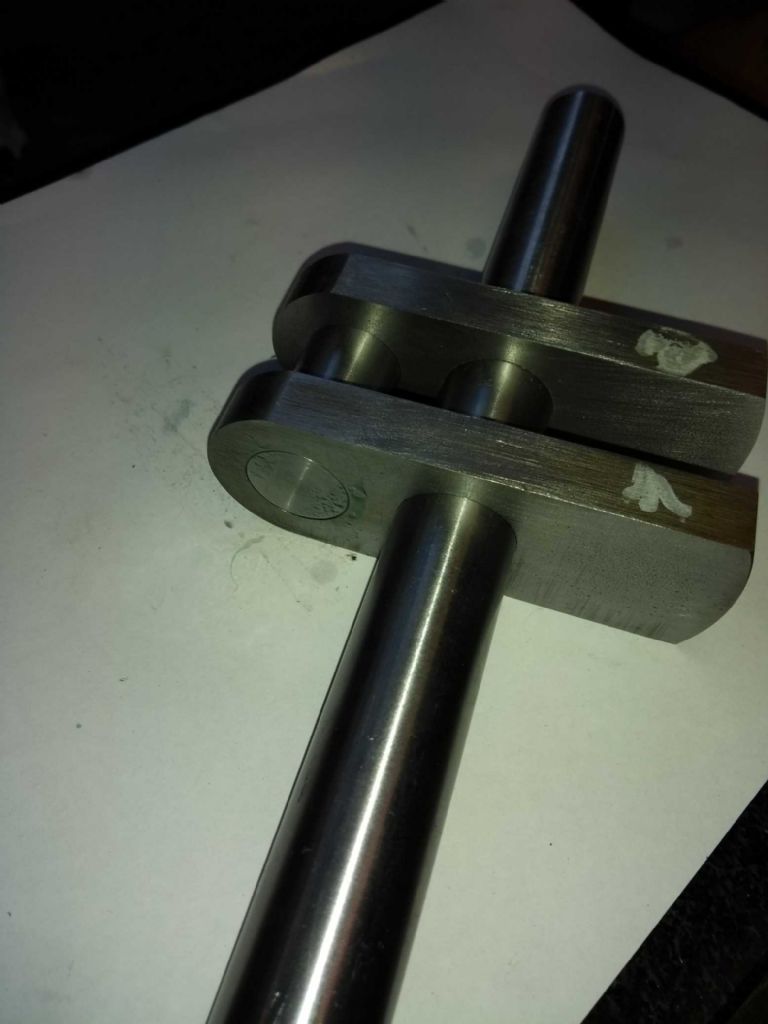
                                                  All that was left (for now) to do with the crank was to slap some loctite in and glue in the pin. I used a couple of bits of scrap to make sure that the pin shaft came to exactly the end of the journals. I was in a bit of a panic for this thinking I only had seconds to get it right, but I now gather setting (curing) time is more flexible.

                                                  As you can see I assembled it on a (protected!) surface table with the main shaft in place too (not glued yet) to make sure every thing lined up.

                                                  crank pin glued.jpg

                                                  Next was to assemble the crank case. The original plan (well the last original plan) was to sliver solder it, but experiences elsewhere put me off that as an idea – there's far too much metal. I originally originally intended to just bolt it together, but felt that this was too inaccurate.

                                                  Instead, I decided to pin it in 4 places and secure with a pair of bolts at each end.

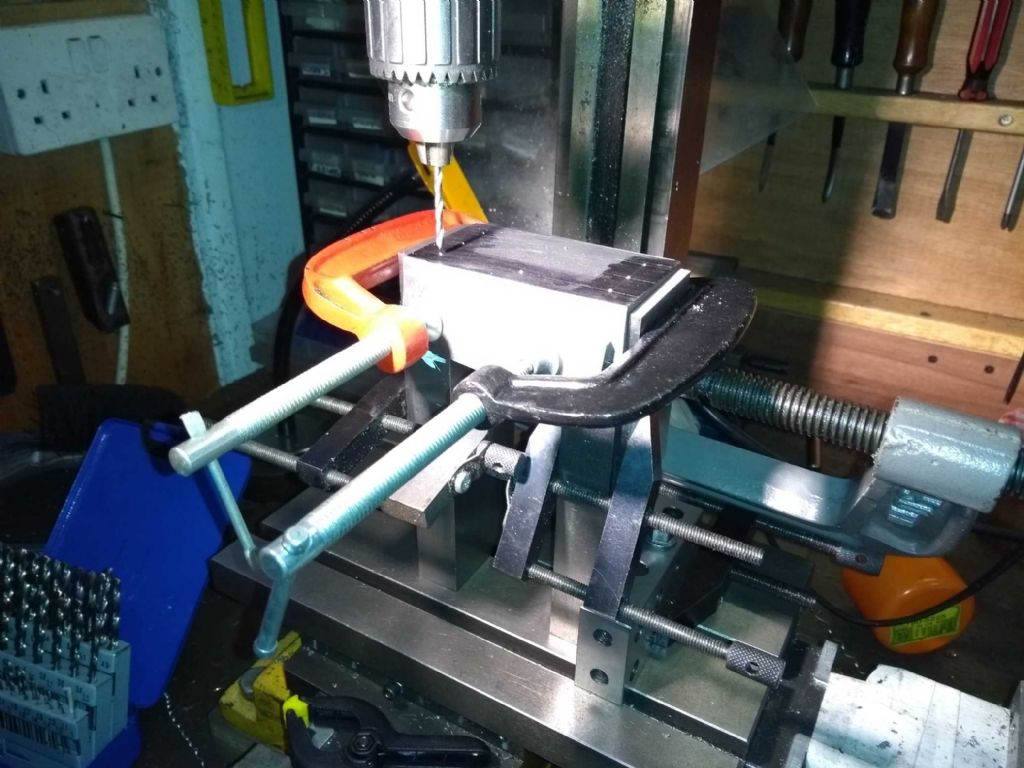
                                                  First task was to drill the pin / pilot holes. These at 2.8mm with a view to reaming to 3mm and using some silver steel I'd bought at a show 'because it might come in handy'. It has (OK, 18 months later, but..).

                                                  crankcase drilling pin holes1.jpg

                                                  I thought about entitling this one, 'you can never have enough clamps'.

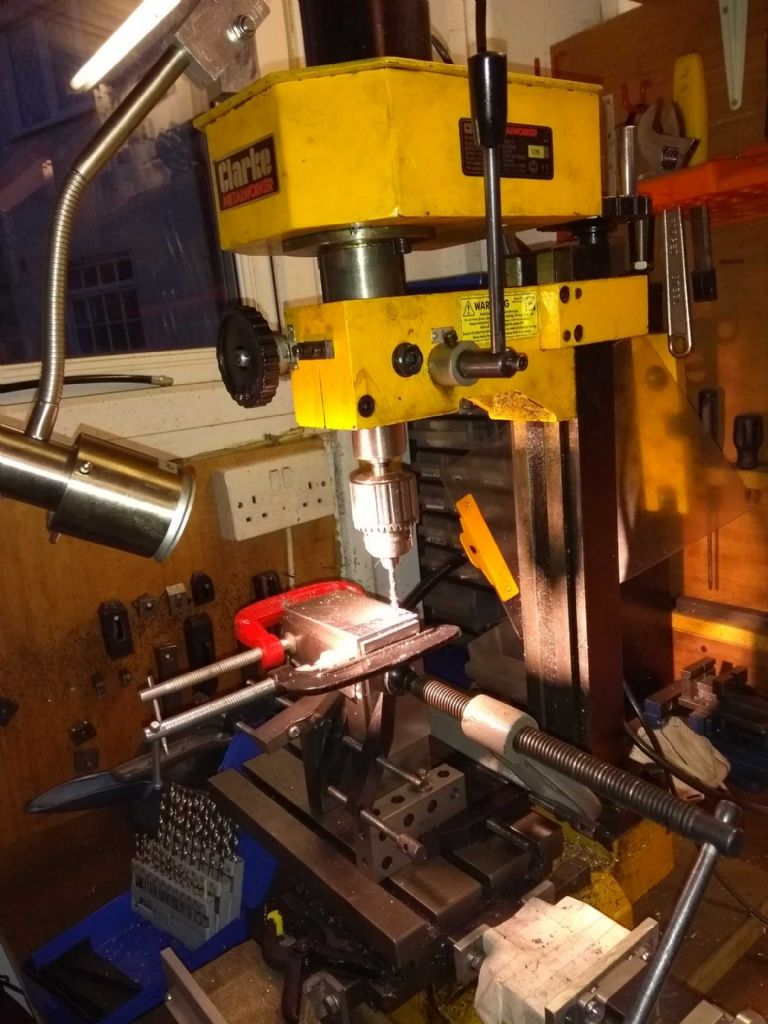
                                                  In fact this task took my little CMD10 right to it's limits.

                                                  crankcase pushing the cmd10.jpg

                                                  If the crank case had been 5mm longer I would have been very hard pressed to do the drilling. Well done! you might say for such careful design work. Hmmmm. (blush – absolute luck!).

                                                  Next to ream out to 3mm. It turned out that I had only got 3mm in machine reamers and I actually don't trust any of my kit to be accurate enough to hold a machine reaminer and not overbore, so I got a 3mm hand reamer.

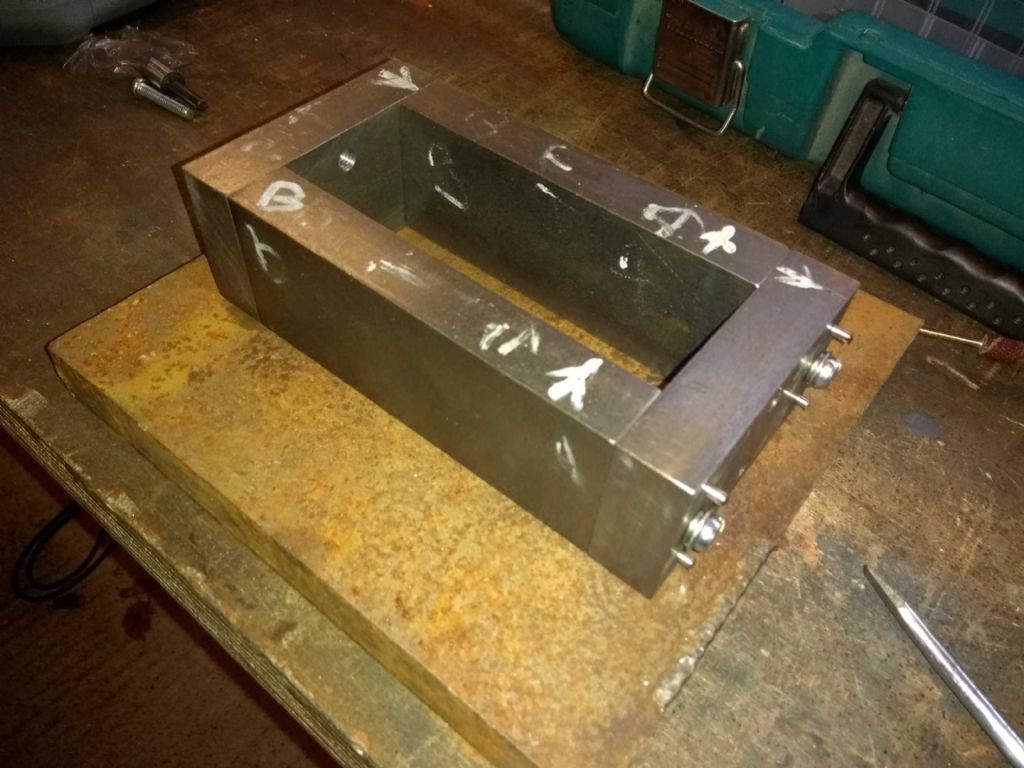
                                                  Next to pin, bolt and hammer in the pins.

                                                  crankcase pinned.jpg

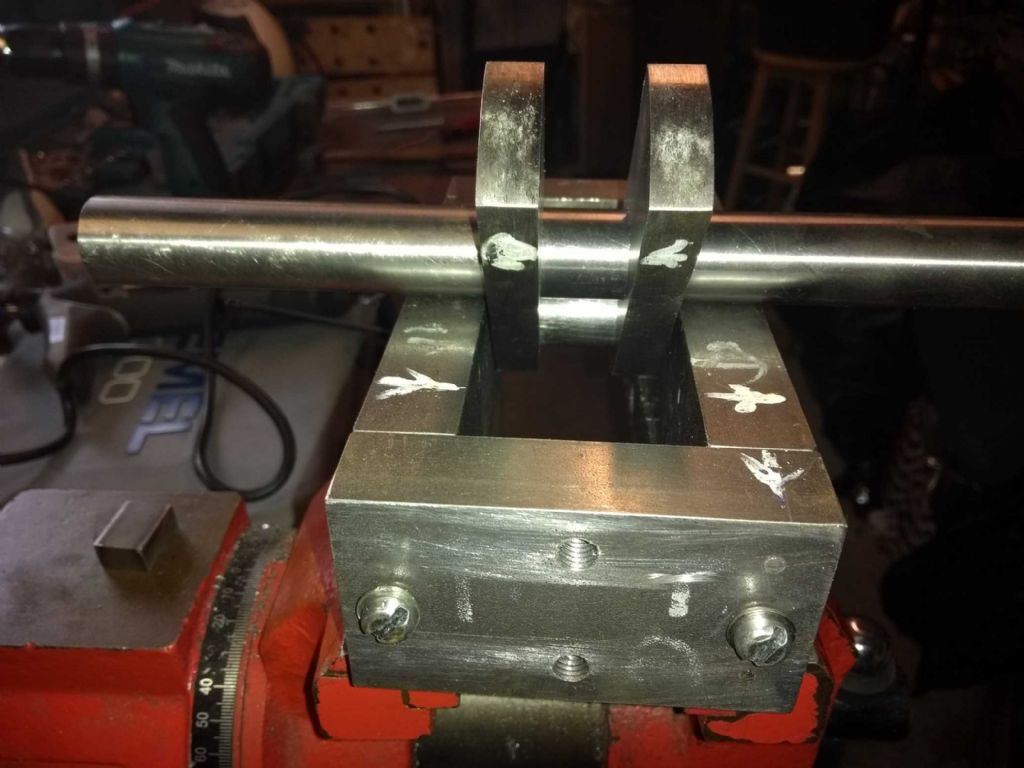
                                                  And finally, here is the crank on the crankcase. Cosmetically – I still need to make the main bearings.

                                                  crankcase and crank together.jpg

                                                  Next step is to try and make the main bearings. A bit daunting. I have a 50x50x65 lump of cast iron out of which these must appear. I'm planning in squaring it up in the lathe (partly because the mill will take forever and partly to extend the range of my fumbles). I'd like to cut it into 4 (two bearings in half) with a slitting saw, but I've had bad experiences with that. I suspect the mill is out of tram so that my be the first job tomorrow.

                                                  And before I fir it, I'm planning on facing the top of the crankcase to provide a good registration surface.

                                                  Iain

                                                  #385493
                                                  Iain Downs
                                                  Participant
                                                    @iaindowns78295

                                                    Another setback surprise.

                                                    It seems that the lump of cast iron I had lying around which I was going to make the bearings from isn't. Isn't cast iron that is.

                                                    My filing seemed to make dust, but when I was playing with truing it up on the lathe (a venture with decidedly mixed results), I got curls not dust.

                                                    I moved it to the mill and trimmed a bit of it off and then the same with some known cast iron. the cast is producing dust, the unknown metal curls.

                                                    More expense (but thank God for ebay)….

                                                    ON the other hand, I had a look at the tramming of the micro mill and it's better than expected. With a bit of bolt tightening on the column I've got it .05 mm out front to back and .03 or so left to right.

                                                    I appreciate that this may seem like the the most appalling laxity to the experts among you, but I've tried to set this machine up before and if you remove the column to shim, the whole setup changes. Quit whilst you are ahead (or at least not too far behind).

                                                    Tomorrow is my last day of leave and it's a domestic day followed by the works do, so my focus is going to be off this now until Christmas week. I might just have a go at starting the cylinder tonight, though. Or I might do some of the domestic jobs I've promised. Hmm, fun? or Brownie Points…

                                                    Iain

                                                    #385496
                                                    JasonB
                                                    Moderator
                                                      @jasonb

                                                      Ian, you could make your bearing blocks from aluminium which will be easy to machine ans just slip in some bronze bearings, I did similar the other week when the cast items were consigned to the bin due to poor quality. having said that with the right tools and a nice bit of iron you can get pleasing swarf not just dust

                                                      Looking at the size of that fabricated base you would still be here until next Xmas trying to heat that lot up with what you had, I think even the standard Sievert burner may be a bit small for lumps like that.

                                                    Viewing 25 posts - 26 through 50 (of 208 total)
                                                    • Please log in to reply to this topic. Registering is free and easy using the links on the menu at the top of this page.

                                                    Advert

                                                    Latest Replies

                                                    Home Forums Stationary engines Topics

                                                    Viewing 25 topics - 1 through 25 (of 25 total)
                                                    Viewing 25 topics - 1 through 25 (of 25 total)

                                                    View full reply list.

                                                    Advert

                                                    Newsletter Sign-up