Hi, I have previously built the GHT Pillar Tool and his dividing head, both using the split cotter method to clamp shafts or spindles with good results.
I am now building a Quorn and I am going to use the same method rather than slitting the castings and using a pinch bolt.
In all cases that I have examined the calculation of the "correct" offset distance between the centre lines of the shaft/spindle (to be locked) and the clamping bolt are different. This is not only for GHT's tooling but the Quorn.
In the Hemmingway drawings for the Quorn, it indicates that the "overlap" or offset to create the clamping effect from the cotters is half the diameter of the bar + half the dia of the clamp bolt + 0.02" (thou).
George Thomas' calcs are slightly different and he explains why this overlap when using split cotters is fairly critical due to the clamping effect and self release when the clamp is slackened off
So is there any guidance on best practice on this?
Incidently GHT used brass cotters against steel spindles, Hemmingways say better efficient clamping is obtained with steel cotters against steel spindles…
For the Hemmingway Quorn (I'm currently upgrading mine to include split cotters) the half the diameter of the bar + half the dia of the clamp bolt + 0.02" (thou) is there to ensure that the clamp bolt itself misses the bar by 20though. The clamping action is dependent on the diameter of the pads and the gap between them when they are tightened. This is defined (established) by the internal step in the machining jig that Hemmingway suggest where the blanks for the pads are held apart by the internal step in the bore.
I did mine a slightly different way as I couldn't be bothered to bore for the pads in the jig from both sides. I through bored the pad hole at the correct offset and made the pads as follows. Both pads were flanged and of the correct length to establish the gap. I actually made the gap smaller than Hemmingway specify. The pads were assembled into the fixture and held with a cap head bolt through the pair. The main bore was machined. The pads can then be removed and the flange turned off. Correct clamping action was established by turning a little off the inner end of the pads until I was satisfied with the action, (basically that they self release).
The fixtures can be used several times to make additional pairs of pads, once you have the bits redoing things is quite quick although I doubt if you will have issues. The thing is not that critical so ling as you don't get any wedging action. If you end up with a slightly larger central gap don't worry too much you will still get more than enough clamping force. With the clamps on the front bar I could not twist the tool holder casting on the bar when I had done the clamp bolt up with my fingers. With a ball handle it will obviously be tighter.
When using the method in my own modest designs I have always aimed to get the centres as close as possible without the clamp bolt fouling; this, instinctively, seems to give best clamping and if there is a tendency not to release, as has been said, the remedy is to turn a bit off the inner ends of the cotters.
MichaelG:
I followed your link with interest. The Quorn has a long tail!
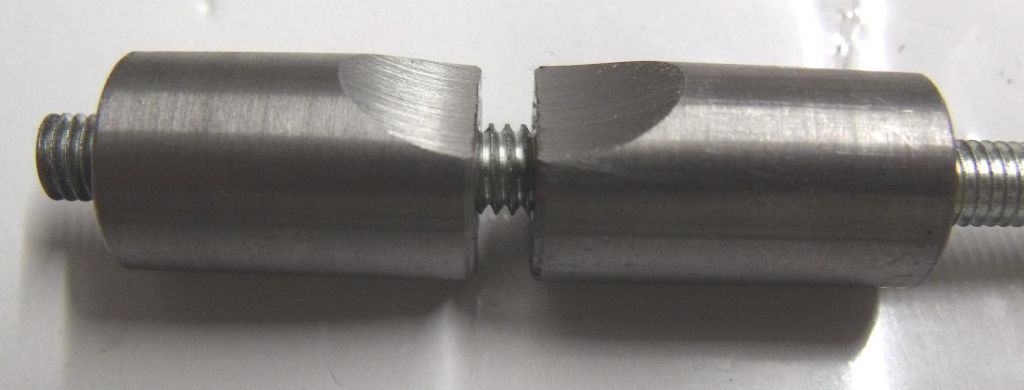
I've always made my split cotters in one piece and then split them after machining the bore. Usually the thickness of the hacksaw or bandsaw blade is adequate gap ! Usually the sharp edges on the cut scallop have to be removed to prevent them cutting into the clamped shaft and causing problems both marking the shaft and sticking.
Posted by Michael Gilligan on 23/06/2021 08:48:25:
Perhaps I am missing something, Derek … but I can’t see why the ‘offset’ should be particularly significant.
A different offset will produce a different angle on the cotter.
Consider the two extremes, where there is virtually no overlap between cotter and shaft and where the shaft and cotter overlap by nearly 50% of the cotter diameter (ignore, for the moment the clamping bolt).
In the first, the slope of the wedged sides will be very shallow. In the other, the slope of the wedged sides will be very steep.
With all tapers, there is a degree of slope below which they are self-holding and above which they are considered self-releasing.
So, I suspect that with a cotter, if there is too little overlap, it may not release when the clamping bolt is slackened.
I agree with the principle of your comment but how far are clamp and release affected by the fact that the contact is an arc of a circle rather than an inclined plane?
I think radiusing the contact surface will cause problems of having to make everything to such a degree of precision that it will be counter productive. The centre bolt being too close to the shaft will cause line contact near the gap where the sharp edge is. The bolt being too far from the shaft centre will cause point contact (until some wear or deformation has occurred) at the outer ends of the scallops. The centre of the radiusing being slightly out of position will cause the same effect. Also remember that the pressure between the cotters faces and shaft will reduce if you increase the contact area (force = pressure x area). This means that there is no gain in the force applied to the shaft by the cotters if they are radiused since the force on the shaft will still be proportional to the closing force on the split cotters. Just cut a flat at a reasonable angle and it will do the job.
I think that every one is under the impression that split cotters are hard to make ! In my opinion they are not difficult at all. I use an M6 thread for my split cotters, so this immediately determines how far away from the shaft you are going to clamp, the cotter needs to be. Obviously you need to make a couple of MM allowance so the thread in the cotter does not touch the shaft.
After that I use any convenient size round bar for the cotter that I have a drill for. I drill the cotter all the way through the cotter, tapping size and then thread the drilled hole. It helps if you have some long series taps, depending upon how long you want to make the cotter.
At this point we now have a piece of bar for the cotter drilled and threaded. Making sure we have correctly calculated and marked the hole position for the cotter, we drill the hole for it making sure that its is a good fit in the hole.
If the cotter is fitted in a through hole where you have access to both ends, just use suitable bolts and washers to clamp the cotter in place. If the hole is blind then you need to drill and place a grub screw near the end at the bottom of the hole, again using a bolt and washer to secure it.
Once the cotter blank is fastened in place bore the hole for the bar that you want to clamp. This will automatically create a scallop of exactly the right dimensions in the cotter. After simply split the cotter in the middle and drill the threads out of the loose half.
I mentioned earlier that the sharp edges need to be removed from the middle of the scallop to prevent any marking of the bar being clamped and to ensure that it will release properly.
I've used split cotters on my "Norman" Patent tool holders and also my "Brooks" TCG as well as a number of other items. Photographs in my album.
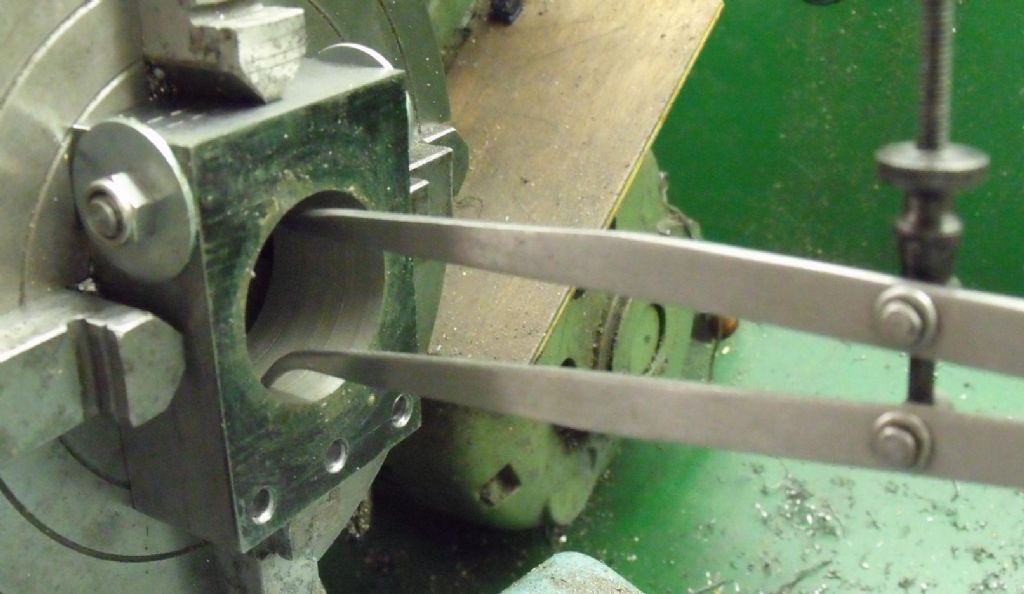
This is a picture of my "Norman" Patent tool holder block being measured showing the collet held in it. I've used a short length of threaded rod on this one with nuts at the ends.
I would have expected there to be a rule of thumb, ie cotter is 1/x * pillar and bolt is 1/y * cotter. What does GHT have to say on the issue?
The link Michael found has both x and y at ~1.8, but this has the cotter bigger than the pillar HSM and also refers to Guy Lautard's "Machinist Bedside Reader" volumes. Anyone got a copy?
I can't really see a problem having the cotter bigger, t just wraps round more of the pillar.
Main thing is making sure the cotters are significantly smaller diameter than the clamped bar, so the action is on the right section.
I remember when changing pedal cotter pins was a regular maintenance task on my bicycles. Cotterless cranks were a revelation
Neil
I, too, remember cottered cranks. They were certainly not self-releasing and I saved my pocket money until I could afford a cotter-less set – strange to define something in terms of what it is not!
The continentals were ahead of us in adopting tapers, splines, etc for this; today, new systems seem to come along every year.
PS According to Archibald Sharp, cranks were originally keyed to their axles – very secure but difficult to remove.
I was just wondering if there was a "sweet spot" in the centre to centre dimension (i.e. offset) or if there was some optimum offset between the bore and the split collet
I have just spent 30 mins looking at my GHT books building the universal pillar tool and building his dividing head as there are copious amounts of these split collets on his designs.
In the Hemingways instruction in building the Quorn the offset is given by:-
D = bore being clamped, d = the diameter of the clamping bolt that sqeezes the two collets together (NOT the diameter of the collets as I presumed it to be)
D/2 + d/2 + 0.02" = the centre to centre dimension for the split collet and bore.
Now I checked this with the GHT articles on his kit and his offset is 0.01" larger than suggested by Hemingway, that is:
GHT method is:- D/2 + d/2 + 0.03 = the centre to centre dimension of the clamping bolt and bore.
So both methods seems to suggest that an offset anywhere between 0.02" and 0.03" is the optimum
Without boring you too much more, GHT does say that "while the clamping effect is very powerful, the 2 halves of the collet may not separate when the clamping pressure is removed. This is down to one or both of these reasons (a) the offset between the bore and the clamping bolt is too large and (b) the shortening of the back of one of the collets was insufficient".
In addition GHT mentions that this offset is important and is recommended that it is held to within 15 thou (0.015"
Well I have lots of these to do on my Quorn so I feel confident that this offset works without stuffing up any castings!
Thanks again for your time and of the jigs and your suggestions. Just got to get prepped for all those ball handles next !!!
It isn't a model so you don't have to be faithful to the original. You'll save yourself a lot of building time and operating frustration by using indexable locking levers like these from Axminster.
In the Hemingways instruction in building the Quorn the offset is given by:-
D = bore being clamped, d = the diameter of the clamping bolt that squeezes the two collets together (NOT the diameter of the collets as I presumed it to be)
D/2 + d/2 + 0.02" = the centre to centre dimension for the split collet and bore.
Now I checked this with the GHT articles on his kit and his offset is 0.01" larger than suggested by Hemingway, that is:
GHT method is:- D/2 + d/2 + 0.03 = the centre to centre dimension of the clamping bolt and bore.
So both methods seems to suggest that an offset anywhere between 0.02" and 0.03" is the optimum
Without boring you too much more, GHT does say that "while the clamping effect is very powerful, the 2 halves of the collet may not separate when the clamping pressure is removed. This is down to one or both of these reasons (a) the offset between the bore and the clamping bolt is too large and (b) the shortening of the back of one of the collets was insufficient".
In addition GHT mentions that this offset is important and is recommended that it is held to within 15 thou (0.015"
Well I have lots of these to do on my Quorn so I feel confident that this offset works without stuffing up any castings!
Kind regards
Derek
Hi Derek, Guys,
Whilst the formula are basically correct I just add a couple of MM to the clamp screw diameter. However one thing that you do need to be aware of in cast iron. Split collets exert a great deal of pressure and whilst very effective at clamping that pressure has to be contained. So take very great care that the wall thickness directly opposite to the split collet is adequate to contain the pressure.
In Steel it isn't a problem, but I've seen castings broken by excessive tightening of a spilt collet ! One way round this is to use a small/smaller diameter material for the collet. Virtually all mine are in steel, I've only one in cast iron and one in aluminium.
If you get the 2 bores too close together and the bolt won't go in don't despair, turn the centre of the bolt down to root diameter of the thread, won't weaken it and it might then go in. Don't ask how I found this out!
Of course you have to put the cotter and bolt in before the main shaft