Soldering/brazing a boiler.

Advert

Soldering/brazing a boiler.

Home Forums Stationary engines Soldering/brazing a boiler.

Viewing 25 posts - 76 through 100 (of 175 total)
  • Author
    Posts
  • #170259
    Brian John
    Participant
      @brianjohn93961

      Jason : I have read it. Please read the section on joint cleanliness. Am I reading this wrong ? It says cleanliness at room temperature is unnecessary.

      Gordon : there is no soft solder involved at all.

      At what point does soft solder become hard solder ? What is the difference between the two ? Is it the silver content or the melting point ?

      Edited By Brian John on 21/11/2014 12:48:24

      Advert
      #170260
      JasonB
      Moderator
        @jasonb

        Brian, you would not want to try and solder a piece of copper that has been knocking around under the bench for 20years or had been heated to leave a heavy oxcide layer on it without cleaning first.

        On the other hand you don't need to go to clinical levels in an oxygen free enviroment to make sure the surface is not contaminated.

        Basically you want a bright copper to the eye, the flux can then cope with the rest.

        So taking your boiler as an example if you soldered say the bottom on and then went back later to do the top you should be acid cleaning between the two, if you tried to do it without cleaning you will get into trouble.

        600degrees C is about the change over, melting point


        Edited By JasonB on 21/11/2014 13:01:22

        #170261
        Brian John
        Participant
          @brianjohn93961

          As I mentioned above, I WILL be cleaning the metal regardless of whether it is necessary or not.

          Yes, the main joints (top and bottom) of the boiler will be done in two stages. Then the chimney in two stages. Finally the filler plug and steam outlet will be added to the top of the boiler. I am hoping that the pinpoint burner will produce enough heat for this last job without melting the already soldered joints of the boiler and chimney.

          Edited By Brian John on 21/11/2014 13:17:34

          #171660
          Brian John
          Participant
            @brianjohn93961

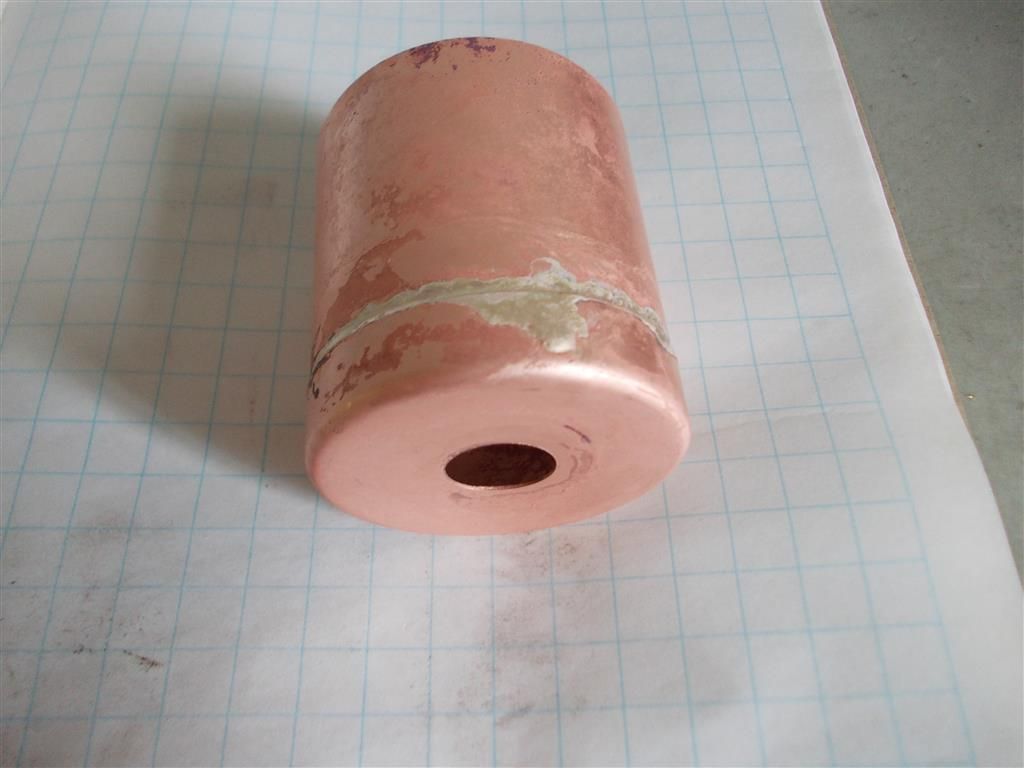
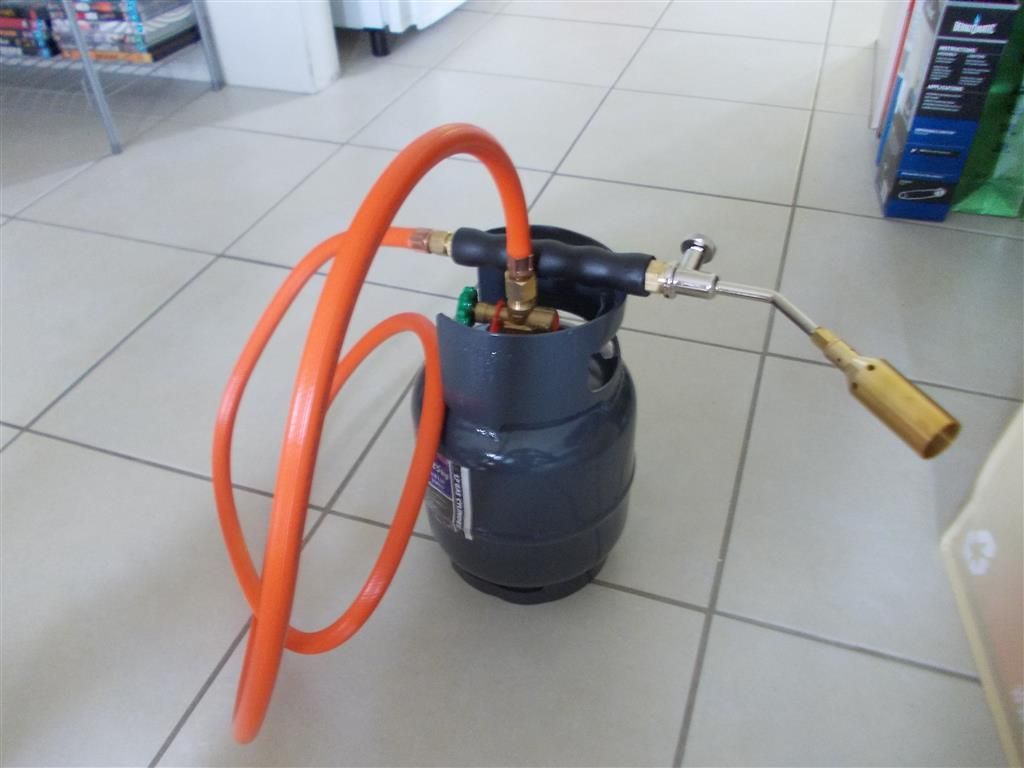
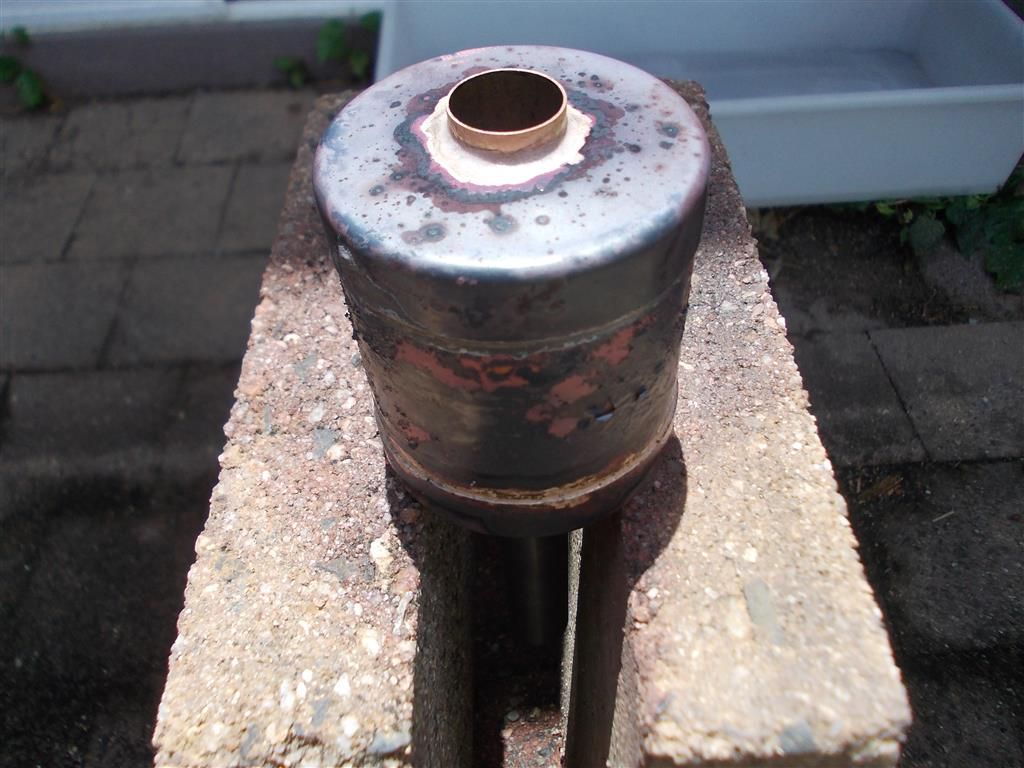
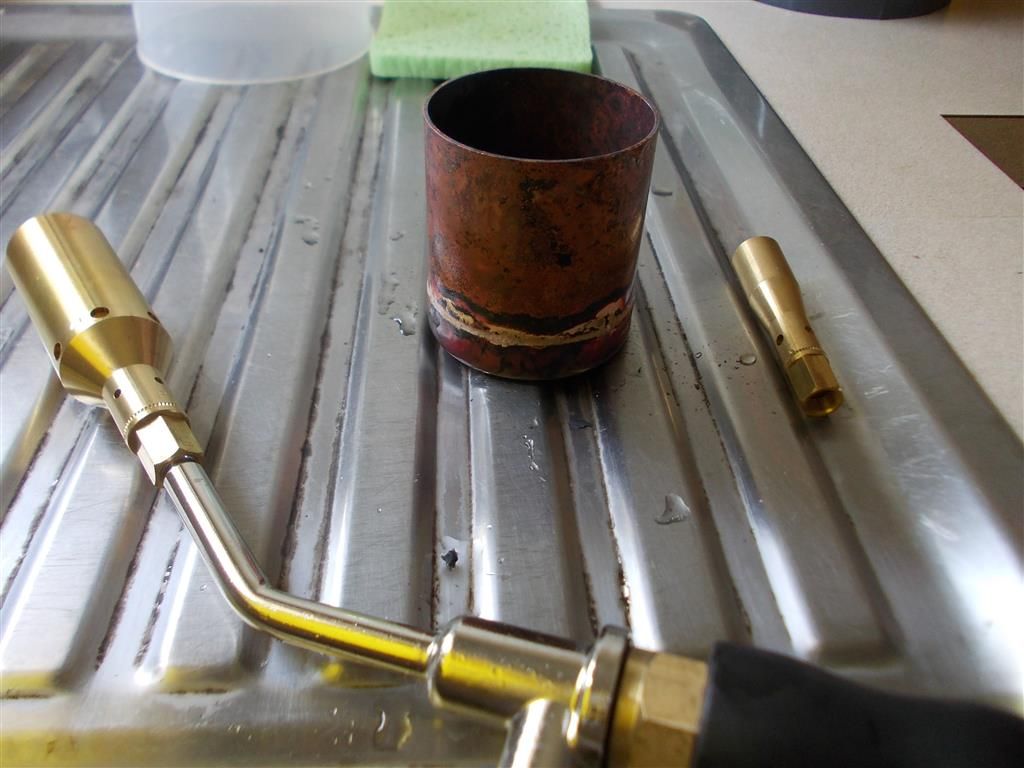
            Today I made the first attempt after purchasing the correct equipment. In the photos below you can see the full flame burner I used to silver solder the base of the boiler. Beside it you can also see the medium burner which I will use to solder the fittings (steam outlet and safety valve/filler plug). Tomorrow I will do the top of the boiler and the next day will be the chimney. I may do both the top and bottom of the chimney in one go…not sure yet.

            Everything seems to have worked well but there is a lot of heat. It uses a surprising amount of solder (expensive stuff). I am worried that when I try to solder the chimney it may melt all my previous work.

            I gave the soldered parts a wash in water then into the citric acid pickle for one hour before taking some photos. I have put it back in the pickle now. The solution has turned blue : has all the citric acid been used ie. should I mix a fresh batch and leave it overnight ?

            NOTE : I did not solder in the kitchen I have a small courtyard outside the apartment.
            dscn0002.jpg

            dscn0014.jpg

            dscn0015.jpg

            dscn0019.jpg

            dscn0021.jpg


            Edited By Brian John on 06/12/2014 02:34:43

            Edited By Brian John on 06/12/2014 02:41:51

            #171661
            Brian John
            Participant
              @brianjohn93961

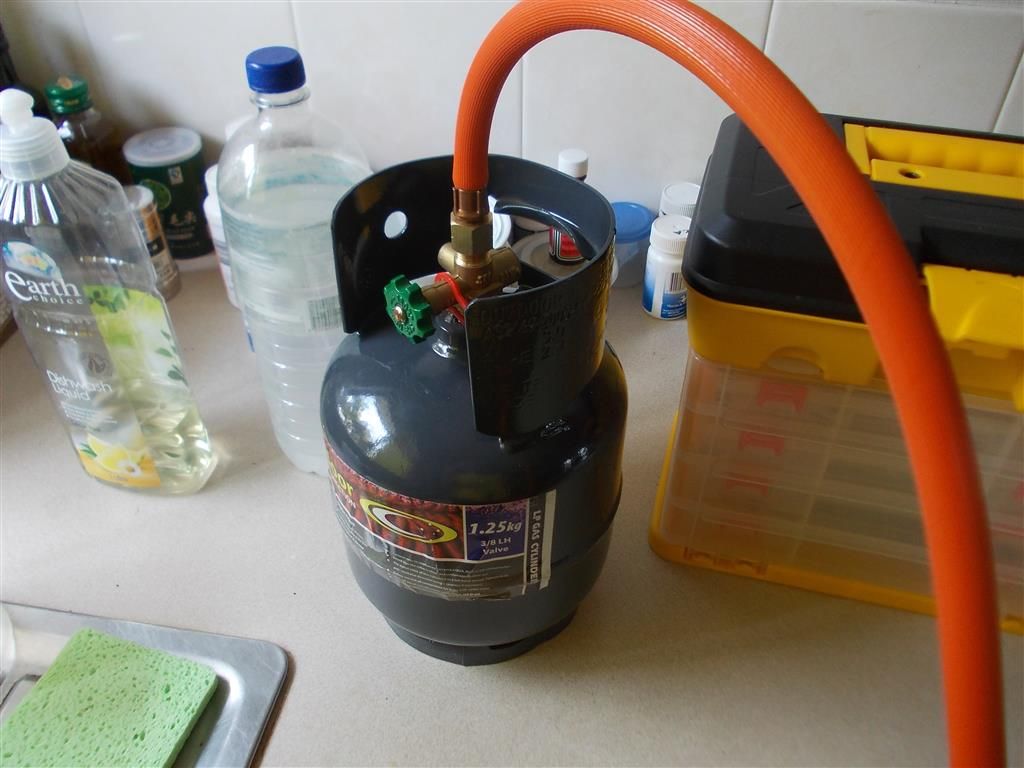
              Here is another photo of the new equipment showing the full flame burner attached to the handle. I have vented all the gas from the hose. I have been told that it is now safe to store it in this position….comments anybody ?

              dscn0024.jpg

              #171668
              JasonB
              Moderator
                @jasonb

                That looks a very good joint for a first attempt, the solder has flowed very nicely around both sides of the joint.

                When you come to do the other joints just position the boiler in such a way that everything is supported and then you should not have too much of a problem with previous joints. Also once silver solder has melted it needs more heat to melt a second time so you should be OK.

                Some people prefer to place a few short lengths of the silver solder rod around the joint as that can be a bit more economical but I prefer to just feed in the stick once the job is upto temperature.

                Yes fine to store like that, if you are not going to be using it for a period of time then I would take the hose off the canister just so its less bulky to store.

                #171671
                Brian John
                Participant
                  @brianjohn93961

                  Placing solder around the joints : Yes, I did it this way when I was soldering the cylinder to the spacer. I did not have the full flame burner then and I could not get the metal hot enough to solder it properly. But by heating the metal parts as hot as I could then heating the solder which I had already placed in position I was able to achieve a good join.

                  I think you can only do it this way when you have a ''horizontal ledge'' on which to place the solder pieces. This method would not work when soldering the top and bottom caps of the boiler but it I may use this method when soldering the chimney, steam outlet and safety valve.

                  1. It is good to know that the solder has a higher melting point when heating it a second time. That is very useful information. Why is it so ?

                  2. Placing the metal parts in citric acid for a few hours seems to get everything much cleaner then using sandpaper. Is this an acceptable method to clean the metal prior to soldering ?

                  Edited By Brian John on 06/12/2014 08:32:32

                  Edited By Brian John on 06/12/2014 08:32:52

                  Edited By Brian John on 06/12/2014 08:40:42

                  #171680
                  JasonB
                  Moderator
                    @jasonb

                    There is some sort of chemical action that alters the structure of the filler rod, I'm sure Keith can explain it better if he is looking in.

                    Sandpaper and emery cloth are not ideal as they can contaminate the surface. Try a Scotchbrite pad, wire wool or a fine steel wire brush.

                    #171688
                    Brian John
                    Participant
                      @brianjohn93961

                      How long should the item be left in the citric acid pickle ? I would think that once it is clean and shiny then it is okay to remove it. Many people say that they leave it in over night but I do not see the need for this.

                      #171705
                      Ian S C
                      Participant
                        @iansc

                        Brian, good to see you have got a good torch.

                        Just out of interest, you could not buy a cylinder like that one in NZ, dark coloured cylinders where banned last year, and only white (and I think yellow) cylinders will be filled. The cylinder I have for my emergency cooking set up is blue, and due for retesting, it will require a new cylinder. Reason, over heating when left in the sun, ie on the BBQ.

                        Ian S C

                        #171709
                        IanT
                        Participant
                          @iant

                          I think it's just a matter of convenience Brian.

                          For me it often depends at what time of day I finish doing the work. If it's late then I do leave things overnight so they are ready for the next day but if it's earlier – then I do tend to fish them out quicker but mainly to see what they are looking like. I don't think I've had any problems by leaving things in for longer but I wouldn't just leave work 'soaking' for very long periods though.

                          Regards,

                          IanT

                          #171717
                          Neil Wyatt
                          Moderator
                            @neilwyatt

                            > It is good to know that the solder has a higher melting point when heating it a second time. That is very useful information. Why is it s

                            I think it's due to the evaporation of tiny amounts of tin, raising the melting point.

                            Certainly if you allow the flame to melt solder before the parent metal is hot enough, it takes more heat to melt it again than it does to melt fresh solder.

                            Neil

                            #171721
                            Russell Eberhardt
                            Participant
                              @russelleberhardt48058
                              Posted by Neil Wyatt on 06/12/2014 13:10:56:

                              > It is good to know that the solder has a higher melting point when heating it a second time. That is very useful information. Why is it s

                              I think it's due to the evaporation of tiny amounts of tin, raising the melting point.

                              Most silver solder alloys don't contain tin. I suspect the real reason is that it absorbs copper from the parent metal thus changing the composition. Perhaps our expert from the supplier will explain better?

                              Russell

                              #171767
                              Brian John
                              Participant
                                @brianjohn93961

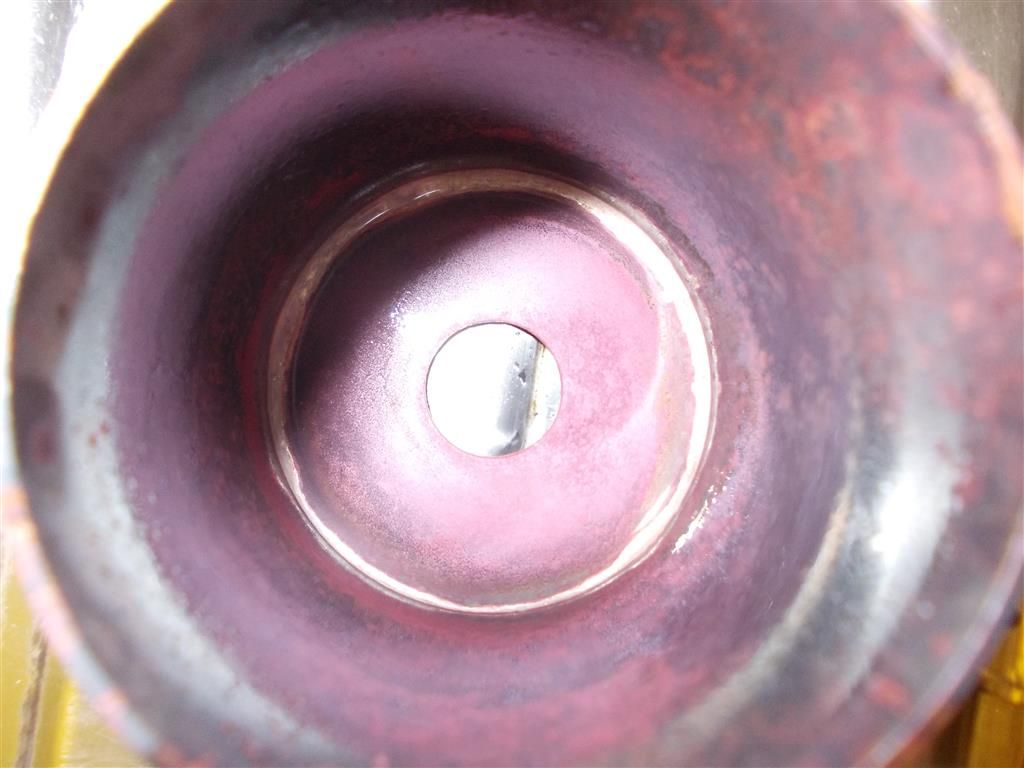
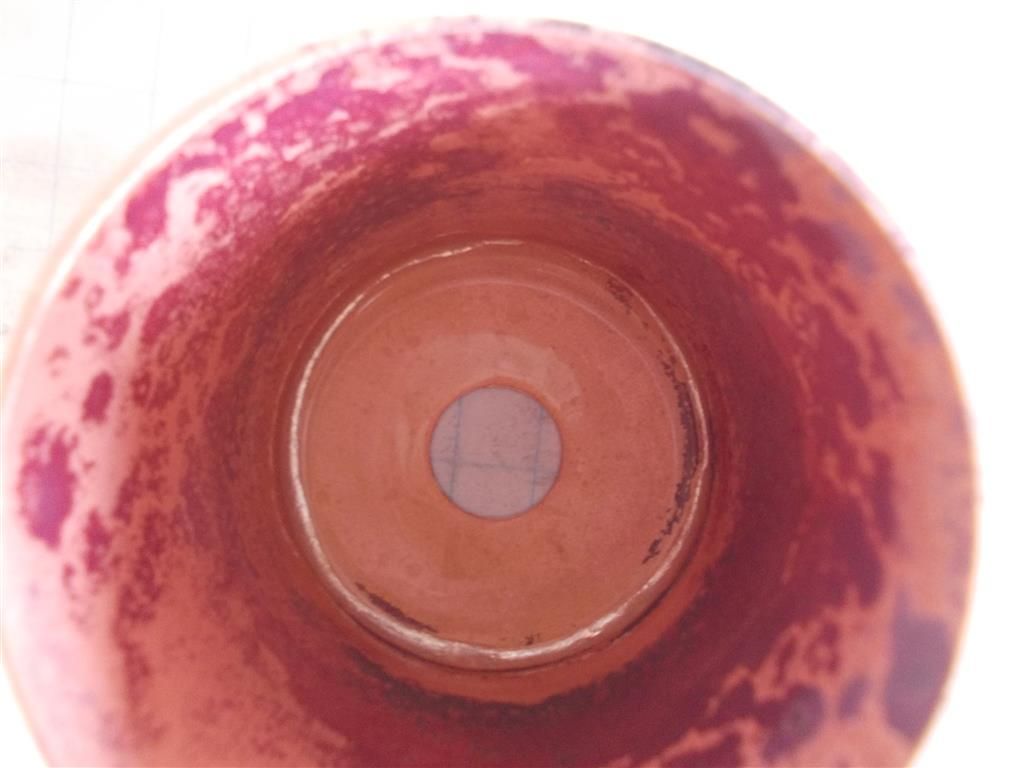
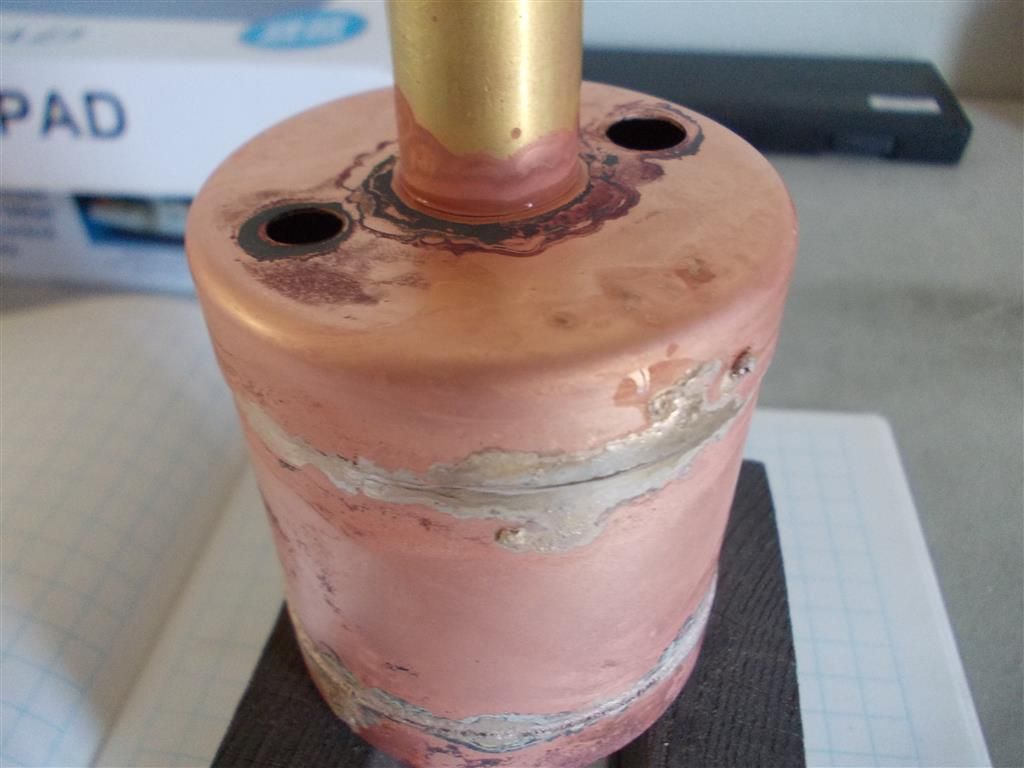
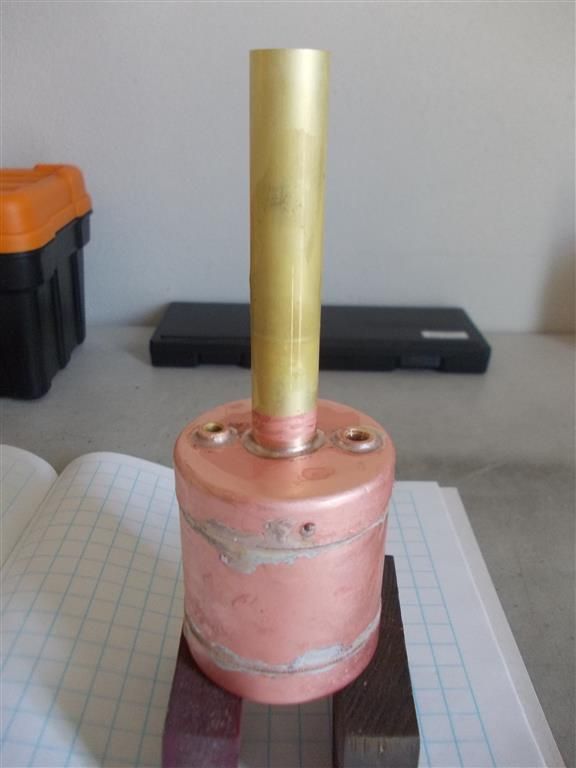
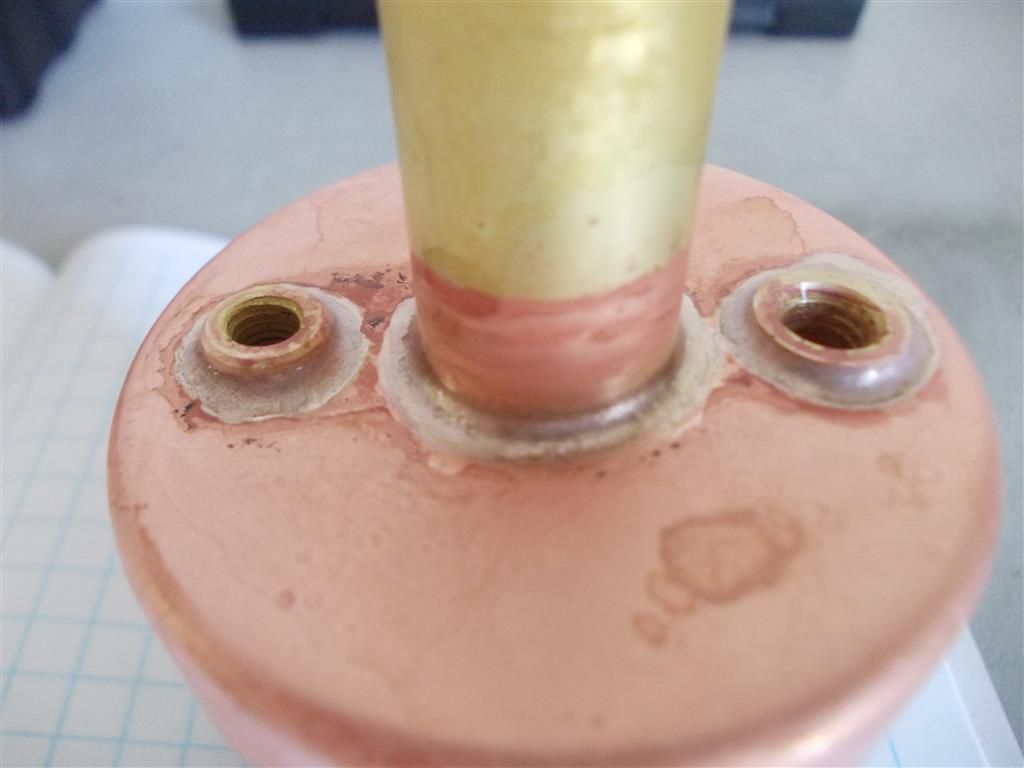
                                Stage 2 : I soldered the top cap (which is at the bottom in the first photo) and the bottom of the chimney (which is at the top in the photo). As mentioned previously, I fluxed the chimney and put some small pieces of solder around it. I then concentrated on soldering the top cap. Once I hit the boiler with the full flame it did not take long for the metal to get hot. By the time I had finished soldering the top end cap, the solder had already melted around the chimney : two jobs in one go. The second photo shows it cleaned up after one hour in the pickle.

                                In the third photo you can see what I have to solder tomorrow : the top of the chimney, safety valve and steam outlet which will all be done in one go. I think I will place small pieces of solder around the required areas and use the medium burner…not sure yet.

                                How do you clean the inside of the boiler ? I have to remove the black stuff from the outside by rubbing with a sponge which I cannot do on the inside.

                                dscn0002.jpg

                                dscn0006.jpg

                                dscn0011.jpg

                                Edited By Brian John on 07/12/2014 03:09:08

                                #171777
                                Brian John
                                Participant
                                  @brianjohn93961

                                  1. Update : I realised that I have the pinpoint burner which has a heat output of 0.75 kW compared to the full flame burner which is 7.00 kW. For doing the smaller parts, I think I need the medium burner which puts out 2kW. I doubt that the pinpoint burner would get the job done but any comments would be welcome.

                                  2. What sort of solder do they want you to use when they specify soft solder : plumbers solder, electrical solder or something else ?

                                  Edited By Brian John on 07/12/2014 08:48:50

                                  #171798
                                  Ian S C
                                  Participant
                                    @iansc

                                    Soft solder for this sort of thing would be plumbers solder 50/50, it has a slightly higher temp than electricians 60/40 solder. There is another grade used by car radiator builders, it has a temp rating a little higher than that used by plumbers.

                                    With silver solder , one of the alloy metals evaporates, and the rest alloy with the metal being joined, to start the remelt I touch the joint with the rod(when the metal is hot enough), and away it goes, it's a bit different if you'r using oxy acetylene, or oxy gas.

                                    Ian S C

                                    #171819
                                    JasonB
                                    Moderator
                                      @jasonb

                                      Personally I would use the 7kw burner as you will still need to get the copper hot enough to form the joint not just the little fittings. Keep the flam playing mostly on the copper and the fittings will soon warm up with it. Infact if you ait to do te top chimny joint and teh two bushes in one go the heat from doing te chimney will likely spread far enough to do the bushes too.

                                      Yes just plumbers solder will do, you will most probably find that it is lead free and get a suitable flux from the same supplier as your silver solder flux can't be used.

                                      #171893
                                      Brian John
                                      Participant
                                        @brianjohn93961

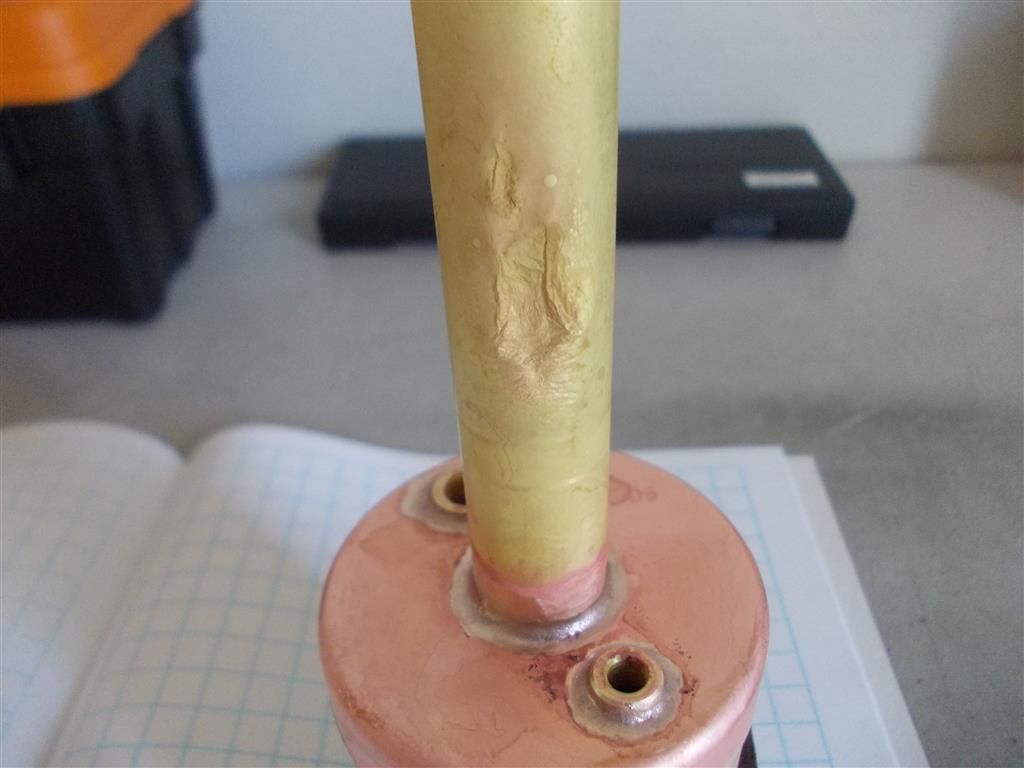
                                        I did use the full flame burner and the job is now finished but not without a slight problem. Look at the chimney in photo 2 : what has caused this…is it too much heat at this point ? I did not think brass would do this.

                                        dscn0005.jpg

                                        dscn0008.jpg

                                        dscn0007.jpg


                                        Edited By Brian John on 08/12/2014 05:56:38

                                        Edited By Brian John on 08/12/2014 05:57:45

                                        Edited By Brian John on 08/12/2014 05:58:10

                                        #171895
                                        JasonB
                                        Moderator
                                          @jasonb

                                          Yes too much heat, the brass has almost become liquid and sagged under its own weight. I expect you were concentrating on the joint area and did not see the chimney getting hot further up. Solder joints a very good though.

                                          #171900
                                          Brian John
                                          Participant
                                            @brianjohn93961

                                            So this burner can melt brass ! I did not think it could get that hot. Any thoughts on repairing the damage : a sleeve around the chimney perhaps or just leave it alone ?

                                            How do other people clean the inside of the boiler once all the soldering is finished ? I was thinking of dropping some small ball bearings inside and shaking it up.

                                            #171925
                                            Ian S C
                                            Participant
                                              @iansc

                                              Brian, yes it will melt brass, often when I'm joining steel I use up some of a supply of scrap brass sheet, or brass wire if I can get it, my metal supplier doesn't stock it any more. I use a similar torch to your's.

                                              Ian S C

                                              #171930
                                              nigel jones 5
                                              Participant
                                                @nigeljones5

                                                You need to reheat, remove chimney and fit new one. If you dont you will never be happy with it. Re soft solder, ensure you buy a reel which has lead in it. You can still get it and its loads better than the lead free stuff.

                                                #171995
                                                Brian John
                                                Participant
                                                  @brianjohn93961

                                                  Something will have to be done ; overnight it has developed a small hole. My option are as follows

                                                  1. Remove it and get a new one. I do not really fancy trying to remelt this solder as I would have to melt both ends at once to get it out.

                                                  2. Cut it off and have a short chimney. This is probably the easiest option but it will look a bit odd.

                                                  3. Resleeve it with copper or brass tubing. The current chimney is 16mm OD (5/8'' = 15.875). I need something that will be a good fit. I will do this if I can find something to fit ie. ID is 16mm.

                                                  #172009
                                                  Ian S C
                                                  Participant
                                                    @iansc

                                                    A bit of copper tube the same size could have a short length expanded at one end for a few mm, the damaged chimney cut off, and the copper one fitted over the stub and silver soldered on.

                                                    Ian S C

                                                    #172018
                                                    Brian John
                                                    Participant
                                                      @brianjohn93961

                                                      Yes, I have been thinking along the same lines. I was down at the hardware store today (Bunnings) but they did not have any copper or brass tubing that was a good fit. There was some steel pipe which was a perfect fit but I will leave that for the moment.

                                                      Tomorrow I will try the plumbers supplies for offcuts of brass and copper and I also have the number of three scrap metal merchants…somebody must have something.

                                                      Why did Midwest supply a a brass chimney anyway ? I would have thought a copper chimney would have been the sensible option.

                                                      Edited By Brian John on 09/12/2014 12:26:12

                                                      Edited By Brian John on 09/12/2014 12:26:27

                                                    Viewing 25 posts - 76 through 100 (of 175 total)
                                                    • Please log in to reply to this topic. Registering is free and easy using the links on the menu at the top of this page.

                                                    Advert

                                                    Latest Replies

                                                    Home Forums Stationary engines Topics

                                                    Viewing 25 topics - 1 through 25 (of 25 total)
                                                    Viewing 25 topics - 1 through 25 (of 25 total)

                                                    View full reply list.

                                                    Advert

                                                    Newsletter Sign-up