Smart and Brown Sabel

Advert

Smart and Brown Sabel

Home Forums Work In Progress and completed items Smart and Brown Sabel

Viewing 25 posts - 26 through 50 (of 64 total)
  • Author
    Posts
  • #479575
    Robin King
    Participant
      @robinking15611

      Afterthought on felts, vintage vehicle part suppliers stock suitable felt sheet, you'll have to search for them tho'.

      Oddly my Boxford has no felt wicks anywhere and I've not seen mention of them ever being fitted on them either.

      Advert
      #480615
      Jim Beagley
      Participant
        @jimbeagley46363

        Thanks for all the ideas Brian. I’ll definitely check those pulleys.
        I’ve been busy and finally got the new paint. I like it MUCH more thankfully.
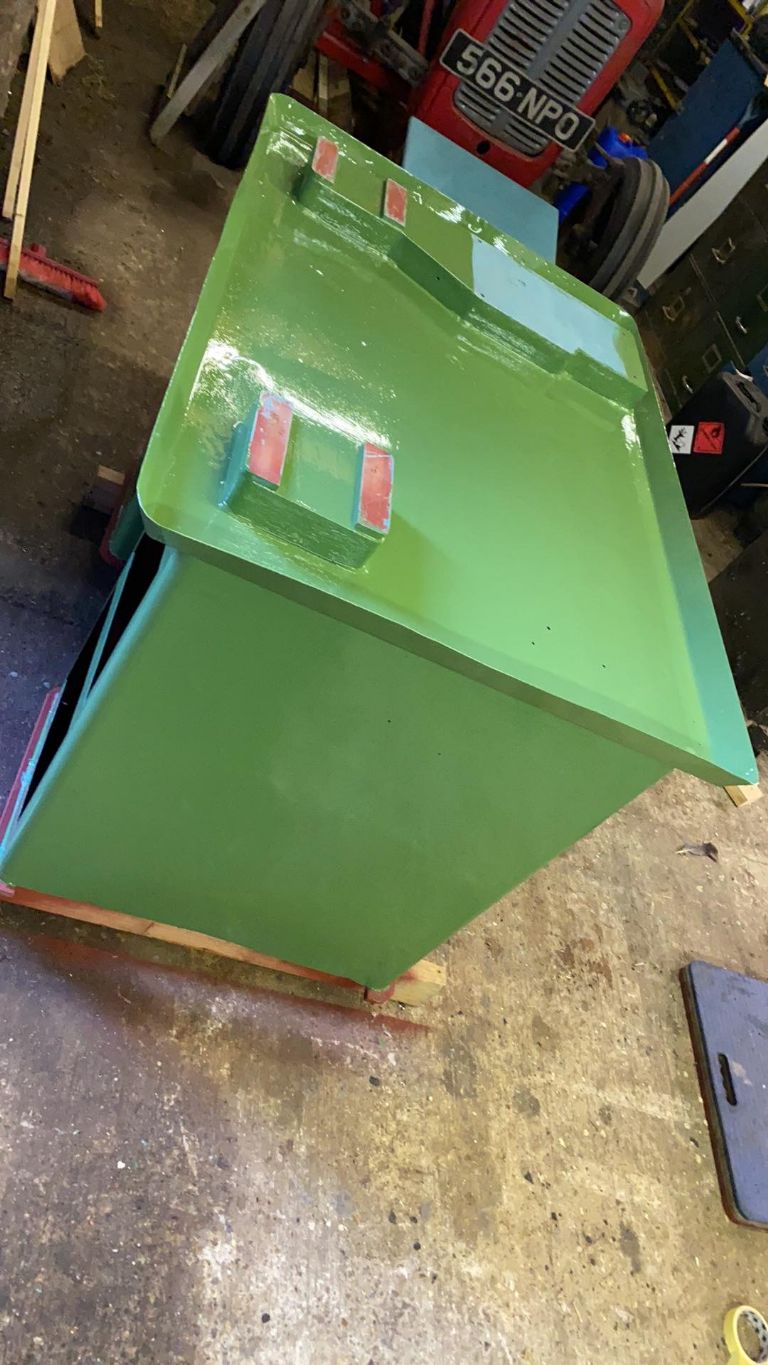
        Reseda Green Cabinet

        Almost everything is primed now and I’ve started painting the parts that were originally left in red oxide in RAL 3011 brown red. It’ll be a nod to the red oxide but much harder wearing.
        RAL 3011 insides

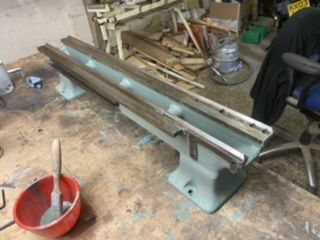
        The bed has come up very nicely as has the saddle but not was a pain to strip.
        I still haven’t fully stripped the worm drive. I think it had a circular ring screwed on with a hole to turn it but I’m not 100% there. Anyone recall how it comes apart?

        Bed primed
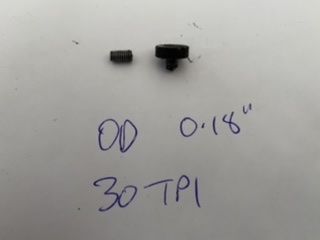
        Lastly I’ve ordered a service kit for the Southbend 9” from the states which will have the oilers and felts to fit, and amazingly I managed to source a 5/32-32 left hand die to make another screw for the clutch knob. I had one form quote me £240 for that die. Luckily the one on order was a lot less than that.
        Right that’s all for now.

        Cheers all

        Jim

        #480655
        Brian Wood
        Participant
          @brianwood45127

          Hello Jim,

          I took all the saddle components to pieces and put them together again when I first acquired my Sabel but sadly I can't recall the sort of detail you are asking for, the description is rather vague. It is not particularly difficult though, perhaps a bit fiddly here and there. There are some oil ways that will need poking through, they were rather choked on my lathe. I remember some wicks in one or two of those as well. They clean up OK and can be refitted

          From the memories I have, the internals are logical. The interlocks are positive and easy to see how they work.

          The clutch, a drum shaped component, works by compressing a disc spring using the star wheel to do so. That causes two shoes [ I think there are two] to expand into the the rim of the drum and provide the drive for either facing or turning as selected by the lever on the apron front

          I don't know if that answers your query, try me again if not.

          Regards Brian

          #480672
          thaiguzzi
          Participant
            @thaiguzzi
            Posted by Jim Beagley on 13/06/2020 11:03:48:

            Well I managed to break something. Bah.
            Stripping the apron and I couldn’t undo the clutch screw so got progressively bigger screwdrivers until I sheared it off. Dufus!

            Got the end out of the shaft – of course it’s left handed isn’t it!!!
            Broken Screw 2

            so now I need to:
            a) make another
            b) find another (Unlikely)
            c) replace with something else (metric allen head?)

            So firstly, does anyone have one
            Next does anyone know what the thread would be as it’s not one I can identify
            Next, anyone got a suitable left handed die?

            Also, no luck on replacement oiler felts. I can get them from the US but that’s pricey of course.
            The good news is only the gearbox left to clean. Yay.

            Google G&M Tools and Home and Workshop Supplies, both suppliers of S/H Boxford parts. That L/H thread screw is also a Boxford/Southbend part. They will stock that item and sell you one.

            Regards.

            #480728
            old mart
            Participant
              @oldmart

              Perhaps you could mark the end of the new screw "LH", in case somebody encounters it in years to come.

              When the Sable was made, the spindle thread was increased in size from the other clones, so S B and Boxford backplates are too small. You know that, but others might not.

              Edited By old mart on 18/06/2020 15:45:55

              Edited By old mart on 18/06/2020 15:47:02

              #480751
              Oldiron
              Participant
                @oldiron

                Boxford wiper felts on Ebay. Item #25452393933

                regards

                #481262
                Jim Beagley
                Participant
                  @jimbeagley46363

                  Almost finished the painting now and I’m pleased with the results.
                  really only got to finish sanding back the filler in the headstock top cover
                  Waiting on the delivery of the Southbend 9” service kit from the US but it’s in the country at least

                  Here’s some photos.

                  04043b2b-1c84-4428-807a-d58f7bea428d.jpeg
                  I wanted to keep this.
                  f85811a3-1177-41f1-90d1-bb0fa00d47e1.jpeg
                  this came out really well.
                  And finally some idea of how it’ll be once done.
                  I have noted that the holes in the bed don’t line up with the holes in the cabinet risers. I’m hoping there’ll be some place in the cast blocks on the bed which are bolted In place.
                  14ddb50b-1f10-4312-a521-bc08eca9e727.jpeg

                  #482209
                  Jim Beagley
                  Participant
                    @jimbeagley46363

                    A bit more work, but now I’m really waiting for the Southbend service kit to clear customs.
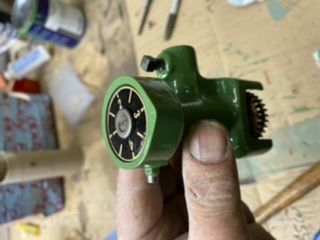
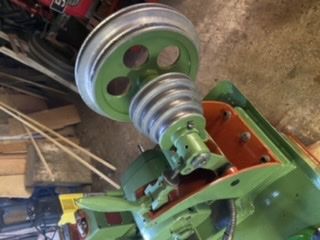
                    Assembled the motor pulley sub assembly which I’m pleased with. Do you like the red?

                    cc4a1252-e0f2-4327-a10d-c91965b07f47.jpeg
                    also got the 3/16×32 W LH die today and cut a test piece. Very happy to report that it fits, so if anyone else needs one, holler!

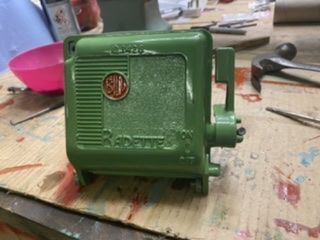
                    Question about the thread cutting indicator. When I reassembled it, the dial wasn’t indexed at all to the drive. Does it matter where the indicating dial plate sits on the mounting plate?

                    Cheers, Jim

                    #482215
                    old mart
                    Participant
                      @oldmart

                      The threading indicator top with the printing should turn with the gear, but be possible to slacken off the central screw to get it lined up with the datum on the casting. The datum will be a simple paint radial mark, yours probably goes where the top edge gets wider at 12 o'clock when it is fitted to the lathe. The dial must not slip relative to the gear, unless you are adjusting it. This type pivot to disengage the gear from the leadscrew to avoid unwanted wear when you are not threading.

                      Edited By old mart on 25/06/2020 21:14:18

                      #482220
                      Martin Connelly
                      Participant
                        @martinconnelly55370

                        Turn the leadscrew and the dial will turn to wherever you want it to be. Move the carriage along the bed and the dial will turn to wherever you want it to be. There is no datum to line the dial with the datum on the casting. If you are saying there is a mismatch between a point on the dial and the datum when the half nuts are engaged then the answer is it doesn't really matter as long as you know what the error is.

                        Martin 

                        Edited By Martin Connelly on 25/06/2020 21:11:11

                        #482224
                        old mart
                        Participant
                          @oldmart

                          When we overhauled the apron of the model A, I decided to fit those telescopic spring leadscrew covers and now the leadscrew is clean and oily, and the new nut will last as long as the machine, also the constantly connected threading dial, with its 24 divisions will not suffer from dirt in its little bronze gear.

                          #482234
                          Jim Beagley
                          Participant
                            @jimbeagley46363

                            Hi guys.
                            what I’m trying so say (badly) is that the painted plate on the thread indicator has come adrift of the driven plate below it.
                            there’s some signs of adhesive between the two or it could just be grime.
                            When screwed on, the etched plate is sandwiched to the driven MS plate below it, but does the relative position to it matter?
                            Should I glue them together as a sub assembly do you think, and if so does the relative position matter?

                            Old Mart. Where did you get your bellows from?

                            cheers
                            Jim

                            #482237
                            Clive Foster
                            Participant
                              @clivefoster55965

                              Commonly the dial is just a locked to the shaft by the screw so that it can be adjusted to line up against the index mark when the half nuts can be engaged. Drive forces are tiny so its not going to move.

                              One of my SouthBends (I think) was annoyingly far out. Fixed by loosening the screw, moving the saddle so the half-nuts could be engaged, resetting the dial to align one of the full, numbered, marks with the index line and tightening the screw.

                              Job done except I was bit over precise and set the dial so the marks came up to alignment at the first point the half nuts could be closed. So in practice the engagement point was just after the marks had gone past alignment. Still annoying asI'm much happier with just coming up to marks than just gone past it on, well, pretty much everything. But not quite annoying enough to be sorted.

                              Clive

                              #482251
                              Jim Beagley
                              Participant
                                @jimbeagley46363

                                Hi Clive.
                                thanks. I think that’s what I needed to know.
                                j

                                #482378
                                old mart
                                Participant
                                  @oldmart

                                  If the dial slips on its shaft, then put a washer under the head of the screw. Don't fix it so that it cannot be moved when required. 

                                  The bellows came from that organisation that should not be mentioned any more. Perhaps putting in "lathe leadscrew cover" into a search engine would do.

                                  Edited By old mart on 26/06/2020 20:34:45

                                  Edited By old mart on 26/06/2020 20:37:13

                                  #482575
                                  Jim Beagley
                                  Participant
                                    @jimbeagley46363

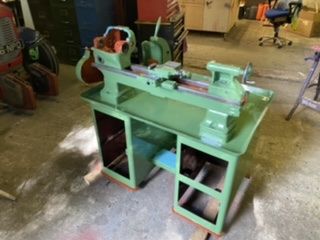
                                    Finished the electrics on the cabinet so have moved it to where it’s going to live.
                                    88ca4ca6-1042-4744-aad9-76096adf8e4c.jpeg
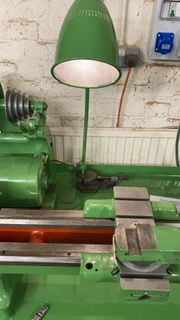
                                    Also I’ve added a period looking lamp
                                    buggered if I can afford a proper MEM Light so this’ll have to do.

                                    95b5c50d-00a3-4c36-9a49-c37b236f51c7.jpeg
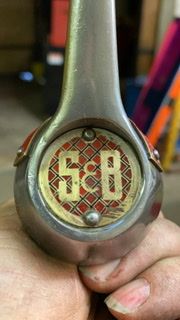
                                    And finally, I’ve been renovating the forward reverse lever labelling.
                                    0e22b6a3-f2b6-402a-9d87-b62c83a90fae.jpeg
                                    Getting there.

                                    #483582
                                    Jim Beagley
                                    Participant
                                      @jimbeagley46363

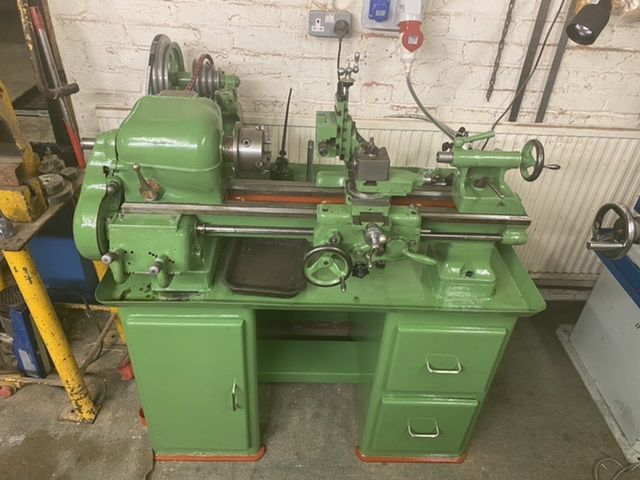
                                      Lots of progress since getting the Southbend service kit.
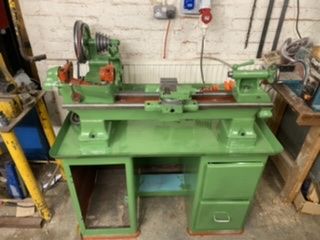
                                      worked until 3am this morning putting the gearbox and carriage back together and this is the result after a couple of hours tonight.

                                      70862066-0b8a-45ca-b13a-151f8c147d7c.jpeg

                                      it’s really coming together now and I’m loving the colour.
                                      The felts are a bit of a ba****d to install but all done (hence 3am). Only the headstock to rebuild and she’ll be ready to rock and roll.

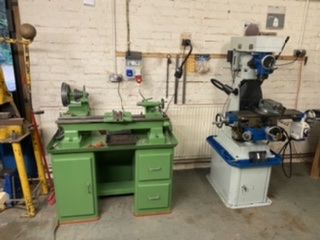
                                      Looks well next to this weeks new addition to the shop….

                                      566d48e2-13c7-49ac-a93d-dfd61199f172.jpeg

                                      #483690
                                      old mart
                                      Participant
                                        @oldmart

                                        When you fit the front and rear main bearings, there should be small pins to locate them and stop them from rotating. And to adjust them, the only way to be sure is with plenty of oil and run the machine at top speed to feel the temperature rise in the headstock casting where the bearings fit. You should start off so that there is about 0.001" movement when you lift each end in turn. Then very slowly tighten the bearings, and test the temperature. The temperature to aim for is just luke warm after 15-20 minutes running. Once the bearings have been adjusted, there should be no reason to touch them. The spindle can be removed without disturbing them. The museum's model A has been happy with semi synthetic 5W30 for years now, it gets oiled every day it is used.

                                        #483691
                                        old mart
                                        Participant
                                          @oldmart

                                          When you fit the front and rear main bearings, there should be small pins to locate them and stop them from rotating. And to adjust them, the only way to be sure is with plenty of oil and run the machine at top speed to feel the temperature rise in the headstock casting where the bearings fit. You should start off so that there is about 0.001" movement when you lift each end in turn. Then very slowly tighten the bearings, and test the temperature. The temperature to aim for is just luke warm after 15-20 minutes running. Once the bearings have been adjusted, there should be no reason to touch them. The spindle can be removed without disturbing them. The museum's model A has been happy with semi synthetic 5W30 for years now, it gets oiled every day it is used.

                                          #483697
                                          Jim Beagley
                                          Participant
                                            @jimbeagley46363

                                            Hi Old Mart,
                                            Thanks for the tip. I'm a little confuséd by this as my main shaft has machine cast iron bearings, and so the info about pins doesnt seem to apply.

                                            Ive been fettling with the oiling wicks this morning, Hopefully I'll be able to fit the spindle etc this evening or tomorrow.

                                            Jim

                                            #483710
                                            old mart
                                            Participant
                                              @oldmart

                                              Sorry,I thought that the bearings were similar to the model A ones. Are yours in halves with shimmed caps holding them?

                                              #483737
                                              Brian Wood
                                              Participant
                                                @brianwood45127

                                                Old Mart,

                                                They are close down cast iron bearings, not lift off caps. It is though possible to set them very finely.

                                                Jim

                                                The oiling wicks can be held down with needles through the drain holes at the bottom of the bearings; it makes the job of inserting the spindle possible without trapping them as you slide it in from the front. It is still a fiddle to get it home successfully.

                                                Regards Brian

                                                #483766
                                                Jim Beagley
                                                Participant
                                                  @jimbeagley46363

                                                  So I’ve pretty much assembled the head stock.
                                                  Belts, covers, back gear, reversing tumbler, everything.
                                                  Turns out you cannot insert the bull gear locking pin into the gear face with the spindle in place.
                                                  Bah!

                                                  #483776
                                                  old mart
                                                  Participant
                                                    @oldmart

                                                    Nice to know that the bearings can be fine tuned. My comments on the general setting up still stand, its best to start very slightly slack, which was why I mentioned 0.001" movement, you should be able to get it a bit tighter than that before things start to heat up. The spindle should be easy to turn by hand using the chuck. I overdid the model A front bearing, it was getting hot after about 5 minutes. The bearings in that are bronze and tapered on the OD with nuts either side to adjust them. I havn't needed to touch them in the last couple of years. Now I know how, I can remove the spindle in ten minutes.

                                                    Edited By old mart on 03/07/2020 21:31:58

                                                    #483780
                                                    Jim Beagley
                                                    Participant
                                                      @jimbeagley46363

                                                      9127b58e-f4d6-4ae5-b204-453c60d3c824.jpeg
                                                      It’s fully assembled at last.
                                                      Still got to set bearing clearances (thanks for the suggestions Old Mart) and put the gearbox plate on. But mostly it’s finished.
                                                      found out the hard way that the bull gear pin cannot be inserted once the spindle is in place. Still, I got some practice putting the spindle in and out.
                                                      What do you think?

                                                    Viewing 25 posts - 26 through 50 (of 64 total)
                                                    • Please log in to reply to this topic. Registering is free and easy using the links on the menu at the top of this page.

                                                    Advert

                                                    Latest Replies

                                                    Viewing 25 topics - 1 through 25 (of 25 total)
                                                    Viewing 25 topics - 1 through 25 (of 25 total)

                                                    View full reply list.

                                                    Advert

                                                    Newsletter Sign-up