Single point Whitworth Threads

Advert

Single point Whitworth Threads

Home Forums Beginners questions Single point Whitworth Threads

Viewing 5 posts - 26 through 30 (of 30 total)
  • Author
    Posts
  • #604164
    Hopper
    Participant
      @hopper

      +1 . Seems like much ado about nothing. Rub the point of the tool on the bench oilstone until there is a bit of a radius and carry on. Put the radius on the peaks with a file at the end of the job. Make the OD a bit undersize to start with. Final fit by trial and fit to a sample nut or chuck or faceplate thread etc. All the rest is superfluous for most practical purposes.

      Advert
      #604171
      Michael Gilligan
      Participant
        @michaelgilligan61133
        Posted by Georgineer on 03/07/2022 21:58:52:

        Though I am reluctant to exhume a thread which died eight years ago, I feel it's important to correct some incorrect information within it to avoid misleading future readers of this thread

        The original diagram comes from the website of the American firm Gage Crib Worldwide and […]

        .

        Well done, George yes … I previously had no idea where that sketch originated.

        I hope you don’t mind, but I am adding a link to the relevant page: **LINK**

        https://www.ring-plug-thread-gages.com/ti-bs-Full-Form-vs-Truncated-Modified.htm

        MichaelG.

        .

        Despite his not referencing B.S. 84-1940 (Amendment No. 3, August 1945). I think ‘Wayne’ makes a pretty fair job of describing the truncation … if the source had been referenced in the opening post, this discussion might have been simpler.

        #604194
        Nigel Graham 2
        Participant
          @nigelgraham2

          The root and crest radii on any thread are only to remove sharp edges and stress-raisers, and provide a small clearance. They are not usually critical, within reason.

          Generally I find it necessary to finish the thread with a die, and that will give the right roundings.

          '

          Jon –

          Fixed dials. I know – I have a Myford ML7 and the dials are not only fixed but also small enough to be difficult for me to read. So a tip applicable to setting any tool for set depth:

          Having set the tool in height and azimuth –

          – Keep the screws clamping the tool itself, slightly slack so the tool can slide under them.

          – Push the tool forwards to just touch the bar.

          – Now keep that light pressure on the back of the tool, to maintain its contact, while winding the slide in until the dial either reads 0 now, or will read 0 when the cut reaches depth. (The latter way had not occurred to me until I read someone elsewhere here, saying that's his method.)

          – Still keeping the tool gently pressed against the surface, now tighten the clamp-screws.

          .

          How to set a thread-cutting tool in azimuth?

          That's what the appropriate Vee-notch in a thread-setting gauge is for. Set it to a piece of any straight, good-quality rod in the chuck or collet, if the work-piece's own shape makes the gauge impractical on that.

          However, and perhaps more easily, the following works if the tool it is either an HSS one ground accurately with respect to the sides of its shank, as ideally it is; or is an insert type whose tip-holder is manufactured anyway to high orthogonal accuracy.

          I abut the flank of the tool (or of a QCTP block) against the face of the chuck-jaws or faceplate, under very gentle hand-pressure applied via the saddle hand-wheel, while tightening the central tool-post stud.

          This method is irrespective of the top-slide's own angle you may have set for diagonal-feed screw-cutting or to cut a taper on the work – or simply to clear the tailstock.

          #604198
          Hopper
          Participant
            @hopper

            Posted by Nigel Graham 2 on 04/07/2022 10:02:18:

            Jon –

            Fixed dials. I know – I have a Myford ML7 and the dials are not only fixed but also small enough to be difficult for me to read. So a tip applicable to setting any tool for set depth: etc…

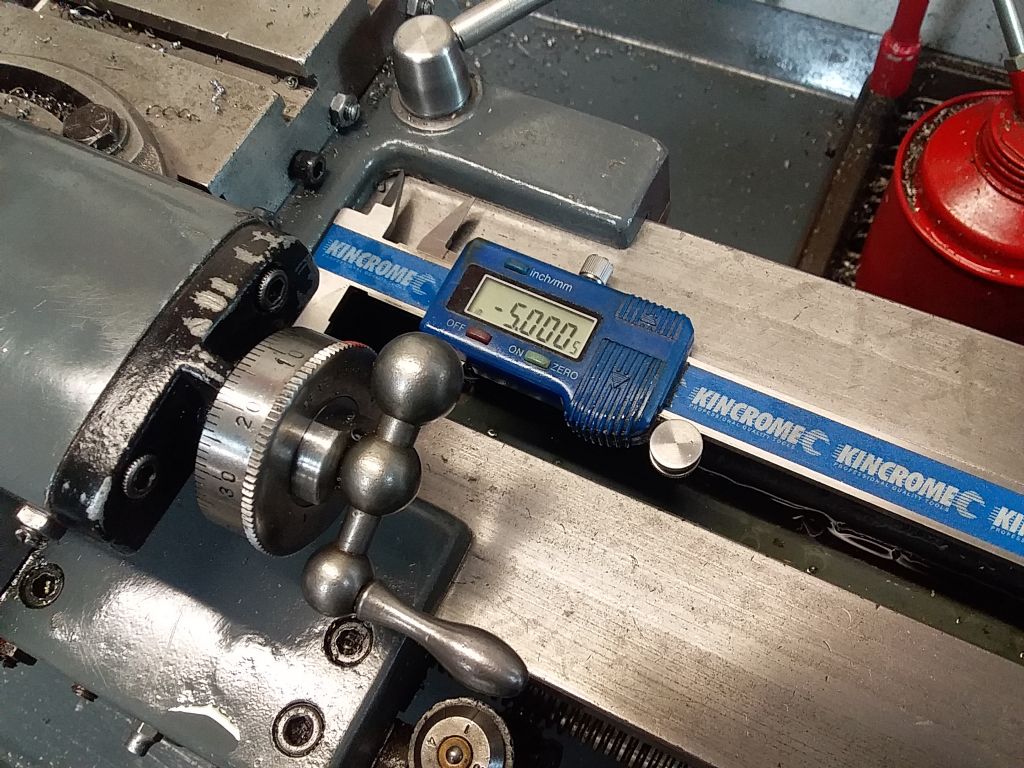
            Or make your own larger resettable dials. Best thing I ever did for my ML7! No more felt pen marks and tortured mental gymnastics. All done in the lathe with no dividing head needed. Drawings and details coming up in MEW at the editor's convenience.

            20220210_170442.jpg

            #604228
            not done it yet
            Participant
              @notdoneityet

              To be quite honest, I think you are over complicating this task. As long as the thread angle and pitch are correct the rest just follows on – if important. The outside diameter may be touchy.

              I you are using this piece for mounting something else, it may well be positioned by the register surfaces – so the thread only tightens the part, not the position.

            Viewing 5 posts - 26 through 30 (of 30 total)
            • Please log in to reply to this topic. Registering is free and easy using the links on the menu at the top of this page.

            Advert

            Latest Replies

            Home Forums Beginners questions Topics

            Viewing 25 topics - 1 through 25 (of 25 total)
            Viewing 25 topics - 1 through 25 (of 25 total)

            View full reply list.

            Advert

            Newsletter Sign-up