Single Point a 5 40 UNC thread

Advert

Single Point a 5 40 UNC thread

Home Forums Beginners questions Single Point a 5 40 UNC thread

Viewing 25 posts - 1 through 25 (of 37 total)
  • Author
    Posts
  • #726735
    David Couling
    Participant
      @davidcouling56621

      Hi Guys,

      I am building a model which requires putting a 5 40 UNC thread on a 0.0124″ dia piston rod. I want to single point thread this using an imperial Myford ML Super 7 lathe complete with a gearbox.

      The question that I’m hoping someone can help me with, is how do I set the gearbox selector levers to cut a 5 40 UNC thread?

      On the other end of this rod there is a 10 32 UNC thread, so I have a similar question relating to the gearbox setting for cutting that thread also?

      Any help/advice will be much appreciated.

      Cheers,

      David


      Advert
      #726736
      Bazyle
      Participant
        @bazyle

        You do know that these are 40 and 32 tpi respectively? The 5 and 10 are the size designation with diameter going in steps of 13thou from 60thou.

        #726754
        Hopper
        Participant
          @hopper

          How are you going to stop the .012″ diameter shaft from bending away from the cutting tool when trying to screwcut it in the lathe? You would be far better off to cut it with a die.

          If you don’t want to spend the money on a die for a one-off job, use the nearest equivalent metric die which will be readily available cheaply. (Turn the end of the shaft down to the nearest metric diameter first of course.)

          Heed the wise words of Kozo Hiroaka, master model maker extraordinaire: To beginners, Kozo always says, “Think, and find a sure and easy way. The pro does his job in a way by which even the novice can do it—while the novice tries to do it in a way by which even the pro fails.” 

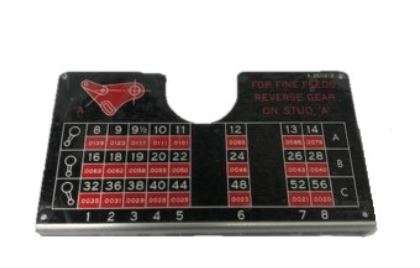
          Other than that, for future reference on more suitably sized screwcutting jobs, you follow the chart on the top of the gearbox. If your lathe is missing the gearbox top plate/chart, Myford sells them and images are all over the net to refer to.

          And when all else fails, read the instructions. Myford gearbox manual is available for download on the net, as is the Myford users manual, or in hardcopy from Myford Ltd. Also get yourself a copy of Ian Bradley’s book Myford Series 7 Manual.

          #726758
          duncan webster 1
          Participant
            @duncanwebster1

            You’re a decimal point out, should be 0.124″. I’d use 1/8 *40 BSW and 3/16 *32 because I’ve got dies, but M3 and M5 if I had to buy them.

            #726762
            JasonB
            Moderator
              @jasonb

              As it is a piston rod for presumably a steam engine the threaded portions for piston (1/8) and Crosshead (3/16) are not going to be very long so no real need for end support.


              Not got a Myford but move the lever to the position shown for the bottom row far left and then the lever below the gearbox along to 40 and 32 as required. Make sure you have any input gears as they should be

              chart

              If you have 5BA and 2BA dies they would work. If you are worried about a die cut thread not going on true and ending up with a wobbly piston the usual practice is to leave the piston say 0.010″ oversize and finish turn it once on the piston rod.

              If you do go for a die make sure your chuck is in good condition as the stainless steel needs more effort to cut than mild steel and you may spin the rod in the chuck which will score the surface, not what you want on a piston rod. Collet would be better. Should not get the problem if you single point it.

              #726769
              David Couling
              Participant
                @davidcouling56621

                Many thanks for you help and advice guys….really appreciate it.

                Yes, this piston rod is stainless steel and my plan was to do a couple of light scratch passes by single point threading (because of the deflection issue) and finish off with a 5- 40 UNC die (which I have yet to obtain).

                As a second thought though, I do have 5BA and metric taps and dies so that’s another option.

                Thanks JasonB for the Myford gearbox settings. (its easier than I thought).

                The project is a PM Research 1B1 Steam Engine. This is the first project like this that I’ve attempted (so far) and it has presented quite a few challenges, but, its a learning process.

                Cheers


                David

                #726772
                roy entwistle
                Participant
                  @royentwistle24699

                  David.  If using the lathe, make sure the gear on the end of the leadscrew is set for screwcutting not for fine turning

                  Roy


                  #726777
                  noel shelley
                  Participant
                    @noelshelley55608

                    Jason and Roy have said it make sure your input is right ! Use bit of scrap, say 1/2″dia, chuck it, skim it true, and cut a light 40 TPI on it. CHECK it is 40tpi. Now you know it’s right carry on, and good luck. Noel.

                    #726779
                    Anonymous
                      On David Couling Said:

                      Yes, this piston rod is stainless steel and my plan was to do a couple of light scratch passes by single point threading (because of the deflection issue) and finish off with a 5- 40 UNC die (which I have yet to obtain).

                      That’s neither one thing nor t’other, scratch passes won’t help guide the die. I’d make the mating part first, using a tap for the internal thread. Then screwcut the external thread, using the mating part as a gauge. I wouldn’t bother using a die at all.

                      There are only two caveats; one, what grade of stainless steel is being used and two, how long are the threaded portions?

                      Andrew

                      #726783
                      JasonB
                      Moderator
                        @jasonb

                        I suppose it is all relative, some may consider 5thou DOC a scratch pass on say a 1″ dia thread but two 5thou passes on a 40 tpi and you are 2/3rds the way through so that should guide the die which will also take care of any crest and root radii a home ground tool may not have.

                        #726791
                        Martin Connelly
                        Participant
                          @martinconnelly55370

                          Do you have a travelling steady? It makes threading on a slender workpiece easier if you are not threading right up to a chuck or a shoulder.

                          Martin C

                          #726815
                          JasonB
                          Moderator
                            @jasonb

                            It’s a piston rod for a small steam engine, neither thread is particularly long

                            rod

                            I expect the OP has been watching Quinn and Joe Pie who both single pointed the threads.

                            #726823
                            David Couling
                            Participant
                              @davidcouling56621

                              Yes, JasonB you’re right!

                              So to make the piston rod I used a 5BA tap and die to finish the shaft and corresponding nut, and things turned out well.

                              My next problem though is the piston/cylinder bore tolerance is too tight.

                              The bore was cut on the mill with a boring head and I think there is a concentricity issue!

                              Piston goes part way down the bore then sticks, and this is before fitting the teflon rings to the piston.

                              I tried honing the bore but so far not much effect/difference.

                              I’m very reluctant to try skimming a couple of thou off the bore, but I thought I might be able to make a mandrel to hold the piston to reduce its diameter then deepen the ring grooves, but this won’t correct for the concentricity of the bore….Hmmmm…

                              #726828
                              JasonB
                              Moderator
                                @jasonb

                                Sounds more like taper, does the piston go in as far from the other end? And is that with the cylinder cover in place or not?

                                Honing will not really cure a taper though you can concentrate the hone in the tight areas. lapping is an option but depends how much of a taper there is.

                                If there is no taper then skimming the piston would be easier than opening up the bore.

                                #726832
                                David Couling
                                Participant
                                  @davidcouling56621

                                  Hi Jason, the piston consistently drops freely from one end and then sticks about 3/4 way down the bore (with end covers removed), from the opposite end the piston does not freely go down the bore so I agree the bore is tapered.

                                  Probably need to run the boring head through again starting at the tight end….(this could end badly)…..

                                  #726840
                                  JasonB
                                  Moderator
                                    @jasonb

                                    Risky trying to set up again to take such a small amount off.

                                    Wait until tomorrow and I’ll take a couple of photos of a simple way to true up a bore.

                                    #726849
                                    David Couling
                                    Participant
                                      @davidcouling56621

                                      Thanks very much Jason…..

                                      #726876
                                      Hopper
                                      Participant
                                        @hopper

                                        I wouldn’t try reboring it either. You will most likely just get more of the same. You could hone it with a brake cylinder hone etc if you focus the honing on the small end, if the amount of taper is not too great. You can make a redneck hone out of a piece of wooden dowel  with a longitudinal saw cut in one end, with a strip of coarse emery cloth or tape held in the slot. Spin it in the pistol drill and work it back and forth in the end of the bore you want to enlarge. Simple, but it works.

                                        Or you could spin the cylinder in the lathe and use the same wooden dowel and emery cloth to enlarge the bore at one end. (Don’t go sticking your finger inside the spinning bore with emery paper etc unless you want to lose a finger!)

                                        #726899
                                        bernard towers
                                        Participant
                                          @bernardtowers37738

                                          I think you would be better to have the hone in the chuck and hold the cyl the way we do model ic engines.

                                          #726906
                                          JasonB
                                          Moderator
                                            @jasonb

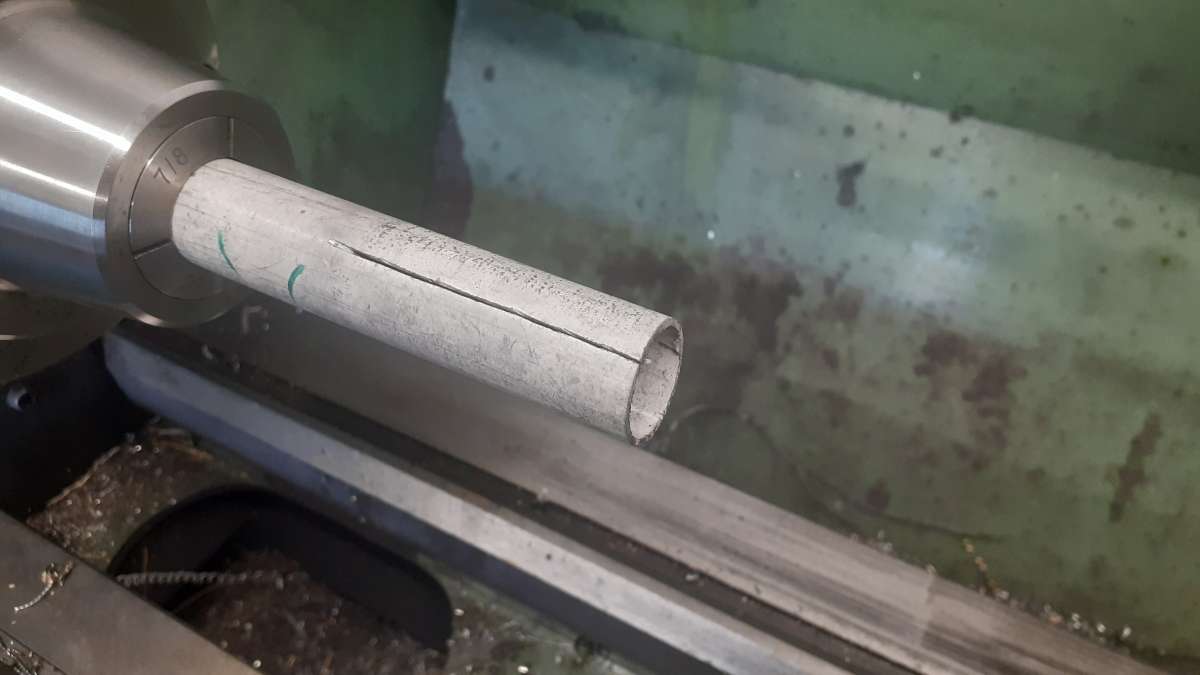
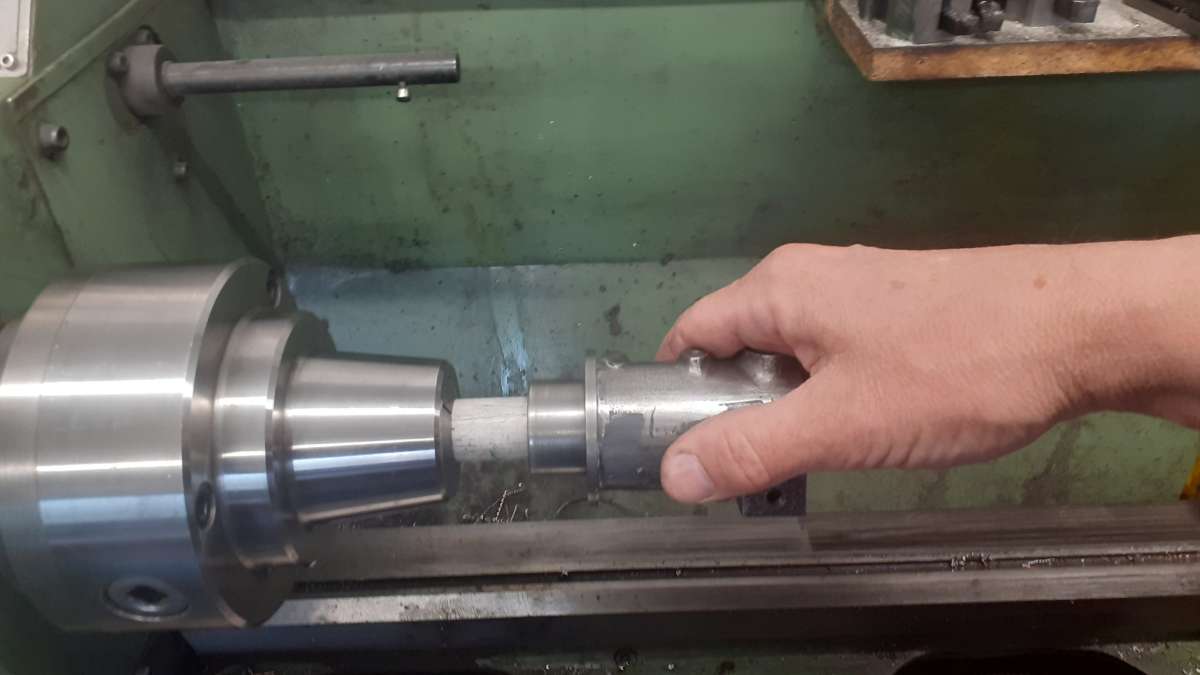
                                            Along the lines of the above, take some wooded dowel like a bit of broom stick or turn down some wood. I prefer a bit of tube and at the 1″ bore of your engine 22mm copper or plastic overflow will do. Cut a slot about 2″ long either right across the wood or just one side of the tube

                                            20240422_100224

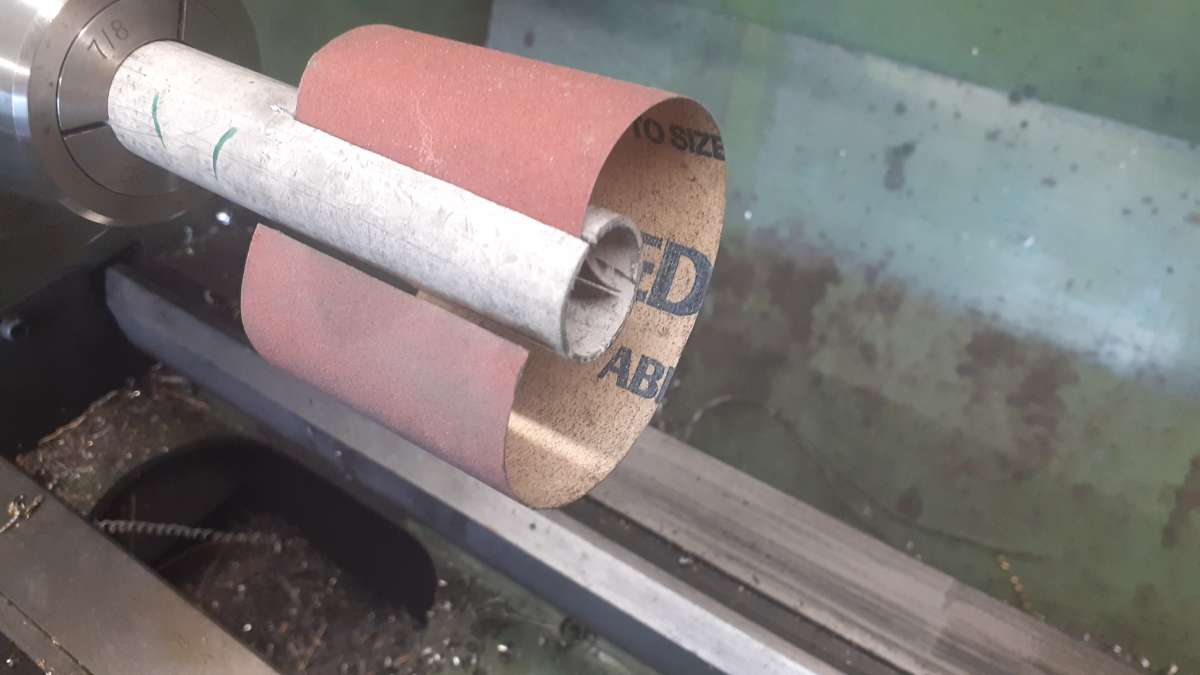
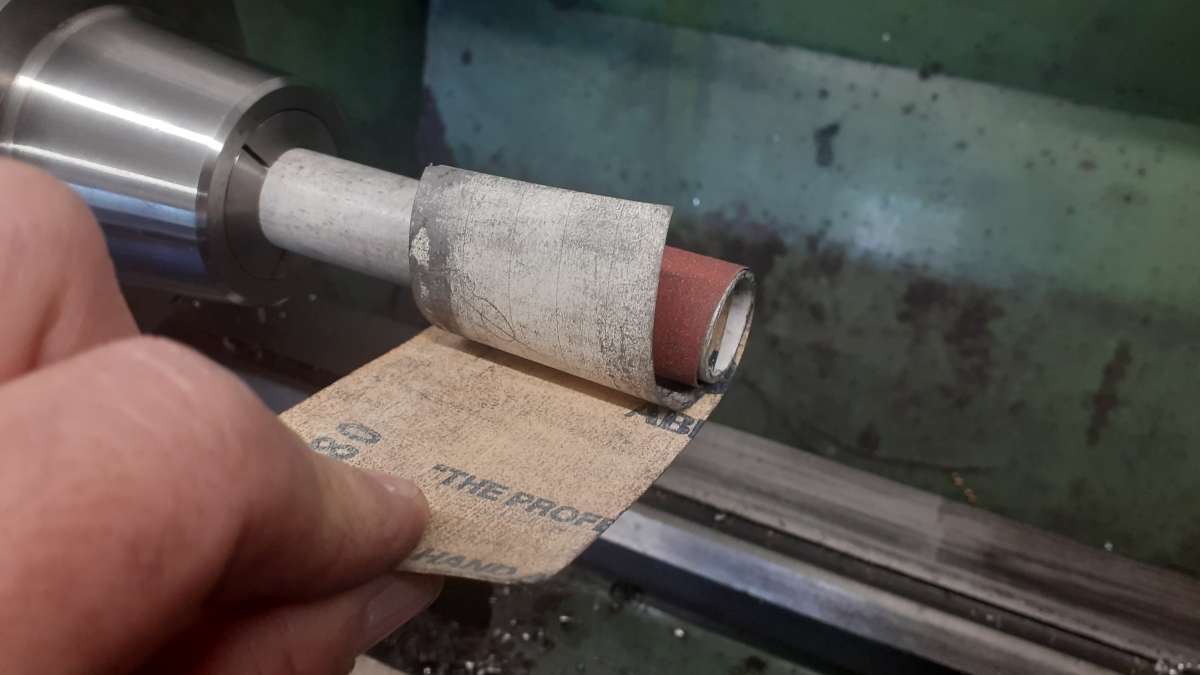
                                            Take a strip of Emery cloth 2″ wide, slip the end into the slot

                                            20240422_100256

                                            then wind around the tube making sure it is tightly wound and in the direction shown. You will have to adjust length so the cylinder just slides over it.

                                            20240422_100326

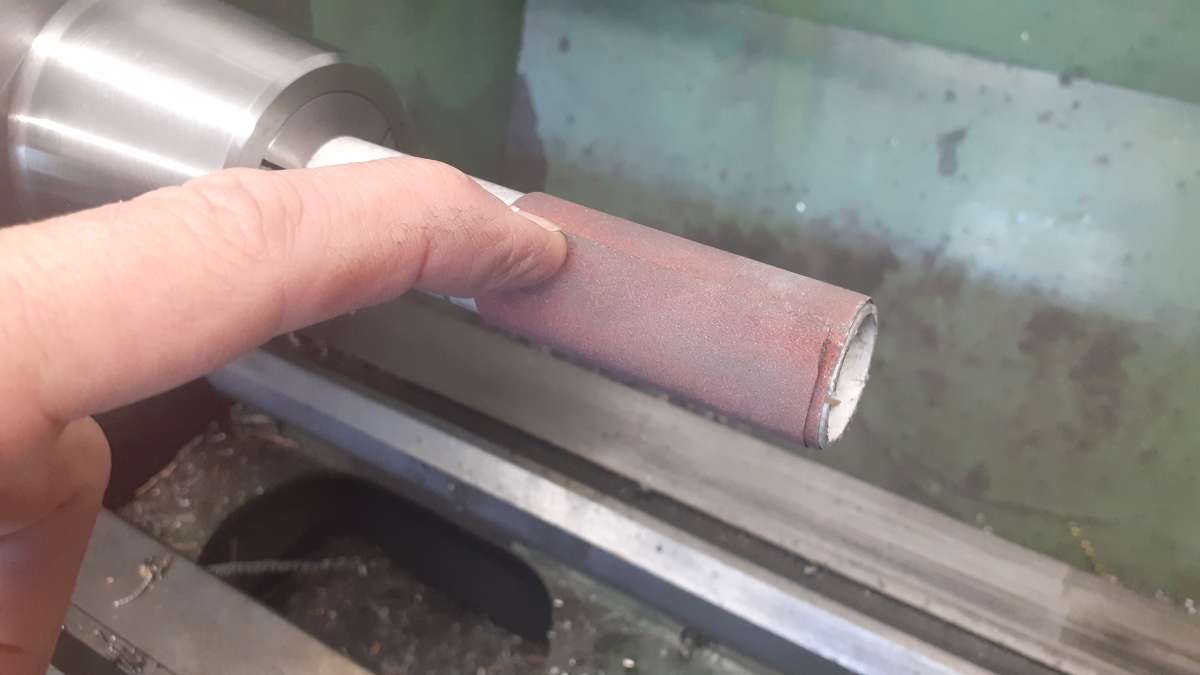
                                            No lightly hold the cylinder and while th elathe runs slowly at first work the cylinder up and down the emery concentrating on the tight end.

                                            20240422_100516

                                            As the emery wears and the bore opens up you can increase the cutting diameter by adding strips of paper to the wrap.

                                            20240422_100400

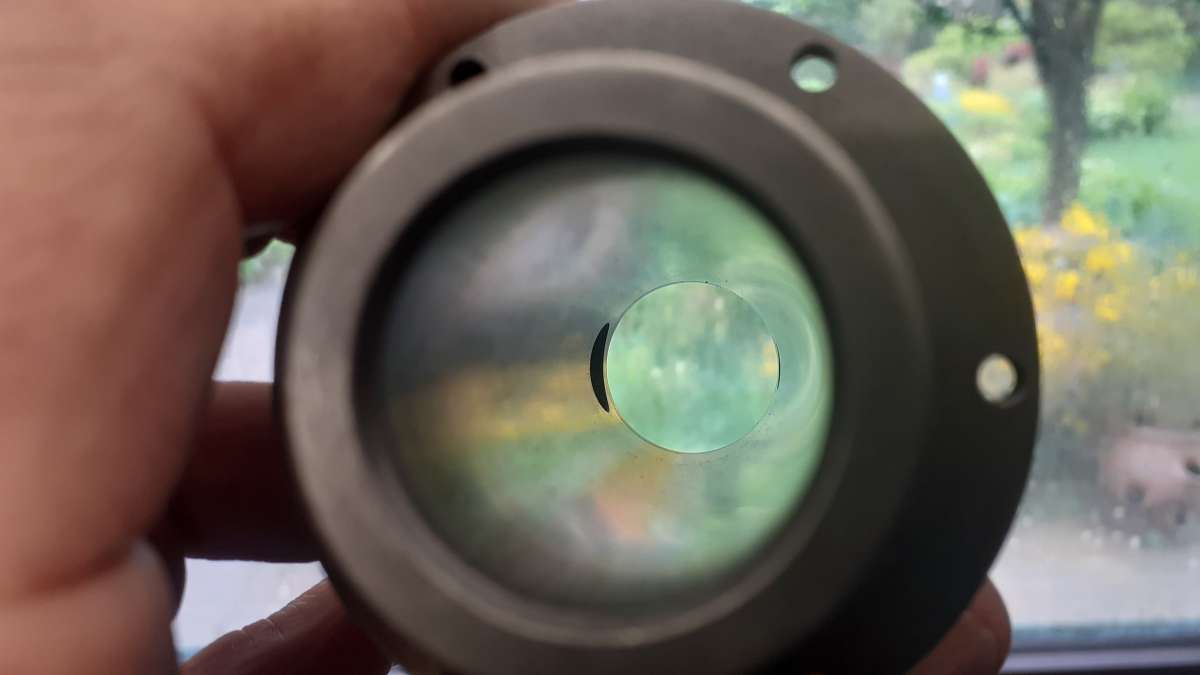
                                            This is the sort of finish you can expect from 180g, not the best of photos.

                                            20240422_100605

                                            #726908
                                            Andy Stopford
                                            Participant
                                              @andystopford50521
                                              On bernard towers Said:

                                              I think you would be better to have the hone in the chuck and hold the cyl the way we do model ic engines.

                                              Agreed, and for a more controllable effect, turn the dowel to an easy fit in the cylinder, drill a hole in the end, split it and screw a woodscrew or a bolt into the hole to expand it slightly. Then charge it with abrasive (Solvol autosol works well for brass and bronze, maybe fine valve grinding paste for cast iron). Then, with the lathe spinning fairly slowly, slide the cylinder on and move it back and forth to hone the bore. If all is going well you can increase the speed. Take care, it may get quite hot, and if the fit is too tight it might snatch, though I don’t recall having that happen with a wooden hone. You may find the tight area only needs a very small amount of material removed to make everything good, so make regular test fittings.

                                              The screw expands the hone non-uniformly of course, but this generally doesn’t matter, and is often an advantage if you have bore with a ridge or taper so you can concentrate your attentions on the appropriate area. You can of course make something similar involving tapered wedges to get a uniform diameter, but I’ve never had the need to do this.


                                              #726915
                                              Hopper
                                              Participant
                                                @hopper

                                                It amounts to the same thing, I think, whether you spin the job or the redneck hone. Although a pistol drill will spin the hone faster than my ancient Mfyrod lathe so it works better that way for me. Flings the emery tape outwards under centrifugal force more firmly. A proper brake or engine cylinder hone has springs to do this function so can be used at low rpm to get a nice 30 degree cross-hatch pattern on the bore for sealing rings in IC engines etc

                                                As always with machining, there is more than one way to skin the cat. Any one of them should get your Stuart engine going. You are seeing now why it is common practice (but not universal!) on such steam models to complete the cylinder bore first and then machine the piston to fit the bore. High revving RC engines are a bit of a different thing and the secrets of their close fitting pistons and bores can be a dark art indeed.

                                                Another trick with simple steam engines such as the Stuart is to use a rubber or viton O ring instead of the traditional cast iron piston ring. Then you can make the piston a relatively sloppy fit and the O ring will still seal well enough for model purposes.

                                                #726930
                                                Anonymous

                                                  A more interesting question is why did the boring head produce a tapered bore in the first place?

                                                  Andrew

                                                  #726933
                                                  JasonB
                                                  Moderator
                                                    @jasonb

                                                    Similar problem to “why did the boring bar produce a tapered bore” that we seem to hear more often.

                                                    #726967
                                                    Anonymous

                                                      If a lathe is properly set up to turn parallel there is no fundamental reason why a boring bar should produce a tapered hole. Over all the holes I’ve bored I’ve never had it happen. Same with using a boring head, always parallel. I am curious as to the set up that apparently produced the result, hence the question.

                                                      Andrew

                                                    Viewing 25 posts - 1 through 25 (of 37 total)
                                                    • Please log in to reply to this topic. Registering is free and easy using the links on the menu at the top of this page.

                                                    Advert

                                                    Latest Replies

                                                    Home Forums Beginners questions Topics

                                                    Viewing 25 topics - 1 through 25 (of 25 total)
                                                    Viewing 25 topics - 1 through 25 (of 25 total)

                                                    View full reply list.

                                                    Advert

                                                    Newsletter Sign-up