Shimming Techniques

Advert

Shimming Techniques

Home Forums Workshop Techniques Shimming Techniques

Viewing 25 posts - 26 through 50 (of 148 total)
  • Author
    Posts
  • #513722
    JasonB
    Moderator
      @jasonb

      Michael what sort of gap did you use it on, I would have thought 5 thou or so too big for it to go off.

      Advert
      #513726
      Ron Laden
      Participant
        @ronladen17547

        I think Loctite claim 638 is good to a gap of up to 0.25mm – 0.010"

        Dont know how true that is. 

        Edited By Ron Laden on 16/12/2020 07:57:39

        Edited By Ron Laden on 16/12/2020 07:58:32

        #513736
        Michael Gilligan
        Participant
          @michaelgilligan61133
          Posted by JasonB on 16/12/2020 07:14:05:

          Michael what sort of gap did you use it on, I would have thought 5 thou or so too big for it to go off.

          .

          It works fine at that sort of thickmess

          … I have removed substantial ‘flakes’ of solid material after sepatating a test-piece.

          MichaelG.

          #513740
          JasonB
          Moderator
            @jasonb

            In that case it would be easier to let some Loctite wick into the gap once the column has been adjusted with shims and no need to rush to get it done before an epoxy goes off.

            #513742
            mgnbuk
            Participant
              @mgnbuk

              As Loctite 638 is a "High strength Retainer", could using it as a gap filler cause problems if dismantling is required in future ?

              Loctite do another product "Quick Metal 660" that is claimed to fill gaps up to 0.5mm & one of it's uses is described as "retaining shims". At around £40 for 50ml, another expensive solution though.

              Nigel B.

              #513743
              Michael Gilligan
              Participant
                @michaelgilligan61133
                Posted by mgnbuk on 16/12/2020 09:10:55:

                As Loctite 638 is a "High strength Retainer", could using it as a gap filler cause problems if dismantling is required in future ?

                .

                .

                As I stated in the other thread, Nigel … its peel strength is relatively low : so the answer to your question is:

                It depends on the mechanical design of your joint and where you put the 638

                Please note that my successful use of 638 [in its original formulation] as a ‘flat’ shim is clearly outside the product’s design-envelope … 

                MichaelG.

                .

                P.S. ___ For Jason: 638 is a high viscosity liquid, so unlikely to ‘wick’ successfully.


                Edited By Michael Gilligan on 16/12/2020 09:48:22

                #513810
                Dr_GMJN
                Participant
                  @dr_gmjn

                  Thanks all. So it's not a completely daft idea to use epoxy after all!

                  I think that since the compressive strength of the epoxy is much less than steel, the best way forward would be to:

                  1) Determine the torque I'm currently tightening the bolts to (using a torque wrench).

                  2) Put the epoxy under the column and replace the steel shims that gave perfect alignment.

                  3) Torque to within, say, 20 Nm of the previously determined torque value.

                  4) Check alignment.

                  5) Finally tighten by diagonally torqueing the bolts back to the original value (ie nominal +20 Nm), making fine adjustments if necessary to maintain alignment.

                  That way I'd know that the column was seated, aligned, and loaded against the shims. The final torqueing would give me some confidence that the bolts were loaded to a similar extent as they were before the epoxy was in place. It would also make sure that the epoxy was actually being compressed to a greater or lesser degree, which was the overall aim of the whole exercise

                  Question is how to apply the epoxy equally over the interface area, without it getting into the threads. Someone mentioned o-rings around the bolts, which might be a good option.

                  BTW the thickest shim in the worst-case corner is 0.013". This tapers to zero at the opposite corner, and approx. 0.006" under the other corners. As I said, these shims are very narrow (about 5mm wide), so this is why I want to get much more area in contact. Increasing the area by shoving the shims further under, always screws the alignment – believe me I tried so many combinations that I was worried about wearing the threads out!. I appreciate what Andrew says about column stiffness not influencing chatter much, but to me the amount of contact area I've currently got is pushing it in terms of what's acceptable.

                  #513909
                  Pete.
                  Participant
                    @pete-2
                    Posted by Pete Rimmer on 15/12/2020 19:38:13:

                    The time-honoured way to remedy this is to scrape the parts into alignment. What error are we talking about?

                    The most intelligent comment here, gets ignored.

                    #513910
                    Ady1
                    Participant
                      @ady1

                      Concrete in pipes is used a lot in industry

                      Need to find a high quality version, then heat the pipe for a few days/weeks to expel water

                      #513913
                      Dr_GMJN
                      Participant
                        @dr_gmjn
                        Posted by Pete. on 16/12/2020 23:04:19:

                        Posted by Pete Rimmer on 15/12/2020 19:38:13:

                        The time-honoured way to remedy this is to scrape the parts into alignment. What error are we talking about?

                        The most intelligent comment here, gets ignored.

                        I did mention I was a beginner. Short of dismantling the thing and taking it somewhere to be done, I can’t think me trying to scrape it into alignment would end in anything but a complete disaster.

                        #513915
                        Pete.
                        Participant
                          @pete-2
                          Posted by Dr_GMJN on 16/12/2020 23:25:44:

                          Posted by Pete. on 16/12/2020 23:04:19:

                          Posted by Pete Rimmer on 15/12/2020 19:38:13:

                          The time-honoured way to remedy this is to scrape the parts into alignment. What error are we talking about?

                          The most intelligent comment here, gets ignored.

                          I did mention I was a beginner. Short of dismantling the thing and taking it somewhere to be done, I can’t think me trying to scrape it into alignment would end in anything but a complete disaster.

                          It's such a slow process, it would be hard to seriously mess up, as long as you check it periodically, I can't imagine you'd go far wrong, scraping to remove material doesn't have to look pretty like bed ways, a small surface plate with blue printed onto the bottom of the column might reveal something obvious, inspection I would have thought would be first?

                          #513951
                          Dr_GMJN
                          Participant
                            @dr_gmjn
                            Posted by Pete. on 16/12/2020 23:34:39:

                            Posted by Dr_GMJN on 16/12/2020 23:25:44:

                            Posted by Pete. on 16/12/2020 23:04:19:

                            Posted by Pete Rimmer on 15/12/2020 19:38:13:

                            The time-honoured way to remedy this is to scrape the parts into alignment. What error are we talking about?

                            The most intelligent comment here, gets ignored.

                            I did mention I was a beginner. Short of dismantling the thing and taking it somewhere to be done, I can’t think me trying to scrape it into alignment would end in anything but a complete disaster.

                            It's such a slow process, it would be hard to seriously mess up, as long as you check it periodically, I can't imagine you'd go far wrong, scraping to remove material doesn't have to look pretty like bed ways, a small surface plate with blue printed onto the bottom of the column might reveal something obvious, inspection I would have thought would be first?

                            Pete, the issue – again – is conflicting advice. I've been told on other threads that scraping is a difficult task for the beginner, and to avoid it on critical or expensive parts.

                            You're now saying it's not difficult, so I'm left with gut feel. Having done a bit of research on the process, I doubt very much I'd be able to do it effectively on such an unwieldy and critical part.

                            On face value, your comment is undoubtedly correct in that scraping would be the established way to correct this issue, but in terms of practicality in the context of me asking how I can correct it myself, I'm afraid it's simply not an option.

                            #513982
                            Pete Rimmer
                            Participant
                              @peterimmer30576
                              Posted by John Hinkley on 14/12/2020 14:26:51:

                              If you really want to squirt epoxy in the gap to tram it, you could look at Stefan Gotteswinter's YouTube video where he does just that. I wouldn't want to try it myself, but he gets it to work. I don't have anywhere near his skill level, though.

                              Link to Epoxy tramming

                              John

                              Slower typer than Tony!

                              Edited By John Hinkley on 14/12/2020 14:27:21

                              There is a fundamental step missing from that video.

                              In order for the mill geometry to be aligned properly you need to align the column way not to the table but to the table's x and y ways. Using the table is fine so long as you first check that the table's surface IS parallel to the working ways. Doing this is easy – just put a parallel on the table surface and indicate the top of it with a dial whilst traversing the table in X, then turn the parallel and do the same check in Y.

                              Note that this isn't the only check that you should make if you're properly re-aligning the machine, but it is all you can do without dismantling it. It will at least confirm if the table top is parallel to it's direction of travel which is what you require if you're going to follow the video in your efforts. If you make the above checks and you find that your indicator moves, you'll have to decide what to do next to bring your errors to a minimum because if the top of the table isn't parallel to the direction of travel all you'll be doing is machining steps in your work.

                              Also note that you cannot use the spindle's rotation to do any of the above (in the traditional sense of 'tramming' ), that would be aligning the table to the spindle's axis, not the column. Aligning the spindle's axis would be the last step in aligning the machine.

                              Edited By Pete Rimmer on 17/12/2020 12:18:54

                              #514018
                              Howard Lewis
                              Participant
                                @howardlewis46836

                                Scraping the base of the column would be the most accurate method, but seems to involve a LOT of work and effort.

                                (The heads of vertical mills are not usually particularly light! ) .

                                Knowing the out of square:

                                Remove head from column,

                                Remove column,

                                Scrape the base,

                                Reassemble,

                                Reclock.

                                Repeat until a satisfactory result is obtained.

                                Probably quicker and easier to shim and remeasure

                                Howard

                                #514028
                                duncan webster 1
                                Participant
                                  @duncanwebster1
                                  Posted by Dr_GMJN on 16/12/2020 14:20:55:

                                  ,,,,,,,,, As I said, these shims are very narrow (about 5mm wide), so this is why I want to get much more area in contact. Increasing the area by shoving the shims further under, always screws the alignment – believe me I tried so many combinations that I was worried about wearing the threads out!. I appreciate what Andrew says about column stiffness not influencing chatter much, but to me the amount of contact area I've currently got is pushing it in terms of what's acceptable.

                                  Not sure I get that, just use a slightly thinner shim and get it well in, I made U shaped ones to slip round the bolts, square profile outside, and make them too long so that you can get them out again

                                  #514068
                                  Dr_GMJN
                                  Participant
                                    @dr_gmjn

                                    A thinner shim pushed further in won’t do much to increase contact area. There’s only so much compliance the shims and bearing material has, and at the end of the day you’re trying to shim a tapered gap with parallel shims. Sure, there will be some local contact and compression, after which the load will literally taper off.

                                    #514080
                                    Hopper
                                    Participant
                                      @hopper
                                      Posted by Dr_GMJN on 17/12/2020 21:02:26:

                                      A thinner shim pushed further in won’t do much to increase contact area. There’s only so much compliance the shims and bearing material has, and at the end of the day you’re trying to shim a tapered gap with parallel shims. Sure, there will be some local contact and compression, after which the load will literally taper off.

                                      You said earlier the difference in shim thickness is only about 6 thou from bolt to bolt. And the bolts are, what, about six inches apart? So that's a taper of 1 thou per inch, or very slightly more if the bolts are a bit closer.

                                      Not much to worry about there. The shim material and the base and column materials will either compress or distort enough to take up this kind of tiny gap.

                                      If it were me, I would make up some L shaped shims with each leg of the L about an inch long. Then slide them into the gap at each corner, outboard of the bolts and cinch it all down. If I were being totally obsessive I might slide a bit of whatever shim fitted into the gaps mid-point between the bolts and tap it home to a tight fit.

                                      I wouldn't use standard epoxy as it is too flexible and compressible unless the specialist stuff containing metal particles etc.

                                      But I certainly wouldn't agonise over a taper of one thou or so across a shim on a roughly machined, highly flexible cheap Chinese hobby machine.

                                      #514183
                                      Dr_GMJN
                                      Participant
                                        @dr_gmjn

                                        Thanks Hopper.

                                        What you describe is pretty much exactly what I've got now. The width of the "L" shims is about 4 mm or 5 mm. Any more than that and it clashes with the bolts.

                                        Each bolt looks to be within a machined rectangular pad of about 30 mm x 25 mm:

                                        I

                                        I can't put shims half way between the bolt centres, because it would be in the unmachined pocketed parts of the base.

                                        If you imagine only the outer two edges of each pad being shimmed to a maximum of 5 mm from the edges, that's my current setup.

                                        To me, it looks precarious, and that is why I wanted to get significantly more contact area.

                                        Edited By Dr_GMJN on 18/12/2020 15:03:12

                                        #514191
                                        Steviegtr
                                        Participant
                                          @steviegtr

                                          Sorry for butting in but. Is there any way you could have the whole assembly re machined to the correct spec. Or is that not an option.

                                          Steve.

                                          #514193
                                          Dr_GMJN
                                          Participant
                                            @dr_gmjn
                                            Posted by Steviegtr on 18/12/2020 16:00:43:

                                            Sorry for butting in but. Is there any way you could have the whole assembly re machined to the correct spec. Or is that not an option.

                                            Steve.

                                            Steve – I suppose I could do, but I'd expect it would be quite expensive. As someone mentioned, there would be plenty of evaluation, setup and testing required, because I want the spindle axis perpendicular to the x/y table rather than the base itself (even than, moving the head in z might result in a horizontal shift of the tool due to column/spindle misalignment).

                                            I managed to get it right by shimming, so I'm happy I know what to adjust etc, it's just that I'm not happy with the bearing area of the shims I ended up using.

                                            Thanks.

                                            #514205
                                            Steviegtr
                                            Participant
                                              @steviegtr

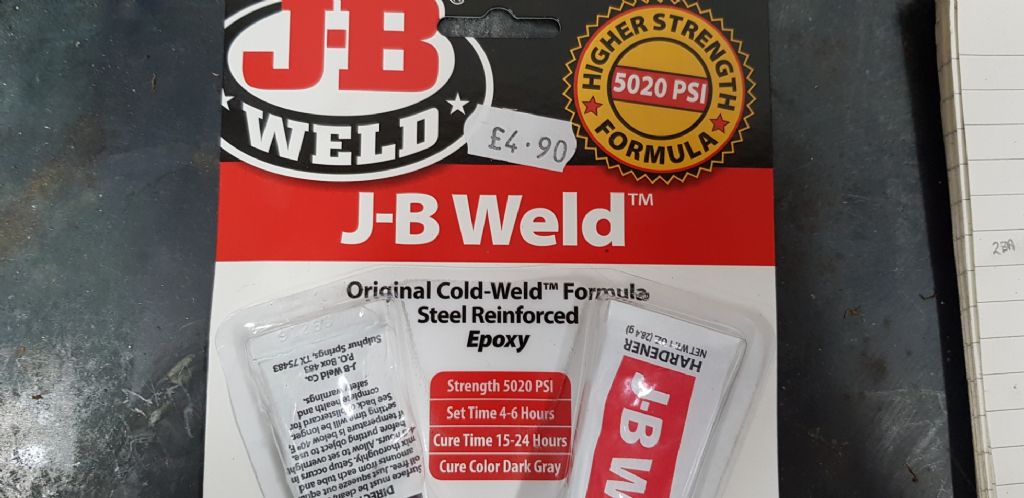
                                              Yes i thought it would be awkward to do. I do hope you find a way. When you mentioned JB weld or someone did. Have you looked at the different version they do. When i bought some ,there was different strengths. Also many years ago i had some 2 part resin that claimed to as hard as cast iron, it was called BELZONA.

                                              Steve.

                                              j b weld.jpg

                                              #514208
                                              mgnbuk
                                              Participant
                                                @mgnbuk

                                                Why not cut 4 shims of the required thickness the same size as the pads on the base, with a clearance hole cut in the required place.

                                                Slacken all four column mounting bolts, then remove one completely. Tilt the column to insert the appropriate shim, then replace the bolt loosley – repeat for the other 3 bolts. Tighten down the bolts & check the alignment – tweak the shims as required if it doesn't come good at the first attempt.

                                                Out of interest, what do you have the machine mounted on ? That base casting looks rather "skinny", with a very narrow (front to back) column, so a less-than-substantial stand / bench would not help rigidity.

                                                Nigel B.

                                                #514209
                                                gerry madden
                                                Participant
                                                  @gerrymadden53711
                                                  Posted by Dr_GMJN on 18/12/2020 16:16:03:

                                                  ……, it's just that I'm not happy with the bearing area of the shims I ended up using.

                                                  One of the points I was hoping to get across in my earlier post was that when you do the maths you almost don't need to worry about the area. A shim is just a very short column. Very short columns have even smaller compression despite high stresses that might be created by reducing the area.

                                                  I know its counter intuitive, but that's the reality. All I would say is make sure the position of the shims gives a stable joint, and not one that has a plane/direction of weakness.

                                                  Gerry

                                                  #514224
                                                  Grindstone Cowboy
                                                  Participant
                                                    @grindstonecowboy

                                                    I'm with Nigel B. on this one – if the shims are the same size as the pads, it can't be any worse than originally designed.

                                                    Rob

                                                    #514228
                                                    Dr_GMJN
                                                    Participant
                                                      @dr_gmjn

                                                      Nigel:

                                                      If the shims are constant thickness, and the same size as the pads, and the upper and lower faces of the joint aren't parallel (which they're not), then once I've got the column aligned, I'm effectively in exactly the same position in terms of shim area am I not?

                                                      It comes down to the impossible task of shimming a tapered gap with parallel shims. Hence the initial question about liquid shim.

                                                      Gerry:

                                                      I don't think it's about compression failure of the materials (if that's what you mean?) it's about the area in compression and its potential effect on stiffness that I'm concerned about. Surely if I've got four patches of c. 250 mm^2 under compression, when the total potential area available is four patches of c. 750 mm^2, there is going to be a corresponding drop in joint stiffness, or at least a potentially detrimental change in the resonant frequency of the system?

                                                    Viewing 25 posts - 26 through 50 (of 148 total)
                                                    • Please log in to reply to this topic. Registering is free and easy using the links on the menu at the top of this page.

                                                    Advert

                                                    Latest Replies

                                                    Home Forums Workshop Techniques Topics

                                                    Viewing 25 topics - 1 through 25 (of 25 total)
                                                    Viewing 25 topics - 1 through 25 (of 25 total)

                                                    View full reply list.

                                                    Advert

                                                    Newsletter Sign-up