Sheet Metal Bending Block and Blade

Advert

Sheet Metal Bending Block and Blade

Home Forums Work In Progress and completed items Sheet Metal Bending Block and Blade

Viewing 16 posts - 1 through 16 (of 16 total)
  • Author
    Posts
  • #31316
    Nicholas Farr
    Participant
      @nicholasfarr14254

      A 500mm long V block and blade for bending thin sheet metal

      Advert
      #489576
      Nicholas Farr
      Participant
        @nicholasfarr14254

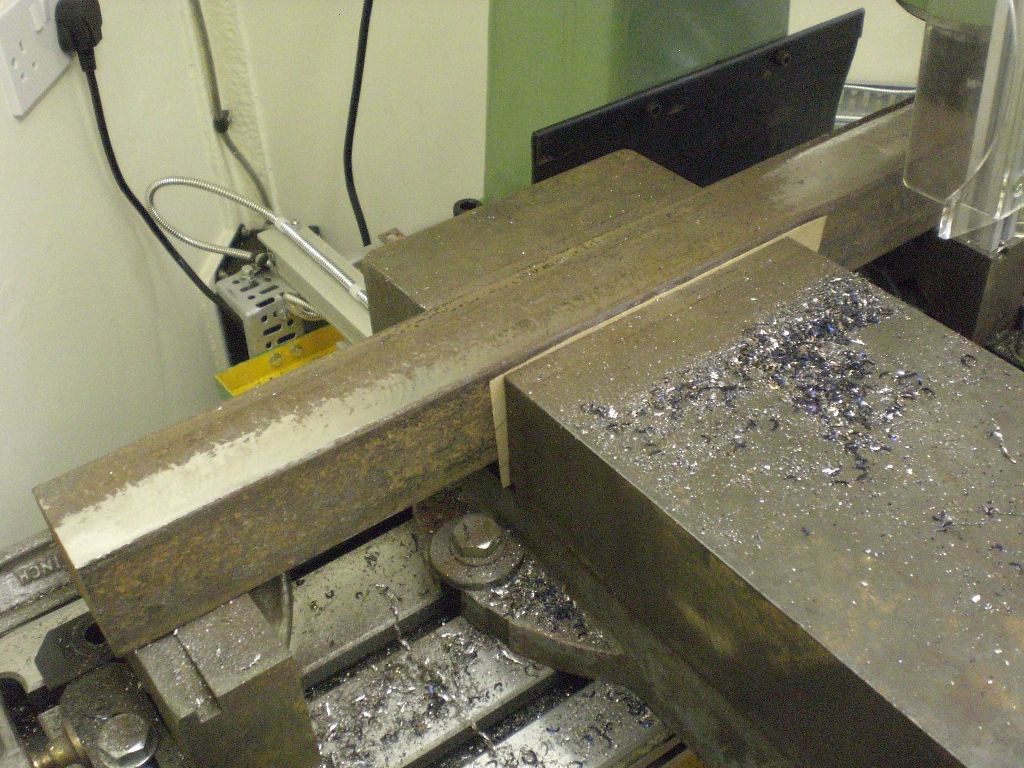
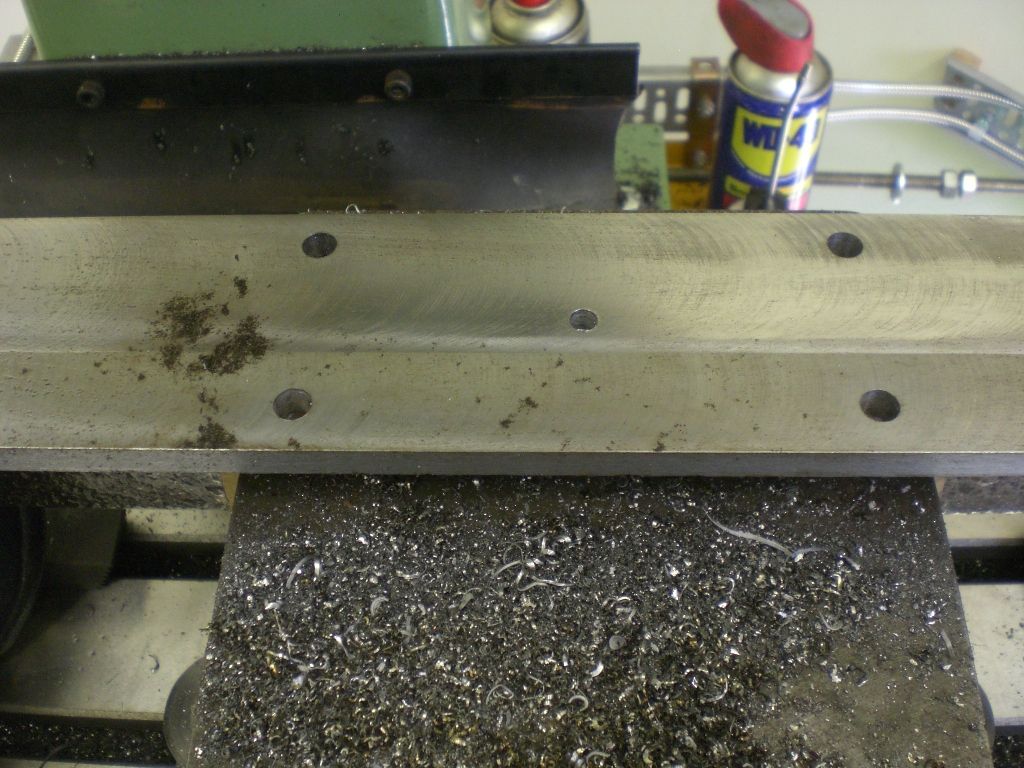
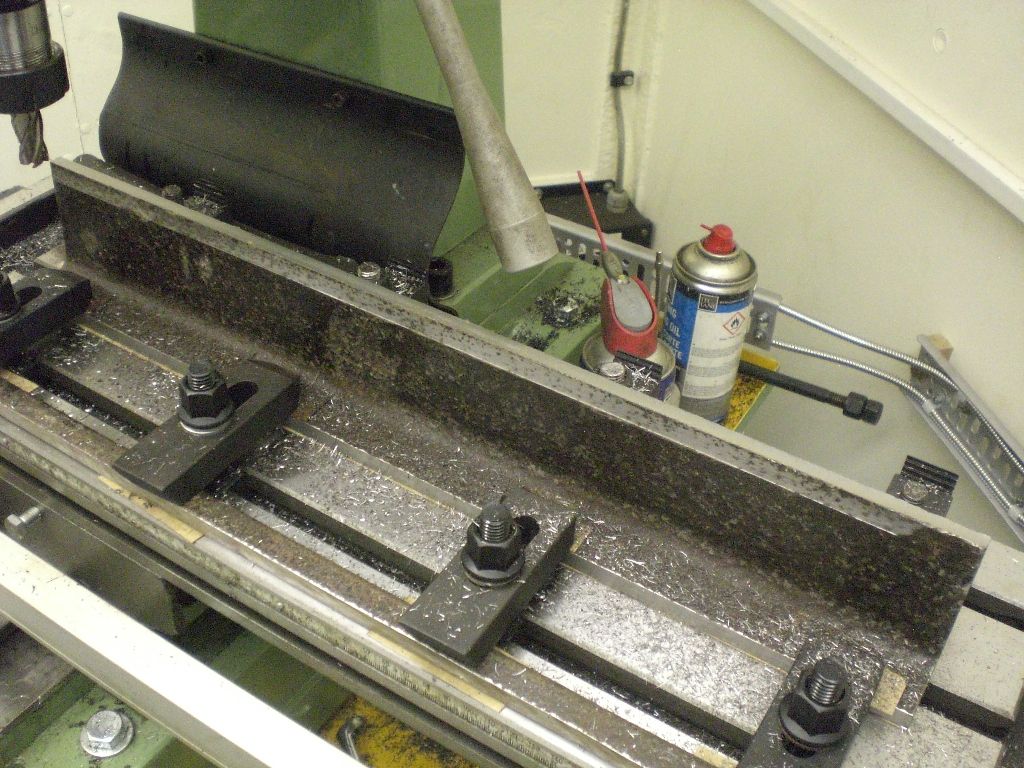
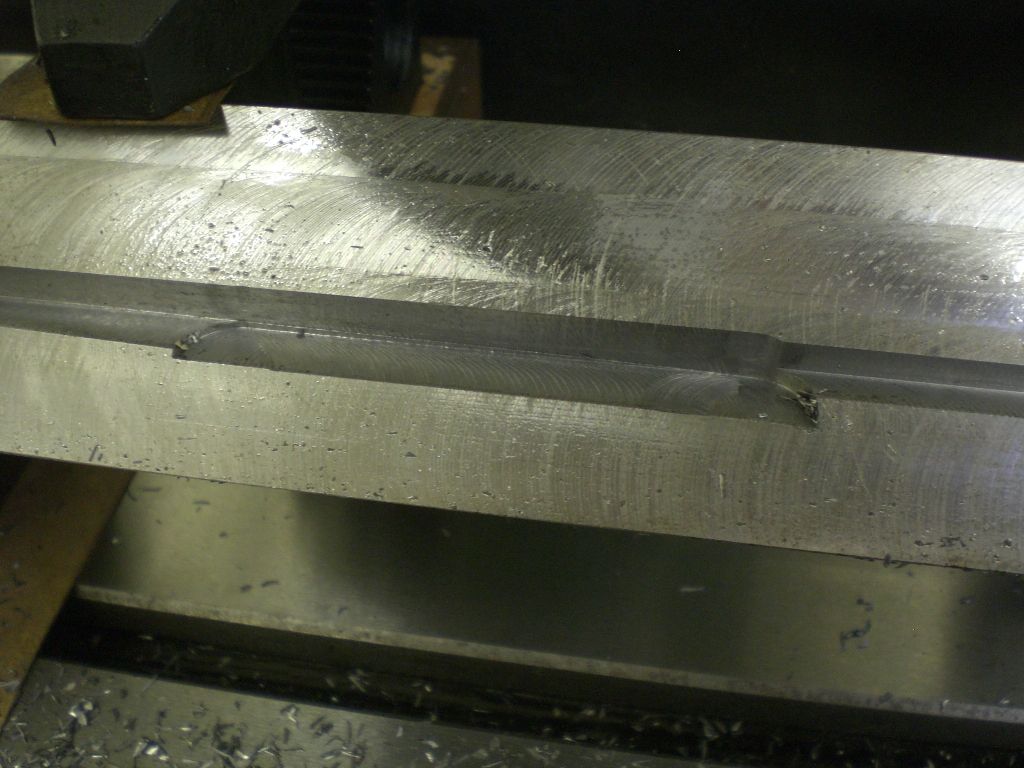
        Hi, last week I started to make the V block from a piece of 50mm square black bar, it first had to be trued up on all four sides and only two of the adjacent side were anywhere near square to each other. So it was set up in my vice and the two ends were supported by upturned V blocks and milling was started.

        v block 01.jpg

        As can be seen above, the sides were not exactly flat. This side and the opposite one showed that the bar was very slightly bent, where this side shows it to below in the middle section, the opposite side was slightly high in this section, but all four sides became true enough to square and flat for it's purpose.

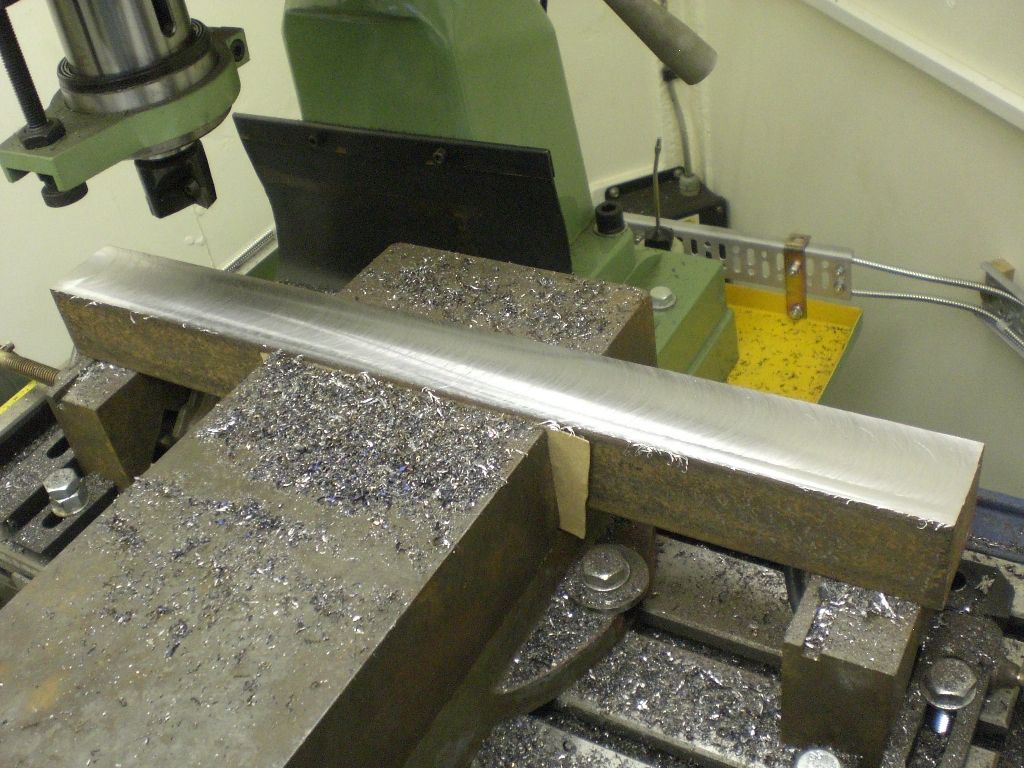
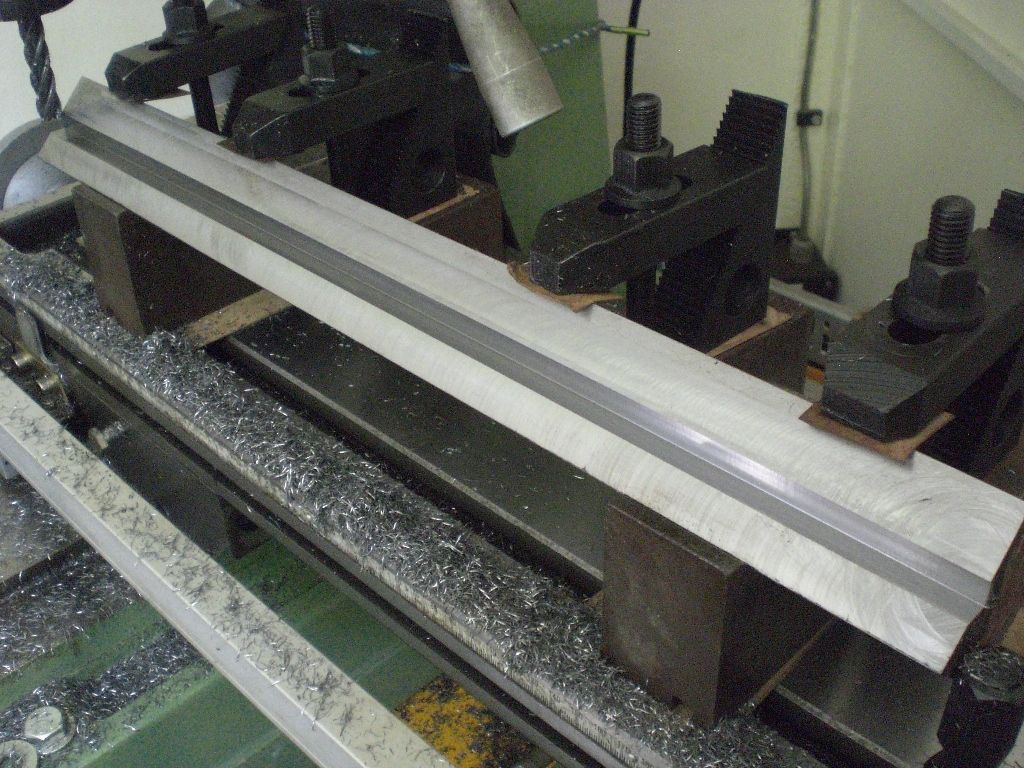
        v block 02.jpg

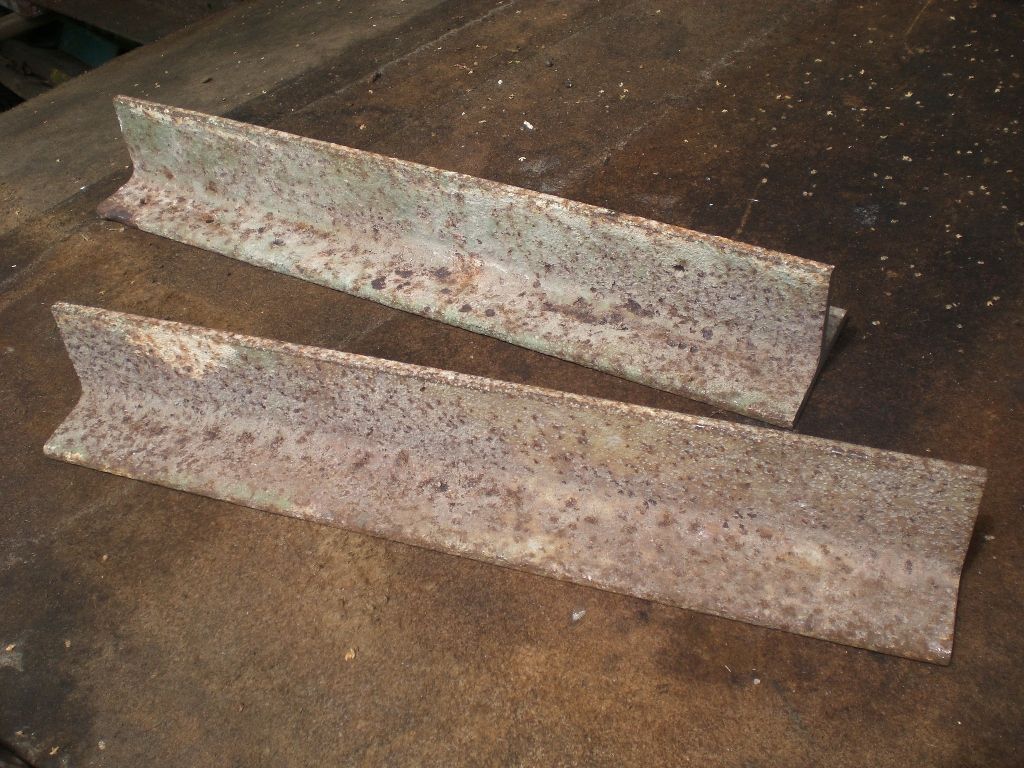
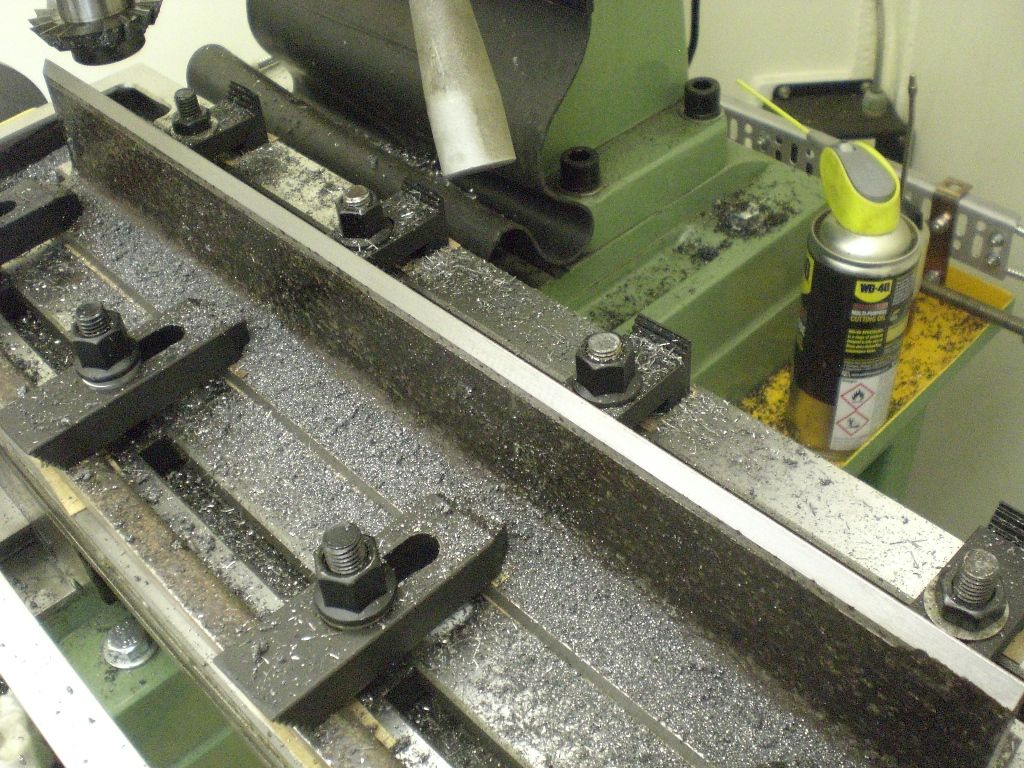
        The above side is the third side that was milled. After finishing truing up the bar and while my vice was still set up on the machine, I turned my attention to making the pressing blade, which I made from a piece of 3" T iron, with a thickness of 3/8". 12mm was cut off with a disc cutter each side of the flat portion, as of course this was not truly square to the other part that forms the blade and it would have meant a lot more machining and would have made it much thinner, but there is no need for it to be 3" wide anyway.

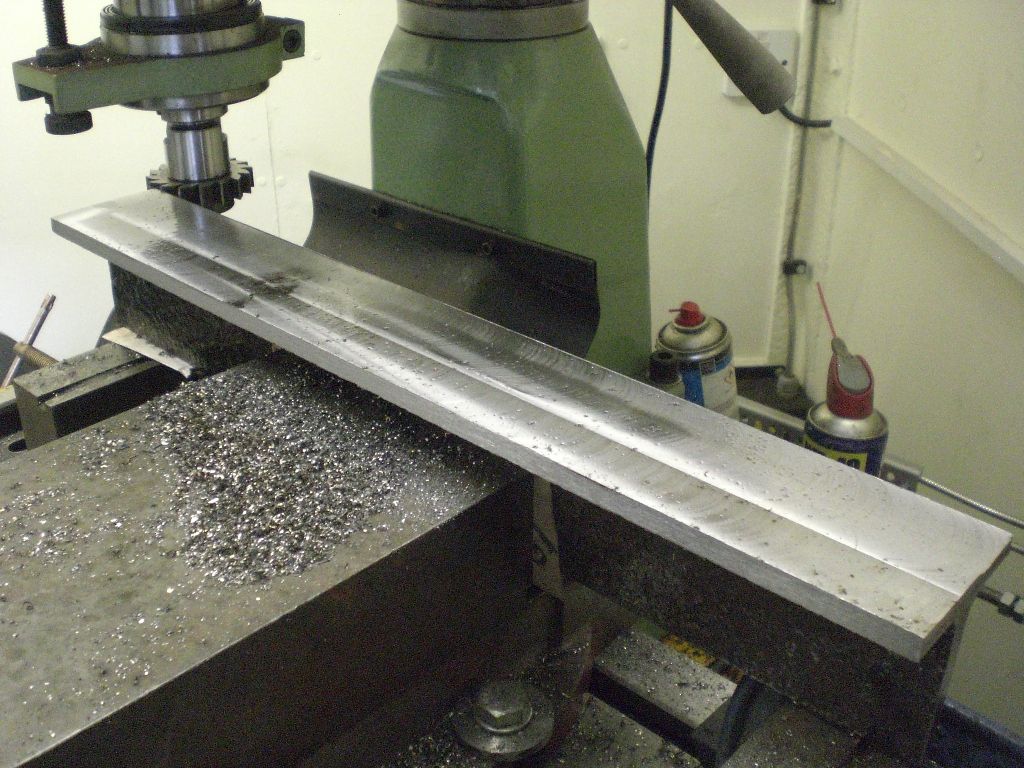
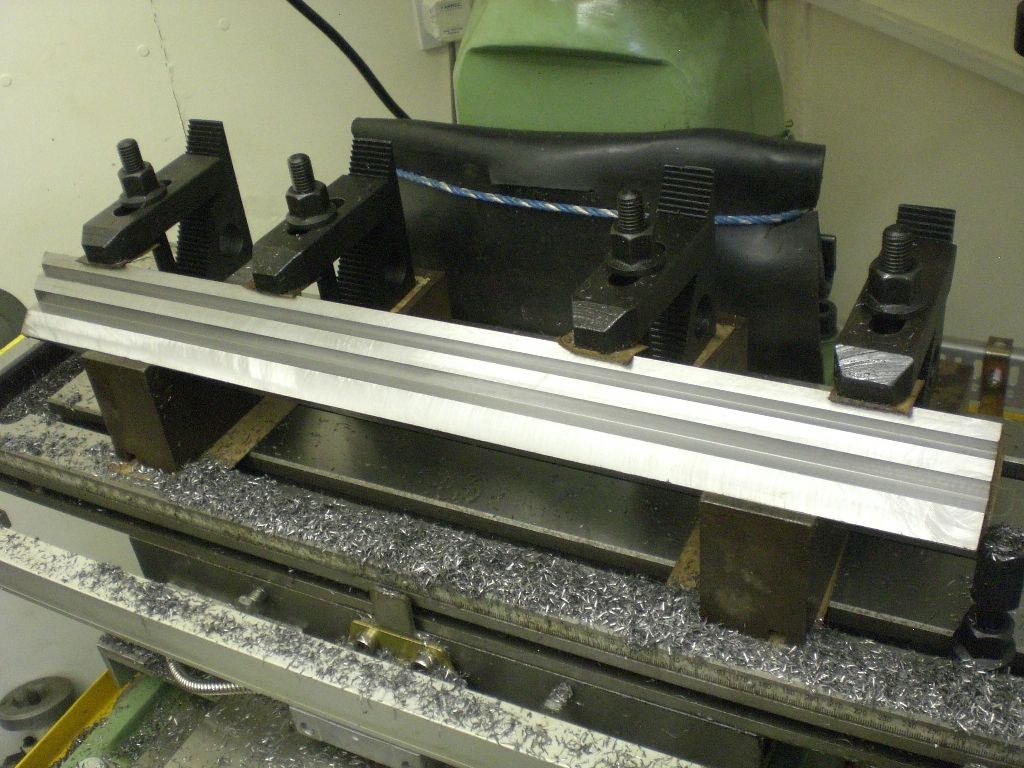
        t blade 01.jpg

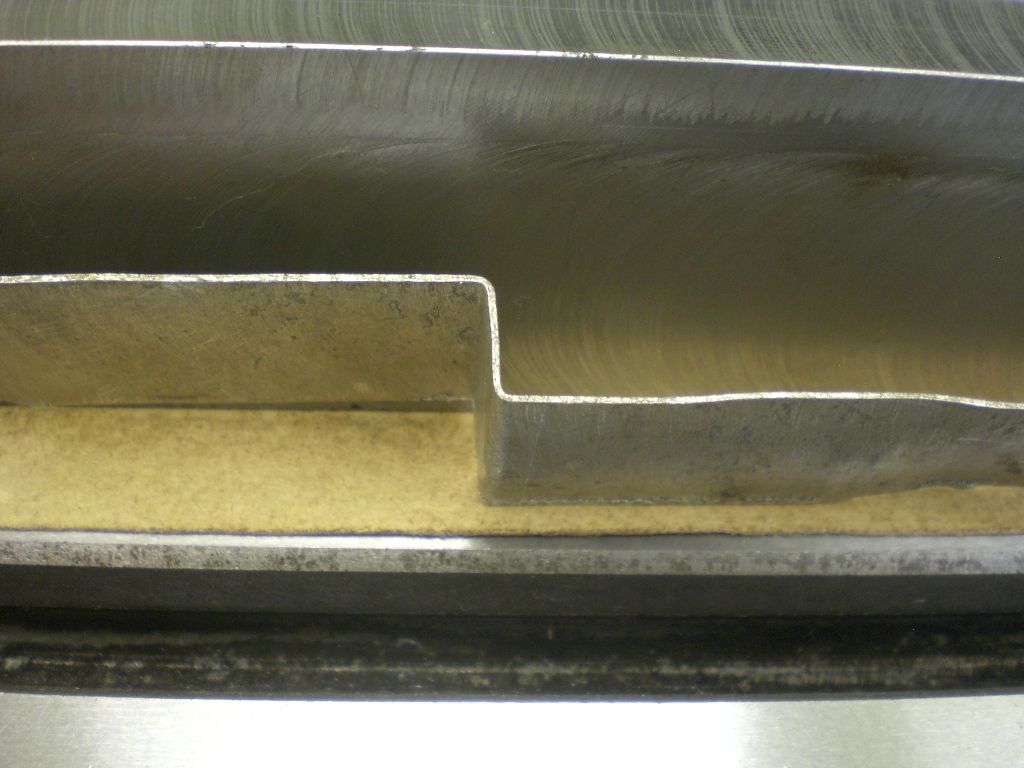
        After facing the flat portion, the two cut edges were milled to be equal distance from the blade portion. Again the two end were supported on the upturned V blocks and you should notice a piece of folded paper under the left hand end, this was just level up the flat portion after taking an initial skim to get the minimum amount to mill off.

        t blade 02.jpg

        Four 8mm bolt holes were drilled while in the vice and using the DRO to get them centrally located, which are for attaching a plate and pin for my fly press, also a small central hole for a location pin for the plate and fly press pin.

        t blade 04.jpg

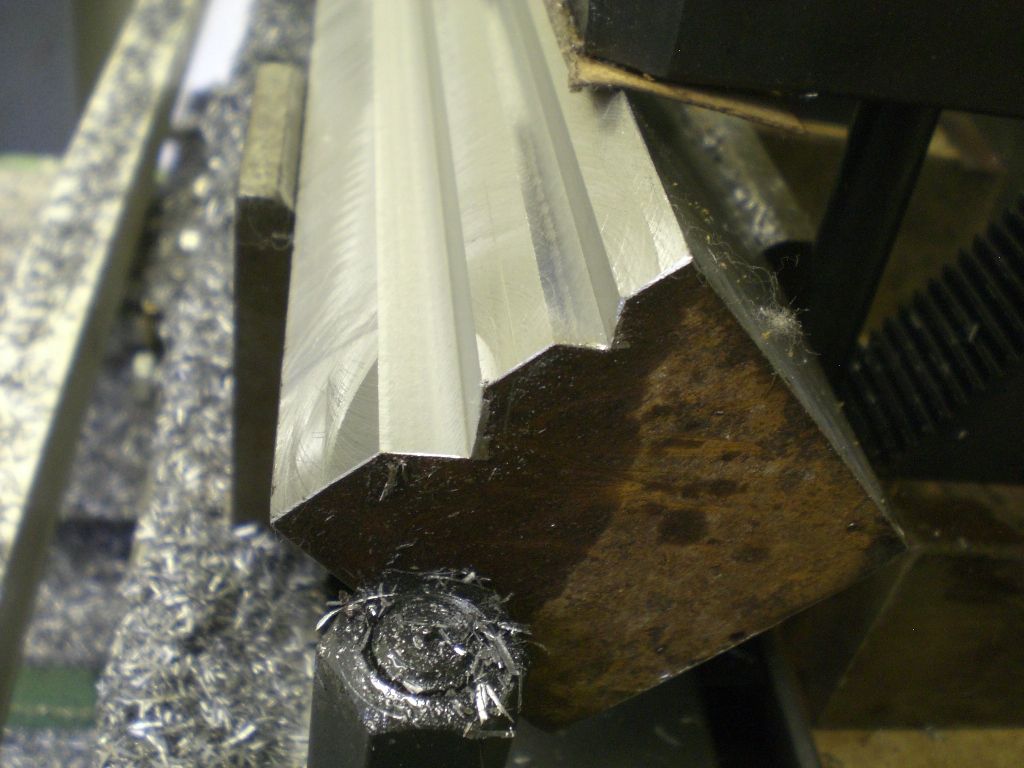
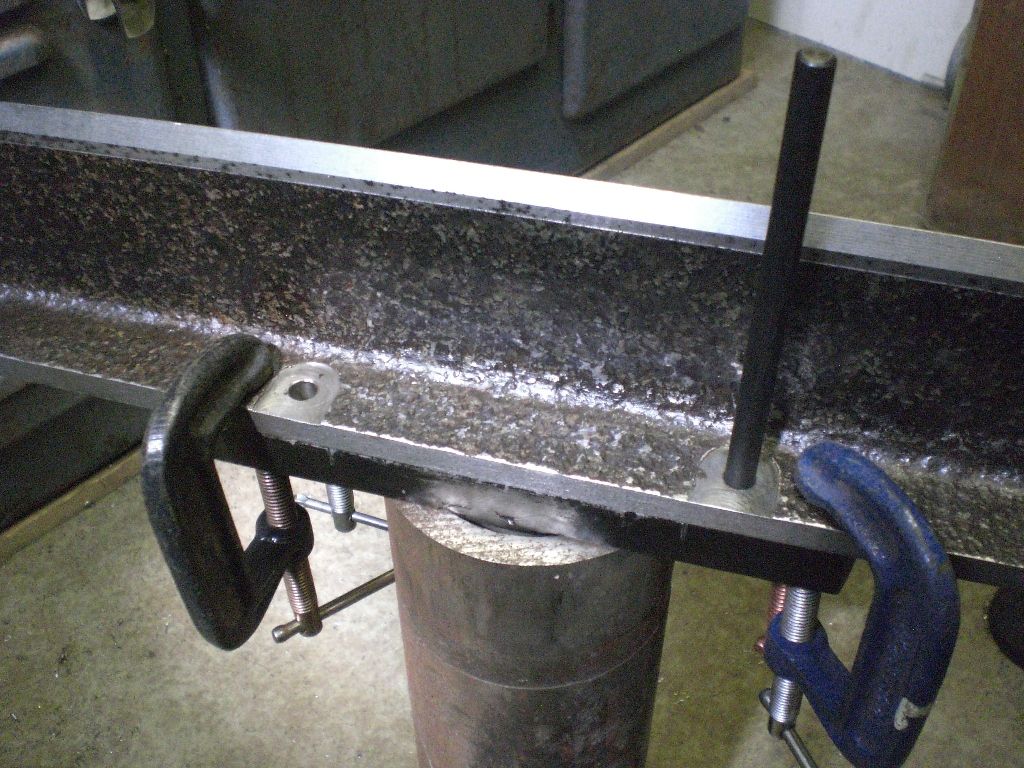
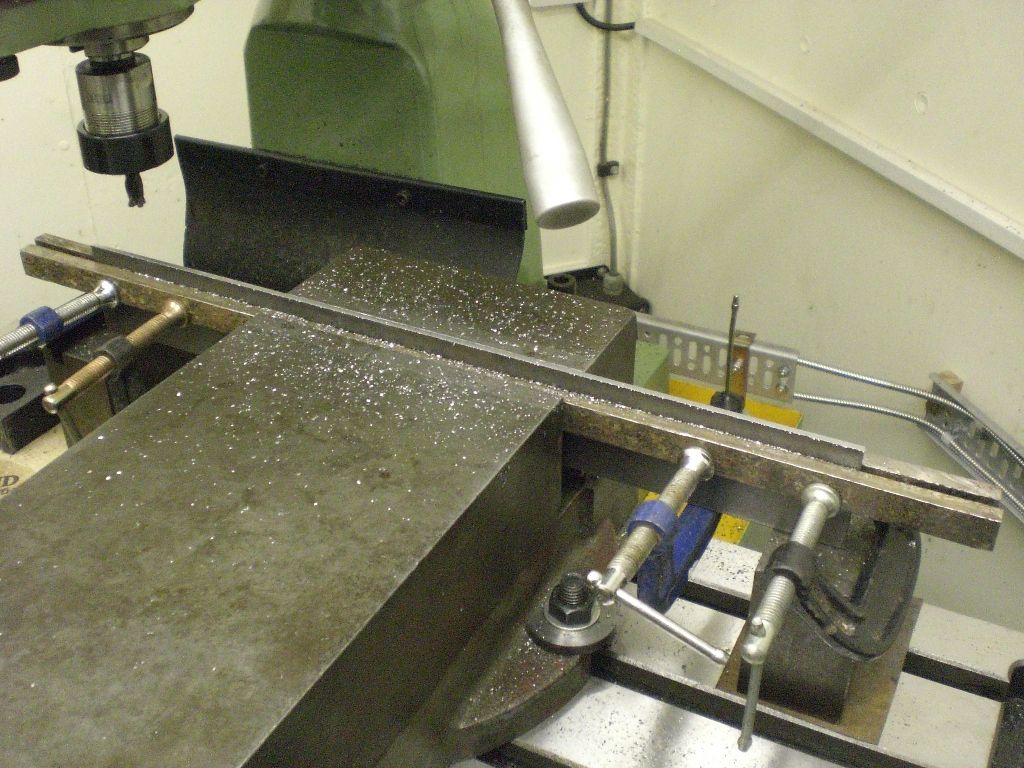
        The T bar was then clamp down on the milling table, with the blade portion upwards and trued up along one of the edges of the flat portion and 12mm of the top end of each side was skimmed to get a a central location to cut a bevel on each side.

        t blade 05.jpg

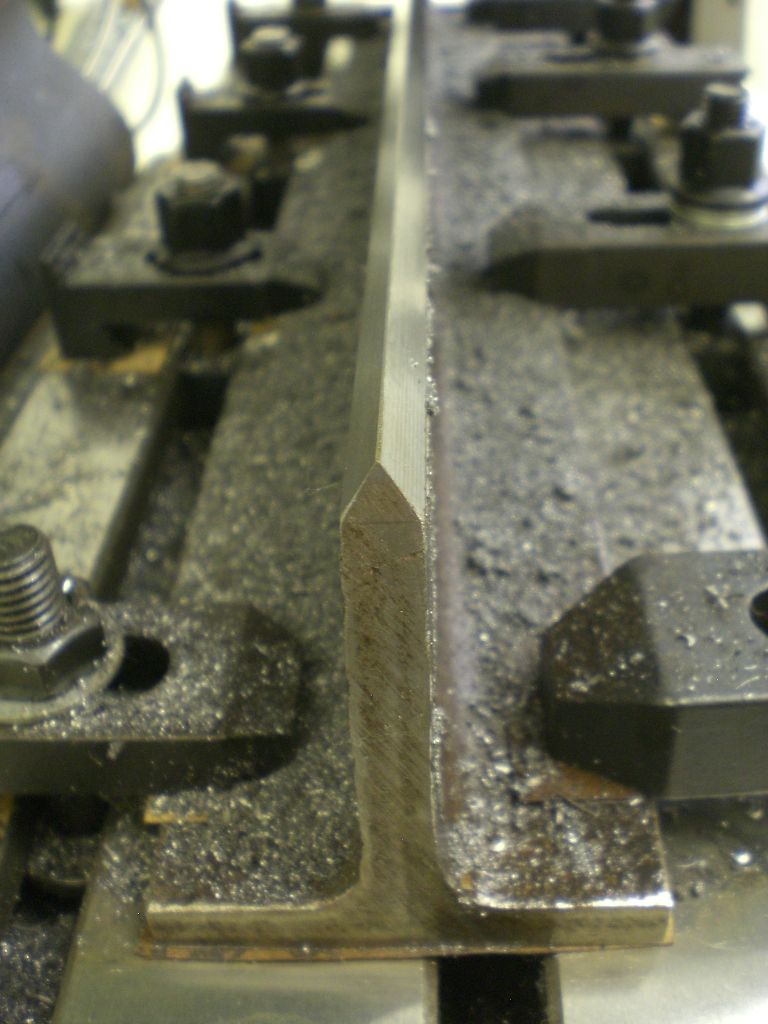
        A bevel was then cut on each side using a 60 degree angle cutter, to leave about 0.3mm flat between the two bevels and a file was lightly used to take off the cut edges.

        t blade 06.jpg

        t blade 07.jpg

        Thus the T bar blade is finished.

        Regards Nick.

        #489587
        Henry Brown
        Participant
          @henrybrown95529

          Looks good Nick, I could do with something like that occasionally. I must look out for some suitable lumps of steel, the bits you used look to be well seasoned!

          #489597
          Nicholas Farr
          Participant
            @nicholasfarr14254

            Hi, after the pressing blade was finished, last thing on Thursday, I set the square bar up at 45 degrees on the two V blocks and yesterday afternoon I proceeded to cut the V in one face. All was going well, but about half way along the bar on the third pass, shock horror ensued and the end mill decided to walk out of the collet, I have no idea why it did this, but a few words that I cannot mention on hear rang out several times.

            v block 03.jpg

            v block 04.jpg

            It's times like this, one feels like quitting, but after evaluating the situation and a bit of measuring, I found that I could recover the situation, but the V would no longer be in the centre of the face. This is no problem, as I had thought about off setting it and putting a smaller one on the other side, which I may well do now. The other problem I had though, was the end mill I was using would not reach the dug in section, because the collet nut would hit onto the clamping bars that was securing the square bar down. I then remembered that I bought a 5/8" long series carbide end mill at the London Exhibition at Ally Pally earlier this year, from that guy that shouts out "who wants to give me some money" at many of these exhibitions. So fitting that and using my collet nut with the bearing in that I use on my lathe collet chuck, I was able to start to retrieve the situation, but time was clocking on and my mill motor was getting fairly hot by now, so I stopped for the day. Note to myself, must get another collet nut with a bearing in it.

            Regards Nick.

            #489598
            Nicholas Farr
            Participant
              @nicholasfarr14254

              Hi Henry, I've had them both waiting for employment for 20 odd years, the square bar was an off cut just for the asking, from my old job and the T bar was part of an old lathe frame that I bought. Just hope it works, but the design is adaptable to a hydraulic workshop press, which is something else I intend to make. But I'm only intending to bend a thin sheet of ally at the moment.

              Regards Nick.

              #489677
              Nicholas Farr
              Participant
                @nicholasfarr14254

                Hi, today I successfully finished cutting the V in my block to size that I wanted, without any more snags.

                v block 05.jpg

                So while it was set up I did decide to cut a smaller 7mm wide V on the other side, which also went well.

                v block 06.jpg

                v block 07.jpg

                I then thought I'd give it ago and see if it performs OK, so using a piece of 0.9mm ally about 25mm wide, I laid it across the V's and pushed the T blade into the wide V with my hands and then turned the ally over and pushed the T blade into the narrow V and the results were very promising.

                trial piece.jpg

                Formed two nice right angle bends, OK, I know it's only a little piece, but a press will have more power than I can push with my hands. Just need to make the pin and plate now to try it for real in my fly press.

                Regards Nick.

                #490807
                Nicholas Farr
                Participant
                  @nicholasfarr14254

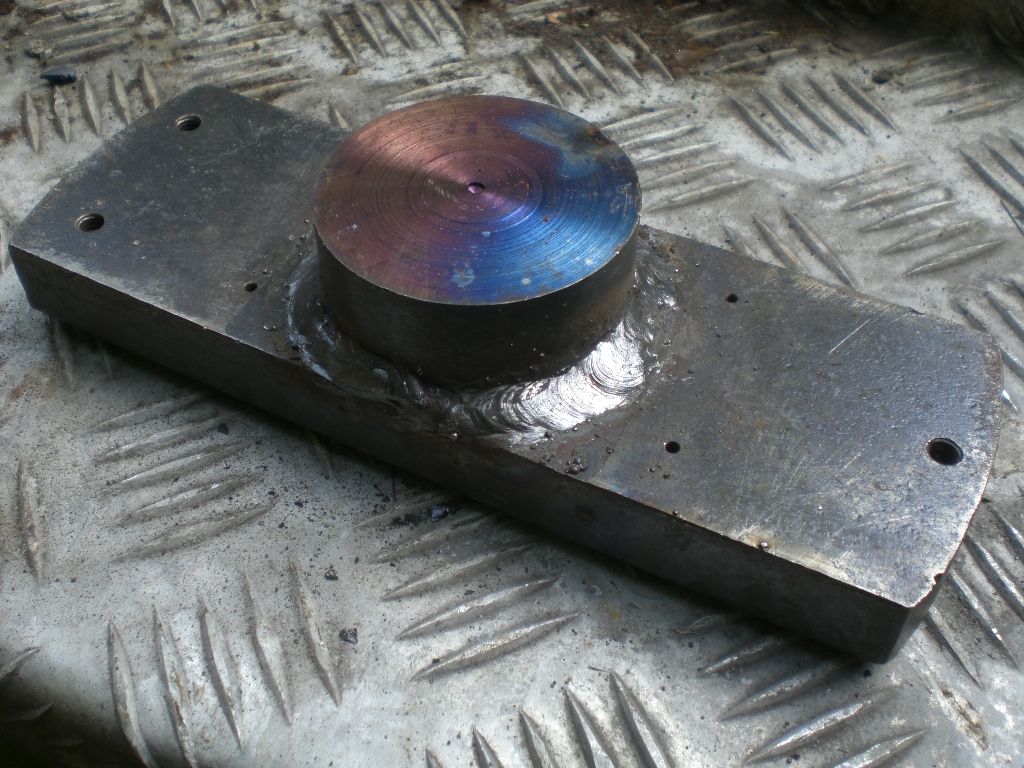
                  Hi, this week I've set about making the pin and plate, (on and off) which holds and presses the T blade, so an old piece 70 x20 black bar that was made for a one off job, several years ago was selected, so just cleaned the rust off with a wire brush with my 4 1/2" angle grinder.

                  used plate 01.jpg

                  A short piece of 2 1/2" BMS was then welded onto the side shown above.

                  used plate 02.jpg

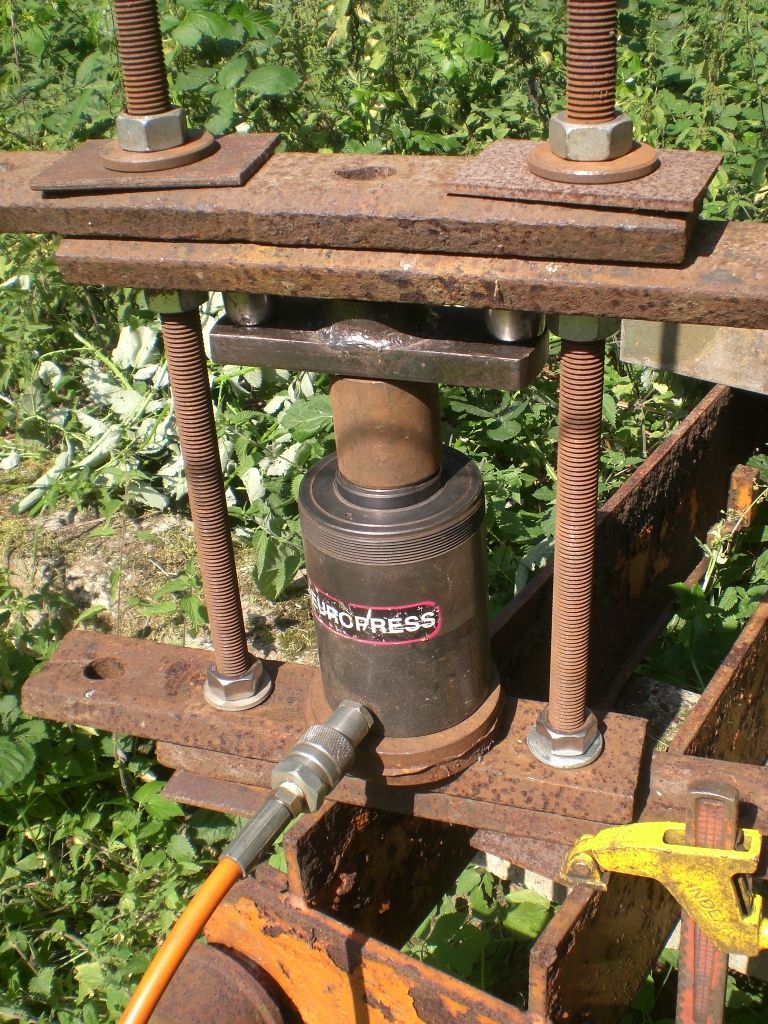
                  I then cobbled four railway line fish plates and some 24mm threaded rod together, to make a press frame for pressing out the bowing in the plate, caused by the welding distortion.

                  used plate 03.jpg

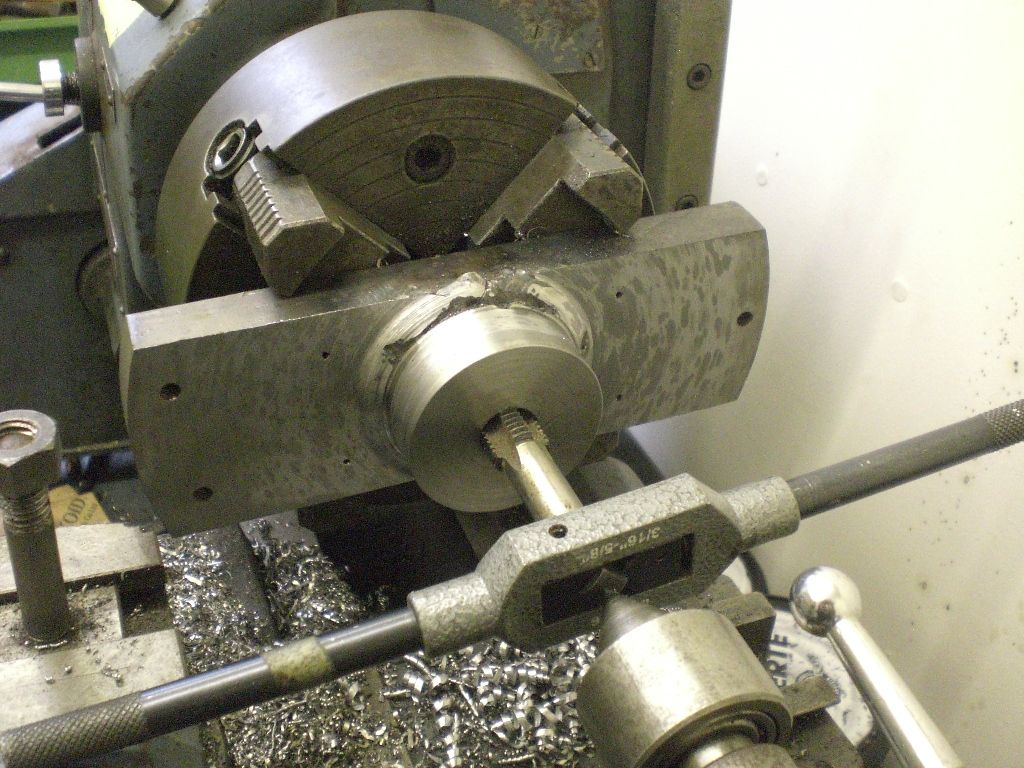
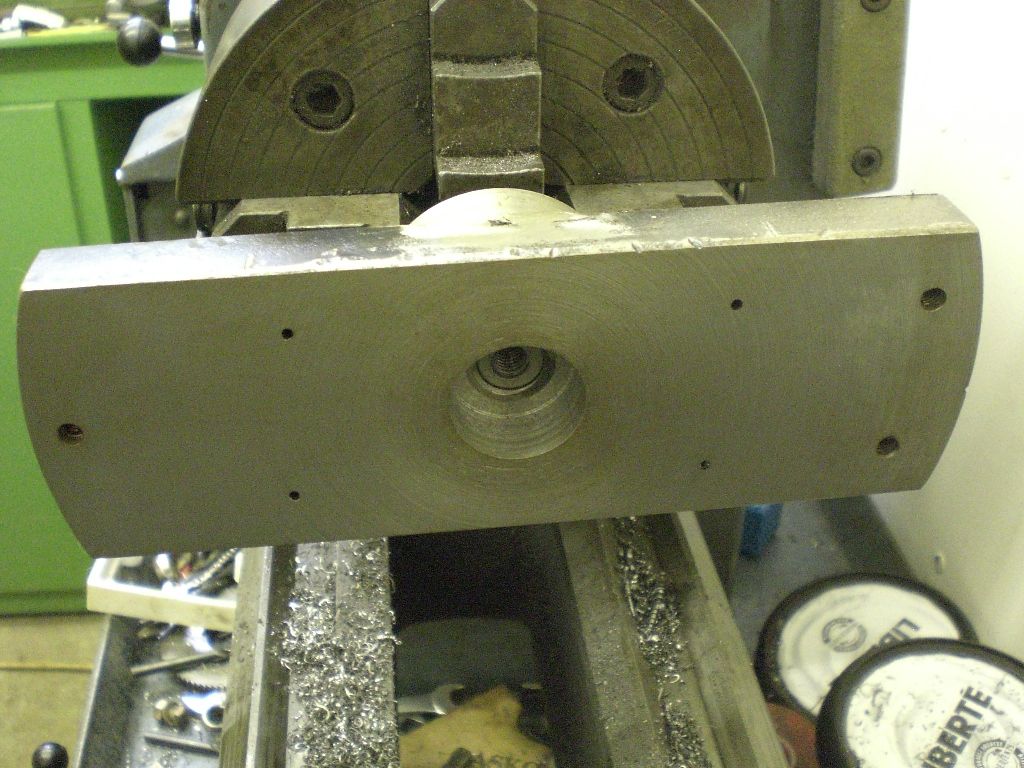
                  The plate was set up in a four jaw, so that the BMS piece was towards the tailstock and running reasonable true and this was then turned down to a diameter of 55mm approximately and faced off, drilled and tapped 16mm. The top side of the plate was also face off, just to make it tidy.

                  drilled & tapped.jpg

                  A 1" diameter piece of BMS was turned down to the same length as the BMS on the plate and was threaded with a 16mm die and a short hole was drilled and tapped 8mm in the end for a locating pin. The photo shows a bolt in the threaded hole.

                  pin 01.jpg

                  Regards Nick.


                  Edited By Nicholas Farr on 15/08/2020 20:52:51

                  #490810
                  Nicholas Farr
                  Participant
                    @nicholasfarr14254

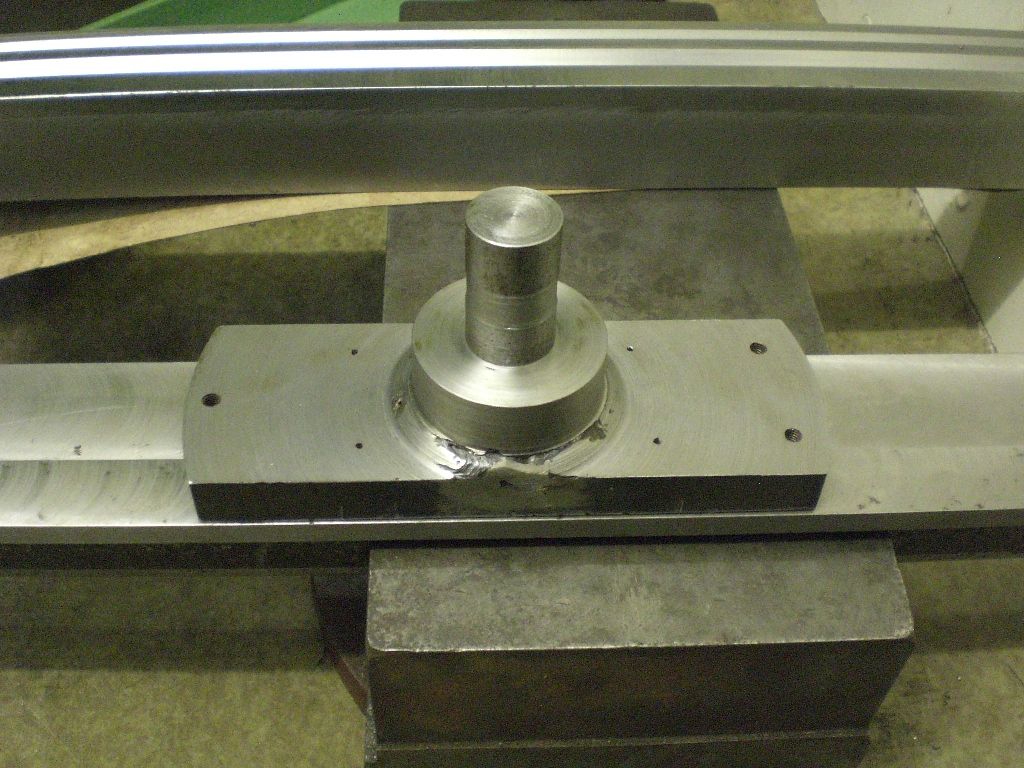
                    The pin was then screwed into the plate boss and then set up in the four jaw, so that the turn part of the boss was running true and the plate side that attaches to the T blade was faced off. The thread in the old hole in the plate was bored out and also making the hole to run true.

                    plate and piin 00.jpg

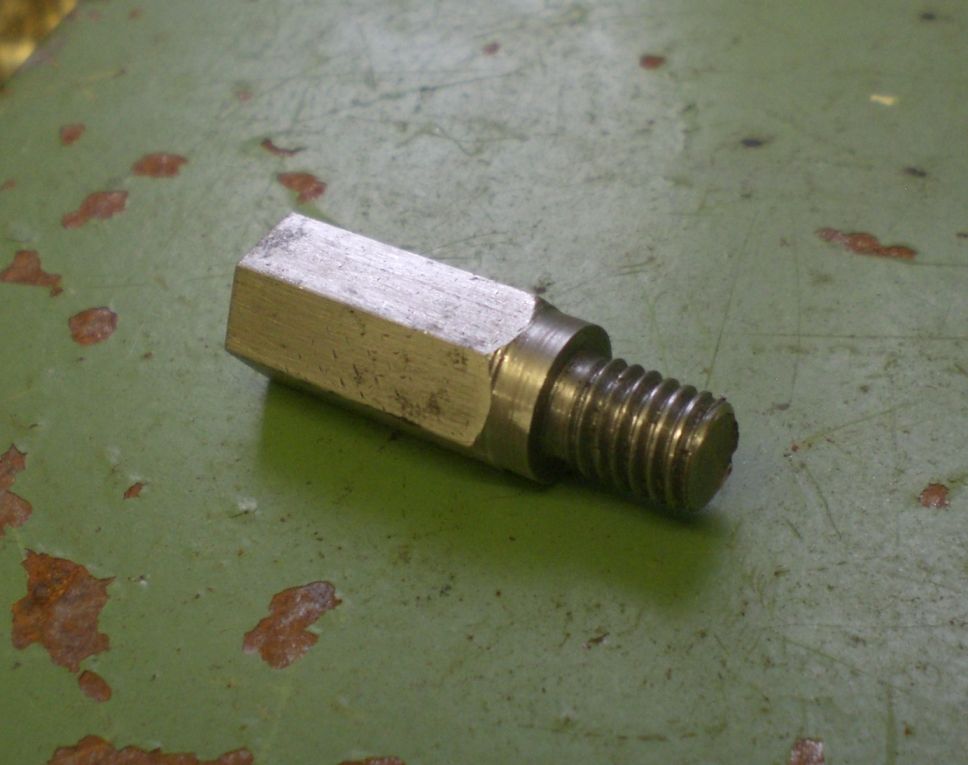
                    I then turned up a piece of 7/16" (11mm) hex bright bar with an 8mm thread 12mm long on my mini lathe and cut off a piece about 30mm long, ready fir the locating pin.

                    locating pin 01.jpg

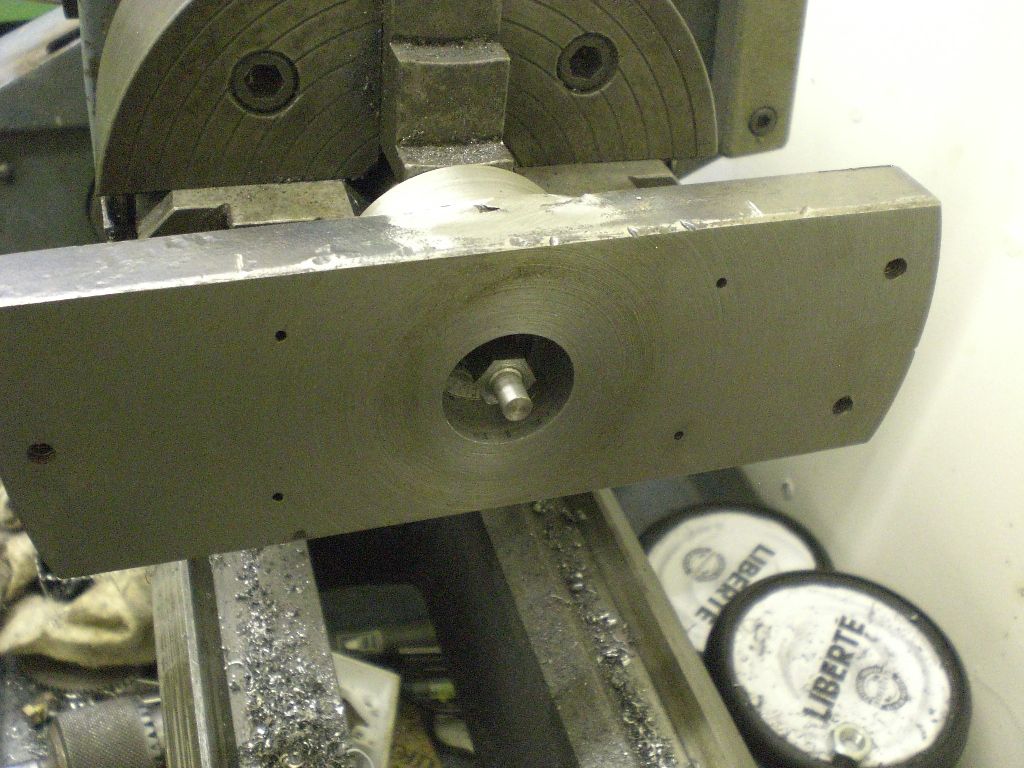
                    This was then screwed into the main pin and tighten up and the projecting part was turned down to 6mm and faced off to length.

                    plate and piin 01.jpg

                    The plate and pin is now ready for the fixing holes on the T blade, to be spotted through using the locating pin to get them central with each other.

                    plate and piin 02.jpg

                    Regards Nick.

                    Edited By Nicholas Farr on 15/08/2020 20:49:30

                    #490817
                    A Smith
                    Participant
                      @asmith78105

                      Very interesting, please keep posting.

                      Edited By A Smith on 15/08/2020 21:20:45

                      #491158
                      Nicholas Farr
                      Participant
                        @nicholasfarr14254

                        Hi, I clamped the pin and plate to the T blade and spotted the holes with a transfer punch.

                        spotting holes.jpg

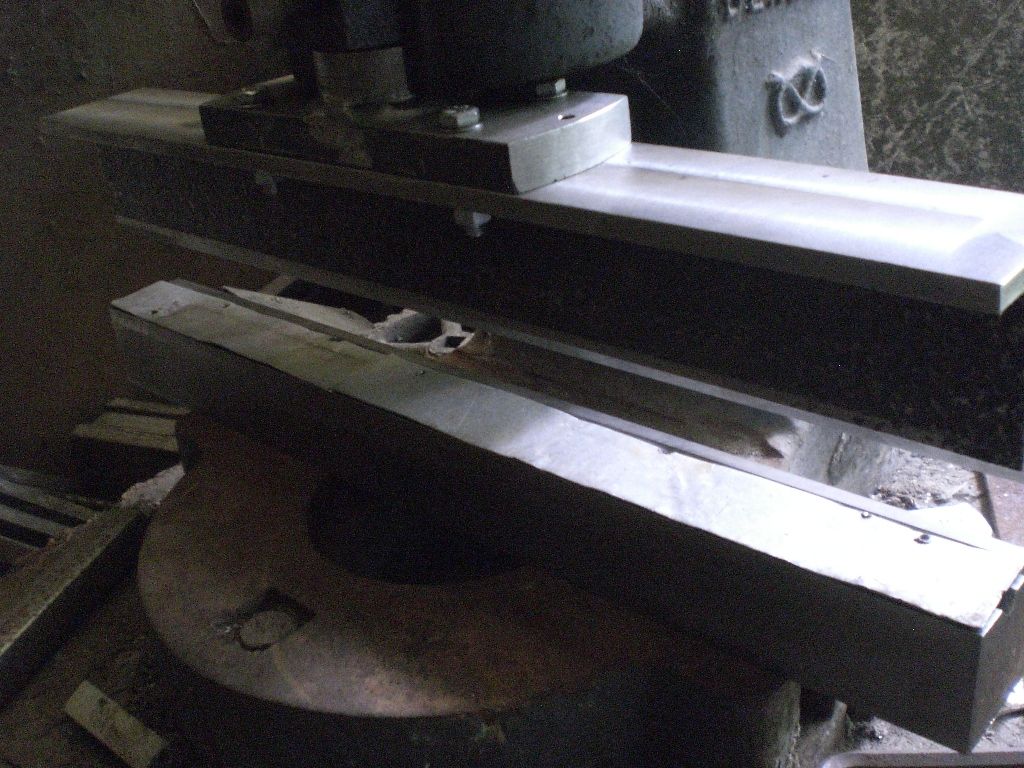
                        The plate was then drill 8.5mm and bolted to the T blade and was set up for a test bend with a couple of pieces of scrap 0.9mm ally, the length of the V block and T blade.

                        test bending set-up.jpg

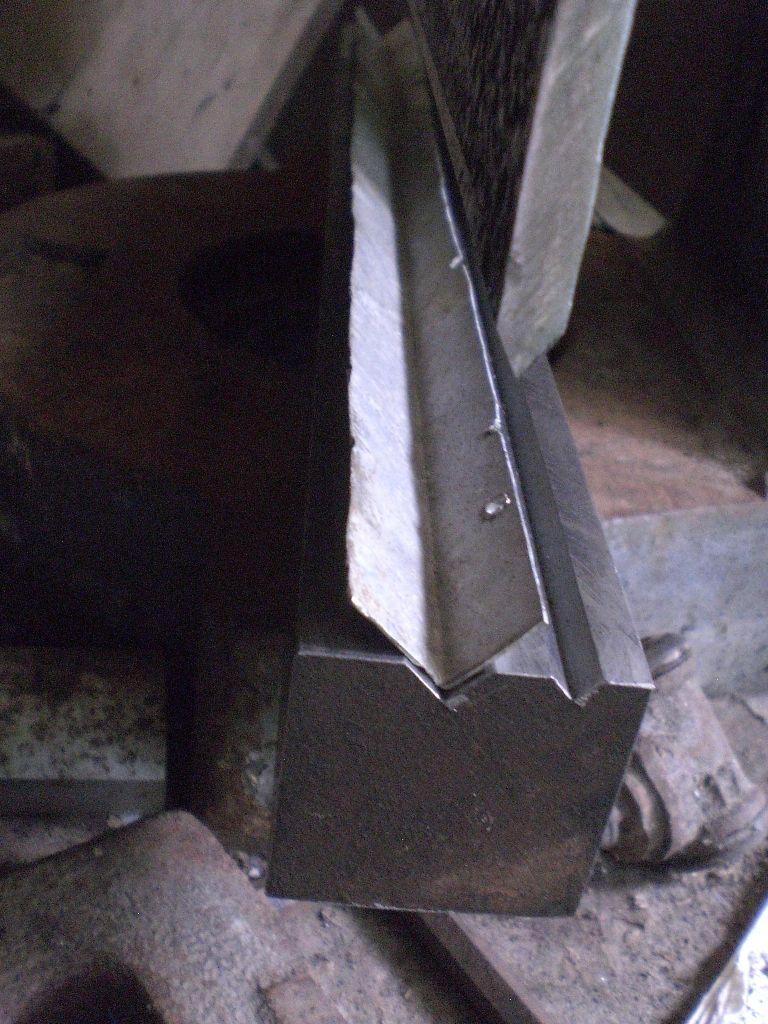
                        The bending operation was straight forward and quite effortless and produced a very good 90 degree bend in the test pieces.

                        successfully bent.jpg

                        This completes the making, but of course, shorter T blades can be made, if needed and fitted to the same pin and plate.

                        Regards Nick.

                        Edited By Nicholas Farr on 17/08/2020 21:15:40

                        #499445
                        Nicholas Farr
                        Participant
                          @nicholasfarr14254

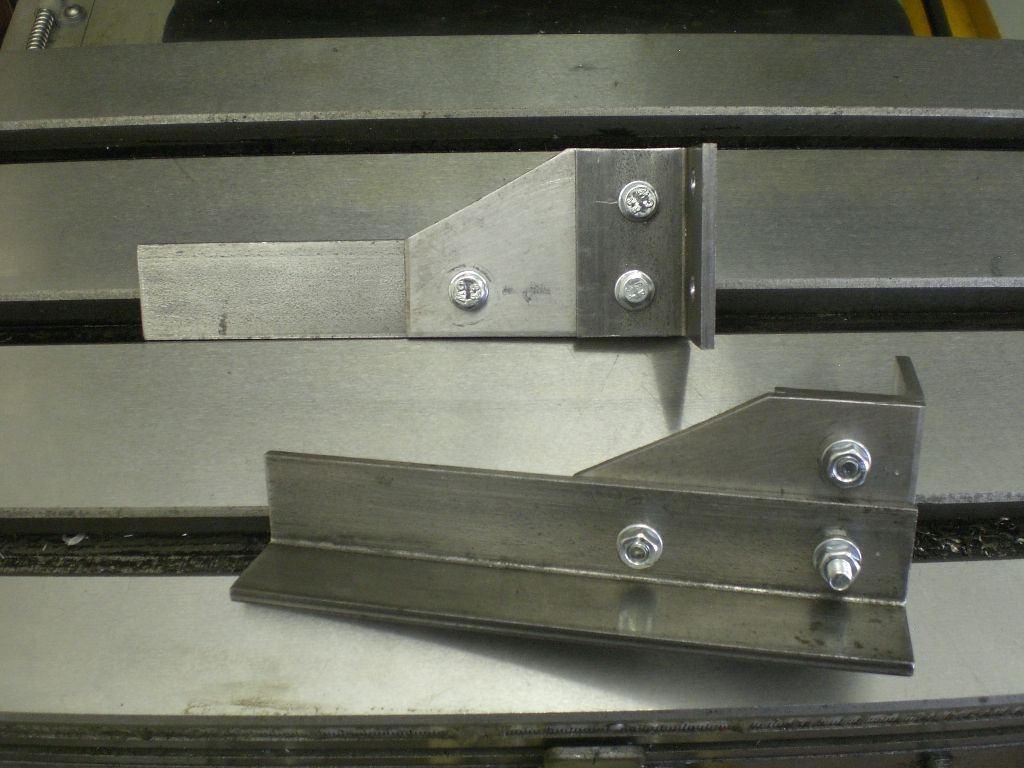
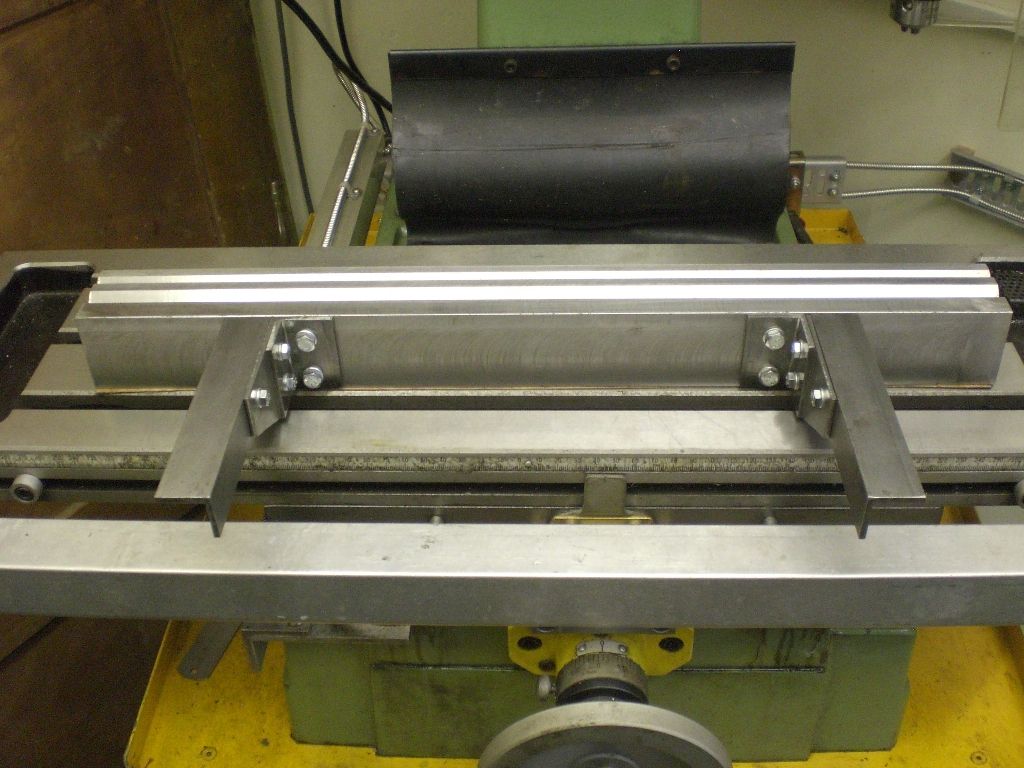
                          Hi, I've added a back-stop and metal support rails to my V block, these can be fitted to either side of the V block, depending on which V is being used, as the back-stop bar won't reach close to the edge of the V on the far side. First two rails were built up from BMS angles and a piece of 2.5 mm MS sheet and bolted together.

                          back-stop rails.jpg

                          The position for the threaded holes for attaching them to the V block each side were established by setting the block with the V's facing downwards on my milling machine table and the rails were positioned and clamped to the side of the block and a transfer punch used to mark the hole centres, which were drilled and tapped into the block. They were then fitted to the block to make sure the tops came level with the top of the block.

                          back-stop rails & v block.jpg

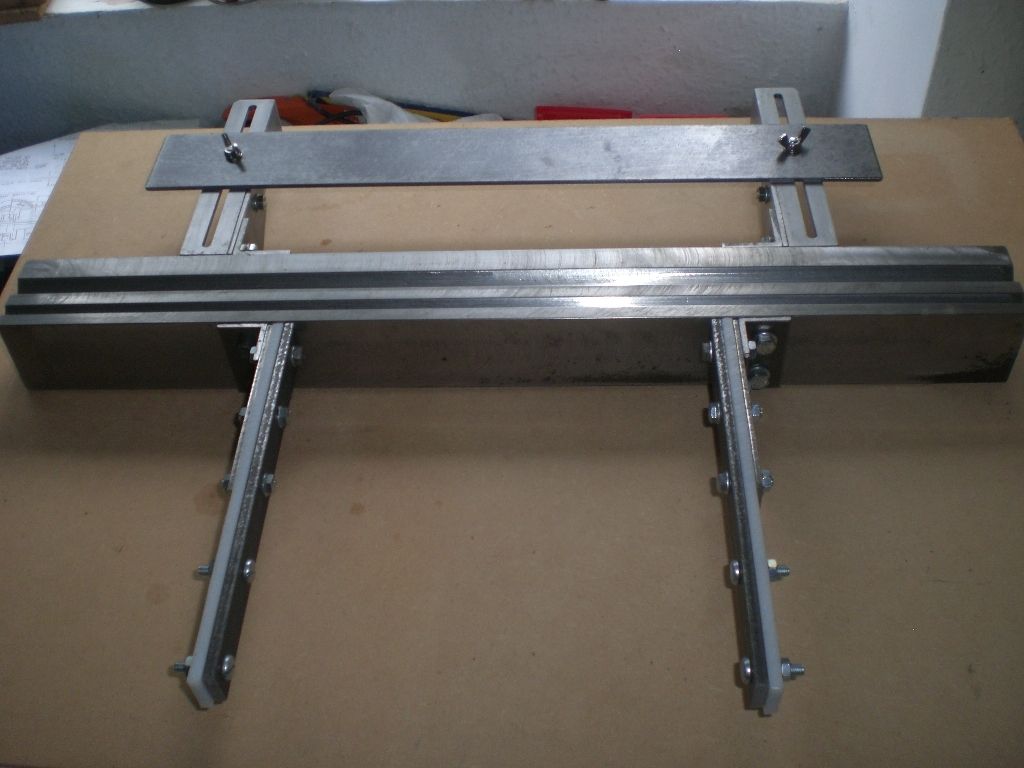
                          Two support rails were made in a similar fashion, but with a flat bar and a strip of nylon, and have the same hole centres for attaching to the block as the back-stop rails have. A strip of 3mm MS sheet 400mm long x 50mm wide for the back-stop bar, had each edge milled to remove the ragged edge of the guillotine cut and also to ensured a good measure of straightness.

                          milling back-stop bar edges.jpg

                          After the back-stop rails had slots cut for 5mm S/S coach bolts, the whole system was fitted together.

                          back-stop & support rails.jpg

                          I do intend to make another back-stop bar that will be only about 15 or 20mm wide, when I get a suitably thick piece of BMS flat bar and this will have slots in it to allow the bar to be set at different angles to the V's in the block.

                          Regards Nick.

                          #499464
                          Henry Brown
                          Participant
                            @henrybrown95529

                            A very useful and well made bit of kit Nick, well done! I've enjoyed following your build.

                            #499488
                            Nicholas Farr
                            Participant
                              @nicholasfarr14254

                              Hi Henry, thanks for your comment and I'm pleased you found it interesting. Of course shorter versions of the same or similar design can be made,

                              Regards Nick.

                              #499595
                              Pete White
                              Participant
                                @petewhite15172

                                Nice work,I have toyed with making something like this for years, never got round to it, ……..one day !

                                I did turn out this, which may be of interest? Bending force calculator , if you have not already seen anything similar?

                                Pete

                                Edited By Pete White on 05/10/2020 06:43:16

                                #499601
                                Nicholas Farr
                                Participant
                                  @nicholasfarr14254

                                  Hi Pete, thanks for your interest and for the force calculator you've linked too, haven't seen that actual one but have seen similar having used brake presses and hydroform's in my day jobs that I've had. The V groove sizes are based on these types of calculations and I'm sure will be OK for what I'm likely to bend, but I'm not likely to be doing any mass production. I do have a commercially made wider V block for thicker stuff, but of course it isn't any use for forming a shallow flange on thin sheet, but it does have a groove in the bottom, so if I need to bend a piece more than 90, I can use it to finish off, once I've used the one above.

                                  Regards Nick.

                                  Edited By Nicholas Farr on 05/10/2020 08:09:31

                                  #499606
                                  IanH
                                  Participant
                                    @ianh

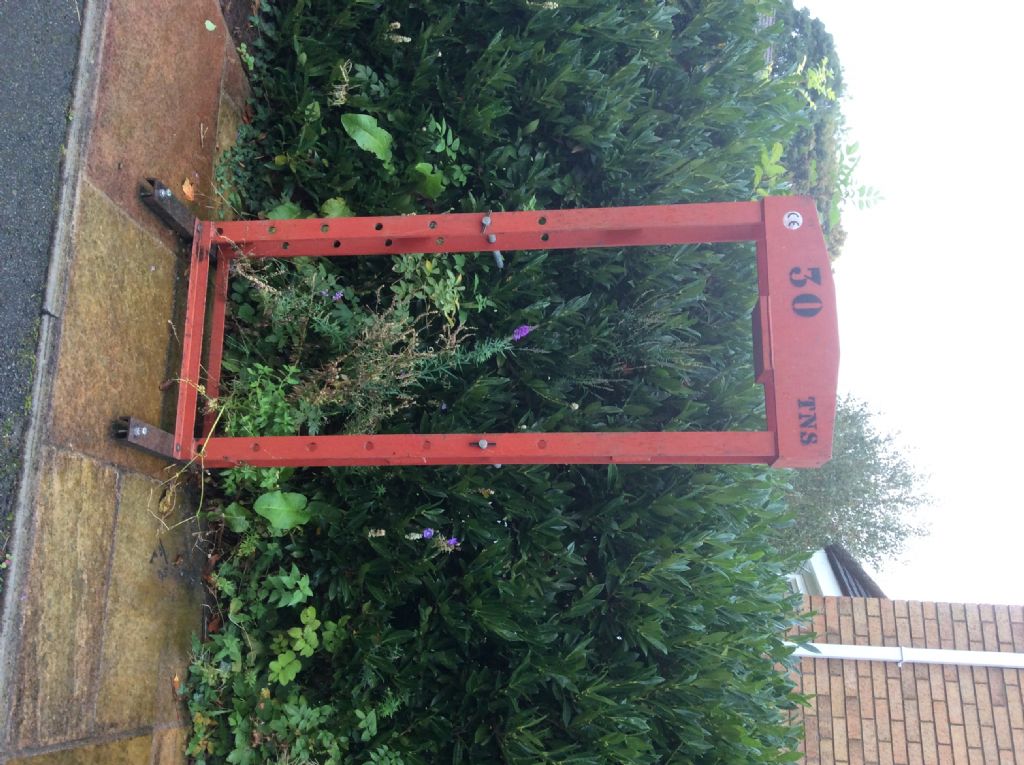
                                    I noted that one or two people are talking about building a hydraulic press. I have the remains of a Sealey 30T hydraulic press on my drive. Free to a good home if you would like to collect it from Cheshire, 5 mins off Jn 18 on the M6.

                                    Ian

                                    835c3811-fcdf-4058-bd1c-dac557d46e20.jpeg

                                  Viewing 16 posts - 1 through 16 (of 16 total)
                                  • Please log in to reply to this topic. Registering is free and easy using the links on the menu at the top of this page.

                                  Advert

                                  Latest Replies

                                  Viewing 25 topics - 1 through 25 (of 25 total)
                                  Viewing 25 topics - 1 through 25 (of 25 total)

                                  View full reply list.

                                  Advert

                                  Newsletter Sign-up