Posted by Dave Shedman on 20/04/2023 09:07:48:
I spoke to a machine shop engineer who asked me to check the gib adjustment.
I found to my surprise that the largest error at the top of the 'hump' (across the y axis) increased by about 0.02mm when the gib/X axis lock lever was applied.
I then remove the X axis gib and the error immediately decreased from 0.15 down to 0.05. (The gib is a tapered type with a lateral adjusting screw at each end).
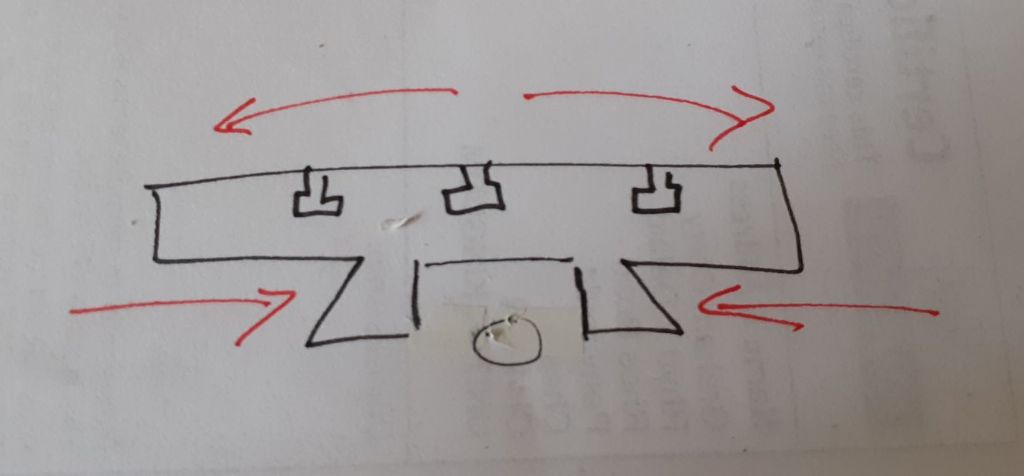
What I fail to understand is how the gib seems to be causing the table to bow upward. I assume that if excessive pressure was applied by the gib and/or the lock lever, this would have the opposite effect; in that the force applied would in effect try to 'spread apart' the tables own dovetails and hence force the table surface to distort in a concave manner?
Umm, I can't explain it either! More likely the table is lifting when the gib is tightened rather than bending. If so, Andrew's comment might explain all: ' It is tricky to make measurements on a machine tool that measure one thing, and one thing only. The measurement as described doesn't prove that the table has a hump. '
High precision measurements are seriously difficult to do correctly. Part of the problem is they look straightforward, but aren't. Below about 0.05mm tiny errors in the setup start dominating the result, making it essential to get the technique right. Experienced metrologists get it wrong, so always approach machine measurements with caution. Having the same fault reappear after paying to have the table re-ground would be depressing.
My advice is to use measurement to help diagnose real faults, not to start with tricky-to-get-right measurements. They come with a high risk of incorrectly concluding that the machine is wonky. In contrast, there's nothing like cutting metal to identify genuine faults, and although 3 years old, this mill hasn't done much cutting yet. Might be a wrong 'un, but humped beds are almost unknown. Is there any evidence it doesn't cut properly?
My preferred approach is to machine a test part and then measure the part, not the machine. Much easier to measure small workpieces accurately than big machines. If the workpiece is wrong, then investigate the machine, bearing in mind that what's wrong with the workpiece provides strong clues.
Don't ignore the other main causes of trouble! In my workshop there are three: the tools, the materials, and the operator. After nearly 10 years self-taught metal-bashing, the main problem in my workshop is still me…
Dave
not done it yet.


