Rob Roy Build/ Rally

Advert

Rob Roy Build/ Rally

Home Forums Locomotives Rob Roy Build/ Rally

Viewing 25 posts - 26 through 50 (of 54 total)
  • Author
    Posts
  • #507291
    Phil H1
    Participant
      @philh196021

      Baz,

      Thanks for the link. I now have a choice. EKP sell 6BA stud and 7/64" diameter rod to make proper 6BA studs.

      Thanks, I will have a think then probably place an order with them.

      Phil H.

      Advert
      #536715
      Phil H1
      Participant
        @philh196021

        Unfortunately, my saddle casting (bought many years ago) is short. It is supposed to be 2 3/8" long but is about 2 1/4". So I have two options;

        1. Machine the existing saddle casting and make it look like a shorter cast saddle as used on many other real engines. Or add some metal somehow – maybe an additional plate at the back.

        2. Bin the saddle casting and form the combined smokebox and saddle from a continuous brass strip 2 3/8" wide as the real engines of this class.

        I would like to take option 2 but I suspect it will be rather tricky. Is this something that should only really be done with bending rollers or will the 16g brass sheet form quite well round a wooden former (with lots of clamps of course) i.e., has anybody done this successfully – any experience/ advice out there?

        Phil H

        #536722
        Rex Hanman
        Participant
          @rexhanman57403

          I would be tempted to make the smokebox as drawn and have a 1/16" overhang at each end of the saddle. That assumes you can get the saddle mounting screws in. Your second option involves a lot of work and as you say, would be tricky.

          #536724
          Phil H1
          Participant
            @philh196021

            Rex,

            I think you might be right. After all, I do want to finish this thing one day.

            I've done some more measurements and there is good and bad news. The bad news is that the saddle is actually slightly short of 2 3/16" long but the saddle fixing screws will be ok.

            I think one of the trickiest steps from here is to machine the smokebox radius or I should say setting it up to machine the radius will be the tricky bit.

            Thanks,

            Phil H

            #536797
            Rex Hanman
            Participant
              @rexhanman57403
              Posted by Phil H1 on 28/03/2021 16:22:01:

              I think one of the trickiest steps from here is to machine the smokebox radius or I should say setting it up to machine the radius will be the tricky bit.

              I mounted the saddle vertically and cut the radius with a fly cutter.

              #536911
              Phil H1
              Participant
                @philh196021

                Rex,

                I was sceptical at first but it does actually look like it will go on the face plate – as per the book. Again, the snag with that option is sliding it around to get the correct position/ radius.

                So I might go the flycutter/ cross slide route as you suggest. That option allows me to cut the chimney base to suit too and maybe even the dome base at a slightly tweeked radius.

                Phil H

                #536927
                Rick Hann
                Participant
                  @rickhann79631

                  When I built my Rob Roy many years ago, I had no way of machining the smokebox radius. My poor boy solution was to turn a piece of wood to the diameter of the smokebox less the thickness of sandpaper, wrapped the wood form with sandpaper and proceeded to sand the radius of the bronze casting. Can't remember how long it took, but probably less time than it would take to set it up for fly cutting. No danger of catching the casting with the cutter. Worked for me. Rick

                  #536946
                  Brian Baker 2
                  Participant
                    @brianbaker2

                    Greetings, would it not be possible to wrap your emery paper round the actual smokebox tube & save making the wooden former?

                    Regards

                    Brian

                    #536981
                    Phil H1
                    Participant
                      @philh196021

                      Rick/ Brian,

                      I tried that (emery round the smokebox tube) – obviously not quite carefully enough because the axis of the smokebox curve is a bit off. Not by a mile but it is just noticeable. It is correctable because there is still at least 1/16" of meat left before the saddle would have a height problem.

                      But its a nice suggestion that can be measured before hand (across the sanding drum). Perhaps a round wooden former similar to your idea Rick but put it between lathe centres to keep it true. Then clamp the saddle 'true' to an angle plate and feed it into the sanding drum VERY CAREFULLY. I wouldn't need to take much out to correct the axis.

                      Phil H

                      #536986
                      Rick Hann
                      Participant
                        @rickhann79631

                        If you use the smokebox tube for a form, the diameter of the casting will be off by twice the thickness of the sandpaper/emery cloth. I factored that in when I turned the wooden former I used. Might not make much of a difference though. maybe 1/16 inch or so. It is much easier to sand off using longer strokes. The smokebox using the smokebox tube would only allow radial sanding, very little room for longitudinal strokes. Use whatever works best for you. Rick

                        #540706
                        Phil H1
                        Participant
                          @philh196021

                          Thanks for the contributions on the saddle. In the end, I looked at my saddle casting and decided to place it in the useful scrap bin. I then took a gamble and simply bought another from Kennions and this really nice casting came through.

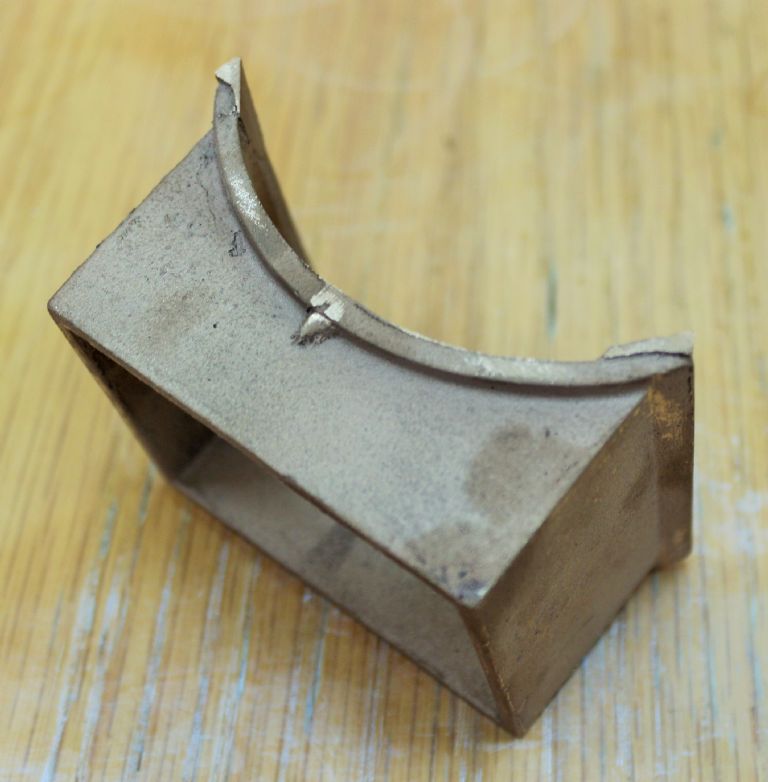
                          All 4 sides are remarkably flat, straight, square and right on size!! Well worth the money. Just a small amount of work with a file and it will be done.

                          saddle 1 - copy.jpg

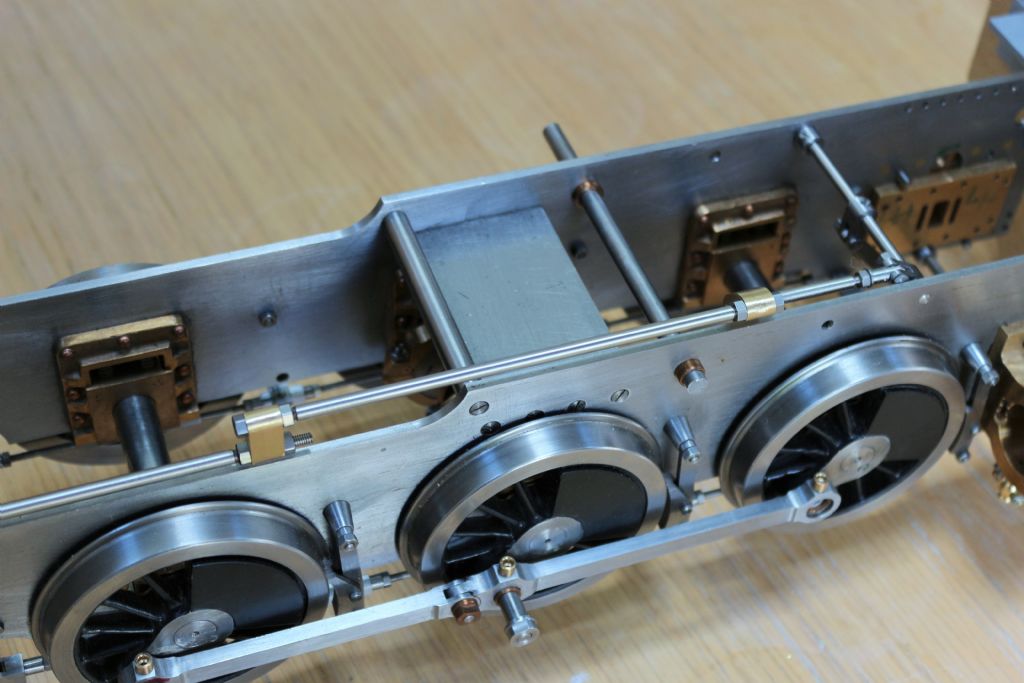
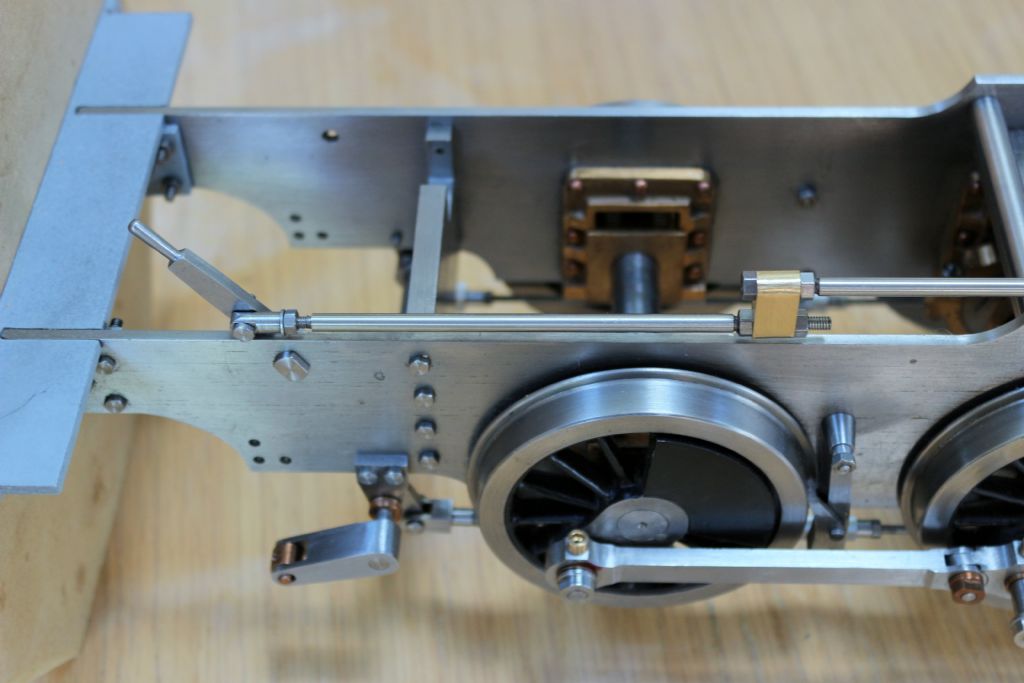
                          Being honest, the saddle has been a diversion from making all those nasty fiddly bits for the cylinder drain cocks, valve gear and brake gear. I really did get bogged down with them and found it difficult to get motivated and move on.

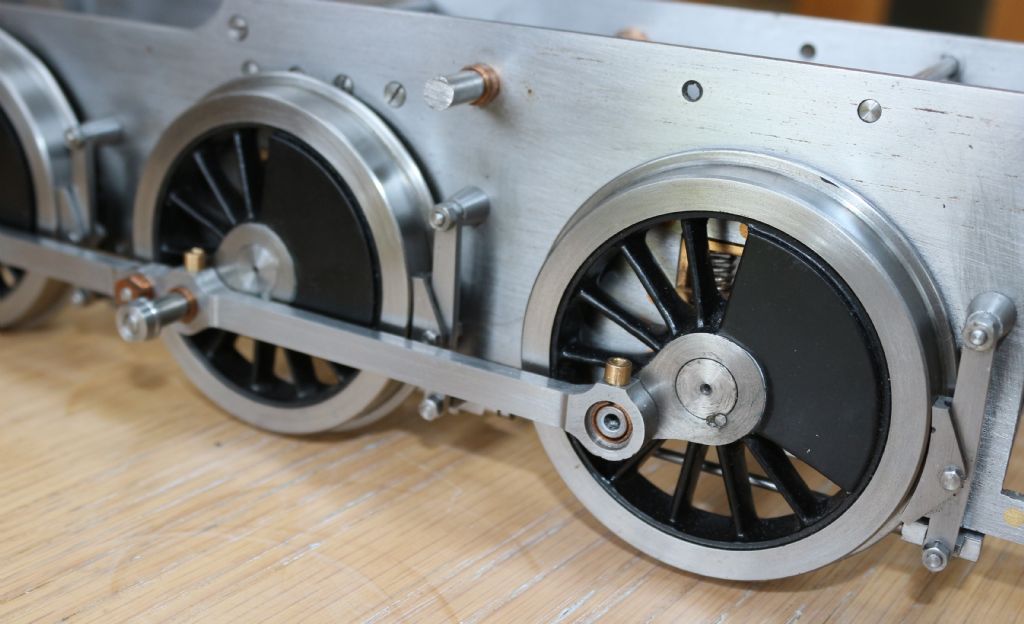
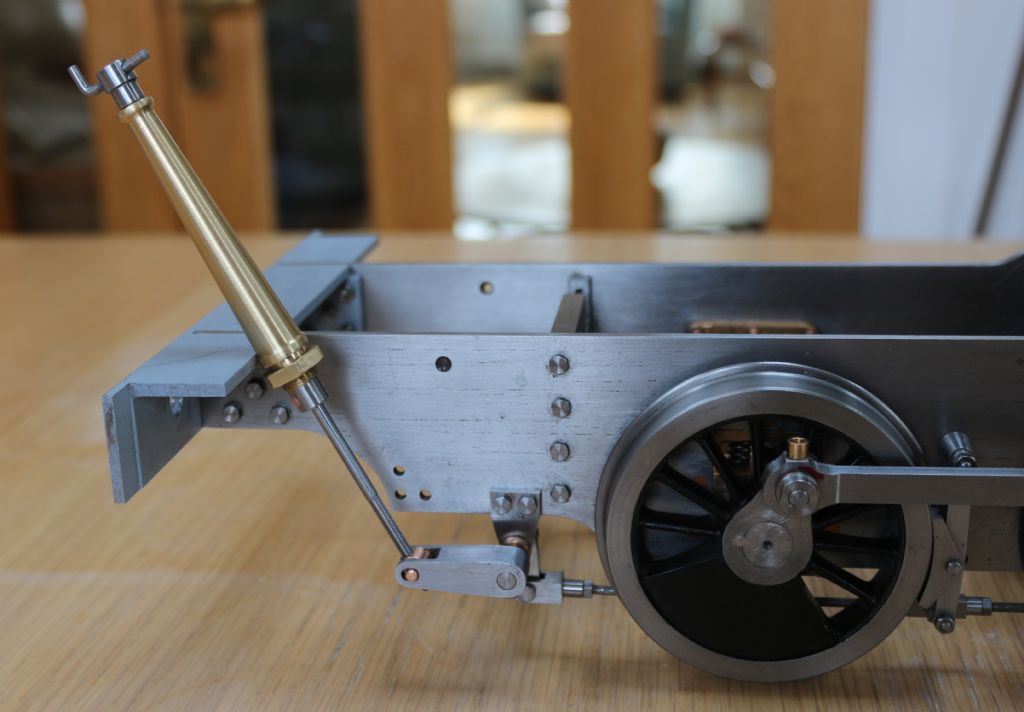
                          Anyway, the brakes are now fitted and they work! The leading hangars appear to miss the cylinder covers but some slight mod might be needed when the cover fixings are added.

                          These shots also act as a reminder to paint the wheel hubs at some point. I hate the look of the wheel pins.

                          brakes 1 - copy.jpg

                          brakes 2 - copy.jpg

                          #541197
                          Rex Hanman
                          Participant
                            @rexhanman57403

                            I have now heard from my Bromsgrove contact that they now plan to hold the postponed rally on Saturday September 11th. 2021, subject of course to covid conditions at the time.

                            If you would like to attend this fun event the contact details are as follows:-

                            Bromsgrove Society of Model Engineers
                            Address : Avoncroft Museum of Historic Buildings, Bromsgrove, B60 4JR
                            Website : bromsgrovesme.co.uk
                            Contacts :
                            Ian Horsfield : meadowsend03@btinternet.com 01386 792628
                            Peter Maybury (Chairman BSME) : peter.maybury@outlook.com 0121 453 3691
                            or myself at hanmanr@yahoo.com 01980 846815

                            #543716
                            Phil H1
                            Participant
                              @philh196021

                              Having completed the brakes, I am no working on the cylinder drain cocks and I have two questions for the knowledgeable ones out there – as follows please;

                              1. Can anybody recommend a reliable sealant and or joint/ gasket system to get a nice leak tight seal whilst achieving the correct orientation for the cylinder drain cock bodies?

                              2. Why does the cab operating lever have a 3/16" 'kink'. The drawing is less than obvious. What is the kink trying to miss?

                              Thanks in advance.

                              #545889
                              Phil H1
                              Participant
                                @philh196021

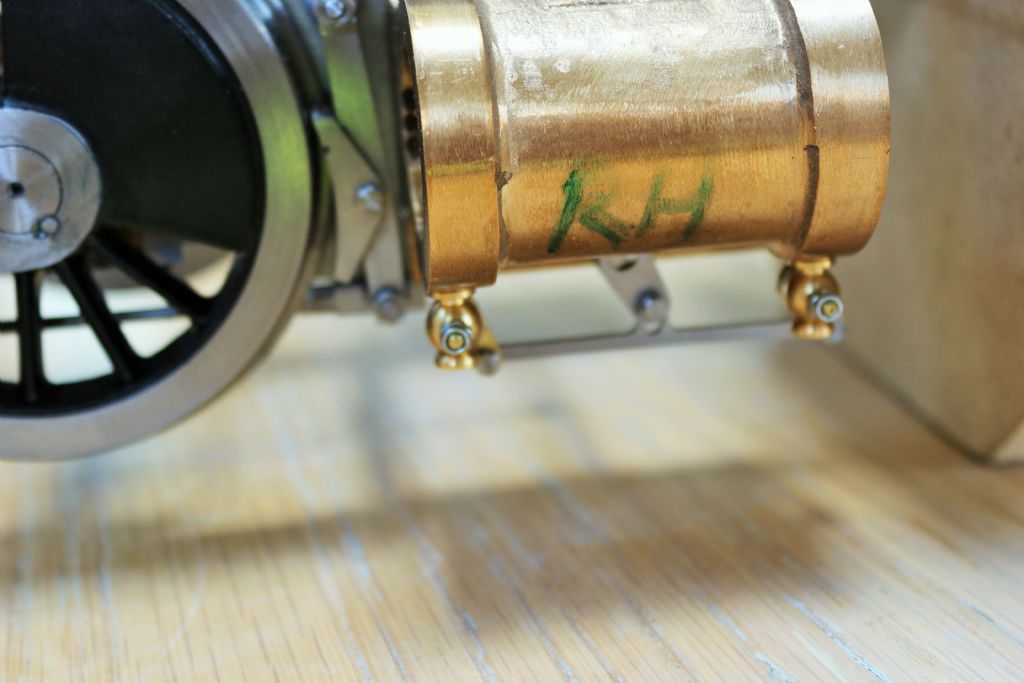
                                With a little bit of help from the chaps on the pro boards forum, Loctite 567 works for sealing the drain cocks and thin copper washers (with their thickness adjusted with fine emery paper) help to get the drain cock bodies nipped up and in the correct orientation.

                                So, I now have the cylinder drain cocks 90% finished. Just a bit of adjustment on some of the rod and thread lengths and I am sorted. The operating mechanism looks a bit over engineered but the 'engineering' will be hidden behind the side tanks and I thought the design in the book was a little bit on the flimsy side.

                                cyl drains 3.jpg

                                cyl drains 2.jpg

                                cyl drains 1.jpg

                                #592863
                                Phil H1
                                Participant
                                  @philh196021

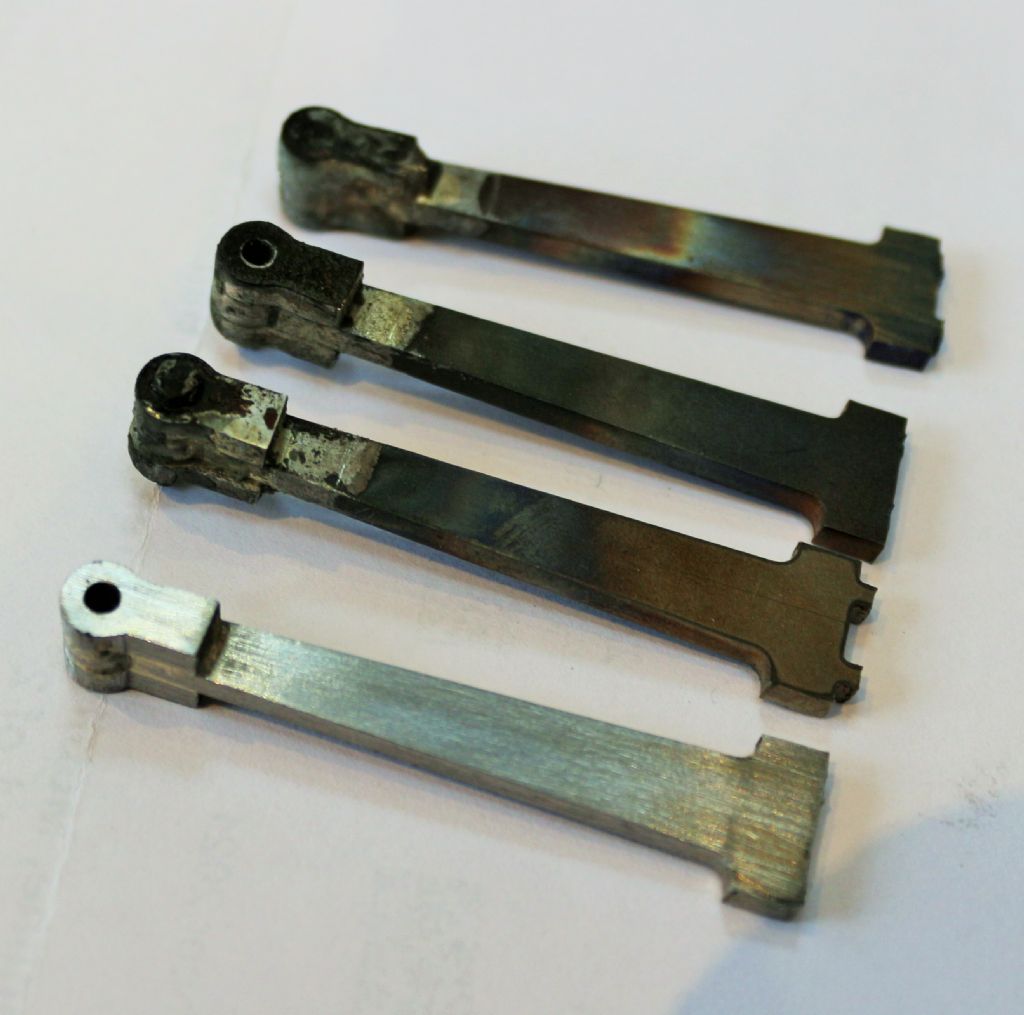
                                  Long time since I added anything. I have started building the valve gear parts. I cheated a bit and bought some laser cut parts. So first we have the embryo eccentric rods which consist of three parts each to be silver soldered together. Here they are with 3 straight off the thermal block and 1 that I have started to clean up.

                                  Eccentric Rods

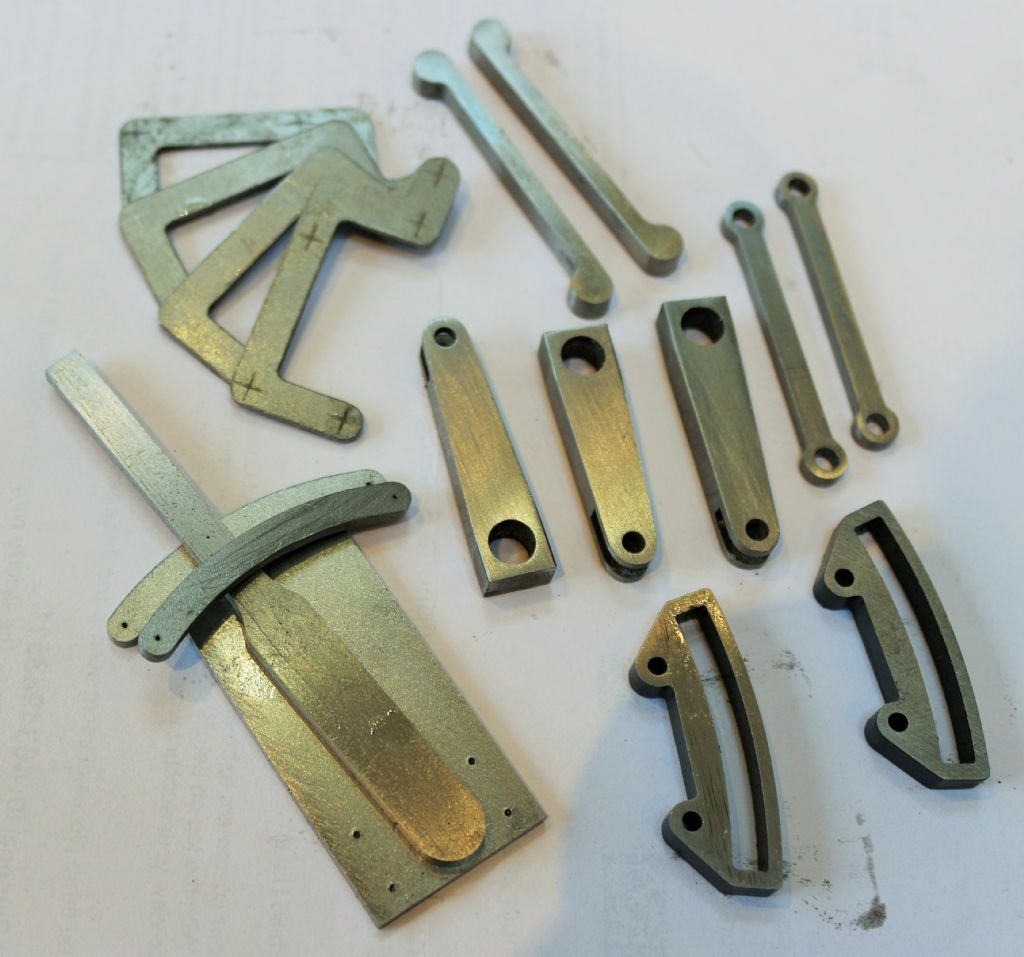
                                  And the rest of the embryo valve gear parts at various stages of machining and cleaning up.

                                  Valve gear bits

                                  #592887
                                  Rex Hanman
                                  Participant
                                    @rexhanman57403

                                    Well done Phil, progress is progress!

                                    #592896
                                    Phil H1
                                    Participant
                                      @philh196021

                                      Thanks Rex. Painfully slow though. But I now have a boiler, super heater and regulator from Bromsgrove. Just need to get it tested.

                                      #592911
                                      John Baguley
                                      Participant
                                        @johnbaguley78655

                                        Hi Phil,

                                        Although the original valve gear design isn't awful it can be improved a lot by increasing the offset of the suspension pin on the expansion link from 0.0625" to 0.160". If you haven't already made the suspension brackets for the expansion link then I would recommend making the alteration. It looks as though you have already made a start on the lifting arms but it also helps to reduce the length of those from 1.25" to 1.0625".

                                        John

                                        #593036
                                        Phil H1
                                        Participant
                                          @philh196021

                                          John,

                                          Thanks very much for those tips. Exactly the kind of stuff I am looking for.

                                          I have just (10 minutes ago) machined the short sections of angle for the expansion link but I haven't drilled the holes yet. So the first change is quite easy if I have understood correctly. Just to clarify (please), the little press fit pin in the angle is moved closer to the eccentrics (away from the valve chest) by 0.0975". Is that correct?

                                          Again, if I have understood you correctly, reducing the length of the lifting arms is a pain (specially the slot milling) but not a real problem. A shortening of 0.1875" according to your recommendation.

                                          That would suggest to me that on the original valve gear drawing, at the central expansion link position, the lifting link looks vertical. But with the changes, it will tilt slightly like a forward slash …./…. because the lifting arm is shorter than the change on the expansion link.

                                          I will sketch it and post here.

                                          #593039
                                          Phil H1
                                          Participant
                                            @philh196021

                                            John,

                                            Have I got you right? I thought a sketch to clarify might be a good plan before I hack metal. Thanks very much

                                            in advance. Phil H

                                            Valve gear mod

                                            #593114
                                            John Baguley
                                            Participant
                                              @johnbaguley78655

                                              Hi Phil,

                                              Yes, you have got that correct smiley

                                              I did some work on a Rob Roy for a chap at our club and out of interest I had a look at the valve gear as very few designers seem to understand Stephensons correctly.

                                              I put all the figures into the Don Ashton spreadsheet and calculated what the correct offset should be to equalise the events over the complete range of cut offs. I then used the Alan Wallace valve gear simulator to check that the figures were correct.

                                              The reason for also shortening the lifting arm is to compensate for moving the suspension pin on the expansion link so that the suspension link is vertical when the piston is at mid stroke and the reverser is in mid gear. In Martin's design the lifting link does slope backwards slightly, hence the modification being larger than the increase in the offset.

                                              I have recently inherited my late Brother's Rob Roy which was built to the original drawings so I must make the modifications to this as well smiley

                                              John

                                              Edited By John Baguley on 05/04/2022 23:47:33

                                              #593132
                                              Phil H1
                                              Participant
                                                @philh196021

                                                John,

                                                Excellent. Thanks very much for that, you caught me just in time. I can easily make those modifications now.

                                                Phil H

                                                #593258
                                                Phil H1
                                                Participant
                                                  @philh196021

                                                  John,

                                                  Perhaps you could modify your late brothers engine and bring it along to the Rob Roy Rally day in September?

                                                  Phil H

                                                  #596866
                                                  Phil H1
                                                  Participant
                                                    @philh196021

                                                    Another question for experienced locomotive and or any other stationary engine builders please.

                                                    I have now completed most of the valve gear parts and Mr Evans suggests that the various rod ends (including their nicely reamed 1/8" diameter holes) should be case hardened.

                                                    Is this a step that I really should go through with or will the plain mild steel parts last a reasonable time without case hardening? Am I asking for trouble if I don't case harden?

                                                    Thanks,

                                                    Phil H

                                                    #596867
                                                    Rex Hanman
                                                    Participant
                                                      @rexhanman57403

                                                      Never case hardened mine and it still runs just fine after about 30 years. Some things are decidedly slack now but so what? No harm in case hardening, Just a matter of choice.

                                                    Viewing 25 posts - 26 through 50 (of 54 total)
                                                    • Please log in to reply to this topic. Registering is free and easy using the links on the menu at the top of this page.

                                                    Advert

                                                    Latest Replies

                                                    Home Forums Locomotives Topics

                                                    Viewing 25 topics - 1 through 25 (of 25 total)
                                                    Viewing 25 topics - 1 through 25 (of 25 total)

                                                    View full reply list.

                                                    Advert