Resin 3D Printer first results.

Advert

Resin 3D Printer first results.

Home Forums 3D Printers and 3D Printing Resin 3D Printer first results.

Viewing 19 posts - 1 through 19 (of 19 total)
  • Author
    Posts
  • #459219
    Ed Duffner
    Participant
      @edduffner79357

      Evening all,

      As per Fizzy's earlier request, here are a few photos of a couple of test prints on an Elegoo Mars resin 3D printer.

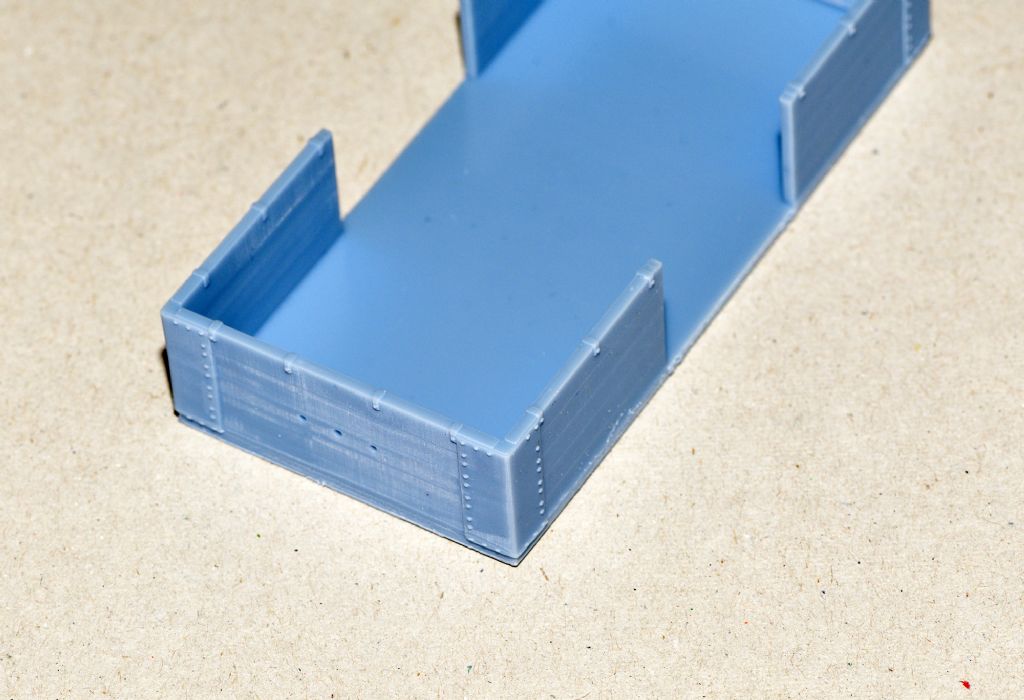
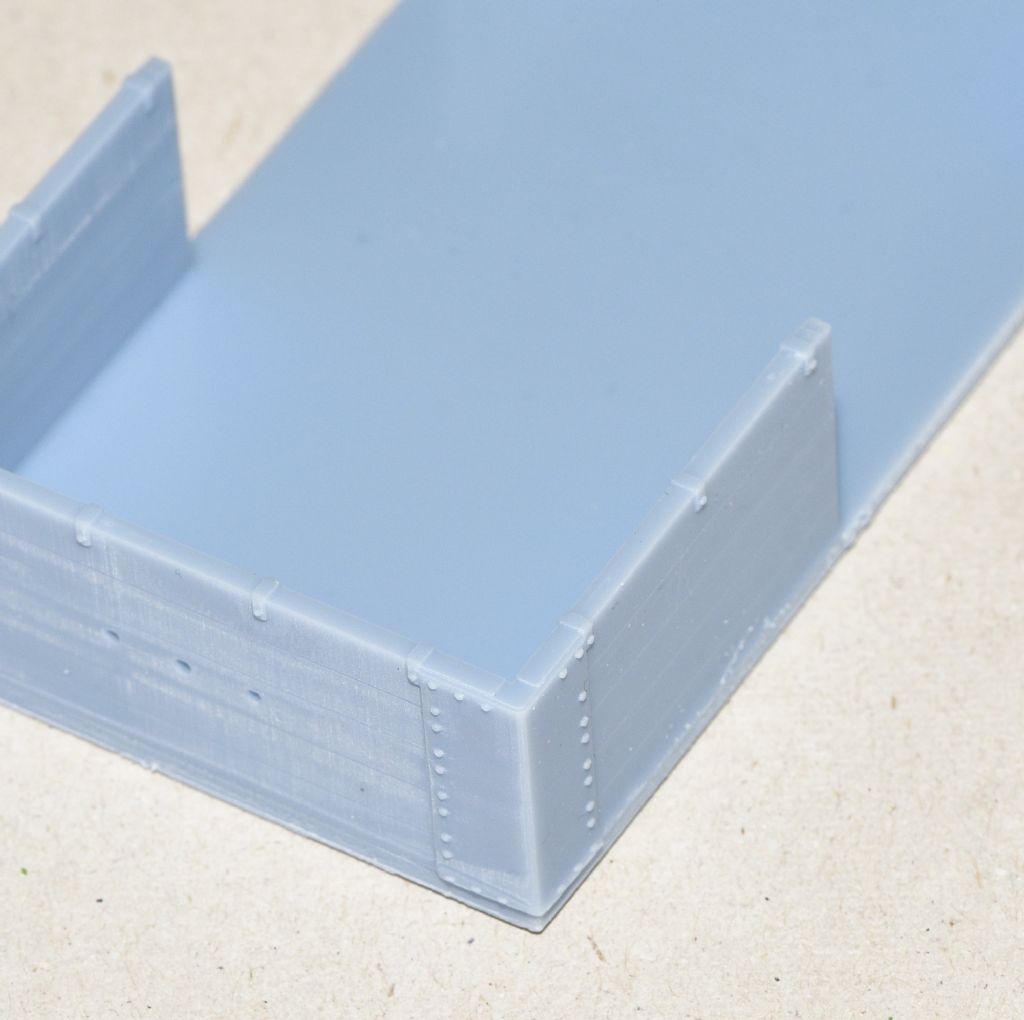
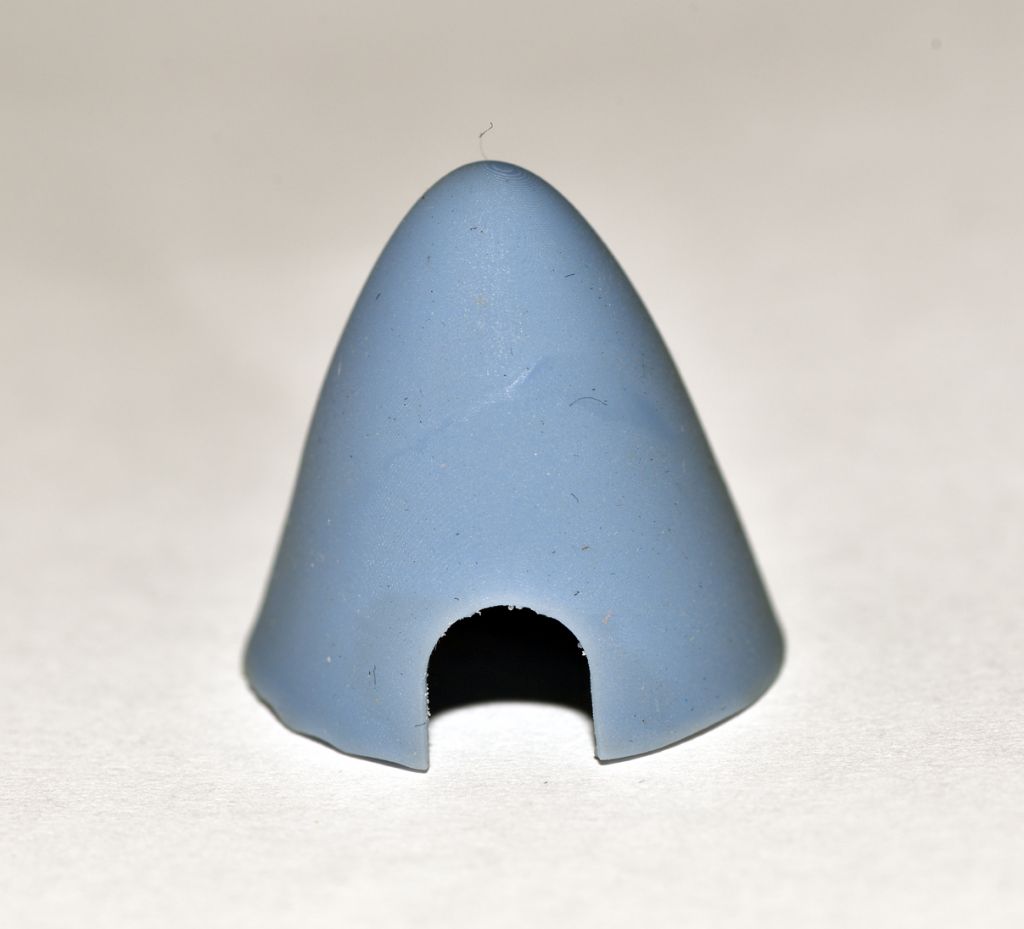
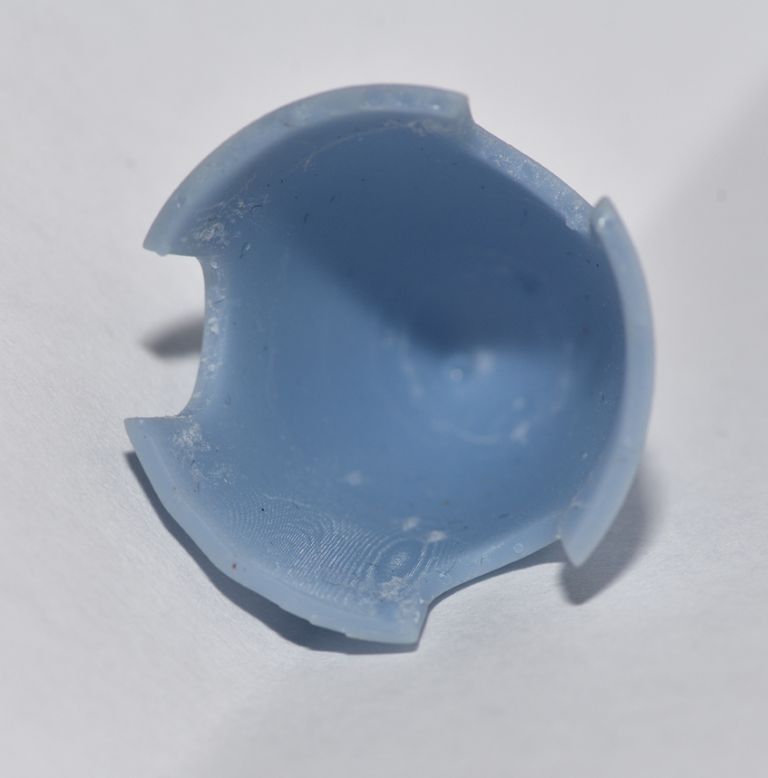
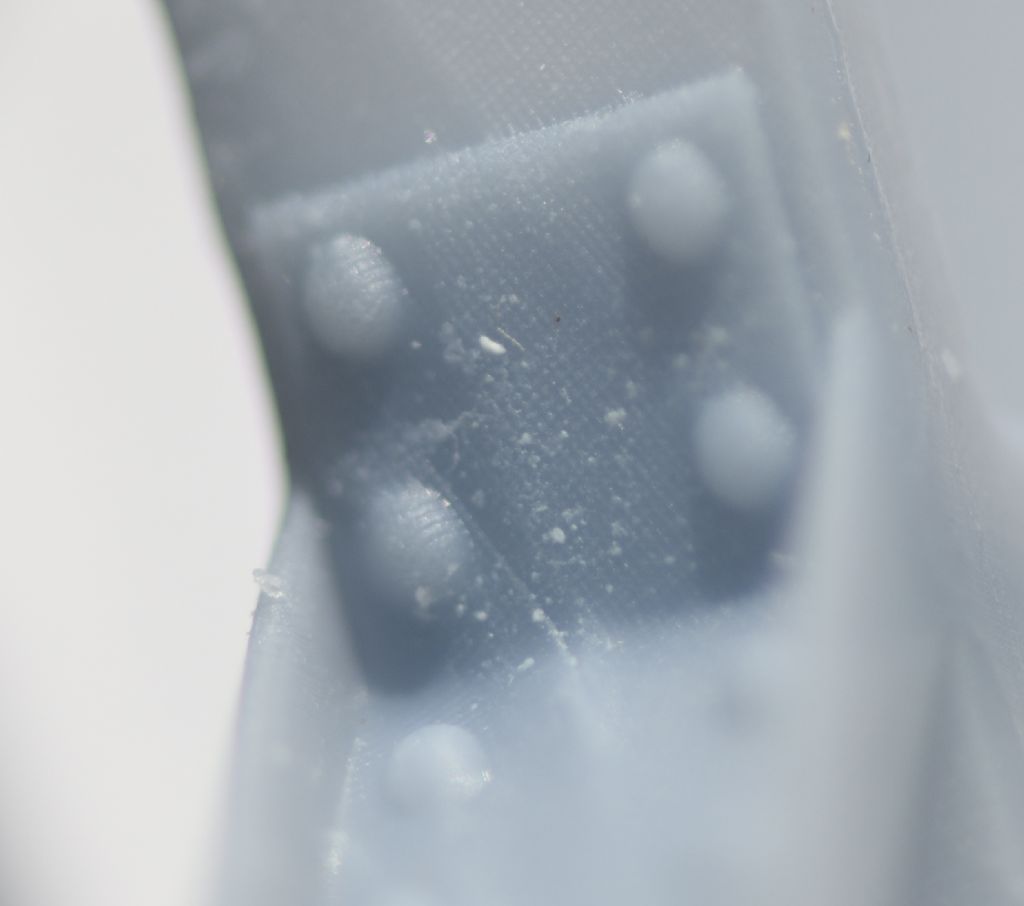
      The two items shown are a Great Western 5-plank wagon body in O-Gauge and a spinner for a Hawker Hurricane in 1/24th scale. Both drawn up in Fusion 360 and exported as STL meshes.

      There are a few things I need to address; understanding "supports" and possibly adding in extra solid areas of resin to be later removed.

      Both parts took about 2 hours each to print. I have another wagon in the printer as I write this with finer layer build-up and supports. There were no supports in this first attempt and it appears to have gotten sticky around the edge of the wagon bed.

      The spinner might have benefited from some kind of skirt to support the wide edge. It has a wavy line where it should obviously be flat.

      Regards,
      Ed.

      _dsc0019.jpg

      _dsc0019_01.jpg

      The planks are 1.6mm thick.

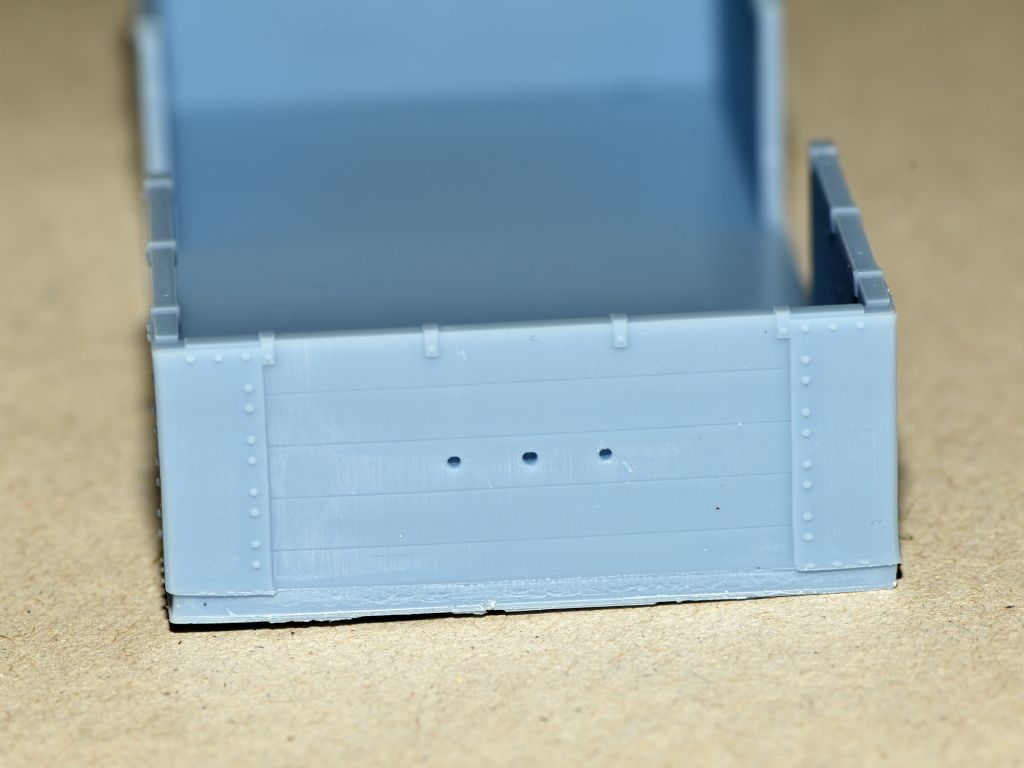
      _dsc0020.jpg

      Holes appear to print quite well.

      _dsc0026.jpg

      I also modelled the plate that the spinner would mate to but only the supports for it came out. The plate somehow got disconnected and floated around in the resin.

      _dsc0033.jpg

      You can see the layers on the inside of the spinner which are accentuated by the camera flash. To the naked eye the layers are barely noticeable.

      _dsc0039.jpg

      Advert
      #31626
      Ed Duffner
      Participant
        @edduffner79357

        Some photos and notes about early results in 3D printing.

        #459225
        Graham A 1
        Participant
          @grahama1

          Ed. PM sent.

          #459242
          Bazyle
          Participant
            @bazyle

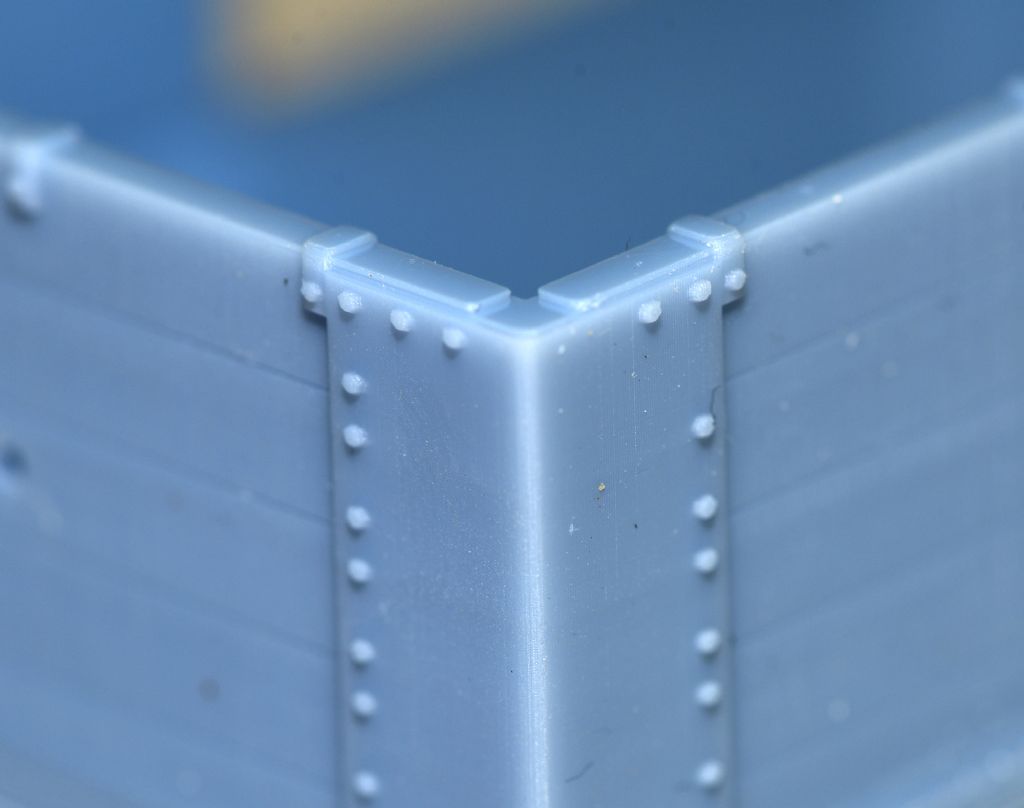
            Impressive detail in those rivets. What size are they, about 10thou?

            #459244
            Ed Duffner
            Participant
              @edduffner79357

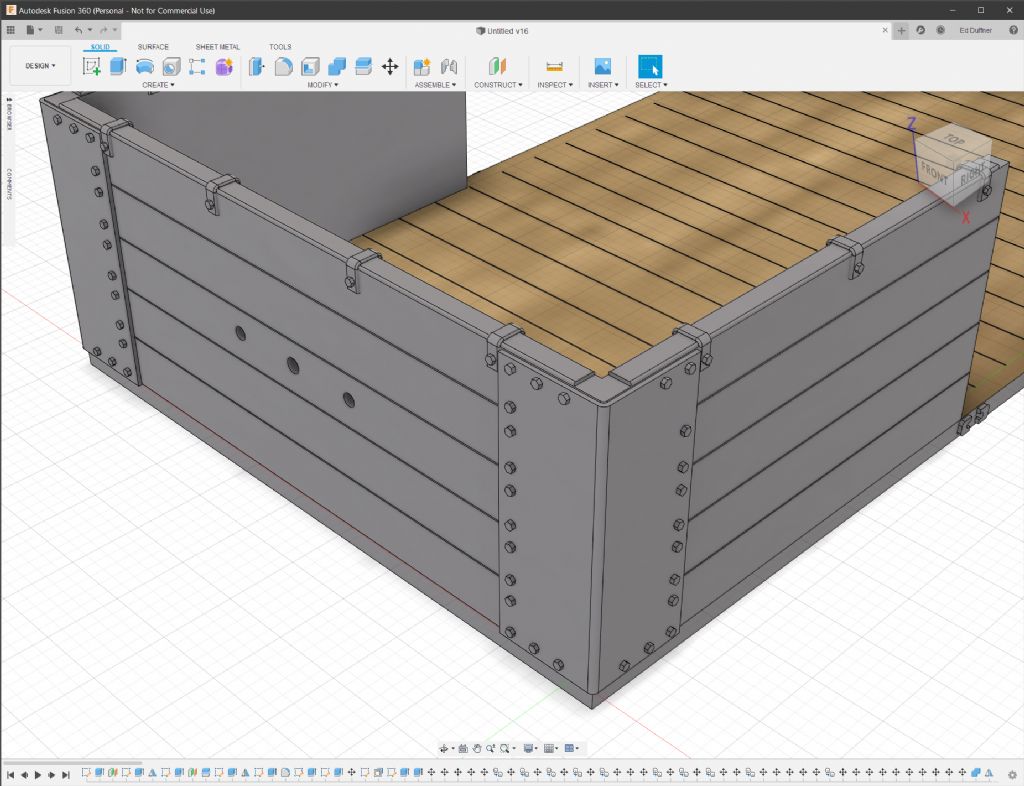
              Actually, they're meant to be bolts Bazyle. laugh Some of them came out ok.

              They are 0.55mm AF.

              Ed.

              gwr_wagon_cad.jpg

              #459281
              Neil Wyatt
              Moderator
                @neilwyatt

                Very nice although there seems to be a little warping.

                I understand resin parts may be a little flexible until the resin fully cures in ambient UV light?

                What was the layer height you use and how long did they take to print?

                I do sense the need for an MEW article once normality returns!

                Neil

                #459305
                Michael Gilligan
                Participant
                  @michaelgilligan61133
                  Posted by Ed Duffner on 24/03/2020 01:20:52:

                  Actually, they're meant to be bolts Bazyle. laugh Some of them came out ok.

                  .

                  So … What thread are they devil

                  MichaelG.

                  #459312
                  Ian Skeldon 2
                  Participant
                    @ianskeldon2
                    Posted by Michael Gilligan on 24/03/2020 12:39:55:

                    Posted by Ed Duffner on 24/03/2020 01:20:52:

                    Actually, they're meant to be bolts Bazyle. laugh Some of them came out ok.

                    .

                    So … What thread are they devil

                    MichaelG.

                    Very quick, I like that laugh

                    #459334
                    Ed Duffner
                    Participant
                      @edduffner79357

                      Neil,

                      Yes the warping is apparently a known issue with the printer's Z axis. On my printer there is some shift in the Y axis (~0.5mm), even though it doesn't have a Y axis and the inital layer heights are inconsistent …the first layers resemble puff-pastry.

                      There is an upgrade available to swap the rod type linear rail for a double rail and truck, Hi-Win kind of setup. But I'll see if I can engineer that out first.

                      This printer uses a UV light underneath an LCD screen to partly cure a layer of liquid resin. Each 'sliced' layer is masked from the UV light by switching on/off pixels on the LCD screen for 8 seconds (controllable in software). The very first layers are exposed for about 50 seconds to make sure they stick to the build plate.

                      When the model is taken out of the printer it needs further curing via either sunlight or a dedicated UV light source of 405nM, which is what I'm using.

                      The layer height for this print was 50 microns, 0.05mm and took about 2 hours to print.

                      ———-

                      Michael, very small ! laugh

                      Ed.

                      #459366
                      jimmy b
                      Participant
                        @jimmyb

                        The quality is fantastic. Makes me want one!

                        Are their fumes etc with one of these?

                        Jim

                        #459373
                        Ed Duffner
                        Participant
                          @edduffner79357

                          Hi Jim,

                          Yes, for this printer, a respirator is required for both the resin and the cleaning of parts with Isopropyl alcohol or similar. Gloves too as the resin is pretty nasty stuff that we can develop a sensitivyt too if it touches the skin before it's cured.

                          There are resins which are water cleanable, but the dirty water then has to be dealt with in an environmentally friendly way.

                          Ed.

                          #459376
                          Roger Clark
                          Participant
                            @rogerclark
                            Posted by Ed Duffner on 24/03/2020 14:57:33:

                            Neil,

                            Yes the warping is apparently a known issue with the printer's Z axis. On my printer there is some shift in the Y axis (~0.5mm), even though it doesn't have a Y axis and the inital layer heights are inconsistent …the first layers resemble puff-pastry.

                            This is called elephants foot due to the extended time required on the initial layers, lifting the item up by 5mm and using supports, preferably with the Prusa slicer (and then export with supports into Chitubox) should cure that. Might need a bit of experimentation. Plenty on YouTube about it.

                            Roger

                            #459385
                            Ed Duffner
                            Participant
                              @edduffner79357

                              Thank you Roger,

                              I started another print a short while ago and have elevated the model about 10mm on heavy supports, with more in each corner. The second print I did last night failed because the model started to pull away from the build plate.

                              I noticed the detail in the rest of the model was better due to the printer's minimum layer height of 25 microns.

                              Ed.

                              #459413
                              Roger Clark
                              Participant
                                @rogerclark

                                Try tilting it slightly, 5mm from the plate one end to 10 or 15 mm the other end, should reduce the suction from the fep on the lift. Temperature also plays a part, resin temp of 27c or warmer is best. and then play with the layer times if that doesn't work but only one change at a time. wink

                                Roger

                                Edited By Rockingdodge on 24/03/2020 22:13:55

                                #463688
                                Ed Duffner
                                Participant
                                  @edduffner79357

                                  Good day, hope you're all doing ok.

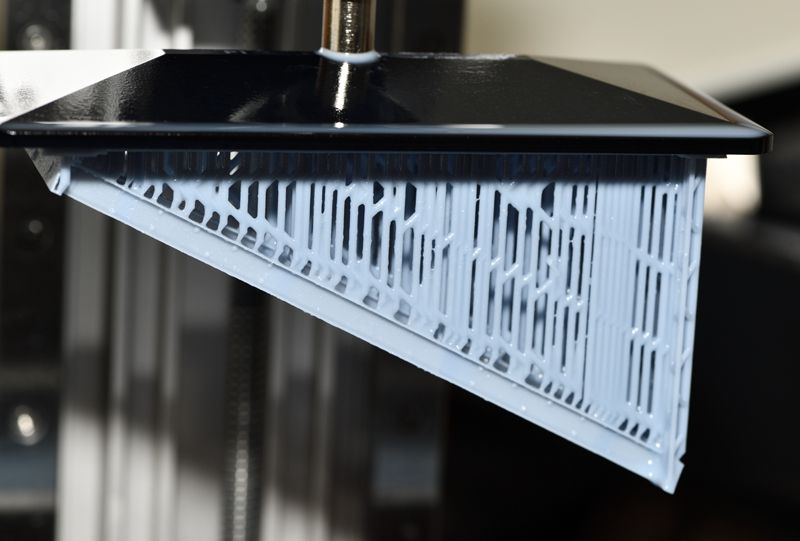
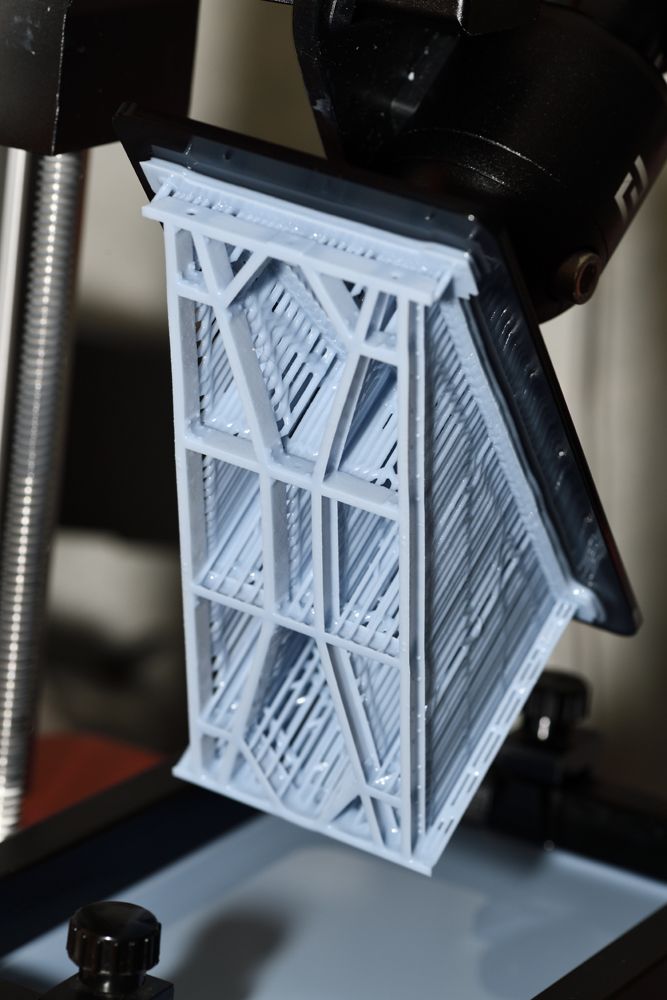
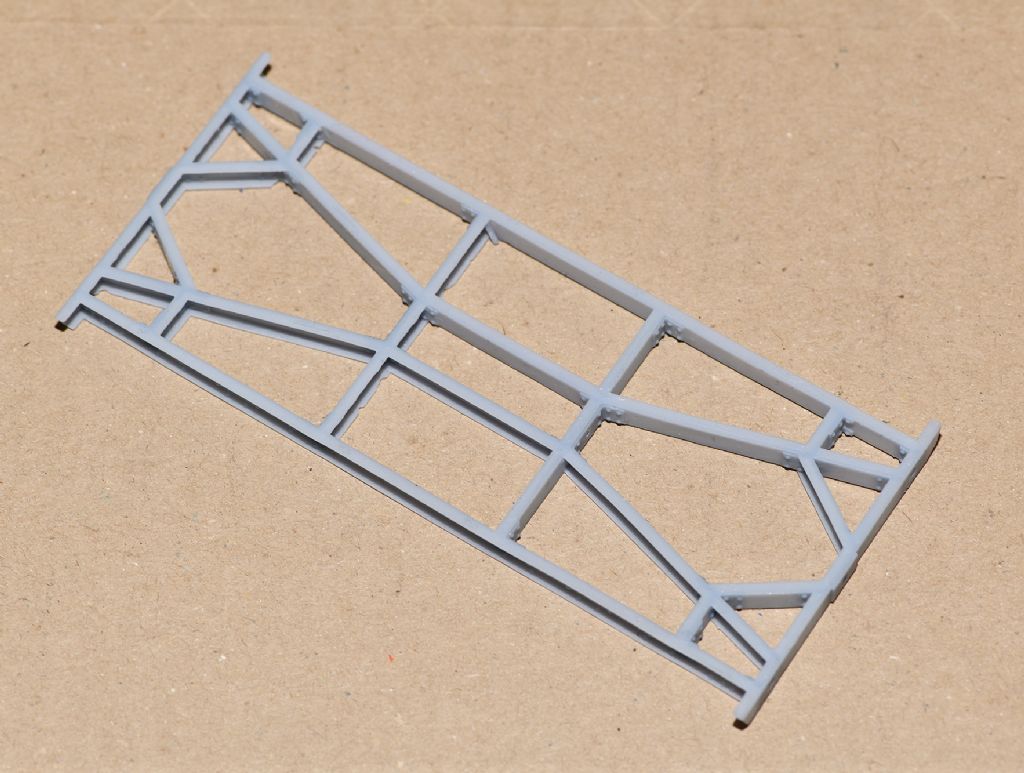
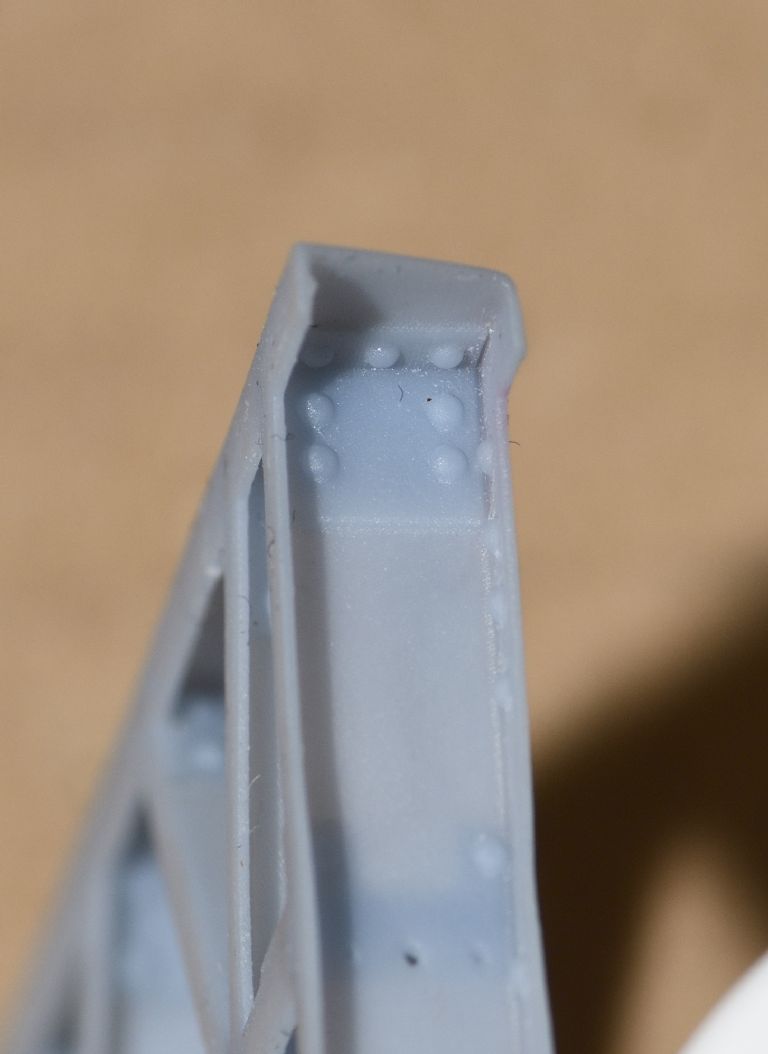
                                  After finding some original wagon drawings online I abandoned my previous 3D model and set about drawing a full scale accurate under-frame with all the brackets, screw and rivet holes. I assembled it in fusion 360 and scaled down to 1/43.5 (Scale Seven). it's taken quite a few hours.

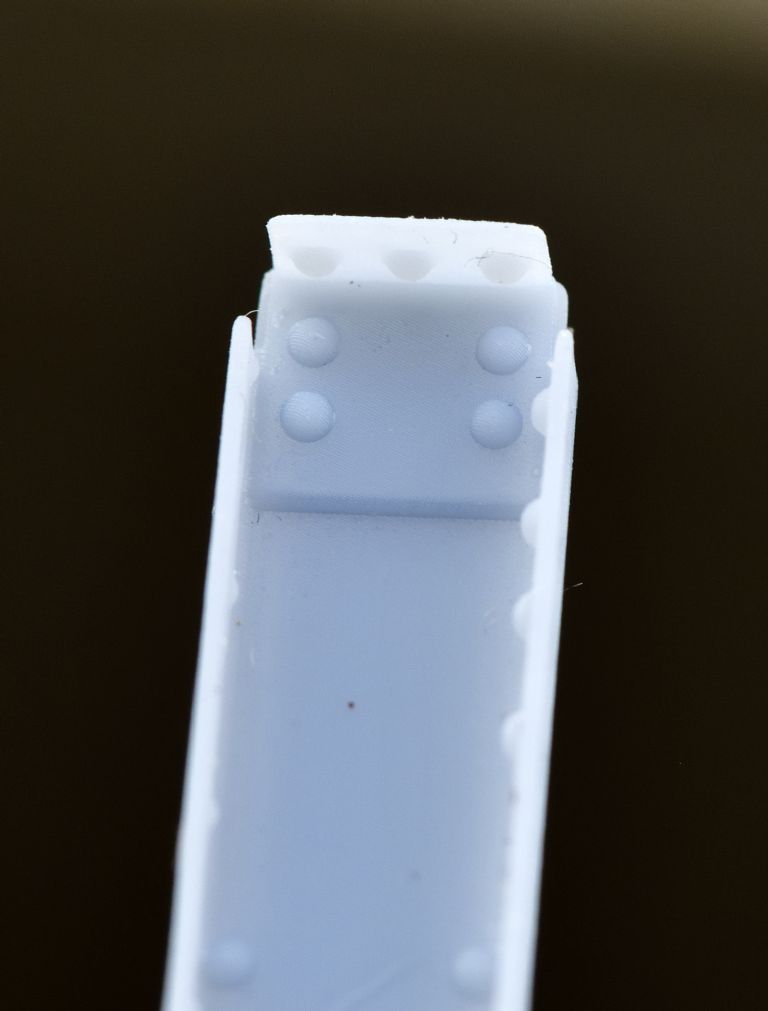
                                  I continued on and made a couple of test prints of a sole-plate, complete with end bracket and rivets (it's the long beam that runs the length of a wagon), It's shown in the first photo below. The result was quite promising so I set up a print of the whole under-frame and loaded it into the printer.

                                  Some 13.5 hours later no less, the print was ready. It was removed from the build plate, washed in IPA and removed from its supports. Due to careless impatience I managed to damage a couple of small areas but these can easily be repaired.

                                  Ed.


                                  Test print.

                                  12tontp1.jpg


                                  Finished printed frame.

                                  12ton3.jpg


                                  Drip drying.

                                  12ton4.jpg


                                  All supports removed.

                                  12ton1.jpg


                                  A close up which shows the structure of the print layers.

                                  12ton2.jpg


                                  A better close-up.

                                  12ton5.jpg

                                  Edited By Ed Duffner on 10/04/2020 12:08:29

                                  #463704
                                  Bazyle
                                  Participant
                                    @bazyle

                                    That is amazing detail and precision. I imagine you could even make and allowance for the thickness of paint.

                                    #463721
                                    Roger Clark
                                    Participant
                                      @rogerclark

                                      That looks really good Ed, impressive 360 work and the detail is great, well done. I must get back to my Mars and start making stuff again.

                                      I did buy the Anycubic washer/ curer to help with the post processing, most impressed with the build quality.

                                      I keep looking at the supports required and, being a tight wad, thinking what a waste of resin. laugh

                                      Roger

                                      #463726
                                      Ed Duffner
                                      Participant
                                        @edduffner79357

                                        Thank you Bazyle and Roger,

                                        Yeah I was thinking the same, it's a very wasteful process. If the build area were bigger I could flatten the print more and save a lot of resin. This is only a one-off build though, just for fun and to get my feet wet with 3D printing.

                                        I had an idea to construct some Tudor style buldings, but from Wurttemburg in Germany, in HO scale. I think this technology would be very good for that.

                                        Ed.

                                        #463729
                                        Neil Wyatt
                                        Moderator
                                          @neilwyatt

                                          That's great. Main advantage I think is the complete absence of any stringing on such a part.

                                          I have several things planned for when MEW 293 goes to bed (soon I hope!)

                                          One is to finally get around to a 3.5" gauge version of the Airfix cement using 3D printed parts.

                                        Viewing 19 posts - 1 through 19 (of 19 total)
                                        • Please log in to reply to this topic. Registering is free and easy using the links on the menu at the top of this page.

                                        Advert

                                        Latest Replies

                                        Viewing 25 topics - 1 through 25 (of 25 total)
                                        Viewing 25 topics - 1 through 25 (of 25 total)

                                        View full reply list.

                                        Advert

                                        Newsletter Sign-up