Replacing a Neutral Switch.

Advert

Replacing a Neutral Switch.

Home Forums Related Hobbies including Vehicle Restoration Replacing a Neutral Switch.

Viewing 5 posts - 1 through 5 (of 5 total)
  • Author
    Posts
  • #603820
    Alan Donovan
    Participant
      @alandonovan54394

      Hi all.

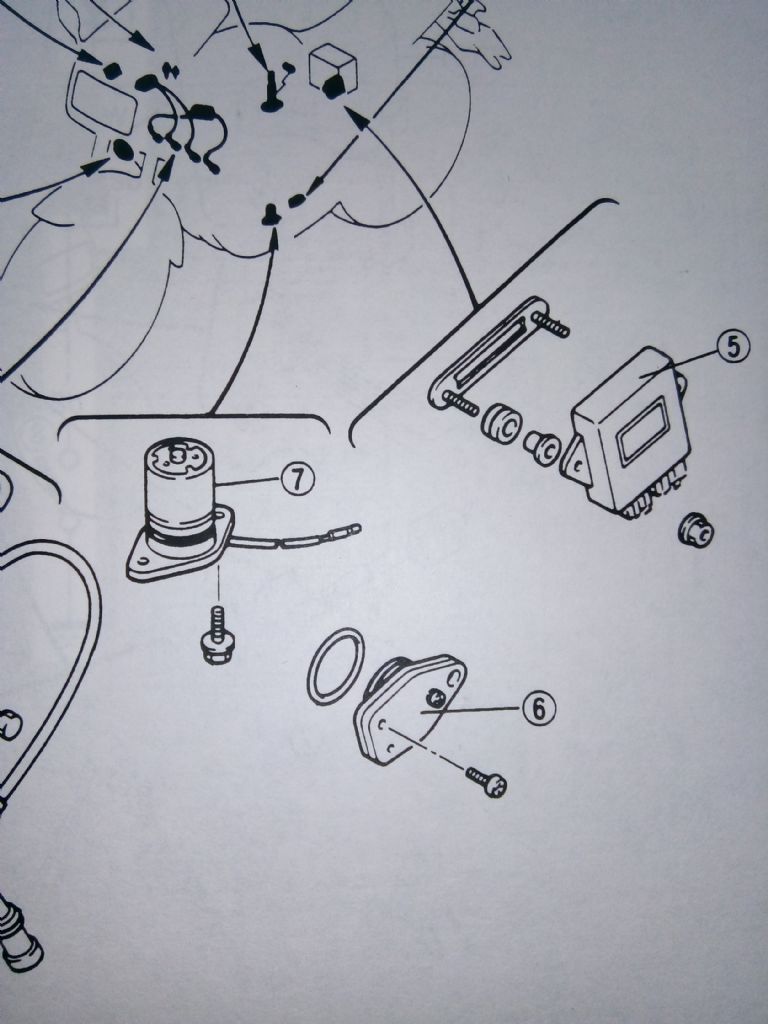
      I believe I have a faulty Neutral switch on a Yamaha FZ 750. Replacement part plus new seal are now ready to be fitted, but its location on the bike is not obvious.

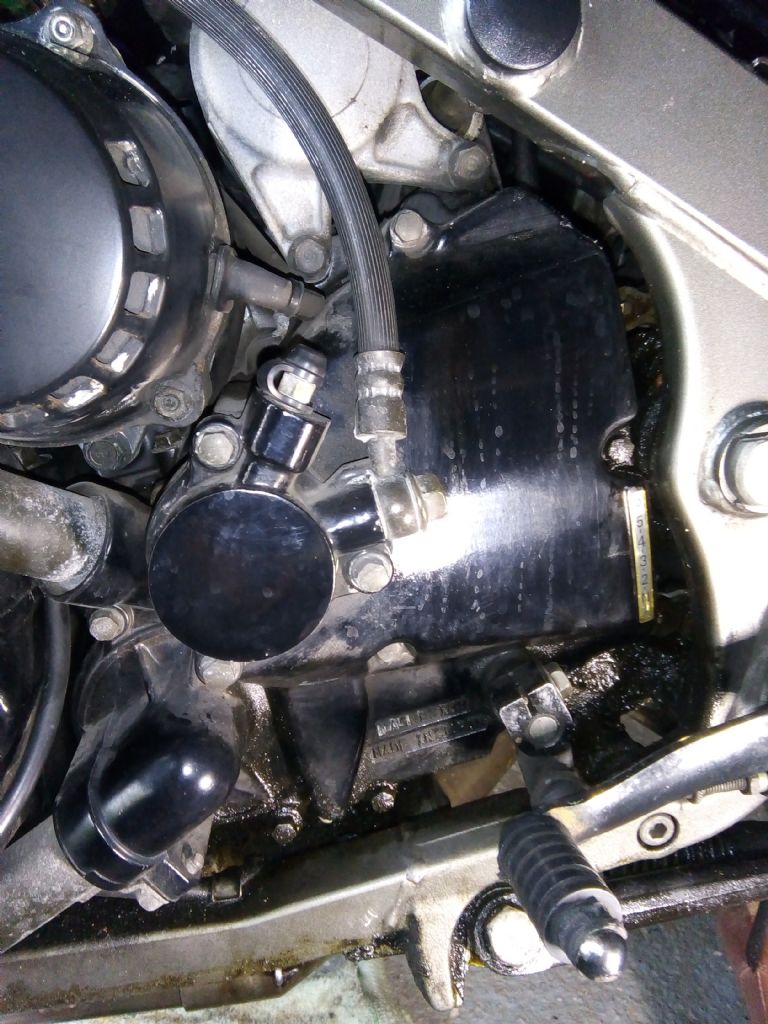
      Close inspection of the bike and scouring thought the parts manual, I have come to the conclusion that it is located behind the drive sprocket cover. This cover also supports the hydraulic piston for the clutch (this appears to push on the end of a long rod that actuates the clutch) and also the gear change shaft passes through this cover.

      I intend (hope) to remove the sprocket cover with the clutch piston assembly still attached ……. it seems possible. Before I go 'blundering on' I thought I would ask for a 'sanity check' and ask if there is anything I should be aware of, or take particular care about.

      Please find below parts diagram for neutral switch (item 6) and a photo of the cover I intend to remove.

      img_20220701_161302.jpg

      img_20220701_143219.jpg

      Many thanks in advance to all who respond.

      Best regards. Alan.

      Advert
      #34522
      Alan Donovan
      Participant
        @alandonovan54394
        #603828
        bernard towers
        Participant
          @bernardtowers37738

          looks very much like a modified disc brake calliper which should mean its self contained, you should be able to unbolt and remove with no fluid loss (I hope). We did a similar thing in the 70s to make the clutch hydraulic on A65s.I would imagine once removed neutral switch will appear!.

          #603831
          DiogenesII
          Participant
            @diogenesii

            Yes, what BT said, you should be able to take it all off still attached, hang it up on a bungee or similar – it's not best practise to let it hang from the pipework which can strain pipe / union.

            If you do need to remove the actuator first, leave it attached to the hose and it will come out 'dry' and can be moved out of the way. Just refit it, no adjustments or 'special measures' required.

            You should check in the 'window' to see whether you will need to DRAIN THE OIL BEFORE REMOVING THE SWITCH – the business end is in the 'wet' side of the gearbox.

            Be mindful to ensure the O ring on the new switch seats correctly and doesn't get pinched or twisted on assembly – a smear of oil may help.

            Check everything works as expected before taking it out !

            #603855
            Hopper
            Participant
              @hopper

              Looks very similar to my VFR800 Honda. You can pull the clutch actuator or the whole cover off with the hydraulic hose still attached and swing it to one side and tie it up with a bungee cord etc. The hydraulic unit is self contained, with a thrust bearing built into the piston and the clutch pushrod, which stays in the hole in the middle of the sprocket shaft, locates in a dimple in the end. So the piston unit is free to simply move away as required. It pays to flush fresh fluid through the unit from the mastercylinder every two years to prevent corrosion and gumming up.

            Viewing 5 posts - 1 through 5 (of 5 total)
            • Please log in to reply to this topic. Registering is free and easy using the links on the menu at the top of this page.

            Advert

            Latest Replies

            Viewing 25 topics - 1 through 25 (of 25 total)
            Viewing 25 topics - 1 through 25 (of 25 total)

            View full reply list.

            Advert

            Newsletter Sign-up