Prototype Boards

Advert

Prototype Boards

Home Forums Electronics in the Workshop Prototype Boards

Viewing 25 posts - 26 through 50 (of 53 total)
  • Author
    Posts
  • #375424
    Peter Bell
    Participant
      @peterbell11509

      Looks like interrupt is being well covered thanks. Unfortunately Unable to try anything at present but looking forward to it

      The other method mentioned by Dave is “spin digitalRead() in a loop” Perhaps that could be an alternative as once the code has been activated by an impulse it runs then just sits waiting for the next pulse.Is there an example of that somewhere? That would help—-thanks Peter

      Advert
      #375429
      Peter Bell
      Participant
        @peterbell11509

        Forgot to say that the input is pretty slow, between 0–5hz

        #375431
        Phil Grant
        Participant
          @philgrant54580

          I have some code that I wrote for an air rifle chronograph that detects a pellet breaking a beam then measuring the time taken before the second beam is broken then sending the time via bluetooth.

          This code basically sits waiting for a pin to be triggered then does something then goes back to wait a again, you could probably adapt t his code, it's very simple really.

          I have details on my blog here http://www.gadjet.co.uk

          Edited By Phil Grant on 11/10/2018 09:34:40

          #375434
          Phil Grant
          Participant
            @philgrant54580

            My chronograph code is measuring events around 200uS apart so it should be more than capable enough.

            #375454
            SillyOldDuffer
            Moderator
              @sillyoldduffer

              Well here's Pete's code modified to increment count whenever pin 3 is grounded.

              Bit more complicated that it should be because I use a different version of the LiquidCrystal library and only have a 20×4 display.

              Testing by tapping a lead from pin 3 to ground. It works, but as noted in the code, it detects contact bounce galore! Debouncing is a separate issue and, as the best way of fixing it depends on Pete's input circuit, I won't cover it in this post.

              #include <Wire.h> // Comes with Arduino IDE
              #include <LiquidCrystal_I2C.h>

              // SoD : there are a few different LiquidCrystal_I2C libraries. Changed to use the one I have

              // LiquidCrystal_I2C lcd(0x27, 2, 1, 0, 4, 5, 6, 7, 3, POSITIVE); // Set the LCD I2C address
              LiquidCrystal_I2C lcd(0x3f,20,4);  // SoD's display has LCD address to 0x3f for a 20 chars x 4 line display

              //int ledPin = 13;
              int ledPin = 2;
              int switch1 = 3;

              volatile int count; // SoD: Changed to volatile.

              void switch1InterruptServiceRoutine()
              {
                // SoD: Executed when an interrupt is received on the attached pin
                // Note: code is potentially too simple for direct use with a mechanical switch
                //       because the ISR will trigger repeatedly if the switch contact bounces. (As they do!)  
                //       See 'debouncing' on web

                count++;
              }

              void setup()
              {
                Serial.begin(9600); // Used to type in characters
                //lcd.begin(16, 2);// set up the LCD's number of columns and rows:
                lcd.init();  lcd.backlight(); // needed for SoD's version of the LiquidCrystal library

                lcd.setCursor(2, 0); // Print a message to the LCD.
                lcd.print("Rail Squirt&quot;
                delay (2000);
                lcd.setCursor(0,1);
                lcd.print(" by Peter Bell&quot;
                delay (2000);
                lcd. clear();
                lcd.print(" Version 2.7M&quot; //Version
                lcd.setCursor(2, 1);
                lcd.print(" 10-10-18&quot;
                pinMode(ledPin, OUTPUT);

                delay (4000);
                lcd. clear();
                delay(1000);

                // SoD – register the interrupt service routine
                // Note 'FALLING' means that switch1 is normally HIGH. The interrupt is triggered whenever switch1 goes low
               
                pinMode(switch1, INPUT_PULLUP );  // SoD: make the interrupt pin normally HIGH to detect FALLING

                attachInterrupt( digitalPinToInterrupt( switch1 ), switch1InterruptServiceRoutine, FALLING );
              }

              void loop()
              {
                // Serial.begin(9600); SoD: already declared in setup(), only needed once
                Serial.println(count);
               
                lcd.setCursor(2, 0);
                lcd.print("Zone&quot; // ZONE 1 OFF
                lcd.setCursor(9, 0);
                lcd.print("1 OFF&quot;
               
                if (count > 155 && count < 175) {
                  digitalWrite(ledPin, HIGH);// output on
                  lcd. clear();
                  lcd.setCursor(2, 0);
                  lcd.print("Zone&quot; // ZONE 1 ON
                  lcd.setCursor(9, 0);
                  lcd.print("1 ON&quot;
                }
                lcd.setCursor(9, 0);
                lcd.print("8 ON&quot;
               
                if (count > 175 && count < 1500) {
                  digitalWrite(ledPin, LOW); //output off
                  lcd. clear();
                  lcd.setCursor(2, 0);
                  lcd.print("Zone&quot; // ZONE 8 OFF
                  lcd.setCursor(9, 0);
                  lcd.print(" END&quot;
                }
               
                //  count ++ ; SoD: replaced by ISR
                lcd.setCursor(6,1);
                lcd.print(count);
               
                delay(200);   // SoD: may not be necessary, best to avoid delay() if possible.
               
                // if (count == 1500) count = 0; //re-sets
                if ( count >= 1500 ) count = 0;  // SoD: safer reset!  Interrupts mean count==1500 might be skipped.  
                lcd. clear();
              }


              Edited By SillyOldDuffer on 11/10/2018 11:51:36

              Edited By SillyOldDuffer on 11/10/2018 11:52:51

              #375502
              Phil Grant
              Participant
                @philgrant54580

                Just for interest I discovered a link to a site that uses blockly to graphically code for Arduino and other languages, this could be very useful for those not confident in using the Arduino IDE C code editor, this basically creates the code by dragging graphical block onto a sheet as required then paste to code into the Arduino IDE.

                **LINK**

                To use the editor click on the US flag on the left under 'blocklyduiuno"

                #375540
                Peter Bell
                Participant
                  @peterbell11509

                  Dave, Many Thanks for adding the code and explanations, just trying to work my way through them on a WiFi hotspot thats worse than dial up used to be.

                  At present it wont verify with a mysterious message (at least to me!) "of expected &#39' before ';' token" on the first LCD print up from the end of the sketch. Cannot spot anything obvious–looks the same as the one I listed and that verifies ok–perhaps I've lost some some syntax somewhere?

                  Phil, thanks for the blockly info, never heard of that for Arduino before–I'll explore.

                  Not sure where all the smileys came from though.

                  Peter

                  #375587
                  SillyOldDuffer
                  Moderator
                    @sillyoldduffer
                    Posted by Peter Bell on 11/10/2018 21:34:01:

                    At present it wont verify with a mysterious message (at least to me!) "of expected '' before ';' token" on the first LCD print up from the end of the sketch. Cannot spot anything obvious–looks the same as the one I listed and that verifies ok–perhaps I've lost some some syntax somewhere?

                    Not sure where all the smileys came from though.

                    Hi Peter,

                    It's the curse of the smileys. The forum's editor 'helps' by converting the character strings once used to make text smileys and the like into emoticons. In the good old days before graphics a winky was a colon followed by a right bracket. Trouble is these combinations appear in computer source. As the editor also applies other officious format rules (like removing white-space on the left), it's hard to publish computer source code without having it subtly mangled!

                    Here's a dropbox link to the code I ran on my Nano. Note that you need to get rid of the changes I made to suit my particular version of LiquidCrystal which differs in the way displays are initialised.

                    Dave

                    #375640
                    Neil Wyatt
                    Moderator
                      @neilwyatt
                      Posted by SillyOldDuffer on 12/10/2018 09:31:52:

                      It's the curse of the smileys. The forum's editor 'helps' by converting the character strings once used to make text smileys and the like into emoticons. I

                      Sadly, it appears to be spreading to other forums

                      Neil

                      #375670
                      Mark Rand
                      Participant
                        @markrand96270

                        That's alright. Just use uuencode laugh.

                        Edited By Mark Rand on 12/10/2018 18:40:57

                        #375695
                        Peter Bell
                        Participant
                          @peterbell11509

                          Hi Dave,

                          I must admit I thought that cut and past was just that, never realised what the editor was doing by tangling things around like that, another lesson learned.

                          The drop version works perfectly once I restored my lcd so many thanks for your help, still untangling what its all doing but its great to be learning and making progress at the same time. The switch bounce is horrendous but at least the serial numbers agrees with the lcd. The software solutions look very involved in the versions found so far so I'll try adding some r&c to see that the effect is. It may be ok in real life as I'm using a proximity sensor but I dont know what the rise time is yet.

                          You mentioned earlier "spin digitalRead() in a loop until a pulse is detected, then count it." as an alternative to attachinterrupt, could you point me to some info on it? Thanks

                          Peter

                          #375731
                          Phil Grant
                          Participant
                            @philgrant54580
                            Posted by Peter Bell on 12/10/2018 21:58:48:

                            You mentioned earlier "spin digitalRead() in a loop until a pulse is detected, then count it." as an alternative to attachinterrupt, could you point me to some info on it? Thanks

                            Peter


                            Peter,

                            Here is some code I wrote to check for a pin going low then counting microseconds before another pin goes low and then sending the value out over serial.

                            This code sits in the "wait state" (Spinning?) until the pin goes low it then changes to another "monitor state"

                            Please ask any questions you might have, I hope this is sort of what you're after.

                            /*
                            Sketch to measure the time in uSeconds between two IR sensors being triggered
                            and sending the result to the serial port.
                            Use with the PC application to display results
                             
                            Version 1.00
                            Phil 25/04/13
                            */
                            #define Trip_in_1 2 //set light Trigger 1 to pin D2
                            #define Trip_in_2 3 //set light Trigger 2 to pin D3
                            #define WAIT_STATE 0
                            #define MONITOR_STATE 1
                            #define OUTPUT_STATE 2
                             
                            unsigned long Trigger_1 = 0;
                            unsigned long Trigger_2 = 0;
                            volatile unsigned int current_state = WAIT_STATE;
                            char my_oldSREG; //to hold status register while ints are disabled
                            unsigned long SensDist = 196850; //Distance between sensors in feet *1000000 60mm
                            unsigned long duration = 0; // time between triger 1 and 2
                            volatile boolean is_timeout = false;
                             
                             
                            void setup () {
                            //Serial.begin(38400);
                            Serial.begin(9600); // for raw un programmed BT board
                            Serial.println("Chrono SW Ver 1.00";
                            pinMode(Trip_in_1, INPUT);
                            pinMode(Trip_in_2, INPUT);
                            digitalWrite(Trip_in_1, HIGH); //turn on pullup resistor
                            digitalWrite(Trip_in_2, HIGH);
                            reset_variables();
                             
                            }
                             
                             
                            void loop () {
                            switch (current_state) {
                            case WAIT_STATE:
                            if(digitalRead(Trip_in_1)==LOW) {
                            Trigger_1 = micros();
                            current_state = MONITOR_STATE;
                            }
                            break;
                            case MONITOR_STATE:
                            while(digitalRead(Trip_in_2)==HIGH); //loop until the Trigger goes LOW && !is_timeout
                            if(!is_timeout)
                            Trigger_2 = micros();
                            current_state = OUTPUT_STATE;
                            break;
                            case OUTPUT_STATE:
                            //if (Trip2 > Trip1) {
                            output_serial_info();
                            reset_variables();
                            current_state = WAIT_STATE;
                            //}
                            break;
                            }
                            }
                             
                            void output_serial_info() {
                             
                             
                            // Serial.print("Durationt";
                            Serial.println((Trigger_2 – Trigger_1));
                            //Serial.println(" uS";
                            }
                             
                            void reset_variables() {
                            Trigger_1 = 0;
                            Trigger_2 = 0;
                            //is_timeout = false;
                            }
                             

                            Edited By Phil Grant on 13/10/2018 10:58:15

                            #375933
                            SillyOldDuffer
                            Moderator
                              @sillyoldduffer
                              Posted by Peter Bell on 12/10/2018 21:58:48:

                              Hi Dave,

                              You mentioned earlier "spin digitalRead() in a loop until a pulse is detected, then count it." as an alternative to attachinterrupt, could you point me to some info on it? Thanks

                              Peter


                              Hi Peter,

                              I've modified your code to show how it's done. It's on Dropbox.

                              Phil's example is more complicated because it does some software debouncing as well.

                              Depending on the application, it's often easier to provide hardware debouncing. The simplest method is just to put a capacitor (about 100nF not critical) across the switch contacts. It prevents 'FALLING' or 'LOW' being detected until the switch has been held down for several milliseconds, which tends to eliminate bounce. For more demanding applications you could wire up an NE555 as a debouncer, or a comparitor, – even better – a Schmitt Trigger chip. Much depends on what you're doing and how bad the switch is.

                              A very simple software debouncer might change the spin loop in the example based on your code to look like this:

                              // Spin waiting for input

                              while ( true ) {
                              if ( digitalRead( switch1 ) == LOW ) {
                              delay(50);
                              if (digitalRead( switch1 ) == LOW )
                              break;
                              }
                              }
                              // To get here the switch was operated
                              count++;

                              All it does is insist on two reads detecting LOW inside a time window before counting.

                              Debouncing is such a common problem that there are a few Arduino libraries in the Library Manager to provide software debouncing. I've tried Bounce2 – it's much smarter and more general than my simple example, for example it can manage several switches, but you might prefer one of the others. Bit of a learning curve with them.

                              Dave


                              Edited By SillyOldDuffer on 14/10/2018 17:15:43

                              #375942
                              Neil Wyatt
                              Moderator
                                @neilwyatt

                                My preferred way of dealing with bounce is to use interrupt routines to set a flag and not re-enable them until I've dealt with the switch routine.

                                This enables me to deal with inputs when and where I want to without affecting time-critical processes with long interrupt routines.

                                If you use inline switch detections, it's usually easiest to plan your code so you don't test for a second switch condition twice within the bounce period.

                                Neil

                                #375973
                                Peter Bell
                                Participant
                                  @peterbell11509

                                  Hi Dave,

                                  Thanks for all that, your description on debounce sounds logical. Yes a 100nf almost fixes it, adding a 1k resistor in series completely cures it as far as I can see. I'll have a look at the bounce libraries, a quick search reveals a lot to choose from.

                                  Thanks also for the spin, makes sense apart from the syntax I'm afraid. The curly brackets with the semicolon inside are used to end a statement according the reference? { ; } I'm sure there's a simple explanation!

                                  // Spin waiting for input

                                  while ( digitalRead( switch1 ) == HIGH ) {
                                  // Do nothing
                                  ;
                                  }

                                  Also adding a LOW digital read version first stops it just rolling through so that it increments each complete input cycle, what is the advantage of interrupt which (to me!) appears to be doing the same job?

                                  Peter

                                  #375974
                                  Peter Bell
                                  Participant
                                    @peterbell11509

                                    Thanks Neil, I'll have to work on that one once I get my head around the present learning!

                                    Peter

                                    #375985
                                    SillyOldDuffer
                                    Moderator
                                      @sillyoldduffer
                                      Posted by Peter Bell on 14/10/2018 20:47:58:

                                      Hi Dave,

                                      makes sense apart from the syntax I'm afraid. The curly brackets with the semicolon inside are used to end a statement according the reference? { ; } I'm sure there's a simple explanation!

                                      // Spin waiting for input

                                      while ( digitalRead( switch1 ) == HIGH ) {
                                      // Do nothing
                                      ;
                                      }

                                      Also adding a LOW digital read version first stops it just rolling through so that it increments each complete input cycle, what is the advantage of interrupt which (to me!) appears to be doing the same job?

                                      Peter

                                      The curly brackets and empty semi-colon are a style trick used to draw attention to an unusual construct. Normally it's not good practice to program a fast tight loop that might never end. (If you do it on a Microsoft platform, the operating system will complain the window is 'Not Responding'.) The brackets, lone semi-colon and comment emphasise that this bit of code is odd, not a mistake, and worthy of attention.

                                      Unless the program is very simple, spinning in a loop waiting for a switch is likely get in the way of other work that the computer should be doing. Say, for example, you want your program to count two switches. If the program loops waiting for the first switch, it can't pick up anything done to the second switch.

                                      One way of overcoming this serious limitation is to use the switches to trigger interrupts. This leaves the main loop() free to do other work. Apart from counting button presses you might want to output tallies over the Serial link, or perhaps timestamping them with time read from a Real Time Clock.

                                      As an Arduino can handle interrupts very quickly ( a few microseconds), it's possible to create the illusion that many events are being processed in parallel. Interrupts can also be used to improve performance – an interrupt driven button counter could manage several hundreds of thousands of button events per second.

                                      Dave

                                      #375988
                                      duncan webster 1
                                      Participant
                                        @duncanwebster1

                                        I'm going to display my ignorance here, but I've found that asking even daft questions often elicits a useful response. As I understand it the interrupt flag register is cleared when the Inerrupt Service Rputine (ISR) is called, and so the int can be triggered again almost immediately (even whilst the ISR is running), and as soon as the ISR is executed it will be called again if another bounce triggered the int during the ISR time. Having just done some googing, how about putting the debounce routine in the ISR and

                                        EIFR = B00000001; (for interrupt0) or EIFR = B00000010; (for interrupt1) or EIFR = 0 (clears both) to clear the int flag register as the last statement in the ISR

                                        Now waiting to be shot down in flames!

                                        #375992
                                        Neil Wyatt
                                        Moderator
                                          @neilwyatt
                                          Posted by Peter Bell on 14/10/2018 20:47:58:

                                          what is the advantage of interrupt which (to me!) appears to be doing the same job?

                                          There are many advantages of using interrupts:

                                          • the basic point of interrupts is they let your rigidly clock-based one-instruction-at-a-time program deal with the nasty, dirty asynchronous real world.
                                          • You never miss an event because it happens while your code is looking elsewhere.
                                          • Because interrupts are self contained, you can get them right and then fiddle with other code and not worry about messing them up (e.g. if you program is one long loop checking different things, sooner or later the loop will become too long, slow or look at things in the wrong order).
                                          • You can have multiple interrupts enabled and appear to handle lots of events in real time.
                                          • Different interrupts have different priorities (on more advance processors) and normally if two happen together you don't lose one, you just tackle them in turn.
                                          • You can easily enable or disable individual interrupts to switch things on or off with minimal code.
                                          • It's good for your ego and strengthens your intellect
                                          • By using flags or by putting data into buffers or registers (for example) interrupts can pass information to the main program without changing its flow.

                                          Most of my programs, even the most complicated, usually end up as having a main loop that is little more than a few subroutine calls, some of which will be conditional depending on the setting of various flags. Timer interrupts deal with any regular recurring events, and asynchronous interrupts deal with messy inputs such as button presses and serial data.

                                          This is an incredibly effective approach as rather than the program continually sitting stuck in a series of loops waiting for one event before it can move on to the next, it whizzes round the simple loop jumping out and dealing with any events as and when they happen.

                                          Just to add, good practice is to make ISRs (interrupt service routines) as simple as possible, incrementing a counter or setting/clearing a flag, for example. This minimises any impact on the flow of the rest of the program, allowing teh interrupt's effects to be dealt with as and when the program has time (or needs to).

                                          They can make simple programs harder to understand and debug, but once your program starts to become complex and non-linear they make it simpler and easier to understand.


                                          Neil

                                          Edited By Neil Wyatt on 14/10/2018 22:27:35

                                          #376086
                                          SillyOldDuffer
                                          Moderator
                                            @sillyoldduffer
                                            Posted by duncan webster on 14/10/2018 22:00:02:

                                            As I understand it the interrupt flag register is cleared when the Inerrupt Service Rputine (ISR) is called, and so the int can be triggered again almost immediately (even whilst the ISR is running), and as soon as the ISR is executed it will be called again if another bounce triggered the int during the ISR time. …

                                            Now waiting to be shot down in flames!

                                            I find the detail of interrupts confusing, not least because how they are implemented varies with each processor. The Intel and AMD processors used in laptops have a much richer range of possibilities than the AVR in an Arduino and not all AVRs are equal. Even though AVR chips are comparatively simple, they still make my head hurt!

                                            Quite a lot of the info on the web about how an Arduino handles interrupts inside an ISR is contradictory. Some say calling an ISR blocks any more interrupts until the ISR is finished. Others suggest that an ISR can itself be interrupted. The chip itself can operate in either mode.

                                            However, by default if I'm reading it right, the Arduino IDE automatically compiles ISRs so that interrupts are disabled on entry and only reactivated on exit. This means that contact bounce won't cause the ISR to call itself.

                                            It is possible to re-enable interrupts inside an ISR but this isn't recommended unless you know exactly what you're doing. Allowing interrupts to nest will quickly and fatally consume all the available stack memory unless Mr Smart Programmer explicitly manages the processors internal resources.

                                            Duncan's suggestion opens another debate, which is should you stay within the IDE's protective but somewhat limiting envelope, or should you unleash the full power of the processor by going off piste? Personally I tend to stick within the IDE – it does a good job of simplifying programming an Arduino by covering up a lot of messy implementation details. But it's worth knowing you can mess with low-level features directly if you want to. Not recommended for beginners though.

                                            The discussion so far has been about external interrupts. These are easy to use but there are only two on a Nano or Uno. These boards do support many more pin change interrupts but they're a pain to work with. The more powerful boards are better – a Mega has 5 external interrupts and all the pins on an M0 support external interrupts.

                                            Dave


                                            Edited By SillyOldDuffer on 15/10/2018 17:08:10

                                            #376096
                                            Neil Wyatt
                                            Moderator
                                              @neilwyatt

                                              AVR interrupts are rich pastures, but because the Arduino has a whole 'abstraction layer' of its own core functions you lose some of the flexibility.

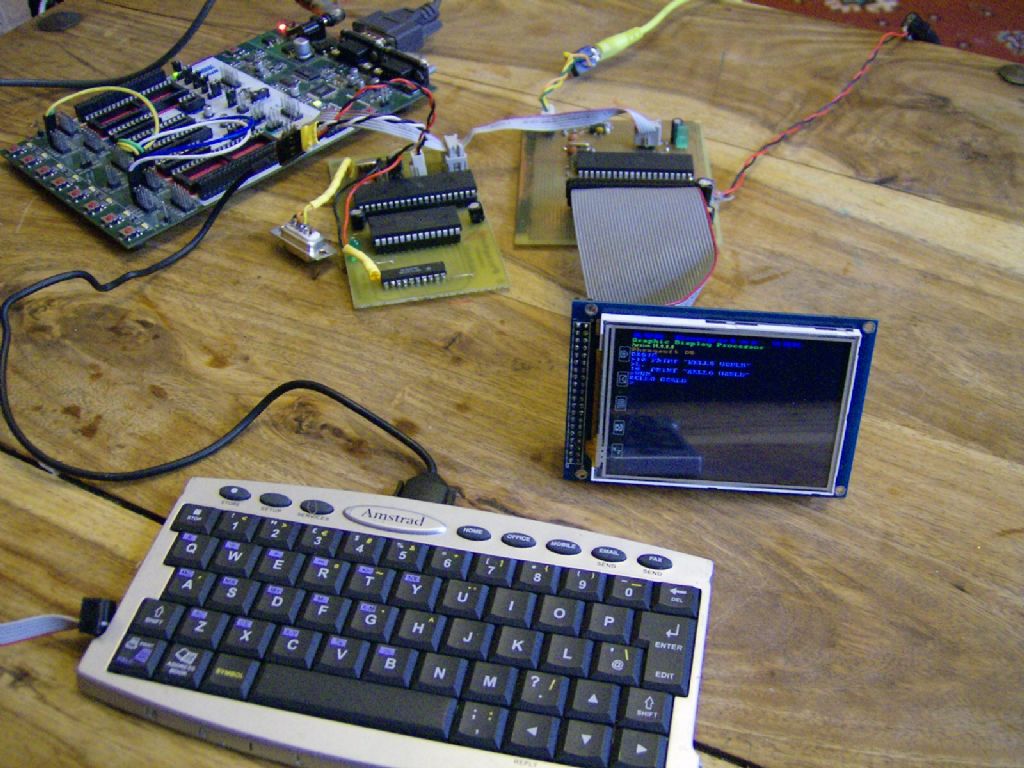
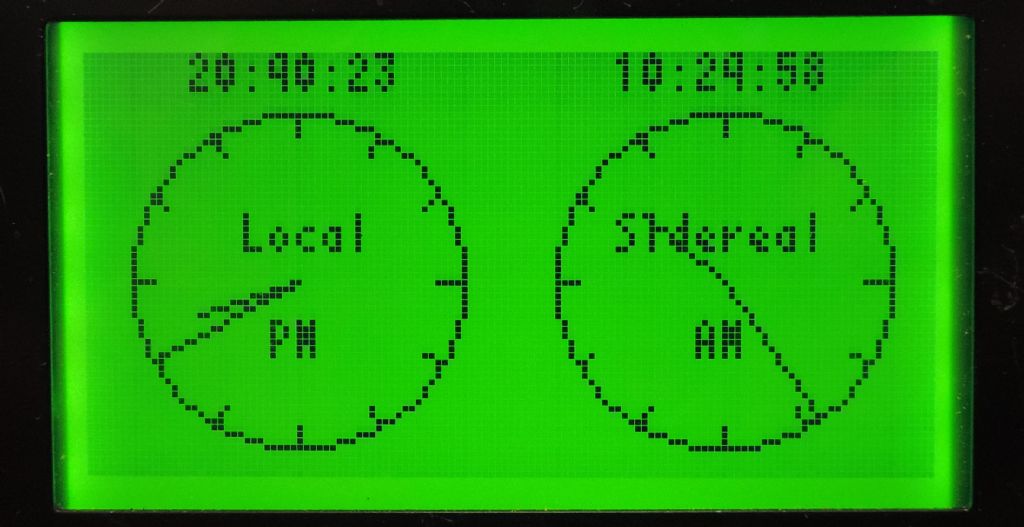
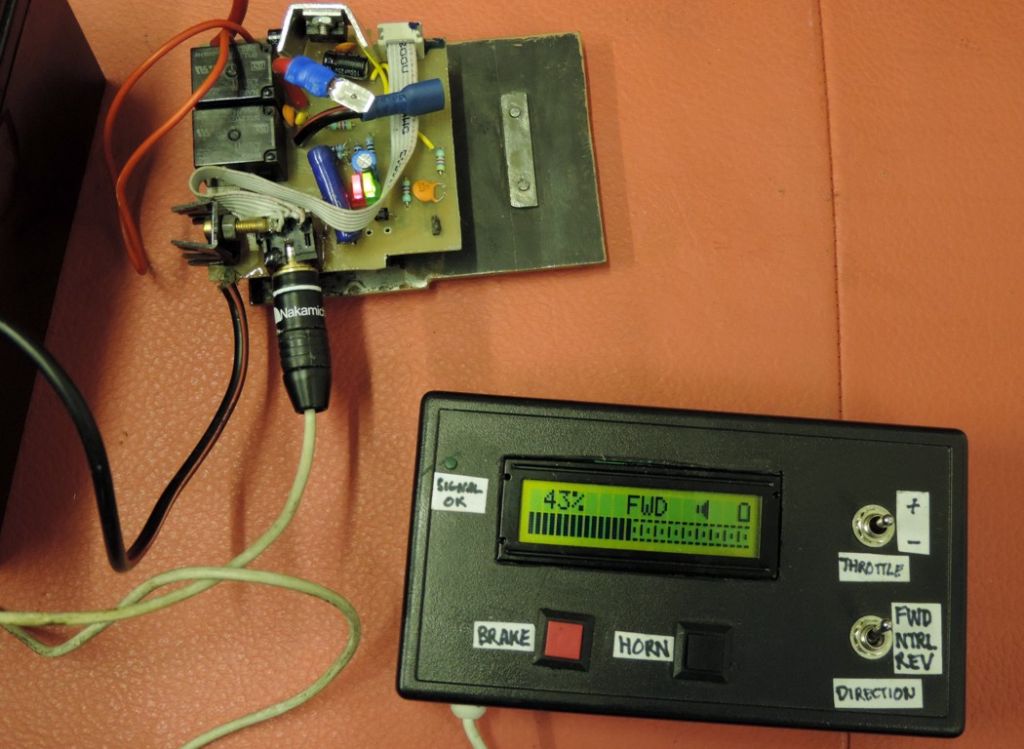
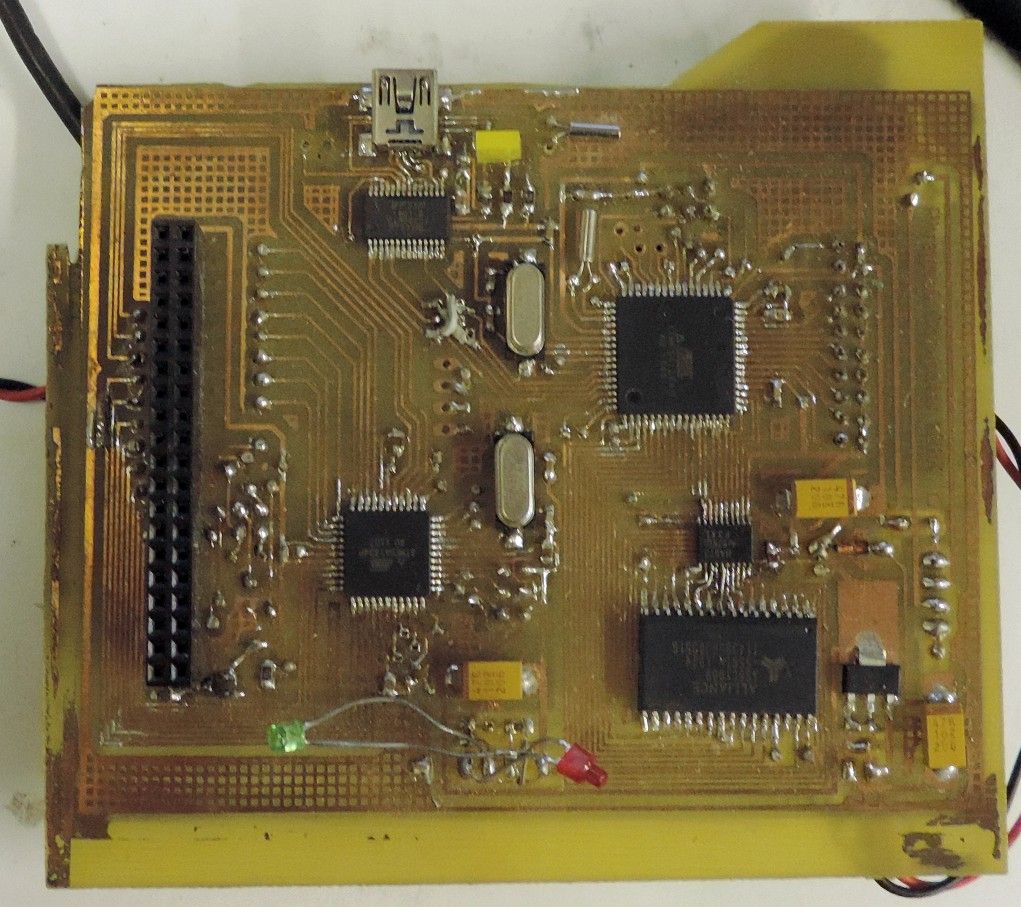
                                              Personally I've barely done any arduino programming, but have done some really heavyweight assembly language programming for AVR (C is for wusses ). I love that initimate engagement with the hardware and the ability to cut corners and do things like really efficient maths through bespoke code or working only to the level of precision you need.

                                              I've done a few fun things:

                                              hpim1892.jpg

                                              dscn5877.jpg

                                              controller.jpg

                                              circuit.jpg

                                              #376099
                                              SillyOldDuffer
                                              Moderator
                                                @sillyoldduffer
                                                Posted by Neil Wyatt on 15/10/2018 17:57:17:

                                                … I love that initimate engagement with the hardware and the ability to cut corners and do things like really efficient maths through bespoke code or working only to the level of precision you need.

                                                I know exactly what you mean! Assembler is like riding a powerful motorbike flat out around Miami wearing nothing but speedos and shades. Enormous fun and everyone thinks you're cool. Only downside is the all too frequent accidents…

                                                Dave

                                                #376104
                                                Phil Grant
                                                Participant
                                                  @philgrant54580
                                                  Posted by SillyOldDuffer on 15/10/2018 18:49:47:

                                                  Posted by Neil Wyatt on 15/10/2018 17:57:17:

                                                  … I love that initimate engagement with the hardware and the ability to cut corners and do things like really efficient maths through bespoke code or working only to the level of precision you need.

                                                  I know exactly what you mean! Assembler is like riding a powerful motorbike flat out around Miami wearing nothing but speedos and shades. Enormous fun and everyone thinks you're cool. Only downside is the all too frequent accidents…

                                                  Dave

                                                  Yes I remember the days of Intel Assembler….. just about but I'm happier with the Arduino C for my less demanding hobby use

                                                  #376107
                                                  Neil Wyatt
                                                  Moderator
                                                    @neilwyatt

                                                    I learned 6502 assembler on a BBC, a privilege I will always be grateful to Aunty for.

                                                    Neil

                                                    #376110
                                                    SillyOldDuffer
                                                    Moderator
                                                      @sillyoldduffer
                                                      Posted by Neil Wyatt on 15/10/2018 19:47:46:

                                                      I learned 6502 assembler on a BBC …

                                                      Old code is best. My Nascom 1 trumps your BBC Micro. 2000 dry joints, all of them crystallised personally by me!

                                                      smile p

                                                      Dave

                                                    Viewing 25 posts - 26 through 50 (of 53 total)
                                                    • Please log in to reply to this topic. Registering is free and easy using the links on the menu at the top of this page.

                                                    Advert

                                                    Latest Replies

                                                    Viewing 25 topics - 1 through 25 (of 25 total)
                                                    Viewing 25 topics - 1 through 25 (of 25 total)

                                                    View full reply list.

                                                    Advert

                                                    Newsletter Sign-up