Parallelism of carriage to spindle. Taper.

Advert

Parallelism of carriage to spindle. Taper.

Home Forums Help and Assistance! (Offered or Wanted) Parallelism of carriage to spindle. Taper.

Viewing 25 posts - 1 through 25 (of 38 total)
  • Author
    Posts
  • #626322
    Cedric
    Participant
      @cedricblaver37709

      Hi complements of the season.

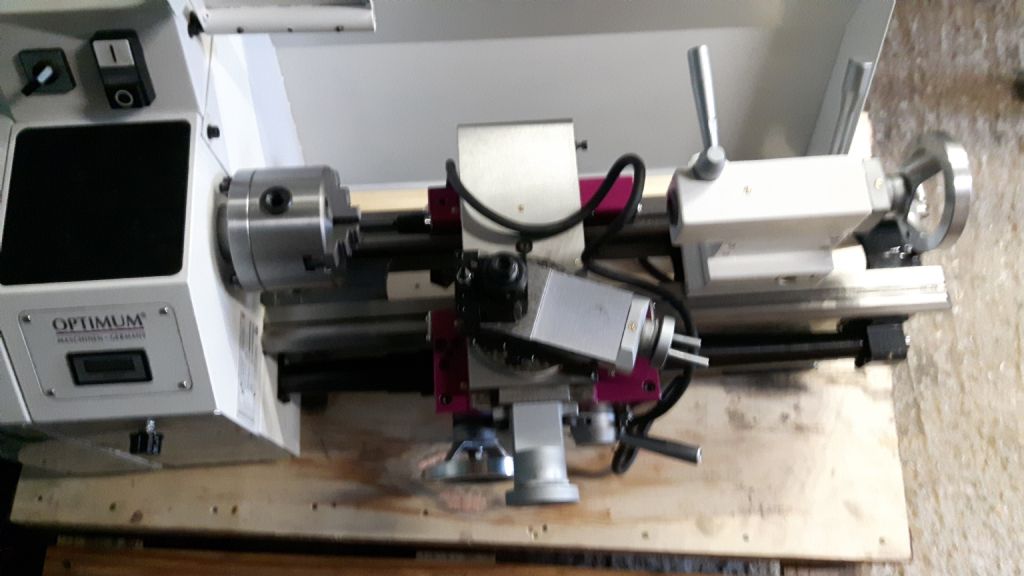
      Please can someone advise. my new metal lathe (114 x 450) has a taper, runout of 0.07mm carriage versus the center line of the spindle.

      The smaller diameter the worse taper becomes. The carriage cuts in towards the chuck.

      Please can someone advise on how I can correct this. The manufacturer has tried to correct it by replacing the chuck jaws which has not corrected the issue.

      Many thanks Cedric.

      Advert
      #34136
      Cedric
      Participant
        @cedricblaver37709

        Table top metal lathe

        #626327
        Bazyle
        Participant
          @bazyle

          Which actual lathe is it? Seems more than a mini-lathe.
          You should never change the chuck jaws, they (should) be made to match the body. Just putting a round bar in a chuck whatever the conditions of the jaws does not by any means result in it being in line with the spindle. If you put a dial indicator on the end of a bar and tap the bar it will move even when it has been moderately tightened.
          If turned between centres, and tailstock on centre then non parallelism is normally attributed to twist of the bed, which is corrected by 'levelling' which is nothing to do with being horizontal.
          However it can also be due to the alignment of the spindle wrt the bed if the bed has been levelled and the work truely aligned with the spindle, when turning without the tailstock.

          #626334
          Grindstone Cowboy
          Participant
            @grindstonecowboy

            " The smaller diameter the worse taper becomes " – sounds more like workpiece deflection to me?

            Rob

            #626335
            Pete Rimmer
            Participant
              @peterimmer30576

              Changing the chuck jaws would not correct it in any case.

              Either bed is twisted or the headstock is not aligned with it.

              #626337
              DiogenesII
              Participant
                @diogenesii

                It would help if you could explain your test method in a bit more detail, Cedric; symptoms may have more than one cause and it'd be useful to narrow down or discount some of the possibilities.

                #626339
                Howard Lewis
                Participant
                  @howardlewis46836

                  A taper could stem from a huge variety of causes.

                  Your question immediately raise a number of others in the search for a solution, so a lot more information is required..

                  Even you checking methods need to be examined closely. (Are the measurements consistent and repeatable. If not the figures are not worth much.

                  1.How accurate is the bar that you use to check alignment?

                  2. As already said, the bed could be twisted. If it is, the cut bis likely to be tapered.

                  3. How is the chuck fitted to the spindle? Screw on or Flange fitting?

                  4. Are the mating faces between chuck and spindle clean, and free from burrs?

                  ANY dirt or damage will throw out alignment.

                  5. is the chuck a close fit on the register / flange / face of the flange?

                  If the fit is not tight, misalignment will be present, and possibly inconsistent.

                  6. Has work held in the chuck been checked for run out close to the jaws and at a distance, say 100 mm away? Bear in mind that a perfectly round bar held in the jaws of a 3 jaw chuck will exhibit r eccentricity. A 3 jaw chuck holding work absolutely true is VERY rare.

                  7. Has the alignment been checked between a centre in the Headstock and one in the tailstock?

                  8. IF the alignment fo Headstock and Tailstock centres appears to be satisfactory, has it been checked with a properly centred Alignment bar?

                  You sound as if you need face to face / hands on assistance.

                  Where are you located?

                  What brand and model is your lathe?

                  Answering all these questions will give a better chance of finding a solution to the problem.

                  Howard

                  #626342
                  Howard Lewis
                  Participant
                    @howardlewis46836

                    As post script, it would be better not use the chuck (That removes a number of variables ) but to locate the alignment bar in the taper of the spindle.

                    You are using an alignment bar when checking, not just any old bit of BMS?

                    If the problem disappears when using the alignment bar in the spindle taper, the the problem is in the accuracy of the mounting flange /register or something within the chuck, possibly its location on the spindle.

                    Every possible variable has to be eliminated until only the cause remains.

                    Howard

                    #626359
                    John Haine
                    Participant
                      @johnhaine32865

                      Lots of suggestions but no clarification from the OP as to what the actual problem is. Cedric mentioned both run-out and taper. As someone suggested it would perhaps be helpful if he could explain exactly what measurement was made, and if this is an eccentricity problem or axis alignment problem. He mentions a "new metal lathe", if it is actually new it might be better to reject it as not fit for purpose.

                      #626374
                      Dave Halford
                      Participant
                        @davehalford22513

                        Hi Cedric,

                        I guess with a brand new lathe this is where your machine shop experience is no help.

                        This machine may not have been adjusted, only assembled. Someone recently on here had a loose headstock, others have had paint in the wrong place, gib strips bent or loose

                        You can't generalise or you get huge long replies with possible fixes buried in the detail. Until you tell us what you have done.

                        #626375
                        JasonB
                        Moderator
                          @jasonb

                          I'm with Grindston Cowboy if the taper is worse the thinner the work being cut then deflection of the workpiece sounds likely. Would help to know over what length the 0.07mm taper is and what sort of diameter is showing this taper.

                          #626388
                          Huub
                          Participant
                            @huub

                            The tool maybe not at centre height.

                            If you have bolted the lathe to the floor or table, you may have twisted the bed. You could loosen the bolts to see if the problems reduces.

                            I have made a video explaining how to measure your headstock alignment:

                            #626392
                            Hopper
                            Participant
                              @hopper

                              Need pics of how you have your lathe set up and how you are testing for parallel etc. Too many variable factors to tell what is going on otherwise.

                              #626393
                              Chris Mate
                              Participant
                                @chrismate31303

                                Greetings to all…
                                Just a question while on this subject: Facing test
                                Headstock Alignment to bed test…If a larger diameter flat piece clamped in jaws are faced, taken out and put on a ver flat surface, does it wobble, rock from the centre or does it set solid, ie is it convex or concaved faced-?

                                I have heard it must be set to slightly not flat but concaved result faced, is this true and how is this then set by factory, the method(by distance-testbar lengh etc)-?

                                #626395
                                Hopper
                                Participant
                                  @hopper
                                  Posted by Chris Mate on 28/12/2022 00:38:35:

                                  I have heard it must be set to slightly not flat but concaved result faced, is this true and how is this then set by factory, the method(by distance-testbar lengh etc)-?

                                  This is a fallacy. It is not that it MUST be set to face slightly concave, but is must (according to Schlesinger limits, Myford inspection sheets, convention etc etc) to cut between dead flat ie 0-0 across the face, to a small amount concave, usually about half to one thou maximum.

                                  The reason is that a concave surface will sit stably on another flat surface if two pieces are to be bolted together etc. but a convex surface will rock and the pieces will end up out of alignment when bolted together etc.

                                  Adjustment has to be made by scraping the ways on the carriage that the cross slide rides on to bring them back into square with the lathe's axis, providing bed and carriage ways are all up to snuff. On a Myford it can be an issue of the vertical guiding surface of the carriage to bed interface is worn, allowing the whole carriage to kick around at an angle and requiring repair, or wide guide conversion etc. Inverted V beds don't have that same problem.

                                  #626398
                                  Neil Lickfold
                                  Participant
                                    @neillickfold44316

                                    Sounds to me you have a machine that has only been put together, and not properly assembled. Somewhere there is adjustment for the headstock to make it run true to the run of the bed, 1st is to get the bed so that it is true with no twist. It does not need to be perfectly level, just all pointing in the same direction. You need better than a builders level. Then check things. I have seen new lathes with the head quite a way out of adjustment before. Also seen tailstocks out of adjustment as well as top slides that are on a taper to the axis of the lathe. So when would forward the tool was around 0.2mm above the centre line. And wound back the tool was 0.2 below centre line. So start with the basics, then see what is wrong from there.

                                    #626426
                                    Huub
                                    Participant
                                      @huub
                                      Posted by Chris Mate on 28/12/2022 00:38:35:

                                      Greetings to all…
                                      Just a question while on this subject: Facing test
                                      Headstock Alignment to bed test…If a larger diameter flat piece clamped in jaws are faced, taken out and put on a ver flat surface, does it wobble, rock from the centre or does it set solid, ie is it convex or concaved faced-?

                                      I have heard it must be set to slightly not flat but concaved result faced, is this true and how is this then set by factory, the method(by distance-testbar lengh etc)-?

                                      This is how I test "facing alignment"  video

                                      Edited By Huub on 28/12/2022 10:19:32

                                      #626502
                                      Cedric
                                      Participant
                                        @cedricblaver37709

                                        Thank you for all your replies, it certainly helped.

                                        The lathe is an Optimum 2406V with a 100mm 3 jaw chuck.

                                        My location is Andover.

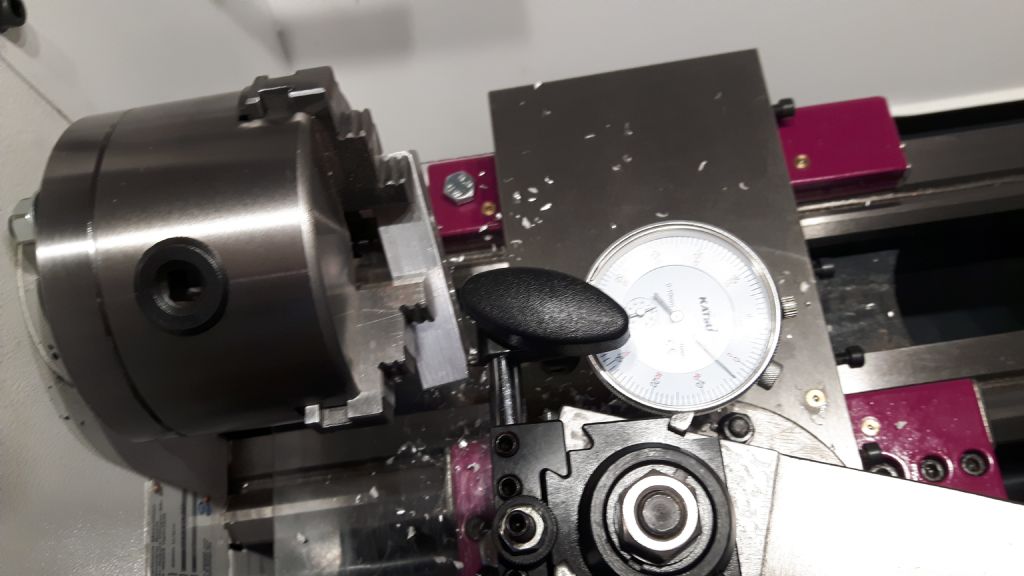
                                        Yes Howard i do need a face to face/hands on assistance. Having seen the video from Chris Mate was just what I needed. I went and did just that.

                                        i got a 0.03mm difference.

                                        So am I correct in saying either the headstock is off or the carriage.

                                        Using a 50mm length18mm steel bar and making a 0.10mm cut shows a taper towards the chuck.

                                        To answer John Haine, I recieved the lathe (new) on the 8th November contacted the seller on the 21st for tech assistance about the taper issue. The seller collected the lathe on the on 28th November for repair (replaced jaws). The seller returned the lathe on 12th December. I still have the issue.

                                        Many thanks everyone.

                                        Lathe

                                        Lathe

                                        #626506
                                        Oldiron
                                        Participant
                                          @oldiron
                                          Posted by Chris Mate on 28/12/2022 00:38:35:

                                          Greetings to all…
                                          Just a question while on this subject: Facing test
                                          Headstock Alignment to bed test…If a larger diameter flat piece clamped in jaws are faced, taken out and put on a ver flat surface, does it wobble, rock from the centre or does it set solid, ie is it convex or concaved faced-?

                                          I have heard it must be set to slightly not flat but concaved result faced, is this true and how is this then set by factory, the method(by distance-testbar lengh etc)-?

                                          It really is best to start a new post when asking questions. Your question was not "on the subject" as the OP was asking about taper on a new lathe.

                                          It saves a lot of messing about trying to seperate 2 questions and the myriad of answers that ensue

                                          Also when people search for a particular answer to a question it will not be hiding in a post with a totally different title.

                                          Anywho I hope you get the answer to your problem.

                                          regards

                                          #626507
                                          Cedric
                                          Participant
                                            @cedricblaver37709

                                            Hi Howard, I dont have a alinement bar but have ordered a Praztech MT3 with 12mm tapping at the MT end. Would this be ok?

                                            Do you know anyone close to Andover that may help.

                                            Many thanks Cedric.

                                            #626509
                                            Huub
                                            Participant
                                              @huub

                                              According to some foto's I have found, this small lathe can't be bolted to the table. That won't mean the lathe bed can't be twisted (due to inaccurate grinding or metal relaxation).

                                              You found a facing misalignment of 0.03 mm/100 mm. Causing a taper towards the chuck that can explain the turned taper.

                                              The facing misalignment the sum of the headstock misalignment and the carriage misalignment. The next step will be measuring the "headstock alignment" using the method in the first video.


                                              Edited By Huub on 28/12/2022 15:52:20

                                              Edited By Huub on 28/12/2022 15:57:54

                                              #626529
                                              Frances IoM
                                              Participant
                                                @francesiom58905

                                                It looks very similar to my WM180 (possibly slightly smaller) tho the topslide differs and it appears to have a guard on the lead screw – the WM180 can be bolted to a bed. Wasn’t it an optimum lathe that Hopper was involved in fixing some years ago?.

                                                Isn’t a quick test for alignment to put centres in both head + tail stocks and see if a thin rule can be held vertical between them?

                                                #626533
                                                peak4
                                                Participant
                                                  @peak4
                                                  Posted by Frances IoM on 28/12/2022 19:30:23:

                                                  Isn't a quick test for alignment to put centres in both head + tail stocks and see if a thin rule can be held vertical between them?

                                                  Surely that would only work if you know the tailstock offset is correct (i.e. zero).
                                                  One you have set up the lathe to turn parallel unsupported by the tailstock, then it might be a quick guide to re-setting the tailstock after an intentional. between centres, taper turning session.

                                                  Bill

                                                  #626539
                                                  Neil Lickfold
                                                  Participant
                                                    @neillickfold44316

                                                    The headstock adjusting screws are at the back of the machine. You will also need to slacken off the head hold down bolts just a little to allow it to move. Doing up the headbolts will have an effect on the horizontal alignment too. So take time and use an indicator on a parallel bar that runs true to see the changes that are being done. You need a horizontal indicator and a vertical indicator, makes it so much quicker for the checking as you tighten and make changes.

                                                    #626543
                                                    Neil Lickfold
                                                    Participant
                                                      @neillickfold44316

                                                      I looked at a manual for the the 2506 lathe as I can't find the manual for the 2406 lathe. No mention of screws for alignment of the headstock. But most lathes do have them. Although it is on a dovetail, does not mean that it can't move a small amount left or right. You have to take apart a fair amount of the covers etc just to get to the head stock hold down bolts. 4 of them, 2 through the middle of the Vee, and 2 through the middle of the back flat area.

                                                      I am of the opinion that the head needs to be readjusted slightly. It may be that just loosening the hold down bolts and re tightening again may just realign it all. Or it may need a small amount of pressure to the side that needs correcting, then tightened in that position.

                                                      Most sales people will have no idea about how to set up or how to adjust the head stock alignment. Most machines are fairly good from factory, but every so often one is not. I don't think that scraping of parts or adding shims will be required in your case. It is not that far out that sort of procedure is required. If things are really wrong, take it back and ask for another machine.

                                                      Cheers Neil

                                                      Edited By Neil Lickfold on 28/12/2022 22:39:45

                                                    Viewing 25 posts - 1 through 25 (of 38 total)
                                                    • Please log in to reply to this topic. Registering is free and easy using the links on the menu at the top of this page.

                                                    Advert

                                                    Latest Replies

                                                    Viewing 25 topics - 1 through 25 (of 25 total)
                                                    Viewing 25 topics - 1 through 25 (of 25 total)

                                                    View full reply list.

                                                    Advert

                                                    Newsletter Sign-up