Novice attempts to build a Filing Machine

Advert

Novice attempts to build a Filing Machine

Home Forums Work In Progress and completed items Novice attempts to build a Filing Machine

Viewing 18 posts - 1 through 18 (of 18 total)
  • Author
    Posts
  • #480048
    Ro
    Participant
      @ro

      Hi All,

      I recently decided that it was time to do a "proper project" on my little mini lathe after years of just using it to make knobs and prototype small aluminium parts for work.

      After far too much deliberation over a good first project I decided upon a sawing and filing machine from Hemingway Kits

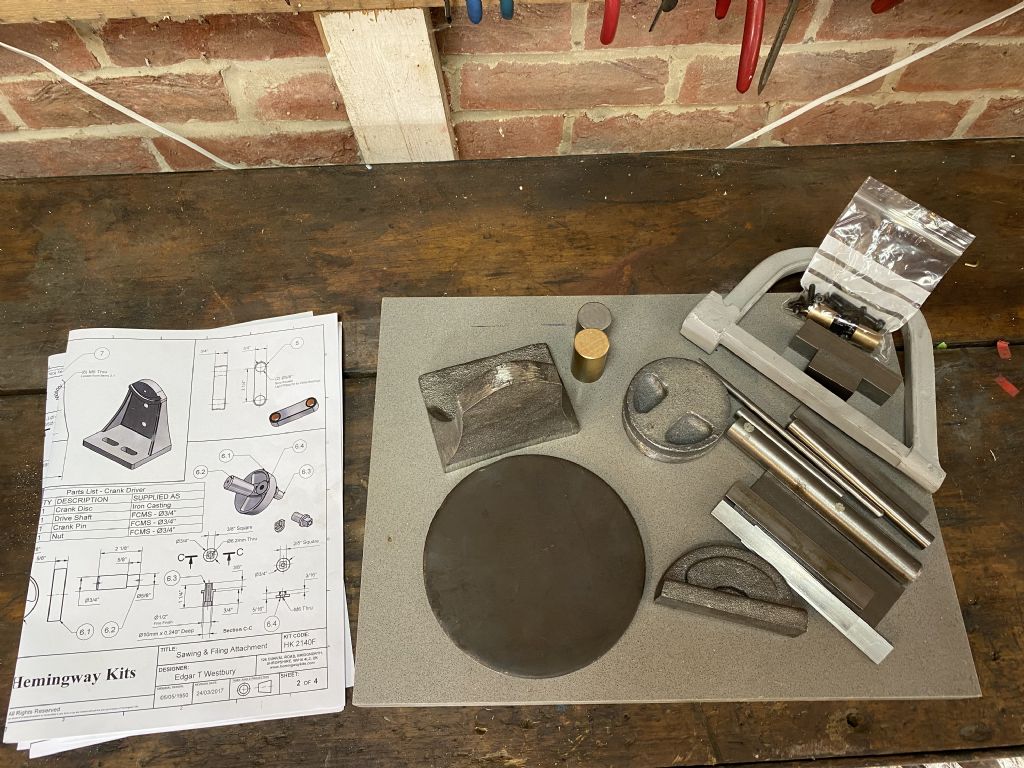
      Well, I placed the order and the castings arrived within a few days, all nicely packaged and with great instructions.

      original castings

      Despite being intimidated by the size of the castings, and never having machined cast iron before, I decided I'd better make a start on the first casting.

      The first job was to drill a couple of mounting holes on the standard.

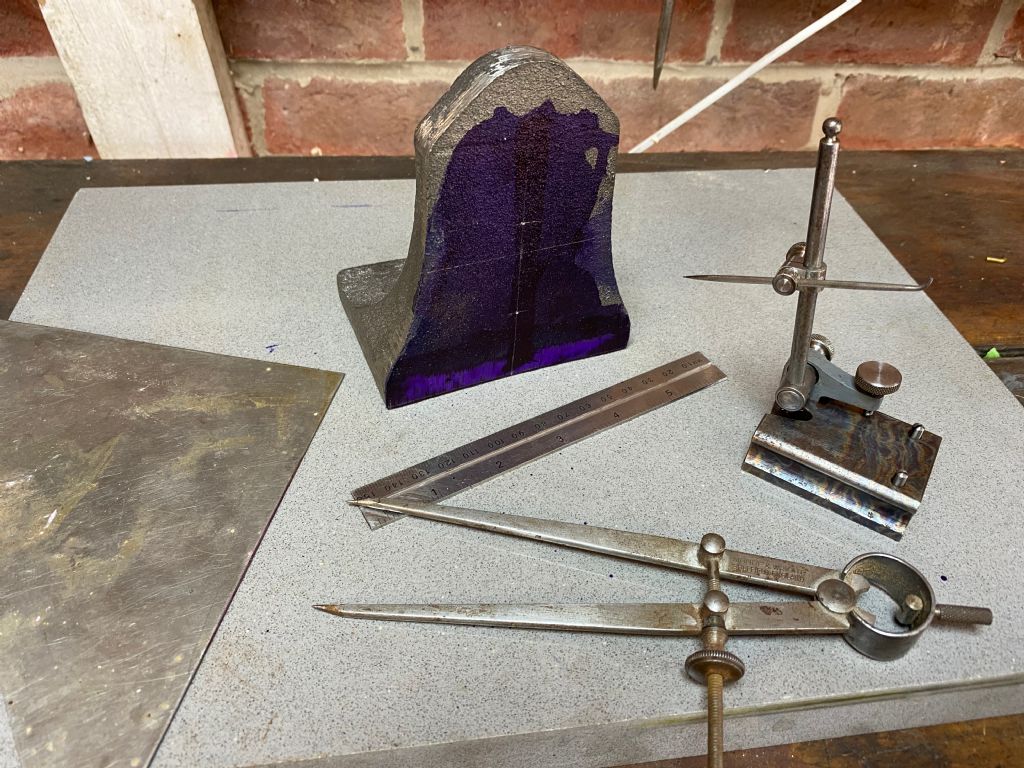
      marking out

      I marked them out (using an off-cut of granite worktop as a surface plate) and then realised that I would need the markings on the other side of the casting in order to drill the holes.

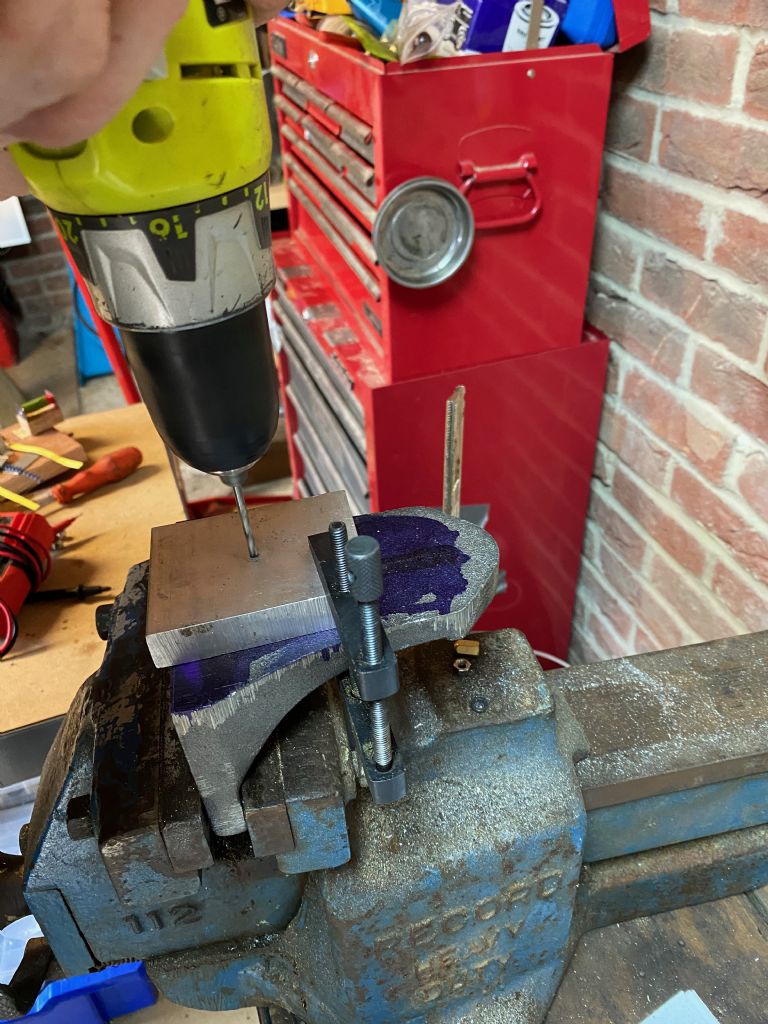
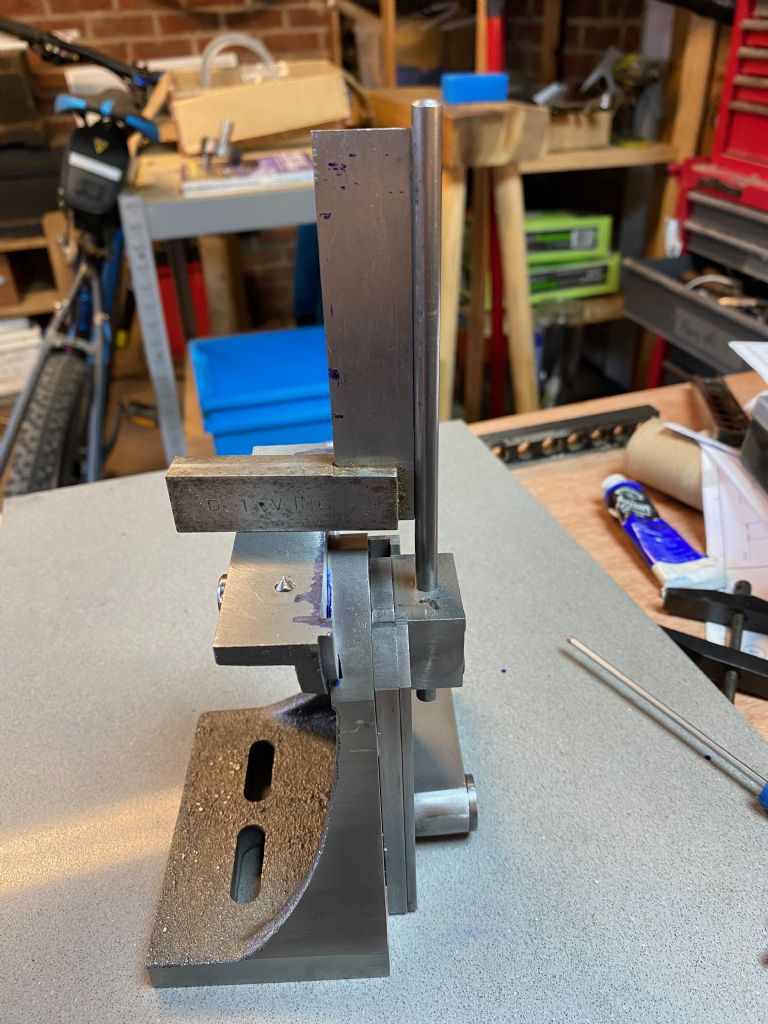
      I couldn't work out how to lay out the centre line on the other side of the casting as the bottom angle was in the way, so after a ponder and a cup of tea I made up a drilling guide and used it to drill 2 (almost perfectly square) small holes using a cordless drill, before enlarging the holes from the other side on the pillar drill

      transferring holes

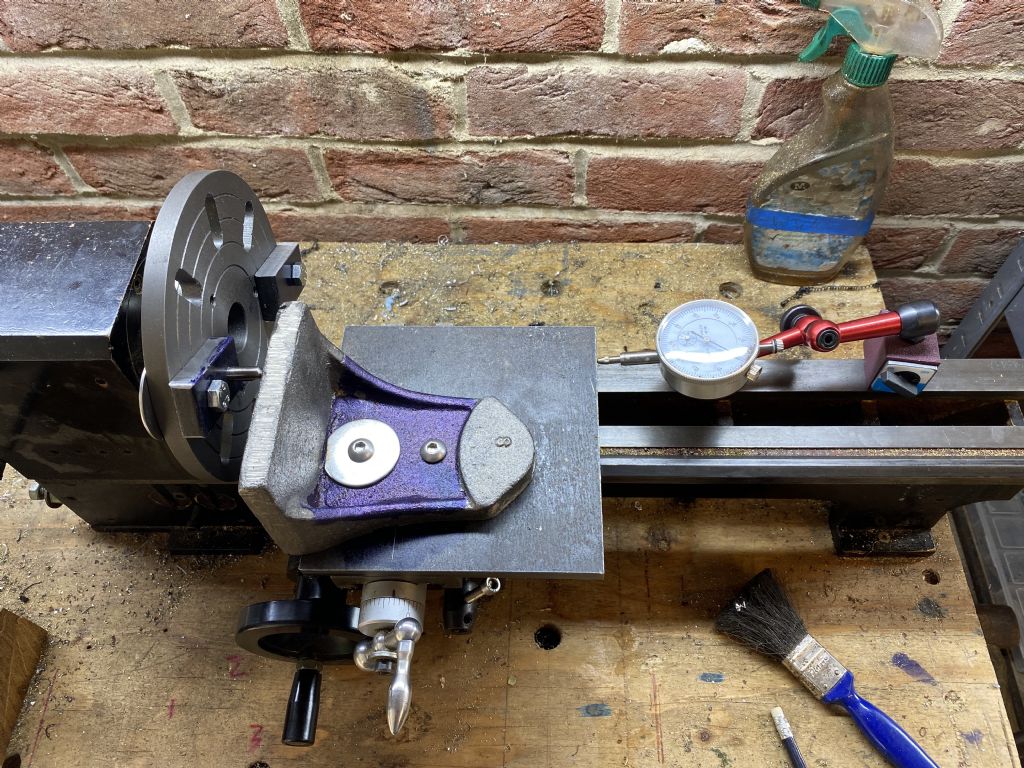
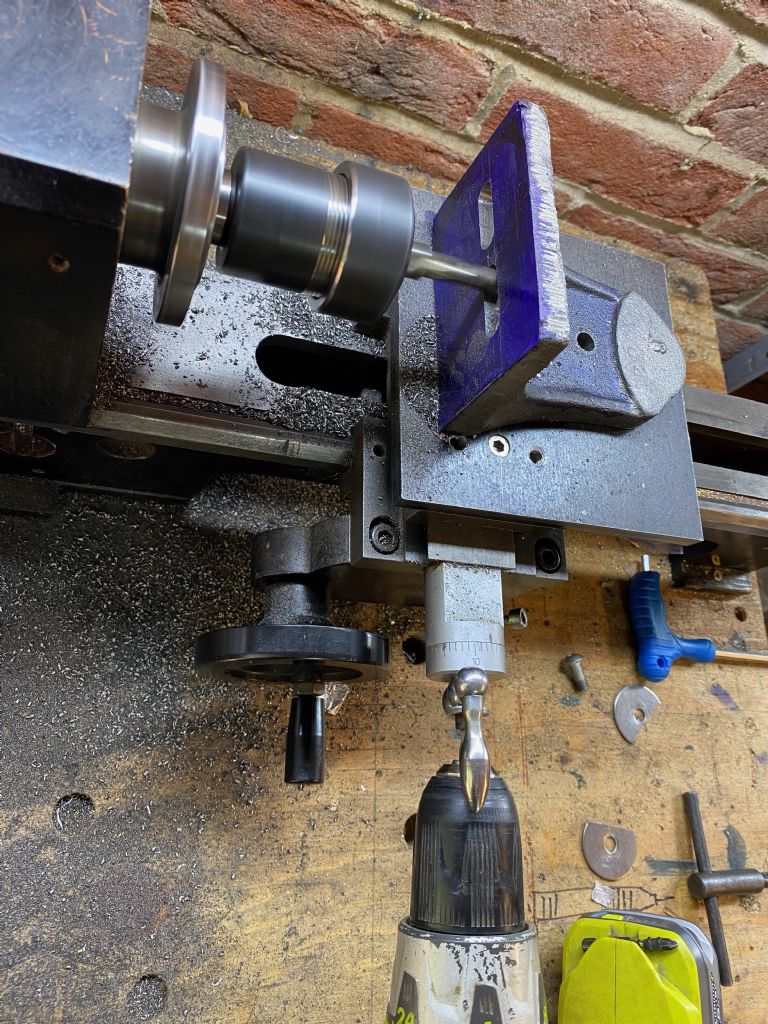
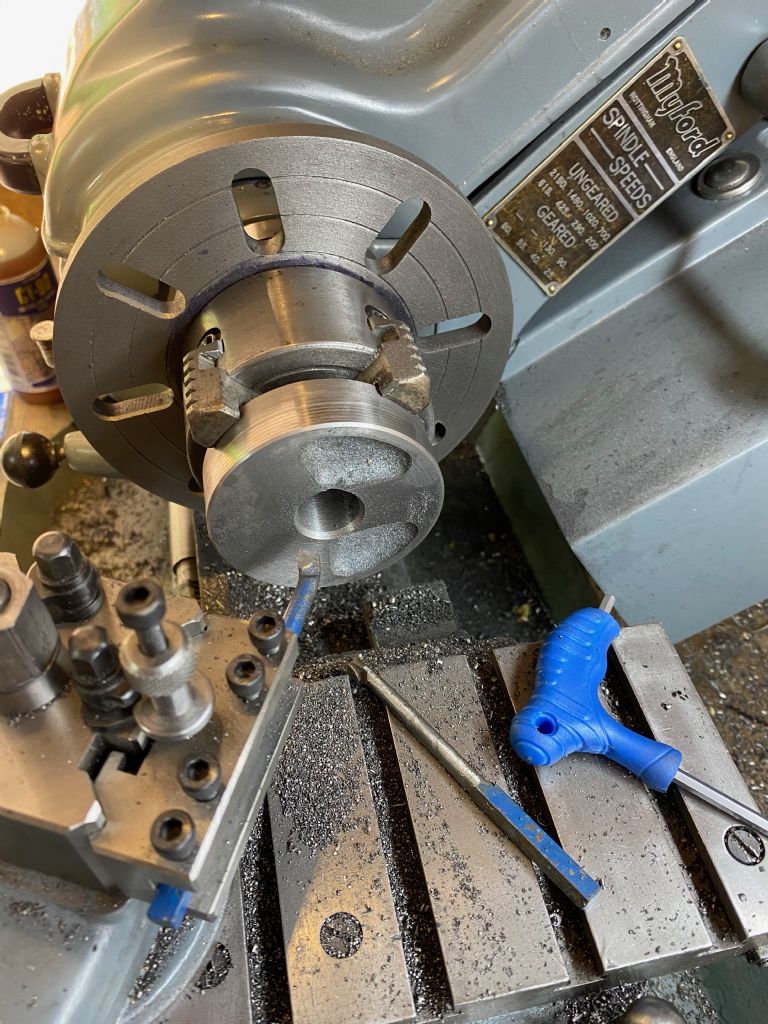
      Now I had the holes in place I could mount it on the cross slide of the lathe. Not wanting to drill holes into my cross slide, I made up a plate that I could bolt onto the cross slide and drilled + tapped M8 mounting holes into that. I also took the opportunity to make a quick saddle lock and a fly cutter for the faceplate.

      faceplate fly cutter

      My first attempt at fly cutting was a disaster, if I took a deep cut then the lathe stalled and if I took a light cut then the cast iron ate away at the (hardened) silver steel cutter.

      I then tried an HSS tool in a bought fly cutter (which I didn't want to use as it would have a smaller sweep).

      I found exactly the same thing with the HSS tool, any cut that the lathe could actually take just caused the tip of the HSS to be eaten away

      The last ditch attempt of an old brazed carbide tool in the fly cutter (I've no idea if this is recommended use!) cut really nicely.

      carbide fly cutter

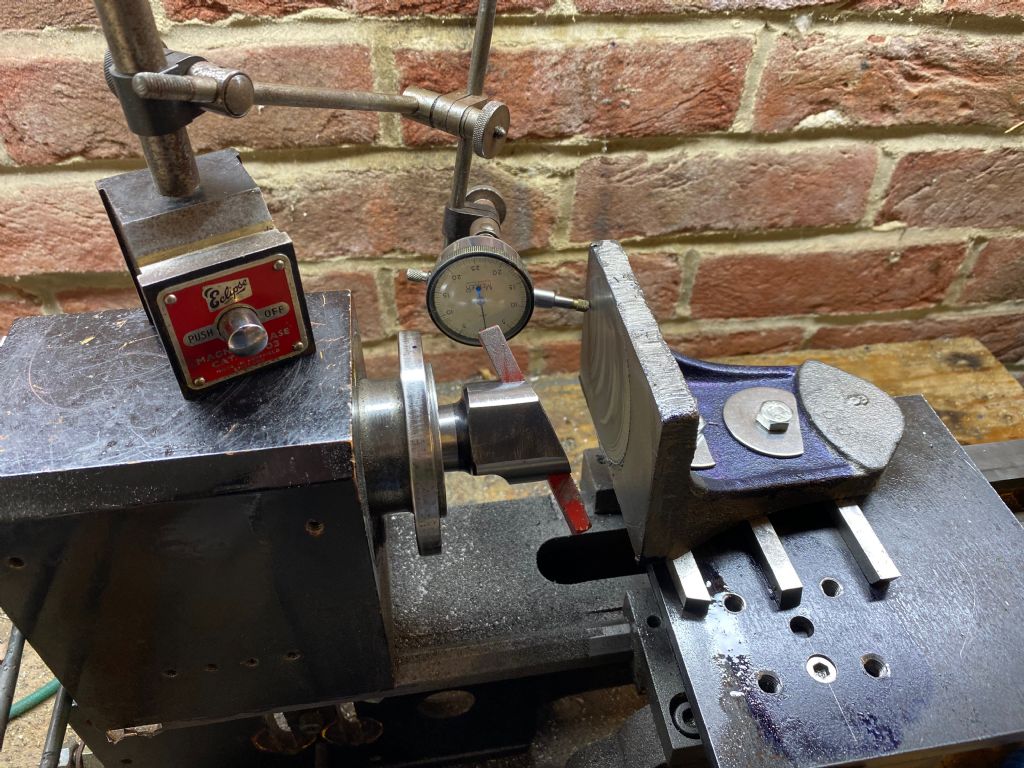
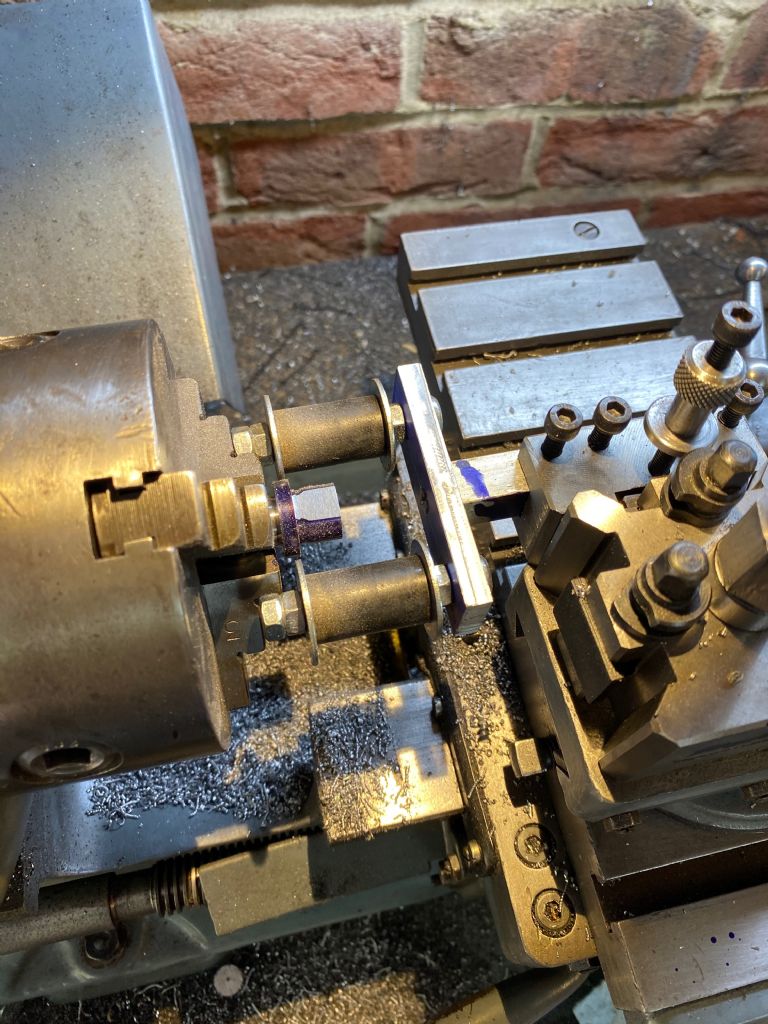
      As the width of the piece was more than the travel off the cross slide, I bolted it to one side of the plate and then moved it to the other side (aligning it with a dial gauge). The HSS blanks under the standard are to pack it up to centre height.

      I had a few issues with the alignment as the base of the casting wasn't exactly flat and I couldn't get my packing pieces in exactly the same place after moving it, but I'll come back and clean it up after surfacing the base.

      Next job is machining a couple of slots.slots

      I pre-drilled the holes either end of the slot (and one in the middle for good luck) and removed the waste with an old 3/4" end mill. These were done in 3 passes, and it took no time at all with the power feed on the cross slide 😀

      Next, I've got to surface the other face of the standard. As this is much higher than the one I've just done and to avoid complicated fixtures I'm going to attempt to machine it on my little 3040 CNC router. Wish me luck!

      Advert
      #31309
      Ro
      Participant
        @ro

        From castings

        #480053
        Michael Gilligan
        Participant
          @michaelgilligan61133
          Posted by Ro on 15/06/2020 19:04:05:

          .

          […] Wish me luck!

          .

          I wish you luck !!

          … Looks like a great project. yes

          MichaelG.

          #480089
          Maurice Taylor
          Participant
            @mauricetaylor82093

            Please keep us informed of your progress.

            #480103
            Nigel Graham 2
            Participant
              @nigelgraham2

              Yes – Good Luck, and we look forwards to seeing progress!

              Neat solutions to the setting-up problems, and I like your faceplate fly-cutter holder.

              Regarding the HSS tools blunting quickly, Hemingway supplies good-quality materials but cast-iron normally does have a thin, hard surface. It is likely that the depth of cut your lathe could handle at that large fly-cutting radius, was insufficient to undermine the "skin".

              The carbide tipped tool you ended up using as a fly-cutter would have been hard enough to cut through that surface.

              #480346
              Ro
              Participant
                @ro

                Thanks for the encouragement, and, Nigel, yes that sounds like exactly what was happening – I'll now know for next time

                Anyway, I had a couple of spare hours this evening so I thought I'd try machining the other face of the standard on the little router.

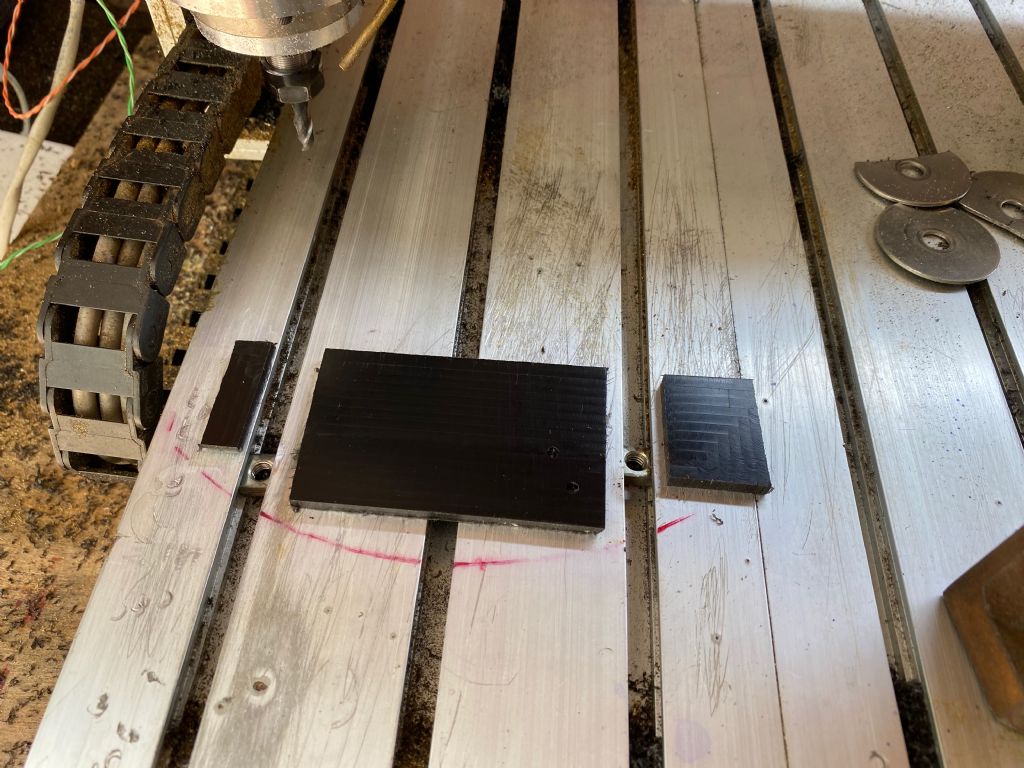
                Unfortunately the bed isn't perfectly flat so I superglued some delrin spaces in the area under where I wanted to mount the angle plate and faced them off flat.

                img_0060.jpeg

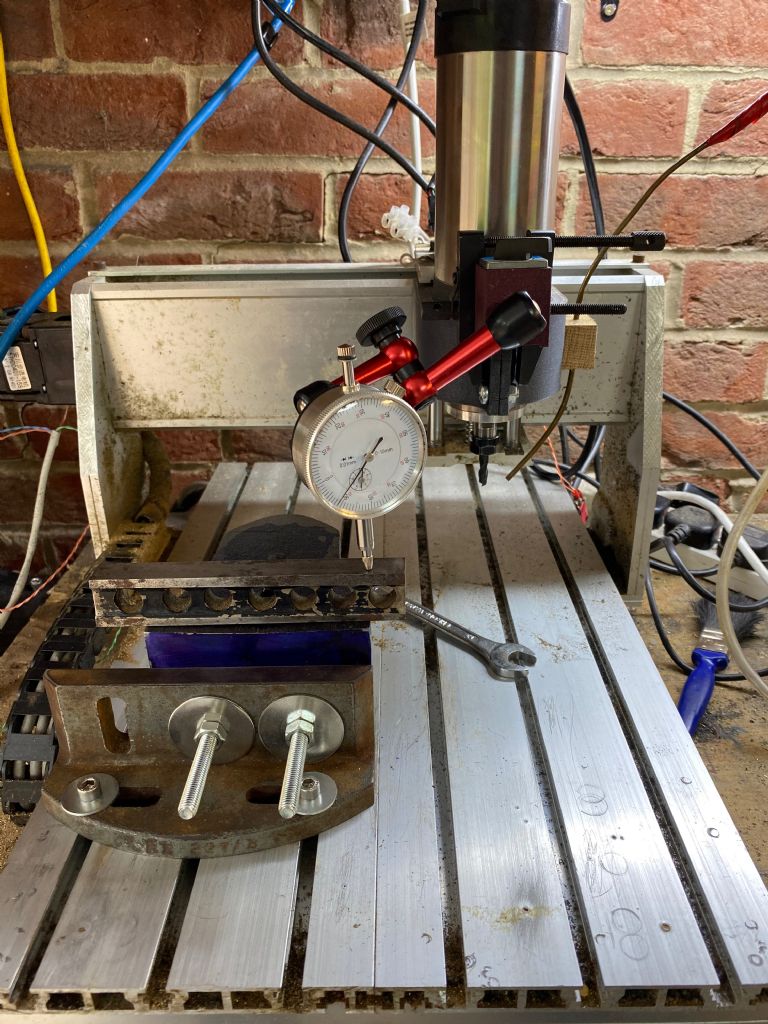
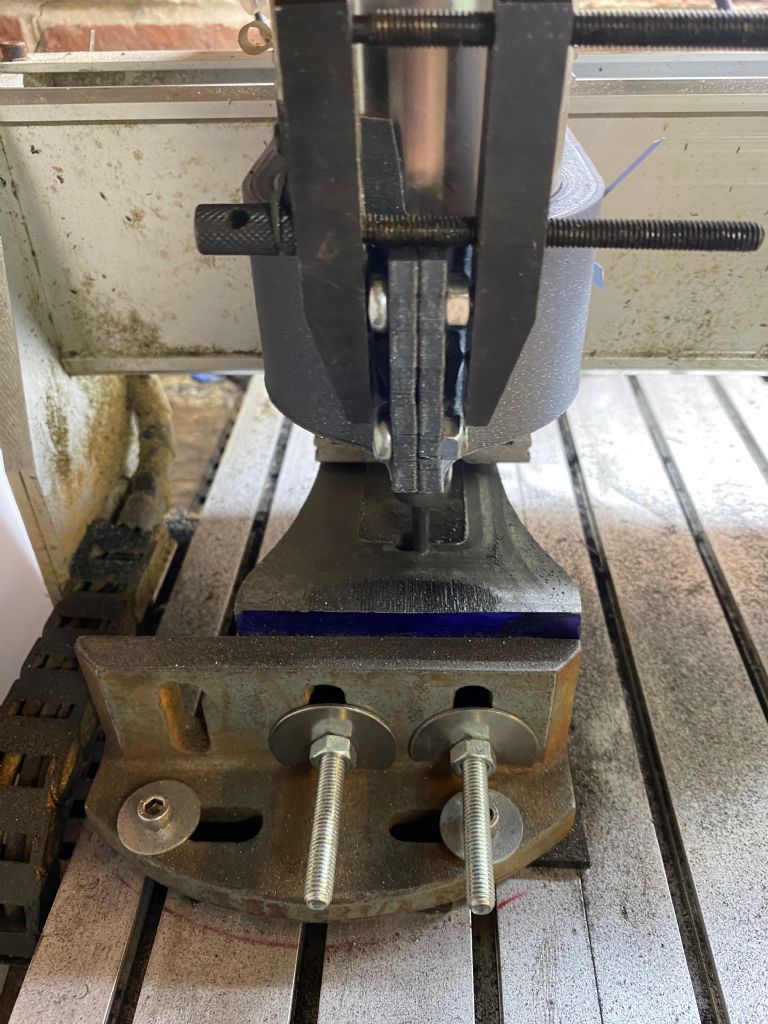
                Next I bolted an angle plate over these and mounted the recently fly-cut face to that, As I couldn't get a consistent reading off the cast face to align it, I used a parallel over the top to take reading with the dial gauge. Is this the best way of aligning a rough casting, or are there better ways?

                img_0055.jpeg

                I can only apologise for the state of the router – it is in desperate need of a good clean smile d

                I was dubious as to whether by little router would be able to cut the cast iron, but I found that by taking light passes it cut fine.

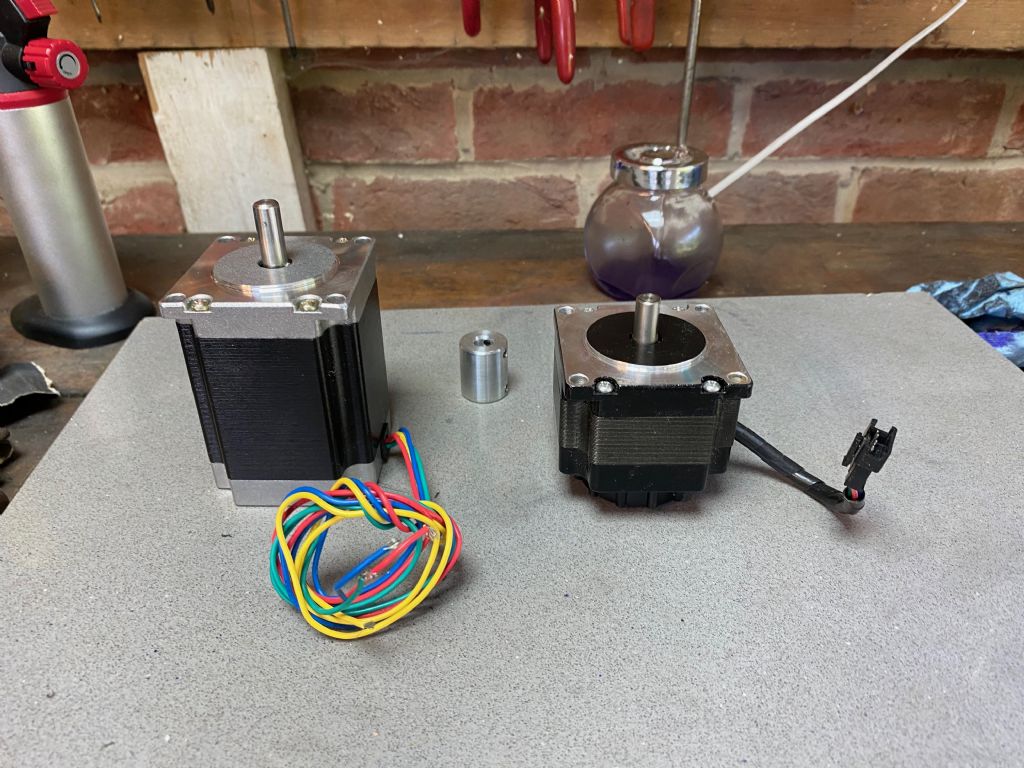
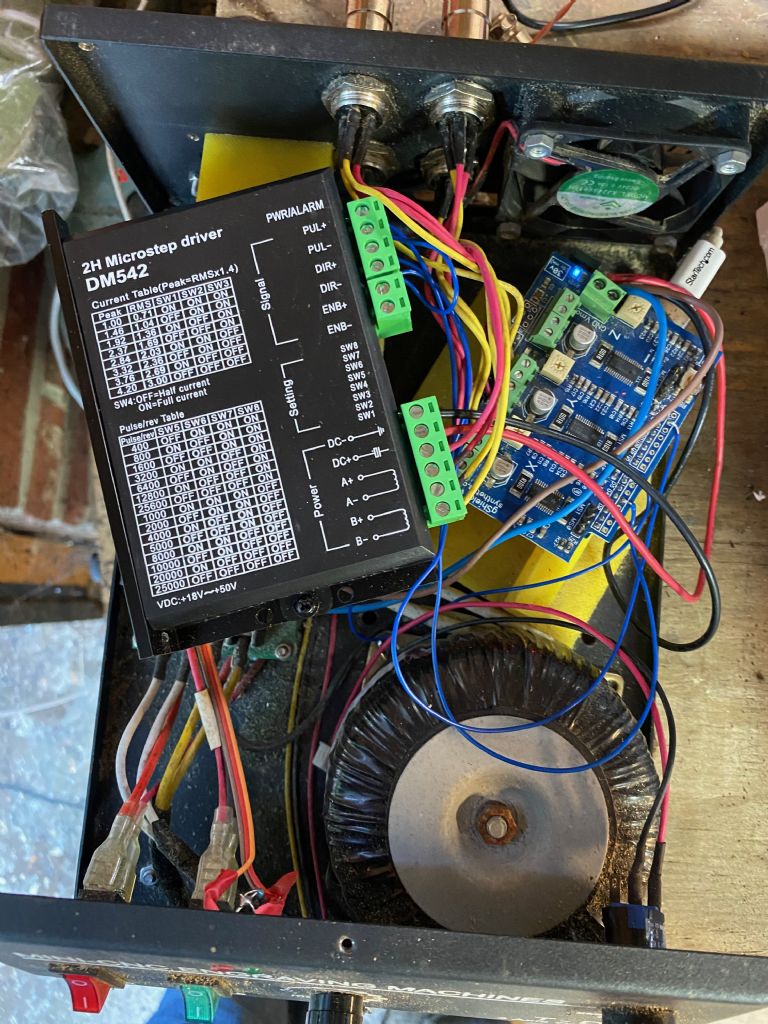
                I noticed though that the vibration was causing the Z axis stepper to lose/gain steps no matter what depth of cut I took. I think the holding torque on the stepper wasn't enough to keep the tool heigh steady. Luckily I had another Nema 23 stepper and driver lying around (for another project) so I swapped the old one out. You can see the old one on the right below, according to a web search it has a holding torque of approx 0.5Nm, whereas the one on the left has a holding torque of 3Nm.

                img_0063.jpeg

                Spent a happy 10 minutes wiring in the driver and replacing the stepper – I'll mount it properly soon, I promise!

                img_0067.jpeg

                The difference was night and day, no movement at all in the z axis when taking cuts.

                I was using a 6mm carbide 2 flute end mill on a 2D adaptive toolpath with stepover of 0.4mm and a depth of cut of 0.5mm at a feedrate of 2000mm/min.

                img_0065.jpeg

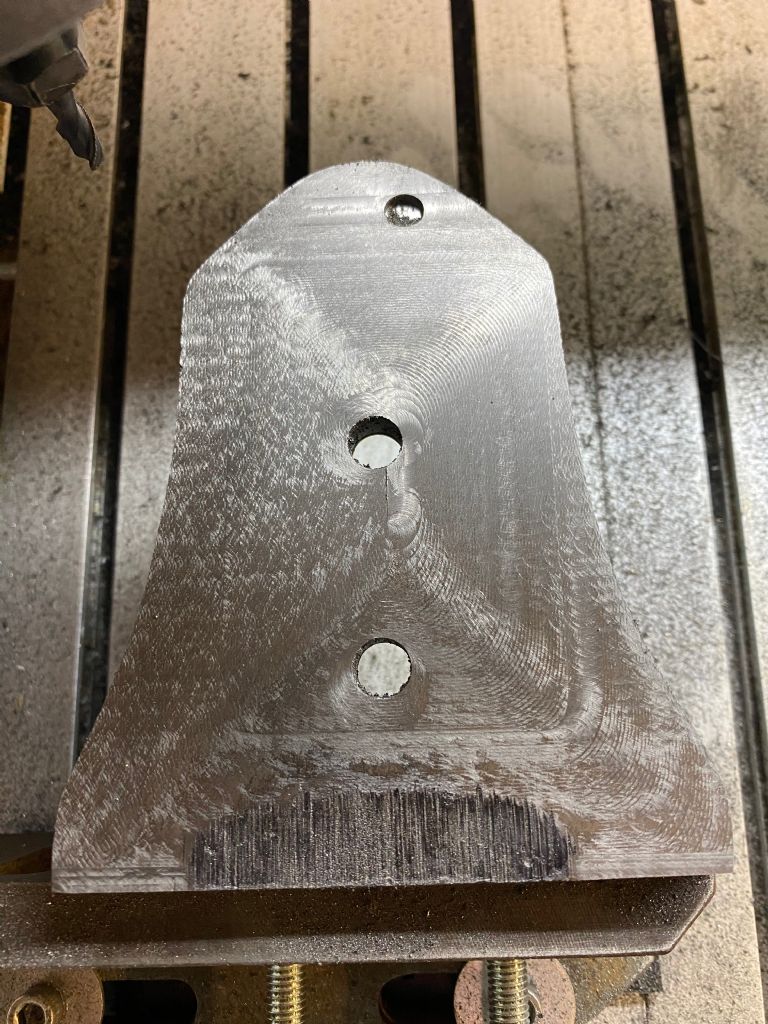
                It took about 20 minutes to face the entire surface, and I'm very pleased with the result, the camera makes it look bad, but you can't feel any ridges and it is perfectly smooth to the touch. I just need to take another cut or 2 to get past the marks at the bottom.

                img_0066.jpeg

                As you. can see, there is now an "extra hole" right at the top, caused by me pressing the wrong button and plunging the end mill straight into the casting.

                Does anyone have any bright ideas about how to fix it?

                I'm wondering about drilling all the way through and threading a piece of mild steel into it, but I'm sure there's a better way.

                #481072
                Ro
                Participant
                  @ro

                  Well, I took a couple more cuts and I'm still not getting a consistent depth of cut over the full surface. The Z axis is no longer moving, but now I seem to be getting flex in the machine itself.

                  I think I'm running up against the limits of this little machine – it can just about machine aluminium and brass, but it really doesn't like this cast iron frown.

                  I'm thinking of buying either a larger lathe (maybe a Boxford A/B/C UD) and do this on the faceplate or a smallish vertical mill.

                  Can anyone tell me whether the Sieg SX2P would be man enough for these kind of tasks?

                  #481097
                  geoff adams
                  Participant
                    @geoffadams14047

                    Hi Ro

                    looking at your router it does not lookup to the job this is what you need sent you a pm

                    geoff

                    img_0802.jpg

                    #481106
                    Ro
                    Participant
                      @ro

                      Hi Geoff, I think you're right – I'm very jealous of your setup there!

                      PM sent

                      ro

                      #481323
                      Ro
                      Participant
                        @ro

                        Well, after chatting with Geoff, I convinced myself that I needed to buy either a SX2.7 or a Chester 20V.

                        Then I made the mistake of talking to my father about it. He convinced me that instead of this being the perfect excuse to buy exciting new toys, it was actually the perfect excuse to practice filing and scraping.

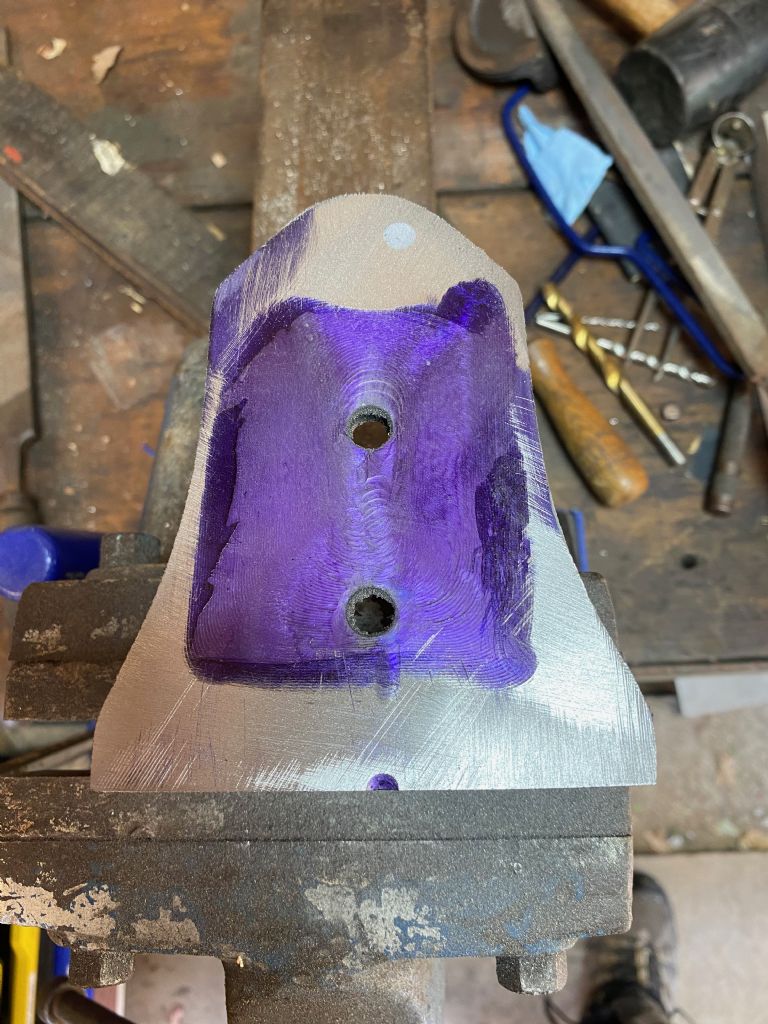
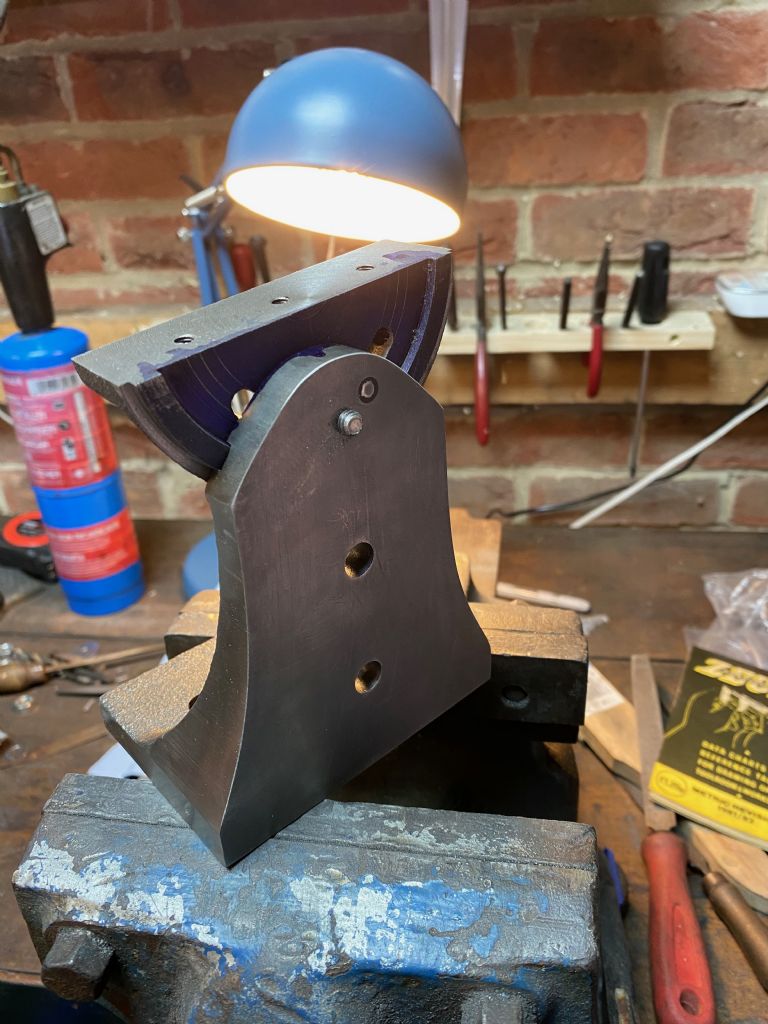
                        So I duly broke out the files and gave it a go. I started by covering the surface with blue layout fluid and then rubbing off the high spots with a (large and flat) diamond stone. This gave me a rough idea of where to file.

                        This is how it looked after 5 minutes of filing img_0070.jpeg

                        You can see the deep pocket in the middle where the little CNC wasn't cutting consistently.

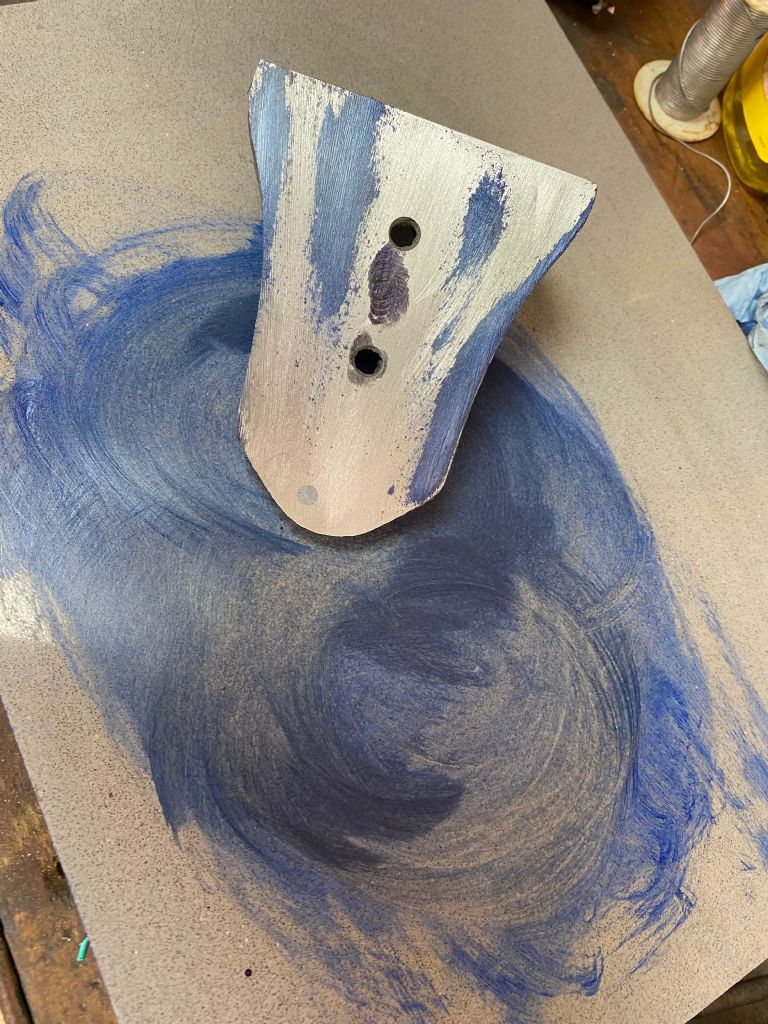
                        After what seemed like a lifetime of filing I switched over to using a thin layer of blue oil paint on the surface plate and a finer file:

                        img_0075.jpeg

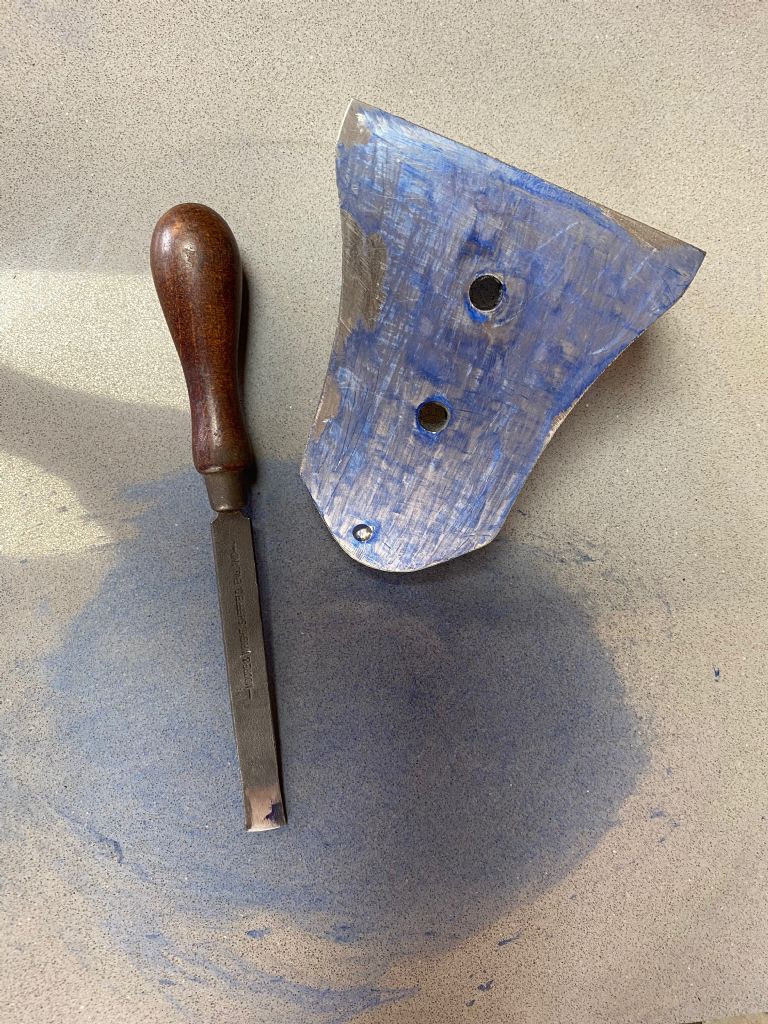
                        Then, moved on to scraping it. I've never tried scraping before, but while the result isn't perfect, the low spots all seem to be outside of the bearing surface. I'm declaring it done.

                        img_0077.jpeg

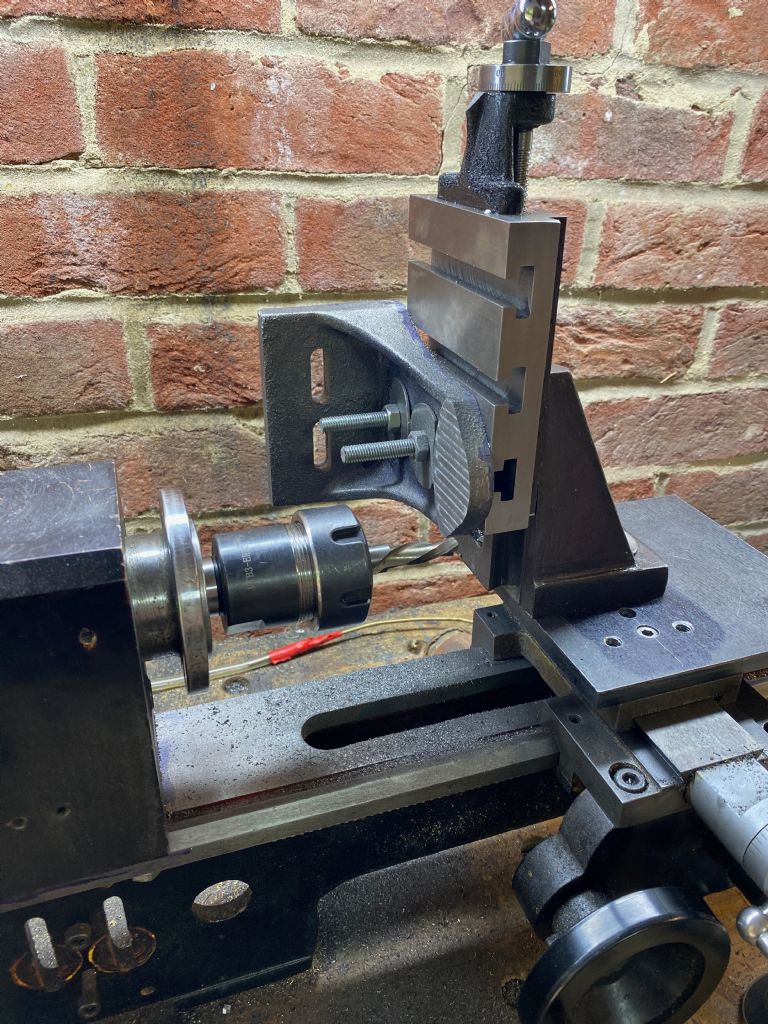
                        Next was milling the top of the other side flat. I had ordered a vertical slide from Arc Euro a couple of weeks back and this was my chance to try it out

                        img_0082.jpeg

                        It worked beautifully! Definitely less work and more fun than filing 😀

                        The final bit for the day was to mill a (semi) circular groove on the freshly faced surface. I ground up an HSS tool for the fly cutter and set up the workpiece.

                        It took a bit of experimenting with the grind and I had to run the lathe at the slowest possible speed, but in the end I cut the slot in 6 passes, adjusting the length of the fly cutter in between each one.

                        img_0083.jpeg

                        That's it for today. Thanks for reading!


                        ro

                        Edited By Ro on 21/06/2020 19:02:16

                        #481556
                        Ro
                        Participant
                          @ro

                          Just a quick update:

                          Cleaned up the raw edges on the belt sander and lapped the milled surface.

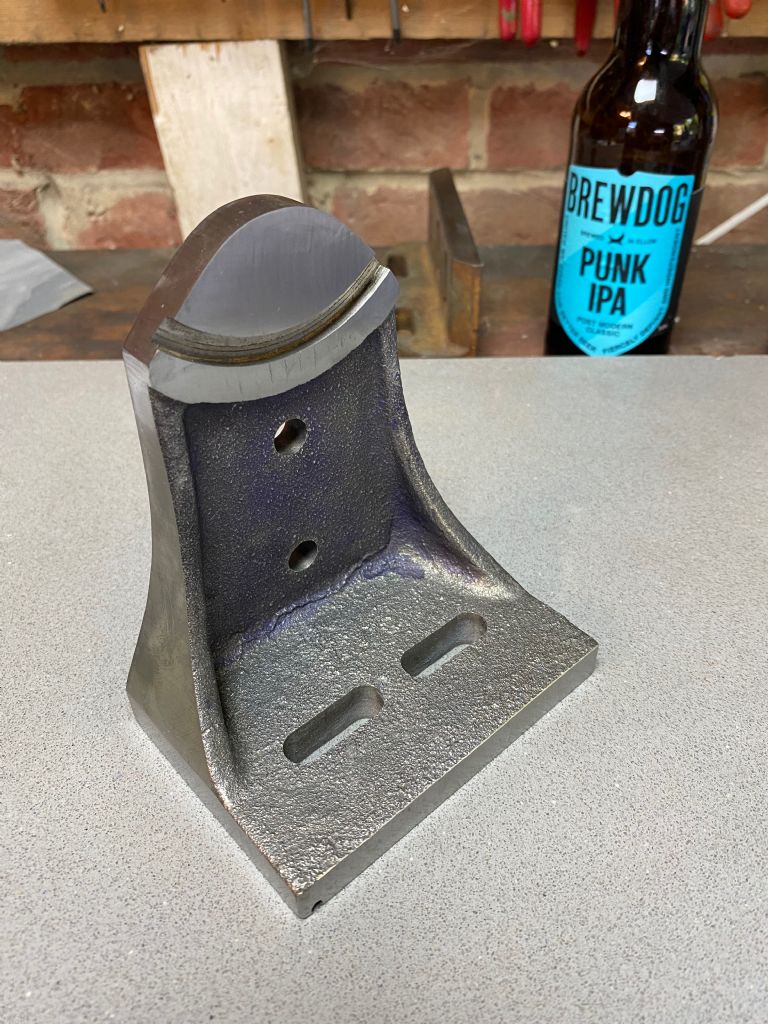
                          I'm really pleased with the result of machining my first casting laugh

                          img_0084.jpeg

                          #481563
                          Michael Gilligan
                          Participant
                            @michaelgilligan61133

                            Looking good yes

                            Presumably the IPA is a modest and well-deserved celebration.

                            MichaelG.

                            #484653
                            Ro
                            Participant
                              @ro

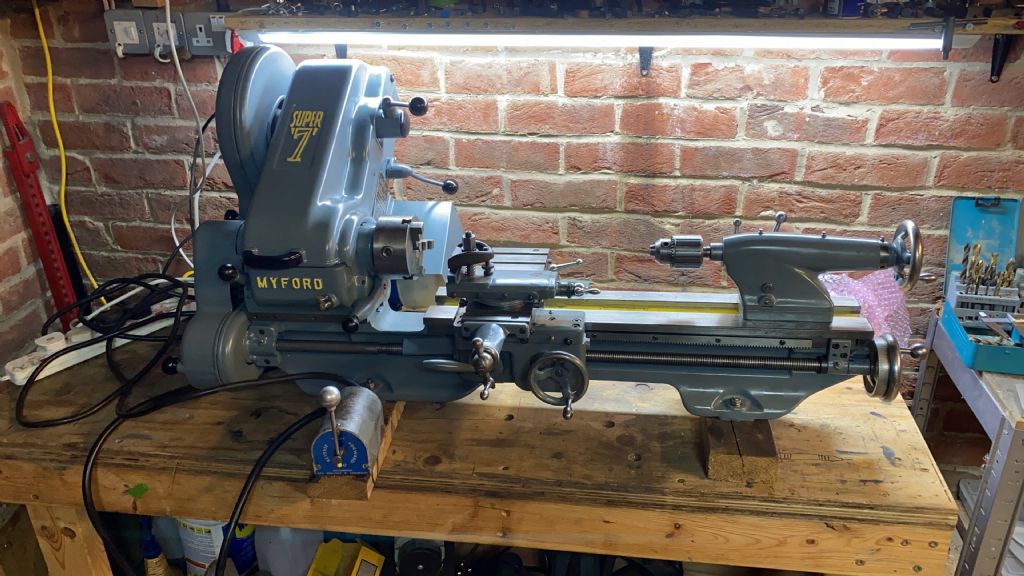
                              Well, progress stalled for a bit on this project, as work got really busy and also I accidentally bought a Myford Super 7.

                              I put a bid in on one on the 'bay thinking I couldn't get it for that price and ended up winning 😀

                              aa987c13-4ab7-4d53-b107-5b9c1a15f3f8.jpeg

                              Here it is before I set it up and bolted it down.

                              It took a bit of getting used to, it's a very different animal to my mini-lathe, but I blooming love it.

                              Anyway, once I had sorted out tooling for the new lathe it was back to the filing machine. Next up is the swinging bracket that holds the table.

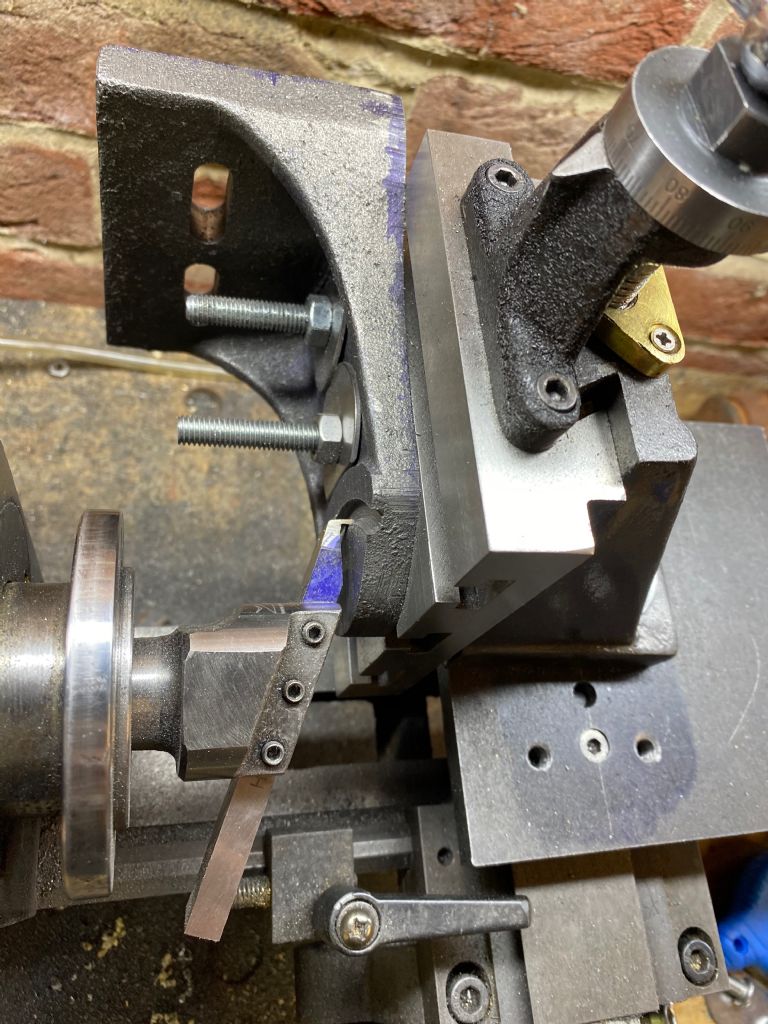
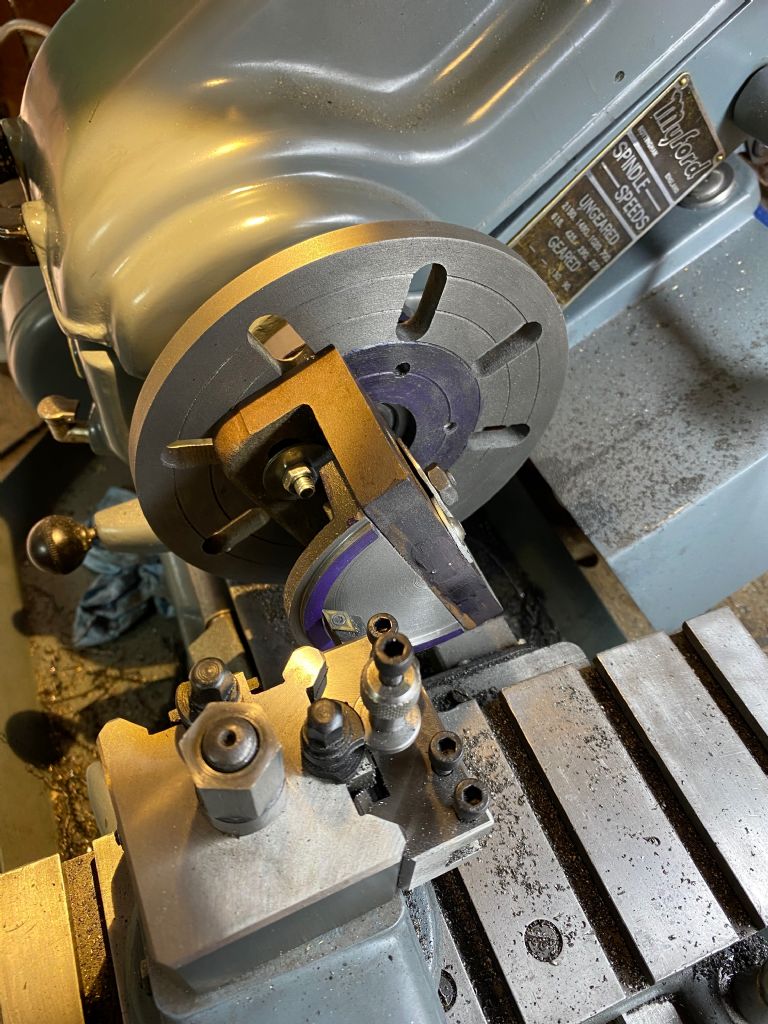
                              One side just needed facing off, so I clamped it to an angle plate on the faceplate and used an old carbide insert followed by a nice sharp HSS tool to finish it.

                              img_0148.jpeg

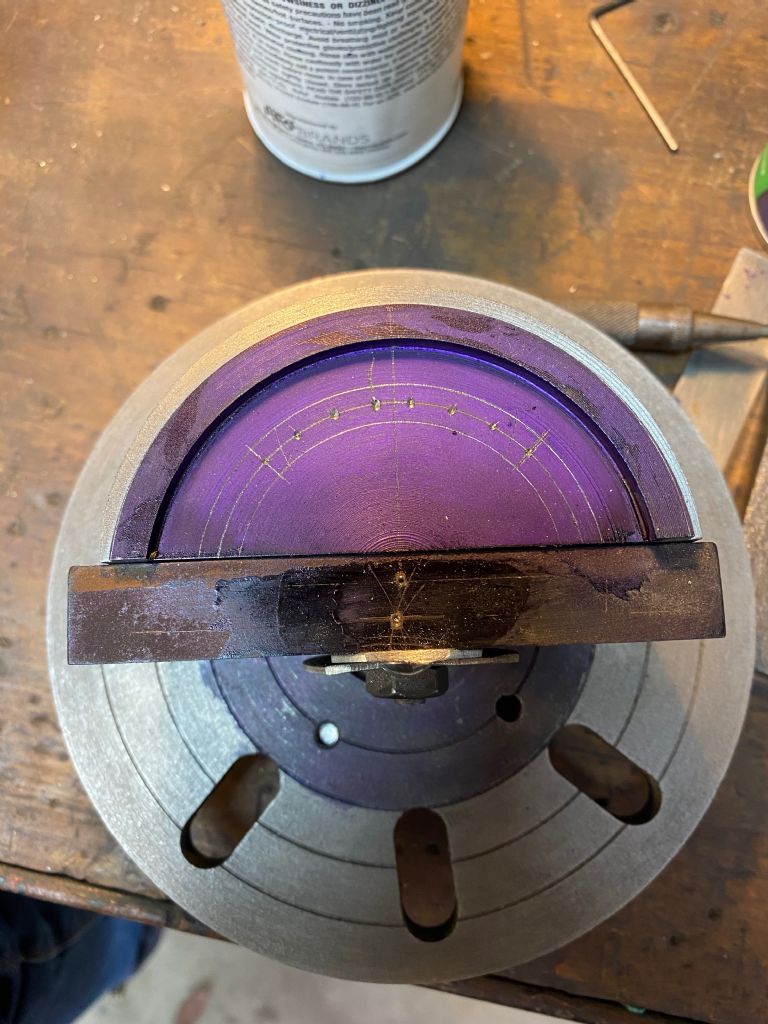
                              The other side had to have a ledge on it to fit into the slot on the standard, so I clamped it onto a smaller angle plate and marked the arcs for the ledge up. I centered it by lining the tailstock up to the center of the arcs and faced off each side up to the lines.

                              img_0151.jpeg

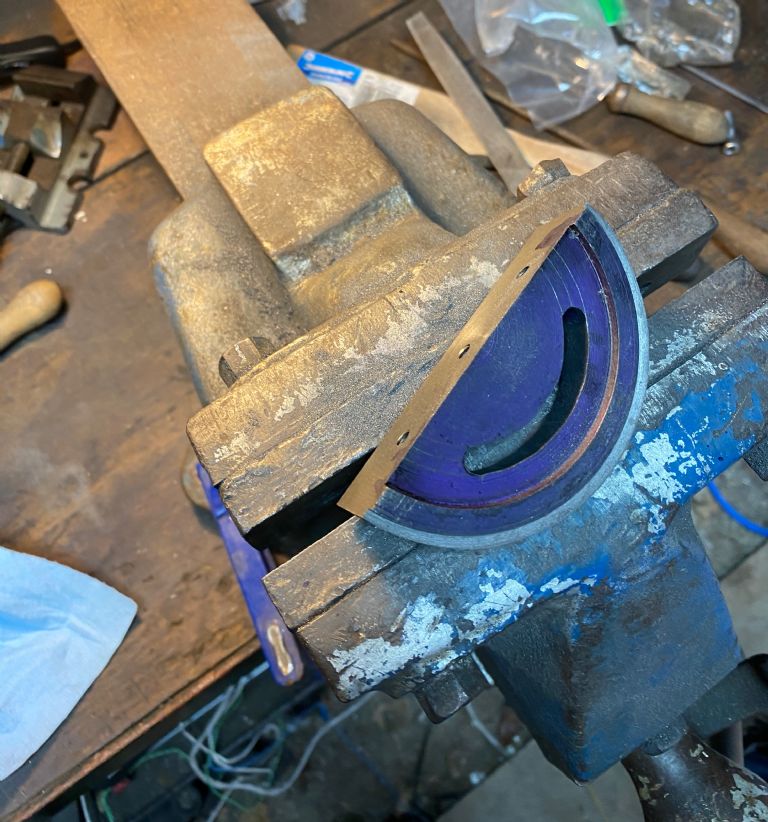
                              The last operation on this piece was to cut a slot for the bolt which holds it to the standard.

                              img_0154.jpeg

                              I couldn't think of a way of machining it on the lathe, so I ended up marking it out with dividers, chain drilling and filing it to size. This is where having a filing machine would be really handy

                              img_0158.jpeg

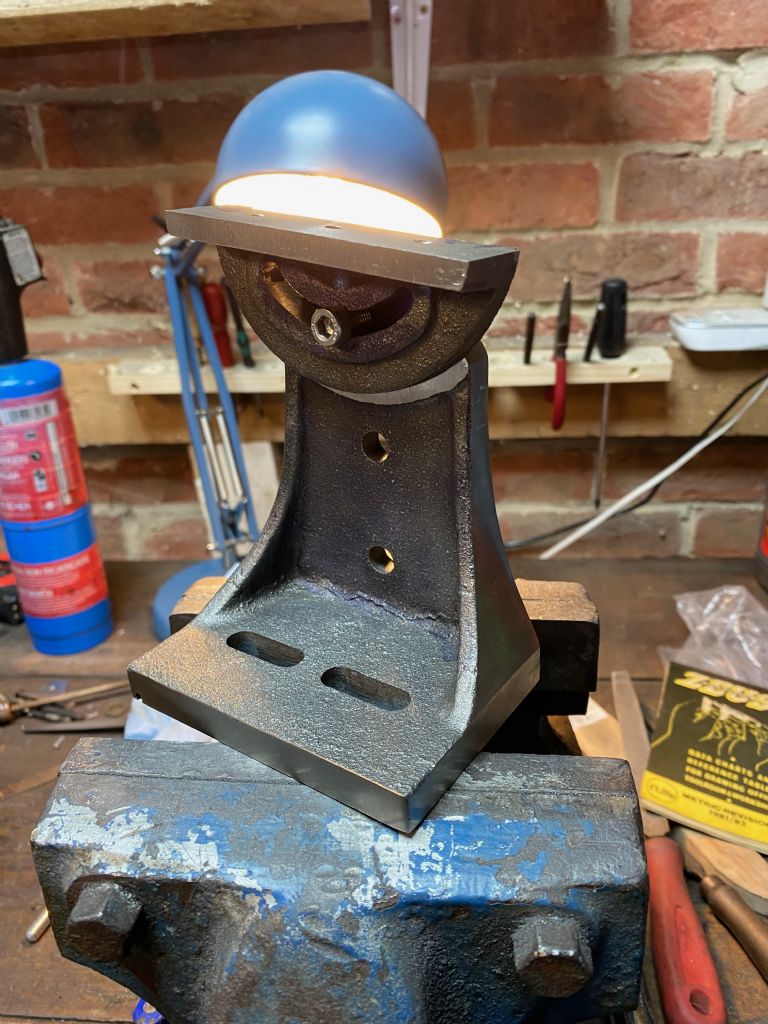
                              And finally, the 2 pieces fit together with a temporary bolt in place, next job is to make up the proper bolt and handle.

                              img_0162.jpeg

                              img_0163.jpeg

                              It's a nice sliding fit. Time for a celebratory beer

                              #484668
                              Paul Lousick
                              Participant
                                @paullousick59116

                                Hi Ro,

                                Mastering a mill or lathe is a long lerning curve and we have all made mistakes but this is how we learn so keep at it. A bit like playing golf. Lots of miss hits and slices into the rough but that one elusive birdie makes it all worth while.

                                The surface of CI castings can be very hard and difficult to remove. You can use an angle grinder to get under the skin and remove high spots to make milling easier. A router is probably too fast and not robust enough for milling cast iron and will be damaged by heavy use. I previously used a router motor as a die grinder and wrecked the bearings trying to grind metal. (another learning experience).

                                Your finished parts are looking good.

                                Paul.

                                Edited By Paul Lousick on 09/07/2020 03:37:02

                                #485654
                                Ro
                                Participant
                                  @ro

                                  Thanks Paul, and yeah I think I'll keep the router for softer materials in the future smiley

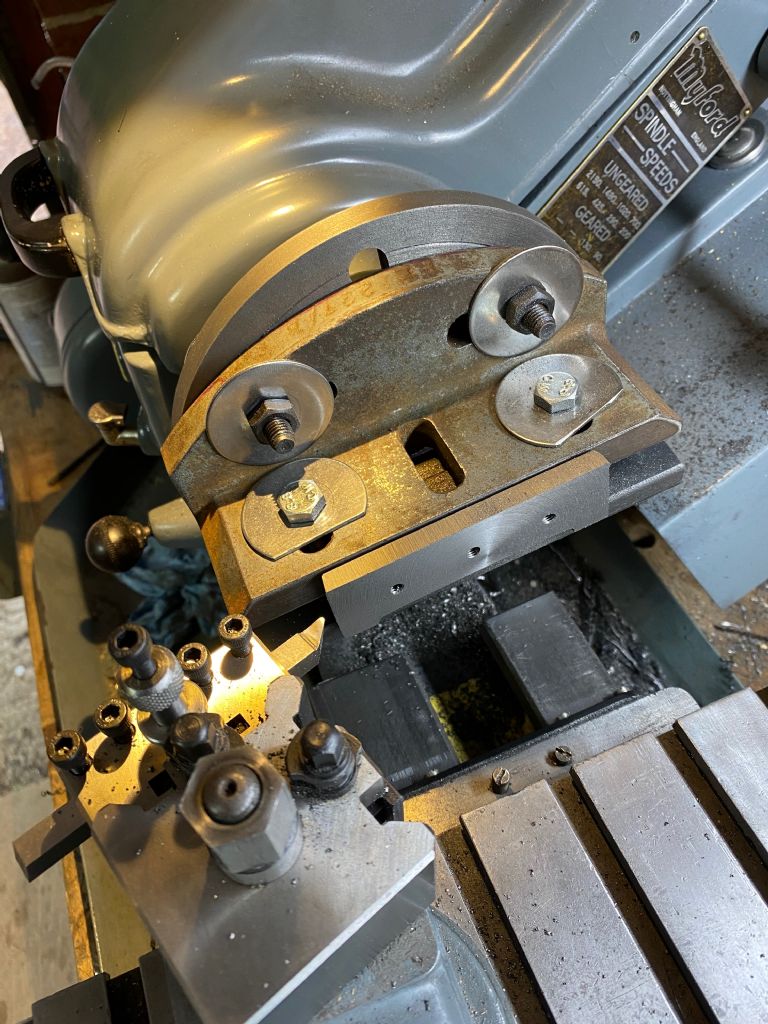
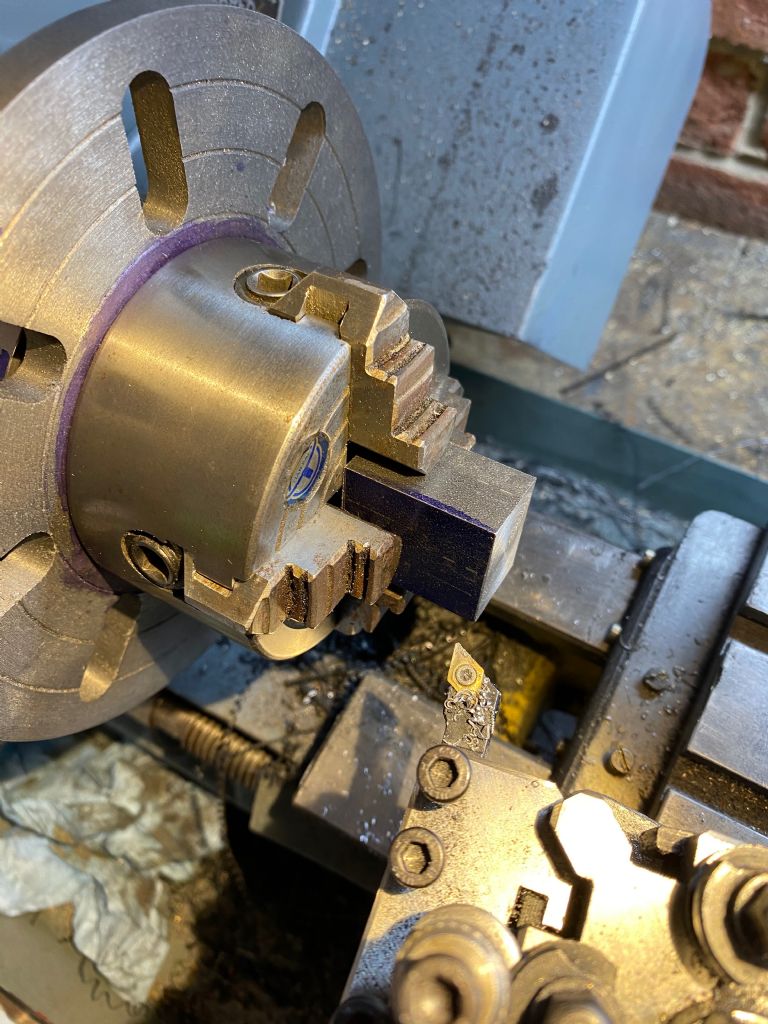
                                  Well, I had a fairly productive weekend in the garage. I needed to face a block of mild steel to make the file holder. Not having a 4 jaw chuck for the Myford, I mounted my mini lathe 4 jaw on the faceplate.

                                  img_0139.jpeg

                                  The rest was all just simple turning, filing, drilling, more filing, a bit of threading and even more filing.

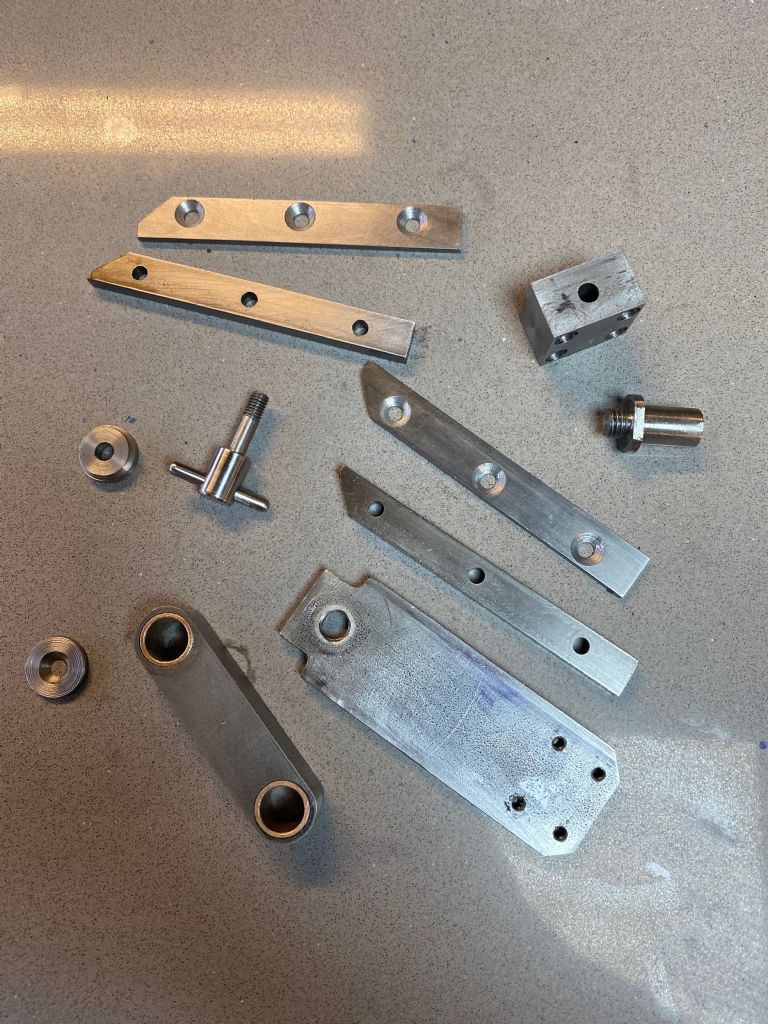
                                  By the end of the weekend I had completed the file holder, slide, cheeks, tommy bar, con rod and wrist pin

                                  img_0180.jpeg

                                  #485873
                                  Ro
                                  Participant
                                    @ro

                                    Well, it feels like I'm finally getting somewhere with this.

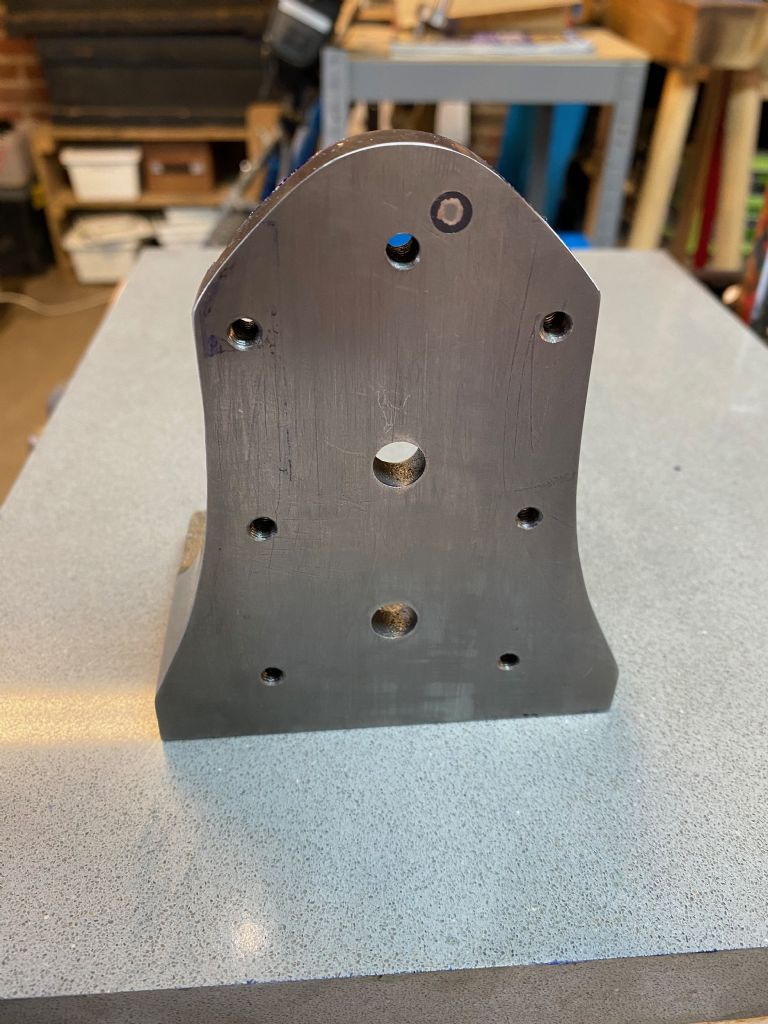
                                    Spotted the holes through the cheeks and into the standard, drilled and tapped M5

                                    img_0183.jpeg

                                    Put everything together and it all fitted first time! The slide has a nice, sliding fit on the standard.

                                    img_0185.jpeg

                                    The only issue I had was that the hole in the file holder. wasn't perfectly square to the sides of the file holder. After a bit of filing and bluing/scraping I was rewarded with a lovely alignment between the.top of the bracket and a piece of silver steel inserted into the file holder

                                    img_0186.jpeg

                                    Mounted the flywheel/crank in the bodged 4 jaw chuck turned the outside and bored a hole through the middle.

                                    As I was putting a chamfer on the hole, I realised I had cocked up. I had misread the drawing and bored a 3/4 hole instead of a 5/8 one. After turning the air blue for a couple of minutes, I decided that the only downside was that it was now a bit close to the voids (is that the right term?) in the casting as you can see below. I think I can live with that.

                                    img_0175.jpeg

                                    The Crank pin was a simple turning job, but needed a square end on it, so i made up a quick ghetto filing guide for the toolpost and squared the end, indexing off the back gear.

                                    img_0176.jpeg

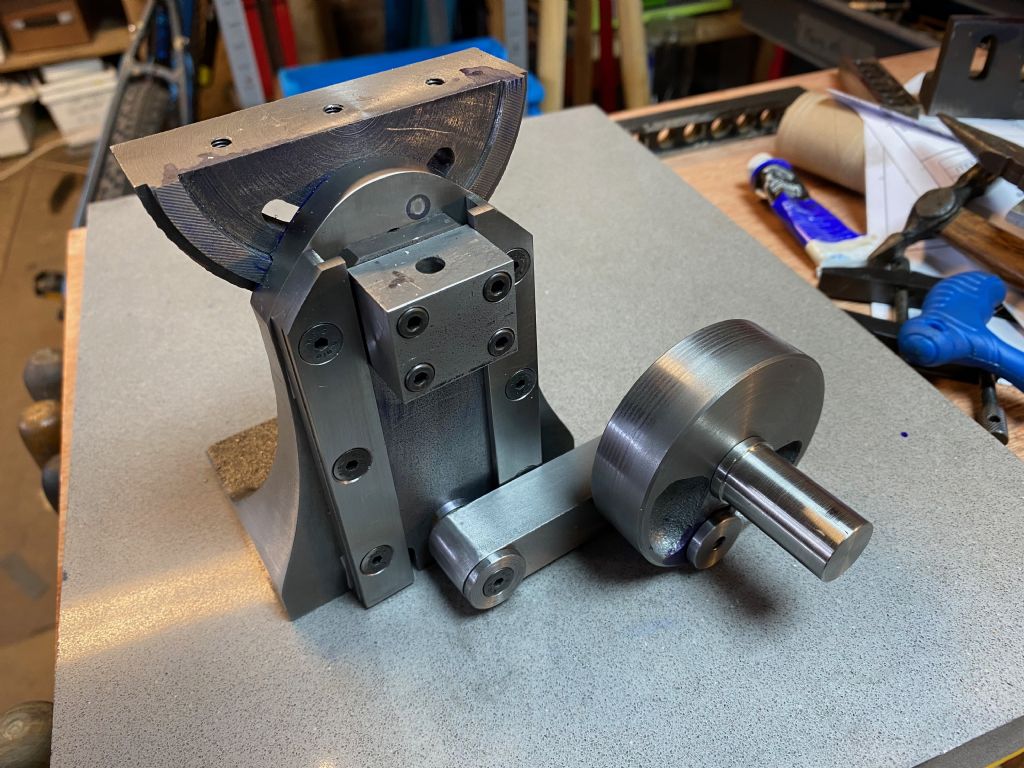
                                    And, here's the crank parts all finished, the slot still needs a bit of tidying up, but it all fits fine.

                                    img_0190.jpeg

                                    Obviously I couldn't resist putting it together.

                                    img_0191.jpeg

                                    And (after oiling it) trying it out on the lathe. It runs!!!

                                    Next step is the table – hopefully tomorrow.
                                    #507891
                                    Buffer
                                    Participant
                                      @buffer

                                      Ro

                                      How are you getting on with this? I was enjoying this thread and looking forward to seeing it working.

                                      #507903
                                      Pete.
                                      Participant
                                        @pete-2
                                        Posted by Buffer on 16/11/2020 21:51:01:

                                        Ro

                                        How are you getting on with this? I was enjoying this thread and looking forward to seeing it working.

                                        Same here, I remember when you started this, I was also enjoying your progress on this project.

                                      Viewing 18 posts - 1 through 18 (of 18 total)
                                      • Please log in to reply to this topic. Registering is free and easy using the links on the menu at the top of this page.

                                      Advert

                                      Latest Replies

                                      Viewing 25 topics - 1 through 25 (of 25 total)
                                      Viewing 25 topics - 1 through 25 (of 25 total)

                                      View full reply list.

                                      Advert

                                      Newsletter Sign-up