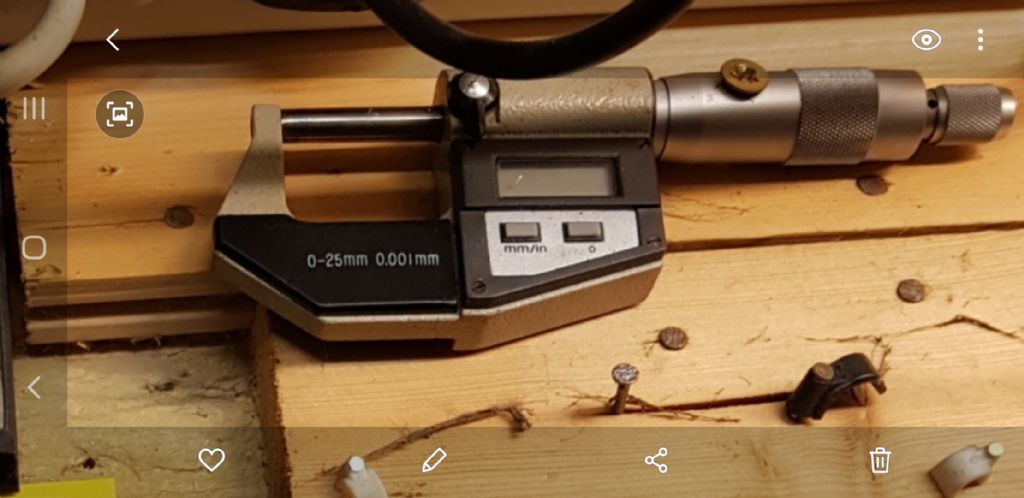
New Micrometers

Advert

New Micrometers

Home Forums Workshop Tools and Tooling New Micrometers

Viewing 22 posts - 26 through 47 (of 47 total)
  • Author
    Posts
  • #573979
    Jon Lawes
    Participant
      @jonlawes51698

      I just remember the Boscombe Down Standards lab… if you opened the door for more than a couple of seconds the chap would shout at you…. as a young erk I found it all a bit eye-opening…

      Advert
      #573984
      Mike Hurley
      Participant
        @mikehurley60381

        What about an internal micrometer? I know not everyone likes them but personally I do find them handy for most tasks. If requiring a very accurate internal bore I would use a home made go/no go gauge but still use the internal mike when working to ' nearly got there '. ( I'm aware of the issues with them normally only being able to measure the first part of a bore ) . Really don't find calipers work for me as well as micrometers, just a personal thing.

        The only drawback I find is having to think backwards when reading the scale and have totally cocked up more than once by misreading it! So, a digital version would be really nice, but they do seem prohibitively priced ( Suppose there's less demand than for external mikes )

        Regards

        #574017
        Dave S
        Participant
          @daves59043

          For bores I use the sliding T gages and then measure those with a mic. Seems to work well in my experience.

          I have 'reworked' the gages slightly to make them smoothly operating – This Old Tony has done a video which is basically what I did.

          Dave

          #574057
          Howard Lewis
          Participant
            @howardlewis46836

            As said, unless our hobby workshops are accurately temperature and humidity controlled we shall be very lucky to be able to work, repeatably, to 0.0001"

            In which case paying lots of money for high grade industrial quality measuring equipment will not be a worthwhile investment.

            I got hold of a Swiss industrial (Standards Room ) quality bore gauge, but a couple of anvils and extensions were missing.

            Enquired about spares; Spares unavailable, retained for repairs, only.

            Cost of a new gauge $5,000 with a 6 month lead time! (i.e. Only made to order )

            For my use bought a Die and a tap for the rather small threads (Circa £30 ) and made my own. The accuracy will suffice, since it is, in reality, a comparator between the bore and whatever is used to set the dimension (Slips, Micrometer, Calliper ) So then we are back to the accuracy and resolution of the the standard to which the gauge is compared.

            My Vernier Height Gauge was condemned because it had ab error of 0.002" over 18" Since my measurements at one time usually cover a range of a quarter of that, I am prepared live with an error which is probably less than than my capabilities.

            Nice to own kit capable of measuring to a micron, but how often is that level of accuracy REALLY needed? is the question.

            It would be nice to own a new Rolls Royce. But for a four mile round trip to and from the local supermarket; a waste of money.

            Howard

            Howard

            #574065
            not done it yet
            Participant
              @notdoneityet

              We used some very accurate weighing scales at the Radiochemical Centre (this was over 50 years ago). Usual assay balance is to four decimal places of a gram. These, IIRC, were 6 figure ones where we had to leave the item (to be weighed) on the scale pan for 20-30 minutes to equilibrate the temperature of any circulating air within the case before taking a reading – and then go back and check that the weight indication had not changed. The balance room was separate to the main lab.

              I remember one fellow tried to weigh a volatile, highly tritiated sample in an unsealed capillary tube. Obviously his weighings kept reducing but he cheated our system of checks. It did not come to light until the next lot of samples, sent for Beta scintillation counting, gave ridiculous results.

              The very expensive B-scint. machine had to be completely decontaminated, thousands upon thousands of counting vials were dumped, a lot of analyses repeated and all of us were on urine sample bottles, for health physics checks, for the following week.

              #574076
              colin hawes
              Participant
                @colinhawes85982

                A decent mechanical micrometer will only develop very small errors due to wear or operational "feel" whereas a digital electronic one could introduce unknown errors so for maximum accuracy I prefer the mechanical micrometer. Colin

                #574125
                SillyOldDuffer
                Moderator
                  @sillyoldduffer
                  Posted by colin hawes on 02/12/2021 19:17:50:

                  A decent mechanical micrometer will only develop very small errors due to wear or operational "feel" whereas a digital electronic one could introduce unknown errors so for maximum accuracy I prefer the mechanical micrometer. Colin

                  Is that true? What 'unknown errors' are introduced by digital micrometers?

                  A common type has a digital display mounted on an ordinary analogue instrument with a differential screw.

                  mitdigmicrometer.jpg

                  I wouldn't expect a difference in accuracy. The advantage of the digital display is eliminating misreading errors, and being able to do Imperial/Metric and offsets etc. The disadvantage is needing a battery! The analogue and digital display can be checked against each other. Owners please, do they differ, and if so, which reading is less wrong?

                  Another type is digital only. There's no analogue scale. Although the example below looks cheap and plasticky to my jaded eye, it's made by iGaging and like the Mitutoyo pictured above reads to half-tenths.

                  igdigitalmic.jpg

                  Seems to save space, and I suspect this type doesn't contain a precision differential screw, relying on some other arrangement, perhaps a miniature DRO track and rotation counter. They're not expensive. Does anyone know how they work?

                  The problem with differential screw micrometers is they depend on the production accuracy of an expensive screw, which is vulnerable to wear, tear and dirt. They're particularly prone to wear on one section of thread if the instrument is repeatedly used to measure similar sized objects. Like the curates egg, worn micrometers are only good in part. A digital instrument could avoid wear problems by not relying on a precision thread, instead directly measuring movement along an optically or magnetically precise track.

                  Anyone have experience of them?

                  Dave

                  Edited By SillyOldDuffer on 03/12/2021 14:45:32

                  #574134
                  David Jenner
                  Participant
                    @davidjenner61726

                    All bar one of my micrometers, a Dasqua 0-25mm, are second hand Moore and Wright brand, one belonged to my father, so probably getting on for 70 years old (or more?) they all work fine all day every day. I had one digital 0-25 (0-1" purchased from Harbour Freight, this was great to use, verry accurate, but failed after a couple of years. If I was to replace it I'd go for a good brand (read expensive) as the cheap ones seem throaway items or at least a bit of a lottery when it comes to service life. I have one good vernier caliper (Japanese) and two digital calipers,fine for some less demanding jobs and a dial caliper. the digital calipers are great fot estimating cuts, I set the required dimension, set to zere, measure the item and can see the depth of cut required, very handy, but I always check with a conventional mic for the final cut and checks. Works for me!

                    Concerning my dads mic, still spot on accurate, smooth to operate but the graduations are quite faint now, anyone know of a way to improve these.

                    Regards

                    Dave J

                    Edited By David Jenner on 03/12/2021 15:26:11

                    #574148
                    Mike Poole
                    Participant
                      @mikepoole82104

                      EBay has come up with many micrometers that are in near new condition, I have acquired a small collection of mechanical and digital but the most used are the 0.001” and the 0.01mm mechanical. The vernier versions of both give the next level of resolution a definite value but I don’t think I would be far out just guesstimating the tenths of a thou or the hundredths of a millimetre. Digital instruments can lull you to believe what you read on the display but every measuring tool has a tolerance so do not confuse resolution and accuracy.

                      Mike

                      #574168
                      Howard Lewis
                      Participant
                        @howardlewis46836

                        For my Reversible Roller Box, i was given a micrometer barrel with a mechanical digital read out.

                        It had been rejected for having a "One per rev" catch point, but appears to be accurate. It will see very little use, so will last far beyond me!

                        Howard

                        #574182
                        Vic
                        Participant
                          @vic

                          I always wanted one of the Mitutoyo mechanical digital micrometers but they were expensive at the time. My standard one works well enough though.

                          #574186
                          lfoggy
                          Participant
                            @lfoggy

                            My favoured micrometer is the Mitutoyo QuantuMike. These are of the highest quality and are a joy to use. One unusual feature is the 2mm pitch spindle which makes moving from one end of the measuring range to the other very quick.

                            #574271
                            old mart
                            Participant
                              @oldmart

                              I sold my Mitutoyo digitals, 0-1, 1-2, 2-3 for about £65 each on ebay, they were in mint condition, so three people got some good kit. I hardly ever used them since retiring, so I turned them into cash and still have mechanical ones in imperial and metric. Ebay can turn up excellent buys occasionally, my 25-50 metric was NOS and made in East Germany, marked DDR and superb quality for £14 including delivery.

                               As Mike Poole mentions, the tenths and micron vernier scale micrometers are not really needed as you can easily estimate the finer decimal place without the vernier, I never bother to turn the mic around to read it, even though my mechanicals have the scale.

                               One advantage of a digital micrometer is the much reduced chance of misreading it.

                              Edited By old mart on 04/12/2021 19:31:21

                              Edited By old mart on 04/12/2021 19:32:53

                              #574281
                              not done it yet
                              Participant
                                @notdoneityet

                                Owners please, do they differ, and if so, which reading is less wrong?

                                I‘ve never bothered to even look and don't intend to.. A bit like having a dog and barking yourself? A check with a gauge block or the supplied standard is sufficient for me. I don’t need that last significant (or insignificant) figure.

                                It’s a bit like my cheap DROs that only read to the nearest 0.01mm – they read to that, but the spec is wider than that last digit. Still close enough for virtually all operations – where the final measurement (if important) is checked by a micrometer, anyway (after the item has equilibrated with the surroundings).

                                About the only time when absolute dimensions are required is for replacement parts, held as spares – and there will always be a specification tolerance involved.

                                #574282
                                jimmy b
                                Participant
                                  @jimmyb

                                  This is my reminder not to but cheap rubbish. Repeating error, hence scrap. My digital Mitutoyo has never given any trouble! If money was no object, I'd like one of these, just because…micron mic

                                  20201025-050749_gallery.jpg

                                  Jim

                                  Edited By jimmy b on 04/12/2021 20:42:39

                                  #574291
                                  Mike Poole
                                  Participant
                                    @mikepoole82104
                                    Posted by jimmy b on 04/12/2021 20:42:02:

                                    This is my reminder not to but cheap rubbish. Repeating error, hence scrap. My digital Mitutoyo has never given any trouble! If money was no object, I'd like one of these, just because…micron mic

                                    20201025-050749_gallery.jpg

                                    Jim

                                    Edited By jimmy b on 04/12/2021 20:42:39

                                    That would be just the job for measuring a gnats c*** and fly s*** .

                                    Mike

                                    #574320
                                    colin hawes
                                    Participant
                                      @colinhawes85982
                                      Posted by SillyOldDuffer on 03/12/2021 14:44:17:

                                      Posted by colin hawes on 02/12/2021 19:17:50:

                                      A decent mechanical micrometer will only develop very small errors due to wear or operational "feel" whereas a digital electronic one could introduce unknown errors so for maximum accuracy I prefer the mechanical micrometer. Colin

                                      Is that true? What 'unknown errors' are introduced by digital micrometers?

                                      A common type has a digital display mounted on an ordinary analogue instrument with a differential screw.

                                      mitdigmicrometer.jpg

                                      I wouldn't expect a difference in accuracy. The advantage of the digital display is eliminating misreading errors, and being able to do Imperial/Metric and offsets etc. The disadvantage is needing a battery! The analogue and digital display can be checked against each other. Owners please, do they differ, and if so, which reading is less wrong?

                                      Another type is digital only. There's no analogue scale. Although the example below looks cheap and plasticky to my jaded eye, it's made by iGaging and like the Mitutoyo pictured above reads to half-tenths.

                                      igdigitalmic.jpg

                                      Seems to save space, and I suspect this type doesn't contain a precision differential screw, relying on some other arrangement, perhaps a miniature DRO track and rotation counter. They're not expensive. Does anyone know how they work?

                                      The problem with differential screw micrometers is they depend on the production accuracy of an expensive screw, which is vulnerable to wear, tear and dirt. They're particularly prone to wear on one section of thread if the instrument is repeatedly used to measure similar sized objects. Like the curates egg, worn micrometers are only good in part. A digital instrument could avoid wear problems by not relying on a precision thread, instead directly measuring movement along an optically or magnetically precise track.

                                      Anyone have experience of them?

                                      Dave

                                      Edited By SillyOldDuffer on 03/12/2021 14:45:32

                                      Reading inaccuracy caused by a reading circuit problem giving a believable false reading. A mechanical instrument can't present such a reading. Colin

                                      #574342
                                      SillyOldDuffer
                                      Moderator
                                        @sillyoldduffer
                                        Posted by colin hawes on 05/12/2021 11:43:53:

                                        Posted by SillyOldDuffer on 03/12/2021 14:44:17:

                                        Posted by colin hawes on 02/12/2021 19:17:50:

                                        A decent mechanical micrometer will only develop very small errors due to wear or operational "feel" whereas a digital electronic one could introduce unknown errors so for maximum accuracy I prefer the mechanical micrometer. Colin

                                        Is that true? What 'unknown errors' are introduced by digital micrometers?

                                        Reading inaccuracy caused by a reading circuit problem giving a believable false reading. A mechanical instrument can't present such a reading. Colin

                                        Surely mechanical instruments give believable false readings whenever the screw is worn, anvils damaged, the clutch is iffy, or the frame is bent. My main objection to second-hand micrometers that they are all believable!

                                        I twitch when chaps describe their latest bargains as having 'reputable brand-names' or being 'top-quality', 'high-grade', 'decent', 'good', 'spot-on', 'very accurate' or 'as new'. These subjective terms are inappropriate to an instrument used to take accurate precise measurements. They imply the owner is an optimist rather than an engineer, and certainly isn't a metrologist!

                                        Micrometers have a specification proved by checking them periodically against a reliable standard gauge and recording the results on a calibration certificate. The standard isn't a pre-loved set of Jo-blocks, even if they do look tip-top. Proof and evidence please, not unverified opinion.

                                        I argue digital displays are less likely to mislead when they go wrong because the malfunction is usually obvious: blanks, zeros, eights, negatives and jumping digits etc. In comparison, an analogue display always looks good, even when the instrument is out of tolerance.

                                        Dave

                                        #574348
                                        colin hawes
                                        Participant
                                          @colinhawes85982

                                          If you rely on using the clutch to take readings it is easy to inadvertently include a speck of swarf as it is not felt ; it is my opinion that finger touch on the thimble is more likely to show up such an event . Although I confess I've never experienced it on a micrometer, I have seen a clock digital display with a number giving a wrong figure due ,presumably, to the connecting matrix becoming faulty and losing a part of the digit. Colin

                                          #574352
                                          Brian G
                                          Participant
                                            @briang

                                            My fear with a digital micrometer is the same as with a digital calliper, accidentally coming out of "Abs" mode and not noticing. To try and avoid this I set the "Inc" zero well away from the zero point which hopefully would make this error obvious.

                                            Brian G

                                            #574361
                                            SillyOldDuffer
                                            Moderator
                                              @sillyoldduffer

                                              This graph puts an interesting perspective on accuracy and the cost of achieving it with various machine tools.

                                              machineaccuracycost.jpg

                                              The graph dates from 1991 and doesn't reflect improvements made at the high-accuracy end: it's not unusual for a CNC Machine Centre to do rather better than 0.025mm.  Broadly right though.

                                              The cost of accuracy increases linearly up to a 'knee', beyond which the cost multiplies. The graph shows the maximum repeatable accuracy rather than the very best that can be achieved by a skilled operator taking his time and accepting a lot of rejects!

                                              The graph divides in the middle at 0.025mm, which is a thou. 0.025mm sets a boundary between low and high accuracy, and it's about the best that can be expected of Shaping, Planing, Horizontal Boring, Milling machines and Capstan/Turret lathes.

                                              Planing and Shaping are expensive and not very accurate. Although they can be pushed to the 0.025 limit, they perform most economically when less than 0.1mm accuracy is needed. Their high cost compared with milling probably explains why these machines have become unusual. My guess is they are too slow.

                                              Milling gets to 0.1mm fairly easily, but pushing up to 0.025/thou triples the price. It's unlikely that a home-workshop mill can achieve better than 0.025mm accuracy. The same limitation applies to Turret and Capstan lathes: they're good for cheap production and can achieve about the same accuracy as a mill.

                                              High-accuracy requires grinding, including honing, lapping, and hand-lapping. Precision grinding is rare in a home workshop, but industry use it on a huge scale.

                                              Lathe performance as shown on the graph is interesting because it straddles the 0.025mm boundary, getting to about 0.02mm/0.0008" before the knee kicks in, with a practical limit of about 0.013mm/0.0005". Lathes are good performers, capable of reasonable accuracy without costing a fortune. Likewise, milling machines are attractive – reasonable accuracy at low cost. Model engineers don't do much precision grinding because the machines and process is relatively expensive.

                                              That 0.025mm boundary is important in the context of micrometers because it pretty much defines the practical accuracy to which we work. It's about a thou, and doing better than ±0.0005" is really hard. I doubt many home workshops are capable of it, whatever micrometer they have.

                                              Most of us use a different technique I think? I 'fit' parts together, using one to gauge the other, without worrying about exact dimensions. For example rather than bore an accurate 20mm hole and turn a 19.97mm shaft to fit it, I bore a hole of about 20mm, and turn the shaft to slide comfortably into it. No need for a micrometer of any sort, let alone one that does tenths! Fitting is too slow and expensive for production work and spares need to be interchangeable but I don't care!

                                              Does anyone really apply the American System of Manufacturing at home?

                                              Dave

                                              Edited By SillyOldDuffer on 05/12/2021 17:47:21

                                              #574383
                                              Neil Lickfold
                                              Participant
                                                @neillickfold44316

                                                What I do like about mechanical micrometers is their are no batteries to leak and fail the tool. In saying that, I recently did buy a digital depth micrometer, for the purpose of using it like a comparator. I don't think it matters all that much , if electronic or mechanical, as long as you can make the parts you want to. Gauge block sets are in the very affordable range now, with many coming with a certificate of accuracy for each block. So with a good set of gauge blocks and repeatable measuring equipment, new cutting tool technologies, now more than ever, allows home users to being able to easily make interchangeable parts.

                                              Viewing 22 posts - 26 through 47 (of 47 total)
                                              • Please log in to reply to this topic. Registering is free and easy using the links on the menu at the top of this page.

                                              Advert

                                              Latest Replies

                                              Viewing 25 topics - 1 through 25 (of 25 total)
                                              Viewing 25 topics - 1 through 25 (of 25 total)

                                              View full reply list.

                                              Advert

                                              Newsletter Sign-up