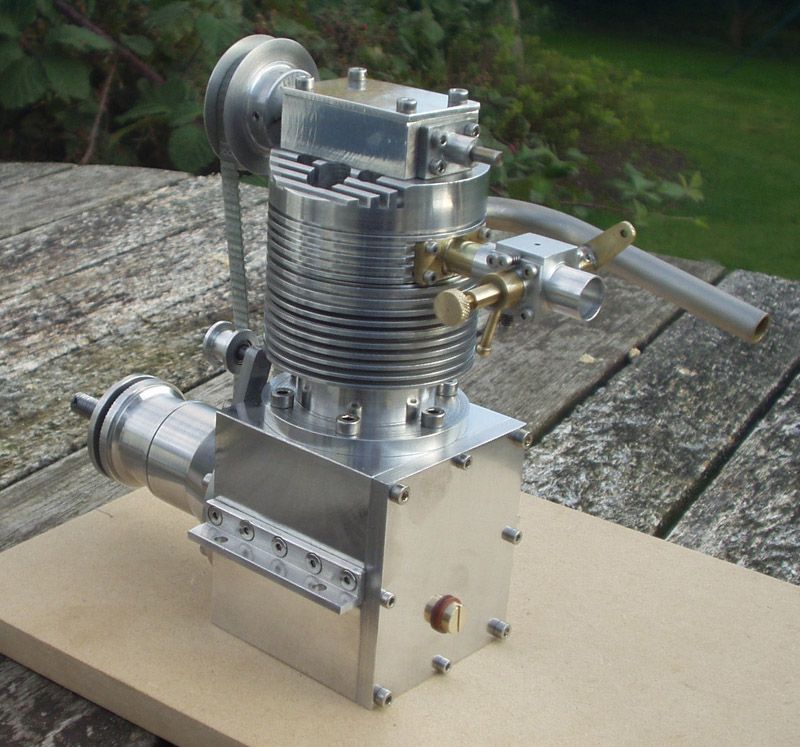
Nemetts 15cc engine

Advert

Nemetts 15cc engine

Home Forums I/C Engines Nemetts 15cc engine

Viewing 25 posts - 26 through 50 (of 78 total)
  • Author
    Posts
  • #74246
    wheeltapper
    Participant
      @wheeltapper

      deleted, double post.

      Edited By wheeltapper on 30/08/2011 21:41:28

      Advert
      #74247
      wheeltapper
      Participant
        @wheeltapper
        Steve
        I just looked at your pics of this engine and noticed you don’t have a breather pipe to the cam box.
         
        is that only necessary on the petrol version?
         
        Roy
        #74409
        wheeltapper
        Participant
          @wheeltapper
          Hi
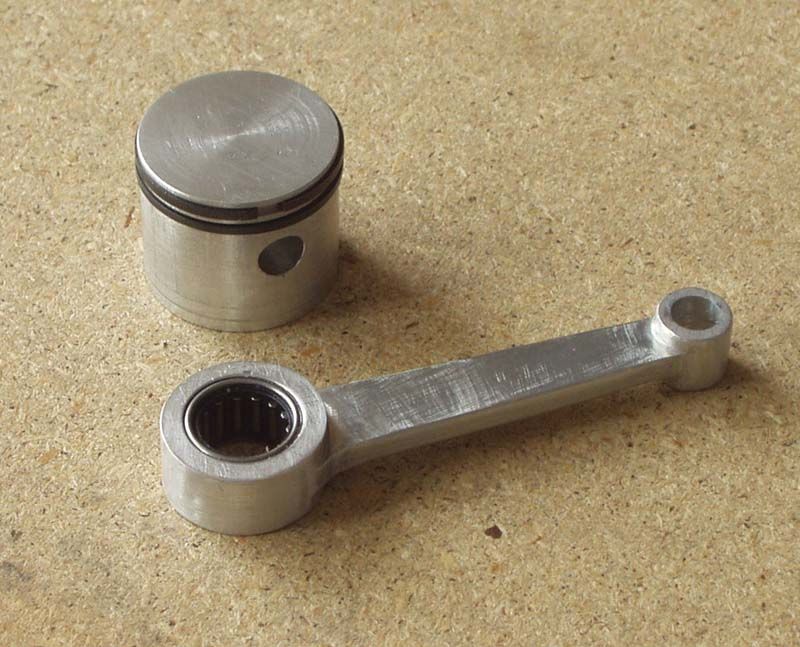
          bit more done.
          piston rings made and fitted and con rod made and fitted with bearing.

          more soon.
          Roy

          #74438
          Steve Withnell
          Participant
            @stevewithnell34426
            Hi Roy,
             
            Don’t think the glow plug version needs the breather, I didn’t accidentally omit it and I’d never made an engine before, so I will have stuck to Nemett’s article to the letter as I had no experience to rely upon. I did put a couple of drops of oil in the cam housing before I started it up and after that there was plenty of oily smoke every where!
             
            You are doing a cracking job of this – you can’t avoid the head much longer! Just keep measuring twice, checking twice and cutting once and it will come out just fine!
             
            Steve
            #74439
            Steve Withnell
            Participant
              @stevewithnell34426

              One thing I do remember from the build which I did forget, was that Nemett recommended the use of a split pin to retain the prop nut as he’d had his prototype backfire and kick the prop off. I simply used a nyloc nut. I didn’t experience the engine kicking back on the few occasions I ran the engine, so maybe the timing on mine was slightly off.

              #74455
              wheeltapper
              Participant
                @wheeltapper
                Hi
                I remember reading about him nearly scalping himself.
                he recommended a circlip but I was giong to use a split pin.
                 
                I couldn’t figure out how to do up a nyloc nut without holding the shaft somehow.
                 
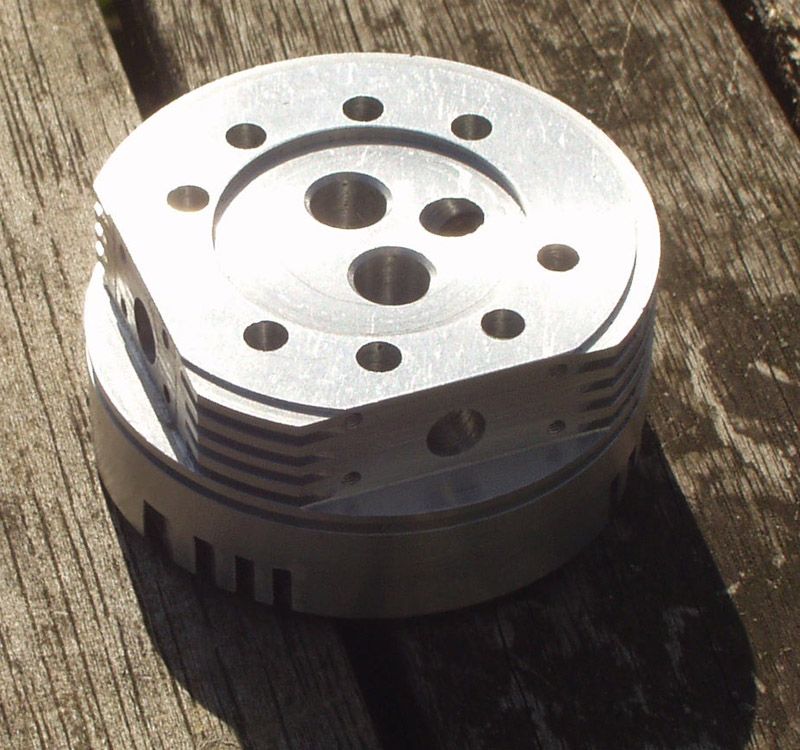
                stop press!!! I’ve started on the head.
                 
                so far I’ve done the valve holes and the fixing holes from the underneath, and turned it to finished depth.
                 
                I splashed out on a rotary table, very handy gadget.
                 
                Roy
                #74473
                Ramon Wilson
                Participant
                  @ramonwilson3
                  Roy, Steve,
                  Speaking from personal experience a prop continually loosening or indeed spinning off all together is definitely not ideal.
                   
                  Personally I think the circlip idea to prevent total ‘loss’ is better than the split pin if for no other reason than asthetics though either could catch an unwary finger if run exposed. A split pin will have to be continually straightened for removal too. However niether will actually prevent the prop from loosening as it fires and kicks back which is the root of the problem.
                   
                  Though I have no experience with them directly I know model four strokes have a far greater propensity to throw a prop than two strokes but it happens with these quite often too.
                   
                  When flying/competing in C/L aerobatics there is only one minute allowed to start and
                  get airborne. A loose prop in that situation then is a definite no-no.
                   
                  I found that introducing a paper ‘washer’ cut from 240/320 grit wet and dry between the driver and the back of the prop (grit toward the prop) virtually eliminated this problem both on wooden and ‘plastic’ props. On some aircraft there was the need to space the spinner backplate out from the prop driver to clear the fuselage and these spacers were made from nylon. Again wet and dry washers were used between all surfaces with total success.
                   
                  It’s a simple tip but works well certainly worth trying to see if it will do the same in your situation.
                   
                  Small, short, drive peg/pegs can also be incorporated into the driver to match a shallow hole/holes in the prop but a paper washer is much easier to produce
                  Like wise by drilling a radial hole in the prop driver to accomodate a ‘tommy’ bar when tightening the prop nut if you decide to use a nylok – though it’s hardly likely to cause an effect, by drilling two or three the balance remains and is more asthetic.
                   
                  Hope this is of use/interest
                   
                  regards – Ramon


                  Edited By Ramon Wilson on 05/09/2011 09:49:16

                  #75056
                  wheeltapper
                  Participant
                    @wheeltapper
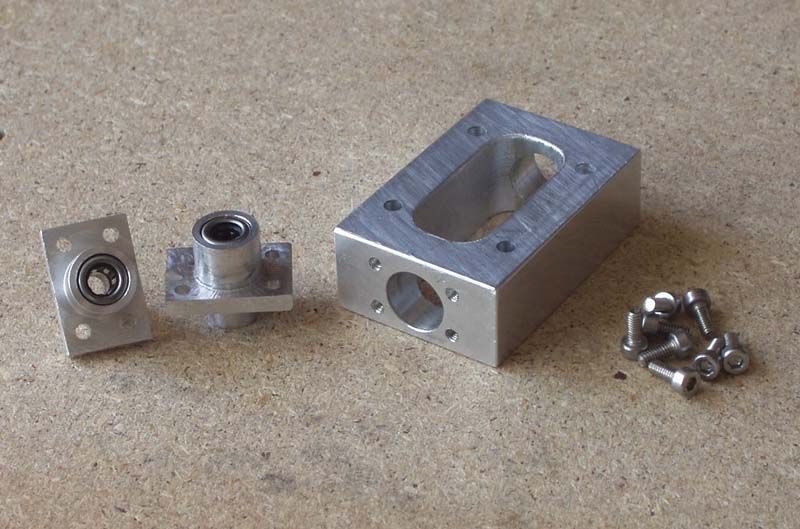
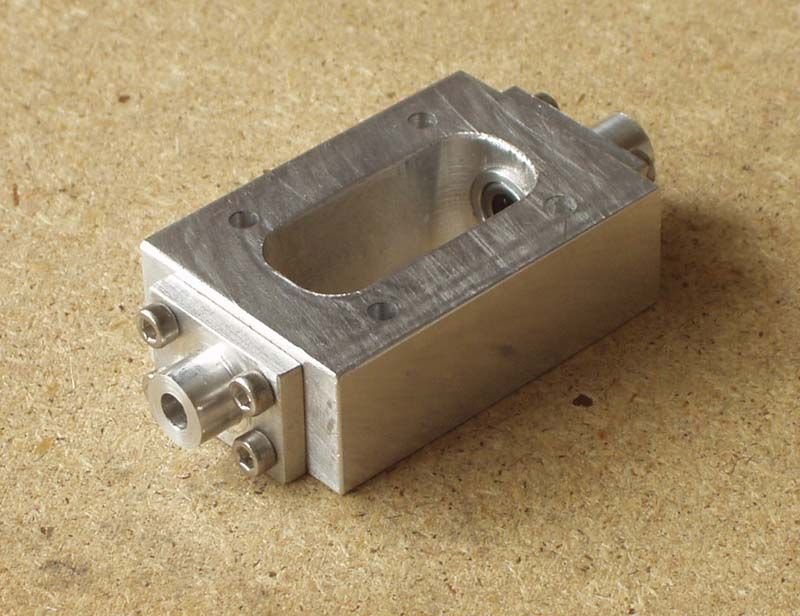
                    Hi
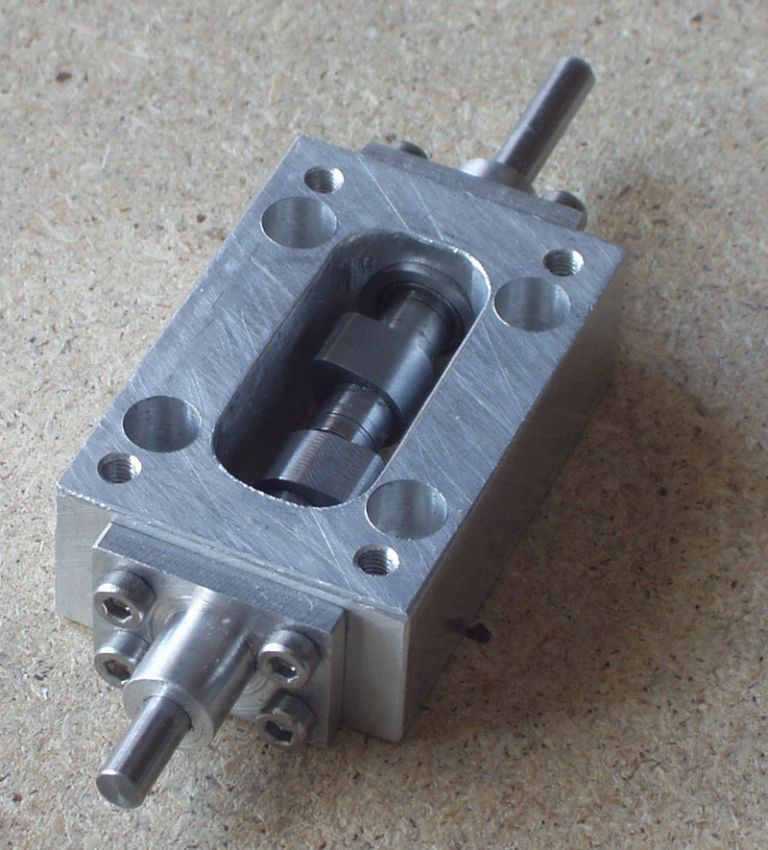
                    a bit more done, the cambox.

                    its coming along, bit by bit.
                     
                    Roy

                    #75062
                    Steve Withnell
                    Participant
                      @stevewithnell34426
                      Hey Roy – you avoiding the cylinder head? I can see all the parts getting done, except the head!
                       
                      Steve
                       
                       
                      #75065
                      wheeltapper
                      Participant
                        @wheeltapper
                        Hi Steve.
                        Not really, I’ve drilled the valve and bolt holes and turned it down to the correct height, I’m waiting for some milling cutters to arrive so I can counterbore the holes then I can get on with the rest of it.
                        I’ll keep you up to date with pics as I progress.
                         
                        cheers
                        Roy
                        #75463
                        wheeltapper
                        Participant
                          @wheeltapper
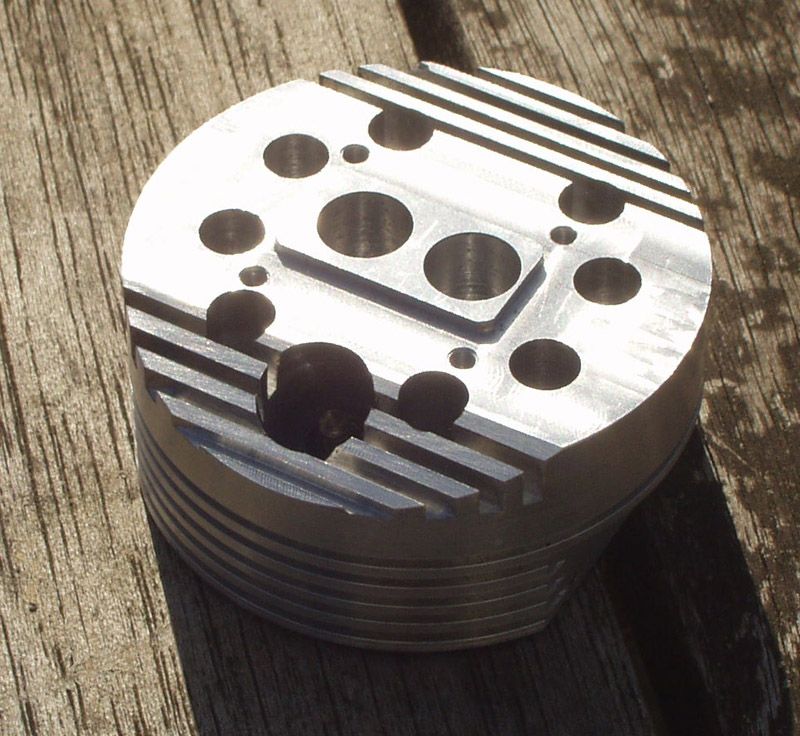
                          HI
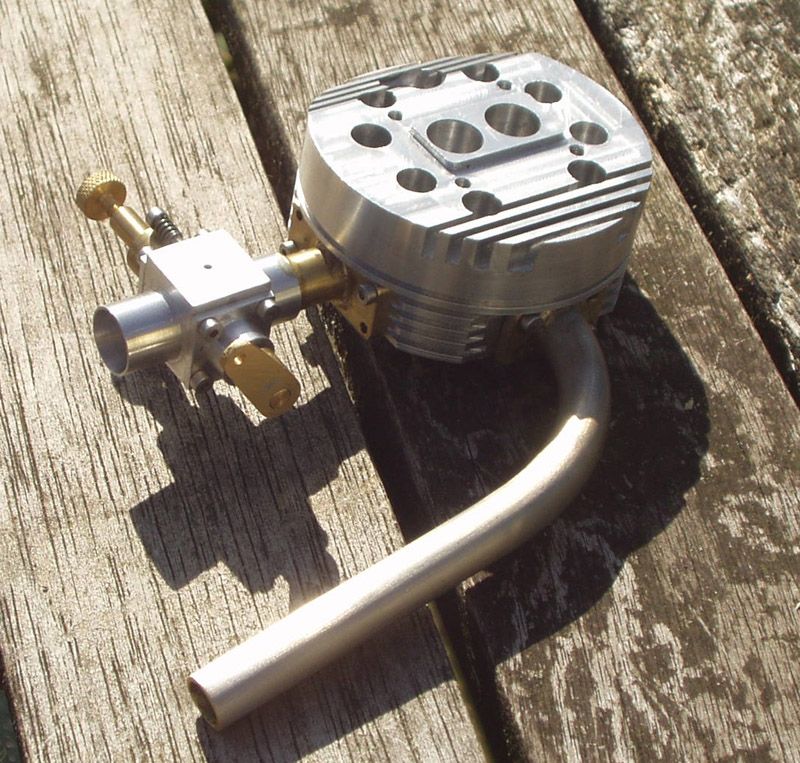
                          are you still watching Steve, I’m not avoiding the head any more.
                           
                          top

                          bottom

                          and finally
                          all dressed up
                           
                          I just need some phosphor bronze for the valve guides.
                           
                          when I recover from doing this I’ll have a go at the camshaft, cutting the cams should be fun, I’ll need a “do not disturb” sign.
                           
                          Cheers
                          Roy

                          #75484
                          Steve Withnell
                          Participant
                            @stevewithnell34426
                            Very nice indeed! no sign of any “oops!” unlike mine!.
                             
                            I can hear a 4 stroke burble coming on soon…
                            #75485
                            wheeltapper
                            Participant
                              @wheeltapper
                              there are a few near oop’s’s .
                              for a start the inlet hole is 6mm instead of 7.5 because it was too close to a bolt hole,
                               
                              I sweated a lot tapping the last 4 holes for the exhaust.
                               
                              I had a go at the cams earlier, what a soul destroying job that was, my arm is killing me cranking the mill bed backwards and forwards 360 times.
                               
                              stil, its all supposed to be fun……………………………………………………………….isn’t it?
                               
                              cheers
                              Roy
                              #75513
                              wheeltapper
                              Participant
                                @wheeltapper
                                me again
                                 
                                a bit more done, cams cut and fitted.

                                watch this space
                                 
                                Roy

                                #75586
                                wheeltapper
                                Participant
                                  @wheeltapper
                                  Hi
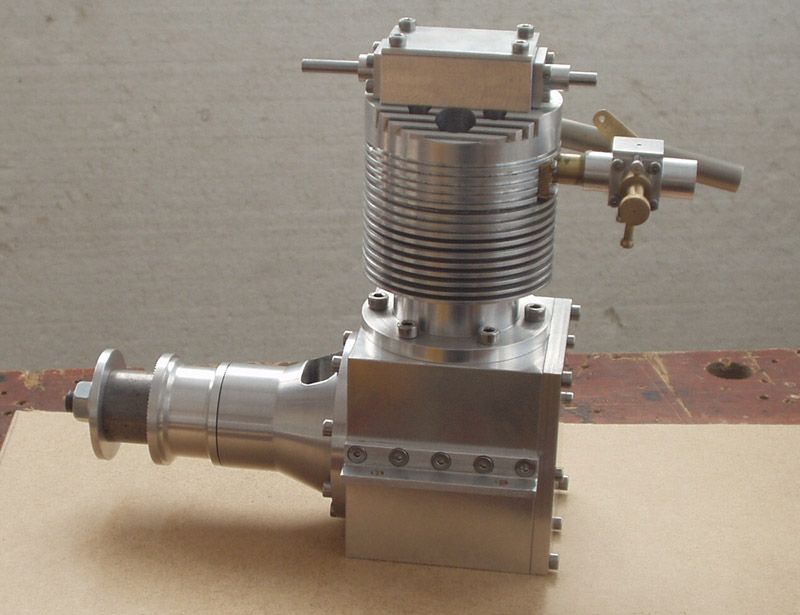
                                  I thought I’d stick it all together temporarily to see what it looked like.
                                   
                                  behold the beast

                                  cheers
                                  Roy

                                  #75592
                                  Clive Hartland
                                  Participant
                                    @clivehartland94829
                                    Now for a nice bit of anodising Roy, The head in Red and the cylinder in deep Blue and the crankcase Black.
                                    Very good work there Roy and you should be proud of what you have made.
                                    It should run well!
                                     
                                    Clive
                                    #75597
                                    Steve Withnell
                                    Participant
                                      @stevewithnell34426
                                      You’ll be needing a can of this soon!
                                       

                                      Works everytime, honest.
                                      #75817
                                      wheeltapper
                                      Participant
                                        @wheeltapper
                                        Hi Steve
                                        I hope it doesn’t come to that.
                                         
                                        I had a good day today, I made and fitted the valve guides, cut the valves to length and put the e clip cut in.
                                        after assembling the valves in the head I put the liner in the cylinder jacket and bolted the head on.
                                         
                                        then I jammed a piece of soft plastic tube ( aquarium air line) in to the plug hole and fixed the other end to a small air compressor I have, it gives about 40 psi.
                                         
                                        holding my hand over the bottom of the liner it blew the line out every time so I assume the valves are sealing.
                                         
                                        the only thing holding me up now is the timing pulleys and belt.
                                        HPC are out of stock of the large pulley.
                                         
                                        more news as and when.
                                        Roy
                                         
                                        #75821
                                        wheeltapper
                                        Participant
                                          @wheeltapper
                                          Well they say pride goes before a fall!
                                           
                                          I thought I would make the timing disc seeing as I’m that close to finishing and I was idly twiddling the camshaft and it suddenly hit me with a thump that the cams were in the wrong positions.
                                          however a quick dose of heat from a small blowtorch soon broke the shaftloks grip so I’ll do it again properly .
                                          I would have sworn I followed the instructions to the letter, obviously not.
                                          all I can say is ” what a prat”
                                          a rather annoyed Roy.
                                          #75822
                                          Clive Hartland
                                          Participant
                                            @clivehartland94829
                                            Better than bent valves Roy, soon fixed I hope!
                                             
                                            Clive
                                            #75826
                                            Steve Withnell
                                            Participant
                                              @stevewithnell34426
                                              Posted by wheeltapper on 04/10/2011 20:27:29:

                                              Well they say pride goes before a fall!
                                               
                                              I thought I would make the timing disc seeing as I’m that close to finishing and I was idly twiddling the camshaft and it suddenly hit me with a thump that the cams were in the wrong positions.
                                               
                                              Steve:
                                               
                                              Funny, I made exactly the same error!
                                              #75835
                                              wheeltapper
                                              Participant
                                                @wheeltapper
                                                Thats amazing, it makes you think that the instructions were wrong.
                                                 
                                                I’ll have a good look tomorrow.
                                                 
                                                Roy
                                                #76291
                                                wheeltapper
                                                Participant
                                                  @wheeltapper
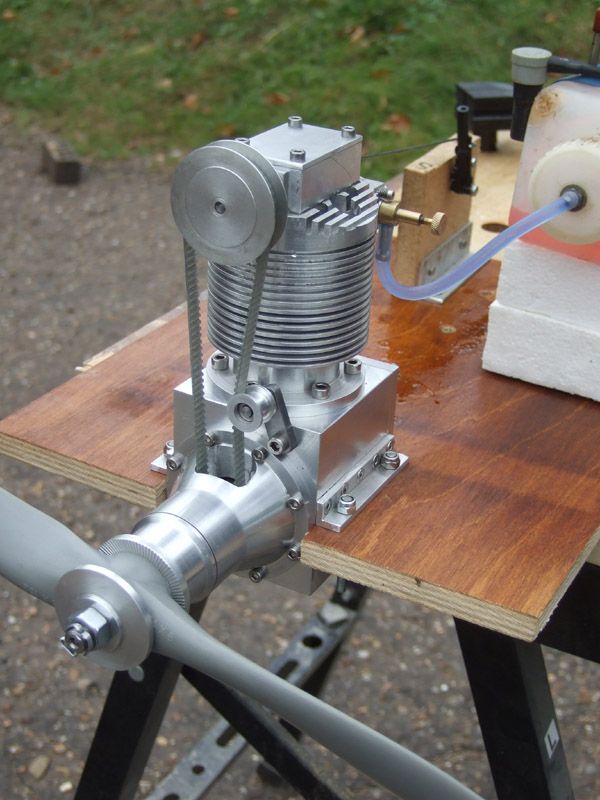
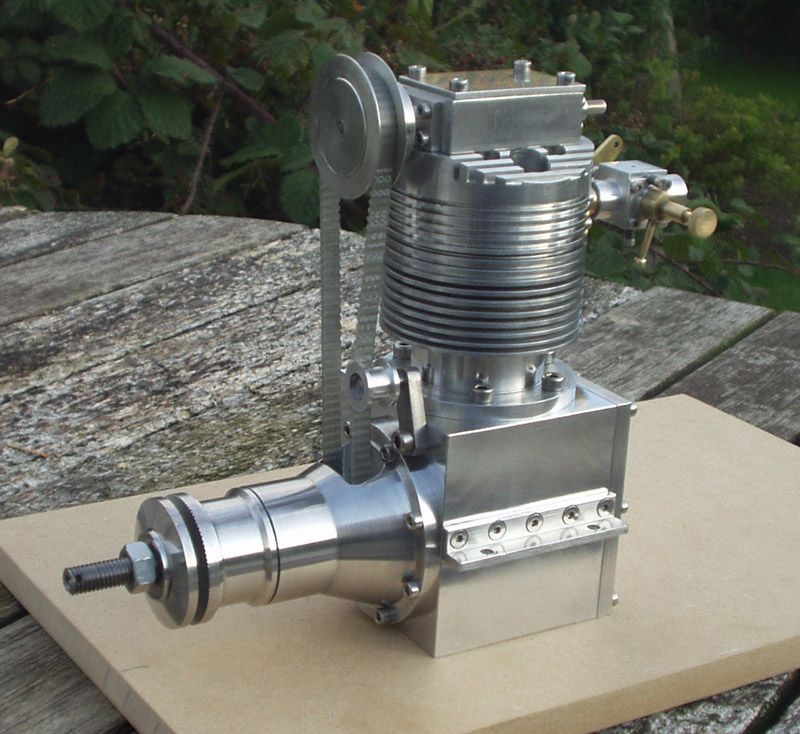
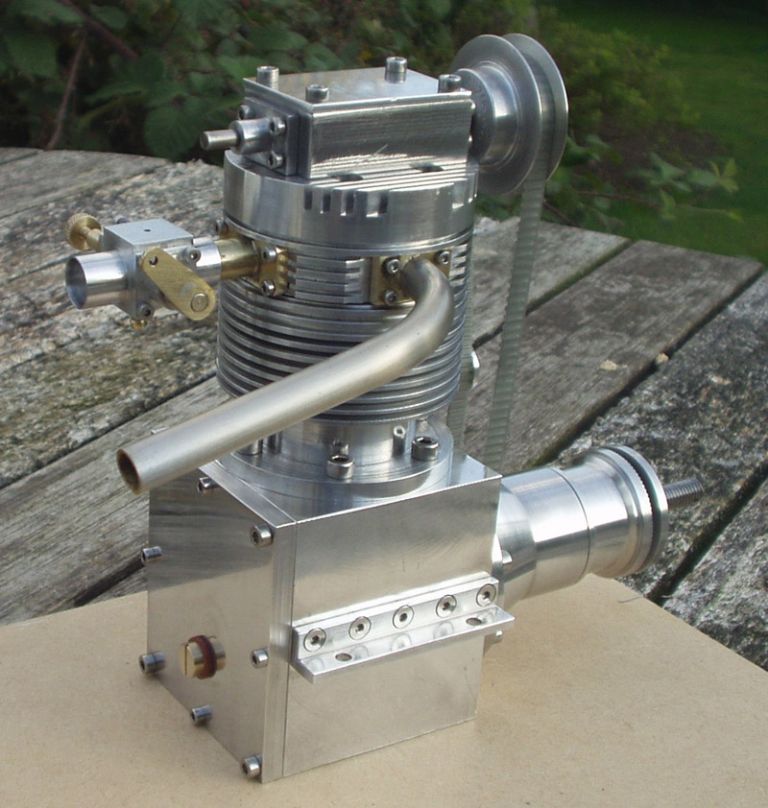
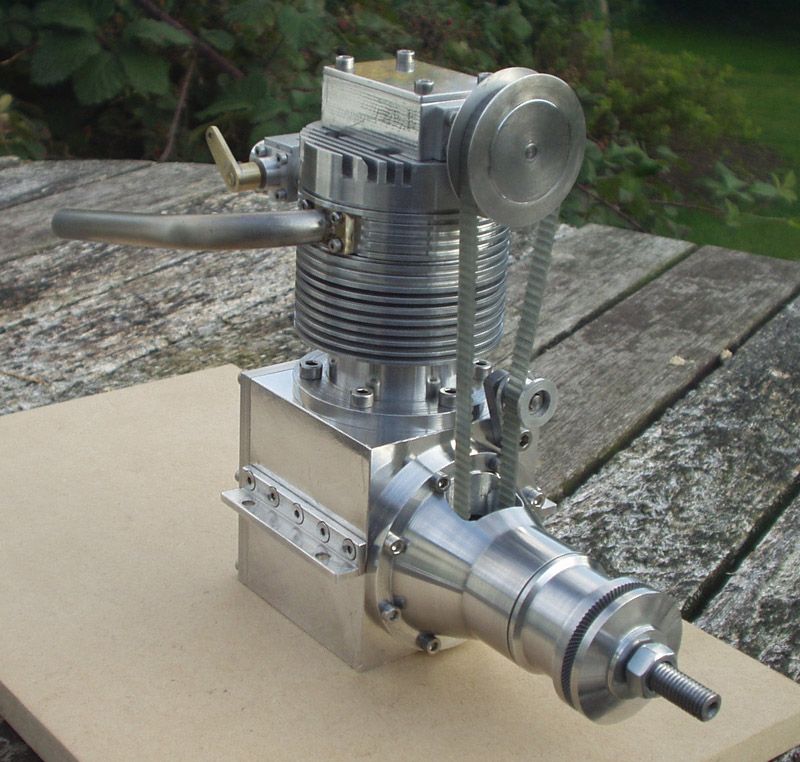
                                                  Hi
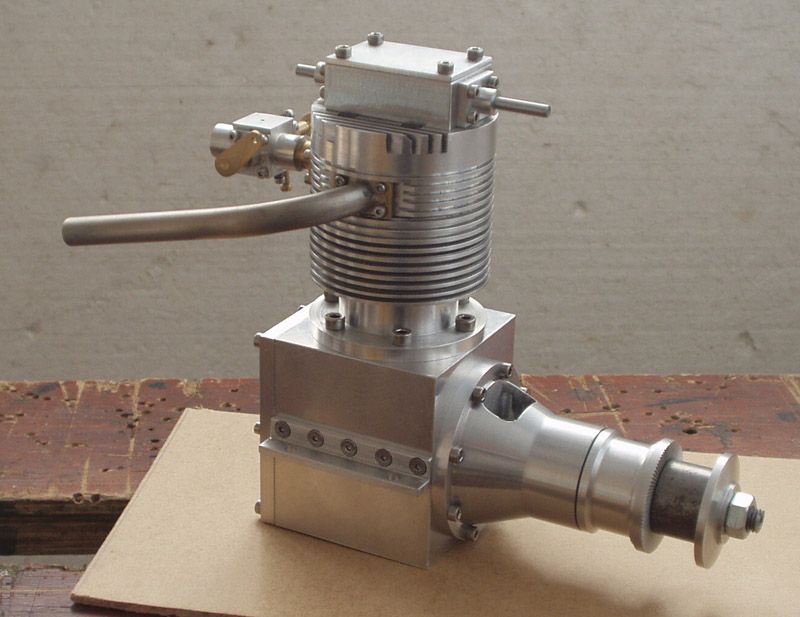
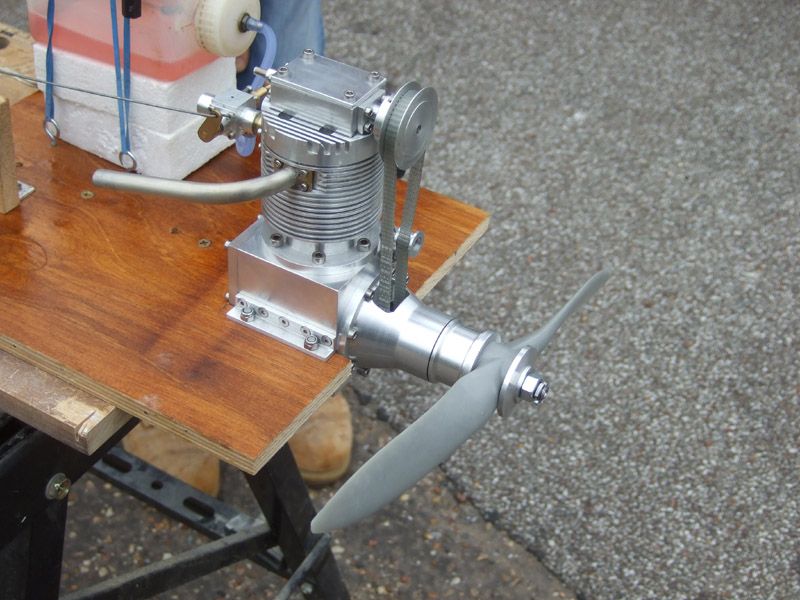
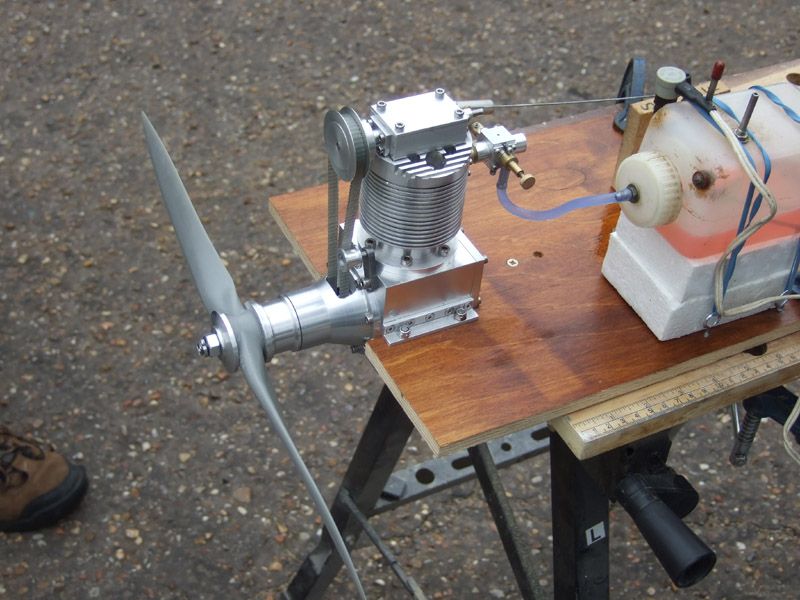
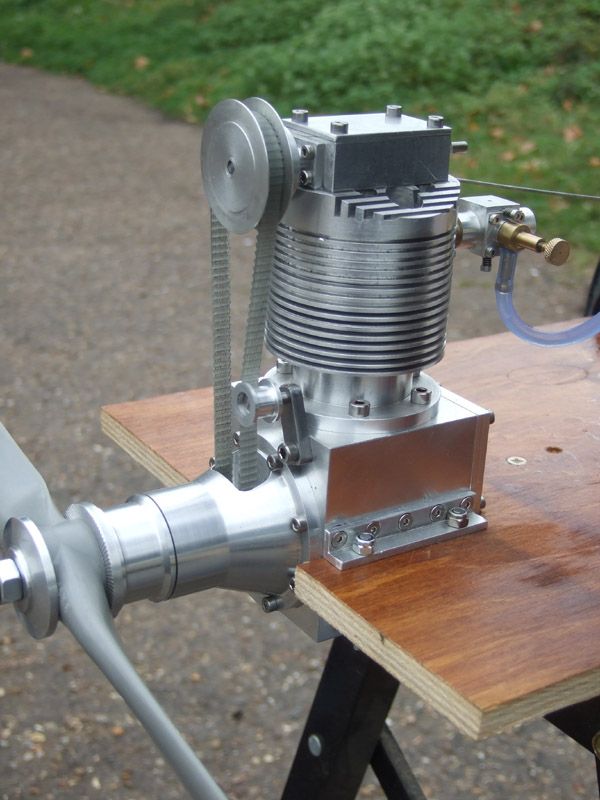
                                                  I’VE FINISHED
                                                  and it runs
                                                  some pics of it ready to run,

                                                  here are some pics after I stripped, cleaned and polished it up a bit

                                                  I’ve got two videos of it running but I don’t know if they will work on here. they are on Photobucket at the moment but it looks like I can only use youtube here.
                                                   
                                                  I have just started an account there and am uploading as I type this so I’ll see what happens.
                                                   
                                                  watch this space.
                                                   
                                                  Roy
                                                  #76295
                                                  wheeltapper
                                                  Participant
                                                    @wheeltapper
                                                    OK how do you add a vid link,
                                                     
                                                    Roy

                                                    Edited By wheeltapper on 14/10/2011 20:02:39

                                                    Edited By wheeltapper on 14/10/2011 20:05:46

                                                    Edited By Katy Purvis on 01/06/2015 11:37:32

                                                    #76312
                                                    Clive Hartland
                                                    Participant
                                                      @clivehartland94829
                                                      Roy, what an excellent piece of work you have done! If it looks good then it must be good!
                                                       
                                                      Clive
                                                    Viewing 25 posts - 26 through 50 (of 78 total)
                                                    • Please log in to reply to this topic. Registering is free and easy using the links on the menu at the top of this page.

                                                    Advert

                                                    Latest Replies

                                                    Home Forums I/C Engines Topics

                                                    Viewing 25 topics - 1 through 25 (of 25 total)
                                                    Viewing 25 topics - 1 through 25 (of 25 total)

                                                    View full reply list.

                                                    Advert

                                                    Newsletter Sign-up