Myford Lever Action Tailstock Design and Build
Myford Lever Action Tailstock Design and Build
Home › Forums › Manual machine tools › Myford Lever Action Tailstock Design and Build
- This topic has 147 replies, 24 voices, and was last updated 16 March 2023 at 00:06 by
john Chappell 1.
-
AuthorPosts
-
8 April 2022 at 07:39 #593491
Hopper
Participant@hopperAdy1 — Thanks mate. You might appreciate the M-Type in the background of a couple of those pics there!
Derek — Thanks also. Yes I like the rounded edges and curves rather than more modern square look. It's easier on the eye and easier on the hands and knuckles when working with them. Plus of course blends in with the original Myford, which was one of the last Art Deco consumer items. Designed in the late WW2 period, it still had that pre-war Art Deco look to it, especially the little touches like the 3 ribs on the headstock belt cover and the fan-burst slots in the motor belt cover. Just cool. If I bought a modern lathe, I would have to take an angle grinder to the tailstock and topslide and round all those sharp edges and corners off before I could use it. Too Soviet Brutalist design for me, which I think is where the current crop of hobby lathes' design originated.
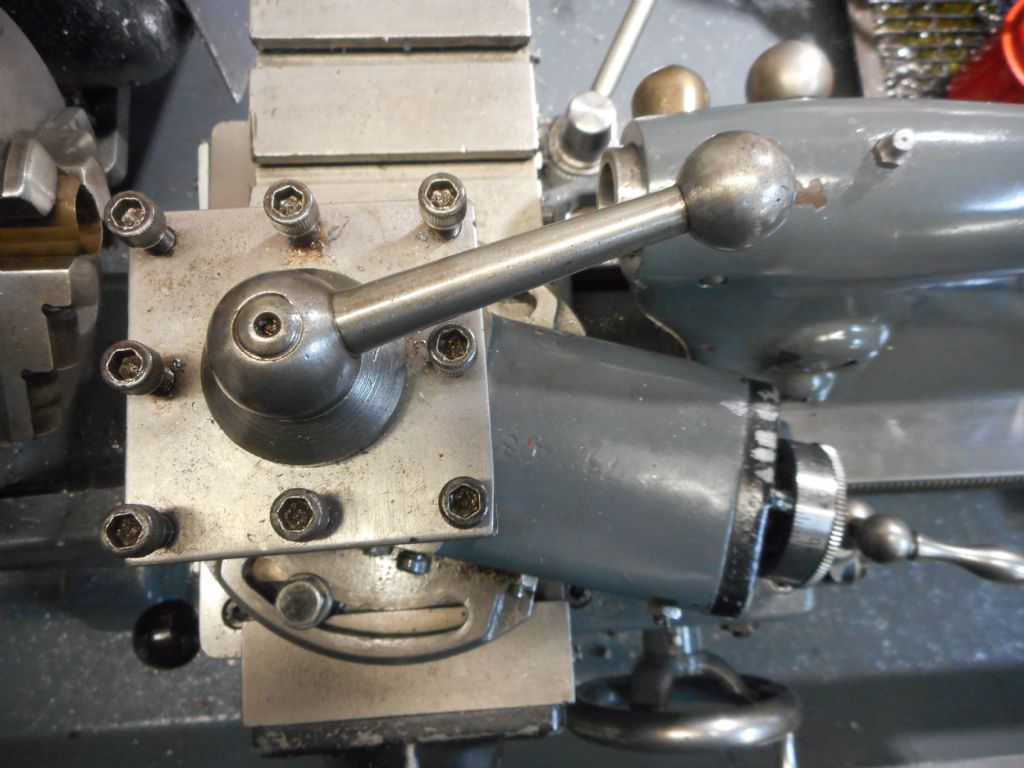
And you just reminded me, I must make a GHT style ball handle for the handle pinch bolt instead of the cap screw! More work.
David — Thanks again. All Slimline frames for the Atlas. Makes it harder to find a Manx or cafe tank at a reasonable price. The Indians are churning them out for Widelines but never any Slimlines. Will get a pic of the Snortster next time in the shed. Or what is left of it. Has been sitting for years and various bits plundered for other projects.
8 April 2022 at 07:55 #593493Hopper
Participant@hopperBALL TURNING
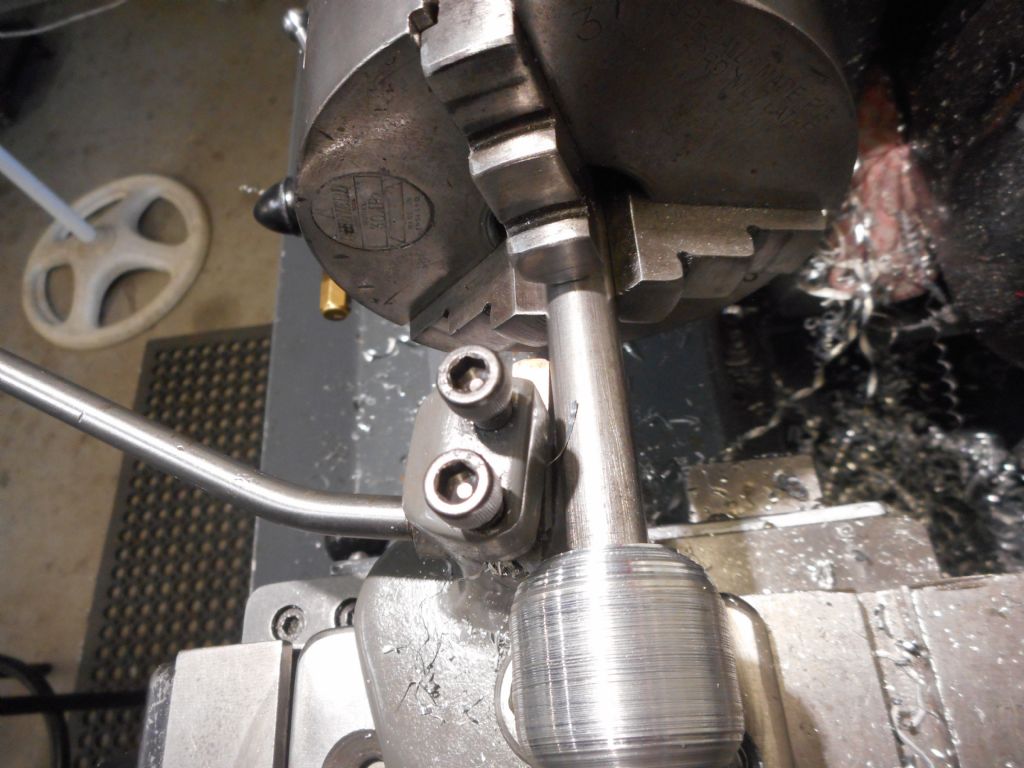
Is always an adventure. More of an art than a science in my case. My ball turning tool is very primitive, simply a flat plate that attaches to the cross slide with another smaller square flat plate attached to it with a pivot bolt. A piece of upright square bar is welded to this to hold the toolbit and the handle to make the toolbit sweep in an arc, the size of which is dependent on how far out of the holder the toolbit sticks. It works but it's a bit fiddly. I made it in a hurry years back to make the ball handles for my fabricated GHT dividing head and it worked well for that. But making the 1-1/2" diameter aluminium ball to go on the end of the tailstock lever handle was a challenge.
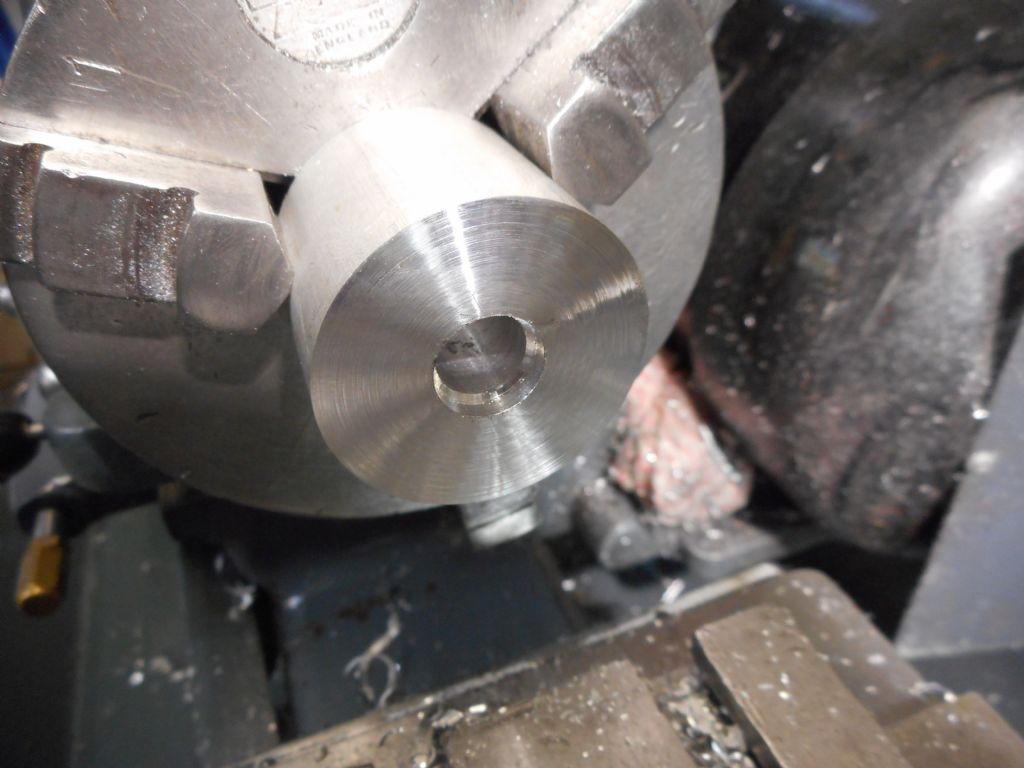
First up, the tool would only move out far enough to make a 1-1/4" ball so had to go with that. So I cut a piece of 1-1/2" round ally bar 1-1/4" long and drilled and tapped it to take the 1/2 BSW thread on the end of the handle. Then turned the OD down to 1-1/4".
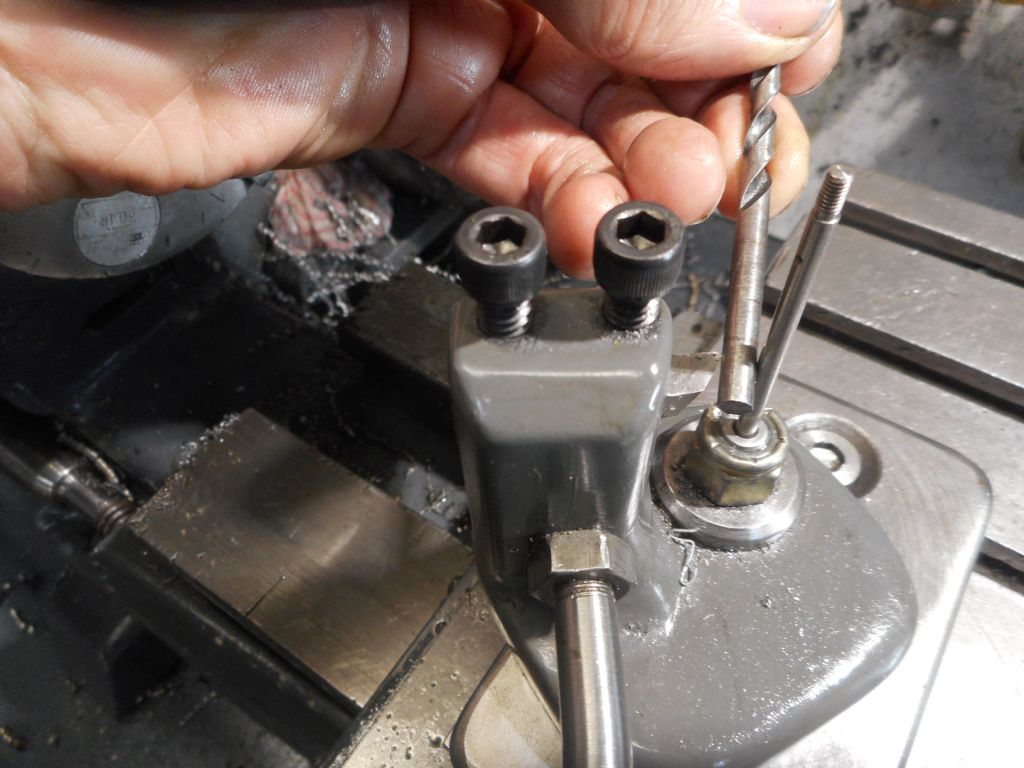
One little trick was I drilled it 27/64 or whatever for tapping, then poked a 1/2" drill bit up the hole for about 1/8" or so. This will cover the last turn or two of thread on the handle, so I don't end up with a half to quarter turn of half-formed thread sticking out on view. Much tidier I think.
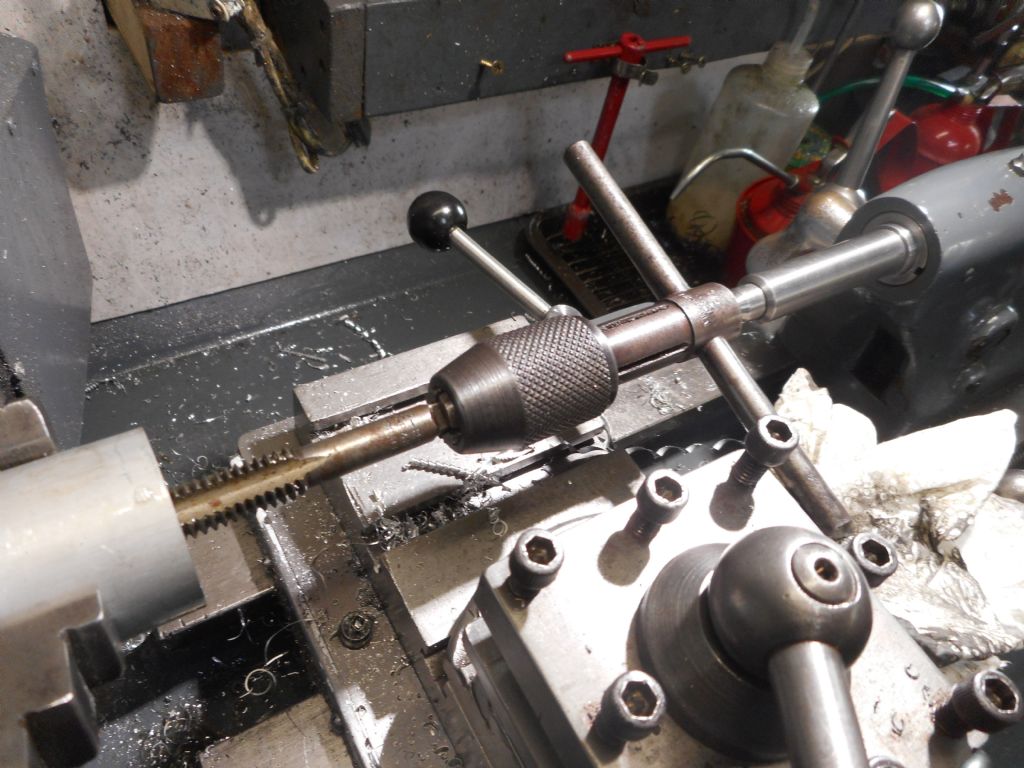
Used my homemade spring centre in the tailstock to guide the tap wrench while using my spindle crank handle same as for the thread on the handle itself. As always: brilliant. Nice and easy and nice and straight.
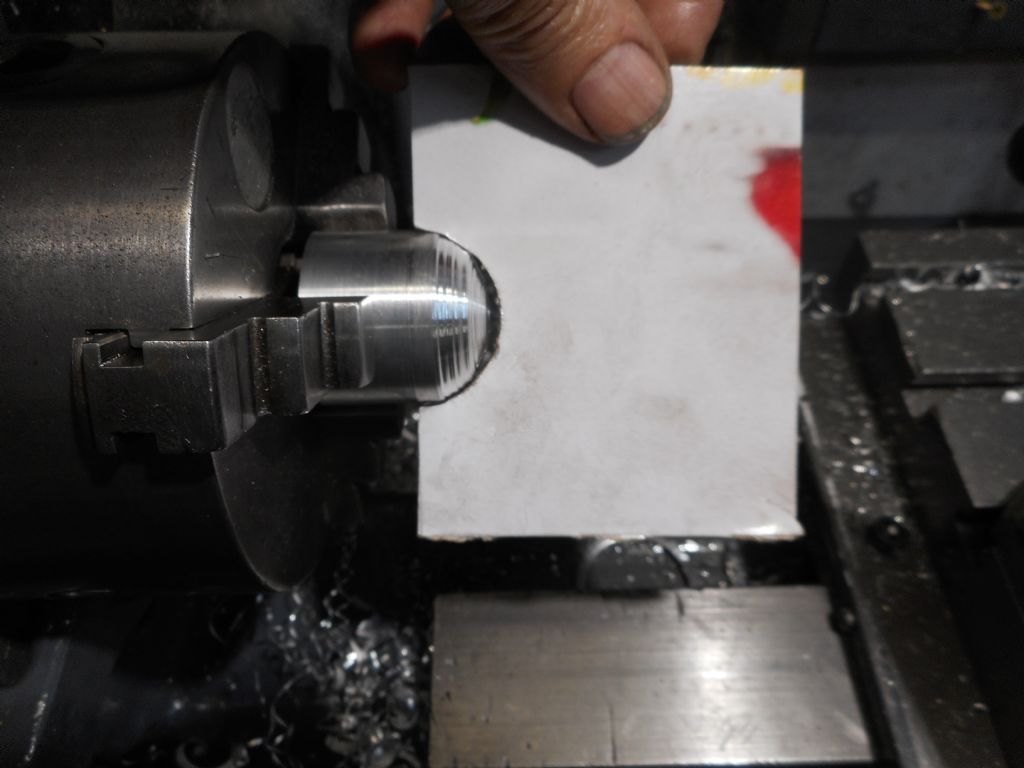
Then before I mounted the ally block onto the 1/2" round handle as a mandrel for the final ball turning escapade, I decided to rough it out a bit freehand to quickly remove most of the metal. Simply done by co-ordinating turning the carriage and cross slide handwheels together. Simply but not that easily. Some people can do this really well. I can't. A bit more CAM – Corn-flakes packet Assisted Machining — with a cardboard template kept me sort of on line. Anyhow, got rid of a lot of metal on both sides of the ball-to-be without hashing it up.
8 April 2022 at 08:25 #593494Hopper
Participant@hopperTHE BALL TURNING TOOL
So the lump was mounted on the round bar handle and held in the chuck. A lot more stick-out than you would normally use, but necessary so the primitive ball turning tool can get around to the back side of the ball without banging into the wildly rotating chuck — that never goes well.
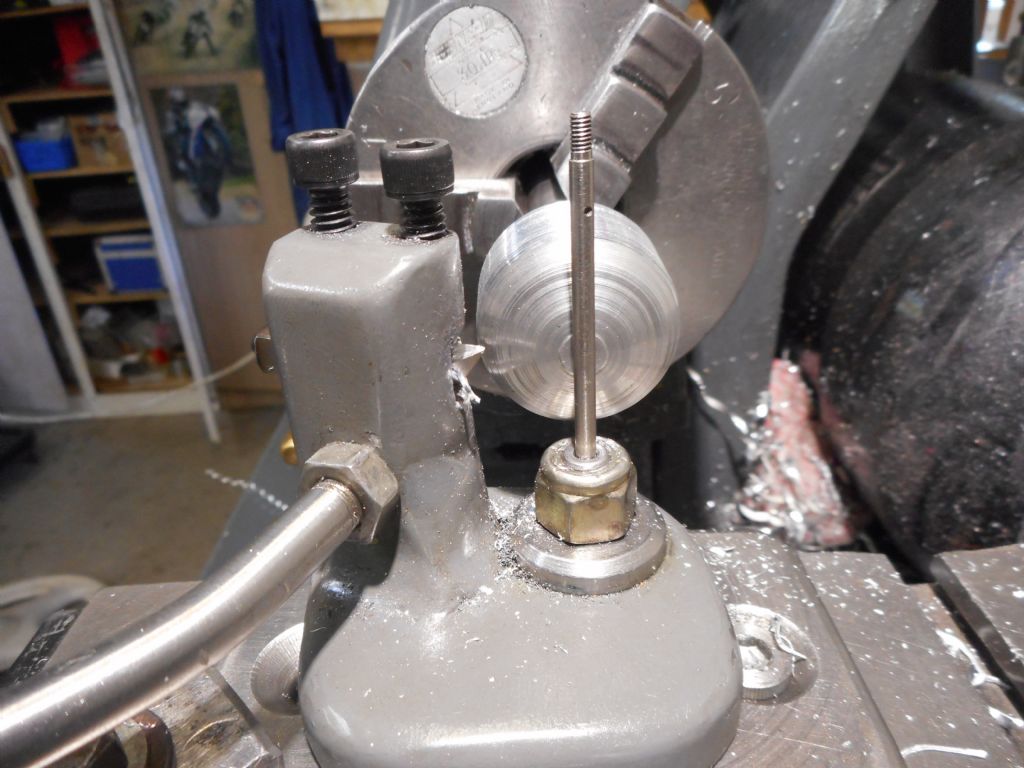
First step is to set the depth of cut. Done by eyeballing a pin dropped into a hole in the middle of the pivot bolt. If the centre of the pivot bolt is in line with the centre of the job, the finished result will be a proper sphere. Otherwise it can come out sort of oval shaped. Once this is set, I marked the cross slide with a felt pen line and zeroed the cross slide dial for future reference.
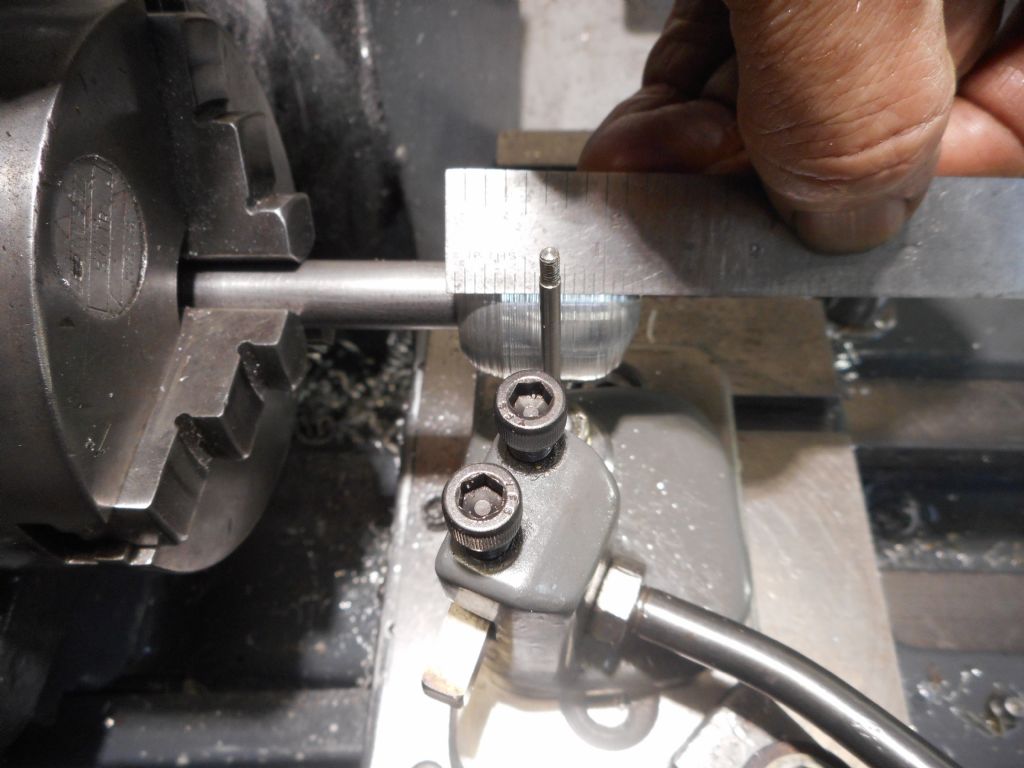
Then it was a matter of wind the cross slide back out and set the ball turning tool up central to the lump longitudinally:
If you have got it right, the tool will just kiss the end of the lump when swung around 90 degrees
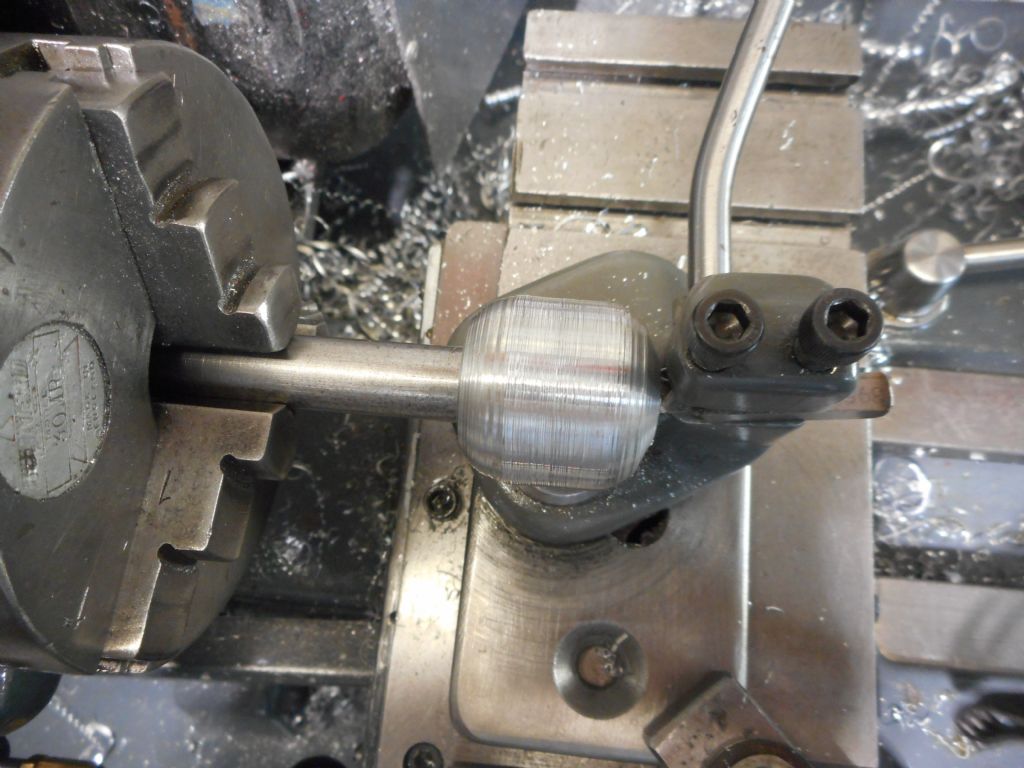
Then its just a matter of bringing the tool back out and starting to wind the cross slide in while sweeping the handle back and forth taking cuts off both sides of the lump. You just wind the cross slide in by the desired depth of cut each sweep.
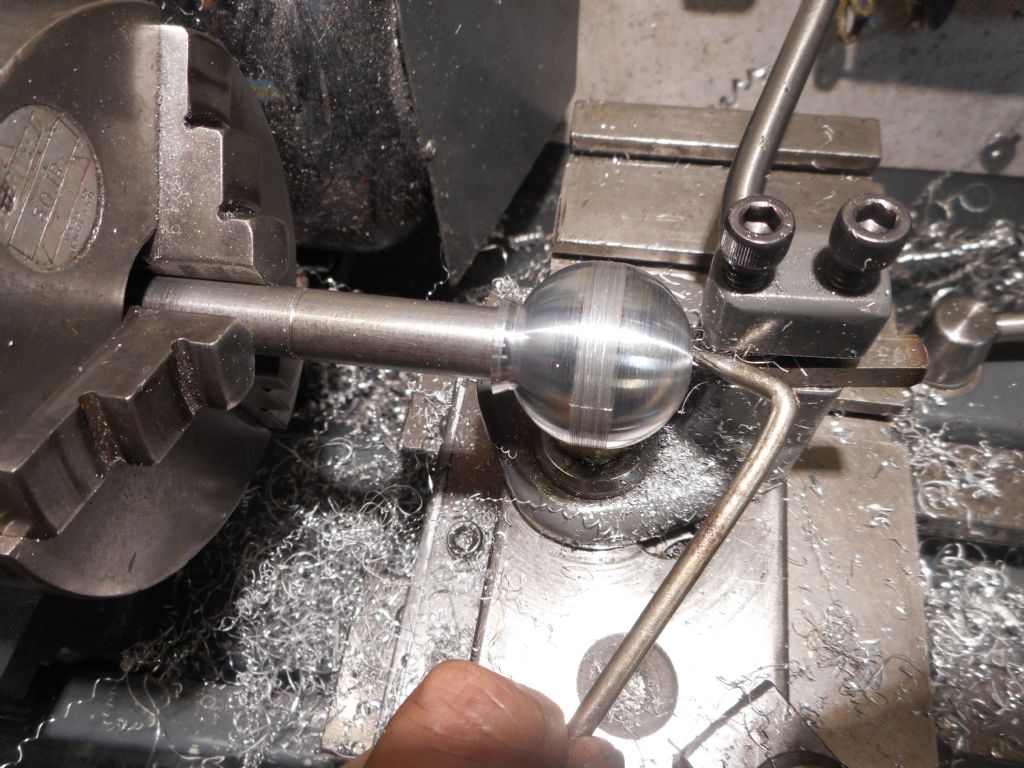
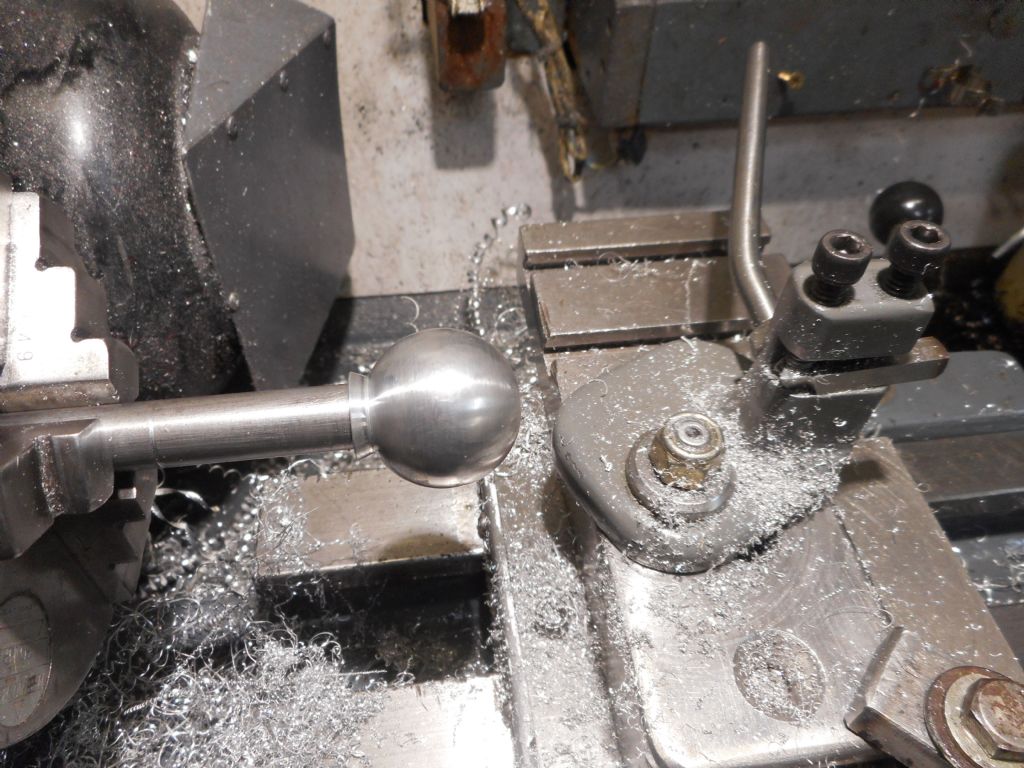
The band in the middle gets smaller and smaller as you go. When it's gone, you have your ball. Here I am removing some of the stringy allly swarf balls that kept getting between the tool and the job and impeding cutting. Poor chip control as the CNC guys would say. But caused by the toolbit having almost nil stick-out from the post in order to make the ball as big as possible. The collar on the left is caused because I had to make the ball slightly smaller than expected to clear the pivot bolt below the lump. Nothing is every easy! So had to reduce the diameter, which meant the lump was a tad too long. No worries. Will make it blend in at the end.
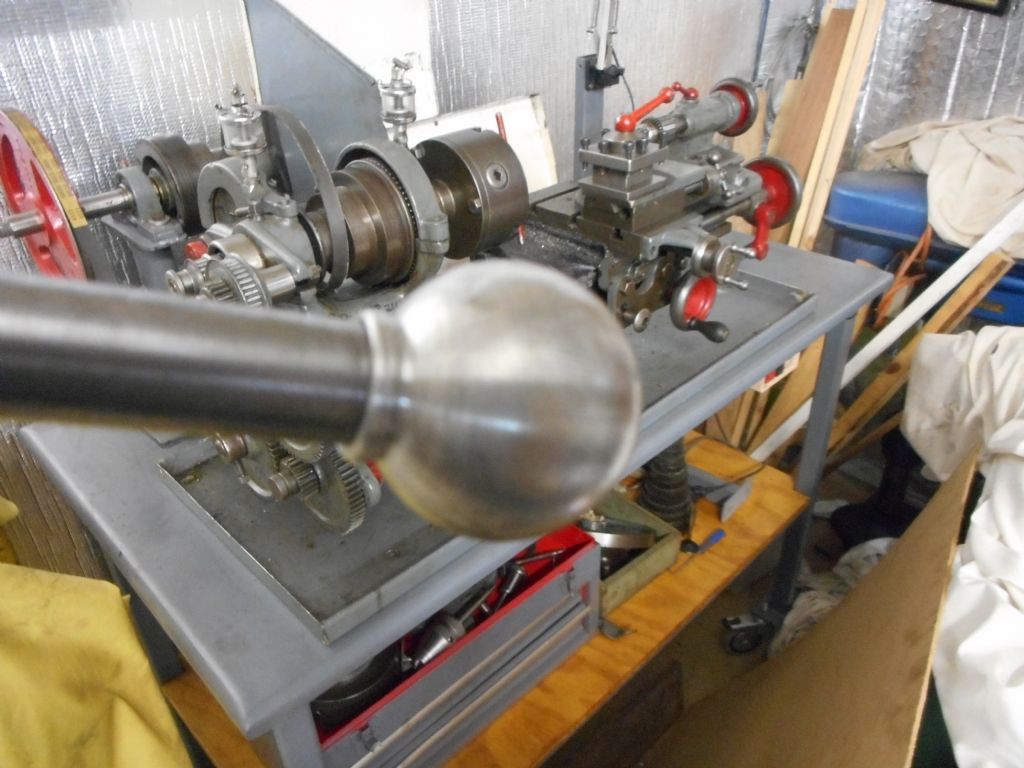
The finished ball gleaming in the lamp light. I did not mirror polish it as I am going to paint it black to look "right" and want a surface for the paint to key to. But of a polish with 400 grit emery gave this result. The off-tool finish can be seen in the above pic. Very shiny. It's a nice bit of ally. Probably 6061 T6 or similar from memory.
And here is the finished ball, badly out of focus but showing the Mighty M-Type Drummond in the background, just for Ady1!
You can see I turned that collar down parallel and blended it in so it all looks like part of the plan. Did that by just holding the ball turning tool in place by hand and operating the carriage handwheel so it turned parallel. Then pivoted the ball turner handle to create the radius on the edge of the collar. I told you ball turning was more of an art than a science! Just be glad I am making decorative ball handles and not artificial hip joints.
And notice that no thread on the shaft is visible due to that counterbore I put in the hole. Gives a nice clean look and no sharp edge of the thread there to catch on hands in operation.
A quick lick of satin black paint and it now looks like another item that fell off the back of Myford's truck. I won't include a pic of the paint drying. Not that exciting to watch really.
Sooo,, getting towards the end of the project now. Just need to make up the three pivot bolts. Plus I think I will use the ball turner again to make a little GH Thomas style ball lever to go on the sliding handle pinch bolt. Just to add the final complication to what could have been a much simpler job! The cherry on top.
Edited By Hopper on 08/04/2022 08:31:27
Edited By Hopper on 08/04/2022 08:39:21
8 April 2022 at 09:43 #593503Sub Mandrel
Participant@submandrelThis would have made a great article for MEW… 😁
8 April 2022 at 10:58 #593517Hopper
Participant@hopperPosted by Stub Mandrel on 08/04/2022 09:43:18:This would have made a great article for MEW… 😁
A 10,000 word 12-part series more like.

Yes I thought about that. But it started off I needed input from the panel to get all the essential dimensions before I could make it. Couldn't have done it without the panel. I'll send you an email about a further possibility.
Edited By Hopper on 08/04/2022 10:59:42
Edited By Hopper on 08/04/2022 11:19:12
8 April 2022 at 12:25 #593535Rod Renshaw
Participant@rodrenshaw28584Just like to say how much I am enjoying this thread. I live in the UK so my difficulties in getting accessories and bits for my Myford are trivial compared to the situation Hopper faces.
I have made a few things for the lathe but have not had the wit to make them look like Hopper's excellent copies of the Myford style. I have the lathe and linisher etc and will try harder next time I make something for the lathe. I will also try using alloy for less stressed parts. something I have avoided so far, just through inertia and not for any valid reason.
I also struggle a little with turning balls so I usually buy black plastic ones for tool handles, much easier and they look OK to my eye.
Rod
8 April 2022 at 15:19 #593553Hopper
Participant@hopperThanks Rod. Glad you find inspiration in my shenanigans. If buying aluminium be sure to get a machinable grade such as 6061 T6. The softer stuff can be like trying to machine putty. Definitley get that belt linisher fired up. As you can see, it can make a big difference to the finished look in a very short time.
I have some plastic balls on order too, but ETA is about two months thanks to Covid induced delays at Australian Customs.
9 April 2022 at 00:21 #593628Hopper
Participant@hopperPosted by David Davies 8 on 07/04/2022 20:07:01:When you have time it would be nice to see some shots of the Snortster as well.
Cheers
Dave
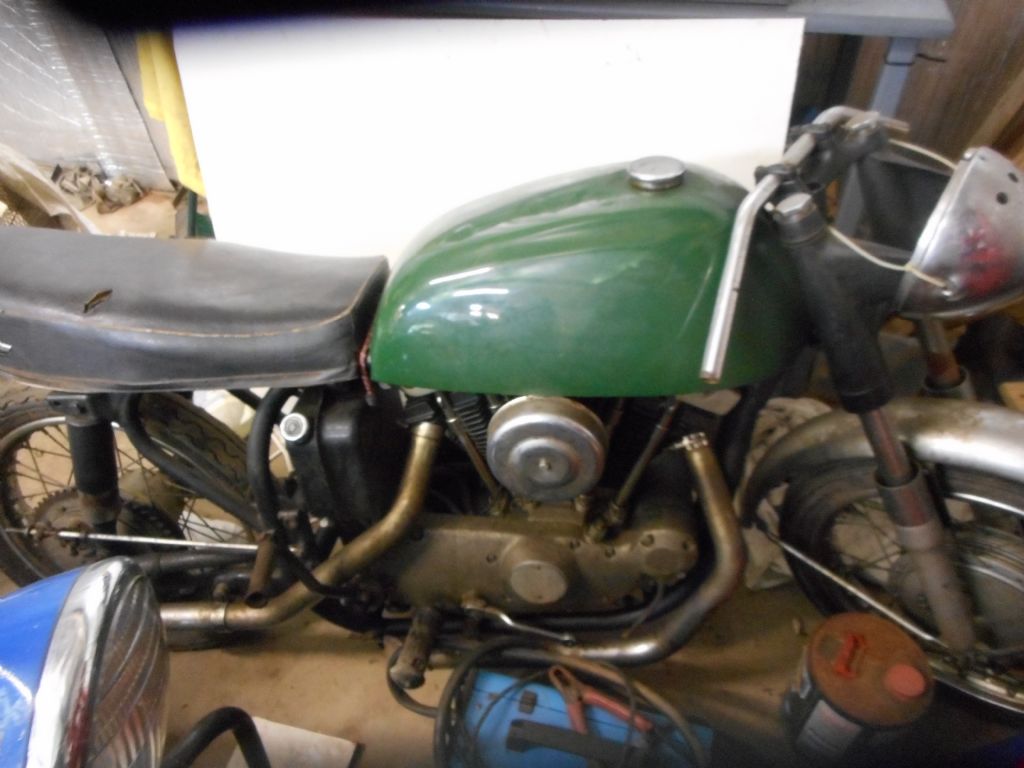
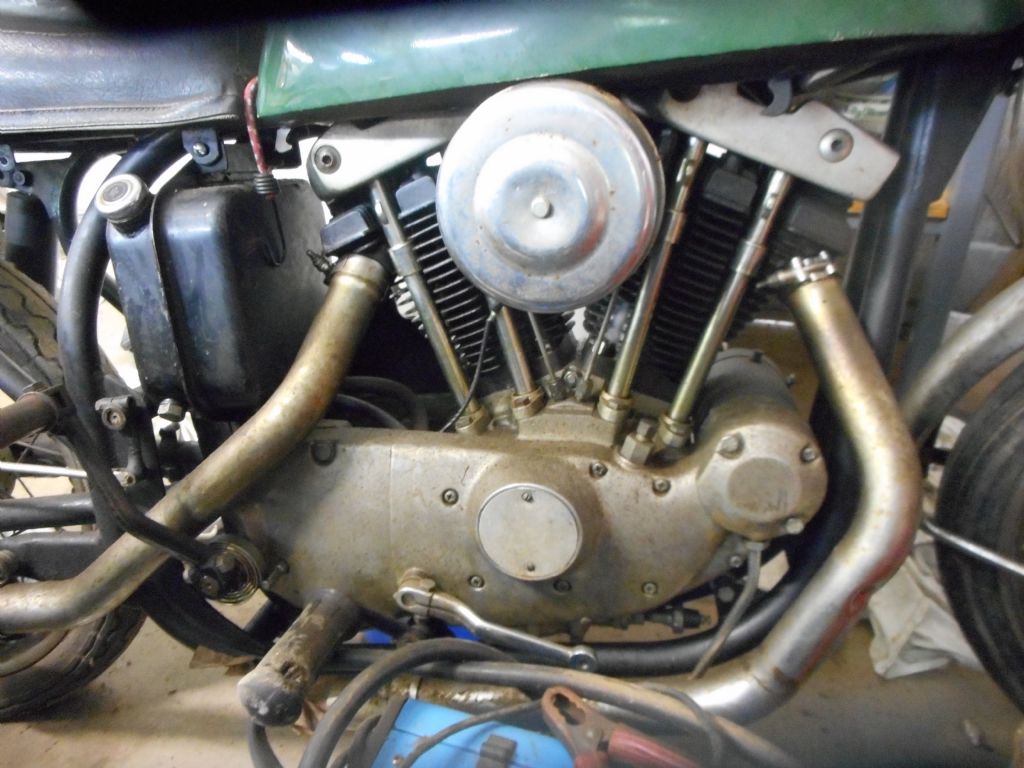
Here you go. Sadly, sadly neglected these days I am afraid. It had a Trident T150 disc brake front end on it when I had it on the road in America. But getting a hybrid registered when I moved back to Australia was more red tape and engineer's certificates etc than I had time/motivation to deal with. Australia has got to be the most over-regulated country in the "free" world. Don't get me started… Anyhow, the Trident got put back together and sold off to my brother so now back to Norton forks and wheel. I do have a John Tickle 2LS brake to go in there one day.
It's a 1974 Harley Sportster engine and that's the Sporty oil tank shoehorned in behind it. Norton Atlas Slimline Featherbed frame. The engine only just fits. The rocker boxes poke up through the top frame tubes and the tank has to be mounted slightly high on extra rubbers to clear. I could drop it by an inch if I cut a section out of the bottom frame rail to clear the oil pump. But I just cant bring myself to stick a hacksaw into a genuine Featherbed frame! Getting the engine in was a trick. Laid the engine on it's left side on the shed floor and then put the frame over it. Worked the top tubes down over the rocker boxes until the bottom frame tube was hung up on the oil pump by about 1/8". So I jumped on the frame and sprung it out over the oil pump and "POP" it all went into position. Stood it all upright together and made the engine plates using cardboard templates (Early CAD — Cornflakes packet Assisted Drafting) . I made the whole thing in a log cabin behind our house in Montana with no gear other than a box of spanners, a hacksaw and pistol drill. I was young and energetic then.
It is a hoot to ride. Lighter and nimbler than the old Sporties and way more raucous than a Norton. Those straight pipes are LOUD! You can feel the extra weight of that tall cast iron engine in the front end though. Confused the heck out of the Yanks who could not understand why anyone would want a Norton frame on their Harley, and how do you ride with those handlebars (BMW R100RS bars) way down there like that. Nobody there had heard of cafe racers in the 1980s.
These days, the combination has become so popular that Dresda are making the frames with the extra inch of height to fit Harley engines. I was only 30 years ahead of the curve!
Edited By Hopper on 09/04/2022 00:22:06
Edited By Hopper on 09/04/2022 00:25:30
Edited By Hopper on 09/04/2022 00:34:06
9 April 2022 at 07:41 #593644David Davies 8
Participant@daviddavies8Hi Hopper,
The Snortster looks very nice! Were the Americans confused because of the waste of a good Featherbed or the waste of a lump of Milwaukee iron? The rear wheel looks from th angle of the photo to have a T140V conical hub is that so? I bet it is great to ride with loads of low down torque.
l know of Dresda but I didn’t realise that they made a raised Featherbed for Harley motors. There is also a firm in Aberystwyth that makes Featherbeds like that, they call the end result a ‘Norley’.
Thanks for posting the photos.The ball handle for the L/O tail stock looks excellent. I have dabbled with ball turning, I went down the tool post mounted boring head route using the ‘up and over method’.
Cheers
Dave
9 April 2022 at 11:33 #593691Hopper
Participant@hopperHi Dave. Its a Rocket 3 rear wheel. Same thing.
Yanks could not see why you would change the HD frame for a Norton. Totally mystified. Rigid choppers were all the go.
I have a boring head waiting to be modded into an up and over ball turner. One day…
10 April 2022 at 09:43 #593815Hopper
Participant@hopperMAKING A BALL LEVER
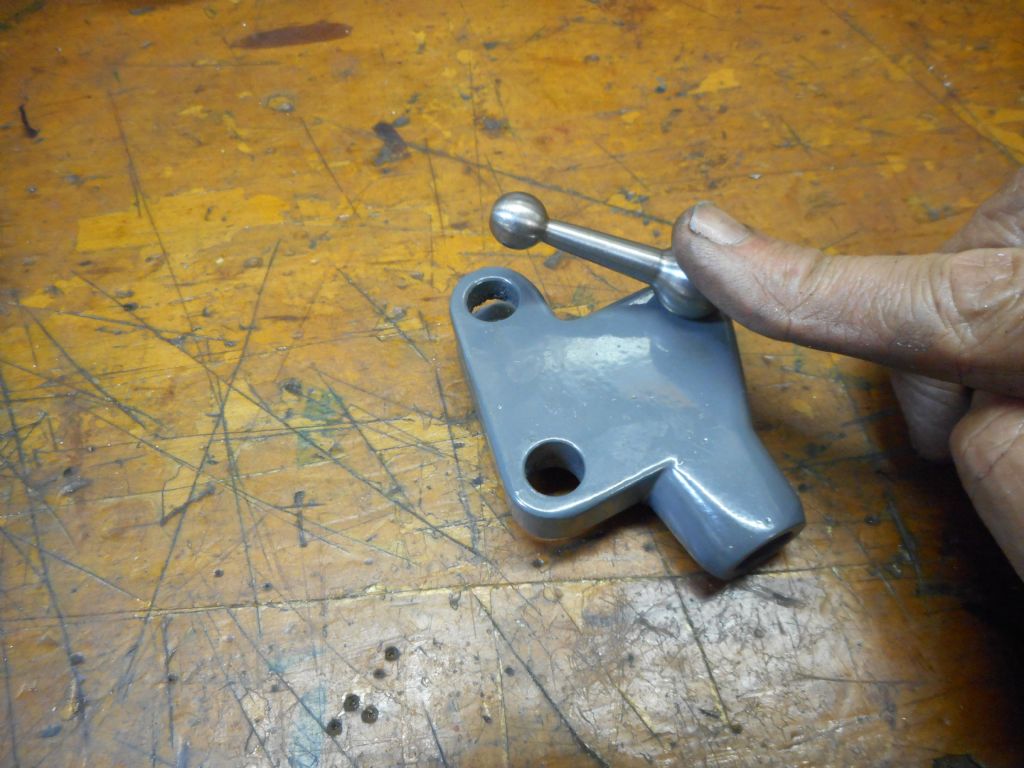
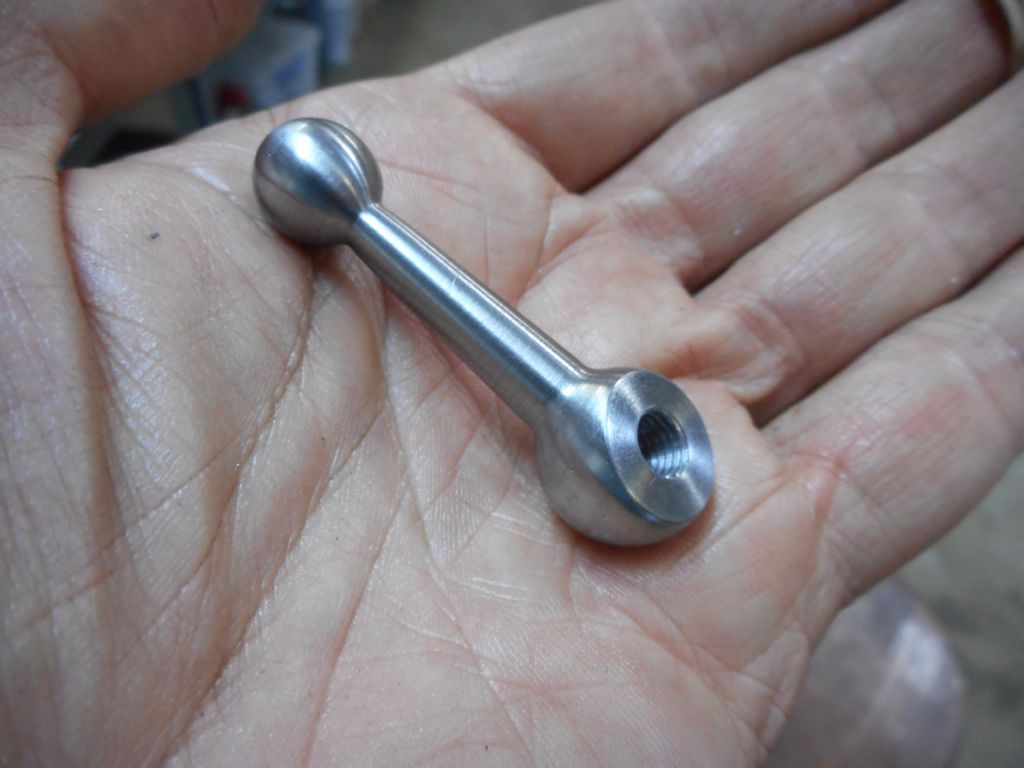
So I decided after seeing Ega's pic to make a ball lever for the handle pinch bolt instead of just using a naff looking and readily available Allen head screw. Noooo that would be too easy! This is it:
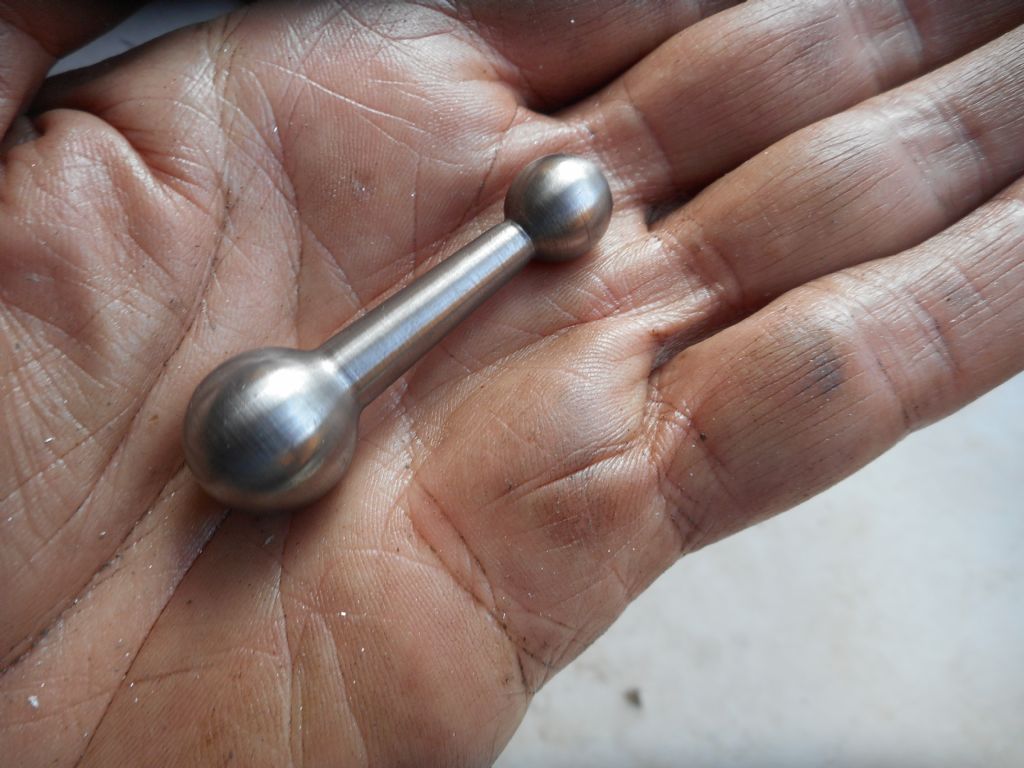
Innocuous looking thing isn't it? But gee whiz those thing are a faff to make. GH Thomas got me started on these with his Versatile Dividing Head. But GHT makes his in two pieces with the small ball screwing on to the main tapered shank. But I'm way too lazy for all that. So I make mine in one piece. I have done them ranging in size from 4"long on the top of the four-way toolpost I made for my Drummond M-Type, down to tiny little 1" long jobs on the tailstock arm for the versatile dividing head. Trouble is I can never remember exactly how I did it last time so every time I do one it turns into a major faff to get it down with that ball turner of mine with not much access in behind the ball towards the chuck. So thought I would make a record of how I did it this time, in case I ever want to do another one in the future. It would of course be easier to do a modern brutalist style handle, just a cylinder with a straight bit of bar sticking out of it. But that would be no fun would it?
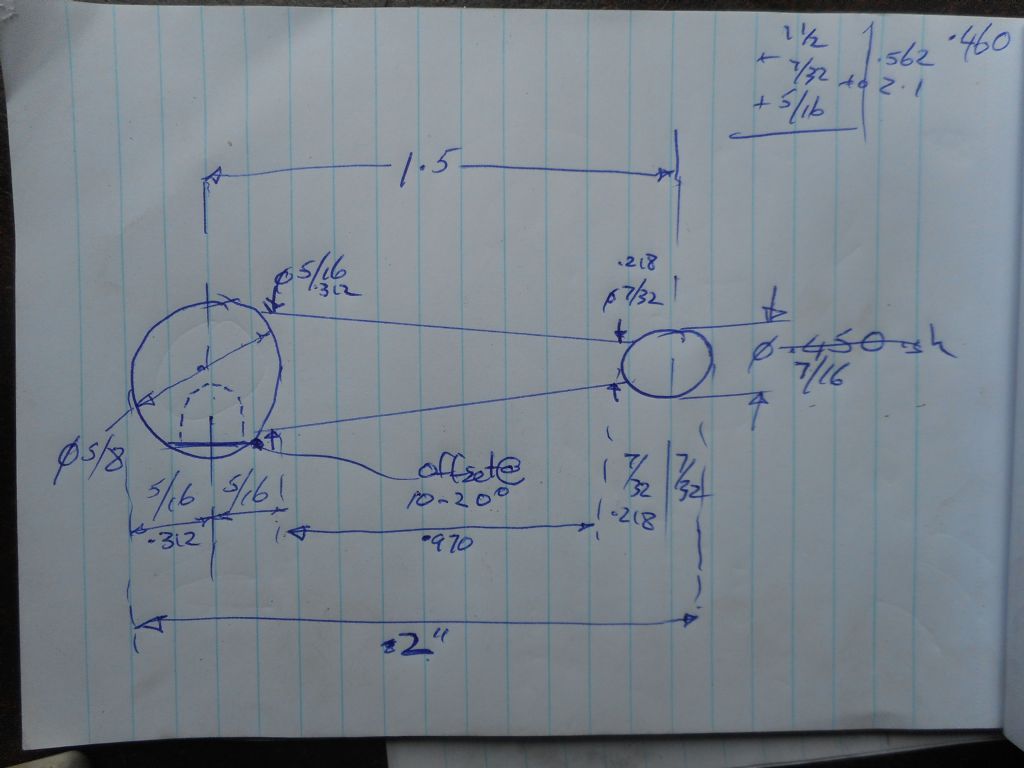
First step is to know in advance what size you want to make it. So based on GHT's rules of proportion but blowing them all up one size to suit my heavy handed proclivities, I came up with the below masterplan. In the absence of a fag packet to sketch it out on, a piece of jotter pad did the job.
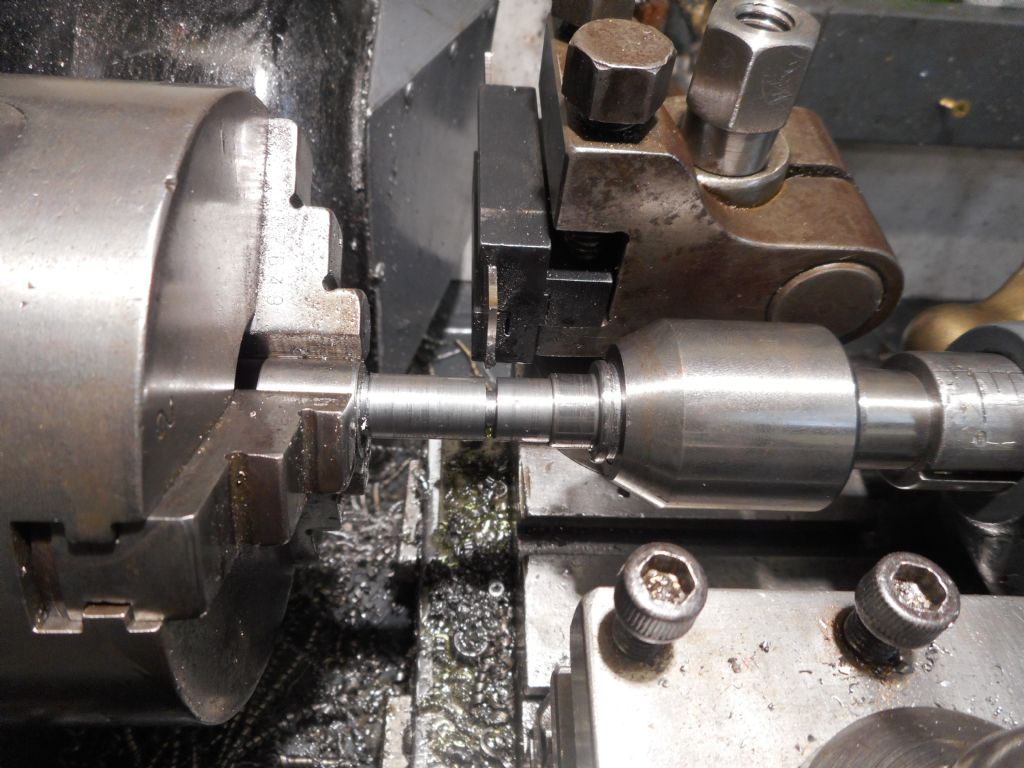
First step was to turn up a blank the correct length, with a lump on one end the length and diameter of the large ball, with the rest of the shaft turned down to the diameter of the small ball. Then go in and put two grooves in it where the end of each ball is going to fall. Each groove is made to the depth the tapered shank's diameter will be, according to the above masterplan.
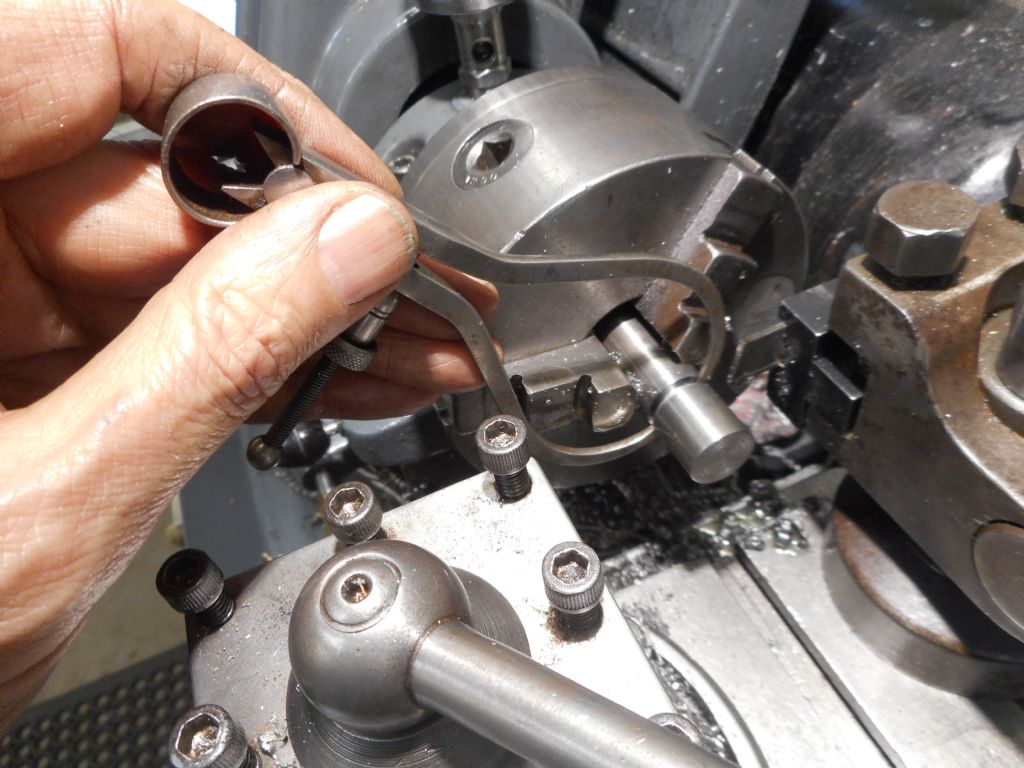
Had to go old school to measure the diameter down in the bottom of that narrow groove. Calipers can then be measured with "normal" digital caliper to ascertain size. Or with a steel rule if you want to really go old school.
IN the end, you have the still cylindrical blank held by the large end in the chuck by the large end, small end sticking out and the two grooves in place demarcating both the edge of each ball and the diameter and location of the each end of the eventual taper. More of which anon.
10 April 2022 at 10:05 #593817Hopper
Participant@hopperBALL LEVER cont.
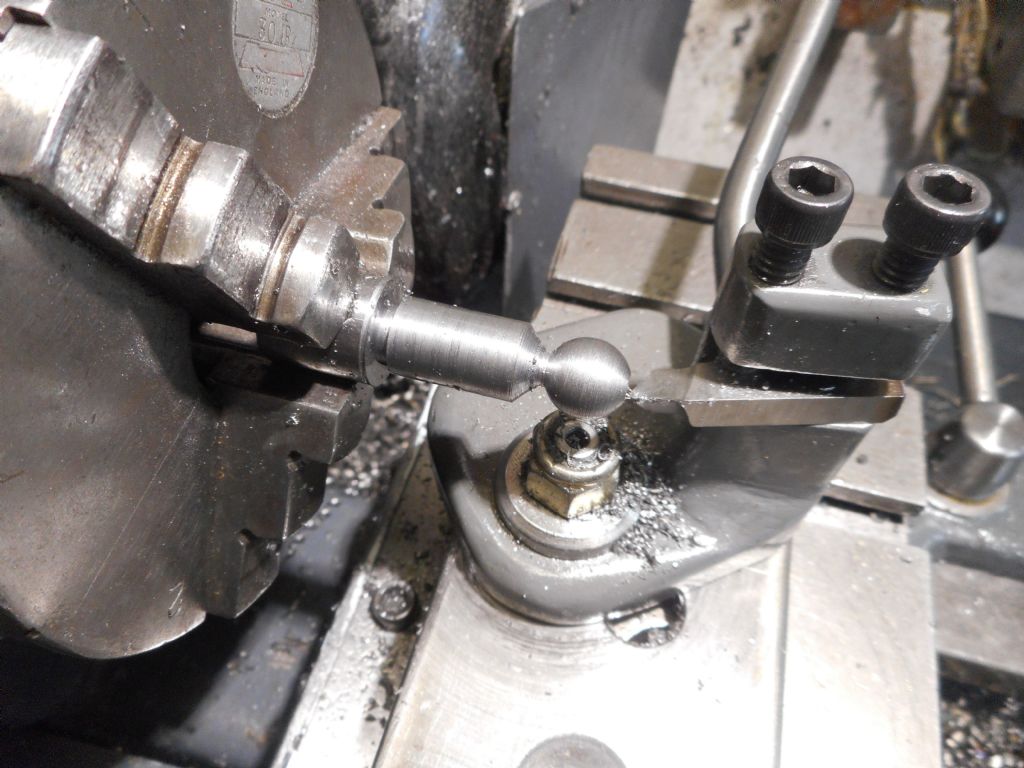
Then it was out with the diabolically primitive ball turning tool. I use a drill bit to set the tip of the toolbit the correct distance from the pivot centre. I know the pin sticking up the middle of the pivot bolt is 1/8" diameter, so drill bit must be 1/16" smaller than the radius I want to cut. Crude but effective. Again, good enough for decorative ball handles but probably not if we were making tiny artificial hip joints for bandicoots.
The small ball is the first to get turned, after setting up the ball turner the same way as described above for the main handle ball. Balls is balls. Same principles apply regardless of size. We can see the lever handle starting to emerge from its hiding place inside that bit of 3/4" bar now.
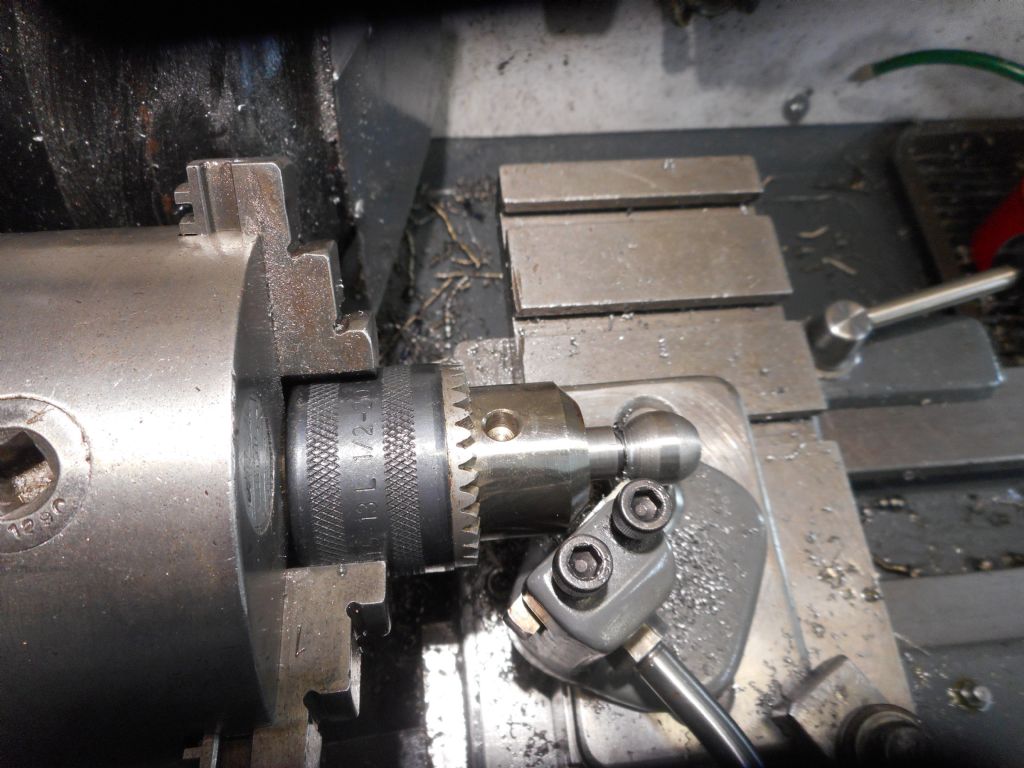
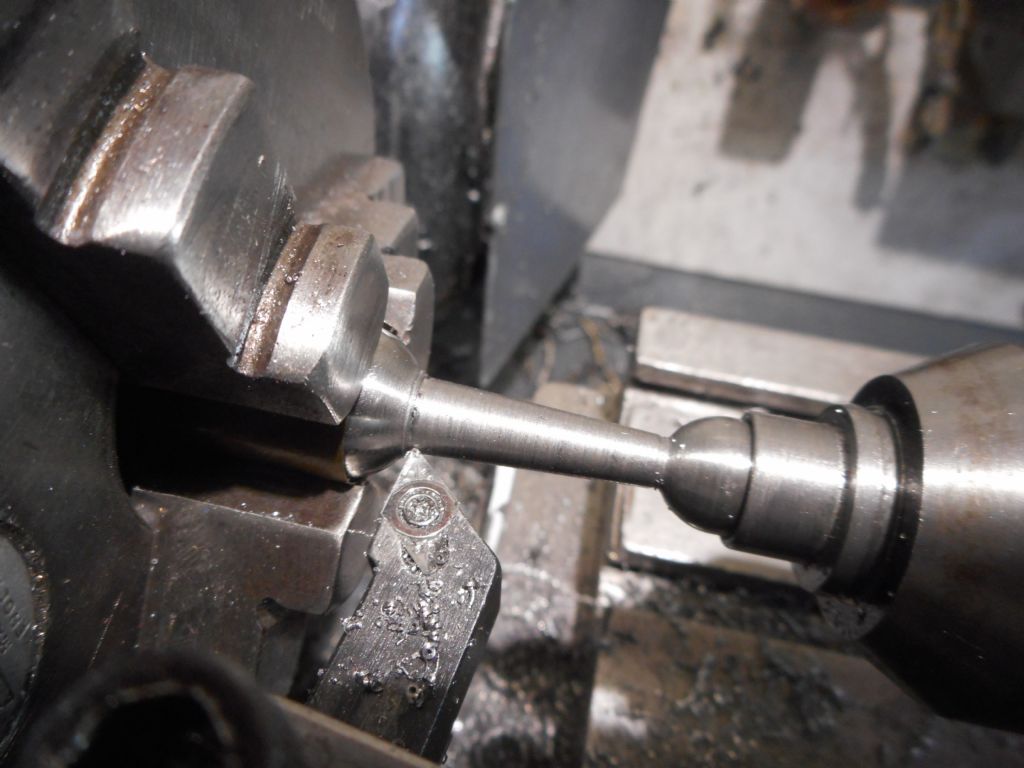
Well, that was the easy bit. The small ball, sticking way out there away from the chuck. But then larger end proved more problematic. With the small bore and part of the shank gripped in the chuck, the ball tool did not have enough clearance before hitting the chuck. And for the life of me I could not remember how I got around this problem when I did the tiny little ball handles for the Versatile Dividing Head. But a bit of "thinking outside the box" (which is a dreadful cliche indicative of thinking way inside the box in itself. But don't tell the management types that.) and a very special high-clearance chuck was pressed into service.
Yes I could have just stuck it straight in the MT2 taper in the spindle, but a previous owner messed that all up and although I have stuck a reamer down there, it is still not quite right and I don't have a drawbar chuck. So to avoid chuck coming loose it was firmly clamped in the three-jaw, firmly to hold but not tight enough to crush it and stop it working properly.
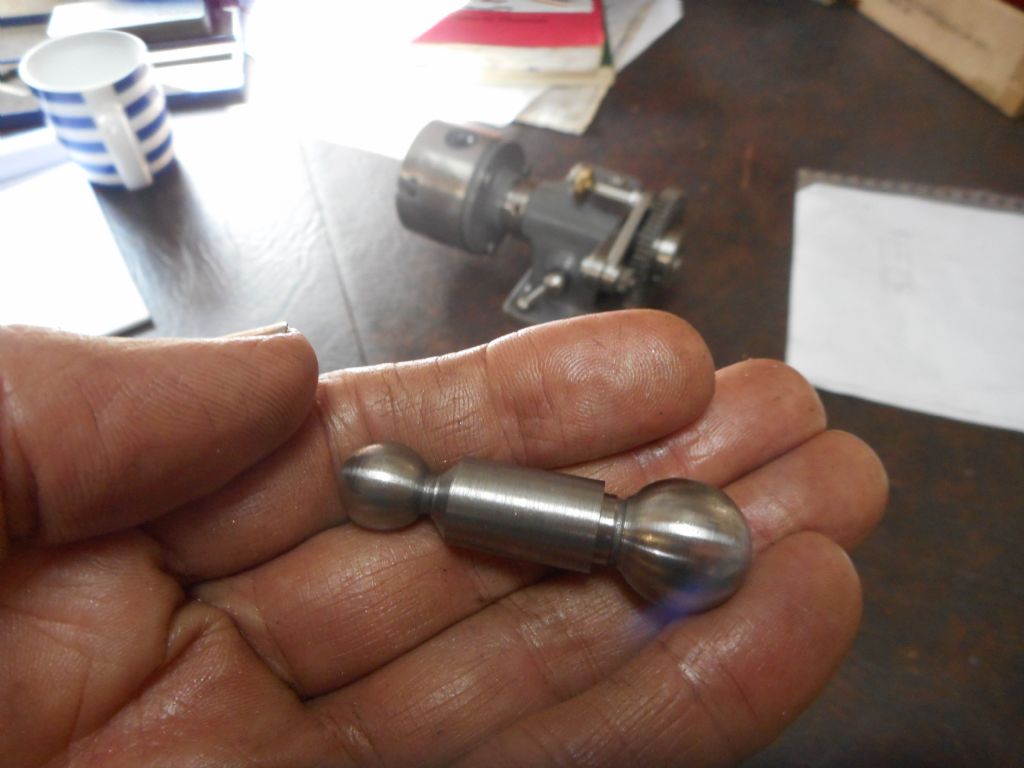
So, now we have two balls (quiet in the back row there) and an oversized parallel shank. Getting close but no ceegar. That is the next challenge: how to hold this thing while turning the taper on to the shank.
Which requires the use of… The Secret Weapon.
Edited By Hopper on 10/04/2022 10:07:22
Edited By Hopper on 10/04/2022 10:12:06
10 April 2022 at 22:12 #593901Hopper
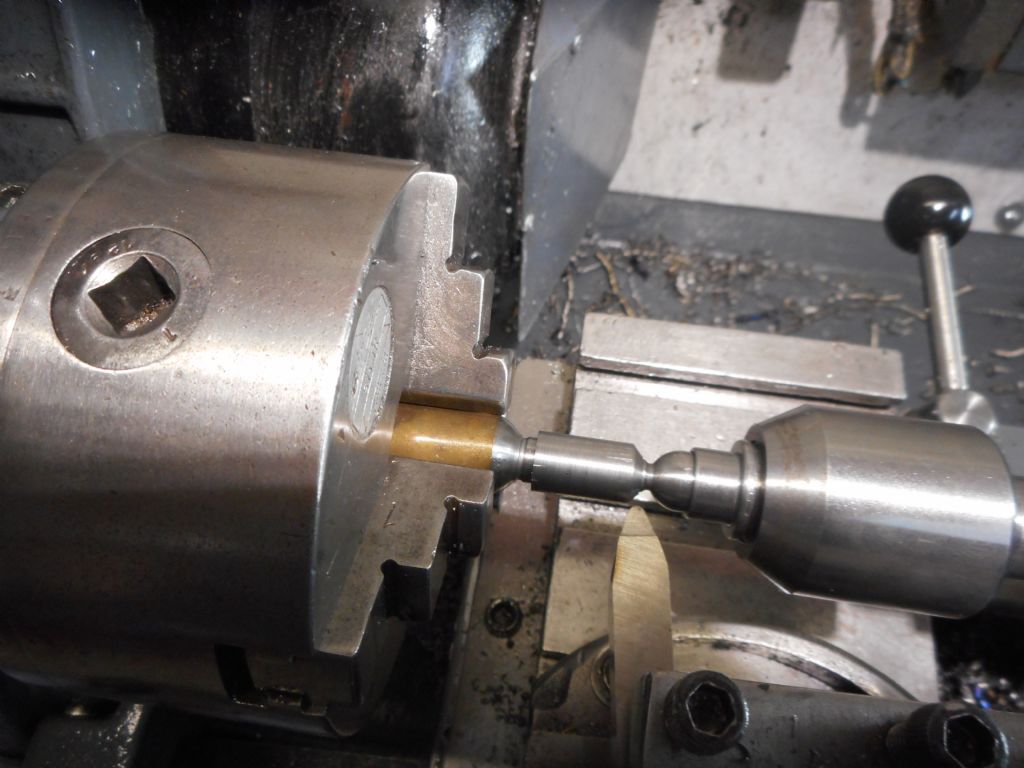
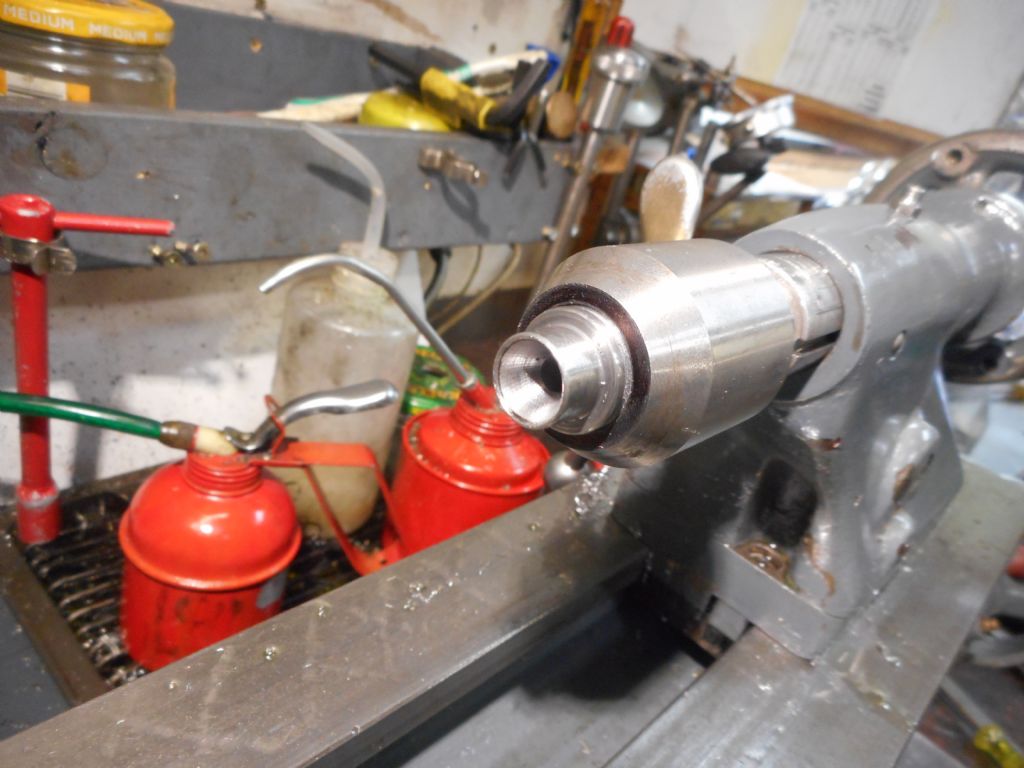
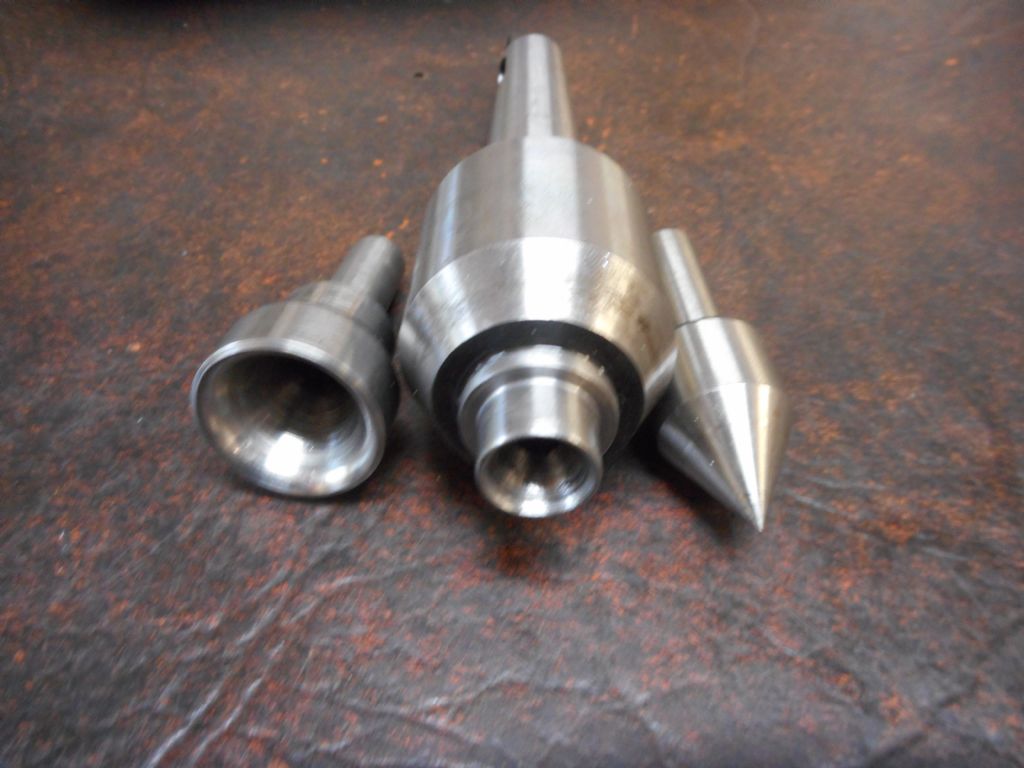
Participant@hopperThe secret weapon, I finally remembered, was the reverse centre. Used to hold the small ball at the tailstock end while the large ball was held in the chuck with a bit of brass shim to protect it from scarring, having been already nicely polished up with a bit of emery paper while still easily "holdable".
The reverse centre was easily made by pulling the usual pointed centre out of a cheapo revolving centre that uses two ordinary ball bearings inside. I made the reverse centres with a shank turned to fit in the ball bearings. The larger one made to fit up to about 3/4" ball bearings had a hole drilled in the business end then the angle cut with a boring bar with the topslide set around to 30 degrees. The smaller one I just poked a large centre drill in there, one with a 7/16" shank. These centres are also handy for holding things like vintage motorbike generator armature spindles that are made with no centre hole. Also modern starter motor armatures when recutting the commutator.
11 April 2022 at 09:54 #593932Hopper
Participant@hopperBALL LEVER cont
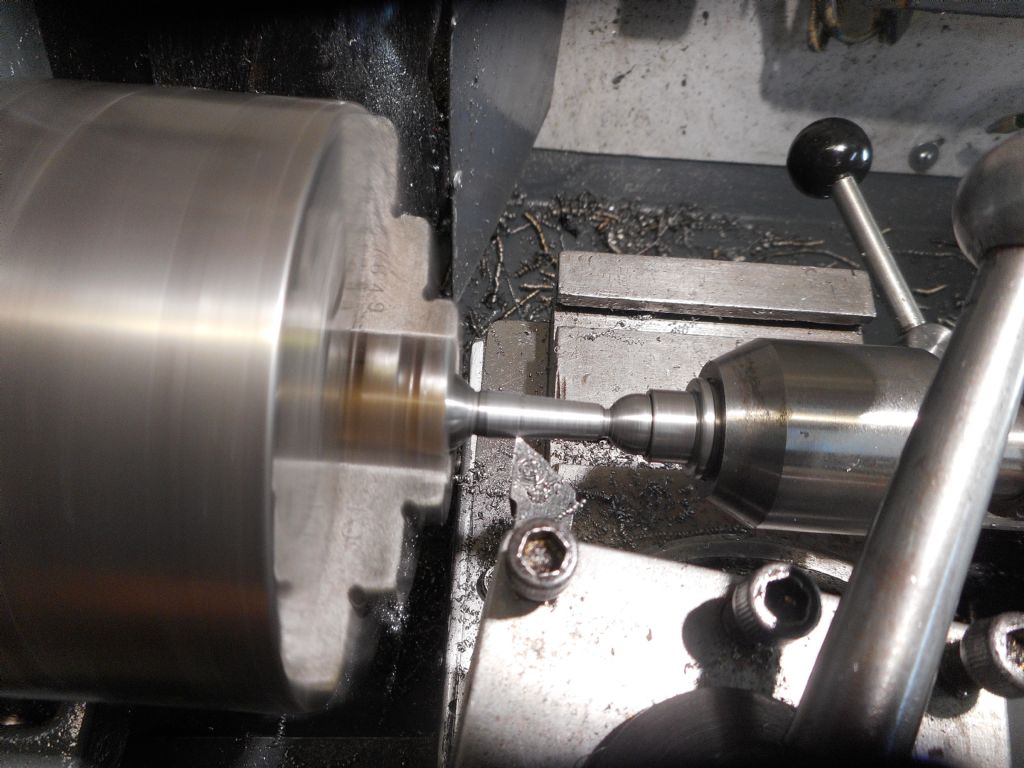
After calculating the required topslide angle from the difference in the known diameters at each end of the taper and the length between the two, topslide was set around at 2.8 degrees, by eyeball on the graduations. The shank was then turned down parallel to the major diameter using the carriage, and then the topslide was brought into action to put on the taper. Took a bit of faffing about so the topslide handle did not foul the tailstock, requiring a bit more tool overhang than normal, but light cuts and all was good.
As I reduced the diameter, I could see the taper was approaching one of the pre-existing grooves faster than the other, so a slight adjustment of the topslide, just a little bump around, and it was spot on. Sometimes you have a win! So eventually the taper joined up the two grooves that were machined in the first stage of roughing out the blank.
Then a small round Swiss file about 1/*" diameter was used to blend the radius between the balls and the taper so it all looked nice and smooth. Bit of emery cloth work and it looks just like a bought 'un.
Very satisfying to see. I am very pleased with that. I don't know why but these ball handles just intrigue me. Well worth all the mucking about, for sure.
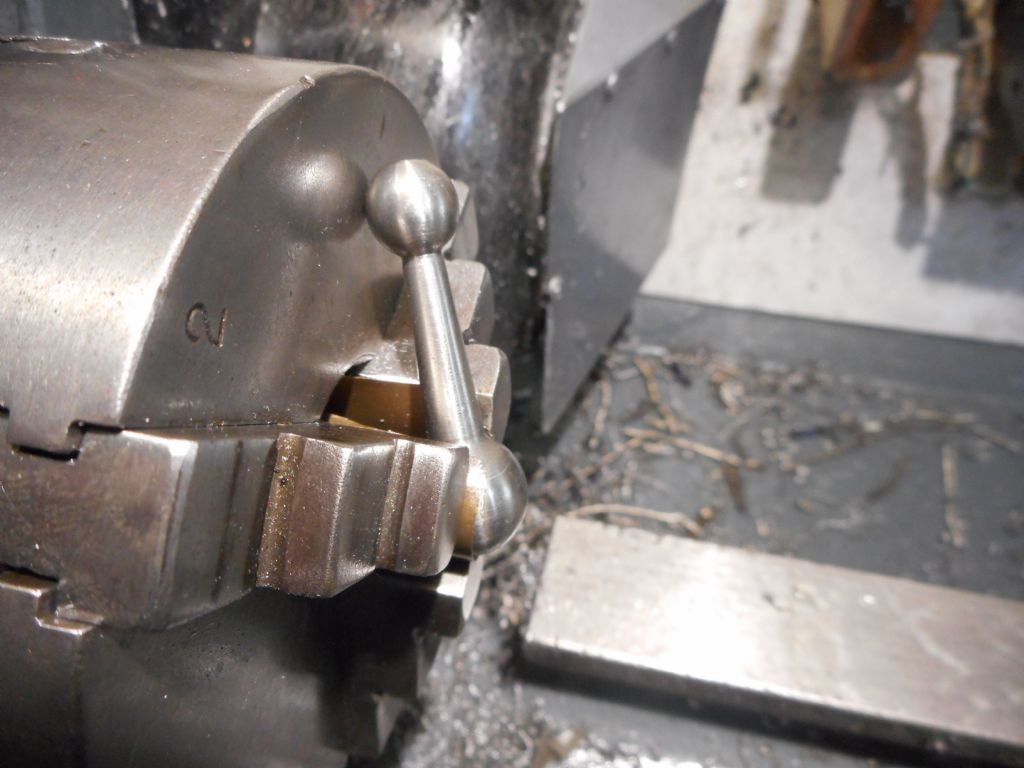
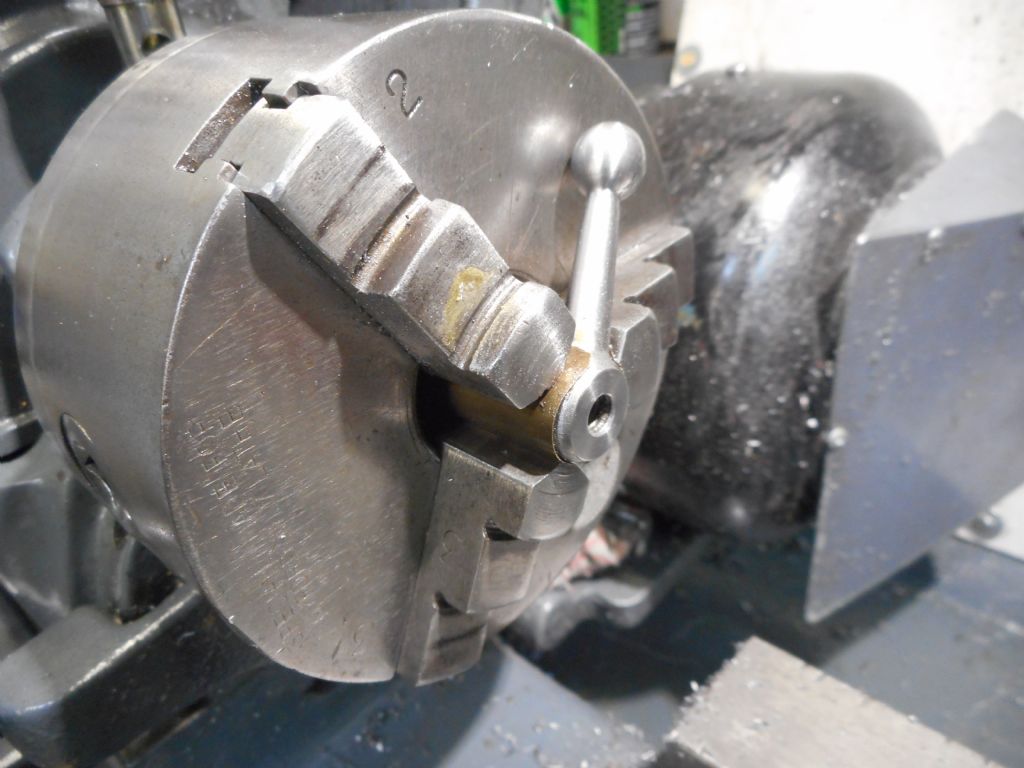
So next it was set up in the chuck ready to face a flat across the major ball, then drill and tap for 1/4" UNF so it can be attached to the locking stud. Old GH Thomas made special split stepped collars with cutouts for the handle to stick through for each sized handle he made. I am way too lazy for that so have always just held them in the chuck with a bit of brass shim for protection. Haven't had one come loose yet. And the biggest one I have done had a 7/16" BSF thread up the middle of it. Had to use the larger Drummond chuck for that one in order to get enough of an angle on the handle, but for these tiddlers, the Myford smaller chuck works just fine. A 15 degree offset seems to be ideal for most cases, but usually I just do it by eye as in the pic. Whatever works.
Edited By Hopper on 11/04/2022 09:58:58
11 April 2022 at 12:34 #593958Hopper
Participant@hopperHole was drilled and tapped using the same method as for earlier parts, with crank handle and spring centre.
Now it really looks like something.
The head was cut off a socket head cap screw and the shank Loctited into the threaded hole. And that is that job done. Handle was fitted to the bracket ready for assembly when the pivot bolts are made.
Looks soooo much better than a modern Allen head cap screw doesn't it?
I'm quite chuffed with that.
11 April 2022 at 12:45 #593959Hopper
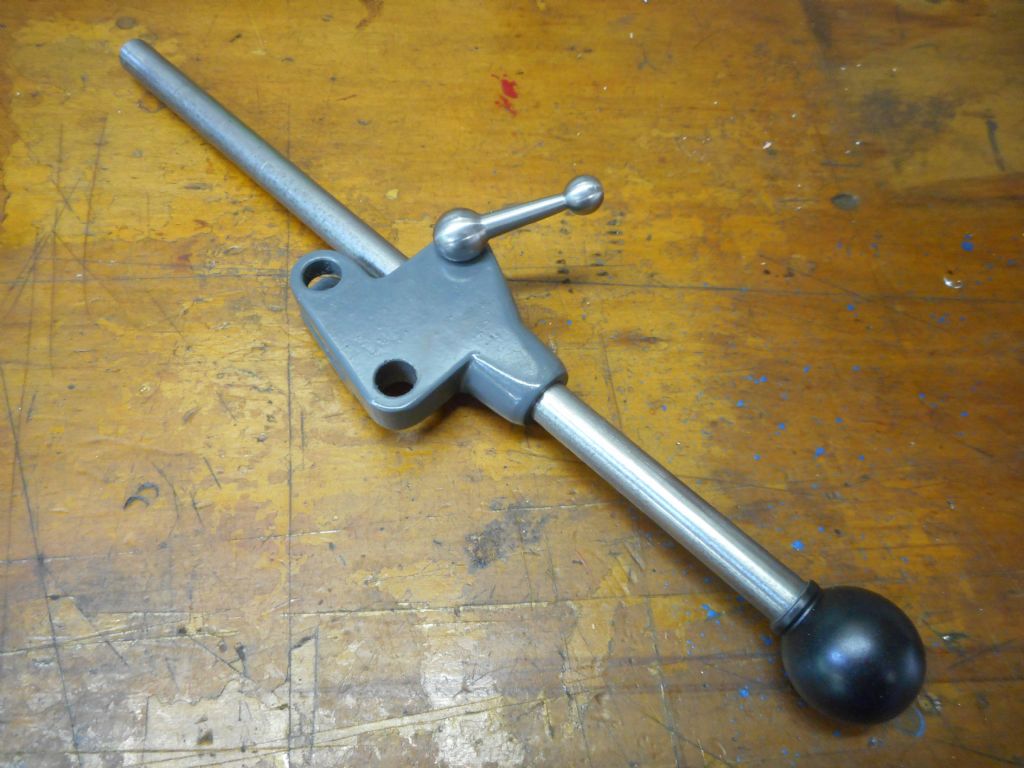
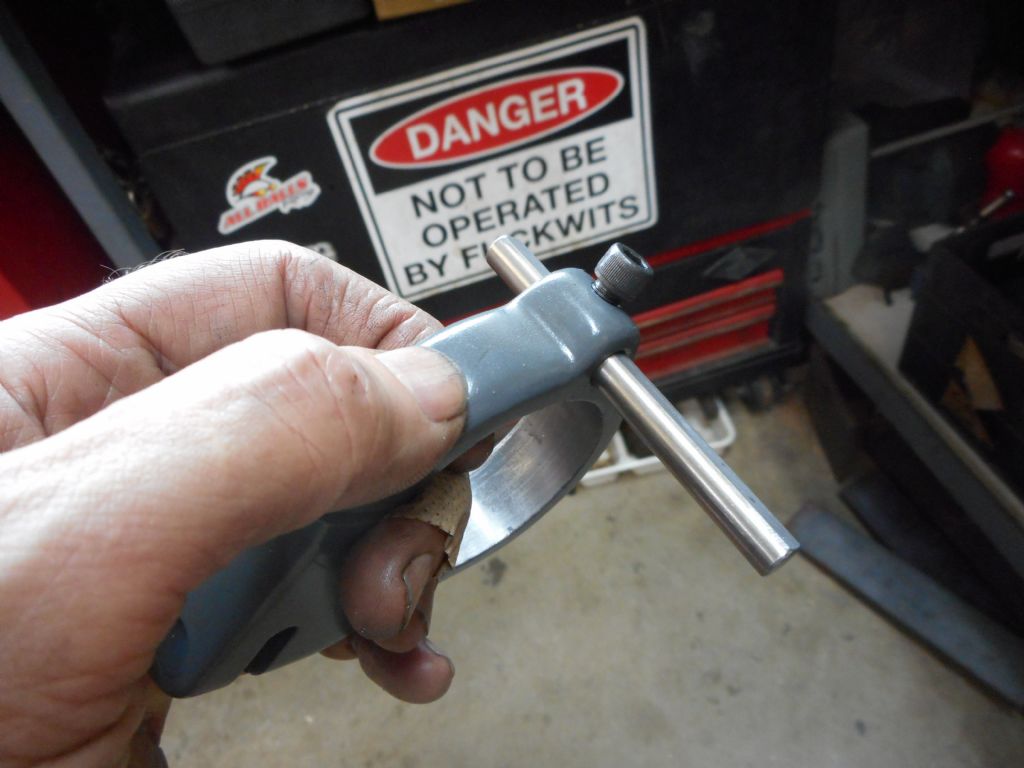
Participant@hopperWhich brought me to the laast fiddly little bit before I make the three special pivot bolts and assemble the whole thing: the depth stop. I went with Noel's suggestion and upgraded my design from the early Myford style threaded rod stop to the later/Super 7 type, which is a piece of 5/16 rod with a clamping bolt. I used a piece of stainless rod out of an old printer to make. it.
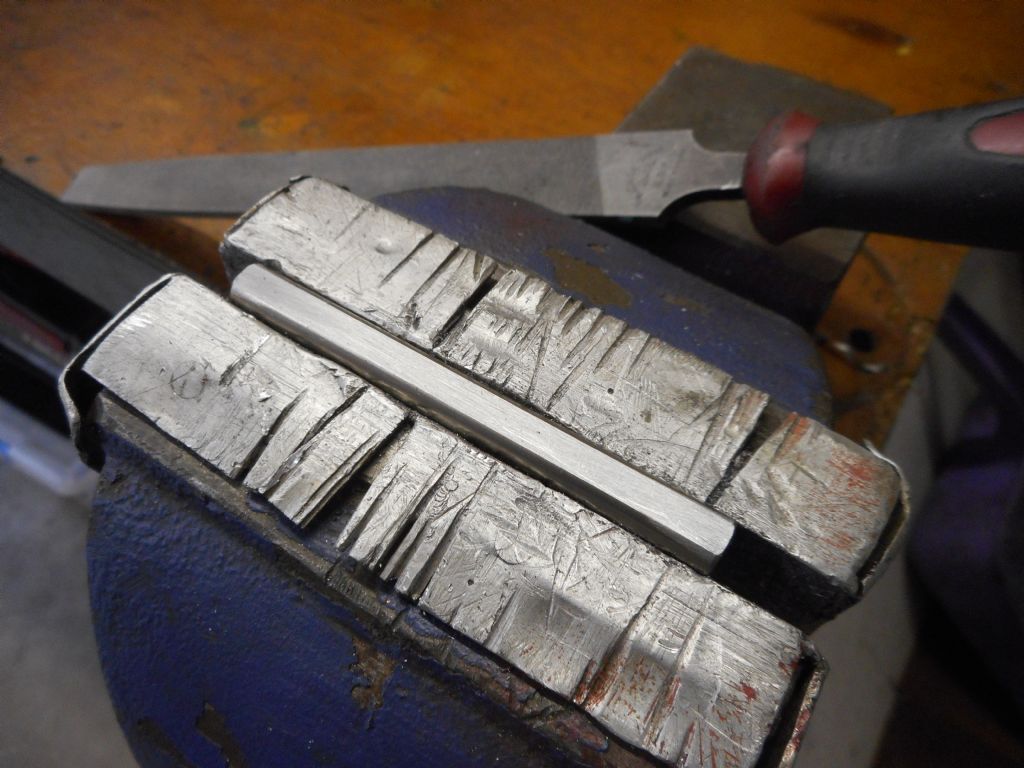
In the absence of a milling machine to put the flat along the bar for the lock screw, I did it the old fashioned way with a file. All those months I spent in the apprentice training centre filing blocks of steel flat and square within one thou to make G clamps and things finally paid off. I got the thickness along the rod well within one thou so haven't lost the touch. There was a slight half thou hump in the middle so I must have rocked the file somewhat. Need more practice!
So that was it. All put together and waiting now only on making those pivot bolts.
11 April 2022 at 22:47 #594060Hopper
Participant@hopperHere's a little trick I remembered when setting the topslide back to "normal" after the taper turning escapade above. It allows for very precise turning, in the tenths of a thou region.
Set the topslide at 14.5 degrees. Now, if you turn the topslide handle to advance the dial by 4 thou, it moves the tool bit inwards to take a 1 thou cut. So easy to take a half a thou cut, or even a quarter of a thou with great precision. Just advance the topslide by two or one thou respectively.
Plus, it gets the topslide handle out of the way of the tailstock on small jobs. Win win.
For the metric guys, if you set the topslide at 11.5 degrees, it gives a 5 to 1 reduction. So moving the topslide dial five hundredths of a mm takes a one hundredth cut.
Or if you want to get into real precision you can set the topslide at 6.5 degrees for a 10 to 1 reduction. Moving the cross slide dial 1 thou will take a cut one-tenth of a thou deep.
I have been using the 14.5 degree set up while making a start on turning up the three pivot bolts for the lever attachment and it actually works really really well. Gives very fine control and repeatability of the off-tool diameter, much more so than the Myford's very basic cross slide feedscrew arrangement normally allows, even with improved dial fitted.
12 April 2022 at 09:29 #594096john halfpenny
Participant@johnhalfpenny52803Just looking at old MEWs. No.16 (May'93) has instructions and dimensioned drawing for making a version of just this. I have to say that yours looks much more professional.
12 April 2022 at 09:58 #594103Hopper
Participant@hopperPosted by john halfpenny on 12/04/2022 09:29:24:Just looking at old MEWs. No.16 (May'93) has instructions and dimensioned drawing for making a version of just this. I have to say that yours looks much more professional.
Hi John
Thanks for the compliment. Yes that would be the smart way to do it. Much simpler – I would have been finished weeks ago – with the Heim joints for slop-free action. I had a look at that article before but could not work out what would stop the lever moving up and down in the vertical plane, as Heim joints allow two-axis movement. Also I priced the Heim joints locally at about $40 each so that was the end of that. Import shipping times are 2 months due to Covid etc at the moment so the cheap Chinese option was not available. Plus they would be metric and I have no metric taps and dies. And like you say, the way I have done it has a much more classic look to it, which I much prefer. I guess one has to be prepared to suffer longer for one's art.

Cheers
Hopper
12 April 2022 at 12:44 #594128Hopper
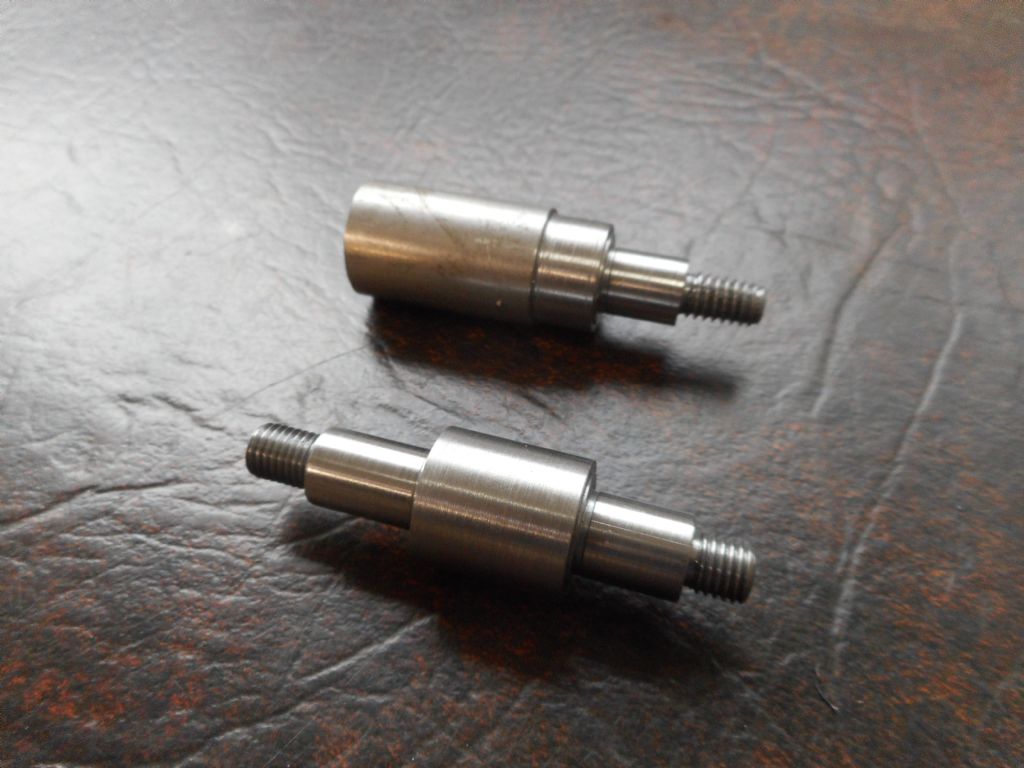
Participant@hopperLittle bit of progress today. Got the three blanks for the pivot bolts turned up, ready to add the hexagons when I set up the vertical slide on the ML7. I wouldn't make much of a production engineer. Three pivot bolts, all the same basic design, but three different shank lengths, three different thread lengths and two different thread pitches!
The bottom blank will make two pivot bolts after milling the hex in one go then parting off.
A couple of small details you can see on the bottom one there: I turned a step 1/64" thick under where the hex hed will be made. This is 10 thou smaller than the AF dimension of the hex. So when you do the bolt up, with no washer under the head, the points of the hex do not scar up the paint. So it is sort of a built-in washer. Plus to make sure the bolts seat on the shoulders, I turned a small groove to just below thread depth at the end of the thread before threading it. You can never get a die to cut a thread fully up to a shoulder, and I want the shoulder to come firm up against its mating surface so the groove solves the problem. Chamfering the hole would also solve the problem. But that would be too easy wouldn't it? I also cut a small groove under the head of the bolt so it mates up flat with its surface. Overkill maybe but nice to know it's all sitting just so after all this work.
So, next trick will be milling the BS hexagons on these UNF bolts with 11mm metric shanks without using a dividing head or indexer, a trick I based on something I learned from an Indonesian YouTube machinist called Mekanik Mesin, an absolute genius of "git 'er done" when you have much nothing to do 'er with.
Edited By Hopper on 12/04/2022 12:48:45
Edited By Hopper on 12/04/2022 12:50:24
12 April 2022 at 13:25 #594130bernard towers
Participant@bernardtowers37738Hopper, Surely you mean 5 deg 45secs for a 10 to 1 ratio which has nothing to do with metric or imperial.
12 April 2022 at 22:58 #594186Hopper
Participant@hopperWell spotted there Bernard. I was relying on ancient memory and should have said 6 degrees, not 6.5 — being the closest practicable setting.
It does work very well though. I was playing around with the 14.5 degree setting when making the pivot bolts and it gives a very nice fine control over the finished size straight off the tool. Much more so than my old ML7 will achieve the "normal" way. It is definitely not as precise as my old Drummond in this regard. I don't know why. Perhaps Myford's fibre washer on the end of the feed screw as a thrust washer whereas the Drummond is metal-to-metal? I keep meaning to make a bronze washer to go in there.
I have seen a roller thrust bearing conversion that can be done, but it looks to me like one has to remove a lot of metal from the cross slide end bracket, thus weakening an already flimsy Mazak component in order to fit it, so not keen on that idea.
Hopper
14 April 2022 at 12:35 #594378Hopper
Participant@hopperMilling BS Hexagons in the Lathe
This little exercise is a good example of how if you have more time than money, or sense, you can do almost anything with almost nothing.
The problem: To mill 5/16 BS sized hexagons on to the three pivot bolts.
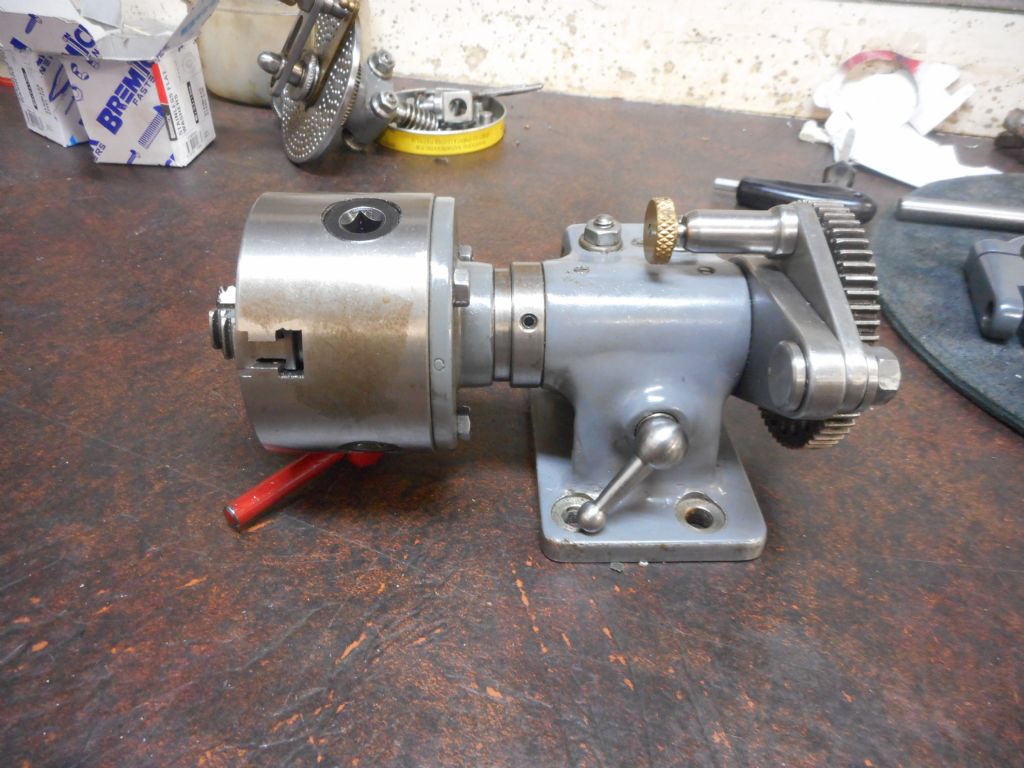
The gear: I am still saving up for that Sieg SX3 milling machine, so no mill. I do have a GH Thomas Versatile Dividing Head, but it really is too big to fit in the Myford or on the vertical slide and with a chuck mounted on it, overhang is riduculously unstable, and the vertical slide makes it worse. Plus you can't get it below centre height on the lathe which makes things even more awkward. So scratch the VDH. Until I can get around to making the badly needed collet set that fits up inside the spindle to give no overhang at least.
The Method
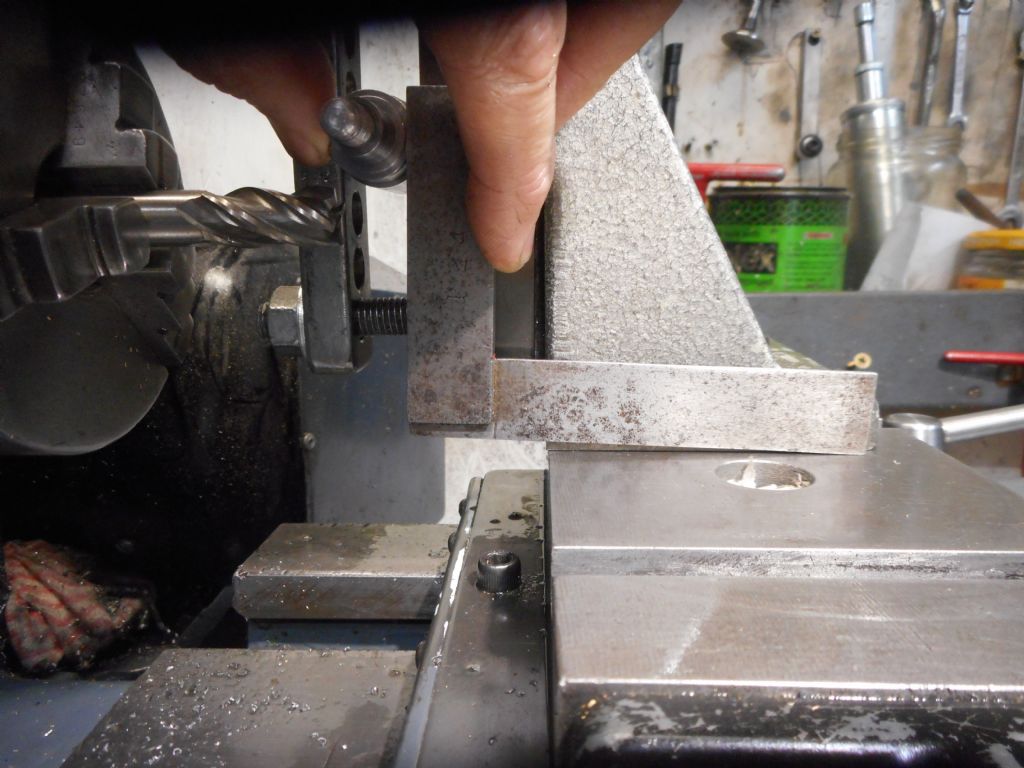
So, the "temporary" method I have used before and pressed into service yet once again is to clamp the job to the vertical slide using a T slot to hold and locate the round job, a sort of jury rigged V block effect. Then start off by milling one flat to full depth, ie job OD minus the hexagon AF divided by 2. Then once the first flat is milled, I turn the job around 180 deg and use a try square to set that flat dead vertical again on the other side.
Note that the try square stock is held firmly against the small flat on the job and the long blade used to see when things are sqaure to the cross slide surface. Any error at the flat is very small this way. If you just plonk the square down on the cross slide in the obvious way, then try to align that tiny flat on the job to the square, error will be much greater.
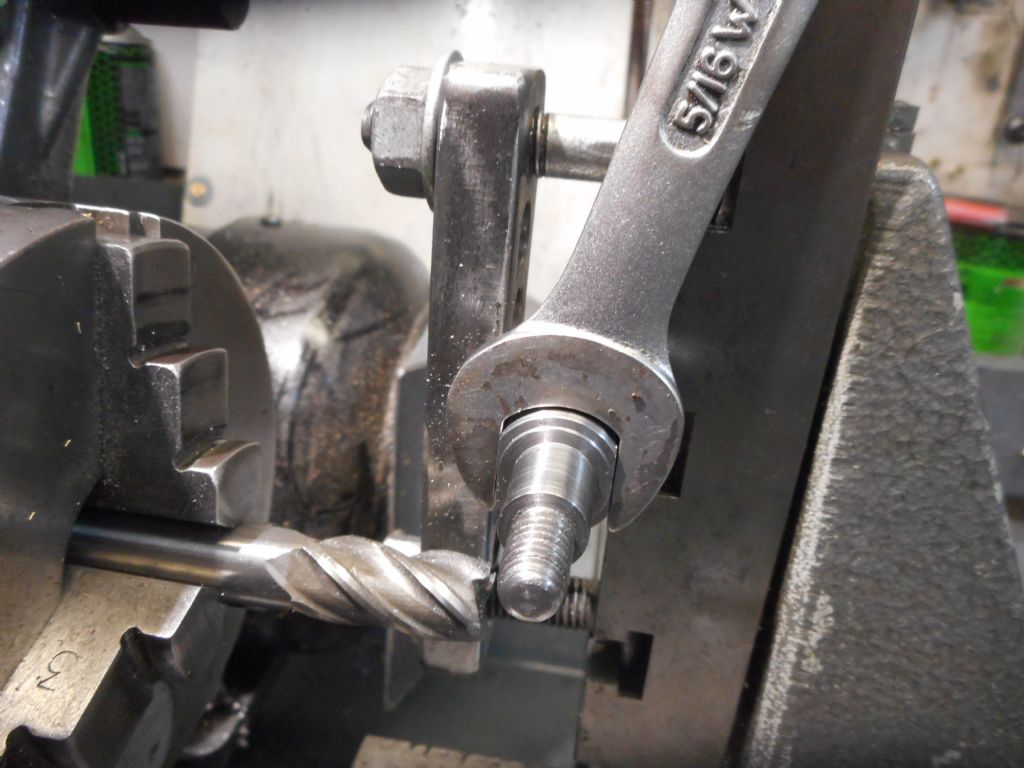
Any how, second cut was successfully made and checked with a spanner for fit all good. The standard dimension for a BSW 5/16 hexagon across the flats is a nice round, logical, easy to remember .601". Apparently Mr Whitworth based his hexagon dimensions on whatever size across the POINTS fitted into the limited range of round bar black bar available, after the OD had been machined down to clean off the mill scale and inconsistencies. So there perhaps was once some method in the madness. But I can't find a reference for that story…
So that was the easy first two parallel flats done. As usual set up time was ten times actual machining time, and it got worse after this.
Edited By Hopper on 14/04/2022 12:40:57
Edited By Hopper on 14/04/2022 12:46:01
14 April 2022 at 12:37 #594379Hopper
Participant@hopperMilling Hexagons in the Lathe, cont.
Indexing
To set the angles for the rest of the hex, I had a choice of equipment:
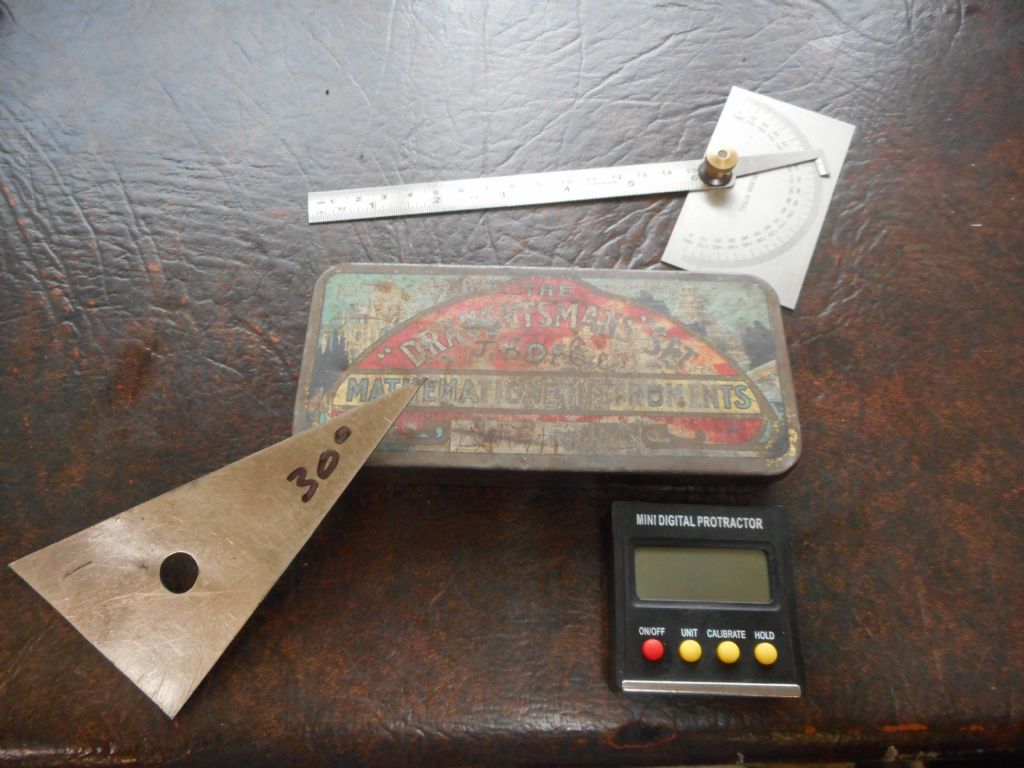
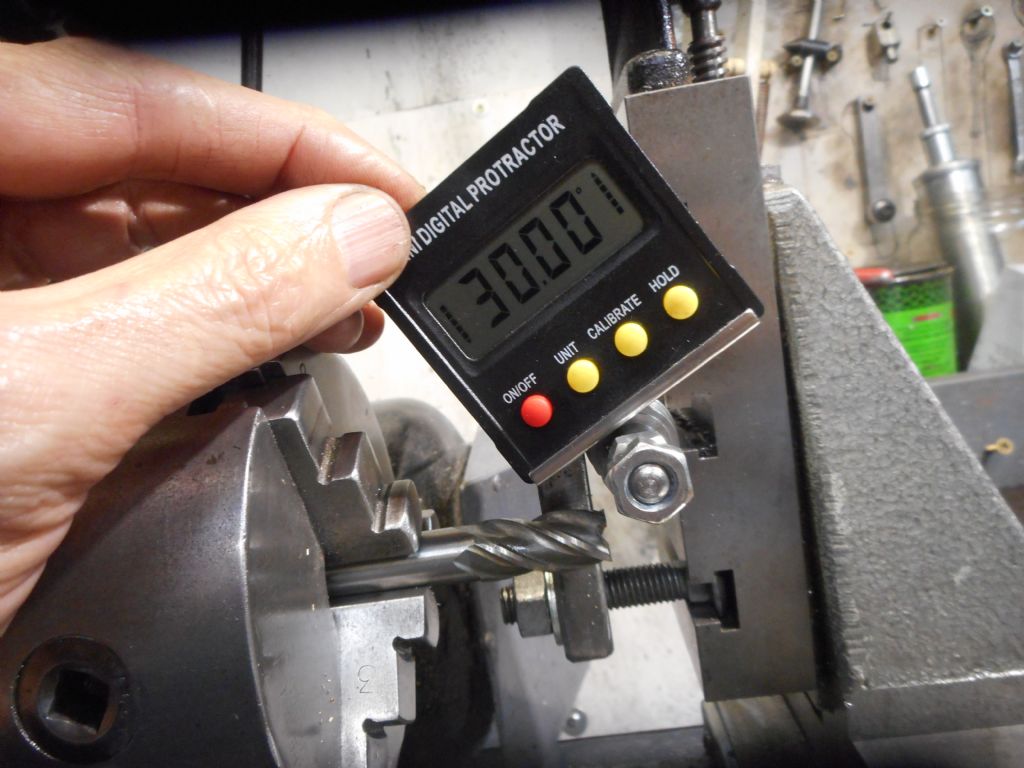
A protractor and my uncle's old 1940s apprenticeship draughting kit, including metal set square with the needed 30 degree angle. I have used this a number of times before with success but it can be fiddly to fit in around the job and the cutter and the chuck and so on. Or, dragged kicking and screaming into the 21st century I lashed out $20 on a magnetic digital protractor that can be set to zero to match the cross slide surface. It's just like having CNC! Almost
The more recent stainless protractor at the top was scratched as too easily moved out of position during the wrangling it in and out of the job space.
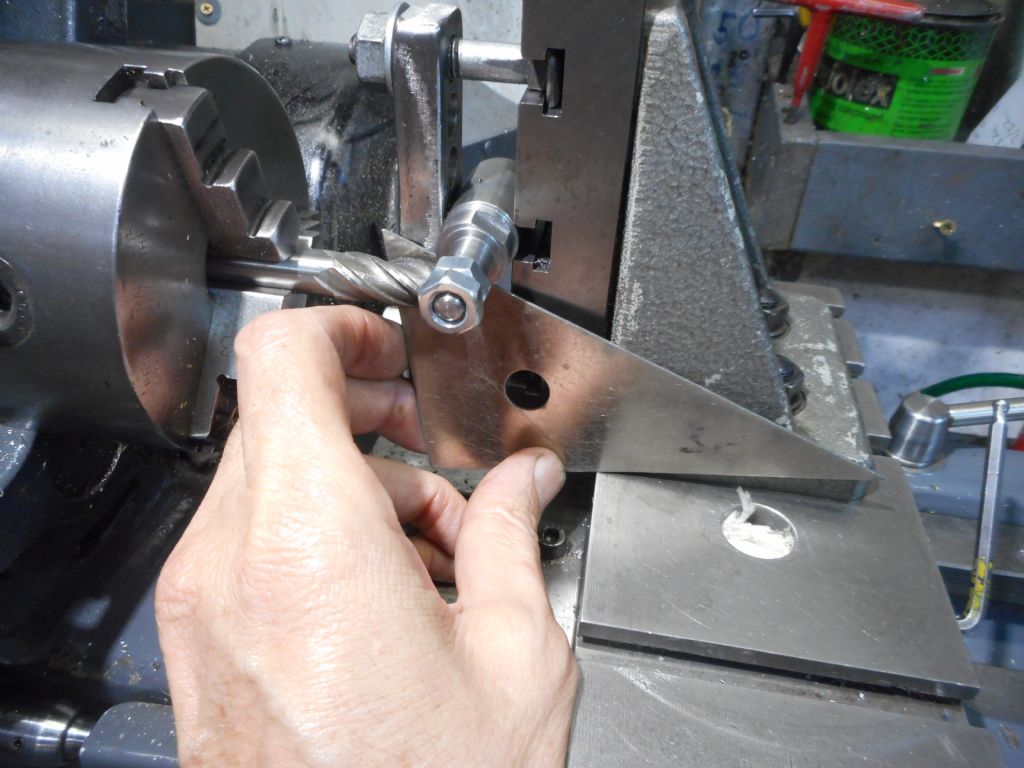
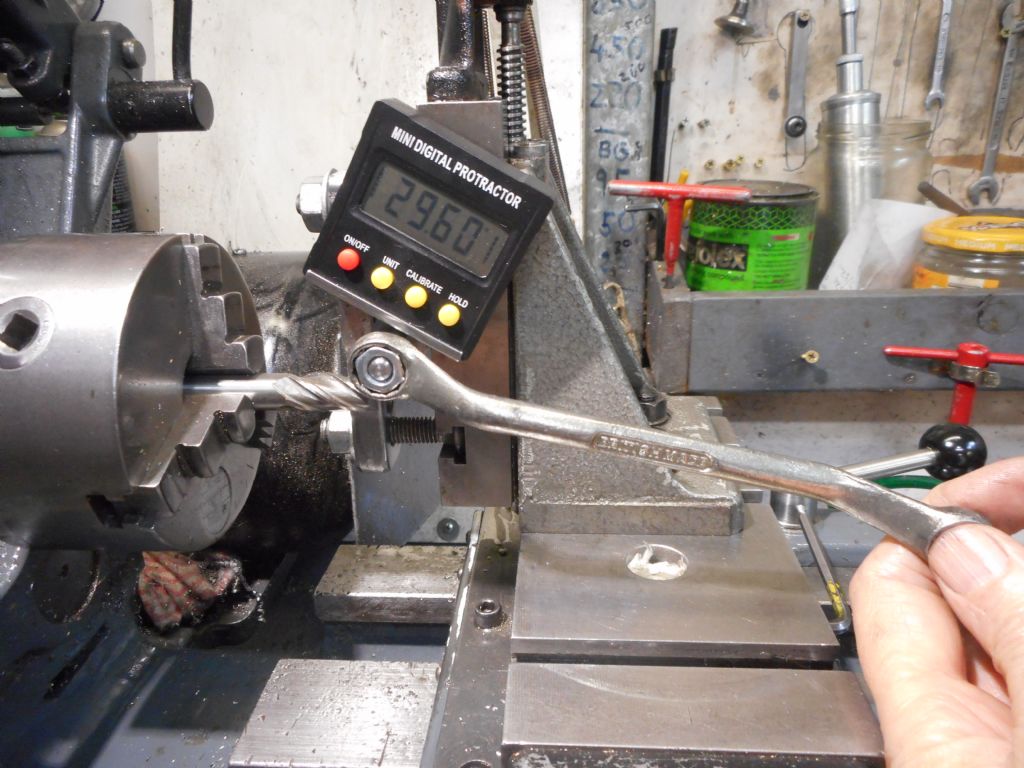
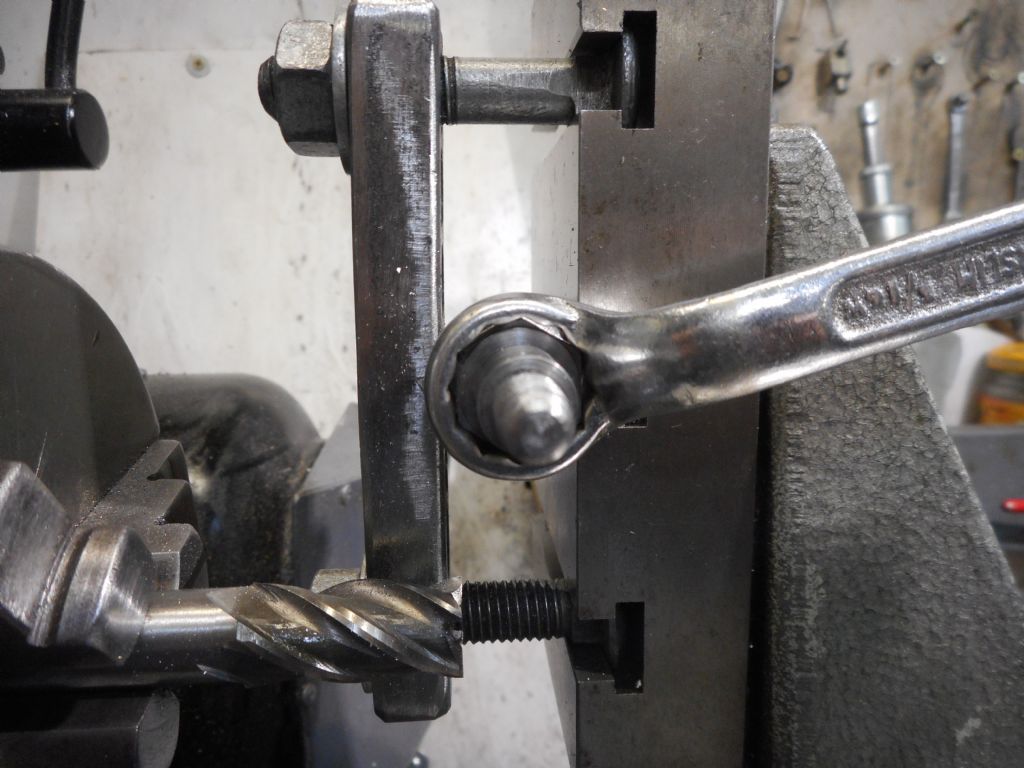
And the easy-to-use set square just would not fit in this job situation. Trying to line up the tiny flat on the job with the set square just could not happen. Interference issues in every direction I tried to move. It's a doddle with large 1" AF hexes etc but not this one. I put the two nuts locked onto the end of the job so I could use a spanner to finely rotate the blank to the desired position. That part worked really well.
So it was out with the digital protractor.
A tiny movement of the spanner at the end gave movement of the job in the region of one tenth of a degree. So I did finally get it set to 30.00 degrees. Not that it is very critical in this case. While the flats are specced at .601" AF, the spanner I have range from .610 to .619 across the jaws so plenty of slack to take up any errors. And measuring a few mass produced 5/16 BS nuts and bolts revealed they vary from .585 to .605 AF. Production tolerances, not toolmaker's tolerances. So that allowed me to mill the next flat. And then on with the same to do the next. The magnet in the digital protractor was not strong enough to grip the small flat, so a bit of careful finger pressure was required to hold it steady. Don't think I will be asking for my $20 back though. It still worked a treat.
And repeat until all six flats were finished.
And result! A ring spanner slips on like a glove, despite my dodgy methodology. ( I actually cheated and made the hex .608" AF so my spanner is a very nice neat fit without too much slop. This is not a mass produced fastener!) I am very please with that.
So that's the easy one done. Next I will do the blank of two bolts together then part them off after the hex is milled. But exactly the same procedure.. All will then need the heads turning down to correct thickness and the 30 degree chamfer put around the top of the hex so it does not rip up hands or tools.
Edited By Hopper on 14/04/2022 12:41:43
Edited By Hopper on 14/04/2022 12:42:30
Edited By Hopper on 14/04/2022 12:44:23
Edited By Hopper on 14/04/2022 12:52:30
17 April 2022 at 09:11 #594777Hopper
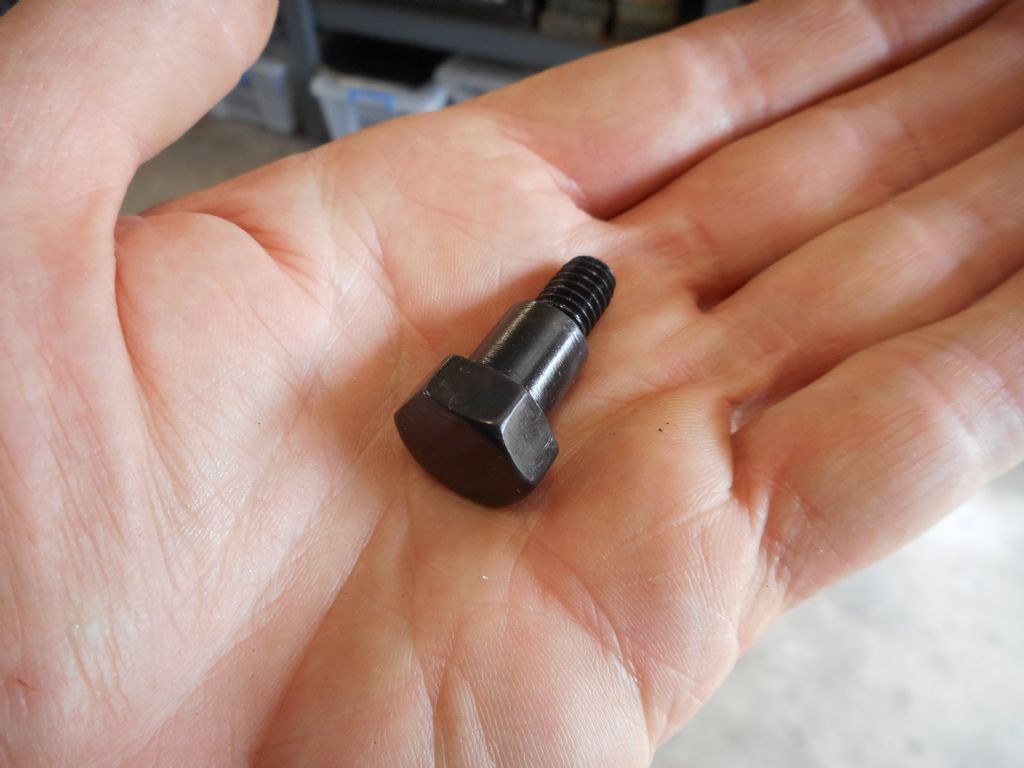
Participant@hopperGot the three pivot bolts done and dusted. To finish them off nicely, I oil-blackened them. Quite pleased with the way they came up.
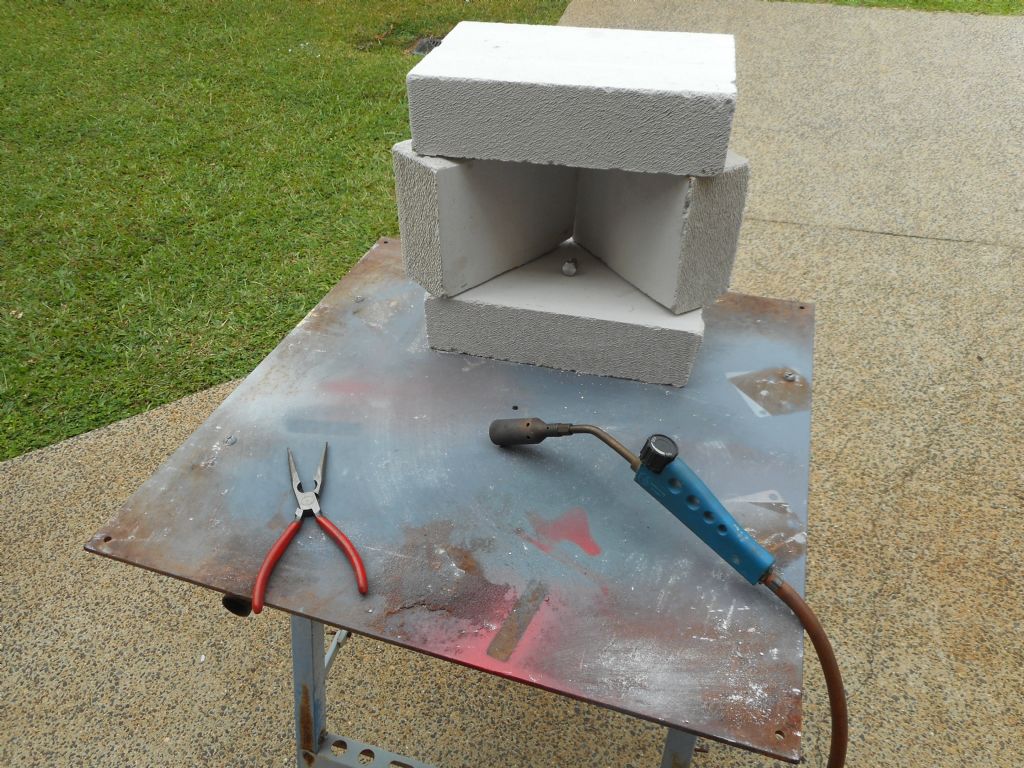
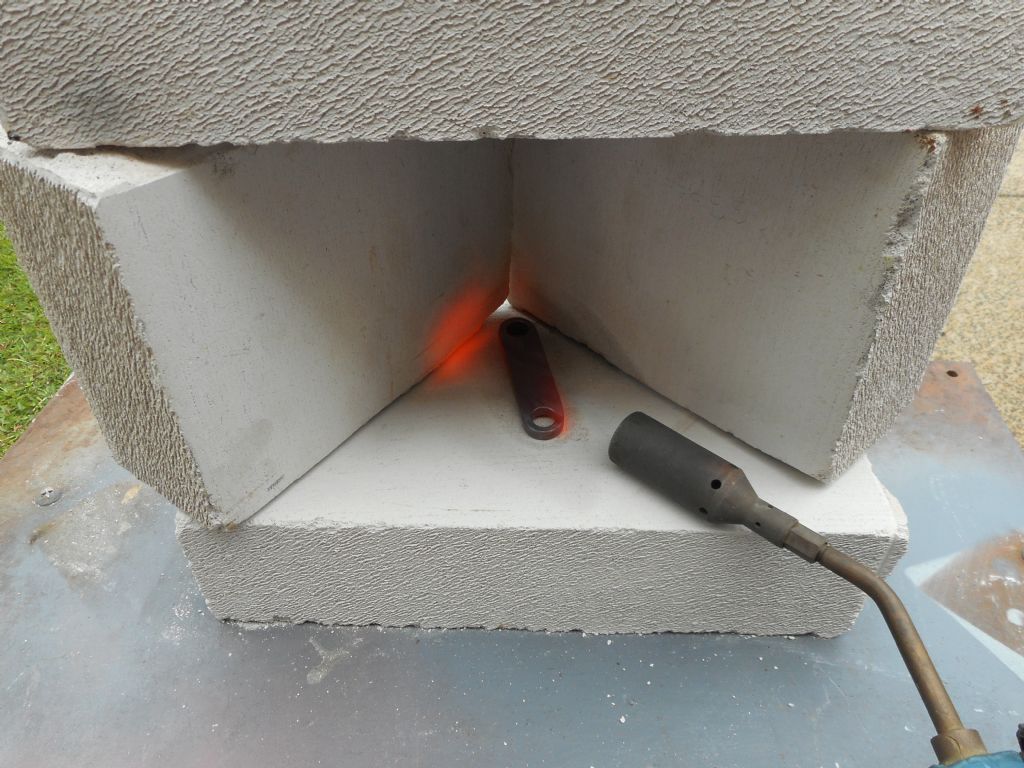
OIl blackening was done by heating them up until they turned black or a very dull red, then dropped into a tin of unused motor oil. I made a little hearth for the heating process. Tin of oil was kept well away on another bench, with fire extinguisher to hand.
The hearth was made from AAC blocks, which I have not used before. They are Autoclaved Aerated Concrete and cost about $5 each from our local hardware store. Living in the tropics where nobody has fireplaces or furnaces, proper firebricks or refractory blocks simply are not available. These seem to work really well though.
I was worried they might snap crackle and pop under the heat of the torch, so wore my best safety glasses and kept my face out of there as much as i could. But as you can see, the block can glow red hot without any dramas. And you can hold your hand on the other side of the block, so not much heat being wasted heating up the block as happens with solid firebricks. It only took a minute or two to get each bolt and the link glowing dull red. Another minute or two and they would have been cherry. But no need for that hot for simple blacking.
Cutting the blocks in half to make the hearth was dead simple. Scored a line around the circumference with the point of a chisel, just held by hand and dragged. Then whacked on the line with hammer and chisel once and the block split perectly along the line. Very handy. The blocks are very light, sort of like styrofoam or meringue made from concrete.Must be 90 per cent air or so. They are used in buildings for fire safety insulation between sections, thermal insulation in general, and sold locally for building barbecues from.
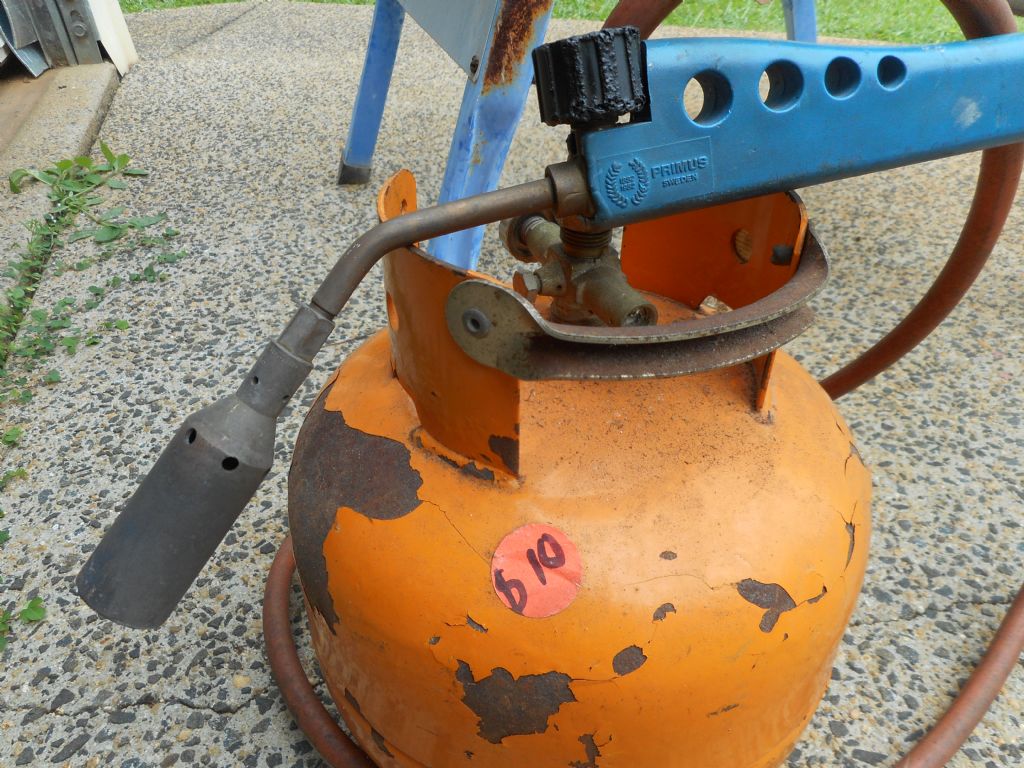
That little propane torch is the best $10 I ever spent at a garage sale. And it came with a full bottle of gas, which so far has lasted about 10 years. Obviously I don't use it much but when I do, it is worth its weight in gold. Handy for heating motorbike alloy casings to get bearings in and out, or for hardening and tempering silver steel components such as the axles on the knurling tool I made some time ago. A little bit of gas seems to go a very long way.
So all that's left now is the final assembly and start drilling holes!
Edited By Hopper on 17/04/2022 09:22:57
-
AuthorPosts
- Please log in to reply to this topic. Registering is free and easy using the links on the menu at the top of this page.
Latest Replies
Home › Forums › Manual machine tools › Topics
-
- Topic
- Voices
- Posts
- Last Post
-
-
Selling an Expensive Item
Started by:
Clive Brown 1 in: The Tea Room
- 8
- 8
-
29 April 2025 at 06:14
Speedy Builder5
-
24cc DIESEL ENGINE FROM SOLID
1
2
Started by:
 dean clarke 2
in: I/C Engines
- 11
- 27
-
29 April 2025 at 05:44
 dean clarke 2
-
Building Bernard Tekippe’s Precision Regulator
1
2
3
Started by:
Chris Raynerd 2 in: Clocks and Scientific Instruments
- 12
- 61
-
28 April 2025 at 22:23
John Haine
-
Fitting DRO to Myford VME mill.
Started by:
Martyn Cozens in: Manual machine tools
- 6
- 8
-
28 April 2025 at 21:51
Martyn Cozens
-
moving 150kg+ machines inside warehouse
Started by:
aytact in: General Questions
- 8
- 9
-
28 April 2025 at 20:03
 Bazyle
-
Lathe floor height?
Started by:
beeza650 in: Beginners questions
- 7
- 10
-
28 April 2025 at 19:50
 Bazyle
-
Bending EN24t
Started by:
vintagengineer in: Workshop Techniques
- 11
- 25
-
28 April 2025 at 19:06
Clive Brown 1
-
Bassett Lowke “Eclipse”
Started by:
 JasonB
in: Stationary engines
- 6
- 21
-
28 April 2025 at 18:11
 JasonB
-
Museum of Science and Technology of Catalonia
Started by:
 Sonic Escape
in: The Tea Room
- 4
- 4
-
28 April 2025 at 14:50
Chris Crew
-
Boiler Examinations: 7-yearly External Query
Started by:
Nigel Graham 2 in: Traction engines
- 7
- 16
-
28 April 2025 at 14:37
duncan webster 1
-
Lantern Pinion
1
2
Started by:
Alan Charleston in: General Questions
- 11
- 29
-
28 April 2025 at 14:21
John Haine
-
Emco FB2 and Maximat Mill?
Started by:
beeza650 in: Beginners questions
- 4
- 10
-
28 April 2025 at 13:40
 JasonB
-
Some help with a Cowells speed controller needed.
Started by:
Hollowpoint in: Electronics in the Workshop
- 6
- 12
-
28 April 2025 at 12:55
 Julie Ann
-
Armortek series 1 landrover kit
1
2
Started by:
Plasma in: Miscellaneous models
- 7
- 35
-
28 April 2025 at 12:22
Plasma
-
Anyone know about wells and Victorian plumbing?
Started by:
Ian Parkin in: The Tea Room
- 14
- 20
-
28 April 2025 at 11:32
SillyOldDuffer
-
minimag set up
Started by:
Dalboy in: General Questions
- 5
- 7
-
28 April 2025 at 10:52
noel shelley
-
Geography lesson required? Crossley Engine
Started by:
duncan webster 1 in: The Tea Room
- 11
- 16
-
27 April 2025 at 23:02
Nigel Graham 2
-
Amazing Fellow and his musical machines..
Started by:
Joseph Noci 1 in: The Tea Room
- 2
- 2
-
27 April 2025 at 22:19
Plasma
-
Small horizontal mill – capabilities?
Started by:
ell81 in: Beginners questions
- 15
- 18
-
27 April 2025 at 21:50
Nigel Graham 2
-
Scam email
Started by:
Ian McVickers in: General Questions
- 11
- 12
-
27 April 2025 at 21:40
Nigel Graham 2
-
Stuart Twin Victoria (Princess Royal) Mill Engine
1
2
…
49
50
Started by:
Dr_GMJN in: Work In Progress and completed items
- 32
- 1,234
-
27 April 2025 at 18:01
Dr_GMJN
-
mt4.5
Started by:
Matt Smith in: General Questions
- 3
- 3
-
27 April 2025 at 15:43
DC31k
-
French Curves
Started by:
 Michael Gilligan
in: CAD – Technical drawing & design
- 2
- 2
-
27 April 2025 at 13:02
 JasonB
-
Change Wheels
Started by:
Julian Goodyear in: Workshop Tools and Tooling
- 10
- 24
-
27 April 2025 at 12:22
halfnut
-
Power hacksaw – powerful banging when running
Started by:
ell81 in: Beginners questions
- 8
- 11
-
27 April 2025 at 08:21
John Haine
-
Selling an Expensive Item
-
Latest Issue
Newsletter Sign-up
Latest Replies
- Selling an Expensive Item
- 24cc DIESEL ENGINE FROM SOLID
- Building Bernard Tekippe’s Precision Regulator
- Fitting DRO to Myford VME mill.
- moving 150kg+ machines inside warehouse
- Lathe floor height?
- Bending EN24t
- Bassett Lowke “Eclipse”
- Museum of Science and Technology of Catalonia
- Boiler Examinations: 7-yearly External Query


