My little engine (continued)

Advert

My little engine (continued)

Home Forums Work In Progress and completed items My little engine (continued)

Viewing 25 posts - 201 through 225 (of 602 total)
  • Author
    Posts
  • #191714
    JasonB
    Moderator
      @jasonb

      Should be fine, its not as though the engine is likely to do any real work.

      Advert
      #191717
      GarryC
      Participant
        @garryc

        Jason, you would not believe how pleased I am to hear you say that! Gordon Banks would have been proud of that save today! Showing my age a bit there..

        Cheers

        Garry

        #191776
        GarryC
        Participant
          @garryc

          Gone to clean down the lathe this morning and discovered I was in double trouble yesterday, i was lucky I didn't end up with a dart rather than a Con Rod..!

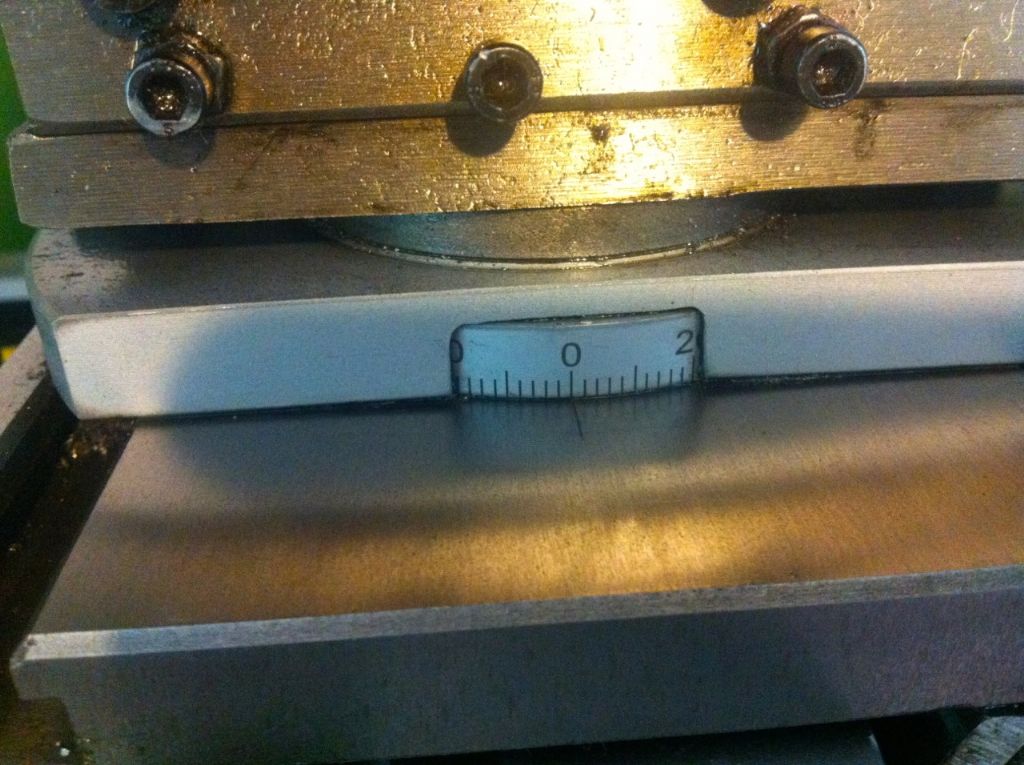
          Yesterday was the first time i had rotated the compound slide to turn a taper (thats my excuse) – noticed this morning the divisions are at 2 degree intervals not 1 as I assumed, the scale is kind of almost hidden as the photo shows so my cross slide error was compounded by this one as well – what a wally!

          Sometimes with so much new stuff to think about I don't seem to see whats right in front of me..

          347. the compound scale.jpg

          Ah well I won't make that mistake again and it totally explains yesterdays woes now – which is good..

          Cheers

          Garry

          Edited By Gary on 31/05/2015 08:38:41

          Edited By Gary on 31/05/2015 08:39:59

          #191781
          Gas_mantle.
          Participant
            @gas_mantle

            To be fair Garry I think it would be an easy mistake to make. With the numbers being partially hidden and the layout of the graduations it's easy to assume they are 1 degree markings.

            I'm pretty sure you are not the only one to make that mistake, I'm a complete beginner and I'd have done exactly the same.

            You have at least helped others, I've never rotated the compound on my machine yet but you can bet I'm going to have a look at how it's graduated now I know there's a trap lurking.

            Peter.

            #191793
            JasonB
            Moderator
              @jasonb

              Have you actually measured what the scale gives you? My 280's topslide is almost the same and that is done in 1 degree increments that don't look a lot smaller than yours, could it be callibrated to read included angle? Should be easy enough to eyeball it at say 45deg on the scale.

              #191796
              GarryC
              Participant
                @garryc

                Thanks Peter, I did rotate the compound slide to do the chamfer on the Gland I've just done – but I just went straight around to the 60 degree mark which was on the dial, the individual marks just didn't register with me at the time..

                If this helps remind someone else to double check on their first time then thats great.

                Time to have a think about doing the big end bearing now and a break from the SG Iron….

                Cheers.

                Garry.

                #191800
                GarryC
                Participant
                  @garryc

                  Jason

                  Heck now there's a thing I've just checked with my protractor – I'll put some photos up after breakfast, very odd..

                  I seem to have had everything against me succeeding yesterday!

                  Cheers

                  Garry

                  #191801
                  roy entwistle
                  Participant
                    @royentwistle24699

                    Gary Just think about it If your taper id too steep or too shallow it can only be the rotation of the top slide that is out How much cut you put on won't matter Personally when turning tapers using the top slide I would test first with a test bar in the chuck and use a clock guage ( Just trying to be helpful )

                    Roy

                    #191805
                    Gas_mantle.
                    Participant
                      @gas_mantle

                      dsc_0010.jpg

                      If it's of any help to compare with another machine, here are the markings on my Chester, I can't imagine they'll be particularly accurate though compared to your own machine which has a greater look of accuracy about it

                      Edited By Peter Nichols on 31/05/2015 10:53:38

                      Edited By Peter Nichols on 31/05/2015 10:55:00

                      #191813
                      GarryC
                      Participant
                        @garryc

                        Hi Jason

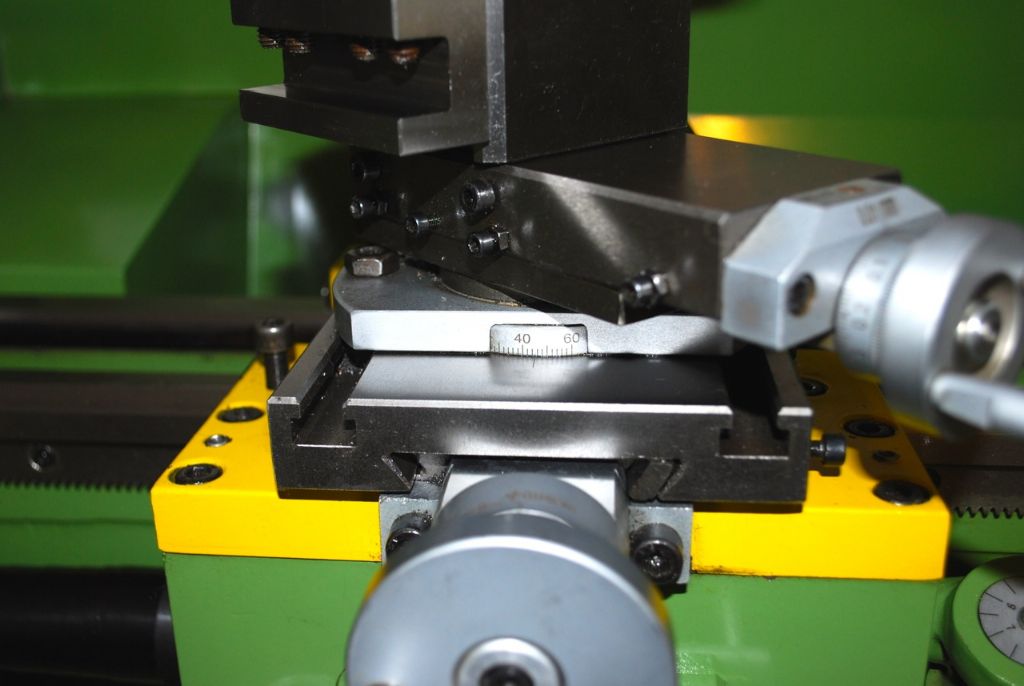
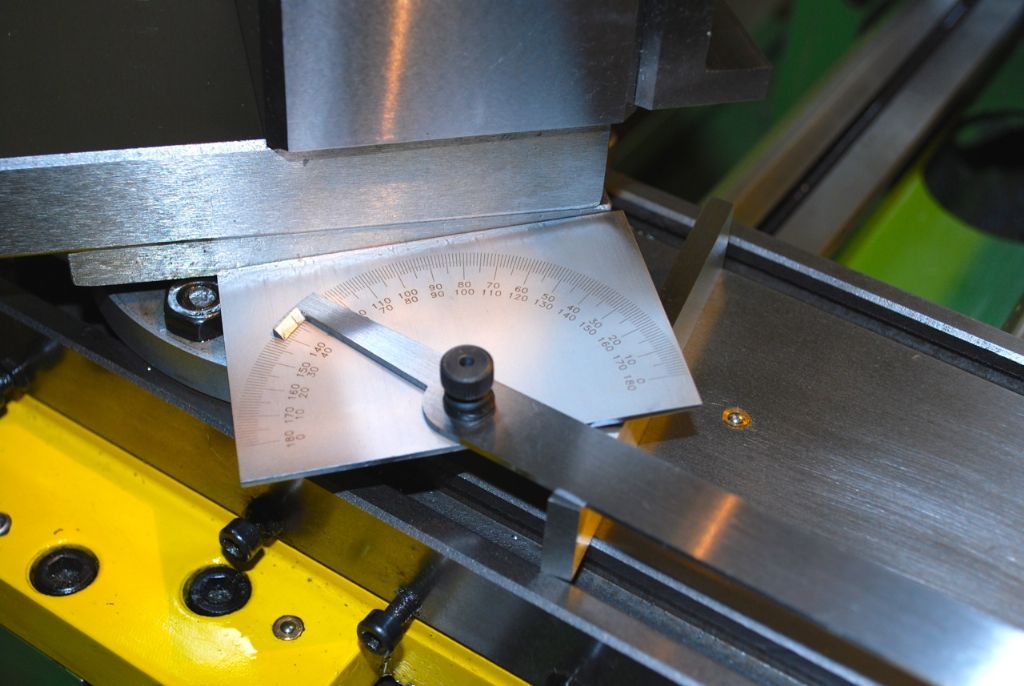
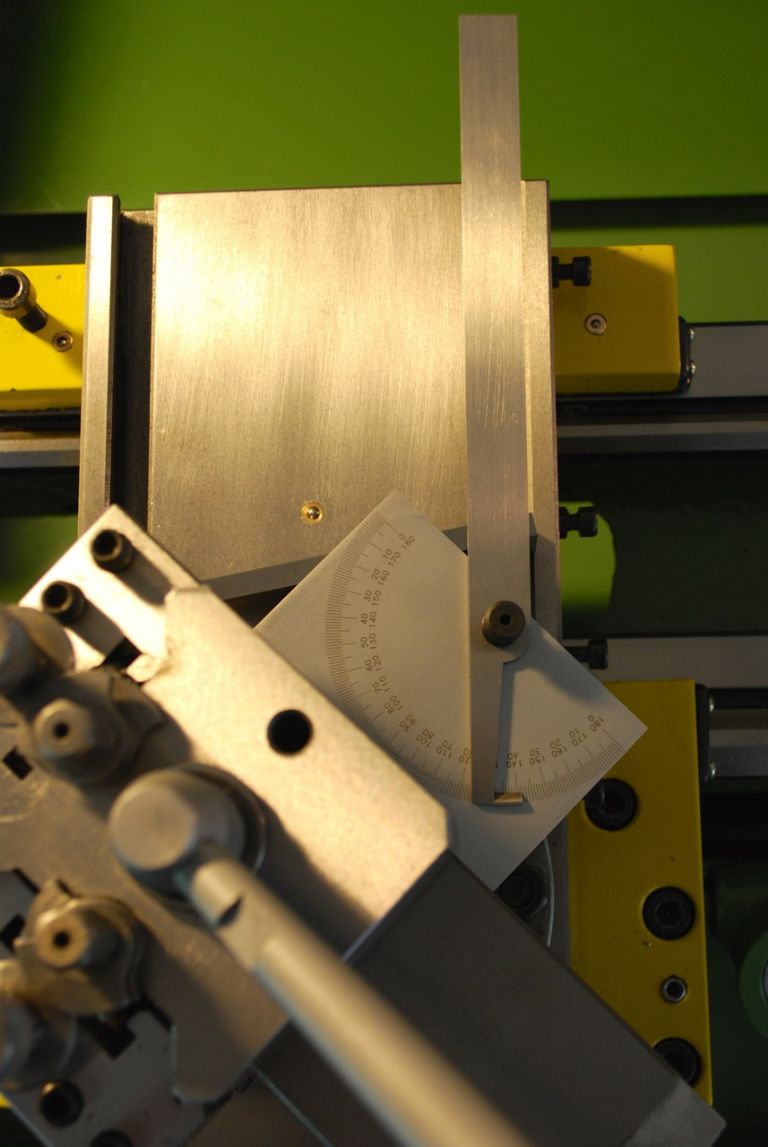
                        I think its ok and the marks are two degrees each by the looks of it – initially when I went out to quickly check I had set the compound dial on 50 and not 45 – that scale is a killer, I'll have to make sure I remember!

                        I seem to have got up today with only half a brain working – I known what is meant by an included angle (the maths term anyway) but I can't see your meaning to the reference to the dial being calibrated for it? My head just won't get around it!

                        The photos are with the compound slide set at 45 degrees – it looks ok to my eye..

                        348. checking the compound slide 1..jpg

                        349. checking the compound slide 2..jpg

                        350. checking the compound slide 3..jpg

                        Hi Roy

                        This is one of those things that is not sinking in yet, I found setting the tailstock over for the taper (with DTI) very straightforward by comparison. Using the Compound Slide I was starting the taper from the furthest point out and winding in so I thought because that start point was out I got into trouble. Its something I just need to have another go at I think and it will probably go in! I'll certainly do all the tests and checking I can think of next time before starting. I feel it should be the same principle as setting over the tailstock but can't quite see it for some reason -Thanks for the comments they will be a help for next time.

                        Hi Peter

                        I see your scale is what I think I would expect to see and how I thought mine was – but no, it should be no problem of course once its known! Thanks very much for the pic.

                        Cheers

                        Garry

                        #191991
                        GarryC
                        Participant
                          @garryc

                          I need some decent lathe tools as well as milling cutters, been managing up to now with mainly just 2 basic LH ones a 12mm and 10mm (and been using just the one [upside down sometimes] for most everything except boring so far) – so I've just ordered a set from RDG that will hopefully take things forward a bit more and give some options..

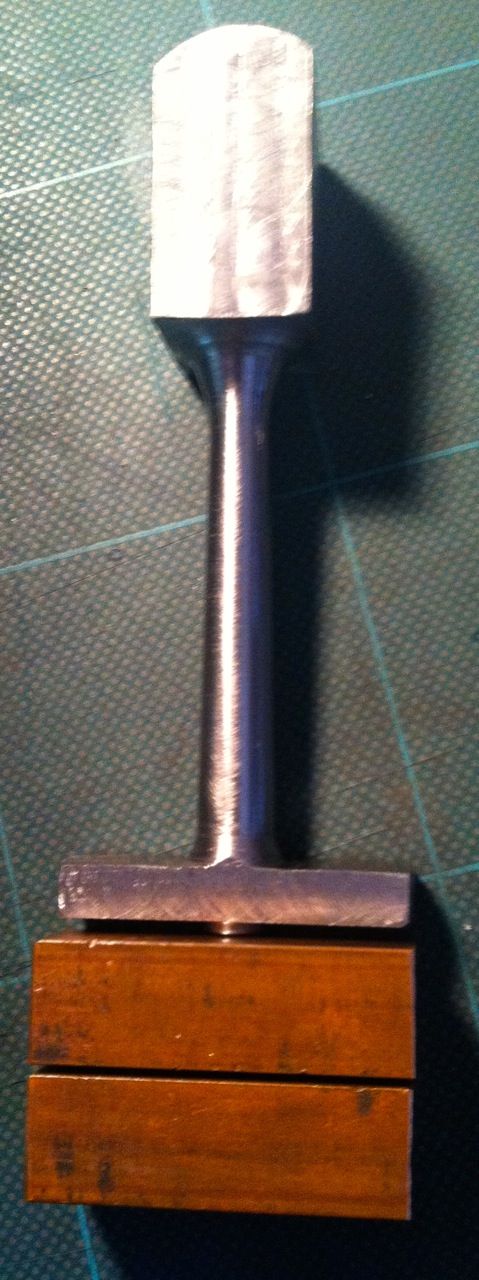
                          Only sorted the Big End bearing register today and although the real thing looks fine the photo shows again that I really needed a better suited tool at the time (which has finally prompted the above..). I used the mill to get it to depth size today although i'll bet a lot of people would have just filed it..

                          At least its in the right place! It looks like a step on the register but its just bad tool marking in reality.. The next time it goes on the lathe to size the bearing to the foot it will use a centre on the bottom of the bearing..

                          Someday soon my photos are going to have nice shiny surfaces to them – I hope!

                          I can start proper with the bearing now tomorrow..

                          351. the big end bearing register 1..jpg

                          Cheers

                          Garry

                          #192217
                          GarryC
                          Participant
                            @garryc

                            Started the Big End Bearing this morning, not much progress yet..

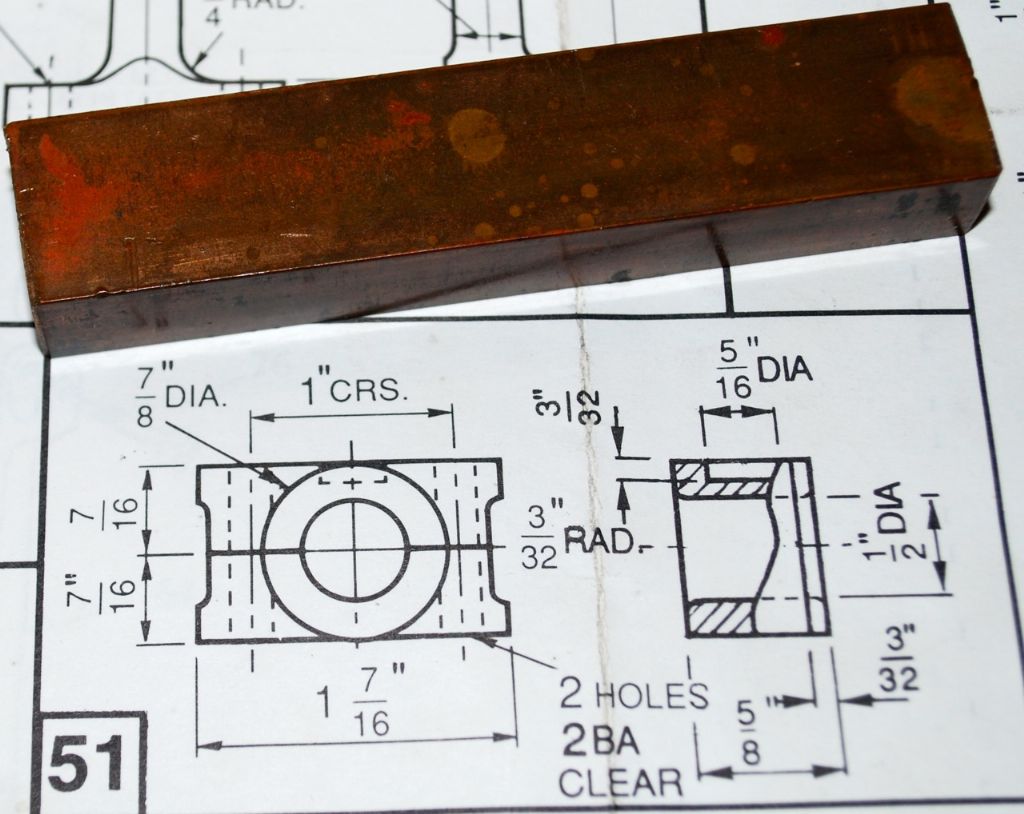
                            The Big End Bearing Drawing and the Phosphor bronze Bar supplied.

                            353. the big end bearing drawing and supplied phosphor bronze bar.jpg

                            The bar cut to a close approx size to minimise the interrupted cut later – the foot is still slightly oversize here and the little end is not to any size or symmetrical yet….

                            352. the phosphor bronze bar for the big end bearing cut to approx size.jpg

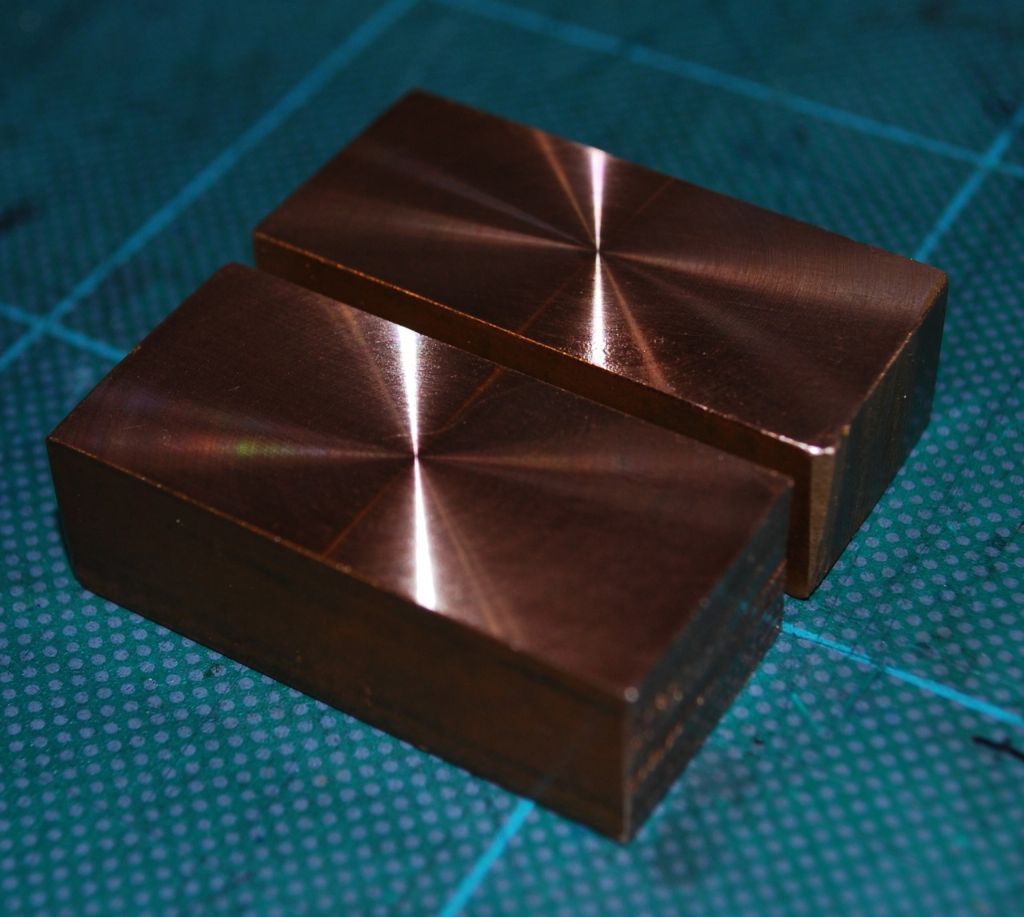
                            The mating surfaces of the Bearing are skimmed ready for sweating together. When I first started I had a problem – my formula that I use for cutting speeds said rpm 800 and I used a slow feed – I assumed the phosphor bronze was a brass type material – but the surface finish was terrible and felt like a file to the touch, I've never had anything like that before and thought at first it was because of holes in the material it was that bad – but dropping the speed to 300rpm and all was then immediately very good..

                            355. the big end bearing mating surfaces skimmed on the lathe 2.jpg

                            Both surfaces skimmed ready to be sweated together and machined as one.

                            359. the big end bearing mating surfaces skimmed on the lathe 3.jpg

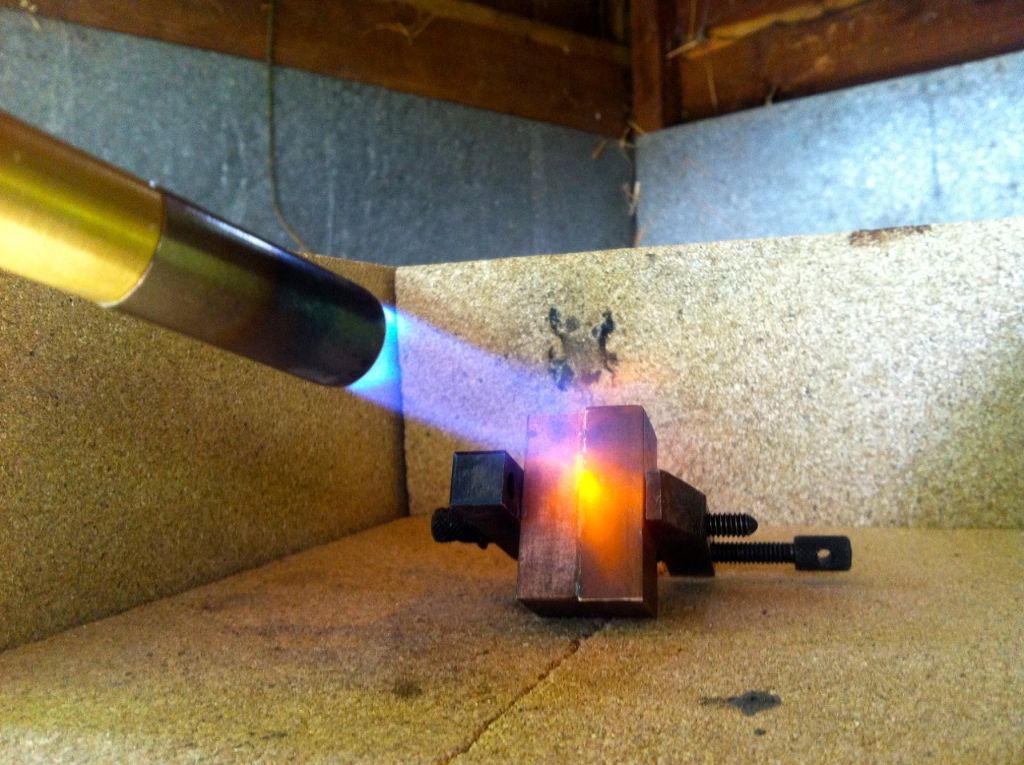
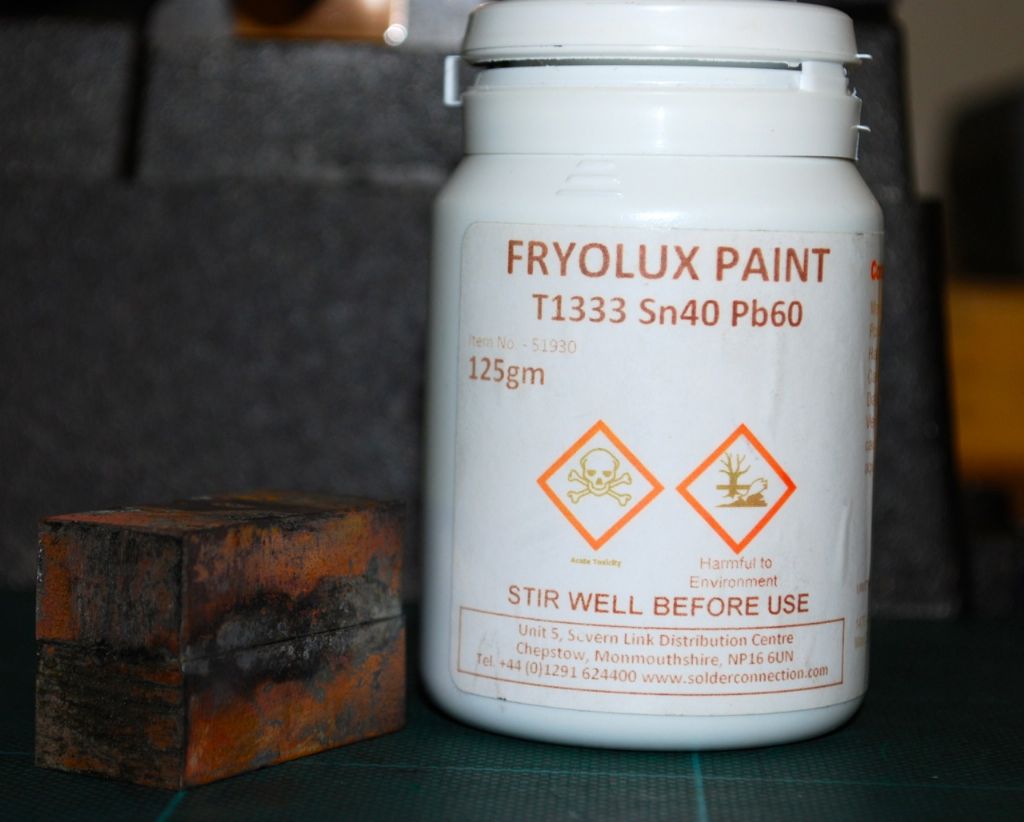
                            The two bearing halts being sweated together after the solder paint had been applied to the surfaces – the flame was not held on constantly but moved to and from across – I've no idea really how much to heat and so just waited for the solder to start bubbling out of the joint and then a bit more..Hoping it will be ok

                            356. the big end bearing sweated together for machining as one.jpg

                            After sweating together and the Solder Paint used.

                            357. the bearing after sweating together and the solder paint used.jpg


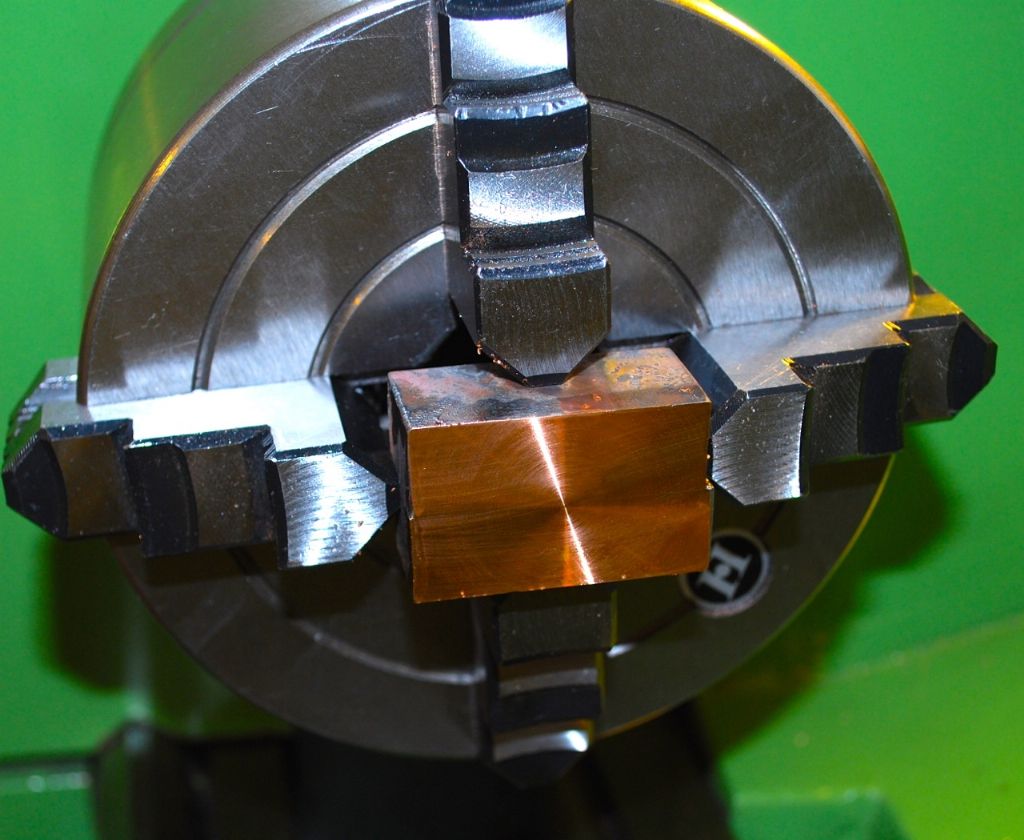
                            Then the two halts starting to be machined as one to size ready fro marking out..358. the bearing starting to be machined to size.jpg

                            Cheers.

                            Garry

                            Edited By Gary on 03/06/2015 10:36:14

                            Edited By Gary on 03/06/2015 10:37:54

                            Edited By Gary on 03/06/2015 10:38:58

                            #192360
                            GarryC
                            Participant
                              @garryc

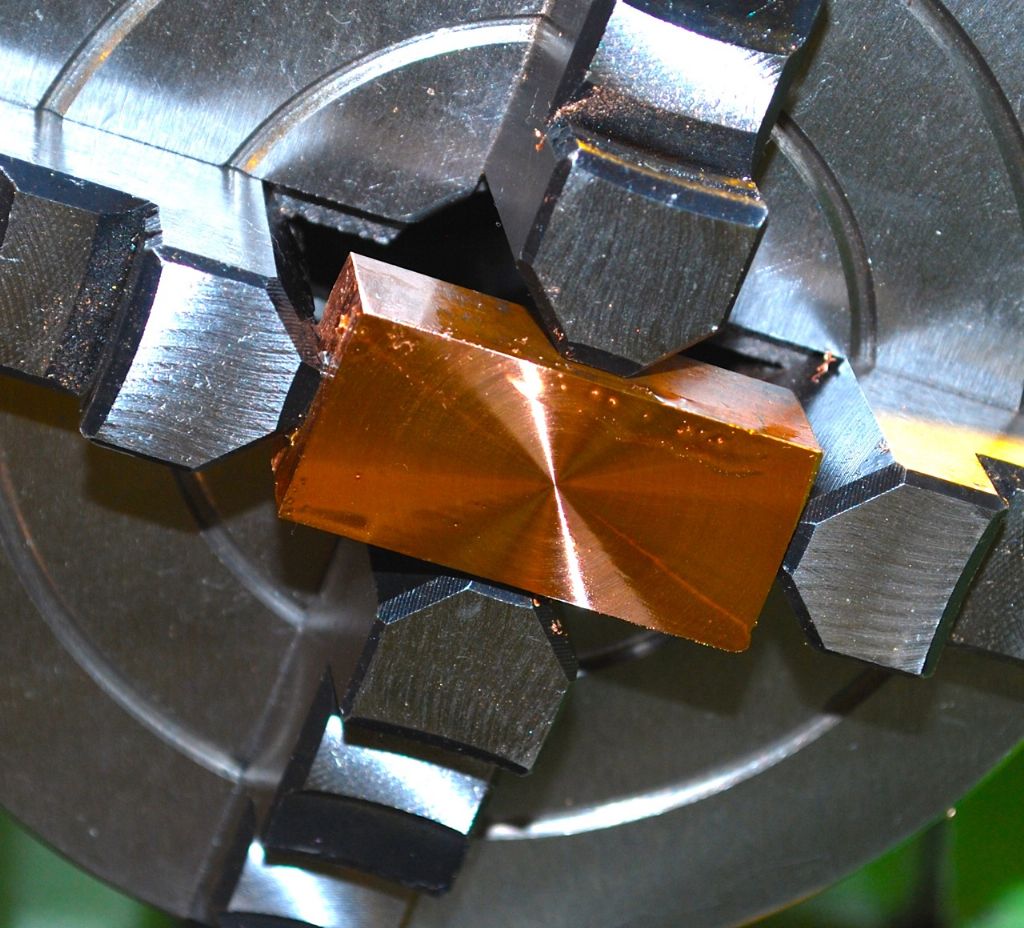
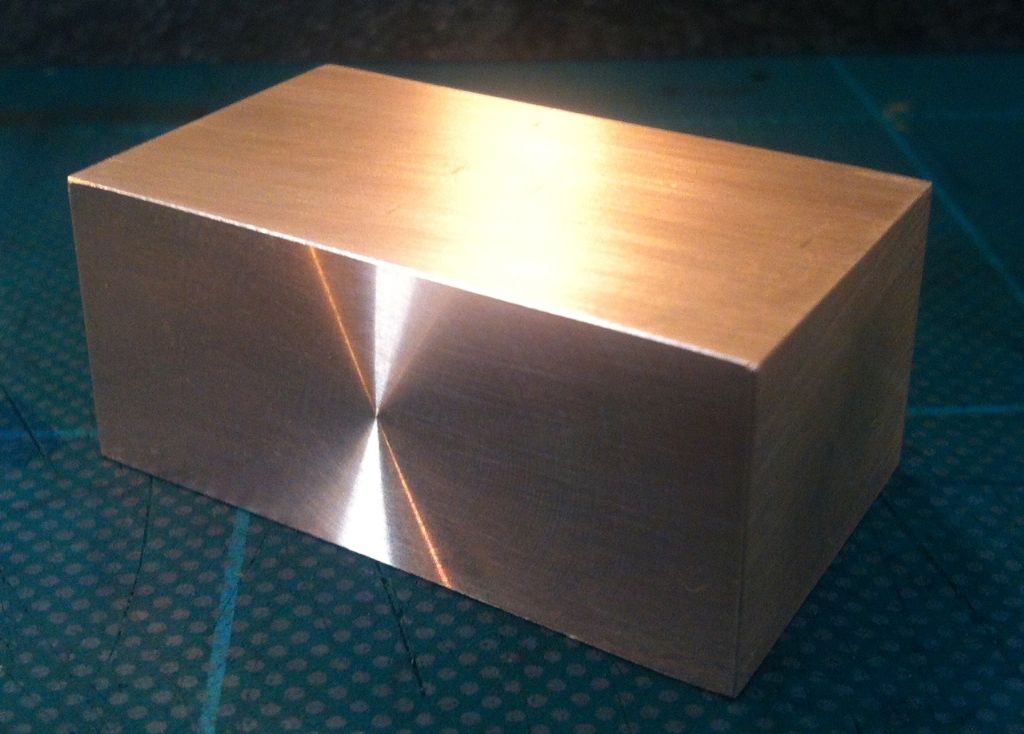
                              The two Bearing half's machined together and ready for marking out etc..

                              360. the big end bearing so far.jpg

                              Regards

                              Garry

                              #192367
                              JasonB
                              Moderator
                                @jasonb

                                "Someday soon my photos are going to have nice shiny surfaces to them – I hope"

                                From the look of the finished bearing blank above you got your copy of Photoshopsmile p

                                Edited By JasonB on 04/06/2015 16:38:25

                                #192376
                                GarryC
                                Participant
                                  @garryc

                                  Hi Jason

                                  I'd much rather have a copy of Solid Works or such like!

                                  New lathe tools have arrived today – I should be able to get into corners now as well, maybe I won't have to work upside down and in reverse so often now !

                                  Cheers.

                                  Garry

                                  #192483
                                  mechman48
                                  Participant
                                    @mechman48

                                    Hi Garry

                                    As an aside what is your Trig app called, where from, & is it on your phone or a tablet.

                                    George.

                                    #192487
                                    GarryC
                                    Participant
                                      @garryc

                                      Hi George

                                      Its a free iPhone app called Trig Solver **LINK**

                                      It also works on iPad..

                                      I like it – quick and easy to use…

                                      Cheers.

                                      Garry

                                      #192492
                                      GarryC
                                      Participant
                                        @garryc

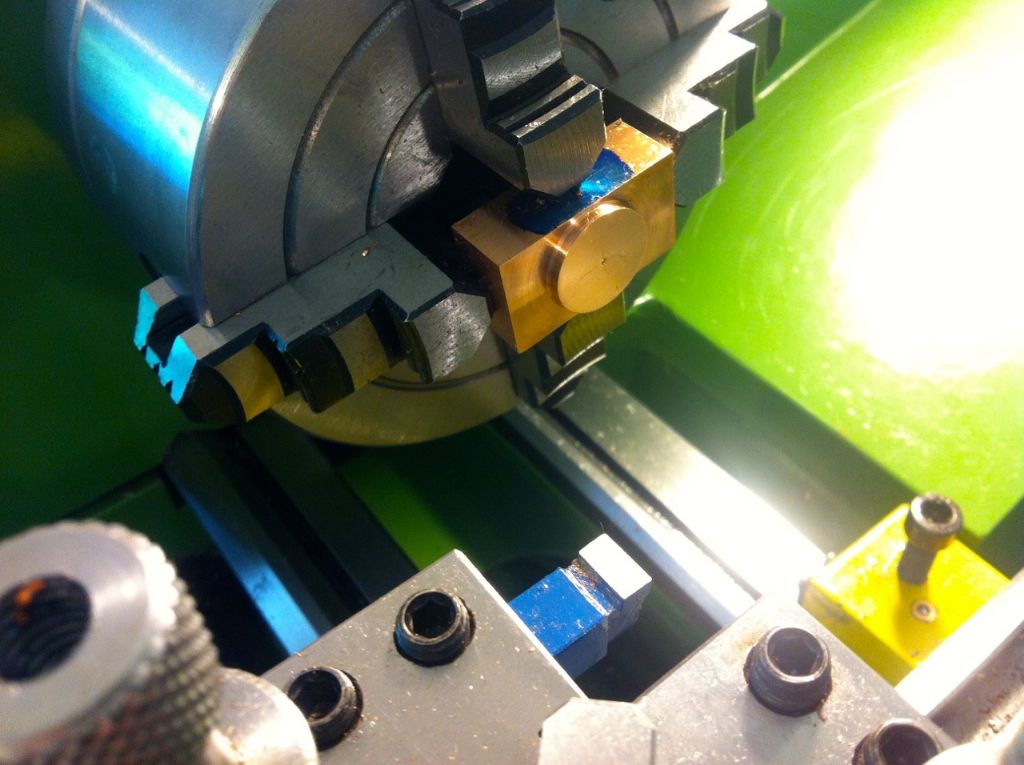
                                        A couple of photos of todays progress..

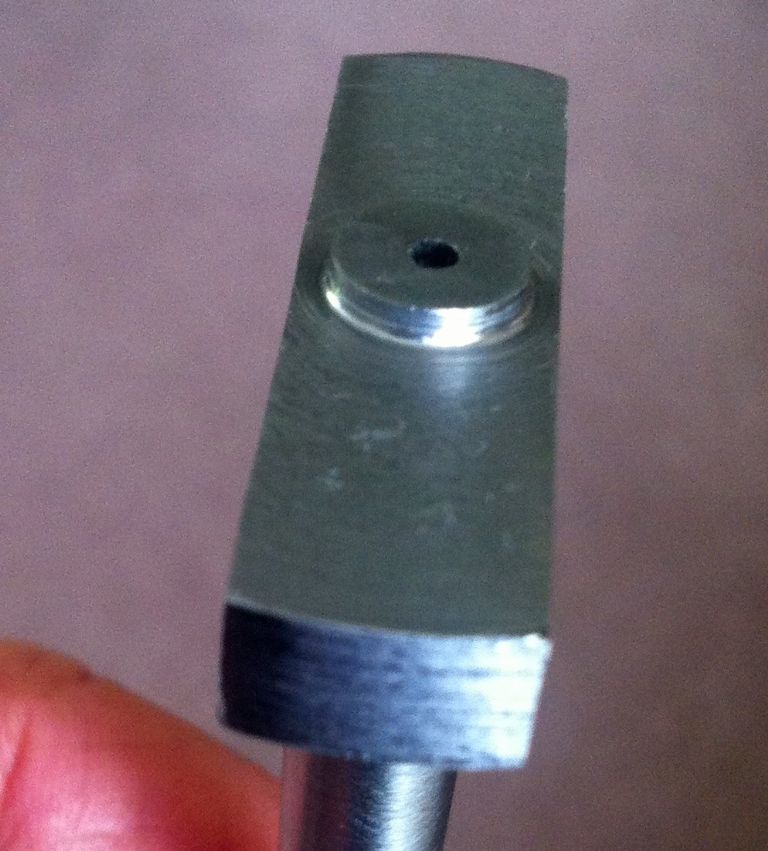
                                        A chance to try one of my new lathe tools – I thought it looked like it would dig in big time and was a bit wary, but turns out its a brilliant facing tool and gave a lovely smooth finish..! Someones going to tell me now its meant for something else I expect..

                                        361. starting to turn the big end bearing 1..jpg

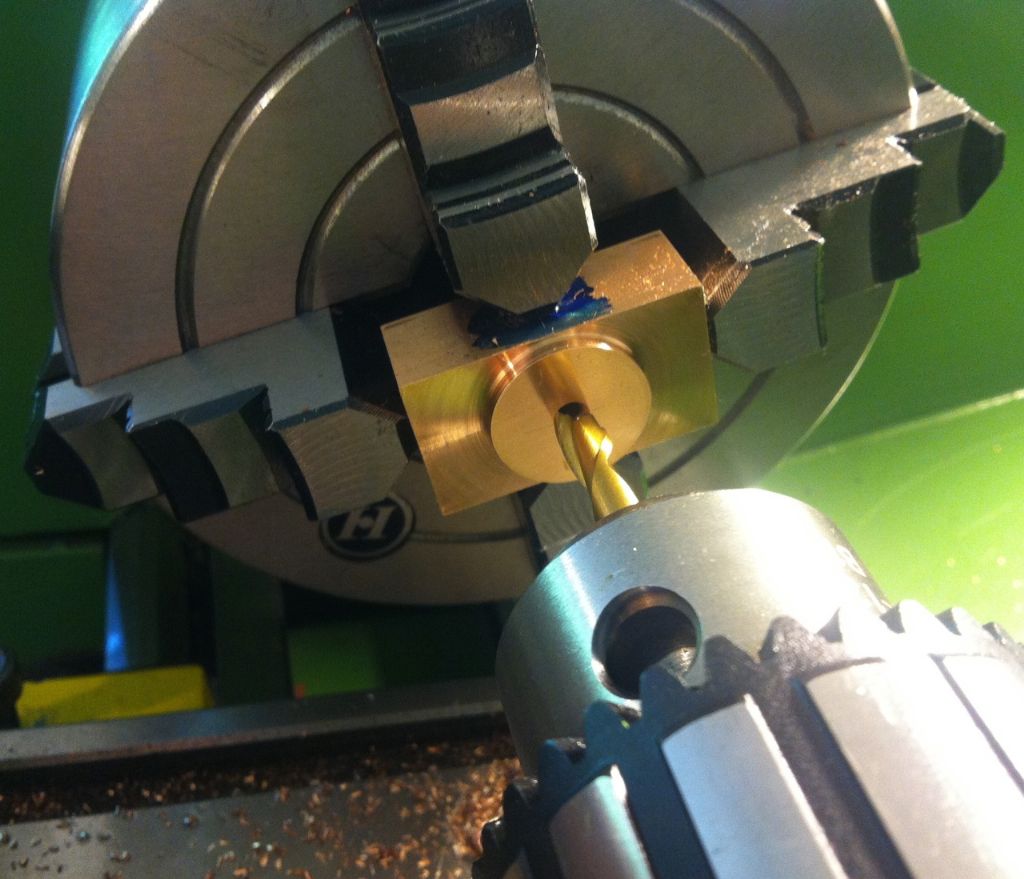
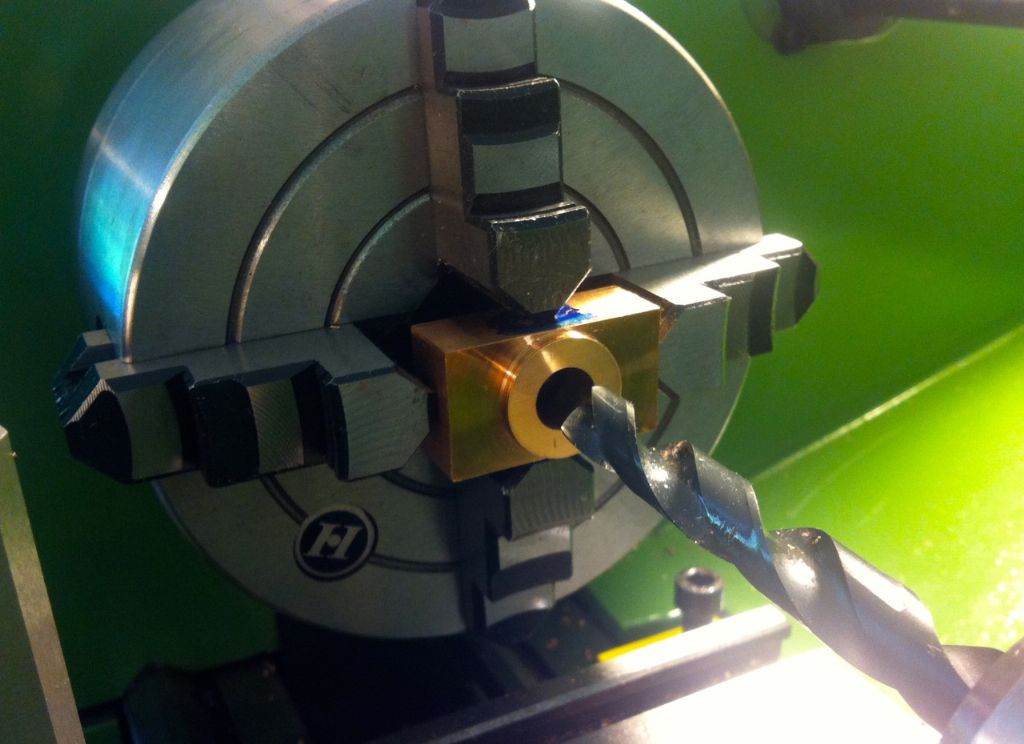
                                        After Andrew mentioning the phosphor Bronze can be a problem to drill I thought I would be extra careful and it was warranted I think. Started with one of my small cobalt drills and then used only slot drills up to 8mm, but then my cheap 10mm (and unused I think) slot drill seemed to be a blunt or bent one and I changed to a decent quality 10.5 drill bit – I can get the boring bar in now. A few months back and it would be a fair bet that I would have continued with the iffy slot drill and had a disaster!

                                        The material definitely felt very 'sticky' not sure why as this lathe's motor is only slightly larger than my last one but it definitely seems to have a lot more power, its very noticeable – the other one would have slowed in this material I think with the larger drills and maybe grabbed as a result. It happened a few times when I was building Victoria and using the Gun Metal. This motor didn't slow at all, very impressed.

                                        363. starting to turn the big end bearing 3..jpg

                                        The hole large enough to get the boring bar in now to take to size to fit the Crankshaft.. Not going to be able to do test fits with this so it has to come off the lathe and be right first time…

                                        364. starting to turn the big end bearing 4..jpg

                                        Cheers.

                                        Garry

                                        Edited By Gary on 05/06/2015 14:34:28

                                        #192495
                                        roy entwistle
                                        Participant
                                          @royentwistle24699
                                          Not going to be able to do test fits with this so it has to come off the lathe and be right first time...

                                          Why can't you remove the crankshaft from the base and try the fit with the bearing in the chuck ?

                                          Just a thought

                                          Roy

                                          #192497
                                          GarryC
                                          Participant
                                            @garryc

                                            Hi Roy

                                            I wish I could, but the Crankpin that the bearing fits is assembled and pinned between the Webs on the Crankshaft. If I had thought earlier I could maybe have made sure I had a bit of 'left over' Crankpin to use for this test fitting – I didn't recognise at the time though!

                                            Something I'll watch out for in the future for sure – I do have some internal bore gauges so I hope I can manage..

                                            Cheers.

                                            Garry

                                            #192504
                                            roy entwistle
                                            Participant
                                              @royentwistle24699

                                              Garry forget that last posting I can only think a senior moment

                                              I would be inclined to bore the bearing on the tight side as it will be easier to open out rather than close up although it can be done

                                              Appologies in abundance

                                              Roy

                                              #192505
                                              S.D.L.
                                              Participant
                                                @s-d-l
                                                Posted by Gary on 05/06/2015 14:45:28:

                                                Hi Roy

                                                I wish I could, but the Crankpin that the bearing fits is assembled and pinned between the Webs on the Crankshaft. If I had thought earlier I could maybe have made sure I had a bit of 'left over' Crankpin to use for this test fitting – I didn't recognise at the time though!

                                                Something I'll watch out for in the future for sure – I do have some internal bore gauges so I hope I can manage..

                                                Cheers.

                                                Garry

                                                Put your 3 jay back on.

                                                Measure the shaft with your best micrometer.

                                                Turn a bit of metal to the same diameter and put a 30 deg chamfer on end.

                                                remove metal from chuck and put 4 jaw back on.

                                                Use gauge just made to judge boring, the taper helps.

                                                easier than internal measumrements.

                                                Steve

                                                #192509
                                                GarryC
                                                Participant
                                                  @garryc

                                                  Please no need apologise Roy, you were not to know – lots of different ways the crankshaft could have been made up I'm sure.. You have been giving me great advice and I'm very grateful.

                                                  Thinking about it afterwards I can't think there would be any other way other than what I have now as when I had the crankshaft assembled and between centres on the lathe I had to skim the crankpin – so the extra length I was thinking may have been useful would have not been…

                                                  I will try make it a bit tight as you say.!

                                                  Many thanks.

                                                  Garry

                                                  #192514
                                                  JasonB
                                                  Moderator
                                                    @jasonb

                                                    As SDL says make a small plug gauge or accurately measure the crank pin and find the shank of a drill/milling cutter etc that measures the same and use that to test in teh hole, a lot easier than a bore gauge at that small size.

                                                    As its a split bearing a fraction over would I think be better than under a syou can always give the mating surfaces a slight rub on some wet & dry to close them up a fraction.

                                                    J

                                                    PS I use a bit of soluable oil when drilling bronze, apply to drill to save it getting hot and expanding which makes it tight in the hole.

                                                    #192515
                                                    GarryC
                                                    Participant
                                                      @garryc

                                                      Hi Steve

                                                      That sounds like a good plan – I think this is what I could have thought to do and had ready before I started to turn and drill the bearing blank. I would be a bit wary about taking the bearing out of the chuck now I'm halfway through though.

                                                      Hopefully this sort of situation will seem more apparent next time – then can do Steve as it would be a better method.

                                                      I've used the internal bore gauges a few times previously and got on quite well with them, so fingers crossed…

                                                      Something else learned!

                                                      Regards

                                                      Garry

                                                    Viewing 25 posts - 201 through 225 (of 602 total)
                                                    • Please log in to reply to this topic. Registering is free and easy using the links on the menu at the top of this page.

                                                    Advert

                                                    Latest Replies

                                                    Viewing 25 topics - 1 through 25 (of 25 total)
                                                    Viewing 25 topics - 1 through 25 (of 25 total)

                                                    View full reply list.

                                                    Advert

                                                    Newsletter Sign-up