My little engine (continued)

Advert

My little engine (continued)

Home Forums Work In Progress and completed items My little engine (continued)

Viewing 25 posts - 76 through 100 (of 602 total)
  • Author
    Posts
  • #188562
    Ed Duffner
    Participant
      @edduffner79357

      Hi Allan,

      I wonder if you could make the large end from a separate piece and make it a push fit on the end of a smaller bar section, then machine to final shape/dimension. It would save a lot of machining and waste.

      Ed.

      Advert
      #188563
      GarryC
      Participant
        @garryc

        Hi Ed

        I must admit I did start thinking that way myself, I'll give it some serious thought.. Doing the curved ends of the Crankshaft Webs showed me how unpleasant interrupted cuts are – on a small lathe anyway. Thanks.

        Cheers.

        Allan.

        #188569
        roy entwistle
        Participant
          @royentwistle24699

          Allan Don't use a grinder to take any amount off metal it's not the tool for the job I would personally use round bar for the column and add the foot from 1/4 x 1/2 bar also the 1/4 26 tpi at the top end I would use the size that you have shown in your photo probably tapping a hole in the top of the column

          Roy

          #188574
          JasonB
          Moderator
            @jasonb

            To square the end you would have been better off with it in the mill taking a few shallow cuts at full depth, always a good use for cutters that have lost their corners. Put your two 2BA clearance holes and ctr drill holes in before you do any turning or waste removal while there is plenty to hold.

            A couple of saw cuts to leave you with a roughly 1/2" x 1/2" will make life a bit easier on the lathe though I don't always bother as it does not take too long to turn the flat away.

            Leave over long so you can machine away the ctr drilled hole you don't really see them with holes left on the full size.

            #188577
            GarryC
            Participant
              @garryc

              Brilliant, thanks Roy. I like the sound of that and much kinder on the equipment. Your [and Ed's] way makes much more sense and more forgiving if I make a mistake. I'll need to get some bar in for the foot..

              You've really quite surprised me with the grinder comment – I'll have to do some reading up. Years ago I had a friend who was a grinder working for British Steel, hope he's not reading this!

              Cheers.

              Allan.

              #188579
              GarryC
              Participant
                @garryc

                Hi Jason

                You posted as I was replying to Roy. Really good to know how you would go about it as well. I have a recipe for a sleepiness night now deciding which way to go! I'll bet your hacksaw blades are better than mine though – my cheapo approach to tooling is beginning to catch up with me today. The many comments about going for as big and heavy a lathe as possible is also ringing in my ears…

                Thanks.

                Cheers.

                Allan.

                #188582
                JasonB
                Moderator
                  @jasonb

                  You could always stitch drill it out if you have a blunt blade and weak elbow. Or chomp it out with the mill, good way to practice with your flycutter.

                  The other advantage of turning from solid is you get a nice fillet where the round beets the flat just like the original forged and machined item would have had. If soldering you just get a small fillet of solder which will tarnish over time.

                  If you do decide to solder then use a bit of the bar you already have, make it a bit thicker than 1/4" so you can true up the bolting face to the axis of the shaft as its likely to move a fraction during soldering

                  #188588
                  GarryC
                  Participant
                    @garryc

                    Hi Jason

                    My mill is more of a nibbler than a chomper I'm afraid!

                    But I think I've come back around to doing it in one piece again though after seeing the 'stitch' drilling you show. I think that approach but with a large enough hole in the corners so that I can get a hacksaw blade in to sort out any 'bad stitching' would work quite well. I've already decided after cutting off the end of the bar earlier before trying the grinder that I'll not be buying any more hacksaw blades from B&Q. I suppose I need some exercise as well..!

                    I've actually only on Friday had delivered (cheap again) a 'cross vice' for the drill press which will speed things up.. Its was a £30 job from Warco so I can post how it goes (£26 as I saved postage on some other bits)…

                    Thanks again.

                    Cheers

                    Allan.

                    #188589
                    JasonB
                    Moderator
                      @jasonb

                      You don't really need a cross vice just use the mill to do the drilling, I usually use a 1/4" split point stub drill which does not need spotting first and just wind the table 2.5 turns = 0.250" As you can saw in from the side and end there is no need for a big corner hole.

                      Eclipse blades are reasonable from the shows in bundles of ten, 24tpi general use & 32tpi for sheet work

                      #188599
                      GarryC
                      Participant
                        @garryc

                        Great Eclipse blades, I'm sure I can find some on the net to order. Sub drills I've been thinking of getting simply because I'm so short of space between table and quill on both mill and drill press, but I can see now as well how well suited to this kind of job. Bought the cross vice in the hope it would result in my using the drill press more – I've hardly used it since starting to drill on the mill, opened out a few holes with it and I think thats all.

                        Picked up more in the last few minutes on here than hours scouring the web. Great stuff.

                        Cheers

                        Allan.

                        #188618
                        GarryC
                        Participant
                          @garryc

                          Thanks Roy, its been well worth some reading on the grinder – I did have some wrong ideas about it..

                          What I need is a new sister magazine to this one – Model Engineers Apprentice!

                          Cheers

                          Allan

                          #188622
                          ChrisH
                          Participant
                            @chrish

                            Allan, as an alternative to stitch drilling consider plunge milling – you would not have to use the hacksaw (the tool I hate the most!) as, having plunge milled along then you can use the end mill to trim up the sides. Plunge milling seems kinder on the end milling cutter and less effort than stitch drilling and hacksawing, plus you end up with a better finish.

                            Chris

                            #188626
                            JasonB
                            Moderator
                              @jasonb

                              Chris if you stitch it right you do not need a saw, on that photo above I only had to cut the narrow bits where I kept just clear of the vice jaws and the rest just dropped out. No need to mill afterwards just bung it straight onto the lathe

                              #188631
                              GarryC
                              Participant
                                @garryc

                                Hi Chris, thanks for that. I may well try that as I haven't any stub drills yet so would need to centre drill (definitely getting some though). Good to have both methods in my head now though. The No 1 parts are much larger and heavier than my first build Victoria was and so making things as easy as possible on the light machinery is more of a consideration if I can – although I'm probably far too gentle with the equipment in general I think. It would be so interesting to be able to wander around a pro working shop just to see things like depths of cuts etc..

                                "I usually use a 1/4" split point stub drill which does not need spotting first and just wind the table 2.5 turns = 0.250" "- great advice here from Jason I think.

                                Cheers

                                Allan.

                                #188639
                                ChrisH
                                Participant
                                  @chrish

                                  Jason, yes, if you are ging to turn it in the lathe after then strictly speaking no need to clean it up with the mill, but cleaning it up in the mill takes but moments (you are all set up for it) and it's then nicer to turn is it not?

                                  Anyway, another saying (following on from the "What did you do today?" thread) – " different ships different splices"!

                                  Chris

                                  Edited By ChrisH on 04/05/2015 21:34:55

                                  Edited By ChrisH on 04/05/2015 21:36:03

                                  #188869
                                  GarryC
                                  Participant
                                    @garryc

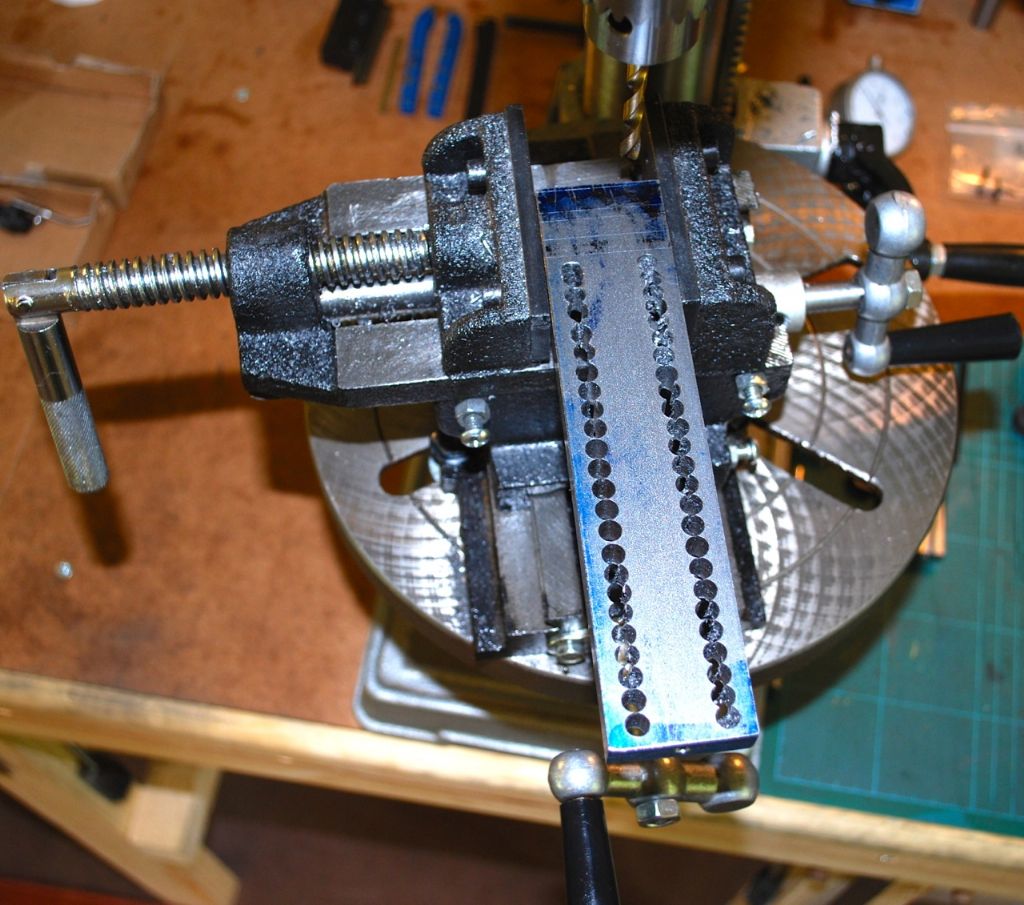
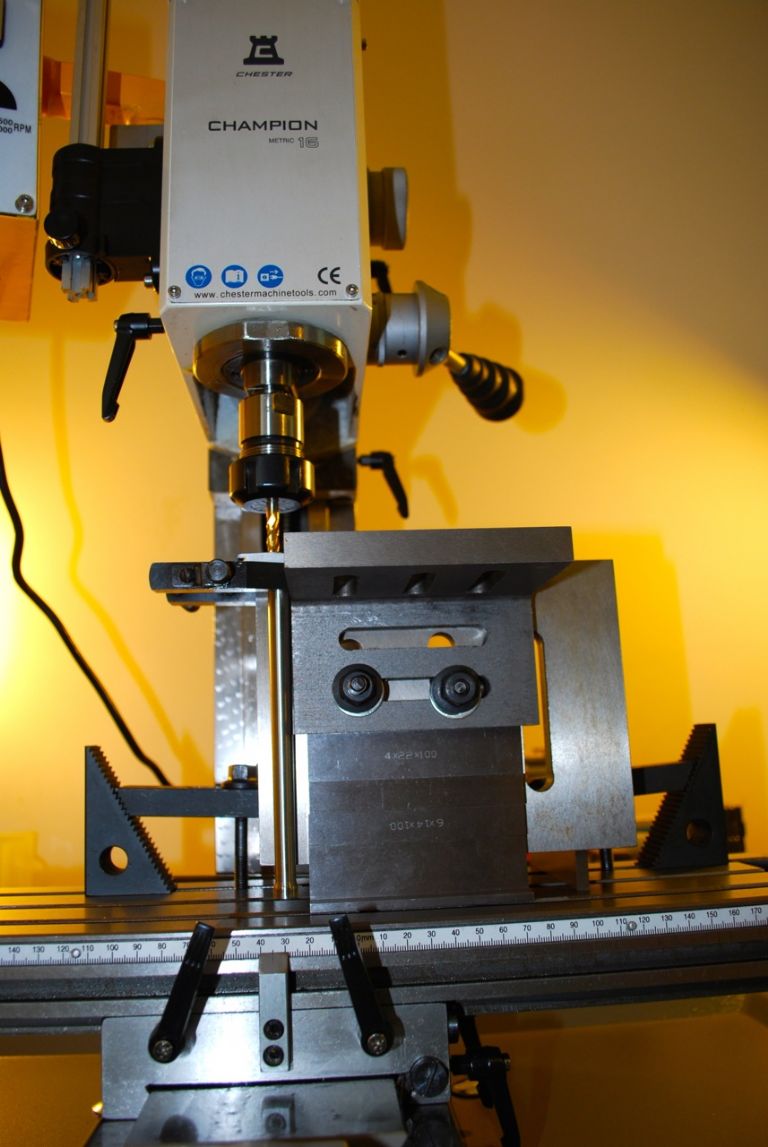
                                    I've decided to try the column from one piece putting a 1/4" BSF Stud in the top. If the supplied bar had been longer I would have tried to do all in one piece – but this way I have more to hold on to in the chuck. Thought I can use a steady on the 'collar' to support for drilling. I've already put in a centre and drilled the foot holes on the mill. So If I clock down the face when I put in the lathe I hope it will turn out ok – excuse the pun.. Have to cut away to size the foot at the end.

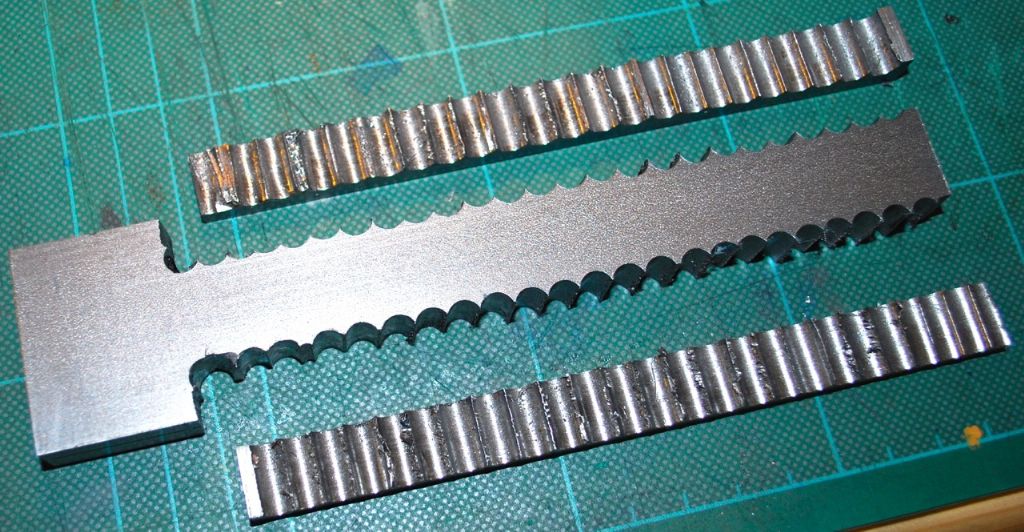
                                    Some photos's of the stitch drilling of the Column. I did it on the drill press and the Warco 'cross vice' was fine (I did remove the sliding jaw when it arrived and filed a bit to get to fit better though). I can see it would have been easier, quicker and much neater on the mill – but its good to spread the wear and tear around. I used the same 6mm drill bit for all the holes with no problem – its one from my cheap set, they average out at 29p each – what a difference it makes with a bit more knowledge and experience using them after all my early drilling woes. Held the drill as short as possible and didn't use a centre drill, just straight through with the 6mm – it didn't need to be very accurate. I'll get some stub drills though for the future.

                                    Had to move the bar along in the vice once or twice but all the holes were drilled in between the vice jaws (ie. not overhanging)..

                                    278. stitch drilling the column..jpg

                                    It didn't take very long at all to do and has saved lots of machining of the interrupted cuts on the Lathe. Well worth doing to say the least.

                                    279. stitch drilling the column 2..jpg

                                    Will probably try it straight on the Lathe now, if it seems a bit rough I can mill it down a bit..

                                    230. stitch drilling the column 3..jpg

                                    Cheers.

                                    Allan.


                                    Edited By Allan. on 06/05/2015 14:52:22

                                    #188978
                                    GarryC
                                    Participant
                                      @garryc

                                      Just a quick photo of where I got to earlier..

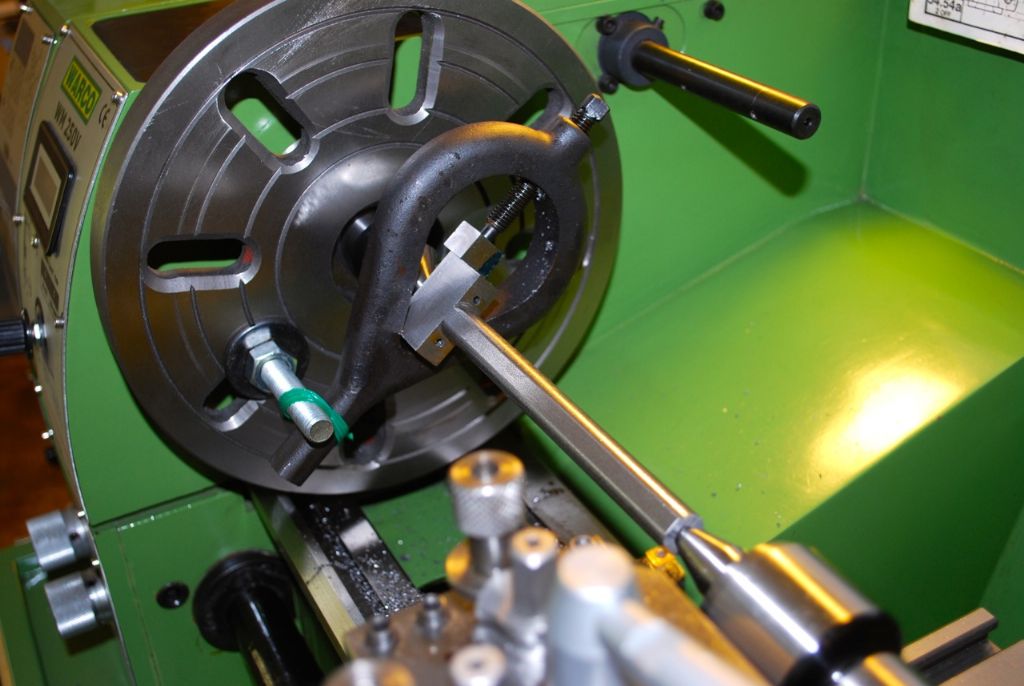
                                      Nice surprise in that the Lathe didn't seem to mind the serrated edges from the drilling yesterday very much at all and they were gone in no time. Just rough cuts taken so far. The brown staining is from the oil..Didn't have a better size lathe dog to fit as all my others were too small.

                                      280. the column so far..jpg

                                      Cheers.

                                      Allan.

                                      #189201
                                      GarryC
                                      Participant
                                        @garryc

                                        A bit more progress today.

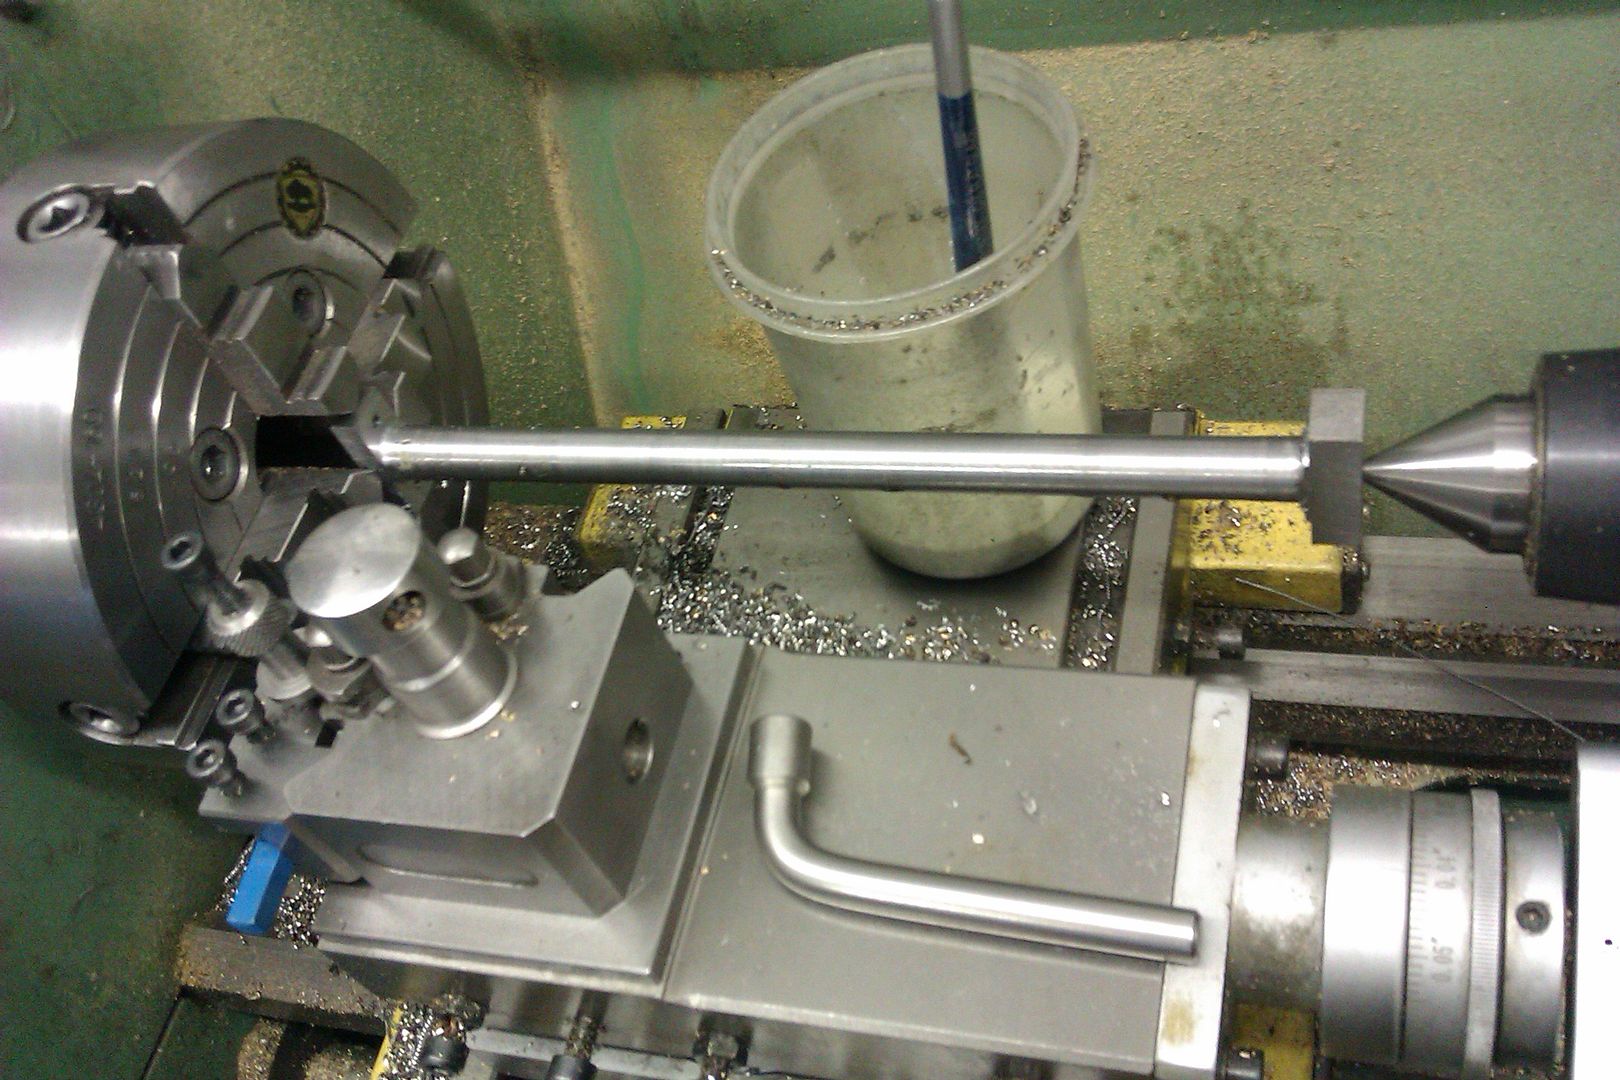
                                        After turning the diameter to 1/2" and rounding off the foot ends the tailstock was put over 0.8mm to do the taper. I know this does not need to be spot on but when learning its good practice to try and get as close as poss with all of it I think..281. putting the tailstock over for the column.jpg

                                        Turning the Column taper and very enjoyable and interesting as another first it was too (with the tailstock over). The finish looks ok with the eye but the camera makes it look not too good. I must get some HSS tools asap to try also some different types.

                                        282. turning the column taper.jpg

                                        The Column so far.

                                        283. the column so far..jpg

                                        No problem for the lathe doing the foot ends and was done in a couple minutes it seemed – its dawned on me that my first intermittent cuts earlier were with the crankshaft assembly which made it seem worse in that situation . The foot ends I did manually and the lathe steady as a rock..

                                        Cheers.

                                        Garry.

                                        (sorry about the name change, should have done it ages ago, my profile should explain, although some of you know already.)

                                        #189314
                                        GarryC
                                        Participant
                                          @garryc

                                          Just a bit more this morning..

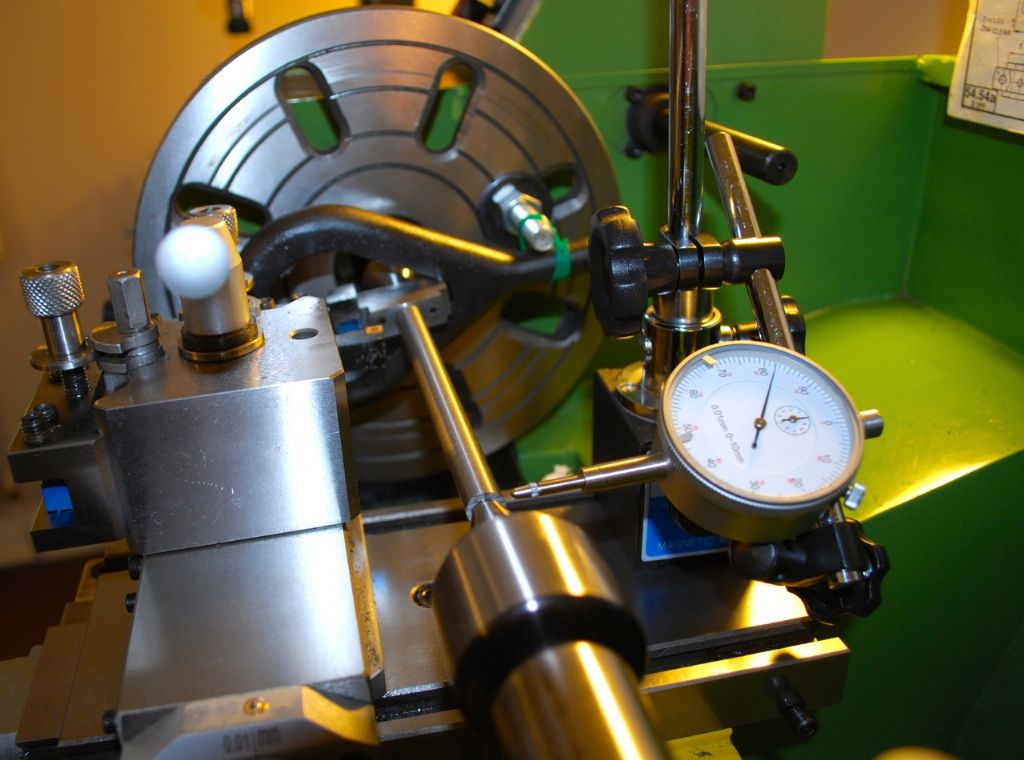
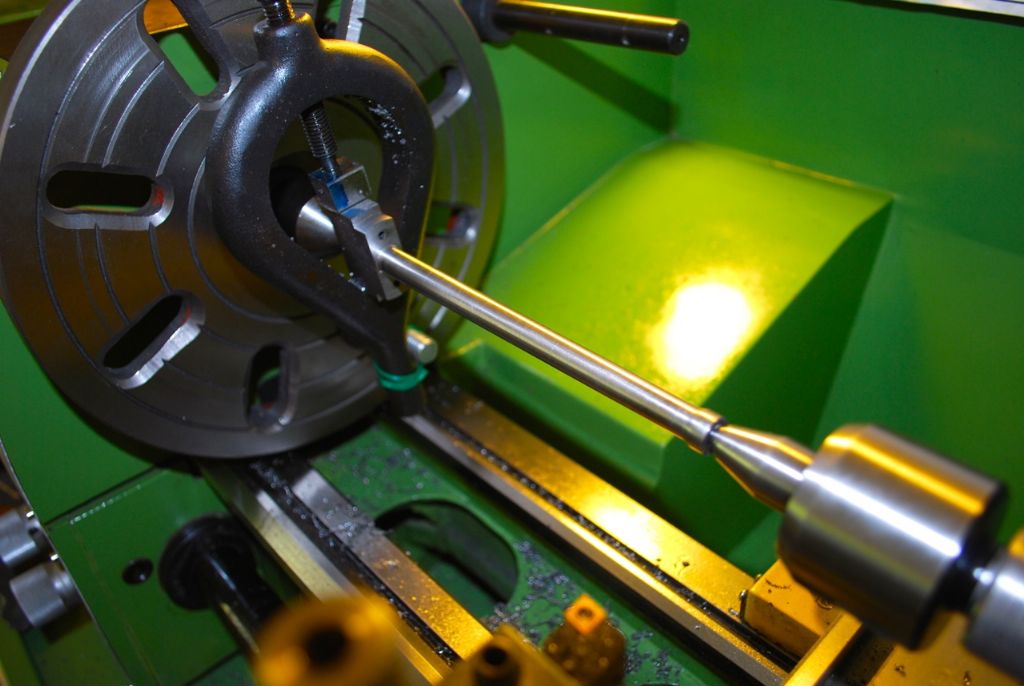
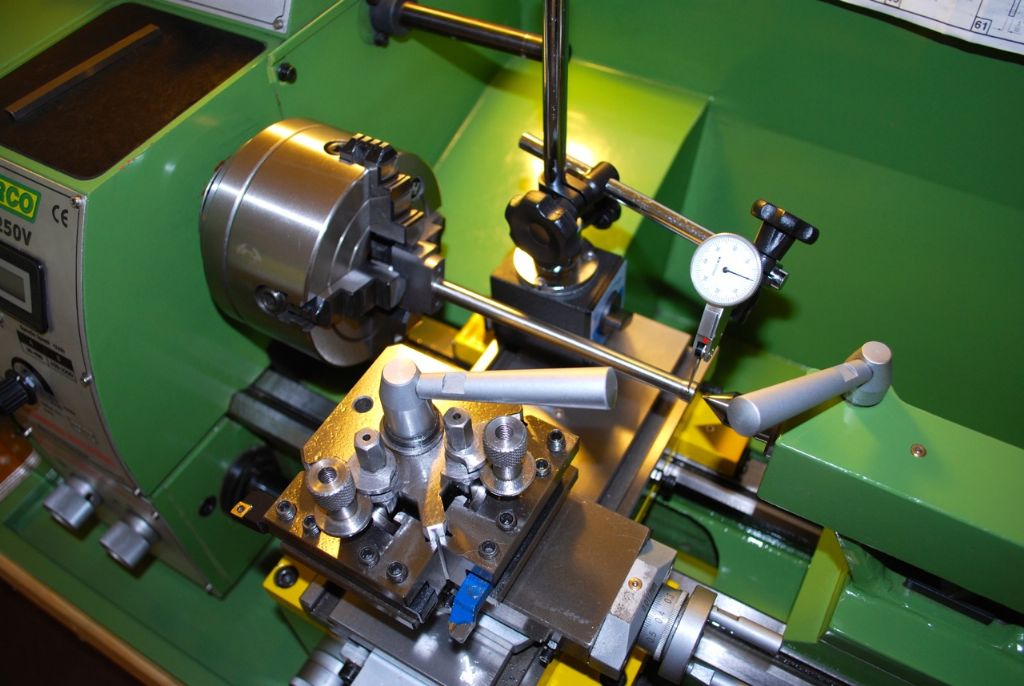
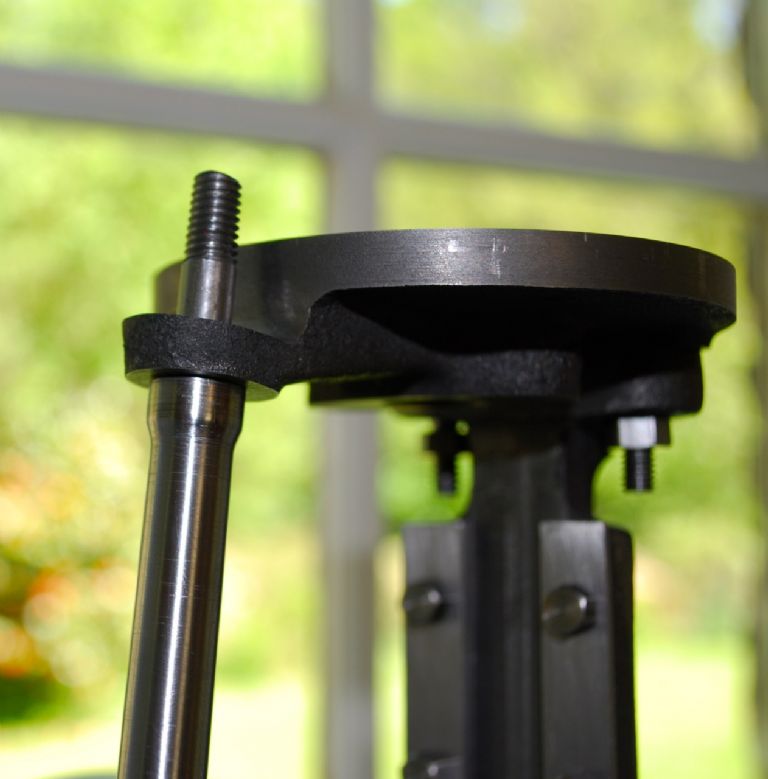
                                          After putting the tailstock back with the test bar the column went into the 4 jaw for drilling using the collar to set it up. Wouldn't be without the test bar now – have the lathe set with my ( cheap!) DTI showing no deflection at all along the bar now I did have it down to under 1 thou now its 0, great!

                                          284. fitting the column stud 1..jpg

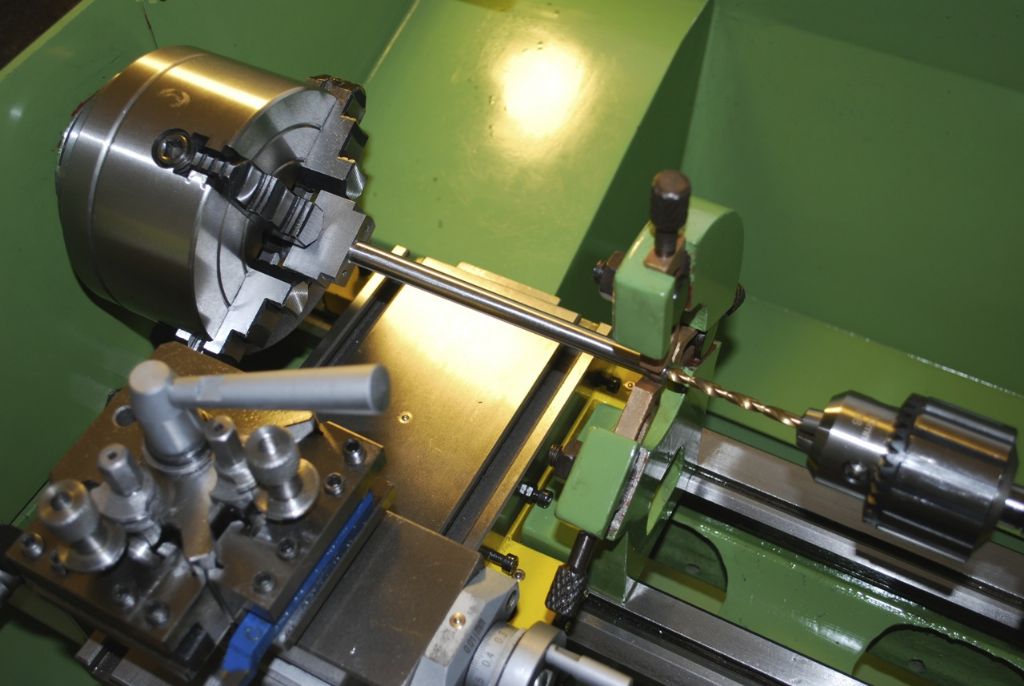
                                          Drilling for the 1/4" BSF Stud.

                                          285. fitting the column stud 2..jpg

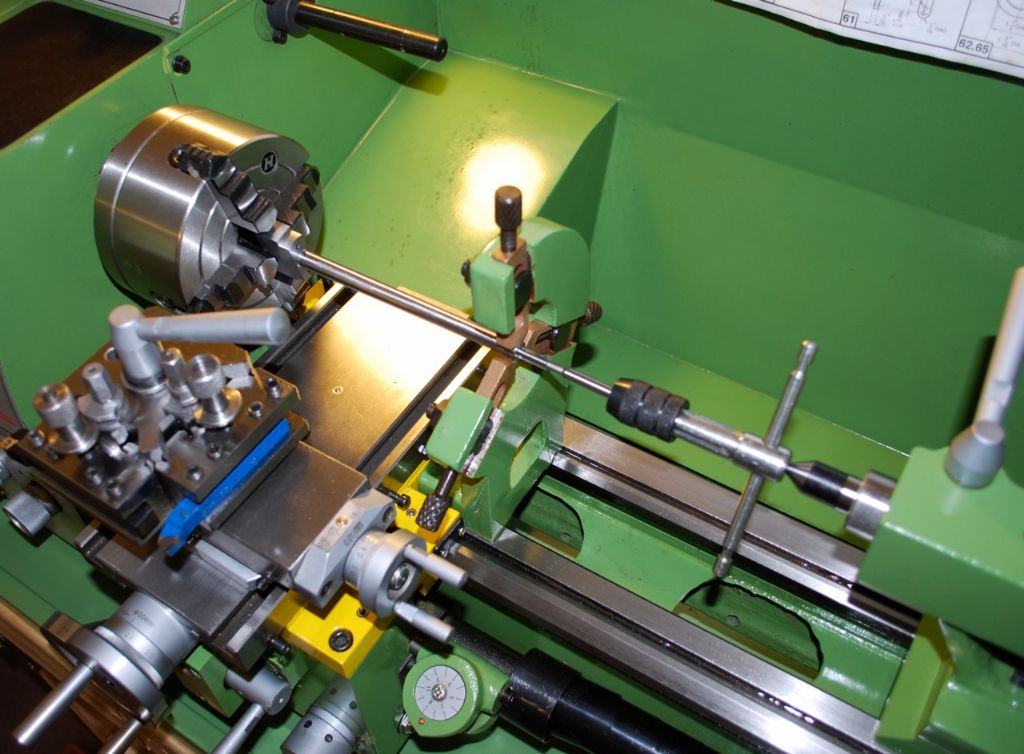
                                          and tapping..

                                          286. fitting the column stud 3..jpg

                                          I'll need to run the thread down a bit more and maybe shorten a bit when it gets fitted.

                                          287. fitting the column stud 5..jpg

                                          Cheers.

                                          Garry.

                                          ps. All the photos do go through a quick auto filter to reduce them to a very small size before posting – I trust someone will yell at me though if I put too much on here..

                                          #189449
                                          GarryC
                                          Participant
                                            @garryc

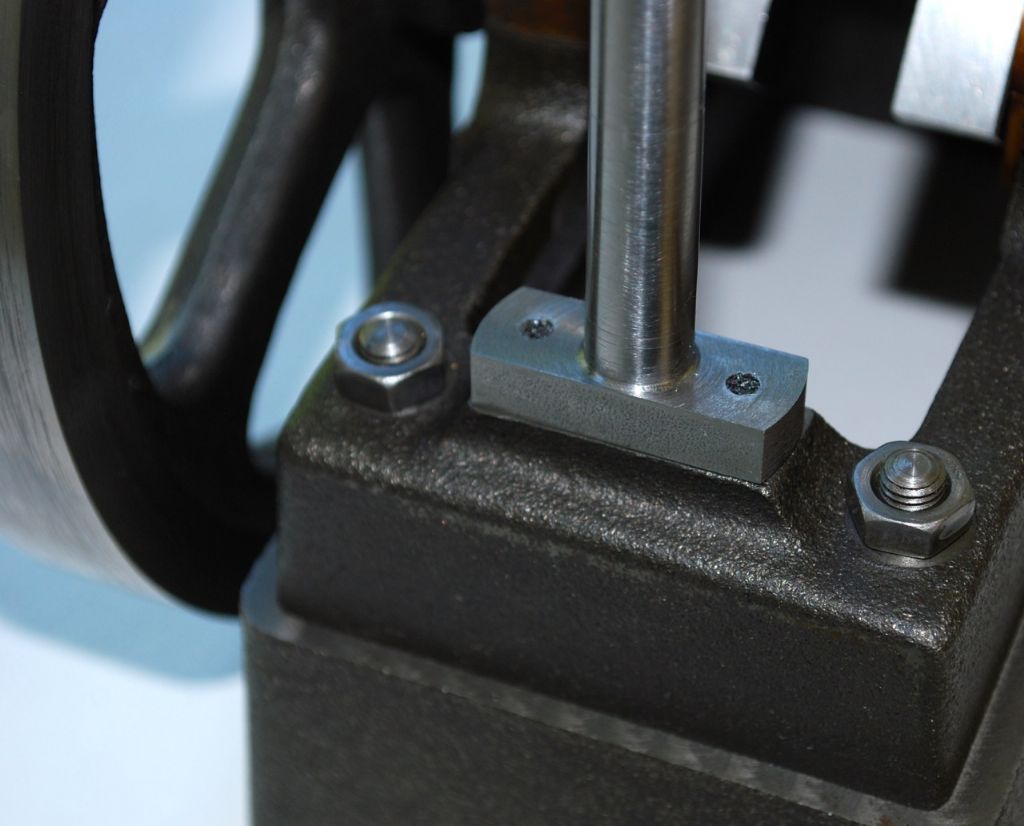
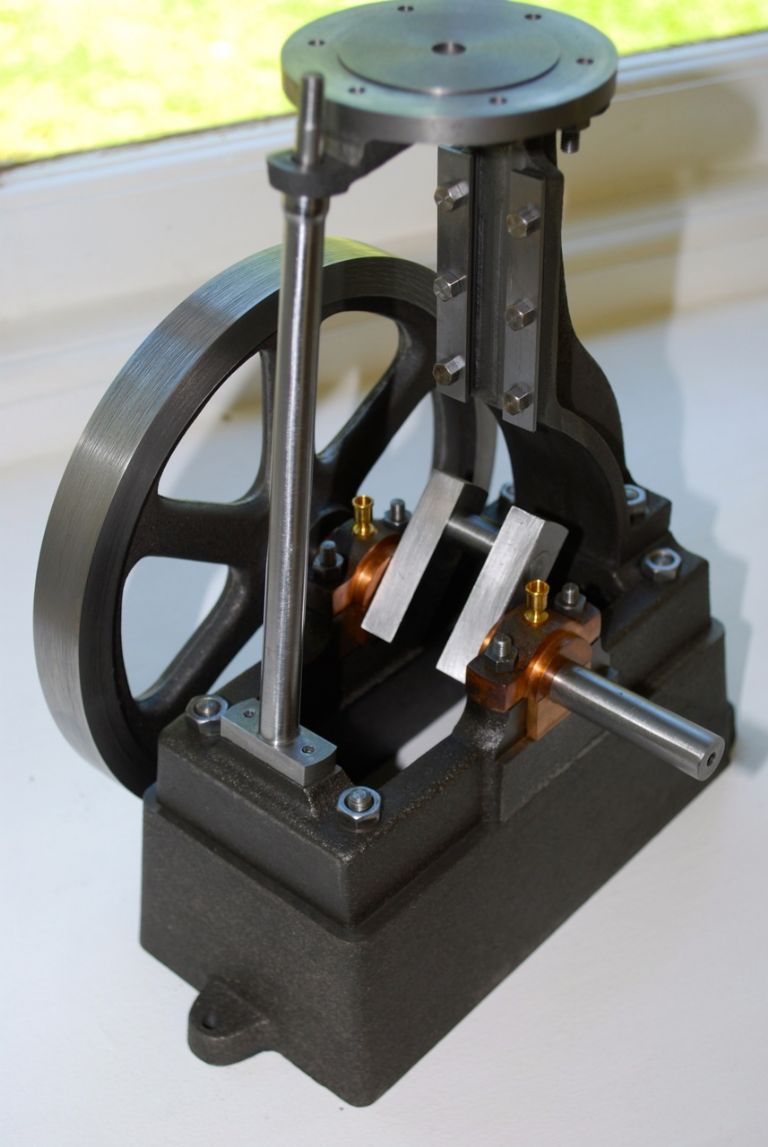
                                            Almost done with the Column now. Its turned out not too bad, not perfect (as usual) but looking ok, I'm tempted to say I'm improving but lets not tempt fate!..

                                            It was awkward to hold with the taper to do the foot and I didn't come up with a very good solution. The bottom face that had to be sized down was square for setting up but I there was a lot of material to come off and I wanted to cut it away with the saw but how to set it back square again to mill to size afterwards – gave me a headache. In the end I did as below with very very light cuts just to get the edge square again for a a different and more secure setup. I didn't realise just how tight you can hold with a little toolmakers clamp, impressive – so using the square upper face of the foot to set it square against the angle iron it worked ok…

                                            288. finishing the column 1..jpg

                                            Then used the now square again bottom to side mill and that was fine. Taking the locked callipers for sizing checks it went straight off the table and onto the engine with a really nice close fit. That was satisfying..

                                            289. finishing the column 2..jpg

                                            Its not perfect but looks ok. I'll extended the thread and shorten the stud when I'm fitting to the sole plate..

                                            291. finishing the column 4..jpg

                                            Just waiting on a set of transfer punches to arrive now to fit to the sole plate.

                                            292. finishing the column 5..jpg

                                            290. finishing the column 3..jpg

                                            Cheers.

                                            Garry

                                            I'm sure most people on here would have made this in 5 minutes while the kettle was boiling..

                                            Edited By Gary on 11/05/2015 14:30:59

                                            #189459
                                            MM57
                                            Participant
                                              @mm57

                                              Welcome to the forum Garry (or Gary?)

                                              Keep going – great posts and pictures as always…

                                              Martin

                                              #189494
                                              Neil Wyatt
                                              Moderator
                                                @neilwyatt

                                                Watch it Garry – the name change has been accompanied by a bit of swarf cvreeping in!

                                                Seriously though, it's coming along really nicely and is a credit to you.

                                                Neil

                                                #189512
                                                GarryC
                                                Participant
                                                  @garryc

                                                  Cheers Martin. Neil I must be picking up dirty habits on here – but its very nice to hear your positive comments, thanks!

                                                  I got into a real mess with the name thing!

                                                  Best regards

                                                  Garry.

                                                  #189590
                                                  Anonymous
                                                    Posted by Gary on 11/05/2015 14:28:32:

                                                    I'm sure most people on here would have made this in 5 minutes while the kettle was boiling..

                                                    Edited By Gary on 11/05/2015 14:30:59

                                                    Not me; I probably wouldn't have even got the tea sorted out in 5 minutes. I've never worked out how people like JasonB nip into the workshop and come out with some complicated part in what seems like no time at all.

                                                    Andrew

                                                    #189591
                                                    JasonB
                                                    Moderator
                                                      @jasonb

                                                      Don't have to fight my way through all those machines and assorted tooling just to get into the workshopwink 2

                                                      I think its the same for all of us, the first time you do something new it will take longer, when you come to do the same or a similar job in the future you find it a lot easier and therefore quicker. For example I would probably have cut that standard to exact length before doing any turning as it would have been easier to hold while still a rectangular bar, maybe I should have shown this photo rather than the conrod which did need a larger lump at one end.

                                                      Edited By JasonB on 12/05/2015 11:32:14

                                                    Viewing 25 posts - 76 through 100 (of 602 total)
                                                    • Please log in to reply to this topic. Registering is free and easy using the links on the menu at the top of this page.

                                                    Advert

                                                    Latest Replies

                                                    Viewing 25 topics - 1 through 25 (of 25 total)
                                                    Viewing 25 topics - 1 through 25 (of 25 total)

                                                    View full reply list.

                                                    Advert

                                                    Newsletter Sign-up