My little engine (continued)

Advert

My little engine (continued)

Home Forums Work In Progress and completed items My little engine (continued)

Viewing 25 posts - 401 through 425 (of 602 total)
  • Author
    Posts
  • #200593
    GarryC
    Participant
      @garryc

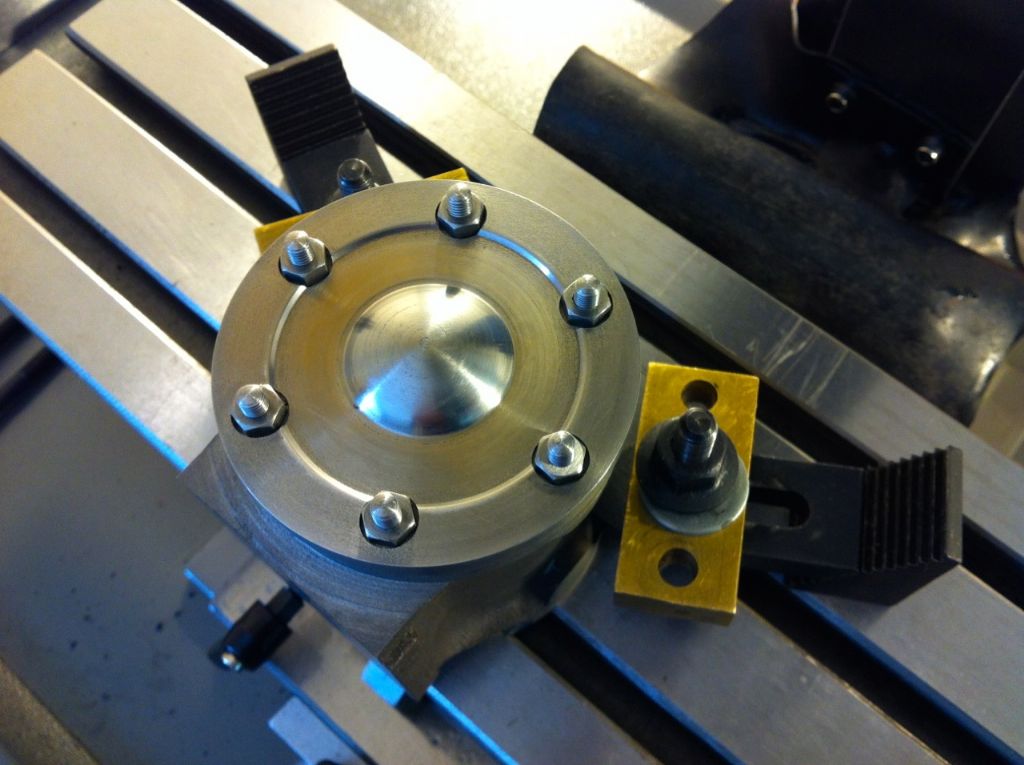
      Have the Cylinder Top Cover fixed in place this morning (the cylinder studs done the same way as the bottom one). I'm quite chuffed as all 6 holes in the cover were able to stay at 2BA clearance size 4.8mm, I must be getting better…

      Last photo of the covers, promise..

      423. test fitting the finished steam cylinder top cover..jpg

      Cheers

      Garry

      Advert
      #201083
      GarryC
      Participant
        @garryc

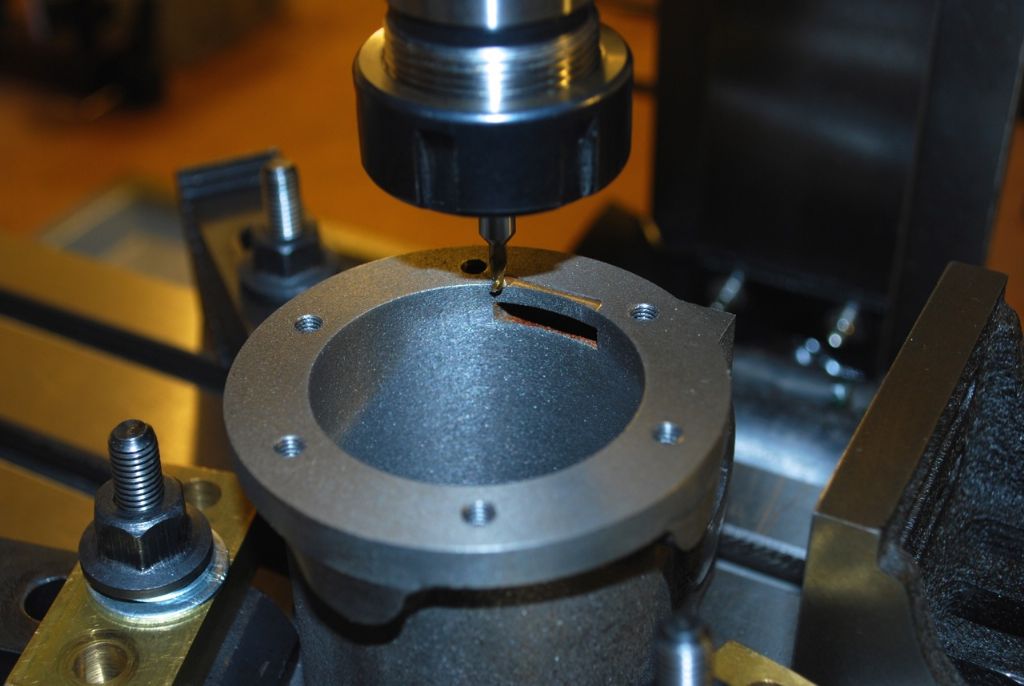
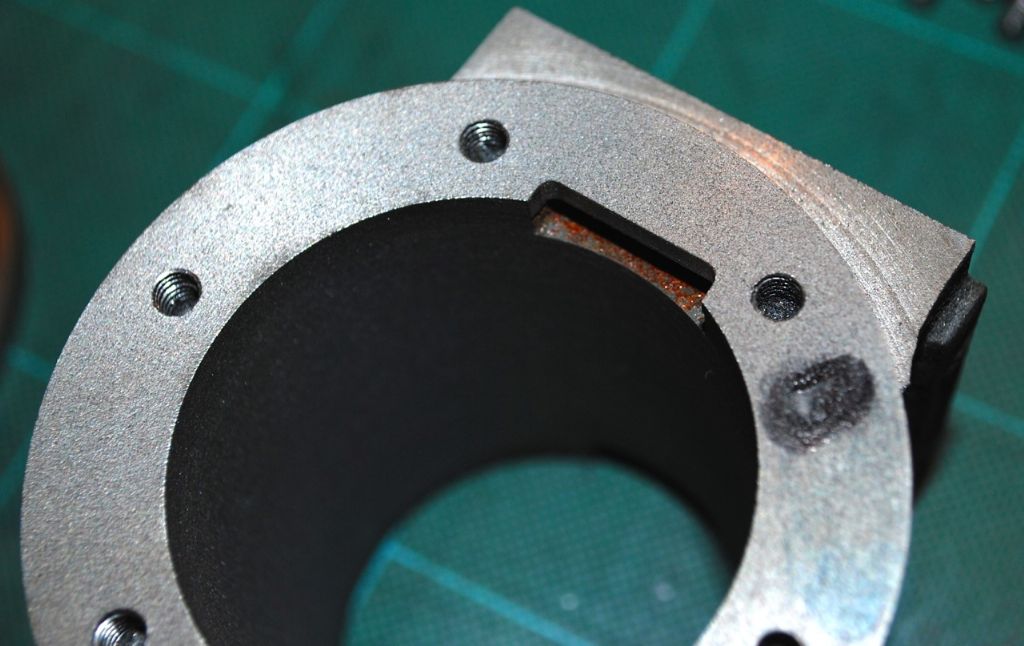
        Just a quick couple of photo's of making a start this morning on aiding the steam to reach the end of the Cylinder..

        424. starting to open the steam inlets 1..jpg

        Starting using a 4mm slot drill.. I didn't make all the cuts that fine, I think I went down 0.5 mm at a time..

        424. starting to open the steam inlets 2..jpg

        One side done, but I may have been a bit heavy handed and taken away too much..

        424. starting to open the steam inlets 3..jpg

        The other end after breakfast then having a go fitting the Drain Cocks and a 'groove' from their holes to the end of the cylinder – to aid water to get away from the ends of the cylinder.. At least I hope I'm understanding that correctly..

        Cheers

        Garry

        #201104
        GarryC
        Participant
          @garryc

          and while the kettle's boiling..

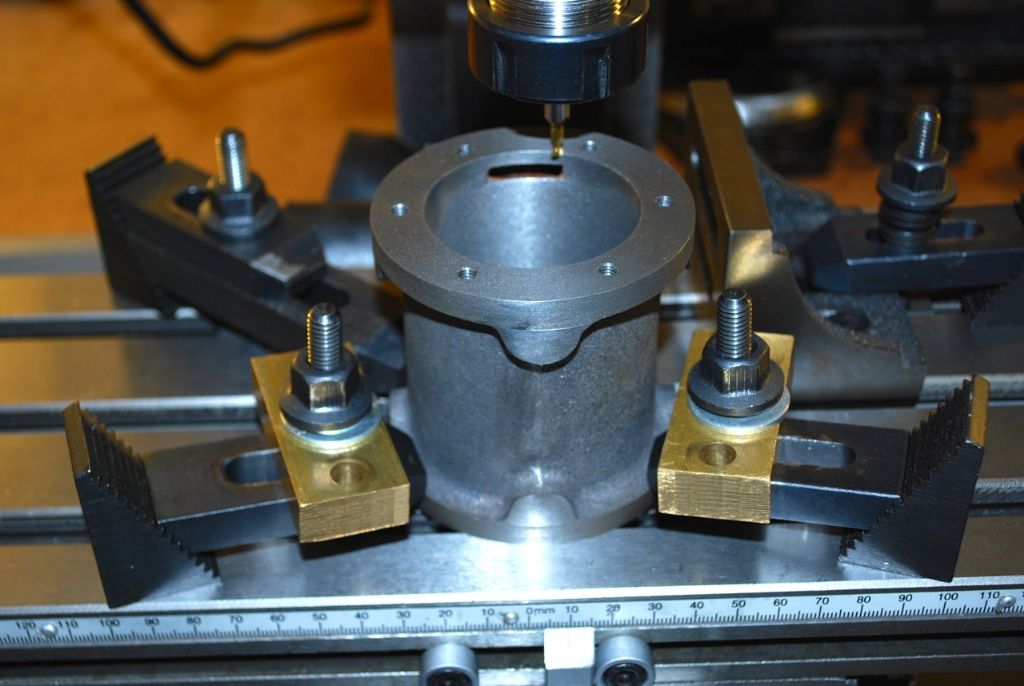
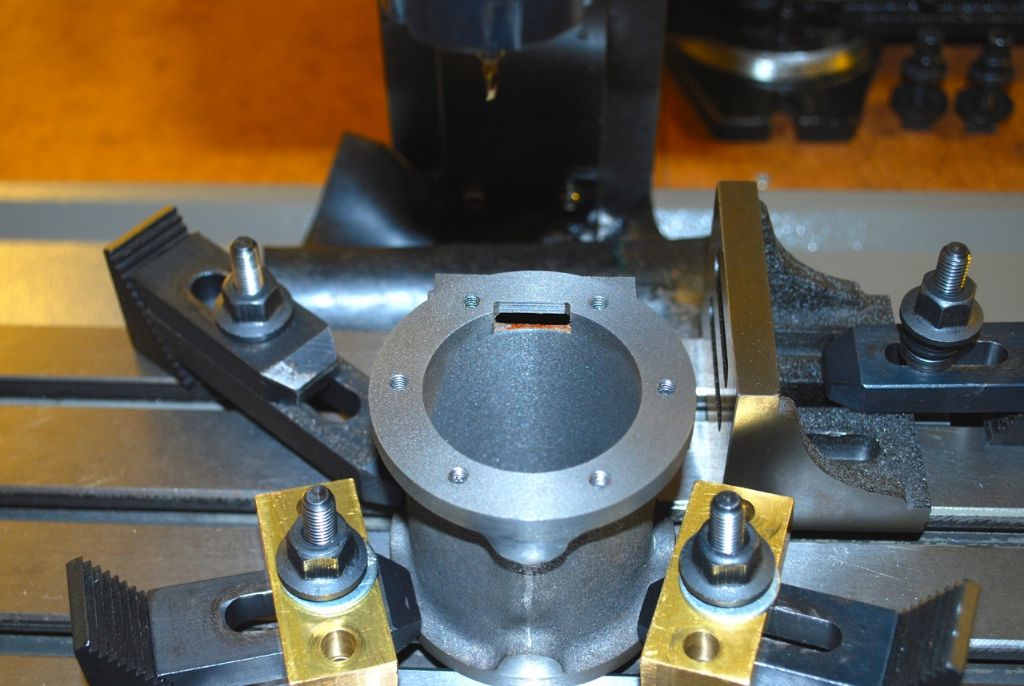
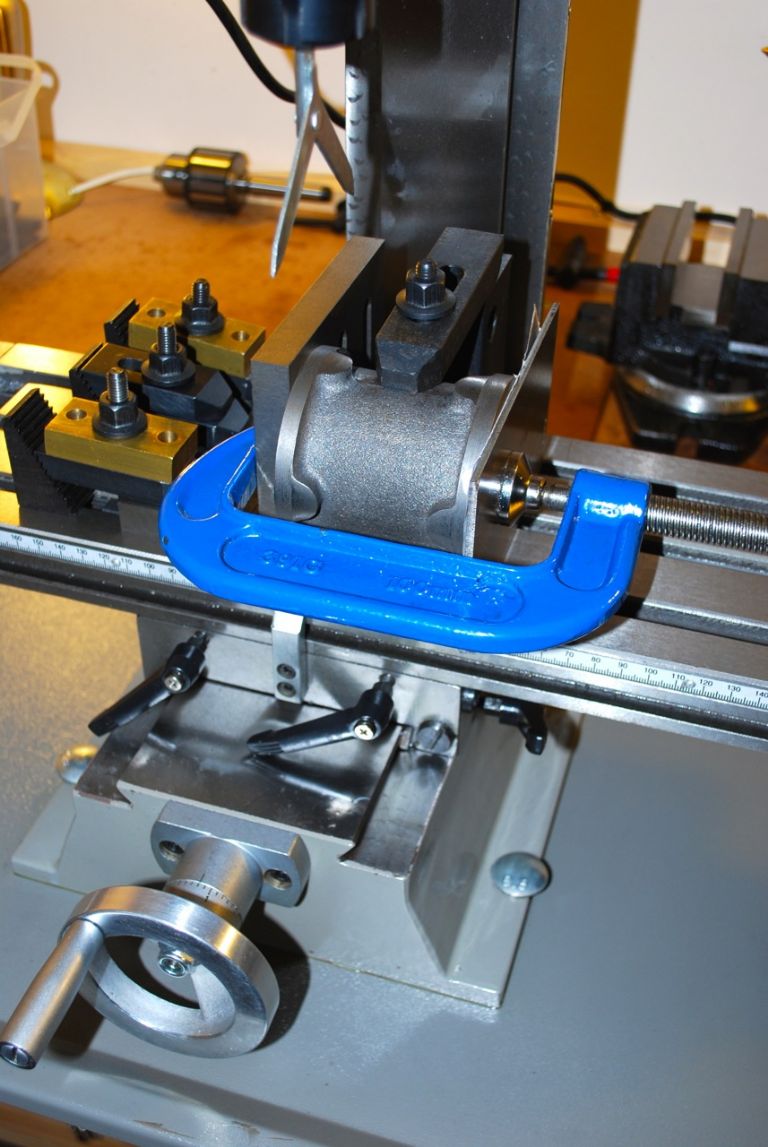
          The other end of the Cylinder and that steam inlet opened out to the end of the wall.

          425. todays progess 1..jpg

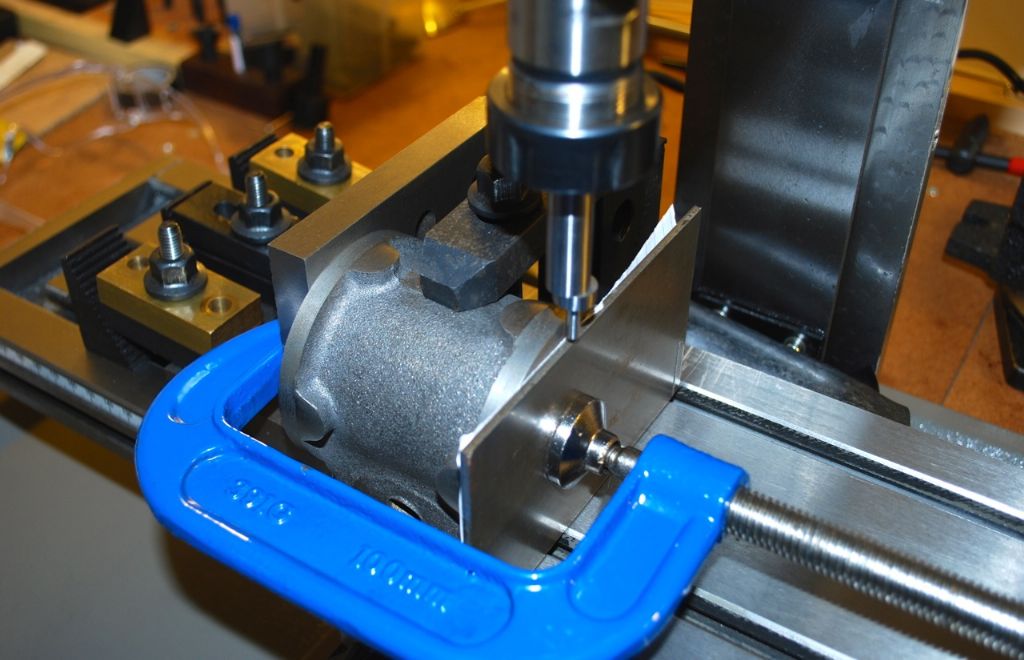
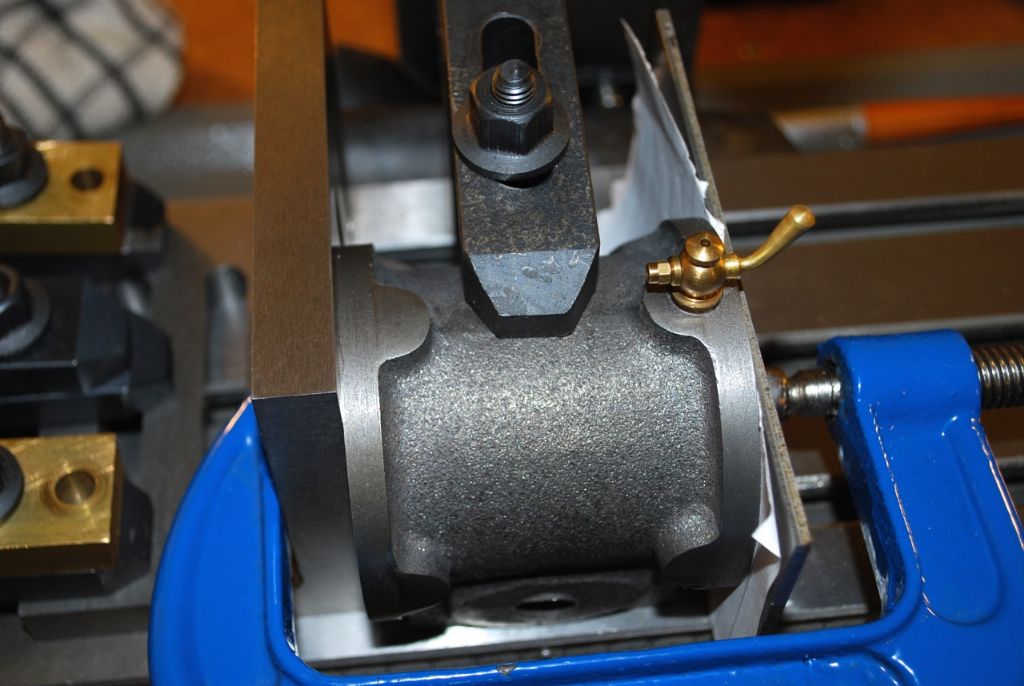
          then lining up to drill for the Drain Cocks.. That (wedge) clamp on the Cylinder wall is only very lightly tightened..

          425. todays progess 2..jpg

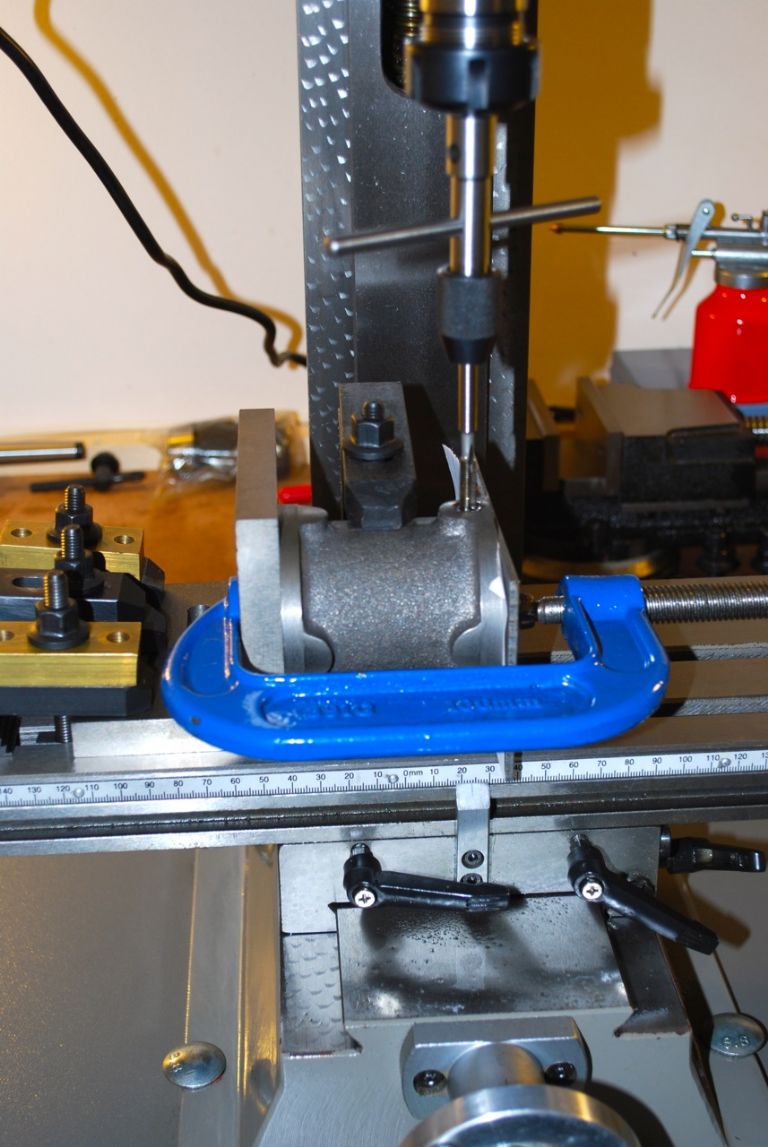
          almost ready to start drilling and tapping..

          425. todays progess 3..jpg

          Cheers

          Garry

          #201116
          GarryC
          Participant
            @garryc

            Tapping the Drain Cock Hole..

            425. todays progess 4..jpg

            One Drain Cock fitted – one to go..

            425. todays progess 5..jpg

            Cheers

            Garry

            #201126
            Jeff Dayman
            Participant
              @jeffdayman43397

              Ports and drain valve fitting look great Garry, well done. JD

              #201130
              GarryC
              Participant
                @garryc

                beerCheers Jeff

                #201137
                Clive Hartland
                Participant
                  @clivehartland94829

                  Gary, why is your machine so clean? I am beginning to suspect you may be more experienced than it appears?

                  The quality of your work is excellent and it has been well thought out, It just makes me think.

                  Clivelaugh

                  #201140
                  JasonB
                  Moderator
                    @jasonb

                    More experienced at cleaning maybe.smile p

                    Its comming on well Garry, the size of the notches for the steam passages looks fine you still have plenty of surface area for the end covers to seal against and are not too close to the stud holes.

                    J

                    #201145
                    GarryC
                    Participant
                      @garryc

                      Hi Clive

                      Thats good for morale that is, cheers..! As Jason says I'm really not too bad at the cleaning bit..smile To be honest the equipment is really only used for my ME and so I don't usually make much mess, its quick and easy to clean up.. I tend to wash down with WD40 before oiling when things get dirty – I know lots of people seem to hate it these days but I've used it on my cars and bikes for more years than I care to remember….

                      and Thanks Jason, its good to know the notches are fine, I wasn't sure about them..

                      Cheers

                      Garry

                      #201148
                      MichaelR
                      Participant
                        @michaelr

                        Gary, Did you need to have those notches for the steam ports ?, my thinking is that the steam port is cast into the cylinder wall and the steam has free passage into the cylinder, if the steam ports were in the cylinder bolting face then yes you would need the notches to form a steam way when the covers are bolted in place, I stand to be corrected.

                        Mike.

                        #201152
                        JasonB
                        Moderator
                          @jasonb

                          Mike if you have a look at the sketches that I posted at 8.39 on 24th July you can see that at the end of its stroke the piston covers these cast in passages. To get a better running engine and allow the steam into the small space between piston and end cover its common to notch out the material as Garry has done.

                          J

                          #201164
                          MichaelR
                          Participant
                            @michaelr

                            Jason, Your sketch makes it clear, I am now corrected.

                            Mike

                            #201269
                            GarryC
                            Participant
                              @garryc

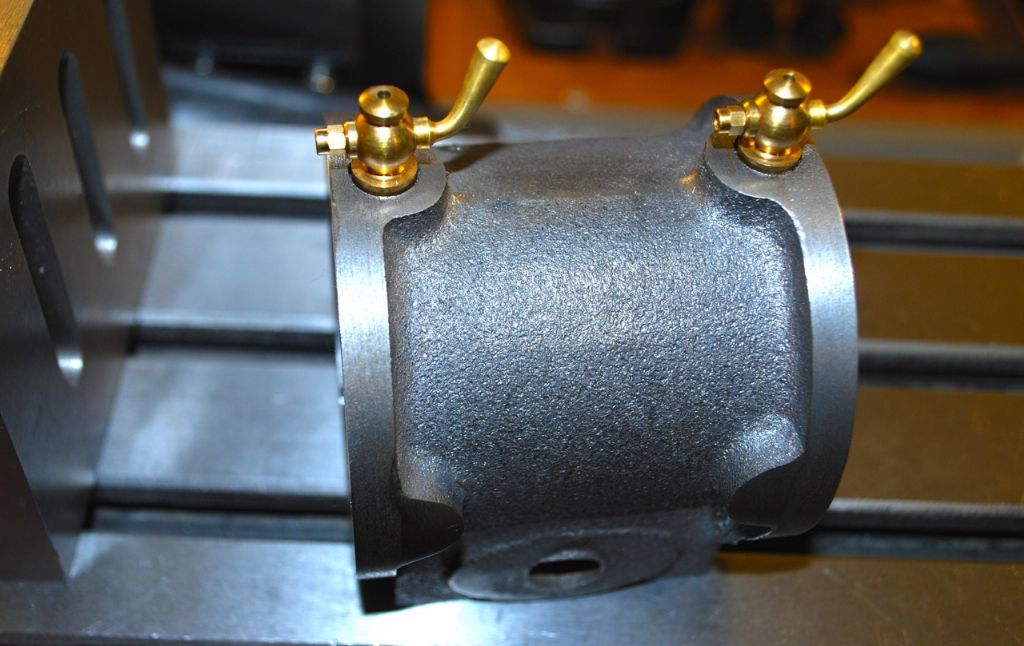
                              Not much done today, just the second Drain Cock (It needs bit of deburring by the looks of it). Its not quite tightening in the right position at the moment – so I hope maybe a bit of 'PTFE tape on the thread will allow me to align it when it comes to final assembly.

                              The Cylinder lagging should hopefully pretty much align with the depth of the shoulders, so they are a sitting a bit 'proud' at the moment….

                              426. both drain cocks in place 2.jpg

                              Next is to have a go at milling in some little grooves in the bore – from the drain holes to the ends of the cylinder..

                              Cheers

                              Garry

                              #201270
                              Ian S C
                              Participant
                                @iansc

                                Gerry's like a few other modellers(tongue in cheek), he's got two workshops, one to do his work, and the other for photography.

                                Ian S C

                                #201275
                                JasonB
                                Moderator
                                  @jasonb

                                  Garry with steam fittings you quite often have to use soft copper washers to allow the fitting to be tight at the right spot, these come in mixed thicknesses from the usual ME suppliers. The other way is to spot face around the hole, with a bit of calculation and luck you can work out how deep to spotface eg one turn of a 40tpi thread is 0.025" so if the draincock bottoms out and is upside down you need half a turn or 0.0125" spotface.

                                  Also worth getting yourself a length of studding (allthread) and chop it up into suitable lengthsfor when you are clamping thin items to teh mill table, this will save having to use packing below the nut due to the unthreaded section of the supplied studs which I can see you are having to do quite a lot..

                                  #201296
                                  GarryC
                                  Participant
                                    @garryc

                                    Hi Ian

                                    I've got one just for drinking cups of tea in as well..!

                                    Hi Jason

                                    So that's how its done – I'll get some washers, thanks..

                                    laughI think thats dead clever in working out pretty accurately how much spot face or turn is needed to tighten a fixture in the right place… for some reason for me that's just shone a little light into the subject of threads generally..!

                                    and yes I do need to get some studding – mine are a real pain to use. I'll have to find some..

                                    Cheers

                                    Garry

                                    Edited By Garry_C on 21/08/2015 14:43:39

                                    Edited By Garry_C on 21/08/2015 14:44:03

                                    #201419
                                    mechman48
                                    Participant
                                      @mechman48
                                      Posted by Ian S C on 21/08/2015 13:01:27:

                                      Gerry's like a few other modellers(tongue in cheek), he's got two workshops, one to do his work, and the other for photography.

                                      Ian S C

                                      My suspicions exactly… both mill & lathe look pristine, even the rubber Y axis cover of his mill looks as though it's never seen swarf & the paintwork on the lathe looks as though it's straight out of the spraying booth… dont know Come on Garry own up, you do have two sets of machines wink

                                      Needless to say excellent work to date, with super pics of your progress all along, look forward to more of the same & maybe a video of it running, puts my efforts to shame.

                                      George

                                      #201433
                                      GarryC
                                      Participant
                                        @garryc

                                        Hi George

                                        I'm going to have to start training you lot to tidy up a bit now and then! angel

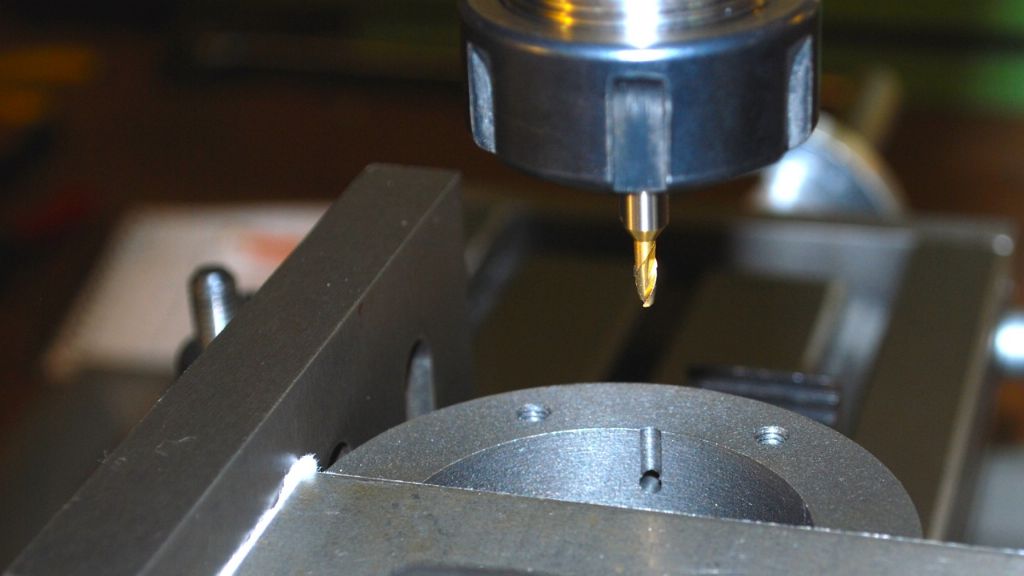
                                        I did get the two grooves to the Drain Cock holes done earlier. They are 1/32" deep and will hopefully aid water in getting out when the piston is at the end of its stroke.. (The cylinder was lined up on the 'through' hole from above and then flipped through 90 degrees each time…..) Not much but its all progress..

                                        427. the drain cock holes 2..jpg

                                        Cheers

                                        Garry

                                        #201434
                                        steve de24
                                        Participant
                                          @stevede2433577

                                          Garry,

                                          Great work and photos of same.

                                          Did you buy the drain cocks or make them yourself?

                                          Steve

                                          #201436
                                          GarryC
                                          Participant
                                            @garryc

                                            Thanks Steve

                                            They are listed as 'recommended' extra options for the engine – I do intend to get a boiler when its finished and so I think they are pretty much essential to have **LINK** – its the largest size listed there to buy for this engine..

                                            Cheers

                                            Garry

                                            Edited By Garry_C on 22/08/2015 12:15:20

                                            Edited By Garry_C on 22/08/2015 12:15:41

                                            #201546
                                            GarryC
                                            Participant
                                              @garryc

                                              I'm going to have a look at doing the Valve Chest next..

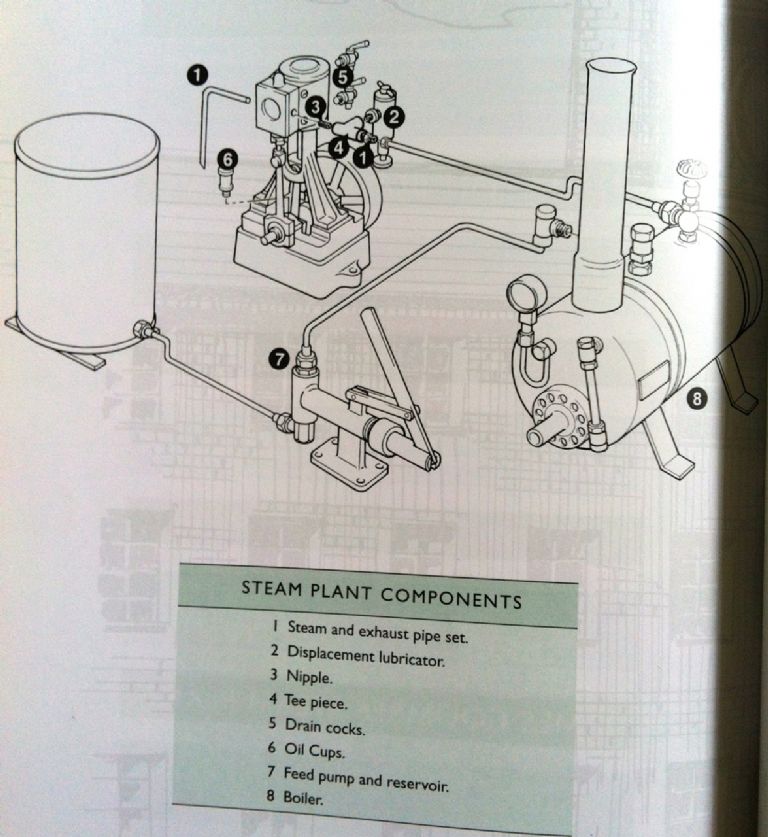
                                              Could anyone please tell me if the Displacement Lubricator should be fitted off (or close to) the steam inlet pipe as per the photo below or as Andrew Smiths guide book suggests on the opposite side of the valve chest to the steam inlet (maybe it doesn't matter?).. I should say that I may not have a permanent connection to the boiler so would likely need to connect to it as and when I want to use it (so I can use the boiler for other engines) – and also can I still run the engine on air with the lubricator fitted?428. displacement lubricator position.jpg

                                              Thanks for any advice and hope that makes sense – and apologies if its a silly question, I have a feeling I may have the wrong idea about how it works..

                                              Garry

                                              #201551
                                              JasonB
                                              Moderator
                                                @jasonb

                                                They can be mounted either way on the steam chest or via a tee in the steam line so really upto you want you wish to do. The lubricator won't work on air but would not cause a problem if left on the side of the chest or it could be removed and a blanking plug/plate used

                                                #201553
                                                GarryC
                                                Participant
                                                  @garryc

                                                  Thanks Jason, I'll mount directly on the steam chest opposite side to the inlet then…

                                                  Cheers

                                                  Garry

                                                  #202027
                                                  GarryC
                                                  Participant
                                                    @garryc

                                                    Just a little update to start work on the Steam Chest and Cover..

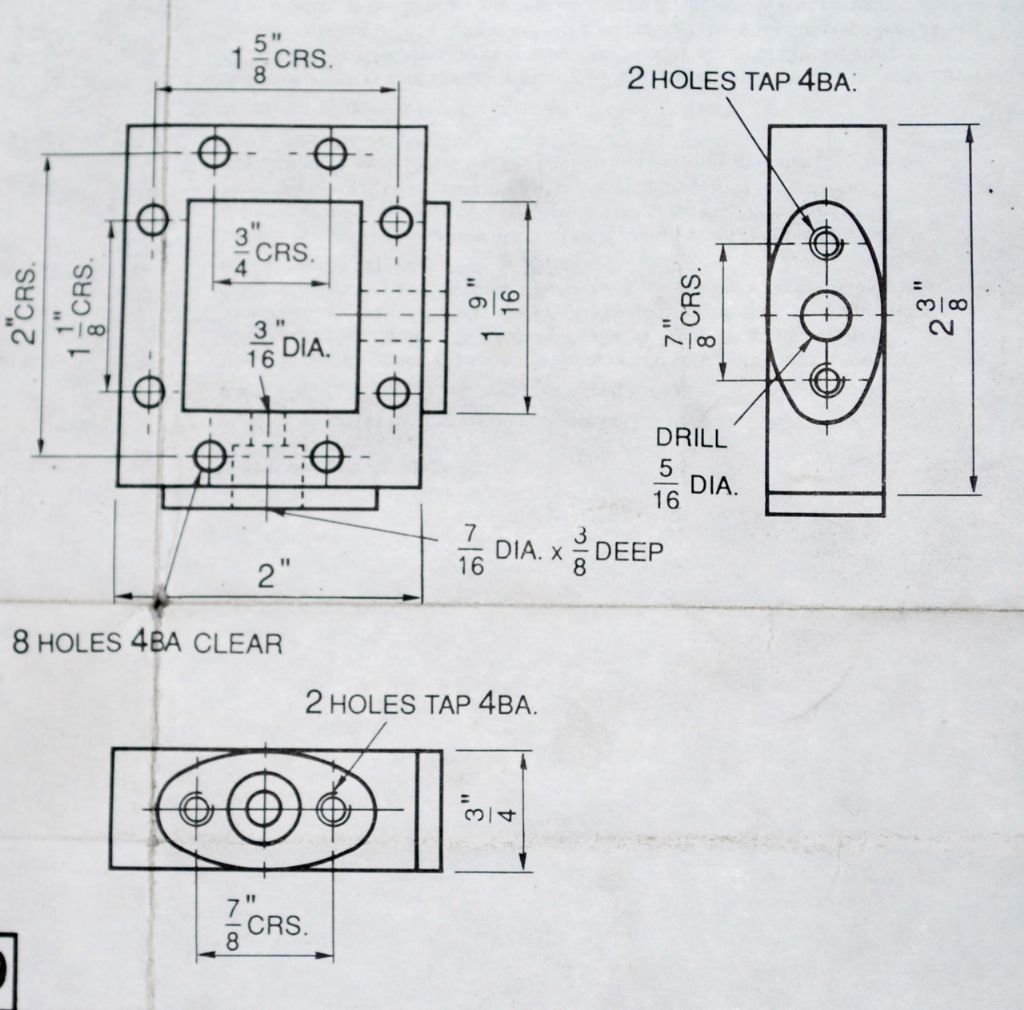
                                                    The Steam Chest Drawing.

                                                    430. the steam chest drawing.jpg

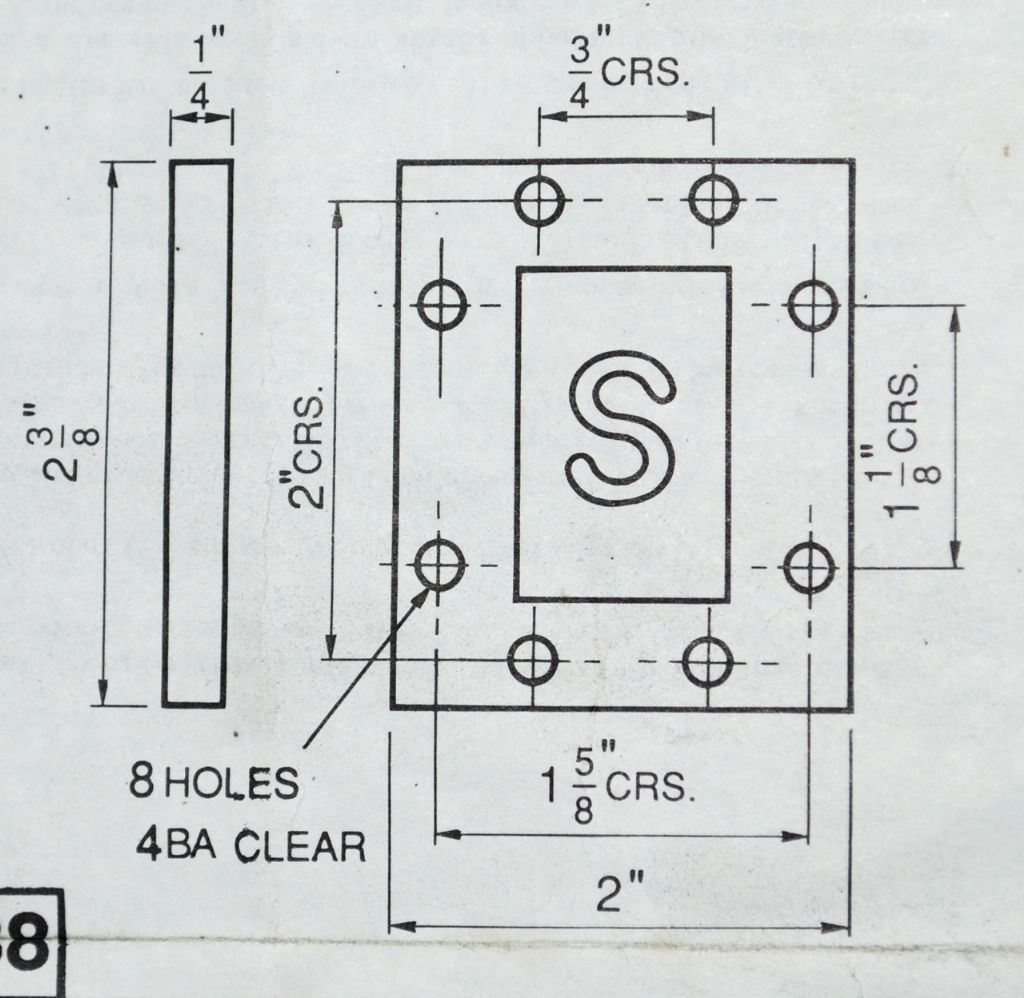
                                                    The Steam Chest Cover Drawing.

                                                    431. the steam chest cover drawing.jpg

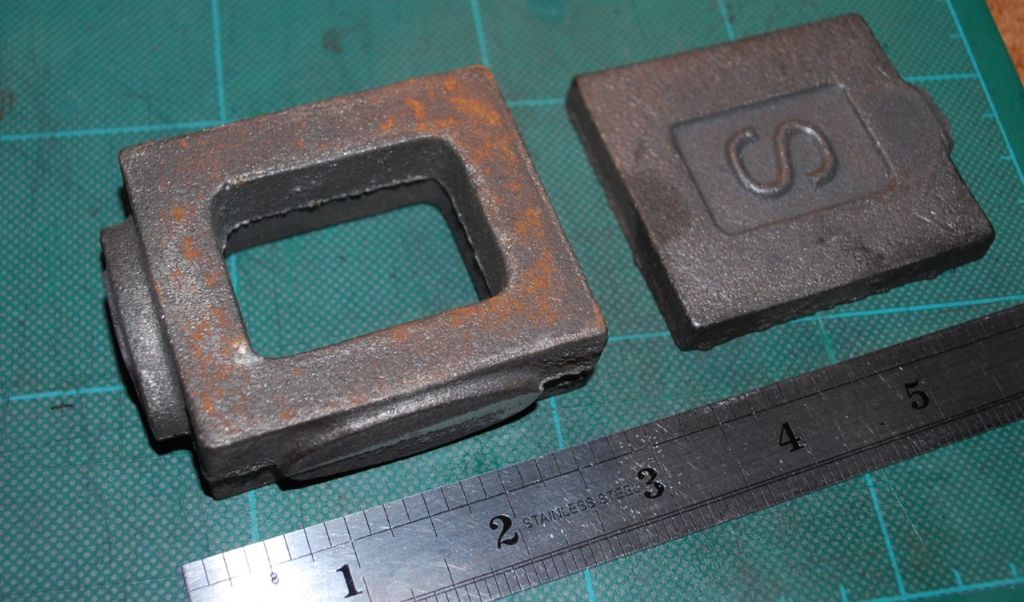
                                                    The Steam Chest & Cover castings.

                                                    432. the steam chest & cover castings.jpg

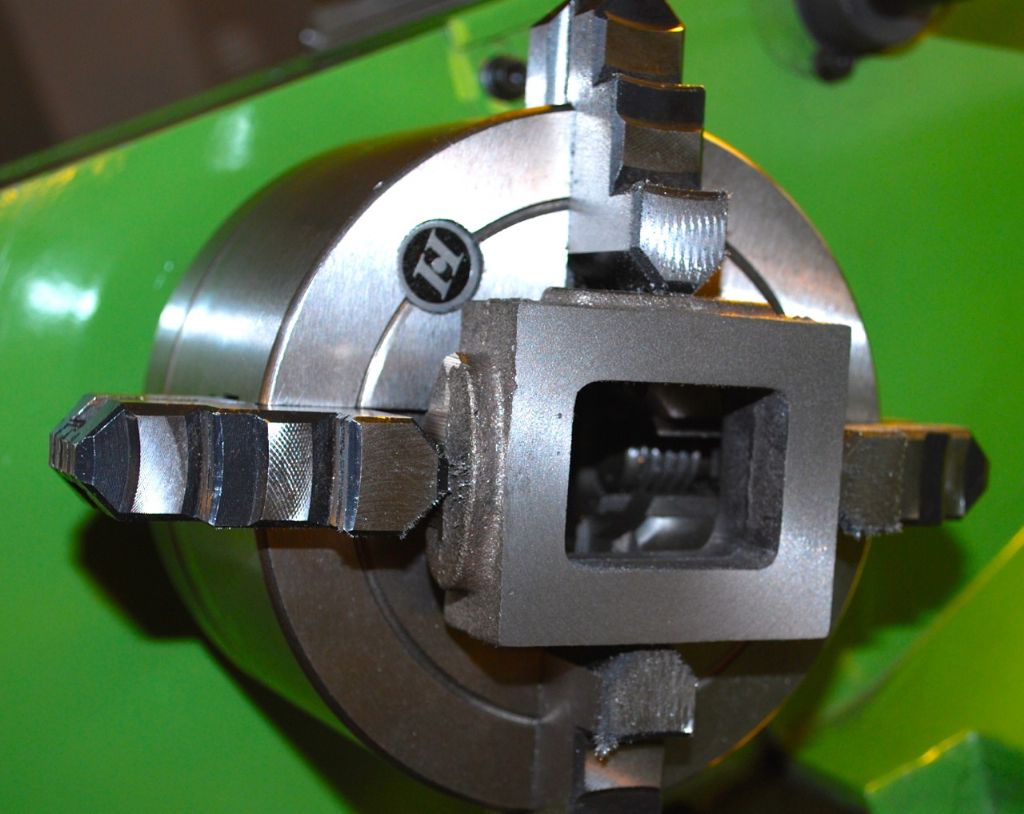
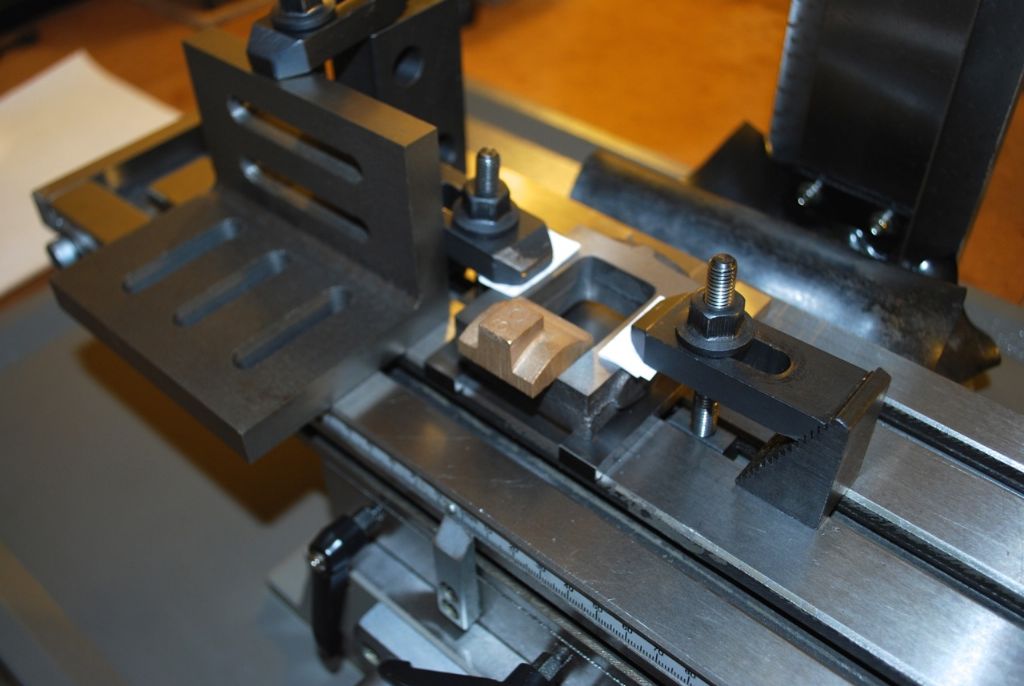
                                                    Starting to face both sides to the 3/4" thickness.. You can better see here I think the sides of the centre of the casting are quite 'bowed' and rough..

                                                    429. steam chest progress 1..jpg

                                                    Sorry this one is a bit blurry – I wasn't quite sure what to about the inside, I seem to remember from Victoria that it was important not to take away too much material to clean and square it up..

                                                    This photo showing the setup used – 6mm End Mill as the cutter.

                                                    [also showing the Slide Valve casting – thats to come as I've not done anything with that yet.]

                                                    429. steam chest progress 2..jpg

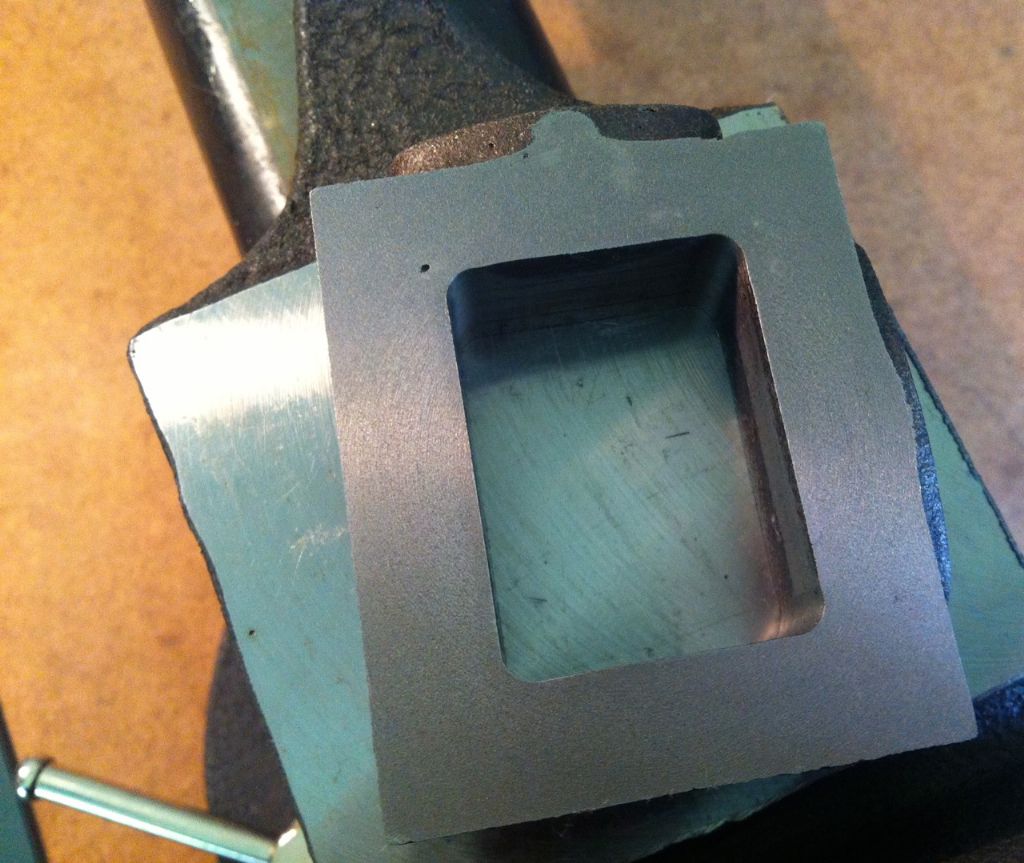
                                                    So I've really only just barely taken away the skin and not all of that – 0.05 cut around each length – but its nice and square now and I can always do more to it later if need be – although I was a little bit out in one corner. I only have 'stops' on one axis on my Mill – maybe that's normal I don't know. I went out I think from 'once' not locking the table when going 'down' to start a new cut around the rectangle – sorry thats not very well explained..

                                                    But I now have clean lines around the rectangle to be able to measure outwards from to mark the sides to size..

                                                    429. steam chest progress 3..jpg

                                                    Cheers

                                                    Garry

                                                    #202033
                                                    Nick_G
                                                    Participant
                                                      @nick_g

                                                      .

                                                      All looking good. smiley

                                                      Next you will have to build a small steam launch to put it in and chug you along the river to the pub. wink

                                                      Nick

                                                    Viewing 25 posts - 401 through 425 (of 602 total)
                                                    • Please log in to reply to this topic. Registering is free and easy using the links on the menu at the top of this page.

                                                    Advert

                                                    Latest Replies

                                                    Viewing 25 topics - 1 through 25 (of 25 total)
                                                    Viewing 25 topics - 1 through 25 (of 25 total)

                                                    View full reply list.

                                                    Advert

                                                    Newsletter Sign-up