Milling for beginners

Advert

Milling for beginners

Home Forums Manual machine tools Milling for beginners

Viewing 25 posts - 51 through 75 (of 134 total)
  • Author
    Posts
  • #365310
    Neil Wyatt
    Moderator
      @neilwyatt
      Posted by Muzzer on 03/08/2018 11:57:58:

      Don't see the point applying coolant by brush to carbide tooling (or any, other than hand tapping for that matter). Seems to be essential behaviour in the US – but on this side of the pond?

      I see an improvement in finish on some materials.

      Also makes a big difference when parting off aluminium alloys under power cross feed. Stops welding to the insert. Affordable uncoated parting inserts are like rocking horse poo.

      Neil

      Edited By Neil Wyatt on 03/08/2018 13:08:04

      Advert
      #365311
      JasonB
      Moderator
        @jasonb

        Although I apply soluable oil with a brush it is not used as a coolant, more a lubricant/cutting oil and I do seem to get a noticably better finish when using it with both carbide and HSS. I don't often drive the carbide really hard so it does not get to a temp where adding more liquid could cause the problems that it is said to.

        I use soluable on steel when both turning and milling, CT85 for tapping/threading/reaming.

        CI and Brass don't use anything

        Bronze I use soluable when drilling applied to the drill both in lathe and mill otherwise all dry

        Aluminium is machined with paraffin and tapped/threaded wih CT-85

        Wood and plastics dry

        #377276
        Matthew Sugden
        Participant
          @matthewsugden41355

          Hi Jason,

          I've been reading your Milling for Beginners series with interest on Ketan's recommendation.

          After also reading the flute-number-related comments above, I was wondering if there is any general 'rule of thumb' regarding cutter flute number to make things simpler in selecting a cutter?

          I have some aluminium edge cutting to do (upto 25mm) and want to cut a long groove (70mm wide, 13mm deep) and I was planning to do these with a 20mm dia. 4 flute cutter after reading your comments in Part 6…

          My current thinking is that the number of flutes are chosen based on the desired chipload and cutter strength and thus this is why a 4 flute is more suitable for edge-cutting (greater strength and smaller chips for lower forces).

          But I was also wondering if there might be other considerations – such as any vibration issues when edge cutting with a 2 flute?

          Any clarification/correction to my thinking will be most welcome!

          Matthew

          #377288
          JasonB
          Moderator
            @jasonb

            The chip loading is not affected by the number of flutes so a 4 flute cutter won't make chips half the size of a 2 flute.

            Chip load is worked out for a single tooth lets say 0.1mm as that is a nice round number. So for a 2 flute cutter one revolution of the cutter needs for it to advance 0.2mm ( 2 x 0.1) to give the desired chip loading. If on the other hand you are using a 4 flute cutter that will need to move 0.4mm per rev (4 0.1) to give the same chip loading. Or looking at it another way the 4 flute can remove twice as much as a 2 flute in one rev and it does this by being fed along at twice the rate.

            As the revolution speed is set to suit the metal being cut and the cutter material and cutter diameter that is fixed and the same for any flute number of the same given diameter. You would have to run a 2 flute faster than optimal speed to remove the same amount of material.

            Generally a 4-flute will have a larger cross sectional area than a two flute so will be stiffer but you may find that with the large volume of swarf that can be produced when working with aluminium can start to clog a 4-flute unless you have coolant or air to help get it away from the cutting edge. For this reason an aluminium specific cutter may be a better bet as you won't risk blunting it or getting a poor finish by recutting swarf.

            Having a larger CSA the 4-flute should vibrate less than a 2-flute of the same diameter and also using a short series will vibrate less than using a standard or long series, though with edge cutting you can use the area of flute nearest the shank to get the same results as a short series.

            I'm trying to picture what you intend to cut. Sounds like you have upto 25mm thickness plate and want to cut a 70mm long groove going 13mm in from the edge is that correct?

            #377452
            Matthew Sugden
            Participant
              @matthewsugden41355

              Hi Jason, thank you for that answer – it helps put my mind more at ease and will save me umming and arring over 2 vs 4 for aluminium! I think I'll be better sticking with 2 flutes for now – I don't have coolant or air system set up and will just be lubricating/cleaning as I go. I have a 12mm 2 flute long series from ARC but I wanted to push it to 20mm preferably for the extra rigidity and to take fewer passes. I have the bigger brother of the machine in your article (SX4) which I think should cope amicably.

              I think we're saying the same thing regarding chipload, feed, speed and number of flutes but from slightly different perspectives. I built a CNC router a few years ago and spent some time trying to get my head around the relationship between the variables and used the relationship "Feed = Flute number x chipload per tooth x RPM" to base a lot of my logic around. For different combinations of cutter material and workpiece material I figure that these variables are essentially adjusted to compensate for the relative difference in hardness and heat generated.

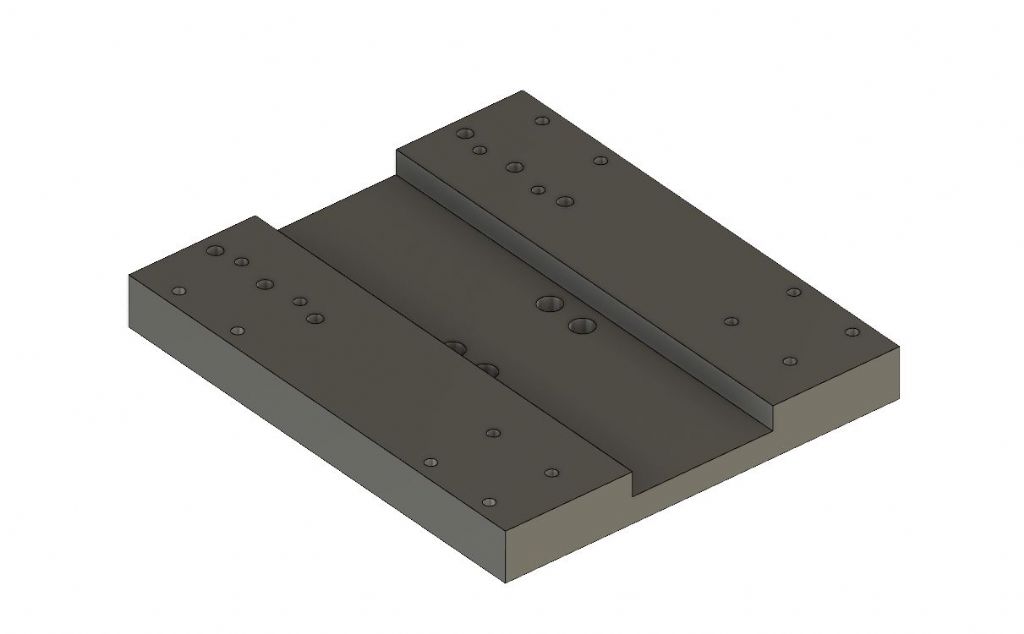
              I've attached a picture of the of the piece with the 70 x 13mm channel I'm going to cut (as well as trimming the edges of the rough/plate sawn aluminium pieces). This is the thickest piece I'll have to edge-cut at 25mm deep.

              capture.jpg

              #377469
              JasonB
              Moderator
                @jasonb

                the 12mm should be fine for doing round the edges if you do as I said above and let it overhang the bottom of your plate so you are using the flutes closest to the shank.

                For the groove work down on say 3 full cutter width passes and then start cutting sideways full depth maybe 2.5-3mm at a pass depending on how the tool sounds.

                The other option to get faster removal rates is to use a carbide cutter for ali which can be run faster so faster feed and ARC do them in standard length, give a good finish too.

                #377585
                Matthew Sugden
                Participant
                  @matthewsugden41355

                  Thanks, I think I'll do that with the 12mm – saves buying more for now.

                  I do apologise though, I'm not sure I understand the procedure – are those 3 full cutter width passes next to each other and in the middle or to one side of the groove? I'd originally considered cutting the groove edges first accurately and then just working across the remaining at 2/3rds of the cutter diameter at a depth of cut that sounded OK.

                  #377596
                  JasonB
                  Moderator
                    @jasonb

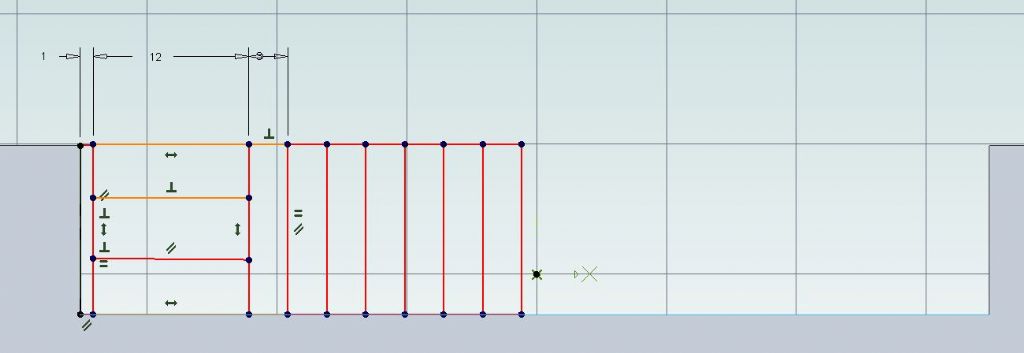
                    I would do the three full width (of the cutter) passes just clear of the edge to take you down to the 13mm depth then a 13mm high by 1mm deep finishing pass to define one edge of your slot and then a series of 13mm high cuts working your way across the work until you get to the other side.

                    70x13 groove.jpg

                    #377864
                    Ron Laden
                    Participant
                      @ronladen17547

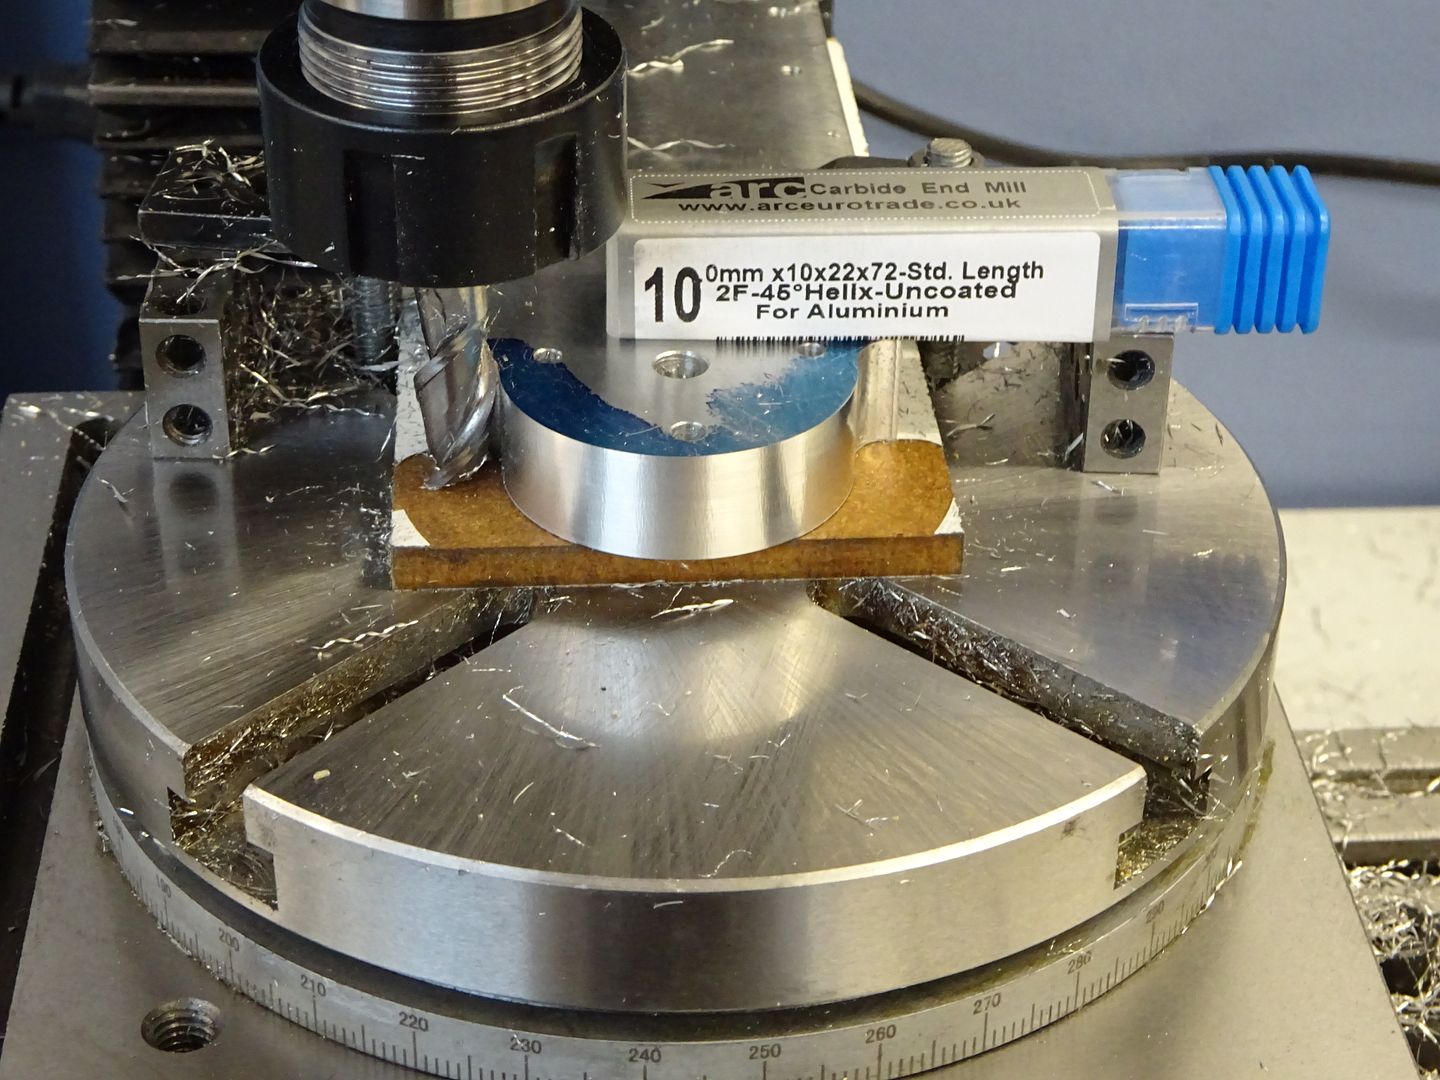
                      Seeing the ARC premium cutter above, the 10mm 2 flute Std Al length carbide, I have just orered one as I have a fair bit of aluminium cutting to do. I have used my 10mm 4 flute TiN coated HSS cutter at around 750- 800 rpm which it seemed quite happy at, what speed increase for the carbide..50%..?

                      Ron


                      Edited By Ron Laden on 27/10/2018 09:00:13

                      Edited By Ron Laden on 27/10/2018 09:06:59

                      #377865
                      JasonB
                      Moderator
                        @jasonb

                        Will depend a bit on what depth of cut the machine can handle but 1500rpm will be fine, more for light cuts.

                        #377879
                        Anonymous

                          I run 10mm coated carbide cutters at 2000rpm in steel and 10mm uncoated carbide cutters at 3000rpm in aluminium.

                          Andrew

                          #377883
                          Matthew Sugden
                          Participant
                            @matthewsugden41355
                            Posted by JasonB on 25/10/2018 13:00:46:

                            I would do the three full width (of the cutter) passes just clear of the edge to take you down to the 13mm depth then a 13mm high by 1mm deep finishing pass to define one edge of your slot and then a series of 13mm high cuts working your way across the work until you get to the other side.

                            70x13 groove.jpg

                            That's brilliant Jason, thank you!

                            #377884
                            Ron Laden
                            Participant
                              @ronladen17547

                              Thanks guys,

                              Andrew, my rpm limit is 2500 and I,m sure you have a lot more power available than I do with my little mill so I will have to keep within its limits.

                              Ron

                              #377896
                              Anonymous
                                Posted by Ron Laden on 27/10/2018 11:23:45:

                                Thanks guys,

                                Andrew, my rpm limit is 2500 and I,m sure you have a lot more power available than I do with my little mill

                                You'd be surprised; both the Bridgeport and my CNC mill are only 1.5hp, ie, about 1100W. While the Bridgeport has constant power across the speed range the CNC mill doesn't as it's driven by a VFD, albeit with a low/high belt driven ratios. I know where the base speeds (at 60Hz) are for both ranges and run low or high to ensure I'm in the constant power regime. I would assume your mill is similar, at least in that maximum power is available at maximum speed.

                                Andrew

                                #382392
                                SillyOldDuffer
                                Moderator
                                  @sillyoldduffer

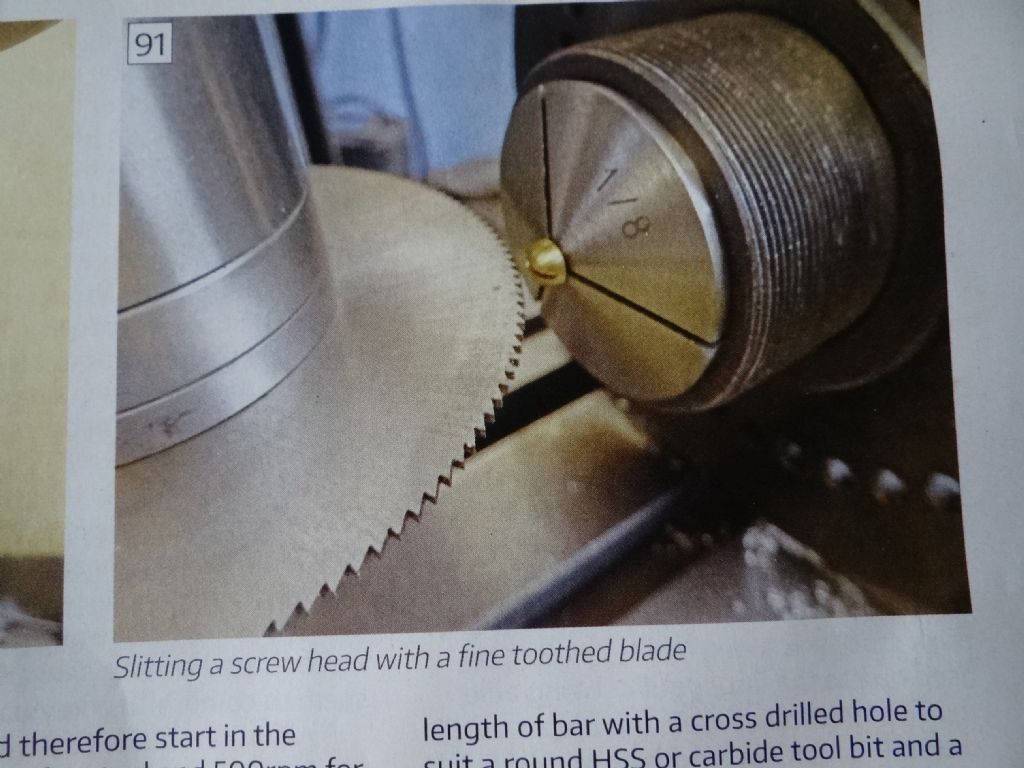
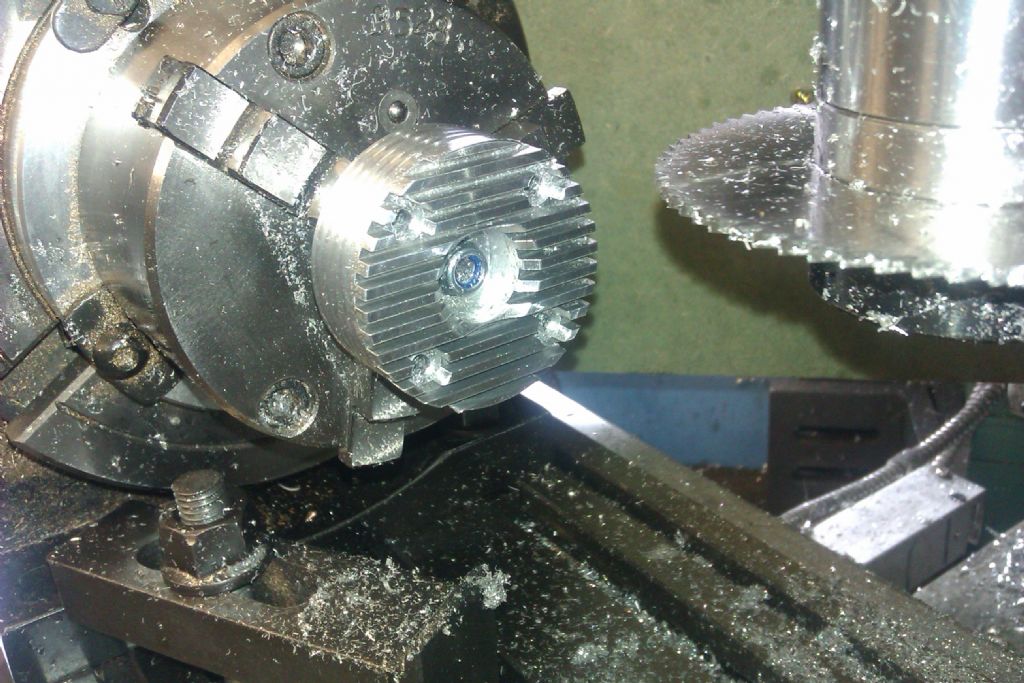
                                  In MEW № 275 Jason covers using a slitting saw to cut screw slots, illustrating the method with this photo:

                                  dsc05829.jpg

                                  Normally I don't care much about the appearance of my rough experimental machining but it does grate on the eye when screw slots are cut off centre and/or crudely hacksawed. I occasionally use a slitting saw as shown by Jason to avoid upsetting anyone who might care about good workmanship.

                                  My problem is, what's the best and quickest way of centring the saw accurately? Even slightly off-centre slots offend the eye! The measure/test/repeat method I use to centre the saw is time consuming and not particularly reliable, and I suspect a machinist would have his saw aligned in a flash whilst I was busy faffing towards nearly right.

                                  Dave

                                  #382394
                                  JasonB
                                  Moderator
                                    @jasonb

                                    The way I tend to do it is to touch the blade onto the top of the work, add a fag paper if you want and zero Z. Then feed down by half diameter or thickness of the work plus half the thickness of the blade for round work. For a cut that is a set distance down then touch off again and zero then feed down half blade plus distance to ctr of slot.

                                    If you get it right you can do things like thiswink

                                    Firefly95

                                    #382406
                                    Ron Laden
                                    Participant
                                      @ronladen17547


                                      Might be a daft question Jason but in the picture of the screw in the collet, what is the collet chuck fitted to, is it a table mounted vertically on the mill..?

                                      Edited By JasonB on 26/11/2018 16:30:34

                                      #382427
                                      JasonB
                                      Moderator
                                        @jasonb

                                        Ron, you have not been doing your homework and catching up on the Milling for Beginners seriessmile p

                                        Part 3 Photo 31. or one of these

                                        #382446
                                        Ron Laden
                                        Participant
                                          @ronladen17547
                                          Posted by JasonB on 26/11/2018 16:30:02:

                                          Ron, you have not been doing your homework and catching up on the Milling for Beginners seriessmile p

                                          Part 3 Photo 31. or one of these

                                          Thanks Jason, I have caught up having read all the series so far, I will probably go back and read them all again so it sinks in..smiley

                                          Excellent series by the way.

                                          Ron

                                          #382462
                                          SillyOldDuffer
                                          Moderator
                                            @sillyoldduffer
                                            Posted by JasonB on 26/11/2018 12:06:04:

                                            The way I tend to do it is to touch the blade onto the top of the work, add a fag paper if you want and zero Z. Then feed down by half diameter or thickness of the work plus half the thickness of the blade for round work. For a cut that is a set distance down then touch off again and zero then feed down half blade plus distance to ctr of slot.

                                            If you get it right you can do things like thiswink

                                            Firefly95

                                            Thanks Jason – that's simpler than the way I was trying to achieve the same thing. Fewer chances of making a mistake, I'll give it a try.

                                            If only 'getting it right' were easy I would be doing things like that. As it is I'm a time-served maladroit who deserves sympathy. Fellow members – please send cash until I feel better!

                                            smiley

                                            Dave

                                            #383893
                                            Ron Laden
                                            Participant
                                              @ronladen17547

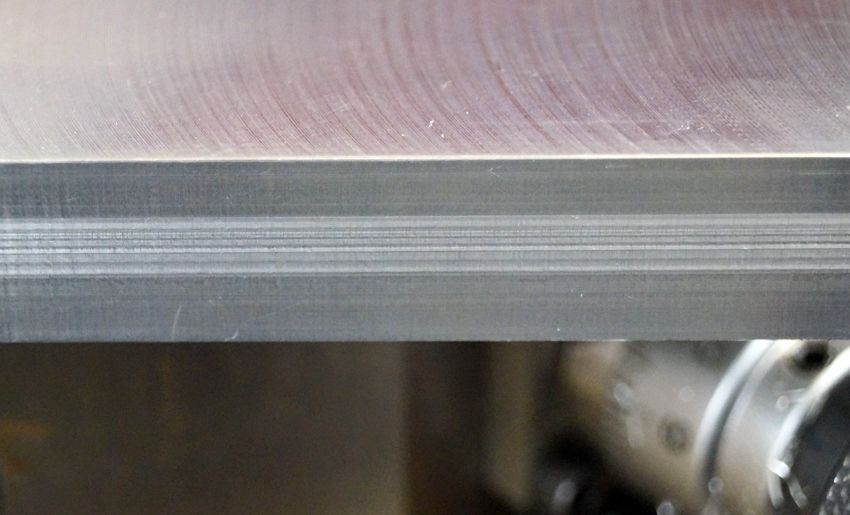
                                              I,m guessing that the band on the side of the plate is telling me that a section of the end mill has lost its edge..?

                                              dsc06269.jpg

                                              #383894
                                              JasonB
                                              Moderator
                                                @jasonb

                                                Or as you seem to be cutting dry you may have some metal stuck to the cutting edge. Try a little paraffin or WD40

                                                Was it the same one you milled the hornplates with as the width of the affected area looks about the same which may have just taken the edge off slightly.

                                                #383895
                                                Ron Laden
                                                Participant
                                                  @ronladen17547

                                                  Thats its Jason you dont miss much, yes thinking about it, it is the tool I used on the hornplates which were sandwiched together and the width of the band fits.

                                                  #386890
                                                  Oxymoron
                                                  Participant
                                                    @oxymoron

                                                    Jason, thanks for your brilliant articles and videos, I have found them very informative.

                                                    I have the SX2.7 mill which I collected from ARC a couple of weeks ago. My question: In article 6 in MEW 271 you mentioned Tapping mode. Is there a minimum size would you suggest Tapping mode could be used for please?

                                                    I have several 7BA holes to tap in cast iron but don't feel confident to go this small (at least to start with). M6 perhaps, also have a couple of 1/4" x 40 ME holes to Tap. Do you have any thoughts if courser or finer threads are better with tapping mode?

                                                    Many thanks

                                                    Dave

                                                    #386910
                                                    JasonB
                                                    Moderator
                                                      @jasonb

                                                      A lot will depend on material, thickness and whether it is a through hole or blind as well as the type of tap being used

                                                      The softer and easier cutting the material the less strain will be put on the tap, you can also adjust the tapping drill size to some extent to make life easier for the tap. Finer threads will be easier than coarse.

                                                      Again if only tapping thin sheet which may only need a couple of turns of thread you will find that lest likely to load up the tap than doing a deep hole.

                                                      Unlike a tapping head the function on the mill relies on the reaction of the user to stop and reverse the spindle, if you can drill the tapping hole to a good depth so there is less risk of bottoming out before you get the number of turns cut then so much the better but if you are doing shallow blind holes there is more risk of a problem.

                                                      One of the main things that makes a difference is the type of tap. A traditional taper tap can soon clog up with swarf in a blind hole so as well as the usual backing off will require withdrawing and cleaning before going deeper. If it is a through hole then a spiral point tap will help a lot as these can be driven straight in without the need to back off and the swarf will be pushed out of the bottom of the hole. In a similar way a spiral flute tap when used in a blind hole will lift the swarf out so are better suited to use under power.

                                                      The two spiral type taps also have a smaller diameter shank above the "threaded" part so if you do run deep they won't get stuck unlike a traditional tap that often has the shank the same size as the thread's OD or even larger.

                                                      7BA with a traditional tap would be pushing your luck particularly if they are blind holes. M6 into say a 5.1mm hole and 1/4 x 40 ME should not be such an issue provided you can stop fast enough before getting to the bottom if they are blind.


                                                      Edited By JasonB on 21/12/2018 17:22:56

                                                    Viewing 25 posts - 51 through 75 (of 134 total)
                                                    • Please log in to reply to this topic. Registering is free and easy using the links on the menu at the top of this page.

                                                    Advert

                                                    Latest Replies

                                                    Home Forums Manual machine tools Topics

                                                    Viewing 25 topics - 1 through 25 (of 25 total)
                                                    Viewing 25 topics - 1 through 25 (of 25 total)

                                                    View full reply list.

                                                    Advert

                                                    Newsletter Sign-up