Mill Wobble

Advert

Mill Wobble

Home Forums Manual machine tools Mill Wobble

Viewing 25 posts - 1 through 25 (of 59 total)
  • Author
    Posts
  • #465955
    Iain Downs
    Participant
      @iaindowns78295

      I noticed a while back that I was having some trouble with centre drills on my mill and that I seemed to be drilling oversized.

      The mill is a Weis VM32L from Amadeal and purchased just before Xmas.

      I also noticed a couple of weeks back a very obvious wobble on the drill so I set about to investigate. I held some ground stock in the jaws and found a fairly significant wobble, roughly 0.5mm.

      I assumed it was a problem with the drill chuck, since it couldn't be the new machine (which mills beautifully even with 60mm face mills).. I did some research on chucks and carried on with some lathe work.

      Yesterday, I took the chuck off and observed that there was some wobble on the b16 taper.

      Today I took my collection of known good bars (some 20mm silver steel and some 6mm rod from a scanner).

      I found that there was a wobble of about 8 microns on the spindle, of 0,2mm at about 85mm down from the spindle and about 0.3mm some 120mm from the spindle.

      The spindle feels firm and the results seem consistent with different bars and collets

      I don't think I'm being unrealistic in thinking this is excessive.

      So should I expect better on a new Mill and what can I do about this? Hopefully without having to return the Mill to London.

      Yours somewhat frantically,

      Iain

      Iain

      Advert
      #13842
      Iain Downs
      Participant
        @iaindowns78295

        Should I be worried?

        #465957
        JasonB
        Moderator
          @jasonb

          Put a DTI on the actual spindle socket, if you are holding your bars in a standard quality collet they are often only good for 10 mictons if you are lucky.

          #465959
          Iain Downs
          Participant
            @iaindowns78295

            Thanks, Jason.

            But would you expect so much run out (0.3+ mm) even with standard collets and so on. To be honest, a drill with a wobble of the best part of half a millimeter is pretty useless for engineering.

            I will check the inside of the spindle socket, but not tonight. I've also measure run out on the body of the ARC end mill which also shows a wobble (only a though or two)

            Iain

            #466081
            Hopper
            Participant
              @hopper
              Posted by Iain Downs on 20/04/2020 20:19:49:

              Yesterday, I took the chuck off and observed that there was some wobble on the b16 taper.

              Can you clarify what exactly you mean by this?

              But I agree with Jason. First step is to determine if your runout is due to the milling machine spindle or to the accessories you are plugging into it. Put a dial gauge on the taper in the spindle and see how much runout you get.

              Then put something like a morse taper centre (if your spindle is morse taper) in the socket and measure runout on the bit that sticks out.

              Then maybe put your drill chuck in another machine, drill press or lathe etc, and see how much runout of your bar you get there.

              Some of the cheap drill chucks around these days are prone to runout. Seems you have to pay the money for the good ones to get precision.

              Or if your mill has a taper with a keyway, like an R8 or something, check the key and keyway are seating correctly. See some previous threads on this forum about your model mill for this problem.

              And yes you should expect better from a new mill. Should be no more than a thou or two runout (.02 to .05mm). As your ARC cutter falls within this range (ish) it sounds like the problem is in the accessories not the mill spindle.

              Edited By Hopper on 21/04/2020 12:09:44

              #466111
              Howard Lewis
              Participant
                @howardlewis46836

                The first place to clock for run out, in my view, would be the taper in the quill on the machine. If this is acceptable, then the problem could lie in:

                But first of all check for bruises or debris on / in the tapers.

                The taper on the arbor going into the machine. BOTH ends, MT or Jacobs – Check between centres?.

                The taper in the drill chuck (Less easy)

                The drill chuck (jaws).: (Mount in the lathe Headstock and clock a bar, known to be round).

                Keep us posted

                Howard

                #466183
                Iain Downs
                Participant
                  @iaindowns78295

                  Thanks for all the input. After tea, I went out to the shed .. and got more confused.

                  Firstly, The Spindle is R8 and it's the only R8 machine I've got so I can't easily do comparisons.

                  I have checked the runout inside the throat of the spindle – this with a standard 0.1mm indicator and it looks to be of the order of 4 microns. No photo for this, I'm afraid.

                  By finger feel there is some faint scratch or scuff in the throat, but impossible to actually see it.

                  I tried to get a good look inside with an endoscope attached to a laptop. I could really see anything – the wrong tool for the job, I think, however the top of the spindle looked like it had rust spots. On the sides as well as the top. Not sure if that would have an effect.

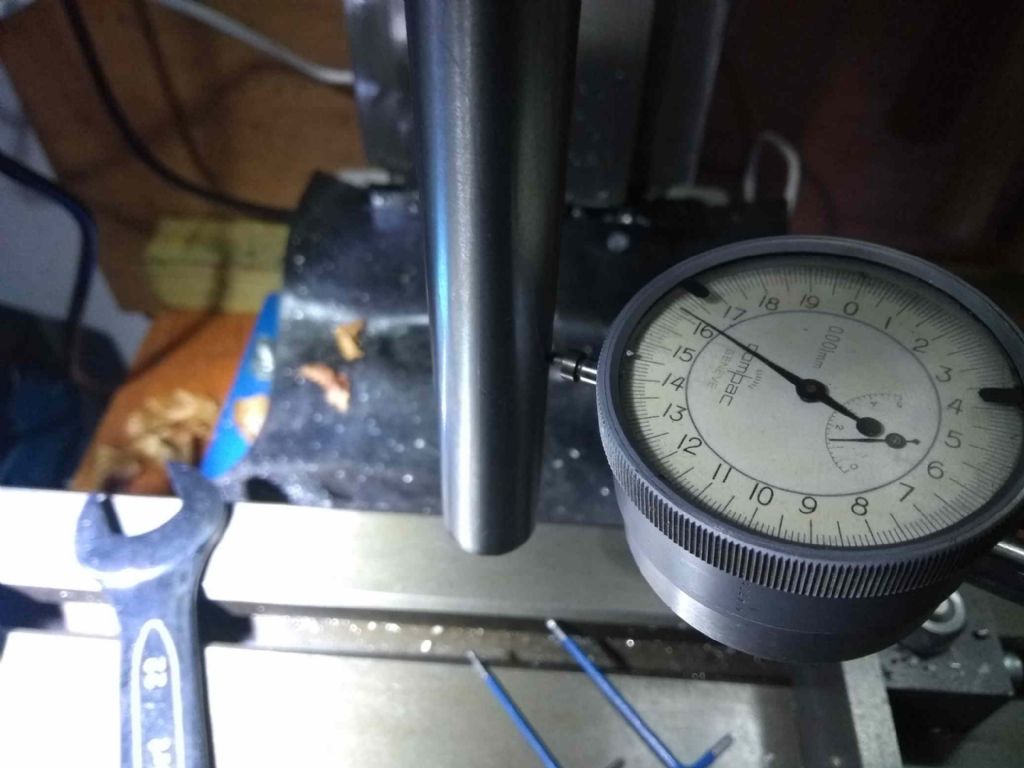
                  I then took a series of measurements at 100 mm down from the throat of the spindle.

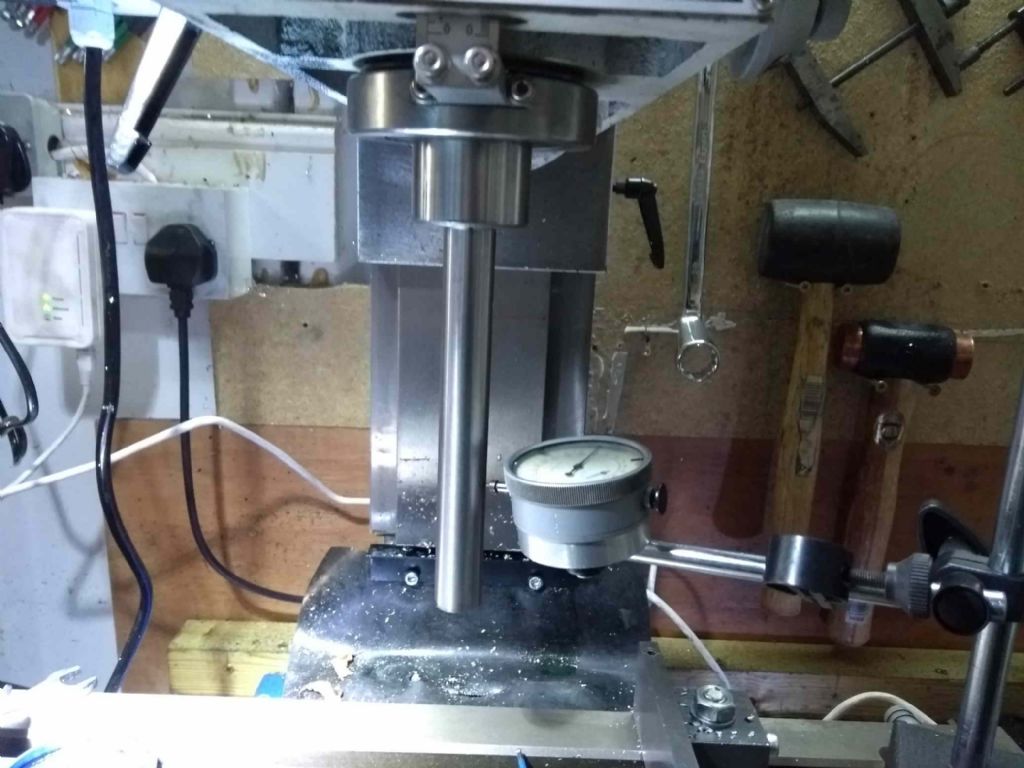
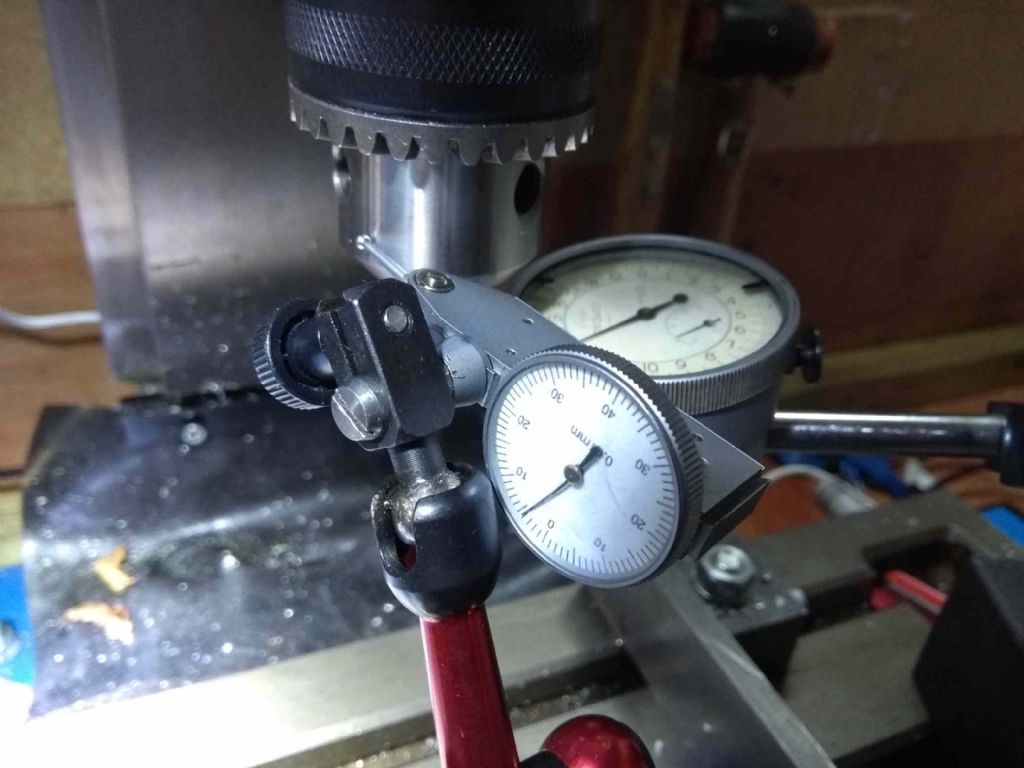
                  The first was with a 20mm silver steel bar which I hope is straight in a 20mm collet. This shows the general arrangement

                  mill spindle 20mm general.jpg

                  I rotated the spindle by hand, mainly but also under power a couple of times. The results were much the same.

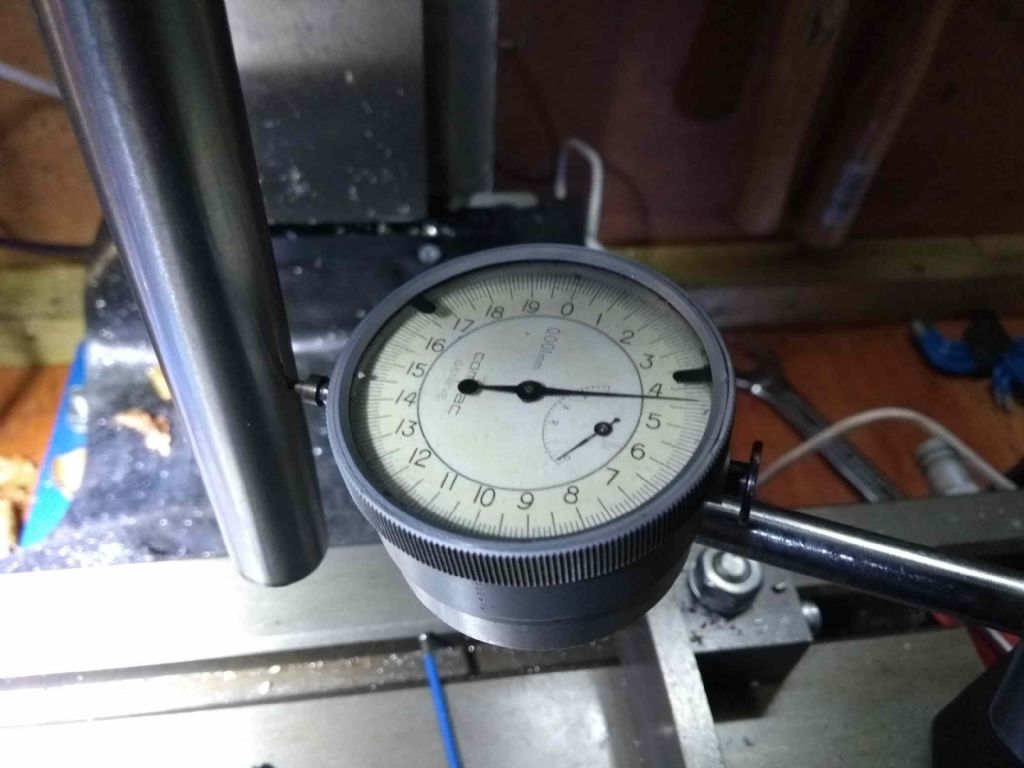
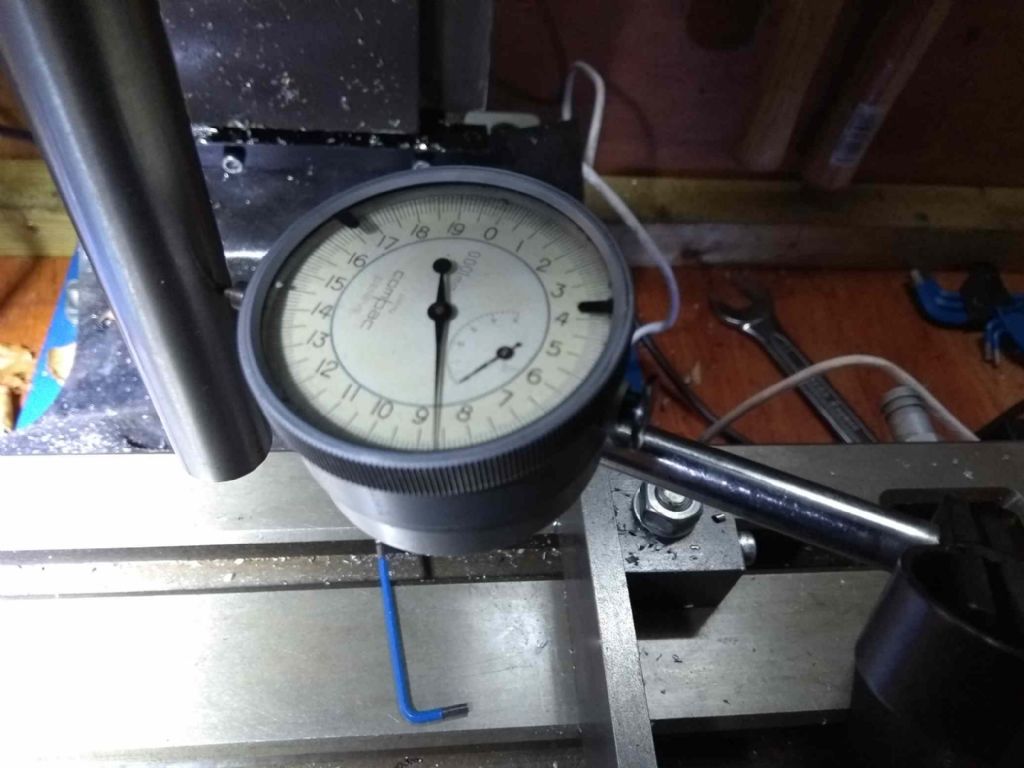
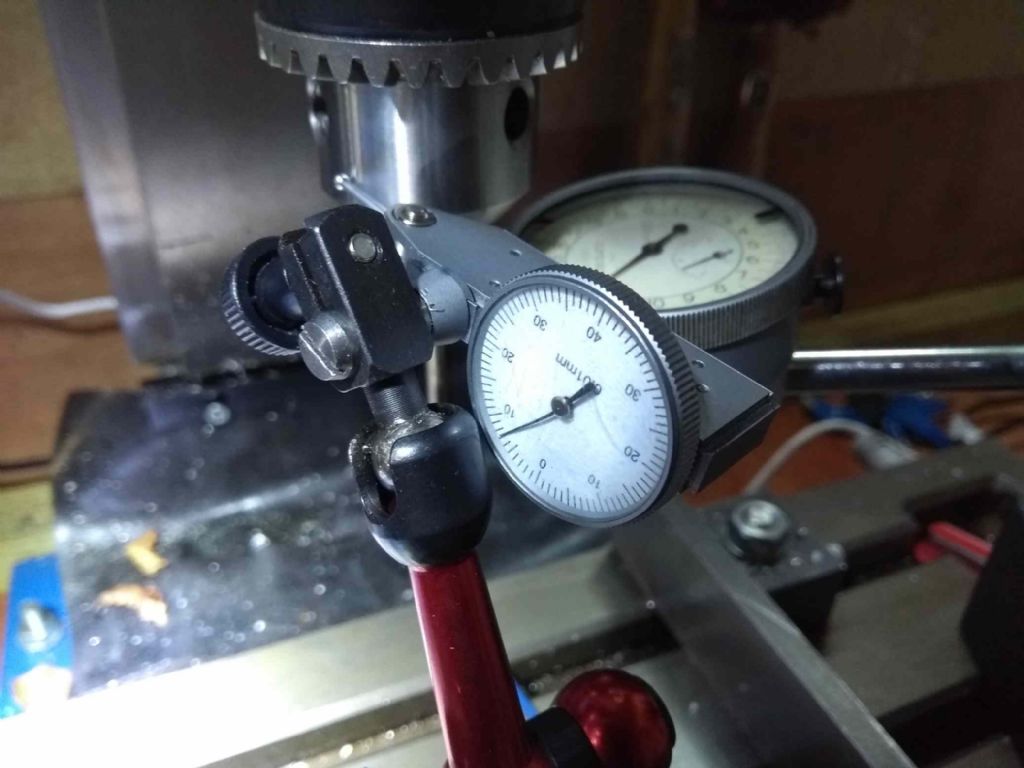
                  The results here were encouraging. Apparently around 50 microns.

                  Min

                  mill spindle 20mm min (01).jpg

                  Max

                  mill spindle 20mm max (01).jpg

                  I was greatly encouraged!

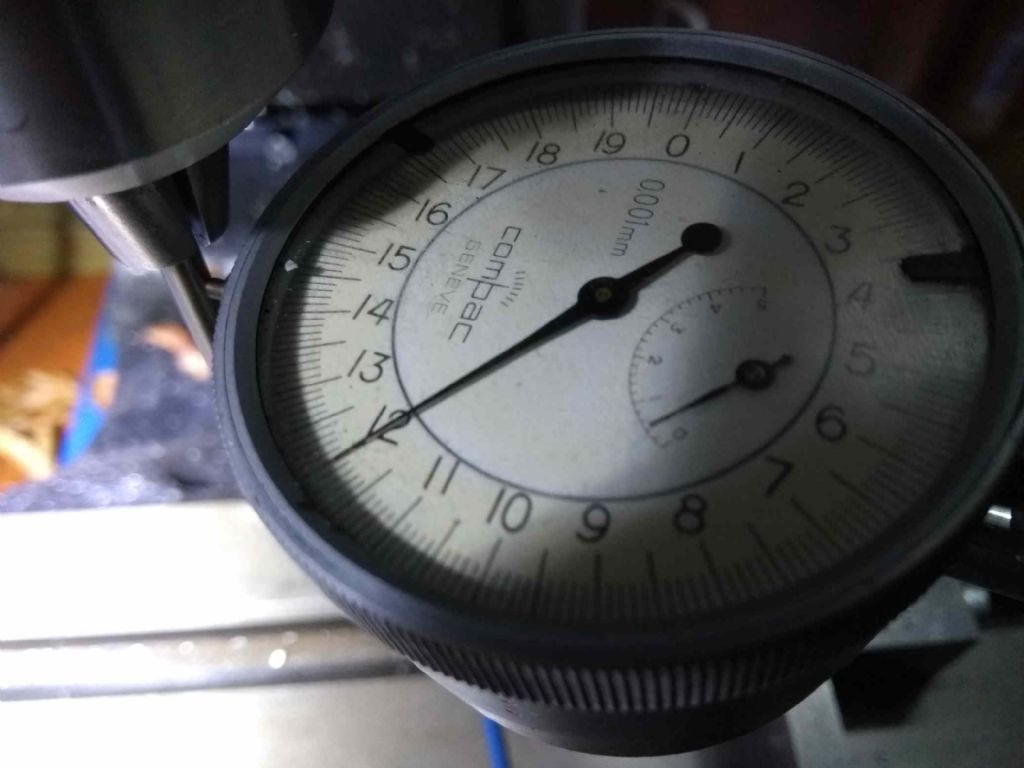
                  Next I tried a piece of 6mm rod from a scanner – which is supposed to be generally accurate. This was terrible, about 0.3mm of wobble (as I call it).

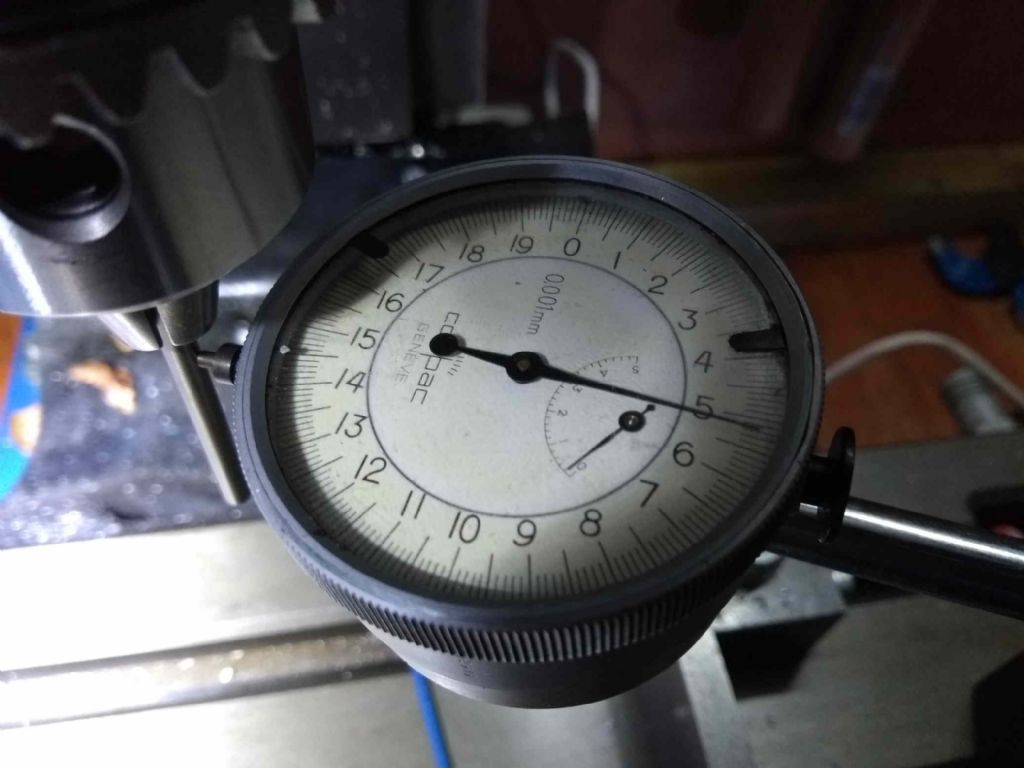
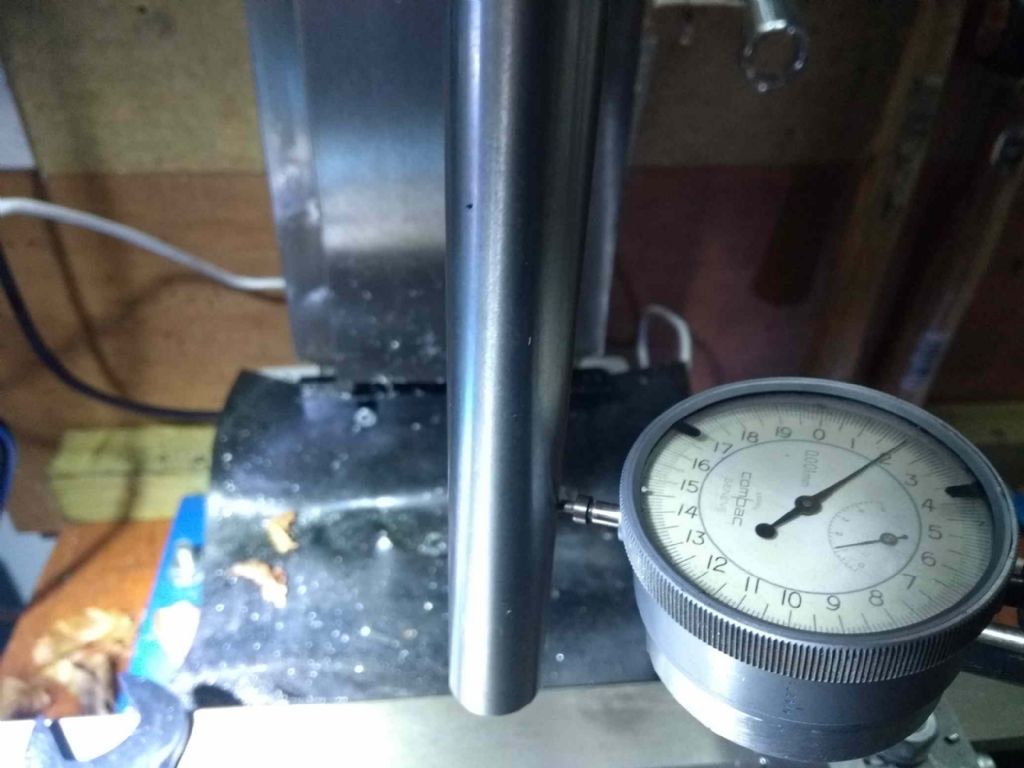
                  Let's try the drill chuck again. I have two pieces of tool steel bar, one 4mm and one 6mm. The 4mm went in and i set up to measure

                  Min 25 microns

                  mill spindle drill chuck 4mm min 50.jpg

                  Max 520 micronsmill spindle drill chuck 4mm max  520.jpg

                  That's half a millimeter

                  I also measured the run out on the drill chuck mill spindle drill chuck chuck min.jpg

                  To

                  mill spindle drill chuck chuck max.jpg

                  That's about 0.03 mm which is a far cry from what's going on just under the chuck!

                  I then noticed that you could rattle the bar in the chuck. Not a lot, but definitely a movement. It clicked when it moved.

                  I tried the same with my 6mm tool steel bit and the results were about the same.

                  In the interests of repeatability, I then put the 20mm bar back in with the same 20mm collet.

                  This give quite different results.

                  mill spindle 20mm min 1020 (2).jpg

                  and

                  mill spindle 20mm max 1360 (2).jpg

                  about 300 microns (0.3mm) wobble.

                  I also noticed at this point that if I turned the spindle backwards it didn't run smoothly, instead it seemed to twitch every 10 degrees. This did not seem to be good. Nice forward, nasty back.

                  Finally, I took another 20mm collet (I happen to have a small selection of these) and put the bar in for that with similar results to the last one (that is, bad).

                  So the first take away is that the drill chuck is bad. It's not holding the drill straight. WIth a 0.03 run out on the chuck body and 0.3 on the drill rod, there's a problem with the chuck. Not sure if I should dissasemble and clean (there's no obvious swarf in there) or try and grind it smooth again. Or buy another chuck.

                  ON the bars and collets, I'm lost. There's something wrong going on here, but I can't work out what. There seems to be some problem – getting such different results in the same session with the same hardware is weird.

                  One think of note. I initially had trouble with collets not fitting in which turned out to be fixed by setting back the set screw which locates the collet, However even now some tools (collets) are harder to tighten up – in the last centimetre or so the drawbar gets stiff – but only at some angles. I don't quite see how this could related, but thought it worth mentioning.

                  I don't know what to try next, so any help – as always -will be much appreciated.

                  Iain

                  #466185
                  Martin Connelly
                  Participant
                    @martinconnelly55370

                    The locating pin in the spindle and the matching slot in the collets can be a problem. I have a full set of metric Bridgeport badged R8 collets. I had to get a small file down the slot on about half of the collets to get them to get past the pin in the spindle. I have also seen reports by some people that the pin sometimes protrudes too far into the spindle bore. Is the high spot of the wobble always in the same place relative to the pin/spindle or is it variably located.

                    Martin C

                    #466188
                    Bill Phinn
                    Participant
                      @billphinn90025

                      It's hard to know whether you're giving us good news or bad overall, Iain.

                      4 microns of runout up your spindle taper sounds excellent to me, as does a keyed chuck that only has 0.03mm. Haas, in one of their videos, tell you to expect "four to five thou" for a keyed chuck. Incidentally, I'm not sure it's diagnostically sound to measure for runout on the exterior of the chuck, as you have done; locking a test bar in its jaws and measuring the bar as close as possible to where it protrudes from the jaw tips seems like a fairer test of concentricity to me.

                      How far down the test bar(s) are you measuring in the photos you've posted? 100mm down on all of them?


                      Edited By Bill Phinn on 21/04/2020 21:55:01

                      #466212
                      Hopper
                      Participant
                        @hopper

                        Bar is moving and clicking in the chuck?

                        Get a new chuck.

                        #466235
                        JasonB
                        Moderator
                          @jasonb

                          If that is the drill chuck that came with the machine then I would not expect that to be too brilliant but but collet in the spindle is OK,, this is the Haas video mentioned note that he will be talking about good quality chucks

                          If the pin is still tight on some collets then that will tend to push the top over and may be the cause of your drawbar tightness and wobble at the end of the bar. Also take the drawbar out of the machine and check it screws into the thread easily, again if it is tight things may get thrown off. Again any rust or damage at the top may be pushing the R8 tooling off to one side.

                          i would test with the machine running as turning by hand you can add sideways forces to the spindle, Actually while you are at it try moving the spindle front to back to see if there is any bearing play.

                          By comparison on the X3 holding a ground bar in a standard spec 10mm ER32 collet I get 0.01mm (10 microns) at the collet and also 75mm out from it with no special cleaning of the collet or fiddling about to find the best position, not too bad for a 13yr old imported tool which the old iron fans will tell you is worn out before it arrivessmile p

                          Edited By JasonB on 22/04/2020 08:00:10

                          #466271
                          Graham Meek
                          Participant
                            @grahammeek88282

                            Hi Ian

                            I recently repaired an R8 spindle form the same supplier. The friend who the machine belonged to gave me the exact same defects.

                            The faint scratch you are feeling is not a scratch but a "crack".

                            This machine was originally designed with a No3 Morse taper. Some bright spark said lets put an R8 in it, but never gave any thought to the weakening effect of this modification. The spindle is induction hardened and too much tension on the drawbar cracks the spindle. Which in my experience is far too hard for the application.

                            The crack in the spindle I repaired extended to the front bearing register. A replacement was sought, but my friend was told these spindles are bespoke, made for each individual machine. If that was the case then why are the machines so cheap, a bespoke spindle would cost a lot more.

                            The only recourse was to source a new spindle from an alternative supplier, as these machines are pretty common, if under different names, but you will understand that the rest of the machine tool industry does not really want to get involved in doing this. It brings with it a lot of trouble, supplying parts for some one else's machine.

                            I did make a sketch of the spindle, (the whereabouts of which escapes me now, I may have thrown it out), if a new spindle could not be sourced then I was going to make one out of En24.

                            Regards

                            Gray,

                            Edited By Graham Meek on 22/04/2020 11:03:31

                            #466281
                            Hopper
                            Participant
                              @hopper

                              Wow. That's just woeful.

                              #466295
                              JasonB
                              Moderator
                                @jasonb

                                That's interesting Grey but not good news for the OP. This is also why the spindle to table height on the Sieg SX2.7 is less on the R8 spindled machine as it has been extended to give more material around the tapered end, easily seen in the sketches of the two spindles here

                                #466304
                                duncan webster 1
                                Participant
                                  @duncanwebster1

                                  If it is cracked I'd demand a refund, just before Xmas is only 4 months old, clearly not fit for purpose. Crack detection kit available here, no experience of this actual one, but it's cheap enough.

                                  **LINK**

                                  I can't quite remember how, but you can test for cracks with paraffin and whitewash. Someone on here will know how it is done. Making a new spindle commercially could cost as much as a new milling machine even if you had a drawing

                                  #466308
                                  Howard Lewis
                                  Participant
                                    @howardlewis46836

                                    Paraffin and whitewash crack detection.

                                    Wash / soak the component in paraffin.

                                    Dry to remove the surface paraffin.

                                    Paint with whitewash.

                                    Paraffin will ooze out of the crack, if there is one, staining the whitewash.

                                    This the same process as a dye penetrant crack detection, but older and less sophisticated.

                                    Howard

                                    #466319
                                    not done it yet
                                    Participant
                                      @notdoneityet
                                      Posted by duncan webster on 22/04/2020 13:40:14:

                                      If it is cracked I'd demand a refund, just before Xmas is only 4 months old, clearly not fit for purpose. Crack detection kit available here, no experience of this actual one, but it's cheap enough.

                                      **LINK**

                                      I can't quite remember how, but you can test for cracks with paraffin and whitewash. Someone on here will know how it is done. Making a new spindle commercially could cost as much as a new milling machine even if you had a drawing

                                      Paraffin and talc are suitable. Clearly better to use a proprietary crack detection system to avoid the supplier arguing the facts. Initial checking with basic materials is OK, mind.

                                      #466322
                                      KWIL
                                      Participant
                                        @kwil

                                        I agree with Duncan, not fit for purpose.

                                        Incidently, the pin in the R8 taper only needs to protrude enough to catch the slot to assist in holding the item during the drawbar tightening. I have used an R8 taper without the pin (when one pin needed replacing). Worked OK.

                                        #466327
                                        Iain Downs
                                        Participant
                                          @iaindowns78295

                                          Well, that's made my day. Particularly as I turned down an MT3 machine with DRO in favour of an R8 without DRO because 'everyone knows R8 is better'.

                                          It sounds like my first task is to pull the set screw back a bit more and see if that makes things better.

                                          After that the next step seems to be to take the head apart and check out the spindle more directly. I'm not keen on doing this, but will if need be. I don't suppose anyone knows of a 'take it apart' much as you will find for Seig Lathes on the ARC site?

                                          I must say that the defect if that's what it is felt more like a pin head than a crack, but I would also say that I'm no expert in stress fractures.

                                          I can maybe also try and apply some wire wool at the top of the spindle to see if that helps with any rust.

                                          I suppose that the difference between the 2 attempts with the 20mm collet and bar could be due to the amount of force on the drawbar. Perhaps something to experiment with there.

                                          Graham – what was involved in 'fixing' the previous spindle. Something like that (or making a new one) is WELL outside my skills and equipment.

                                          And work was shit too.

                                          Iain

                                          #466329
                                          duncan webster 1
                                          Participant
                                            @duncanwebster1

                                            I wouldn't start taking it apart until you know whether it's cracked, might invalidate the warranty. According the the interweb the head tilts 90 degrees so you should be able to see what you're doing

                                            #466344
                                            Graham Meek
                                            Participant
                                              @grahammeek88282

                                              Hi Ian,

                                              Sorry I was the bearer of bad news.

                                              When the spindle arrived from my friend I too thought the crack was just a surface defect, but after polishing it with wet or dry on a polishing stick the mark/crack was still there.

                                              There should be a crack visible on the outside diameter of the spindle nose so there would be no need to dismantle.

                                              If it is only 4/5 months old then I would return the machine, it is not fit for purpose. My friends machine was way outside any warranty period.

                                              The repair consisted of turning down the spindle nose and heat shrinking on an En24 ring of the same outside diameter as the original spindle. However in machining the spindle nose down to take the ring. Pent up stresses in the material makes the R8 register distort even more, and open up further. Once the ring has been shrunk onto the spindle. The spindle was held at the drive end and supported in a three point steady on the front bearing register.

                                              Using a long stylus Verdict type lever clock the internal plain cylindrical register of the R8 was checked to see if it was concentric, which it was. The front cone of the R8 was then reground using a toolpost grinder.

                                              Turning down the register consumed 4 carbide inserts which are supposed to be for turning hardened steel, hence my comment about the shaft being too hard to start with. My lathe is an Emco Maximat Super 11 which has done similar work like this in the past. I would not entertain using any lathe smaller than this to perform this job.

                                              R8 collets like most draw-in collets have a certain amount of give in them when tightened. A drill chuck arbor is solid and therefore it expands the crack. As the crack opens on the one side of the spindle, the taper centre effectively moves towards the crack. This is why there is a more pronounced run-out with the drill chuck.

                                              Regards

                                              Gray,

                                              Hi Jason,

                                              From what I can see the OP's Wiess VM32L machine is more like the Warco WM18, but I take your point about the difference in spindle nose sizes in the link you provided, which I assumed were ARC's machines.

                                              Regards

                                              Gray,

                                              #466345
                                              Nick Clarke 3
                                              Participant
                                                @nickclarke3
                                                Posted by not done it yet on 22/04/2020 14:23:36:

                                                Paraffin and talc are suitable. Clearly better to use a proprietary crack detection system to avoid the supplier arguing the facts. Initial checking with basic materials is OK, mind.

                                                This combination works well, but in this instance something with a more permanent whitewash 'developer' might be advisable so the evidence was there when the machine was returned. Just to save any argument.

                                                #466363
                                                Iain Downs
                                                Participant
                                                  @iaindowns78295

                                                  Well, something's gone wrong.

                                                  Here's what I've been doing.

                                                  First set of tests with a 20mm bar and collet (from yesterday). A bit of a tight fit on the drawbar and this even after easing the set screw back by half a turn.

                                                  As set up yesterday run out at 100mm 130 microns

                                                  remove and replace with light clamp, runout 50 microns

                                                  Tighten a bit, run out 60 microns

                                                  Tighten a lot, runout 70 microns.

                                                  Loosen again, runout stays 70 microns

                                                  Remove and retighten firmly, runout 90 microns.

                                                  I realised I had another 20mm ground bar, so I replaced the original with this.

                                                  clamped lightly, 70 microns runout

                                                  clamped tightly, 90 microns.

                                                  Then I lowered the quill. which showed a deviation of around 90 microns. However, what I saw was that it was not regular. As I moved the quill down first the deviation went up by 10 microns or so then started to fall back. to 90 microns less. I'd also tried it on the other bar and had similar results. I don't believe I've got two bent 20mm silver steel bars!

                                                  The next thing I did was to lock the quill. this resulted in a movement of 155 microns (0.15mm!)

                                                  The min and max are not quite in line with the set screw, they are around 20 degrees out. I haven't got any pictures but I've blued the spindle and set up some tools. The blue is uneven, with some sopts, but most of the blue is near the mouth of the spindle (on the tool) and is weighted towards one side.

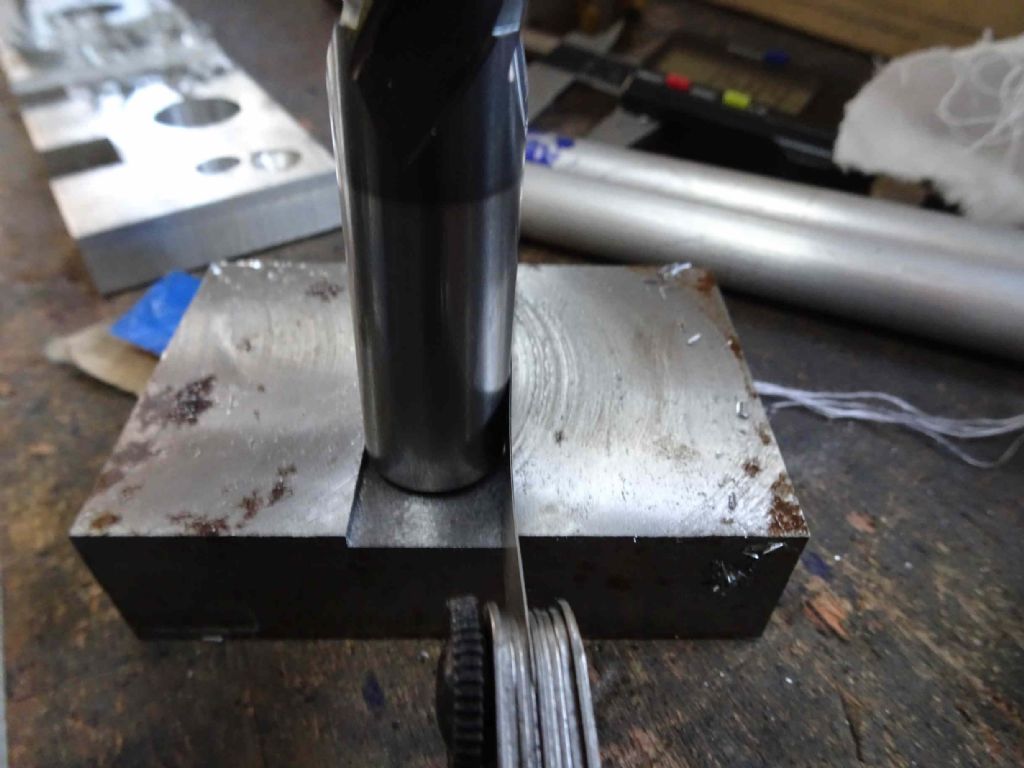
                                                  Finally, I thought to actually cut some metal and see if it was behaving. Here is some steel with a roughly 16mm carbide cutter (refurbished and may be a bit undesized. I measured the stock at 16mm but the blades seemed to be nearer 15.90.

                                                  mill spindle 16mm with feelers.jpg

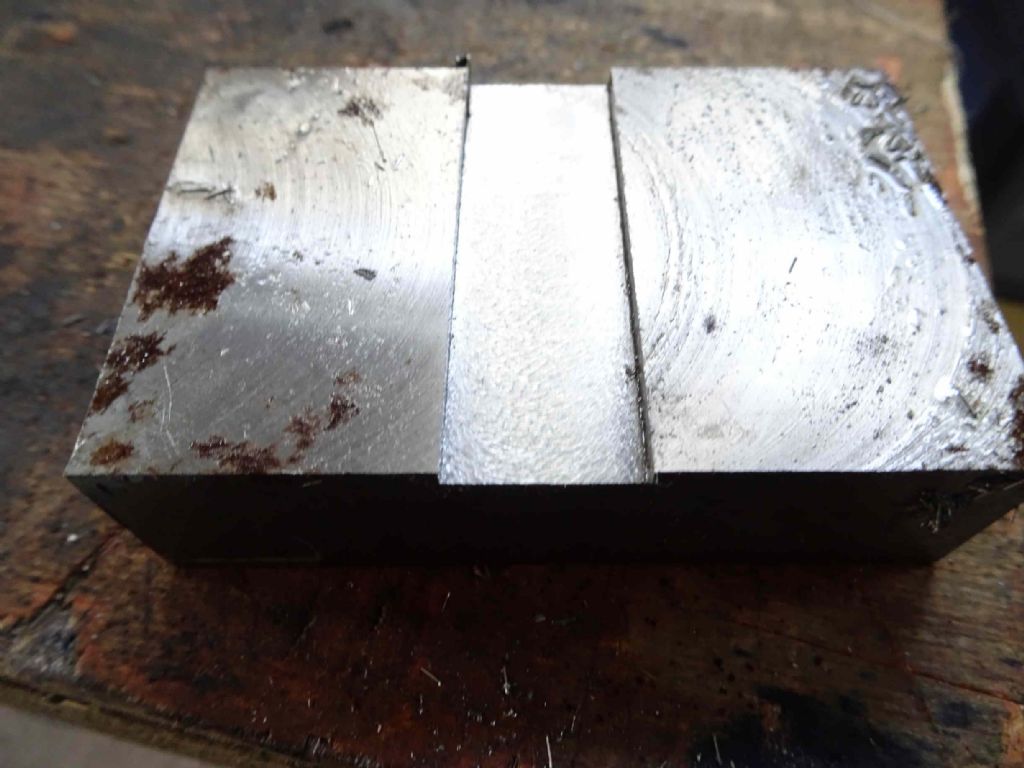
                                                  The channel cut by this mill was between 0.15 and 0.2 mm bigger than the tool. More importantly I heard a nasty squeaking noise as it cut and the surface was poor.

                                                  mill spindle 16mm cut.jpg

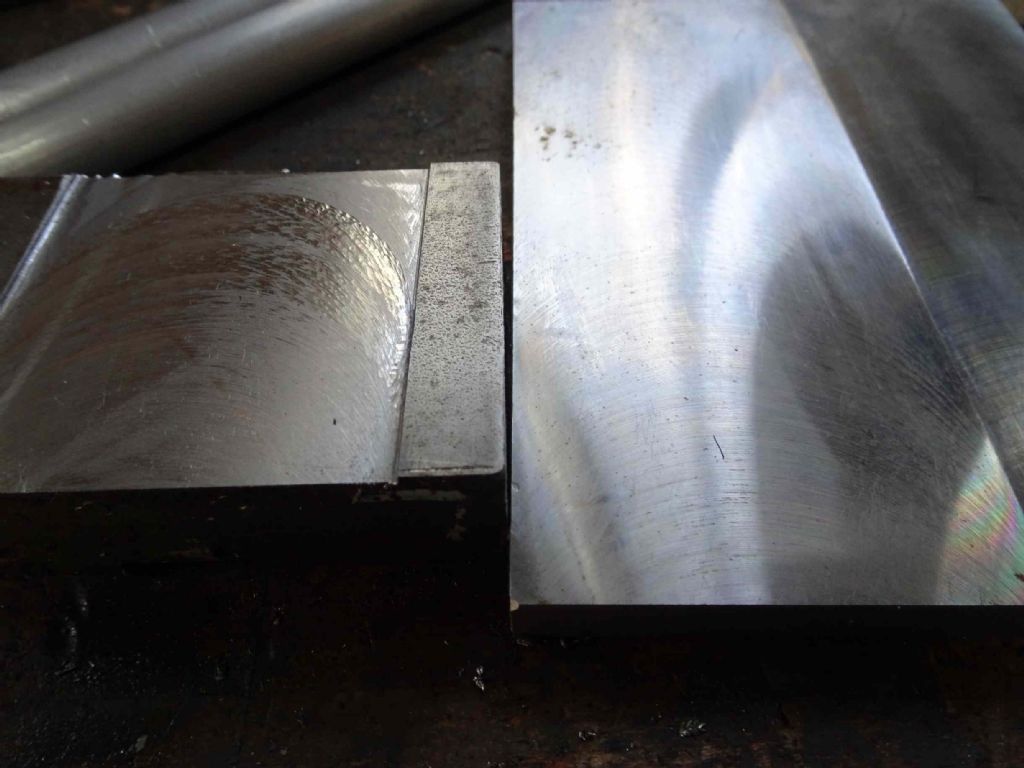
                                                  As I check I turned the piece over and mounted my ARC 50mm face mill . As with the smaller mill, I had a horrid squeaking sound. The photo below compares this cut with 'one I did earlier'

                                                  mill spindle face mill.jpg

                                                  I think the one on the right was done with the bigger face mill, but I've done work with the smaller one of the same quality. There;s clearly a vibration of some sort happening here which wasn't happening before.

                                                  I'm wondering if this is more about teh bearings than the spindle. I noted earlier that when I turned the spindle backwards by hand it was not smooth. Also, and this may be just how it is, when I slowed the spindle down to around 60rpm, it would tick round rather than runing smoothly. upping the speed by 10 rpm seemed to fix this.

                                                  sad face

                                                  Iain

                                                  #466382
                                                  Bill Phinn
                                                  Participant
                                                    @billphinn90025

                                                    I'm sorry to see this, Iain. It does look like something is seriously awry. I'm sure I'm not alone in being keen to know what is causing the problem and see you get it swiftly resolved.

                                                    On the possibility of a bearing problem, when you were rotating the spindle and getting the rough feeling, was the machine in gear or in neutral? I'm assuming you have high/low/neutral gear settings like on my similar mill.

                                                    #466389
                                                    Iain Downs
                                                    Participant
                                                      @iaindowns78295

                                                      The mill has a brushless motor with belt drive, so no gears to engage or not.

                                                      I've also had a close (naked eyeball) look at the end of the spindle and there is no evidence of a crack. There are a few small scuffs, but nothing I'd recognise as a crack.

                                                      I will try and have a call with Amadeal tomorrow, assuming they aren't on furlough, but at the moment I don't think I have a clear diagnosis apart from 'something is seriously awry'!

                                                      If anyone can suggest any more tests I can undertake, I'd be grateful.

                                                      Thanks

                                                      Iain

                                                    Viewing 25 posts - 1 through 25 (of 59 total)
                                                    • Please log in to reply to this topic. Registering is free and easy using the links on the menu at the top of this page.

                                                    Advert

                                                    Latest Replies

                                                    Home Forums Manual machine tools Topics

                                                    Viewing 25 topics - 1 through 25 (of 25 total)
                                                    Viewing 25 topics - 1 through 25 (of 25 total)

                                                    View full reply list.

                                                    Advert

                                                    Newsletter Sign-up